Belly Bao - BAONANA SPLIT

Belly Bao

Hello Everyone! Finally I’m back with an all new Review Sunday (on a Monday – sorry about that) on the blog! I had a pretty hectic day yesterday and didn’t get around to finishing this post. I spent yesterday morning hanging out with my sister, the afternoon with a fellow food-loving friend, Miao, over some cold drinks and cake, then went to indulge in the not-as-amazing-as-I-thought-it’d-be fireworks display for Singapore’s 50th National Day (might I add also, being sardined between sweaty, wet, and smelly people; it was so gross). Then ended the night meeting Alex, talking about anything and everything while we strolled around the area and eventually made our way to have some food.

So onwards with the review – I’ve only ever been to this place once, but have heard many things about it before it even started shaking up the Sydney scene permanently. I think, that is if I am not mistaken, Belly Bao first started dishing out these buns at various market stalls across Sydney about a year ago. I managed to visit a stall at the Paddington Markets on a Sunday afternoon before the found permanent residency at the GoodGod Small Club in the Sydney CBD.

Belly Bao

So the first and not quite last, but won’t be back in a while kind of thing, time I visited the club was with my friend Marissa on a Thursday, maybe Friday night after she had finished her work. We got to the place at around 6:30pm and the place was already packed. The line to order food was not too long, but a good 20-30minute wait, so while Marissa was lining up to order food, I went around the club quite possibly 7-8 times to look for a seat, and occasionally approach people that looked like they were about to be done, asking if I could have their seats when they were done. Thank goodness I was able to snag a seat for a two just as Marissa was about to be next in line to order the food. So yes, if you do plan on visiting on a Friday or Saturday night, be prepared to hunt down seats for a while and battle the noise a bit (well it is a club after all).

BELLY BAOS

Belly Bao - SLOW BRAISED PORK BELLY
SLOW BRAISED PORK BELLY: Pickled mustard greens, coriander, crushed peanuts, and kewpie mayo ($6.50)

The braised pork belly was well cooked – tender, juicy, and packed with flavour. However, I was not a fan of the pickled mustard greens and the coriander. I was able to look past these because it was actual a delicious bao overall. Perhaps a little bit more kewpie mayo or a spoonful of the stock that the belly was braised it would have been nice as it did feel a bit dry with the steamed bun.

Belly Bao - CRACKLING ROAST PORK BELLY
CRACKLING ROAST PORK BELLY: Crackling, pickled radish, coriander, and kewpie mayo ($6.50)

Though I did not have this bao when I was at the club, I did have this when I visited their Paddington Market stall before they opened permanently at GoodGod. Like the first bao, this was also as delicious as the first – tender, juicy pork belly with a nice crispy crackling skin.

Belly Bao - SOFT SHELL CRAB
SOFT SHELL CRAB: Watercress, chilli aïoli, and lemon vinaigrette ($7.50)

Now, I love a good soft shell crab, however I was kind of disappointed with this bao just because the soft shell crab wasn’t as crispy as it could be. It had a bit of a crunch, which I’m guessing came from the shell of the crab anyway, and it was a bit chewy more than crispy. Although I really wanted to love it, it was a sad let down. If it had been the crispy soft shell crab aI hoped it’d be, it would’ve been a great bao especially paired with the chilli aïoli and lemon vinaigrette!

SIDES & SNACKS

Belly Bao - Belly Bao spicy half chicken
SIDES & SNACKS: Belly Bao spicy half chicken ($15.00)

Beside the baos, we also got a couple of sides and we didn’t need to think twice about getting some fried chicken; I mean, who doesn’t like fried chicken? Or better yet, spicy fried chicken? Absolutely delicious, crispy skin on the outside, and tender, juicy meat on in the inside. It wasn’t really that spicy to be honest, but it’s alright for someone who can’t take spicy I guess. Or if you don’t do spicy at all you can just opt to have the non-spicy chicken 🙂

Belly Bao - Sweet potato fries drizzled with chilli aïoli
SIDES & SNACKS: Sweet potato fries drizzled with chilli aïoli ($7.00)

You can honestly never go wrong with sweet potato fries, NEVER. This was a pretty hefty order though and I don’t think we even finished them because we were too full in the end to down them all. The fries weren’t very crispy to be honest which was a shame, but were still nevertheless oh so good. For some reason though, I found their chilli aïoli super spicy – even more spicy than the spicy chicken so not sure what happened there!
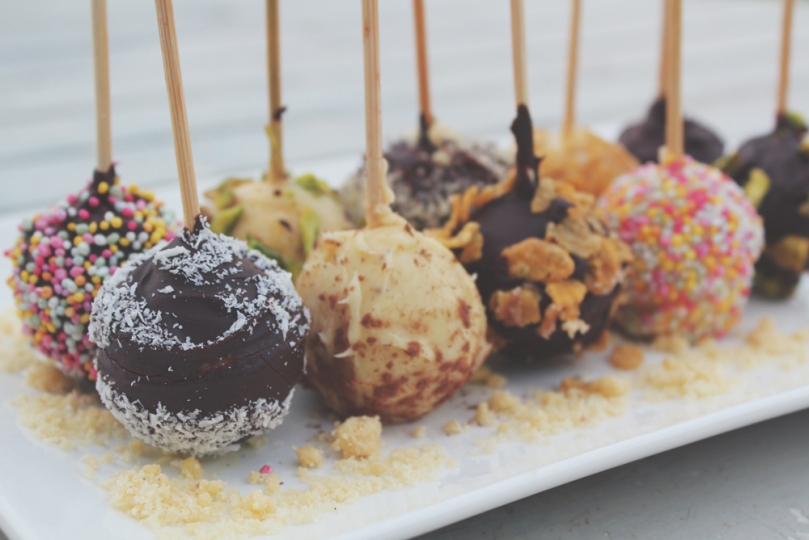
DESSERT BAOS

Belly Bao - BAONANA SPLIT
BAONANA SPLIT: Golden fried bao with vanilla ice cream, fresh banana slices, salted peanuts, drizzled with Nutella ($6.50)

Before I begin, I just want to say that I wished they did more desserts for their menu because their golden fried baos are heaven on earth. Maybe they could consider changing up the dessert menu once in a while like how other places change up their dessert flavours once every two weeks. That may just very well attract me towards the place even more! Anyway, I can’t really fault this dessert because I love banana and Nutella, and everything else paired with it. If I had to nitpick this dessert, I just wished that the Nutella was a bit more like a sauce 🙂

Belly Bao - STRAWBELLY BAO
STRAWBELLY BAO: Golden fried bao with vanilla ice cream, fresh strawberry slices, drizzled with condensed milk ($6.50)

From the two desserts, this was the once I actually ordered while Marissa had the first. I’m glad this was the one I ended up because I loved the strawberries and condensed milk drizzle over the whole dessert. It was delicious indeed!

NON-ALCOHOLIC QUENCHERS

Belly Bao - CHERRY MELON POP & GG ICE TEA
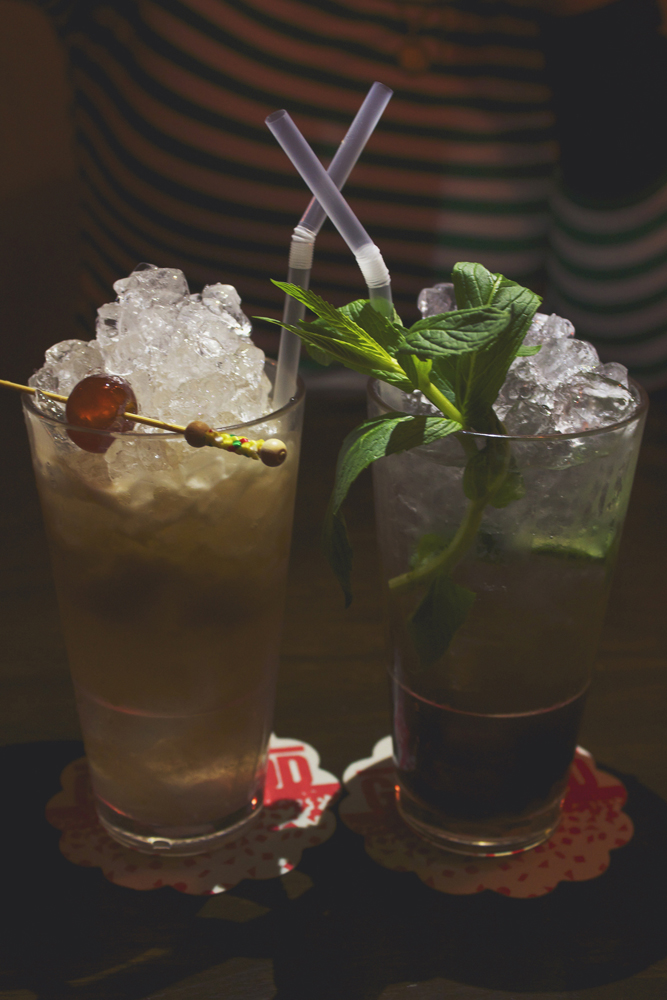
(LEFT) CHERRY MELON POP: Freshly juiced watermelon & green apple popped sweet with Fee Brothers Cherry Bitters ($9.00)

(RIGHT) GG ICE TEA: Our classic house-brewed ice tea with fresh mint ($9.00)

Overall, I wouldn’t say that the food is really outstanding, but it’s a pretty good interpretation of traditional Taiwanese street food, “not how grandma remembers it”, or as one has questioned, is bao the new taco? They’re definitely a little more than just average, but would probably not score it more than a 7 out of 10; I just didn’t feel any fireworks as I had a bite of my slow braised pork belly bao. The dessert bao though I feel were on an entirely different level to the savoury baos, and so if I were to score the savoury and sweet separately, I’d give the dessert a higher ranking. Other than that, I suppose that the baos are a good value for money. One of these babies, plus a side or two, with dessert filled me up real good, each bao only setting you back about $6.50 on average. I believe that Belly Bao could have chosen a better place to locate their residency – something more in line with the history of how they started out would have been a much more enjoyable scene I believe. I was imagining a quirky café on the corner of a suburban street that isn’t too far away from the city, like perhaps Bronte or Coogee, with some outdoor seating. I was a bit disappointed to hear that they’ve teamed up with a club scene which feels like the complete opposite of what their food is about I guess; then again this is just my opinion. I’d give the ambience a 4 out of 10, possibly 5 if I am being generous – but yeah, dark, noisy, super packed, not quite the way I want to enjoy these delicious baos.

Belly Bao
53-55 Liverpool Street
Sydney, New South Wales
Australia, 2000

– Ally xx

Auguest 2015: Jialng Mew

Polvorón Pops (Popvoróns)™

Hello everyone, it’s Jialing again, with my second/final recipe for this week. It’s been a pleasure sharing my recipes with you, and I hope to do it again in the future, but in the meantime, feel free to add me on Instagram – @jialingmew. Also, check out Tuesday’s Chicken Pastel Mini Pot Pies if you haven’t already 🙂 Today’s recipe is another one of my Filipino favourites, but this time based on a sweet treat called Polvorón, which is made with powdered milk and toasted flour and wrapped in colourful cellophane.

Polvorón Pops (Popvoróns)™

I’d previously tried to bring packs of polvoron back to Sydney with me after a trip back to Manila so that my Australian friends could try it, but was told at Sydney Airport Customs that it was on the permanent confiscation list, because of the powdered milk. But fortunately, Australia is not doomed to a polvorón-less fate! The ingredients are actually all very easy to find, and had I realised at the time that they were so simple to make, I wouldn’t have had to go through all that trouble with Customs.

Polvorón Pops (Popvoróns)™

To be quite honest, although I had made polvorón before, a very long time ago, I sort of had to make up this recipe as I went along, adjusting the proportions using some educated guesswork. Traditionally, polvoron is shaped with a special metal tool – that I did not have access to. So I was stuck with the option of cookie cutters, which of course, were nowhere to be found (and probably would not work out at all, looking back in retrospect), and finally, shaping them by hand. I then had one of my pressure and stress-induced moments of genius, and polvorón cake pops happened! Luckily it worked out (better than expected, actually), so I didn’t have to come up with a different recipe, and I can quietly sit down to calmly write about this experience. The recipe can easily be adjusted to make more (or less), which is a bonus! So we all lived happily ever after ❤

Polvorón Pops (Popvoróns)™ Ingredients

PREP TIME 20 MINS | COOKING TIME 15 MINS | MAKES 16-20 POPS

INGREDIENTS

  • 1 cup chocolate chips or melts (I used 1 cup each of dark and white chocolate)
  • 1 cup plain flour, sifted
  • 1/2 cup unsalted butter, melted
  • 1/2 cup powdered milk
  • 1/2 cup white sugar
  • Additional toppings (i.e. crushed nuts or cereal, desiccated coconut, sprinkles, cocoa powder, etc)

METHOD

  1. Using a frying pan or wok, toast the all purpose flour gently on low-medium heat, stirring the flour constantly until it is very lightly browned throughout, about 10-15 minutes. You should notice a change in the aroma of the flour, though the colour change will be very slight, so keep a watchful eye on the pan! Do not overheat, as the resulting taste will be bitter (a helpful tip is to keep a small bowl of all-purpose flour nearby so you can keep checking the colour difference). Once flour is toasted, remove from heat and pour into a large heat-safe mixing bowl.
  2. Make the polvorón mixture by adding the powdered milk and white sugar to flour, stirring until well combined. Add the melted butter and continue to stir (or use hands) until the mixture resembles wet sand, and holds when pinched. At this stage, you can eat some of the polvorón mixture (highly recommended – it’s divine) and add more sugar or powdered milk to your liking. If the polvorón mixture is too dry, add a teaspoon of melted butter.
  3. Using your hands, firmly pack a small amount of the mixture into a 1-inch ball, rolling in between palms to shape. Set completed ball aside on a baking paper-lined plate or small tray, and repeat until the rest of the mixture is used up (should make around 16-20 balls).
  4. Using toothpicks or BBQ skewers (I used BBQ skewers, and cut them in half), very slowly and carefully insert pointed end about 2/3 of the way through each ball. If the ball cracks, gently press around cracked areas and reshape around the inserted skewer. Place the polvorón pops in the fridge to harden while preparing the next step.
  5. Melt chocolate using a double boiler method, being careful not to allow any steam into the chocolate. Alternatively, place into a microwave-safe bowl and heat in the microwave on high for 15 seconds at a time, stirring between intervals, until chocolate is fully melted (please note that you may need to adjust intervals according to your microwave).
  6. Place bowl of melted chocolate on a clean surface, and pour selected toppings separately into small bowls or dishes arranging work surface so that all the bowls and dishes are all adjacent to each other.
  7. Remove polvorón pops from the fridge, and dip one at a time into the melted chocolate mixture (the chocolate will start to set once removed), then immediately into the toppings. Transfer back to the tray and continue dipping and coating the remaining pops.
  8. Serve immediately, or store in a container and keep refrigerated until needed. I’m not exactly sure what the shelf-life of these is, but I’d recommend eating them within 2 weeks – if you can even resist eating them for that long #polvoronparty #theend

Polvorón Pops (Popvoróns)™

Polvorón Pops (Popvoróns)™

Recipe Copyright © 2015 | jialingmew

ENJOY YOUR MEAL!

Jialing.

myTaste.com

Auguest 2015: Jialng Mew

Chicken Pastel Mini Pot Pies

Hello Everyone, I’m Jialing, and I’ll be taking over Amcarmen’s Kitchen for this week, so watch this space for my experimental Filipino fusion recipes! Like Allison, I come from a Filipino background, but didn’t really start doing a lot of cooking until my university years. My cooking style is… hazardous… I may set off the occasional fire alarm, or forget a key ingredient or two, but don’t worry! My recipes for this week have been Amcarmen-approved. Today’s recipe features one of my favourites, Chicken Pastel, which is a cream-based chicken and vegetable dish, typically eaten with rice, as typical with most Filipino cuisine.

Chicken Pastel Mini Pot Pies

Today’s recipe came into existence after I made a batch of chicken pastel using 1kg of meat, then realising too late that I only had 2 cups of rice left in the pantry, and wasn’t due for a Coles-run for another week 😦 I decided to make use of recently purchased ramekin sets by turning the pastel into pot pies, which proved to be a big success with my boyfriend (or so I surmised, after returning to a mountain of empty ramekins). The pastel is adapted from my mother’s recipe, using chicken thighs, which she claims is tastier (and she’s right, of course), but be warned that this recipe makes several servings of pastel, simply because there are a lot of components, but feel free to play around with the ratios.

So apparently, after doing a bit of research, Filipinos adapted this dish from the Spanish Pastel de Pollo – essentially the same thing – which is actually eaten with a pastry crust. Not rice. So… this recipe isn’t so much fusion food as accidentally recreating the recipe in its original state… But… anyway.

Chicken Pastel Mini Pot Pies Ingredients

PREP TIME 2 HOURS | COOKING TIME 1 HOUR 35 MINS | MAKES 6 MINI POT PIES

INGREDIENTS

For the marinated chicken

  • 500g chicken thigh fillets, cubed
  • 3 tbsp light soy sauce
  • 1 & 1/2 tbsp flour
  • Juice of 1/2 a lemon

For the pastry

  • 2 & 1/2 cups plain flour
  • 2/3 cup ice water
  • 250g unsalted butter, chilled and cut into 1 cm cubes
  • 1/2 tsp salt
  • 1/2 tsp white sugar

For the chicken pastel filling

  • Prepared marinated chicken
  • 1 can (420g) cream of mushroom soup
  • 1 can (230g) vienna sausage*, cut into 1/2cm pieces, reserve the liquid
  • 1/2 cup grated tasty cheese
  • 6 large cup mushrooms, diced
  • 3 garlic cloves, minced
  • 2 medium-sized carrots, peeled and cubed
  • 1 large potato, peeled and cubed
  • 1 large red Spanish onion, diced
  • 1 medium-sized capsicum, diced
  • 1 chicken bouillon cube

*Alternatively you can use cocktail sausages or pre-cooked chorizo sausages

METHOD

Preparation

  1. Marinate the chicken: Toss the chicken thigh fillet with lemon juice and soy sauce, and marinate in a large covered bowl for at least an hour (or refrigerate overnight for juicer chicken).
  2. Once you are ready to prepare the chicken pastel (after you have made the pastry), add the flour to the chicken marinade, making sure to mix evenly.
  3. Prepare the pastry dough: Combine the flour, white sugar, and salt in a large mixing bowl. Using a pastry cutter (or a blunt knife, in my case), cut the butter into the flour until it resembles a coarse, pebbly mixture. Be careful not to overwork the mixture as this will cause the butter to melt before baking and reduce the pastry’s flakiness!
  4. Slowly add the iced water, one tablespoon at a time, gently stirring it into the flour until the mixture just holds when pinched (it should still look crumbly, but not doughy).
  5. Carefully shape mixture into two round disks (if the dough does not hold, add another tablespoon of iced water), then cover each with plastic wrap and refrigerate them for at least one hour. While the pastry is chilling, prepare the filling.

Chicken Pastel Filling

  1. Heat a large frying pan over medium-high. When the oil is hot, add the garlic stirring until fragrant and golden brown, followed by the onions. While onion is cooking, add the chicken bouillon cube.
  2. Once the onions are soft and translucent, add the chicken together with the marinade liquids. Stir continuously until the marinade thickens slightly and the chicken is almost cooked through.
  3. Add the carrots and potato, cooking them until softened for about 3-5 minutes. Then add in the capsicum and mushroom, cooking them further for another 3-5 minutes.
  4. Once all vegetables are cooked through, add cream of mushroom soup, plus half the can of water or milk if you prefer, stirring well (if you are using cocktail sausages or chorizo, use one full can of water/milk). Reduce the heat to low and allow the mixture to simmer on the stove for about 15 minutes.
  5. Add the vienna sausage pieces and the reserved liquid to the chicken mixture, and stir, allowing to simmer for another 5-10 minutes until the sauce is thickened.
  6. Remove from stove, and allow the chicken pastel to cool down a bit while preparing the pastry.

Chicken Pastel Mini Pot Pies

Prepare the pastry for the pies

  1. Preheat oven to 200C (200F or gas mark 6). Spray 12 ceramic ramekins with cooking oil (or grease with butter) and set aside.
  2. Sprinkle some flour onto a clean tabletop or surface. Remove one disk of pastry dough from fridge (leave the other in the fridge while you work, to make sure the butter in the mixture remains chilled), and gently work into a ball. Cut into 6 equal portions.
  3. Working with one portion at a time, divide into two pieces – one piece should be approximately 1/3 of the portion (this will be the top) and the remaining 2/3 of the portion will be used to line the inside of the ramekin.
  4. Roll out the larger portion into a circle large enough to fit inside the ramekin. Gently drape the pastry into the ramekin, pressing it onto the bottom and sides. Smooth out the folds of pastry so that the entire interior of the ramekin is covered, with a slight border of pastry going over the lip of the ramekin.
  5. Spoon enough chicken pastel filling into the pastry-lined ramekin, ensuring that it does not spill over the edge.
  6. Roll out the remaining 1/3 portion of pastry into a circle, and gently place on top of the filled ramekin. Join edges to pastry lining the lip of the ramekin, pinching the pastry securely.
  7. Using a small paring knife, cut slits into the top (this will allow the heat to escape, so the pie tops do not explode in your oven).
  8. Repeat with remaining 5 portions (to make process quicker, first divide all the portions into 1/3 and 2/3 pieces, and then roll them out and line the six ramekins. Fill the ramekins, then pinch the tops into place and cut slits).
  9. Arrange the ramekins on a baking tray, lined with baking paper (this will catch any drips from the filling). Bake in preheated oven for 45-60 minutes (may or may not take longer depending on your oven), or until tops are golden and pastry is flaky.
  10. Once the first batch of pot pies are in the oven, repeat steps 13-19 with the remaining pastry dough from the fridge.
  11. Once cool, the pies should come out of the ramekins quite easily, with gentle help from a breakfast knife.
  12. Serve hot and enjoy with a side of a green leafy salad of your choice.

Chicken Pastel Mini Pot Pies Process

Chicken Pastel Mini Pot Pies

Baked pies can be refrigerated for up to one week, or frozen for up to 3 months. Place frozen pies in refrigerator overnight to thaw. To heat refrigerated pies, place in an oven preheated to 200 C for 15-20 minutes.

Unfortunately, the recipe for the chicken pastel filling and pastry don’t quite match up in terms of quantity, so there WILL be leftover chicken pastel. But never fear! It is quite delicious eaten with a bowl of steaming white rice, in true Filipino fashion #pastelfordays

Chicken Pastel Mini Pot Pies

Recipe Copyright © 2015 | jialingmew

ENJOY YOUR MEAL!

Jialing.

myTaste.com

Auguest 2015: An Introduction

Auguest 2015: An Introduction

Hello Everyone! Yes, I am aware that I said today I would get right back into Review Sundays since I did a post on the Sisterhood of the World Bloggers Award last week. However, since it’s August and I’ve got some exciting content for you guys this month, I thought I’d take this opportunity to explain what will happen on Amcarmen’s Kitchen for the upcoming month!

I came up with this idea about a month ago or so while I was in the shower – well actually, the idea already existed, but I used that as a base and put a food blogger twist to it.  Before I get into it, I should probably make mention that I did not misspell August in the title of this post – and yes you read it right as ‘Auguest’ and here is why:

The idea is based on a famous YouTube celebrity known as Tyler Oakley. If you don’t already know him, you can look him up on YouTube, especially his ‘Auguest’ collaboration videos. In a nutshell, two years ago he started something known as ‘Auguest’ where for everyday (maybe just weekdays I can’t remember) in August, he uploads collaborations with other well-known YouTubers. So therefore, my idea for content this month will be based on the concept of collaborating with other foodie friends and/or food bloggers and have them guest blog on Amcarmen’s Kitchen for the month of August.

How this will work is that for example, today’s content on my blog would feature a post/recipe written by another blogger, while their post/recipe on their blog will be written by me. Then next week, another blogger will be featured on my blog, and so on. I thought that this would be a great way to get in touch with other food bloggers as well as a great opportunity to network and produce some really cool content for our blogs/websites. It didn’t quite work out as I hoped it would as I initially wanted to feature at least 12 different bloggers on my blog. It was actually quite difficult to find bloggers who were interested in taking part, and also it was a bit difficult for me to organise with so little time on my hands. I do hope to make this a yearly thing, so I hope that it will actually work out the way I had initially envisioned it!

I still have 4 foodies/bloggers that will be guest blogging on Amcarmen’s Kitchen for the rest of August. The theme of this year’s collaboration will be ‘Back to your Roots’ – cooking up dishes from your own cultural background and basically food that you love eating. In addition, I will still be writing reviews on Sunday’s from next week onwards – so don’t miss me too much! And I will still be writing, on the other blogger’s page so you can still head on over to their blog, when the post goes live to have a read 🙂

Cheers!

– Ally xx


I wanted to keep this to last because I didn’t want the beginning of the post to start of with a whole chunk of rant that has nothing to do with the actual post. Just think of this a bonus material on the life of Amcarmen’s Kitchen when not actually in the kitchen.

So, I just wanted to let you all know that I am back in Singapore (arrived just a few hours ago) and boy was it hectic! First off all, the baggage belts in the Sydney Airport this morning were all down for some reason – like actually across the WHOLE airport, which meant that baggages had to be manually transported from the check-in counters to the aircraft. I thought, okay maybe the flight might be delayed for a bit since they needed to do this. When I boarded the plane and was waiting for take off, they made an announcement that not ALL baggages were loaded into the aircraft that I was on because of that whole system being down and they didn’t want the flight to be delayed. They said that the baggages would be loaded onto the next flight out of Sydney to Singapore which was 3 hours behind the flight I was on.

When I got off the plane, I waited for about 10 minutes at the baggage belt after passing immigration, HOPING that my bags travelled with me. Ground staff then started approaching people saying that what was already on the belt were the bags that the aircraft was able to carry and that no new bags were being placed on the belt for collection. I could’ve sworn that I saw less than 50 bags on the belt. Terrible! And they were all priority bags for suites, first, and business class people. So after that I had to queue up at the lost and found with practically half of the other passengers who didn’t get their bags as well. Good thing I was able to beat a few people and was kind of sort of at least in the first quarter of the line, but I swear the line did not even move for like 20 minutes. Anyway, I got out of the airport 2 HOURS after my flight landed – I blame Sydney Airport for such unnecessary hassles.

Good thing I have extra clothes and underwear packed in my hand carry, and an extra $120 to compensate for the troubles. I overheard a lady saying that she had no clothes at all because they were all packed in her check-in baggages – and she leaves the next morning to another destination. I feel sorry for those who are in that situation and hope that they get their bags soon! And I hope I get mine tomorrow morning as well!