Crispy Tofu Kare-Kare

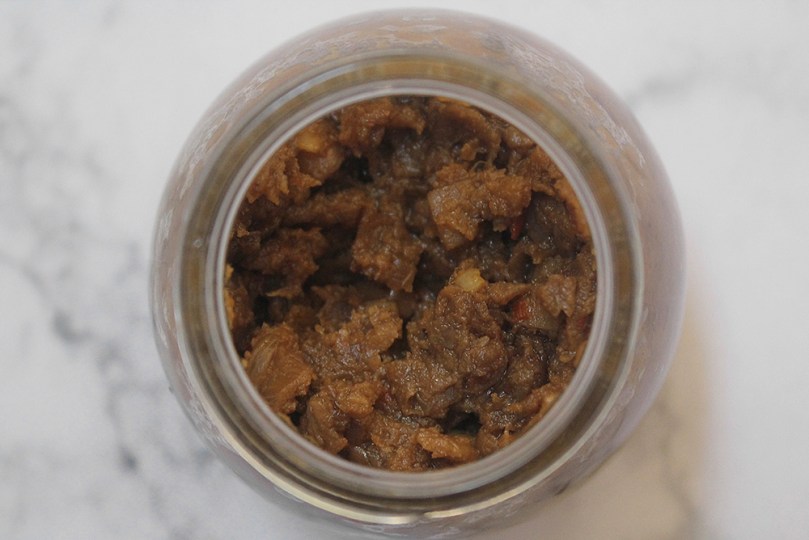
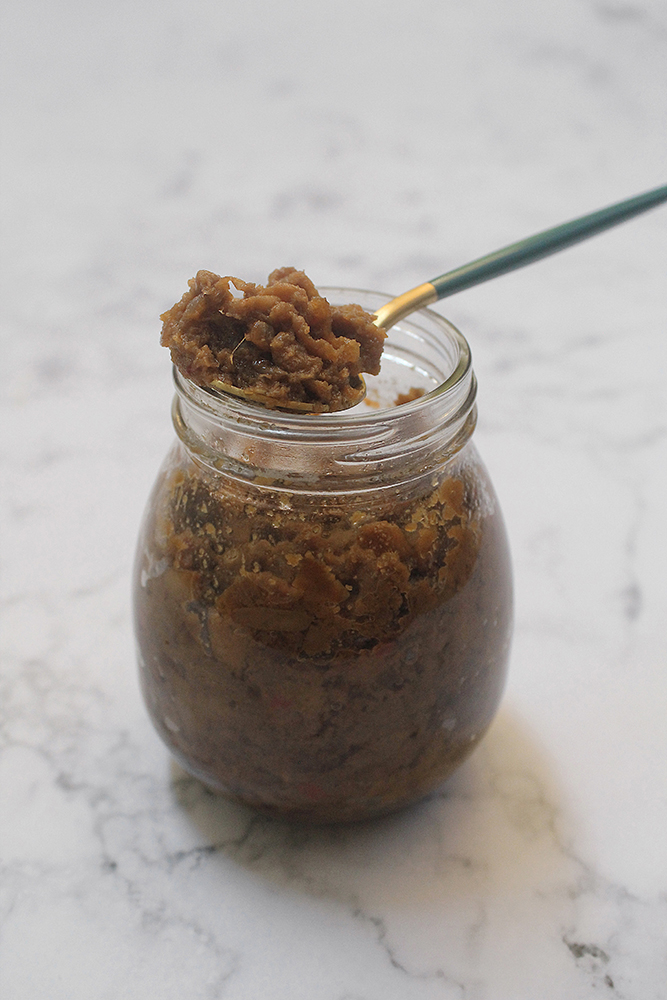
Hello Everyone! Yes, I am here again with another recipe for you guys this week! The dish that I will be sharing tonight is a build up on the Mushroom ‘Bagoong’ recipe that I shared yesterday, which I will further explain in tonight’s post.

The word kare actually means curry, so therefore kare-kare is a thick and creamy curry, or stew that is rich in peanut flavour, cooked with your protein of choice and various vegetables. The stew gets its rich flavour from my homemade vegetable broth, ground roasted peanuts and peanut butter, together with sautéed onions, and garlic. It is coloured with annatto and can be thickened with toasted or plain ground rice. It is said that kare-kare has a similar flavour to satay because of the peanuts in the sauce.

The main protein used in a traditional kare-kare is beef, oxtail being the preferred choice of cut and often paired with either beef tripe, beef hock, or beef meat. Various cuts of pork can also be used such as, but not limited to, pork belly, hocks, and/or trotters.

Crispy Tofu Kare-Kare

Kare-kare can also be made exclusively from vegetables, known as Kare-kareng Gulay, that may include, but not limited to, eggplant, Chinese chard (pechay/bok choy), yardlong beans, banana heart/blossoms, okra, daikon, other other various greens. Now while this already is a vegetarian/vegan version of the traditional kare-kare, the condiment on the side, usually shrimp bagoong, strips it of its vegetarian or vegan title. While you can leave the bagoong to the side, kare-kare is just not the same without it. Hence, in yesterday’s post, I made a vegan alternative to bagoong to complete this dish.

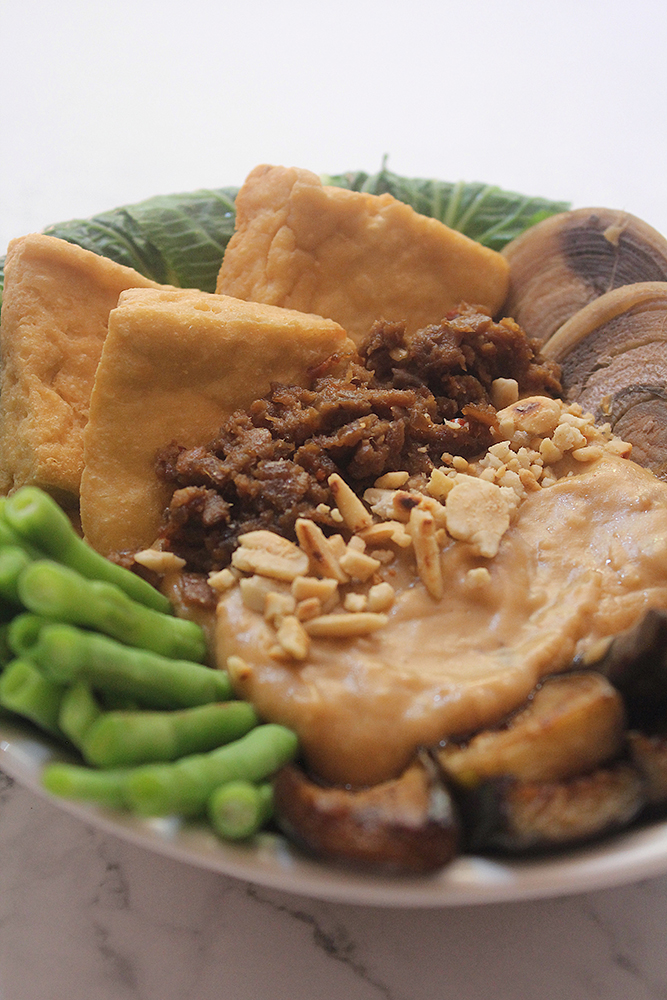
I think the last meat-based kare-kare that I had before I stopped eating meat was crispy pork belly kare-kare, and to mimic that, I added crispy fried tofu to my kare-kareng gulay of fried eggplant, blanched yardlong beans and Chinese chard, and boiled banana heart. I first came across Crispy Tofu Kare-kare from various posts I had seen on Instagram last year. Since then I’ve been looking for a reason to make the dish for a blog post and finally I can do so as it fits with the theme for the month!

Crispy Tofu Kare-Kare Ingredients

PREP TIME 10 MINS | COOKING TIME 30 MINS | SERVES 6

INGREDIENTS

For the kare-kare

  • 3-4 garlic cloves, minced
  • 1 small red onion, diced
  • 1 cup vegetable broth (plus additional, if needed)
  • 1/2 cup + 1/2 tbsp creamy smooth peanut butter
  • 1/3 cup white rice flour
  • 1/4 cup roasted peanuts, crushed
  • 2 tbsp cooking oil
  • Salt, to taste

For the annatto mixture

  • 1 & 1/2 tsp annatto seeds
  • 1/4 cup hot water
  • Banana heart, boiled
  • Chinese chard (pechay), blanched
  • Eggplant, fried
  • Firm tofu, fried
  • Yardlong beans, blanched
  • Mushroom ‘bagoong’
  • Roasted peanuts, crushed

METHOD

  1. Annatto Mixture: Combine the annatto seeds and hot water in a cup. Leave to soak for the seeds to release their colour.
  2. Kare-Kare: Add oil in a medium-sized stockpot over medium-high heat. Once hot, sauté the garlic until golden brown and fragrant, about 30 seconds. Follow with the onions and cook for a further 30 seconds before adding the crushed peanuts. Continue to cook for a further minute.
  3. Add the peanut butter and mix well until melted before adding 1 cup on the vegetable broth. Mix and season with a pinch of salt, then turn the heat down to medium-low. Leave to simmer for about 10 minutes for the flavours to infuse.
  4. Take about a third cup of extra vegetable broth and add the white rice flour to it. Mix until the flour is incorporated into the broth.
  5. Stir the rice flour mixture into the peanut butter stew. Leave to cook until the sauce thickens, a further 10 minutes and mix every 2 to 3 minutes to make sure the sauce doesn’t stick to the bottom of the pot.
  6. Strain the annatto seeds from the water and add the annatto liquid into the stew. Mix well to incorporate its colour, and if needed, add more vegetable broth to thin out the stew. You may also need to adjust the seasoning to your liking.

At this point, you may choose to add your prepared tofu and vegetables to the stew or separate them for plating up.

  1. Serve and enjoy with steamed rice and mushroom ‘bagoong’ to complete this vegan dish!

Crispy Tofu Kare-Kare

Crispy Tofu Kare-Kare

BON APPÉTIT

– Ally xx

myTaste.com

Mushroom ‘Bagoong’

Mushroom ‘Bagoong’

Hello Everyone! We’re taking a little detour on our Flavours of Southeast Asia. My initial plan for the year is to go down the list of Southeast Asian countries alphabetically, but since April is a special month for Amcarmen’s Kitchen, I thought it would be fitting to travel through my home country, the Philippines.

Yes I am aware that it’s only Tuesday, those who have been following me for a long time now know that my regular posting schedule is every Wednesday night (GMT+8), but I decided that I would make a separate post for this recipe, leading up the the main recipe I have originally planned for tomorrow. The reason is because the recipe that I will be sharing tonight can be used as a base for many other Filipino dishes, or as a condiment to other savoury dishes.

Mushroom ‘Bagoong’

I don’t think the word ‘bagoong’ even has a direct English translation to it. Rather, the term refers to a condiment local to the Philippines that is partially or completely made of either fermented fish (bagoong isda), krill, or shrimp paste (bagoong alamang) with salt.

The recipe that I will be sharing tonight uses neither fish nor shrimp, instead mushrooms for a vegan-friendly alternative. I first came across mushroom ‘bagoong’ when I was browsing around in an artisanal market about a year ago. I didn’t buy a jar of it though at that time only because I had no idea what I would make/do with it, but I did think that it was an interesting alternative to the bagoong we’re used to here in the Philippines. It wasn’t until I decided to make the dish that I will be sharing tomorrow night, that I also decided to attempt making mushroom ‘bagoong’ as an accompaniment to that dish.

Mushroom ‘Bagoong’ Ingredients

PREP TIME 5-10 MINS | COOKING TIME 15-20 MINS | MAKES 1 CUP

INGREDIENTS

  • 100g fresh oyster mushrooms, minced
  • 2-3 garlic cloves, finely minced
  • 2 red bird’s eye chillies, finely minced (optional)
  • 1 small red onion, finely minced
  • 1/2 cup white miso paste
  • 2 & 1/2 tbsp white granulated sugar
  • 2 tbsp cooking oil
  • 2 tbsp dark soy sauce
  • 2 tbsp light soy sauce
  • 1 tbsp grated ginger

METHOD

  1. Add cooking oil in a medium-sized pan over medium-high heat. Once hot, sauté the garlic until golden brown and fragrant, about 30 seconds. Follow with the onions and cook for a further 30 seconds before adding the grated ginger and chillies, total 1 and a half to 2 minutes.
  2. Add the minced mushrooms and continue to cook for about 3 to 4 minutes before adding the sugar and then miso paste into the mushroom mixture. Mix until well combined and continue to cook for another 3 to 4 minutes.
  3. Taste and adjust according to your liking.

Add more sugar if you want it a little sweeter, or more chillies if you want a spicier kick. At this point, I added both dark and light soy sauce a tablespoon at a time for added umami flavours and for colour as well.

  1. Cook further, a total of 15 to 20 minutes, until the mushrooms are completely cooked through. Turn the heat off and set aside to cool down before storing in a jar and keeping it tightly sealed.
  2. Refrigerate until ready to use, and can be stored for up to 3 months!

Mushroom ‘Bagoong’

Use for dishes such as pinakbet for a completely vegan alternative to using shrimp bagoong, or as a condiment for other dishes. Enjoy!

BON APPÉTIT

– Ally xx

myTaste.com

Ikan Sabuko (Grilled Tamarind Fish)

Ikan Sabuko (Grilled Tamarind Fish)

Hello Everyone! It’s the last day of the month and also my last East Timorese recipe! I’m not going to lie, I did have a difficult time researching the country’s most popular dishes, but despite that, I enjoyed the dishes that I came across – easy, humble, yet delicious meals that you can add to your weekly meal plan!

As we all know, East Timor’s cuisine is heavily influenced by the countries that they were once colonized by. The dish that I will be sharing tonight, known as Ikan Sabuko, or in English, Grilled Tamarind Fish, draws on the flavours of Portugal. Along with other fish species, mackerel is a very common fish to eat in Portugal, sometimes on toast, for special occasions, or even a staple weeknight meal.

Ikan Sabuko (Grilled Tamarind Fish)

Ikan Sabuko is a specialty dish made of Spanish mackerel that is marinated in tamarind paste, grilled with basil and chillies for a kick of heat, and then optionally served with a budu sauce to tie all the flavours together. Budu is essentially a fermented anchovy sauce mixed with a squeeze of calamansi juice, red and green chillies, and some sliced red onions. You can add other ingredients as well such as mint leaves and cherry tomatoes for extra flavour.

This dish really only needs a few ingredients, but it’s packed with lots of strong and bold flavours. You don’t have to use mackerel fish in particular, use whatever fish is readily available at your local fish market. Add this to your list of dishes to try and I promise you, it won’t disappoint!

Ikan Sabuko (Grilled Tamarind Fish) Ingredie

PREP TIME 45 MINS | COOKING TIME 10-15 MINS | SERVES 3

INGREDIENTS

  • 6 mackerel fish filets
  • 2 tbsp tamarind paste
  • Juice of 3 small-sized calamansi
  • Salt and pepper, to taste
  • Turmeric leaves
  • Basil leaves
  • Red & green Thai chillies

METHOD

  1. In a medium-sized bowl, add the fish filets together with the salt, pepper, calamansi juice, and tamarind paste. Give it a good mix and set it aside to marinate for about 45 minutes.
  2. Line a grill pan with aluminium foil (about twice the length of your grill pan) and the turmeric leaves. Place the fish filets on top of the leaves, skin side up, and fold the aluminium foil over the top of the fish to enclose it.
  3. Cook over medium-high heat for about 10 to 15 minutes, or until done to your liking.
  4. Once done, plate up and garnish with some freshly chopped basil leaves and some red and green chillies too (optional).
  5. Serve with freshly cooked rice and a simple budu sauce on the side. Enjoy!

Ikan Sabuko (Grilled Tamarind Fish)

Ikan Sabuko (Grilled Tamarind Fish)

BON APPÉTIT

– Ally xx

myTaste.com

Balado with Ai Manas (Fried Boiled Egg with Chilli Sauce)

Balado with Ai Manas (Fried Boiled Egg with Chilli Sauce)

Hello Everyone! Who here doesn’t love eggs? Eggs are probably one the the reasons why I don’t think I’d ever be able to go on a fully vegan diet. It’s amazing how many varieties of dishes we can make using the eggs as a side or main ingredient. So put your hands up if you love eggs!

To be perfectly honest, boiled eggs are my least favourite from all of the basic ways to cook eggs. Since I like a runny yolk, my absolute go-to would be sunny-side up eggs (with browned, crispy edge that gives a certain nutty flavour to the white) and/or poached eggs. I guess it’s now safe to say that the recipe that I will be sharing tonight has changed the way I see boiled eggs. Now, if you’re like me and this recipe doesn’t convert you, then I don’t know what will!

Balado with Ai Manas (Fried Boiled Egg with Chilli Sauce)

Here’s a great way to turn boring and plain-old boiled eggs into a spectacular appetizer or side dish at home. The East Timorese version of Balado is an adaptation of the original Indonesian Spicy Eggs, known as Telur Balado. Balado is a popular snack that you can find being sold, usually by children, all over the streets of East Timor. If you want a flavourful egg dish where the sauce penetrates all the way into the inside, then you really want to develop a fried and crispy skin to your eggs. Likewise, you can serve this dish with a fried egg or sunny-side up, but tradition calls for boiled eggs.

On the streets for just 25 cents, you get a fried, hard-boiled accompanied by a bold sour and spicy chilli sauce, called Ai Manas. Ai Manas is the heart of every East Timorese food. It’s very famous all over the country and comes with many regional varieties that vary according to taste. Green or red chillies often make up the bulk of the ingredients of the paste. The chilies are grounded along with lime or lemon rind and juice, ginger, onions, and several other local spices. Even a teaspoon of this sauce is enough to fire up any meal. Thai chillies are usually used for this sauce, which can be significantly hot for some. Use what you like and can tolerate.

Balado with Ai Manas (Fried Boiled Egg with Chilli Sauce) Ingredients

PREP TIME 10 MINS | COOKING TIME 10 MINS | SERVES 6

INGREDIENTS

  • 6 large free-range eggs

For the spicy chilli sauce

  • 8-10 pc red bird’s eye chillies, roughly chopped
  • 2 garlic cloves, finely minced
  • 1 small red onion, finely diced
  • 1-2 tsp white granulated sugar (optional)
  • Handful of Thai basil, roughly chopped
  • Salt, to taste
  • Small thumb-sized ginger, grated
  • Zest and juice of 1 lemon

METHOD

  1. Ai Manas: Using a mortar and pestle, pound the chillies, garlic, and red onion into a rough paste.
  2. Follow with the grated ginger, lemon zest, and a pinch of the basil leaves. Continue to pound and season with a touch of salt. Add in the lemon juice and give it a good mix. Taste and adjust to your liking.

I had to add about a teaspoon or two of white granulated sugar to balance the spice and tang of the sauce. You don’t have to add it if you’re alright with the level of sour and spice.

  1. Once done, add the rest of the chopped basil leaves to the sauce, mix, and then set aside.

Balado with Ai Manas (Fried Boiled Egg with Chilli Sauce)

  1. Balado: To boil the eggs, heat a medium-sized pot of water (enough to cover all the eggs) over high heat until boiling. Once boiling, turn the heat down to low and carefully place the eggs in the pot using a ladle to prevent them from cracking.
  2. Depending on your preference, boil for 5 minutes for soft-boiled eggs, 7 minutes for medium eggs, or 10 minutes for hard-boiled eggs. Take note that you’ll be cooking the eggs again, so I would recommend you go for soft or medium eggs if you don’t like over-cooked boiled eggs as a result.
  3. While the eggs are cooking, prepare an ice bath* by combining ice and tap water in a large bowl. Once the eggs are cooked, immediately transfer them to the ice bath to cool for 2 to 3 minutes.
  4. Peel the eggs and make sure to pat them dry if you don’t want them to explode while frying.
  5. Heat oil, enough to submerge an egg for deep frying, in a medium-sized pot over medium high. Carefully lower the eggs into the oil and fry until golden brown, about 2-3 minutes.
  6. Carefully remove from the oil using a slotted spoon and transfer to a plate lined with a paper towel to absorb any excess grease.
  7. Serve the fried boiled egg with the spicy chilli sauce and enjoy while hot!

Balado with Ai Manas (Fried Boiled Egg with Chilli Sauce)

*The ice bath will cool the eggs quickly and stop the cooking process. The ice water will also cause the egg to contract and pull away from the shell, which will make it easier to peel.

BON APPÉTIT

– Ally xx

myTaste.com

Pastéis de Nata (Portuguese Egg Tarts)

Pastéis de Nata (Portuguese Egg Tarts)

Hello Everyone! As I mentioned in my post last week, East Timor was colonised by Portugal from the 16th century up until 1975, hence why East Timorese food even up to this day is heavily influenced by Portuguese cuisine. A favourite East Timor dessert snack that stuck around is Pastéis de Nata, or in English, Portuguese Egg Tarts. These egg tarts were originally created and made by Catholic nuns in Lisbon over 200 years ago. In East Timor, these tarts are a standard dessert found in fancy hotels, usually paired with a flavourful, aromatic, and organically grown East Timorese coffee.

If you’ve ever had one of these egg tarts, you’ll know that they are one of the greatest pastries to binge-eat! It has a crisp, flaky crust that holds a rich and creamy custard center that is blistered on top from the high heat of an oven. It tastes like home, even if you aren’t from Portugal. They’re just as enchanting as a trip to Lisbon.

Pastéis de Nata (Portuguese Egg Tarts)

Before we dive into tonight’s recipe, please take the time to check out the original where I drew my inspiration from over on the Tasting Table. Now in the original recipe, they make their own puff pastry dough, which you can also do. If you want to save time and energy (like me), you can always use store-bought puff pastry. The results are pretty much the same for a quick, easy, and hassle-free Portuguese Egg Tart.

Now you may notice that the tops may not brown quite as much as the authentic pastéis when baking at home. In fact my oven only goes to a maximum of 250C (482F or gas mark 9) and commercial pastry shops that sell these tarts have oven temperatures that blast up to 430C (800F)!

Pastéis de Nata (Portuguese Egg Tarts) Ingredients

PREP TIME 10 MINS | COOKING TIME 30 MINS | MAKES 32 TARTS

INGREDIENTS

  • 3/4 cup white granulated sugar
  • 2/3 cup water
  • 1 cinnamon stick
  • 1 cup & 6 tbsp whole milk
  • 1/2 cup all-purpose flour
  • 6 free-range egg yolks
  • Puff pastry sheets
  • Ground cinnamon, to garnish (optional)

Pastéis de Nata (Portuguese Egg Tarts)

METHOD

  1. Cinnamon Sugar Syrup: Combine the sugar, water, and cinnamon stick in a small saucepan. Over high heat, bring the mixture to a boil and cook for about a minute or until all the sugar granules have dissolved. Remove from the heat and let it sit aside until ready to use.
  2. Egg Filling: Add one cup plus one tablespoon of the whole milk into a separate saucepan over medium heat, until bubbles begin to form around the edges, about 4 to 5 minutes.
  3. While the milk is heating up, whisk the flour and remaining five tablespoons of milk in a large mixing bowl. Continue to whisk while adding the hot milk in a slow and steady stream.
  4. Discard the cinnamon stick from the sugar syrup and slowly whisk it into the milk mixture in a steady steam.
  5. Return the milk and sugar mixture to the saucepan and cook over low heat, whisking constantly until thickened, about 10 to 12 minutes.
  6. Turn the heat off and add in the yolks to the mixture. Whisk until well combined, and then strain through a fine-mesh sieve into a mixing bowl. Set aside to cool down slightly.
  7. Egg Tarts: Preheat oven to 260C (500F or gas mark 10).
  8. Prepare you muffin tins by lightly greasing them with a little butter.
  9. Roll out your store-bought puff pastry sheets and cut them depending on the size of your muffin tins. Ideally you’ll want them about 3/4 up the sides of each muffin mold. Evenly flatten the dough against the bottom and sides by pressing down on it.
  10. Pour about 1 & 1/2 tablespoons of the warm egg filling into each pastry shell.
  11. Bake for about 15 to 20 minutes, or until the shells are golden brown and crisp, the custards are set, and the tops are blackened in spots.
  12. Let cool in the pans on wire racks for 5 minutes, and then remove them from the tin and onto the wire rack. Sprinkle with cinnamon, serve warm, and enjoy!

Pastéis de Nata (Portuguese Egg Tarts)

BON APPÉTIT

– Ally xx

myTaste.com

Batar Da’an (Pumpkin, Corn, and Mung Bean Stew)

Batar Da’an (Pumpkin, Corn, and Mung Bean Stew)

Hello Everyone! With only 28 calendar days, February flew by so quickly and it’s already the 3rd day of the 3rd month of 2021! In 13 days it’ll be a year since we (the Philippines) went into Enhanced Community Quarantine because of the global pandemic. Last week we shared our last recipe for local Cambodian delicacies; our second stop on our road to discover the Flavours of Southeast Asia for Amcarmen’s Kitchen. Our next stop for this month is a small Southeast Asian nation that is rarely heard of, a country that only gained its full independence in 2002 – East Timor! After centuries of Portuguese colonization, the state became independent in 1975 before being invaded by Indonesia. The country was finally able to restore its sovereignty in 2002.

This is why East Timorese Cuisine is heavily influenced by other Southeast Asian foods, Indonesian cuisine to be specific, and Portuguese cuisine. Since agriculture is one of the most important sectors in the country, the cuisine uses mainly rice (since its largely homegrown), sweet potatoes, corn, cassava, and taro. To add up to the base of every dish there is usually a vegetable component, also with homegrown products such as black-eyed peas, onions, spinach, and cabbage. Meat such as pork, chicken, goat, and fish are also common in East Timorese dishes.

Batar Da’an (Pumpkin, Corn, and Mung Bean Stew)

The first dish that we’re going to tackle for this month is known as Batar Da’an, or in English, Pumpkin, Corn, and Mung Bean Stew. Mung beans are very popular in Asia, particularly in Southeast Asia. Though having said that East Timorese cuisine is heavily influenced by other cultures, Batar Da’an is actually one of the few dishes that are authentic to the country. It is a simple, yet hearty and humble vegan dish (gluten-free too!) that is prepared with a combination of diced pumpkin, corn, and mung beans that are sautéed in garlic and onions, seasoned with just salt and pepper. There are also other variations of this dish, where squash is used instead of pumpkin, and kidney beans are used as an alternative to mung beans.

Before we dive into tonight’s recipe, please take the time to check out the original where I drew my inspiration from over on 196 Flavors by Vera and Mike. The original recipe uses water as the base for this stew. I replaced the water with my own homemade vegetable stock to really amplify the flavour of this dish. You may also use store-bought broth if you wish. Also, at the very last minute, I asked my maid to harvest some moringa (malunggay) leaves from our neighbour’s tree to not only add colour to the dish, but also an extra added nutrition!

Batar Da’an (Pumpkin, Corn, and Mung Bean Stew) Ingredients

PREP TIME 10 MINS* | COOKING TIME 20 MINS | SERVES 6

*Allow for 6 hours to overnight to soak the mung beans.

INGREDIENTS

For the vegetable broth

  • 6 cups water
  • Carrot
  • Onion
  • Garlic
  • Celery
  • Leek
  • Long Green Chilli
  • Dried Rosemary
  • Dried Bay Leaves
  • Salt
  • Whole Black Peppercorns

Note: When making a basic vegetable broth, you want vegetables with neutral, but savoury flavours. Onions, carrots, celery and mushrooms are the ideal starter vegetables for stock, but feel free to swap any of these for leeks, tomatoes or parsnips. Avoid starchy vegetables like potatoes and turnips will make for a gummy, cloudy vegetable stock. Beets overpower their aromatic counterparts. Zucchini and green beans become bitter when slowly simmered for as long it takes to make this stock.

For the batar da’an

  • 600g pumpkin, peeled and cut into large chunks
  • 4 & 1/2 cups vegetable broth
  • 1 cup corn kernels (fresh or frozen)
  • 3/4 cup dried mung beans, soaked for at least 6 hours to overnight
  • 3 tbsp coconut oil
  • 3-4 garlic cloves, finely minced
  • 1 red onion, finely diced
  • Salt and pepper, to taste
  • Moringa (malunggay) leaves, optional

METHOD

You can choose to make your vegetable broth the day before to save time when actually cooking the Batar Da’an.

  1. Vegetable Broth: Combine all the ingredients in a large stock pot and bring to a boil over high heat. Once boiling, turn the heat down low and leave to slowly simmer for an hour.

If you’re using your broth right away, skip ahead to step 3a.

  1. When done, turn the heat off and leave to cool down slightly for about half an hour.
  2. Strain the vegetables and spices from the broth, into a bowl and then:
    a) set aside until ready to use, or
    b) set aside to cool down completely before transferring into a jar/container to store in the fridge.
  3. Batar Da’an: Add the coconut oil to a large stockpot over medium-high heat and sauté the minced garlic until golden brown in colour and fragrant, about 30 seconds. Next, add the diced onions and cook until soft, a further 30 to 45 seconds.
  4. Add the pumpkin chunks and give it a good mix for about a minute and then add in the drained mun beans. Season with a touch of salt and freshly cracked black pepper and cook for about a minute to get some caramelisation happening.
  5. Pour in the vegetable broth, mix, and then turn the heat down to medium-low. Cover and cook for about 15 minutes.
  6. In the last 5 minutes, stir in the thawed corn and give it a good mix. At this point, you may taste and adjust the seasoning to your liking. Turn the heat off after 5 minutes and then serve immediately while hot and enjoy!

Optional: Once the heat is turned off, you may stir in some moringa (malunggay) leaves, or other choice of leafy greens, and let the residual heat cook them.

This dish is traditionally enjoyed as a main course, usually accompanied by rice, but it can also serve as an excellent side dish when paired with other meat or fish dishes.

Batar Da’an (Pumpkin, Corn, and Mung Bean Stew)

Batar Da’an (Pumpkin, Corn, and Mung Bean Stew)

BON APPÉTIT

– Ally xx

myTaste.com

Num Ansom Chek (Rolled Banana Rice Cake)

Num Ansom Chek (Rolled Banana Rice Cake)

Hello Everyone! February flew by in just the blink of an eye, and before we know it, in a couple of days it’ll be March already! This also means that this will be the last Cambodian recipe that I will be sharing on my blog, for now. There are still so many wonderful recipes that the country has to offer, and maybe one day I’ll revisit the cuisine and discover more dishes that’ll take a liking to my tastebuds.

For our last Cambodian cuisine, I’ll be sharing a popular street snack that is sold across the country, known as Num Ansom Chek, or in English, Rolled Banana Rice Cake. It is a traditional Cambodian snack that is low fat, healthy, and easy to make as it only requires a few ingredients to put together. In many Cambodian snacks, banana is used because of its abundance in the tropical region, and its ritual value. Of course, it is also delicious and sweet!

Num Ansom Chek (Rolled Banana Rice Cake)

Other than bananas, this snack also includes sticky rice and grated coconut. Sometimes, jackfruit is also added, but since I’m not a huge fan of jackfruit, I’ve replaced them with strips of mango instead. You may also add red mung beans or black beans and it can also be sweetened with palm sugar if desired. All of this is then carefully rolled and enclosed in a banana leaf. The resulting cylindrical-shaped snack is then steamed until tender and fragrant.

In Cambodia, this sweet delicacy is traditionally prepared for important celebrations such as Cambodian New Year and the religious festival Pchum Ben (Festival of Souls). With a culture that is heavily influenced by Hinduism and Buddhism, during a festival, it is common practice to offer food to the monks at the temple, and the ghosts of our ancestors, relatives, and friends. One of the foods that they offer is Num Ansom Chek because of their ability to be kept for days without being spoiled. This is due to them being wrapped and steamed in banana leaves.

Before we dive into tonight’s recipe, please take the time to check out the original where I drew my inspiration from over on Vanier Culinary by Thun-Carl Sieu.

Num Ansom Chek (Rolled Banana Rice Cake) Ingredients

PREP TIME 30 MINS* | COOKING TIME 1 HOUR | MAKES 6 ROLLS

*Allow for 6 hours to overnight to soak the glutinous rice.

INGREDIENTS

  • 3 ripe bananas
  • 1 ripe mango (optional)
  • 1 & 1/2 cups sweet glutinous rice, soaked for at least 6 hours or overnight
  • 3/4 cup freshly grated coconut
  • Salt, to taste
  • Banana leaves, 6 of about 15cm x 20cm pieces

METHOD

  1. Drain the water from the soaked rice and mix the grated coconut in with the rice.
  2. Peel and cut the bananas in half and sprinkle a touch of salt over them.
  3. Take a piece of banana leaf and place a small portion of the rice and coconut mixture in a horizontal line along the longer side of the banana leaf. Place a banana half in the centre of the rice and strips of ripe mango if you wish. Top the fruits with more rice, there should be enough to fully surround them.

Num Ansom Chek (Rolled Banana Rice Cake)

  1. Roll the banana leaf tightly around the rice to form a log and fold both edges in to seal. Make sure that the leaf is not loose so that the mixture can use it as a mold. Use string to secure the banana leaf wrapping if needed. Repeat until all of the bananas have been wrapped.
  2. Stack the rolls in a steamer and steam over boiling water for about 60 minutes.
  3. Once done, allow to cool slightly before unwrapping and serving. Enjoy!

Num Ansom Chek (Rolled Banana Rice Cake)

Num Ansom Chek (Rolled Banana Rice Cake)

BON APPÉTIT

– Ally xx

myTaste.com

Num Treap (Sticky Rice with Sesame Seeds)

Num Treap (Sticky Rice with Sesame Seeds)

Hello Everyone! Forget about brownie sundaes, forget about éclairs and chocolate cake; the real desserts, the sinfully sweet and decadent treats, can be found in one region: Southeast Asia. Ingredients in Southeast Asian treats are less traditional than the sweet flavours you typically see in Western desserts. Ingredients like cassava, mung beans, and lotus seeds paired with sticky sweet syrups like coconut cream, palm syrup, and condensed milk are common and no strangers to Cambodian treats. Beyond these ingredients you can also always expect to have at least one fresh fruit added to the mix. Look for favourites like mangoes, rambutan, durian and of course, bananas.

Just as Southeast Asian desserts, Cambodian treats are most frequently enjoyed mid-morning. Instead of being served to cap off a delicious meal, the treats are bought and enjoyed in markets as you are doing your shopping around town. Many of the most popular Khmer treats are sold from mobile street stands. Look out for the crowds of students outside universities and schools, flocked around a stand.

Traditional Cambodian treats, also known as Khmer sweets, also come in the form of custards and puddings; egg-based dishes that are spiced up with a variety of flavours (vanilla and cinnamon are typical favourites). Since rice remains a main staple in current day cuisine, being eaten as often as three times a day, rice-based cakes are also very popular.

Num Treap (Sticky Rice with Sesame Seeds)

Tonight, I will be sharing a Cambodian favoured treat that is simple and super easy to make at home. The best part? You’ll most likely have everything readily available to whip this up in your pantry. Num Treap, or in English, Sticky Rice with Sesame Seeds, is a treat that is basically as the name states, steamed sticky rice mixed in a warm coconut sauce. The mixture is then spread into a baking dish or pan, topped with sesame seeds, and then set aside to cool before cutting into squares and then served. You may serve it as it is, or with fruits on the side. Num in Cambodian means pastry, so it is essentially a sticky rice (bai damnaeb) pastry treat.

This dessert is very much similar to a sweet rice cake that we have here in the Philippines known as Biko. It is also made of coconut milk, brown sugar, and glutinous rice, that is topped with latik (coconut curds) instead of sesame seeds.

Num Treap (Sticky Rice with Sesame Seeds) Ingredients

PREP TIME 60 MINS* | COOKING TIME 45-60 MINS | MAKES 9 SLICES

*Allow for an additional 6 hours (or more) to soak the glutinous rice before cooking.

INGREDIENTS

  • 1 cup sweet glutinous rice, soaked for at least 6 hours or overnight
  • 2/3 cup coconut milk
  • 1/2 cup coconut sugar
  • 3 tbsp sesame seeds, toasted
  • 2 tsp vanilla extract
  • 1/2 tsp salt

METHOD

  1. Rice: Drain the water (no need to shake off the excess water), and evenly arrange the soaked sticky rice in a steamer lined with a greased banana leaf.
  2. Cover and steam for 30-45 minutes. You can check the rice and increase the steaming time if need be. Once done, keep the rice in the steamer or covered to prevent it from drying out until you need to use it.
  3. Coconut Sauce: While the rice is cooking, add the coconut milk, coconut sugar, salt, and vanilla extract in a large saucepan and cook over medium-high heat. Stir frequently until it thickens, about 5 minutes.
  4. Num Treap: Fluff the cooked rice with a fork to separate the grains. With the heat off, add the rice to the saucepan with the coconut sauce and mix well.
  5. Spread the rice mixture into a shallow dish or baking pan, pressing them down with a spatula. Sprinkle sesame seeds on top and cover with plastic wrap. Leave to set and cool for about an hour.
  6. Cut into squares, then serve and enjoy!

Num Treap (Sticky Rice with Sesame Seeds)

Num Treap (Sticky Rice with Sesame Seeds)

BON APPÉTIT

– Ally xx

myTaste.com

Kuih Koci Gula Kelapa (Glutinous Rice Cake with Coconut Filling)

Kuih Koci Gula Kelapa (Glutinous Rice Cake with Coconut Filling)

Hello Everyone! Tonight I will be sharing my last recipe from Brunei. As previously mentioned in a post I shared two weeks ago, I came across this Kuih Koci Gula Kelapa from the same website entitled ‘Brunei’s Traditional Sweet Treats You Must Try’.

To be honest, when I was still living in Brunei, this was a kuih that I barely saw sold in the night markets or road-side stalls – or maybe I was too focused on my favourite kuih-kuih that I failed to notice them amongst the pack. Nevertheless, as with most, if not all, kuih-kuih found in Brunei originate from a different country, and the Kuih Koci Gula Kelapa is no stranger to that. As it turns out, it is actually native to Indonesia.

Pronounced koh-chee, this is a snack/dessert made with a mix of white and black glutinous rice flour, stuffed with sweetened coconut and palm sugar filling, wrapped in banana leaves, and then steamed. The deep purple hue of the kuih comes from the black glutinous rice flour. There are also varieties of this kuih that do not require black glutinous rice flour, in fact a majority of it is made with white glutinous rice flour. The black glutinous rice flour is mainly used to colour the kuih.

Kuih Koci Gula Kelapa (Glutinous Rice Cake with Coconut Filling)

In fact, black glutinous rice flour may be quite difficult to source (depending on where you live). You can actually make your own too by grinding black glutinous rice grains. Place them in a coffee grinder or blender and then grind until really fine. Sieve the flour and then grind again. You need to grind several times until you get a really fine flour, so technically it’s a lot of work too. I managed to source mine online from Indonesia.

The Kuih Koci has a mochi-like texture and is sweet in flavour from the coconut filling inside. Though optional, a slightly salty coconut sauce cuts through the sweetness nicely. Other than just adding a dollop of it atop after the kuih has been steamed, you can also spoon the coconut sauce into the banana leaf, place the dough in, and then steam it with the coconut sauce.

Before we dive into tonight’s recipe, please take the time to check out the original where I drew my inspiration from over on What To Cook Today by Marvellina.

Kuih Koci Gula Kelapa (Glutinous Rice Cake with Coconut Filling) Ingredients

PREP TIME 30 MINS | COOKING TIME 30 MINS | MAKES 6 PCS

INGREDIENTS

For the dough

  • 1 & 1/2 cups white glutinous rice flour
  • 1/3 cup black glutinous rice flour
  • 2/3 cup coconut milk

For the coconut filling

  • 2 cups grated coconut
  • 1/2 cup coconut sugar*
  • 1/4 cup coconut cream
  • 1/4 cup white granulated sugar**
  • 1 tsp cornstarch
  • 1/4 tsp salt

*Gula Melaka (palm sugar) is the choice of sweetener used when it comes to traditional kuih like this, but if you can’t seem to source it, you can always substitute it for coconut sugar like I did.

**Also, I ran out of coconut sugar. It’s supposed to be 1 cup of coconut sugar but I only had half a cup left and therefore mixed it together with a quarter cup of white granulated sugar.

For the coconut sauce (optional)

  • 2/3 cup coconut cream
  • 1 tsp all-purpose flour
  • Pinch of salt, to taste

Wrapping

  • 6 pcs banana leaves (15cm x 20cm)
  • Coconut oil, for brushing

METHOD

  1. Prepare the Banana Leaves: Soak the banana leaves in warm water for 30 minutes. Wipe them dry and brush with coconut oil. Set aside.
  2. Coconut Filling: Meanwhile, add the coconut cream and sugars in a pan over medium heat. Mix until the sugars have melted, then stir in the grated coconut and salt. Mix until well incorporated and then sprinkle the cornstarch over the coconut-sugar mixture. Stir and cook until the mixture thickens. Once done, set aside and let it cool down completely.
  3. Coconut Sauce: Add the coconut cream and a pinch of salt to a small saucepan. Whisk in the all-purpose flour until smooth. Place on the stove and cook over medium heat, whisking continuously until the sauce thickens. Set aside.
  4. Dough: Heat the coconut milk in a small saucepan until it is hot, but not boiling. Add both flours to a large mixing bowl, together with the hot coconut milk. Stir to mix everything, until the dough comes together. It should be pliable and not sticky.
  5. Divide the dough into 6 equal pieces. Flatten the dough with the palm of your hands and place the cool coconut filling in the middle. Wrap around it and roll the dough into a smooth ball. Repeat with the remaining dough.
  6. Wrapping: Take a piece of banana leaf and shape into a cone. Place a dough ball in the cone and gently push it into the leaf. Fold one side over, and then the adjacent side. Then fold the other two sides to make your cone-shaped Kuih Koci.

You may also choose to wrap them into a parcel, or steam them with no wrapping at all! Just place the balls onto a small sheet of banana leaf.

  1. Steaming: Place the wrapped Kuih Koci into a steamer and steam for about 10 -15 minutes.
  2. Serve: Once done, unwrap and serve immediately while hot, topped with the coconut sauce. Enjoy as a light mid-morning or mid-afternoon snack!

Kuih Koci Gula Kelapa (Glutinous Rice Cake with Coconut Filling)

Note: Steamed Kuih Koci can be kept in the refrigerator for up to 3 days. Otherwise, you may freeze the uncooked kuih koci for later consumption. Steam, frozen for, 15-18 minutes.

BON APPÉTIT

– Ally xx

myTaste.com

Nasi Katok with Buttermilk Salmon

Nasi Katok with Buttermilk Salmon

Hello Everyone! We’re pushing on with more Bruneian favourites, and this month wouldn’t be complete without tackling the famous Nasi Katok, which in English literally means ‘knock rice’. It is a simple combination of white rice, sambal (a condiment made out of blended chillies and other spices), and a piece of fried chicken, traditionally served wrapped in a piece of waxed brown paper. A variety of secondary ingredients including but not limited to shrimp paste, garlic, ginger, shallot, scallion, palm sugar, lime juice, vinegar, and anchovies can also be served together with the fried chicken.

Nasi Katok is as quintessentially a Bruneian version of fast food, with many vendors running around the clock 24 hours a day selling this classic favourite. The roots of the term originated from the act of katok (knocking), on the window of this small flat in the country’s capital, to buy nasi (rice); the unofficial first Nasi Katok establishment since the 1980s. Naturally, the name stuck and today the dish is among the best national dishes.

Nasi Katok is one of Brunei’s most affordable staples that is priced at only BND$1.00. That’s right, one dollar for a piece of fried chicken, sambal, and steamed white rice. Over the decades the Nasi Katok has evolved into many versions – my favourite being the fusion of chicken and buttermilk.

Nasi Katok with Buttermilk Salmon

Bruneians love their buttermilk chicken, so when word got out that there was a place in Brunei that combines two of the country’s most loved foods, it caused a sensation! As of the majority of the dishes found in Brunei, the origins of buttermilk chicken is actually a Malaysian dish known as Lai Yao Kei 奶油鸡, or Malaysian Butter Chicken. It is about a million miles away from what most of us imagine when we think of Butter Chicken (and I’m talking about the Indian variety).

Other than chicken being the main source of protein for the dish, other meat varieties such as pork, fish, and prawns can be found too. I decided to keep mine pescatarian friendly for this recipe and so I used salmon belly for this dish. The buttermilk sauce is infused with the aroma of fresh curry leaves, and spiked with the heat from fresh chillies. It is actually very simple to make and comes together in just minutes. Though you’d think the butter would be the star of the show here, it is actually the evaporated milk that steals the limelight!

Nasi Katok with Buttermilk Salmon Ingredients

PREP TIME 30 MINS | COOKING TIME 30 MINS | SERVES 6

INGREDIENTS

For the salmon

  • 6 pcs salmon belly strip, scaled and cleaned
  • 3 garlic cloves, finely minced
  • 2 pcs calamansi, juiced
  • 2 tsp turmeric powder
  • Salt & freshly ground black pepper, to taste
  • All-purpose flour

For the buttermilk sauce

  • 1 can (300ml) evaporated milk
  • 1 bunch (8-10 pcs) curry leaves
  • 2 pcs red bird’s eye chillies, chopped
  • 1 tbsp unsalted butter
  • 2 tsp white granulated sugar
  • Salt & freshly ground black pepper, to taste

For the sambal

  • 3 garlic cloves, chopped
  • 2 small red onions, peeled and quartered
  • 1 medium-sized brown onion, quartered
  • 1 long green chilli, chopped
  • 1/2 + 1/2 cup water
  • 3 tbsp blended red chillies
  • 1 tbsp white granulated sugar
  • Salt, to taste
  • Cooking oil

METHOD

  1. Salmon Belly: Add all the ingredients into a medium-sized bowl and mix well. Set aside to marinate for at least 30 minutes before cooking.
  2. Lightly coat the salmon belly strips in flour and shallow fry until golden brown and crispy. Fry in batches if needed and once done, set aside. You can fry the salmon bellies just before serving so that they are hot and remain crispy.
  3. Sambal: Add the onions, garlic, green chilli, and half a cup of water into a food processor or blender. Blend until the ingredients are finely chopped.
  4. Add about 2 tablespoons of oil in a medium-sized pan over medium heat. Add the onion mixture and cook until soft and fragrant, about 5 minutes.
  5. Add the blended red chillies and continue to cook for a further 2 minutes. Season with a pinch of salt, add the sugar, and the remaining half cup of water. Give it a good mix and continue to cook until thickened. Once done, set aside.
  6. Buttermilk Sauce: Melt the butter to a medium-sized pan over medium heat. Once melted, add the red chillies together with the curry leaves and cook to infuse the flavours and aromas into the butter. Set aside a few curry leaves and chillies for decoration later.
  7. Turn the heat down to medium-low and add the evaporated milk. Add the sugar and season with a touch of salt and freshly ground black pepper. Taste and adjust to your liking. Cook until the sauce thickens, about 8 to 10 minutes altogether.

At this point, you can either add the fried salmon bellies to the sauce and simmer for a couple of minutes before serving, or top the bellies with the sauce. It’s completely up to you.

  1. Serve with rice and vegetables of choice, together with sambal. Enjoy!

Nasi Katok with Buttermilk Salmon

Nasi Katok with Buttermilk Salmon

Before I end tonight’s post, there’s something I want to share with everyone. So about two weeks ago I came across a post on Instagram regarding the price of Nasi Katok – should it be increased from BND$1.00 to BND$1.50? From a survey of almost 2000 people, 58% said that it should stay at BND$1.00. Small business owners usually sell Nasi Katok just to get through the day; it was never about profit for some. In fact, vendors would only make a profit of 20 cents per serving of Nasi Katok sold. In my honest opinion, if it’s just for a 50 cents price increase to help small businesses, I wouldn’t mind paying extra especially if I’m getting more in return. Think about it, you’re getting a serving of rice, a decent-sized piece of chicken and a spicy relish to bring it altogether. I think we can spare a little more out of our pockets to help them out.

BON APPÉTIT

– Ally xx

myTaste.com