Potato Salad with Green Beans and Asparagus

Potato Salad with Green Beans and Asparagus

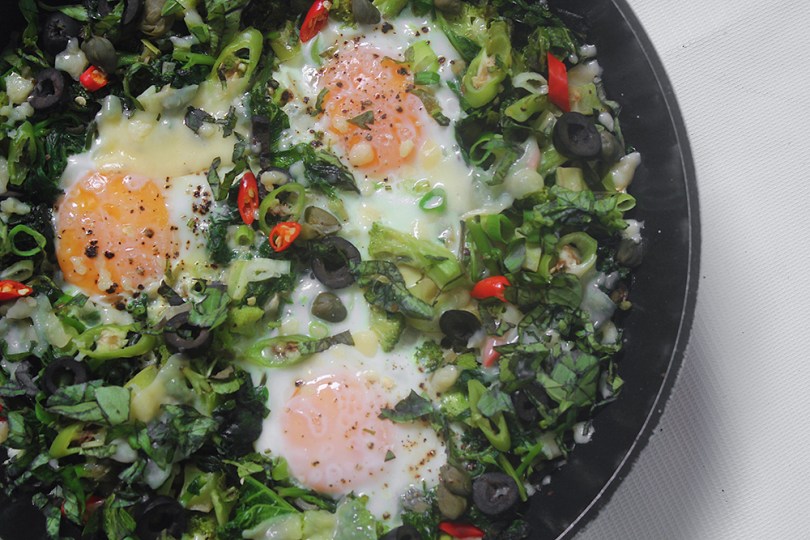
Hello Everyone! Potatoes and green beans are a classic combination; throw some asparagus and lettuce leaves or any other leafy greens into the mix and you’ve got yourself a great side dish that goes with almost anything. You can also bring it to a picnic, party, or barbecue.

Potato Salad with Green Beans and Asparagus

You’ll want to slice the baby potatoes (skin on) in half before cooking to help them cook faster. If you are using slightly bigger potatoes, you may want to quarter them. How long you cook them depends on their size, and you can check to see if they are tender by piercing a fork into the potatoes about 10 minutes into cooking. I prefer to steam my potatoes rather than boiling them because it takes a fraction of the time. Why? You’re only waiting for a small amount of water to boil, not a whole pot. In addition, unlike a big pot of boiling water, steam won’t dilute the flavour of the potatoes substantially.

This Potato Salad with Green Beans and Asparagus works really well at either room temperature or served cold. It has a bold, tangy taste thanks to the vinaigrette – a simple combination of red wine vinegar, olive oil, minced red onion and garlic, and seasoned with a touch of salt and freshly ground black pepper. You want to toss half the dressing over the warm potatoes to enhance their flavour. The remaining dressing is tossed over the whole salad at the end.

Potato Salad with Green Beans and Asparagus Ingredients

PREP TIME 15 MINS | COOKING TIME 15 MINS | SERVES 4-6

INGREDIENTS

For the salad

  • 450g baby potatoes, thoroughly cleaned and cut in half (skin on)
  • 250g french beans, ends trimmed and cut in half
  • 1 bunch asparagus, tough ends snapped off and cut to the same lengths of the french beans
  • 1 bunch leafy greens of choice, roughly chopped
  • Handful of chopped malunggay leaves
  • Handful of sliced almonds
  • Salt and freshly ground black pepper, to taste

For the vinaigrette

  • 4 tbsp olive oil
  • 2 tbsp red wine vinegar
  • 1 garlic cloves, finely minced
  • 1/2 small red onion, finely minced
  • Salt and freshly ground black pepper, to taste

METHOD

  1. Fill a pot with about an inch of water and put a steamer basket inside. Place the potatoes in the steamer basket and bring the water to a boil. Cover and steam until potatoes are tender, about 10 to 15 minutes.
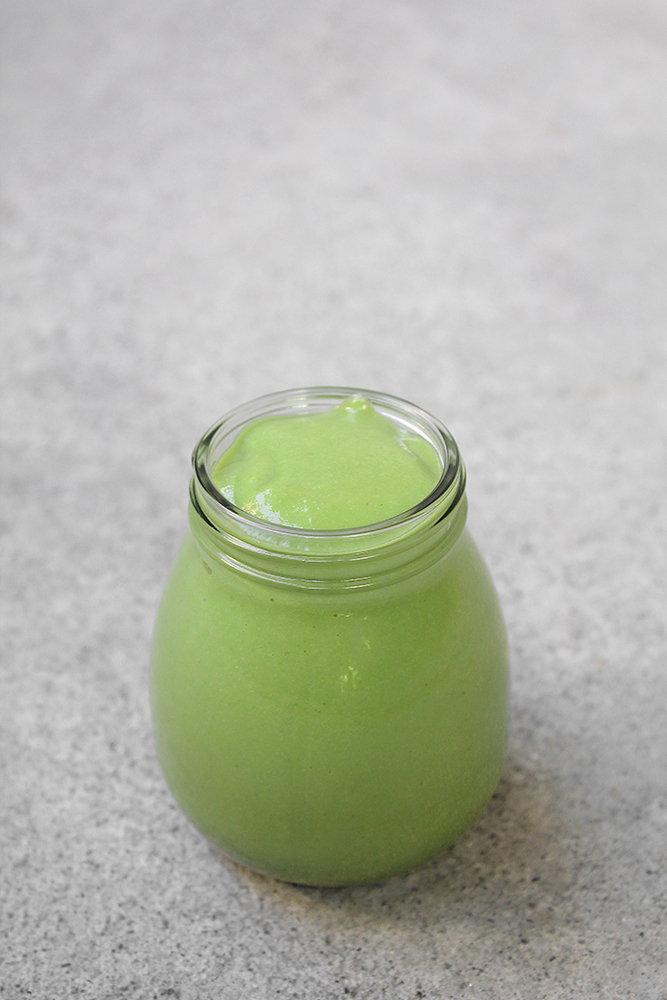
  2. While the potatoes are cooking, combine all the ingredients for the vinaigrette into a small-sized jar. Put the lid on a shake vigorously to combine the ingredients together. You can make this ahead of time to ensure that all the flavours have time to develop.
  3. Bring a small pot of water to a boil. Once boiling, add both the french beans and asparagus to the boiling water. Cook for 4 to 5 minutes. While waiting, prepare an ice bath (large bowl with half ice and half water).
  4. When the french beans and asparagus are ready, drain and then plunge into the prepared ice bath. Let them sit in the ice bath until completely cool. Once cool, drain the french beans and asparagus and pat them dry with a paper towel. Set aside.
  5. Once the potatoes are done, transfer them into a large mixing bowl and add half of the vinaigrette. Toss to combine. Add the other vegetables together with the sliced almonds and remaining vinaigrette. Season to taste with salt and freshly ground black pepper. Give it a good toss and it’s ready to serve as a delicious side to your main! Enjoy!

Potato Salad with Green Beans and Asparagus

BON APPÉTIT

– Ally xx

myTaste.com

Ondeh-Ondeh (Glutinous Rice Balls with Coconut Sugar Filling)

Ondeh-Ondeh (Glutinous Rice Balls with Coconut Sugar Filling)

Hello Everyone! In Singapore, Malaysia, and even in Brunei, Ondeh-Ondeh refers to a glutinous rice ball kuih (sweet snack or dessert). In Indonesia they call it Klepon. There are two versions of Ondeh-Ondeh. One is made with just plain glutinous rice flour and scented with pandan (screwpine) juice, while the other has a little sweet potato added to the dough.

Ondeh-Ondeh (Glutinous Rice Balls with Coconut Sugar Filling)

Ondeh-Ondeh is made with fresh pandan juice and glutinous rice flour rolled in freshly grated coconut with a little surprise on the inside. The surprise makes these balls of Ondeh-Ondeh oh so fun to eat! Its pandan-flavoured skin wraps semi-melted gula melaka (palm sugar) that would burst upon the first bite, like sweet little bombs as the sweetness explodes in the mouth. The slightly salted grated coconut further enhances the deliciousness of this kuih.

Before we dive into tonight’s recipe, please take the time to check out the original where I drew my inspiration from over on Rasa Malaysia by Bee.

Ondeh-Ondeh (Glutinous Rice Balls with Coconut Sugar Filling) Ingredients

PREP TIME 30 MINS | COOKING TIME 5-10 MINS | MAKES 12-14 BALLS

INGREDIENTS

  • 10 pandan leaves
  • 2 cups glutinous rice flour*
  • 1 cup water
  • 100g freshly grated coconut**
  • Coconut sugar***
  • Pinch of salt

* Using only glutinous rice flour will make the ondeh-ondeh rather soft in texture. Although some do enjoy such consistency, tapioca flour may be added to the dough to make it slightly firmer. You may also substitute tapioca flour with corn flour.

** If you are using desiccated coconut for this recipe, add 1 tablespoon of water and half a teaspoon of salt to half a cup of desiccated coconut. Mix well and steam the mixture for 15 to 20 minutes. The reason for steaming is because you want to achieve a fluffier/softer texture, similar to freshly grated coconut.

*** The amazing taste of ondeh-ondeh comes from the gula melaka, a special palm sugar which has a toffee taste to it. You may substitute this for brown sugar, coconut sugar, or other sweeteners if gula melaka isn’t available. That will, however, change the traditional taste of the ondeh-ondeh.

METHOD

  1. Pandan Juice: Place the pandan leaves together with the water in a food processor or heavy-duty blender, and blitz/blend for a few minutes until the pandan leaves have been finely puréed.
  2. Pour the blended pandan-infused water over a fine sieve and into a small bowl. Strain the liquid from the pandan leaf pulp, pressing down firmly with the back of a spoon to extract all of the juice from the pulp. Discard the pandan leaf pulp.
  3. Dough: In a large mixing bowl, combine the glutinous rice flour with the extracted pandan juice and lightly knead to form a smooth dough. Cover the dough and set aside for about 15 minutes to rest.
  4. Ondeh-Ondeh Balls: Bring a large pot of water to rolling boil. Pinch a thumb-sized piece of dough and flatten lightly and thinly. Fill the centre of the dough with about half a teaspoon of coconut sugar. Roll it in your palms to form a smooth ball and then place each ball on a baking tray lined with lightly greased cling film. Repeat until all the dough is used up.
  5. Bring a large pot of water to a rapid boil. Carefully drop each ball into the boiling water. Do not overcrowd the pot. You may need to work in batches depending on how many balls you managed to make with the dough.
  6. When they float to the surface, remove them with a slotted spoon and shake off the excess water. Coat the ondeh-ondeh balls with the slightly salted grated coconut and serve immediately. Enjoy!

Ondeh-Ondeh (Glutinous Rice Balls with Coconut Sugar Filling)

Notes:

Why does the dough crack?
The dough is too dry. Add some water and knead the dough again. Work in batches and store the dough in a bowl with a piece of damp cloth over it to prevent it from getting dry.

Why does the Ondeh-Ondeh burst while boiling?
Sometimes, the dough may crack during the cooking process. This is due to the thinness of the dough. However, remember not to make the dough too thick either. Wrap it closely around the palm sugar to prevent air from getting in. Otherwise it will burst during the cooking process.

Why did the palm sugar not melt?
The ondeh-ondeh wasn’t cooked long enough. To ensure that the pal sugar has fully melted, simmer them over low heat for another 5 to 10 minutes once they start to float. Also, the trick is to shave the palm sugar with a knife or mandoline or simply chop them into small chunks. This way, they would melt faster. Larger chunks may not melt as quickly as smaller pieces.

How long can ondeh-ondeh last for?
Cooked ondeh-ondeh with grated coconut will only last a day because grated coconut spoils easily. If you would want to prepare them in advance, you may refrigerate shaped ondeh-ondeh for up to 5 days covered with plastic wrap. Shaped ondeh-ondeh can also be frozen for up to 6 months if kept in an airtight container or freezer bag. Simply boil refrigerated or frozen ondeh-ondeh before coating them with shredded coconut.

Ondeh-Ondeh (Glutinous Rice Balls with Coconut Sugar Filling)

Before tackling this recipe, I read up on a few different ones online and gathered that on average, these Ondeh-Ondeh Balls take about 10 minutes to cook. I made mine slightly bigger than those in the recipes I looked at, but no way did it take 15 or 30 minutes to fully cook through. It was already way past the 1-hour mark and the balls were still rock hard. At first, I didn’t know where I went wrong… and then it hit me. I was using rice flour instead of glutinous rice flour. What a rookie mistake *facepalm* Nonetheless, after I got around to picking up some glutinous rice flour from the grocers and tackled the recipe again, it was a success!

BON APPÉTIT

– Ally xx

myTaste.com

Herb & Caper-crusted Salmon

Herb & Caper-crusted Salmon

Hello Everyone and happy first of July! If you’re a little pressed for time when it comes to preparing and cooking, this should be one of your go-to, quick yet healthy and light weeknight dinner recipes. The salmon is full of fresh flavours, tang, and heat! It could not be any simpler to make and goes from fridge to table in 20 minutes, even including all the sides you need to make this a complete meal! Simply chop up your herbs and capers, slather it onto your salmon filets, then bake. Easy peasy lemon squeezy right?

Herb & Caper-crusted Salmon

Salmon is one of the most nutritious foods you can find. This popular fatty fish is loaded with nutrients and may reduce risk factors for several diseases. It’s also super tasty, versatile, and widely available. Salmon is rich in long-chain omega-3 fatty acids, which have been shown to reduce inflammation, lower blood pressure and decrease risk factors for disease. Salmon is also rich in high-quality protein, which is needed to heal, protect bone health, and prevent muscle loss, among other benefits. The list goes on.

Before we dive into tonight’s recipe, please take the time to check out the original where I drew my inspiration from over on Iowa Girl Eats by Kristin. The original recipe crusts the salmon with a caper and dill-infused gremolata – which is just a fancy name for chopped parsley, lemon zest, and garlic. I used basil and green onions/scallions in place of the dill and parsley only because I could not find those herbs at the grocers. I think it worked well with the herb substitutes that I used, so don’t be afraid to mix up your herbs for the crust to what’s readily available at your local grocers.

Herb & Caper-crusted Salmon Ingredients

PREP TIME 10 MINS | COOKING TIME 7-9 MINS | SERVES 4

INGREDIENTS

  • 4 salmon filets, about 150g per filet
  • 2-3 garlic cloves, minced
  • 2 red bird’s eye chillies, minced
  • 2 stalks green onion, roughly chopped
  • 1 & 1/2 tbsp capers, drained, rinsed, and roughly chopped
  • Olive Oil
  • Salt and freshly ground pepper, to taste
  • Zest of 1 lemon

METHOD

  1. Preheat oven to 200C (400F or gas mark 4), and line a baking sheet with foil. Grease with a little bit of oil or butter and set aside.
  2. Mix the chopped/minced basil, green onions, chillies, capers, lemon zest, garlic, salt, and black pepper to the centre of a large plate. Squeeze a bit of lemon juice into the mixture to moisten.
  3. Rub the salmon filets with olive oil and then season generously with salt and freshly ground black pepper. Press the top and sides of each filet into the herb and caper mixture to create an even crust.Place the filets onto the prepared baking sheet and bake for 7-9 minutes. Be careful and do not over bake them!
  4. Once done, transfer the salmon filets to individual serving plates. Serve with a squeeze of fresh lemon juice on the salmon fillets, and some creamy mashed potatoes on the side with blanched asparagus or any other greens of choice. Enjoy!

Herb & Caper-crusted Salmon

Herb & Caper-crusted Salmon

BON APPÉTIT

– Ally xx

myTaste.com

Seri Muka Kuih

Seri Muka Kuih

Hello Everyone! Our last recipe for the month of June is an amazing Malaysian and Nyonya kuih made of glutinous rice, coconut milk, sugar, and pandan leaves. Kuihs (or kuehs) are common snacks of the Hokkien, Teochew and Peranakan cuisine.The terminology is actually a general description for bite-size pastries/nibbles. These traditional delights come in many different forms and are either sweet or savoury snacks/desserts.

Seri Muka literally translates to beautiful face in Malay. It is a two-layered cake that consists of a glutinous rice layer steamed with coconut milk and topped off with a sweet and silky smooth pandan custard layer (hence the green colour). It’s heady with the flavour of coconut milk, a key ingredient used to impart a creamy taste when cooking the glutinous rice and making the custard layer.

Seri Muka Kuih

My fondest memory of Seri Muka would have to be during the festive season of the Islamic New Year. These pretty faces, alongside other kuihs of course, were served at almost every Malay household I would visit during that time of the year. The soft, sticky rice underneath with just a hint of saltiness pairs so deliciously with the decadently sweet pandan custard on top.

Before we dive into tonight’s recipe, please take the time to check out the original where I drew my inspiration from over on Rasa Malaysia by Bee. Seri Muka can also be found in the Indonesian province of South Kalimantan, and is also known as Kuih Putri Salat in Singapore.

Seri Muka Kuih Ingredients

PREP TIME 35 MINS | COOKING TIME 50 MINS | MAKES 14-16 SLICES

INGREDIENTS

For the bottom layer

  • 1 & 1/3 cups glutinous rice, soaked in water for 30 minutes
  • 1 cup thin coconut milk (1/2 cup coconut milk plus 1/2 cup water)
  • 2 pandan leaves
  • 1 tsp salt

For the top layer

  • 1 cup thick coconut milk (or coconut cream)
  • 1/2 cup pandan juice*
  • 1/2 cup white granulated sugar
  • 2 large free-range eggs
  • 2 large free range egg yolks
  • 5 tbsp all purpose flour
  • 2 tbsp cornstarch

*For the pandan juice

  • 8-10 pandan leaves
  • 1/2 cup water

METHOD

  1. Bottom Layer: In a large mixing bowl, combine all the ingredients needed, except for the pandan leaves, to make the bottom layer. Evenly spread onto a lightly greased 8in x 11in rectangular baking dish and add the in pandan leaves, making sure that they are submerged in the rice mixture. Steam over high heat for 20 minutes. Meanwhile, prepare the pandan juice for the top layer.
  2. Pandan Juice: Place the pandan leaves together with the water in a food processor or heavy-duty blender, and blitz/blend for a few minutes until the pandan leaves have been finely puréed.
  3. Pour the blended pandan-infused water over a fine sieve and into a small bowl. Strain the liquid from the pandan leaf pulp, pressing down firmly with the back of a spoon to extract all of the juice from the pulp. Discard the pandan leaf pulp.
  4. Top Layer: Mix all the remaining ingredients for the top layer in a medium-sized heatproof bowl until well combined.
  5. Create a bain-marie (double-boiler) by pouring some water into a pot that is slightly larger than your heat-proof bowl. Very important, check to see if your bowl can sit on top of the pot without any water touching the bottom of the bowl.
  6. Heat your pot of water over low-medium and bring to a slight simmer. Once slightly simmering, place the bowl with the pandan, coconut milk, and egg mixture over it. Cook until the mixture thickens slight, but is still runny enough to pour, about 8-10 minutes.
  7. Seri Muka Kuih: Once the rice layer is done, discard the pandan leaves. Stir and flatten the rice with the back of a spoon, making sure that it is compact. Using a fine sieve, strain the pandan, coconut milk, and egg mixture over the cooked rice. Return to the steamer and steam over medium heat for 30 minutes.
  8. Remove from the steamer once done and leave aside to completely cool down before cutting them into diamond or rectangular-shaped bite-size pieces. Serve with a hot cup of coffee or tea for a lovely mid-afternoon snack. Enjoy!

Seri Muka Kuih

Seri Muka Kuih

BON APPÉTIT

– Ally xx

myTaste.com

Dr. Seuss’ Green Eggs and No Ham

Dr. Seuss’ Green Eggs and No Ham

Hello Everyone! I’ve been wanting to do my own take on Dr. Seuss’ Green Eggs and Ham for Amcarmen’s Kitchen ever since last year. I was super excited when I realised that I could tackle this idea for this month, but then quickly questioned, what am I going to do about the ‘ham’ part of this recipe?

For those of you who don’t know me personally, or if you haven’t picked it up from the recipes I have been sharing since the beginning of the year, I’ve been slowly cutting meat out from my diet. Since the second half of last year, I’ve managed to cut both beef and pork from my diet (with very rare relapses – I can’t avoid a good beef kaldereta during work events). I tried cutting out chicken from my diet this year too and attempted a pescatarian diet, but that didn’t quite work out. Nonetheless, I’ve strictly kept the recipes I’ve been uploading on the blog to pescatarian, vegetarian, or vegan.

Dr. Seuss’ Green Eggs and No Ham

Mini tangent aside and back on to tonight’s recipe; after having spent countless hours on the Internet searching for how I could adapt Dr. Seuss’ Green Eggs and Ham without the ham, I came across Jenny’s Green Eggs, No Ham over on Jenny Can Cook.

Breakfast can’t get any healthier than this! This recipe for Dr. Seuss’ Green Eggs and No Ham has three servings of green vegetables to boost your immune system, combined with the fluffiest, moist, flavorful, and evenly cooked scrambled eggs for protein – all in one single meal!

The best thing about this recipe is that you can get creative with the greens. Choose what’s cheap and local to your area; what’s in season and most importantly, your favourite greens to eat!

Dr. Seuss’ Green Eggs and No Ham Ingredients

PREP TIME 10 MINS | COOKING TIME 10 MINS | SERVES 3

INGREDIENTS

  • 6 large free-range eggs
  • 1 red bird’s eye chilli, sliced
  • 1 small red onion, diced
  • 1 cup kale leaves, roughly chopped
  • 1 cup spinach leaves
  • 1/2 cup broccoli, roughly chopped
  • 4 tbsp milk
  • 2 tbsp olive oil
  • 1 tbsp sesame oil
  • Salt and freshly ground black pepper, to taste

METHOD

  1. In a small bowl, beat the eggs together with the sesame oil and milk. Season with a touch of salt and freshly ground black pepper then set aside.
  2. In a large non-stick frying pan, heat 1 tablespoon of the olive oil over medium-high. Add the diced onion and cook until soft, about 1 minute. Then add in the broccoli and cook for a further minute or two. Season with a touch of salt and freshly ground black pepper.
  3. Add in the kale leaves and give it a good mix before adding the spinach leaves in. Reduce the heat down to low and cover for about a minute to allow the leaves to wilt. Once wilted, transfer the cooked vegetables to a plate or bowl.
  4. Bring the heat back up to medium* and in the same frying pan, add the remaining olive oil. Pour the eggs into the pan and using a rubber spatula, begin pulling the cooked outer edges in towards the centre of the eggs. Uncooked eggs will flood the area you just pulled back while the cooked scrambled eggs will gather at the centre of the pan.
  5. When the eggs are about halfway cooked through, add the cooked vegetables back to the pan and continue pulling the uncooked eggs to the center of the pan.
  6. Turn off the heat when the eggs are 90% cooked. And transfer to a serving plate immediately. Perfectly cooked scrambled eggs are moist but not runny, with no crisp or brown edges.
  7. Garnish with some sliced red chillies, freshly ground black pepper, and a sprinkle of ground smoked paprika. Serve immediately with some toasted bread on the side if you desire. Enjoy!

Dr. Seuss’ Green Eggs and No Ham

* It’s important to leave the heat somewhere between medium-low and medium, so that it warms up but doesn’t get too hot. If the pan is too hot, the eggs will cook too quickly and become rubbery.

** If you plan on adding cheese to your eggs, add it in at this point. This will allow ample time for the cheese to melt and integrate into the eggs. Make sure that the cheese is shredded/prepared and set aside so you can add it to the eggs quickly.

Dr. Seuss’ Green Eggs and No Ham

BON APPÉTIT

– Ally xx

myTaste.com

Kaya (Malaysian Pandan Coconut Egg Jam) with Fried Mantou

Nyonya-style Kaya (Malaysian Pandan Coconut Egg Jam)

Hello Everyone! Try something new on your morning toast! If you’re looking to change up your breakfast condiment selection from the everyday jams and jellies, try this Pandan Coconut Egg Jam. It will transport you to the tropics with its flavourful, rich, and sweet taste!

Kaya (Malaysian Pandan Coconut Egg Jam) with Fried Mantou

Kaya in the Malay language means “rich”, with reference to the texture of this jam. It is a sweet coconut egg jam that is rich, thick and custard-like in texture, and flavoured with pandan, giving it a fun green colour.

There are two well-known varieties of kaya:

  • Nyonya, which is green in colour
  • Hainanese, which is darker brown in colour and often sweetened with honey

The colour variation depends on the number of eggs, the caramelisation of the sugar, and the amount of pandan leaves used. In the Philippines, a variation of this jam is known as matamís sa báo, but it does not contain eggs and is less thick in texture. In Thailand, it is known as sangkhaya.

Kaya (Malaysian Pandan Coconut Egg Jam) with Fried Mantou

This version of kaya that I will be sharing with you guys tonight is the Nyonya-style one, which gets its aromatic fragrance and natural green colour from the pandan leaf. The idea of treating it as a dip rather than a spread or a filling was inspired from my trip to Thailand a couple years back, in 2013. We (my family and I) were at a roadside stall for dinner and on their menu they had steamed thick-sliced bread with a kaya and condensed milk dip. I decided to recreate this dish to share with you guys tonight, but instead of serving it with steamed bread, I fried some mantou buns for that extra-added crunch on the outer layer while still keeping the inside of the buns soft.

Before we dive into tonight’s recipe, please take the time to check out the original where I drew my inspiration from over on Curious Cuisiniere by Michelle Wong.

Kaya (Malaysian Pandan Coconut Egg Jam) Ingredients

PREP TIME 5 MINS | COOKING TIME 15 MINS | MAKES 1 SMALL JAR

INGREDIENTS

  • 4-5 pandan (screwpine) leaves
  • 200ml coconut milk
  • 4 large free range eggs
  • 1/2 cup coconut sugar

Optional (to serve with)

  • Condensed milk
  • Fried mantou buns

METHOD

  1. Place the pandan leaves together with the coconut milk in a food processor or heavy-duty blender, and blitz/blend for a few minutes until the pandan leaves have been finely puréed.
  2. Pour the blended pandan-infused coconut milk over a fine sieve and into a large bowl. Strain the coconut milk from the pandan leaf pulp, pressing down firmly with the back of a spoon to extract all of the coconut milk from the pulp. Discard the pandan leaf pulp.
  3. In a separate heat-proof bowl, beat together the eggs and sugar, until frothy. Then, add the pandan-infused coconut milk to the egg and sugar mixture.
  4. Create a bain-marie (double-boiler) by pouring some water into a pot that is slightly larger than your heat-proof bowl. Very important, check to see if your bowl can sit on top of the pot without any water touching the bottom of the bowl.
  5. Heat your pot of water over low-medium and bring to a slight simmer. Once slightly simmering, place the bowl with the coconut milk and eggs over it and gently whisk for 10-15 minutes, ensuring no water escapes from the bottom pot. It’s important to keep a low simmer or else the eggs can curdle quickly (refer to notes).
  6. Once done, transfer the kaya to a small serving dish and add just a touch of condensed milk (just enough that it doesn’t become overly sweet) and serve with your choice of steamed or fried bread. Whatever tickles your fancy! Enjoy!

Kaya (Malaysian Pandan Coconut Egg Jam) with Fried Mantou

Transfer the remaining kaya into a sterilised and clean jar. Let it cool before storing in the refrigerator for up to two weeks. Kaya is eaten as a condiment spread on bread or toast, usually as breakfast.

Kaya (Malaysian Pandan Coconut Egg Jam)

Notes:

  • If you don’t have access to fresh pandan leaves, you may be able to find pandan extract which comes in a small bottle or pandan leaf powder, which will work perfectly fine with the recipe.
  • If your eggs curdle during the cooking process, not to fret! Continue to cook for the full 15 minutes, and then transfer the mixture to a blender. Blend until the kaya is smooth.

Growing up in Brunei, Nyonya-style kaya was my go-to choice of spread (together with peanut butter or just butter) on the waffles that you’d get at the local supermarket (Hua Ho) in the snack corner. Their freshly made kaya-filled pancakes, or even the kaya buns on their shelves were also my go-to choice. Also not forgetting the Hainanese kaya-filled cakoi (Chinese youtiao fried dough) from a nearby roadside stall from my workplace that my then workmates and I used to drive to our lunch breaks, and the kaya-buttered toast from a popular Chinese kopitiam known as Chop Jing Chew. These are, if not all, then some of my fondest memories of kaya.

BON APPÉTIT

– Ally xx

myTaste.com

Super Green Shakshuka

Super Green Shakshuka

Hello Everyone! I can’t believe that we’re already halfway through the year! Metro Manila has now shifted from Enhanced Community Quarantine to General Community Quarantine since the beginning of this week and I honestly don’t know what’s going to happen. We haven’t even started to flatten the curve, and here we are letting people out and go back to work with positive cases rising much higher than when we were under enhanced quarantine.

I’ll unfortunately be reporting back to the office starting this coming Monday and Tuesday, twice a week while the other 3 days will be to continue working from home. I honestly don’t see the point in risking my health and my life just to go into the office two times a week when there is still so much uncertainty with the on-going pandemic, especially when it’s ten times harder to get anywhere via public transport due to capacity limitations to comply with social distancing. It was hard enough to get a ride to and from work pre-pandemic times, what more now? I remember waiting almost an hour for a ride home on many occasions, now I’ll probably be waiting 2 or even more hours just to get home, exposed in the open to the virus. While there’s a shuttle service initiated by the company I’m working for to avoid this issue, I don’t know how long they’ll be able to keep up with a door-to-door pick-up/drop-off service.

Super Green Shakshuka

Anyway, mini tangent/rant aside, a new month means it’s time to move onto the next colour of the rainbow for this year’s theme on Amcarmen’s Kitchen! The recipe that I’ll be sharing with you tonight is inspired by a dish that I had way back when I was still living and studying in Australia. It was in fact a weekend farewell brunch for me as I left the country the following day for good after having completed my degree and graduated a couple months back before this weekend brunch gathering.

I first came across the idea of a green shakshuka at SHUK North Bondi. Green shakshuka puts a healthy green spin on the classic Middle Eastern shakshuka recipe. Traditionally, a shakshuka is a mixture of simmering tomato sauce and spices, topped with gently poached eggs. Within the tomato sauce there’s diced onions, garlic and bell peppers. Lastly, it’s garnished with freshly chopped herbs such as cilantro and parsley.

The great thing about a shakshuka is its versatility. Similar to how you can toss most ingredients from your fridge into a smoothie, the same can be said for a shakshuka. For this green shakshuka, I’ll be replacing the tomato sauce and bell peppers with an abundance of sautéed green vegetables.

Super Green Shakshuka Ingredients

Whatever veggies you’ve got lying around, just throw them in! For my improvised take on this recipe, I’m going with broccoli and asparagus for some bite, and leafy greens such as locally grown kale, spinach, chilli, and malunggay leaves. I also threw in some green chillies for a kick of heat and some fresh basil and green scallions for freshness.

Super Green Shakshuka Ingredients

PREP TIME 10 MINS | COOKING TIME 30 MINS | SERVES 3

INGREDIENTS

  • 3 large free range eggs
  • 1 cup broccoli, roughly chopped
  • 1 cup kale leaves, roughly chopped
  • 1 cup spinach leaves
  • 3/4 cup chilli leaves, stemmed
  • 1/2 cup asparagus, roughly chopped
  • 1/4 cup malunggay leaves, stemmed
  • 2-3 garlic cloves, finely minced
  • 2 large green chillies, sliced
  • 2 small red onions, finely diced
  • 2 small red bird’s eye chillies, sliced
  • 1 stalk green scallions, chopped
  • 3 tbsp olive oil
  • 2 tsp black olives, sliced
  • 2 tsp capers
  • Handful basil leaves, roughly chopped
  • Salt and ground black pepper, to taste
  • Shaved parmesan cheese

Optional (to serve with)

  • 1 large avocado, peeled, pitted, and sliced (optional)
  • Crusty bread, toasted

METHOD

  1. Heat olive oil in a non-stick sauté pan over medium heat. Add the minced garlic and sauté until golden brown and fragrant, about 30 seconds. Be careful to not burn the garlic. Then add in the diced onions together with half of the sliced green chillies and the white parts of the scallions, cooking until they soften, about 1-2 minutes.
  2. Next, add in the chopped broccoli and cook for about a minute before adding the chopped asparagus in. Season with a touch of salt and freshly ground black pepper. Give it a good mix and cook for a further minute or so until they start to soften a bit.
  3. Add in the chopped kale and spinach leaves with just a touch of water. Cover for about 30 to 45 seconds to allow the steam to wilt the leaves. Add in the chilli leaves followed by the malunggay leaves and give it a good mix. Cook, uncovered, for about a minute or two; turning the heat down to low at this point so that your veggies do not overcook.
  4. Flatten the veggie mixture with a spatula and create 3 small wells. Crack an egg into each well and season with a touch of salt freshly ground black pepper. Add the sliced black olives, capers, red and green chillies, and green scallions. Cook the eggs until done to your liking. You can also cover to steam and cook the eggs faster (about two minutes for cooked whites and a lovely runny yolk). Heat off, and sprinkle with the chopped basil leaves to garnish.
  5. Serve immediately with your choice of sliced avocado or crusty bread, or ever both for a heavy brunch. Enjoy!

Super Green Shakshuka

You can easily double this recipe to serve more hungry tummies. It’s an easy, one-pan dish filled with lots of green goodies and poached eggs. Whether you eat it for breakfast or dinner, it’s a hearty, nutrient-packed meal that will last you through any season!

Super Green Shakshuka

BON APPÉTIT

– Ally xx

myTaste.com

Salted Sweet Corn Ice Cream (No-churn)

Salted Sweet Corn Ice Cream (No-churn)

Hello Everyone! Earlier on the beginning of this month we’ve been experiencing dangerously high heat indexes, to the high 40s and I think even 50 degrees celsius in some cities in the provinces. The scorching weather we’ve been experiencing has left me craving for something sweet and something cold to beat the heat! Something like Salted Sweet Corn Ice Cream!

Central Coast, NSW (July 2011)

I remember when I was still studying in Australia for my Bachelor’s Degree in Design; I went on a weekend away trip up north to the country with my friend to visit her family. We stopped over… Somewhere (I can’t remember where) and ended up having Cold Stone Ice Cream at the beach in the dead winter. So there’s really no excuse to only have ice cream during the summery days! *cheeky grin* Also, I just realised that the photo above was taken almost 9 years ago (July 2011)!

Mini tangent aside, you can still whip this up even though we’re now entering the rainy season here in the Philippines; I mean we still have relatively hot and humid days in between the rainy days anyway.

This Salted Sweet Corn Ice Cream is sweet, summery, and creamy with that perfect hint of salt for that classic sweet-and-salty buttered corn at the backyard cookout kind of flavour. Perfect for a quick quarantine dessert! The great thing about it is that you don’t need an ice cream churner for this recipe, and most may already be readily available in your pantry. If not, be sure to pick them up on your next grocery run.

Salted Sweet Corn Ice Cream (No-churn)

It’s common for many to not associate or equate corn to something sweet, but rather used in savoury meals. But in Southeast Asia, specifically in Malaysia, Singapore, and the Philippines, corn is widely used in various desserts, most especially in ice cream.

Before we dive into tonight’s recipe, please take the time to check out the original where I drew my inspiration from over on My Recipes by Stacey Ballis.

Salted Sweet Corn Ice Cream (No-churn) Ingredients

PREP TIME 4 HOURS* | COOKING TIME | SERVES 4-6

*For freezing time, minimum 4 hours or up to 24 hours.

INGREDIENTS

  • 1 bag (200g) frozen corn**, thawed, quickly blanched, and roughly chopped
  • 1 can (218g) sweetened condensed milk
  • 1 cup (250ml) all purpose cream
  • 1 tsp vanilla extract
  • Pinch of salt
  • Yellow food colouring (optional)

** Alternatively, you can use fresh corn or canned corn as well for this recipe. Whichever is readily available.

Note:

When selecting fresh corn, look for plump ears with tight, green husks that feel cool and a little bit moist in your hand. Note that the natural sugars in sweet corn start converting into starch the minute it’s picked so buy the freshest ears you can find and be sure to use them within a day or two of bringing them home.

METHOD

  1. In a chilled medium-sized mixing bowl, whip the all purpose cream using an electrical hand-held mixer until soft peaks start to form.
  2. Add the sweetened condensed milk and continue to whip to soft peaks, it should be fluffy and mousse-like. Add the corn together with the vanilla extract and pinch of salt. Gently fold through and then, using a stick blender, blitz the mixture to break down the corn kernels.
  3. Pass the mixture through a sieve to get rid of the corn fibres to get a smooth-textured ice cream. Pour into an airtight container and freeze for 4 hours or up to 24 hours. Let sit at room temperature for about 15-20 minutes before scooping and serving on a hot summer’s day!

It’s excellent garnished with caramel sauce (and/or caramel popcorn), nut of choice or cornflakes for an added element of crunch! Enjoy!

Salted Sweet Corn Ice Cream (No-churn)

So before I end tonight’s post, I just want to share the little mishaps I had when making this ice cream. Firstly, I wanted to add just a hint of yellow food colouring to give a mixture a slight tint. I was slowly tipping the bottle over and nothing came out. I shook the bottle a bit, and only a tiny drop came out. I shook it again and then… boom. I think a teaspoon or more of it spilled out. Now it looks like the kind of ice cream you’d get from the stores that are 90% food colouring/flavouring *le sigh*.

Secondly, after freezing the ice cream mixture overnight, I was super excited to dig into it the next day. To my dismay, the ice cream was way too salty for my liking. It was really unpleasant to eat. On top of that, the ice cream tasted nothing like sweet corn at all. The corn kernels that were added to the mixture were hard and frozen. I was basically eating salty ice cream with cold chunks of corn that barely taste like corn. I was so disappointed.

I decided to try and fix this without having to throw out the first batch I made, all I needed was more cream, which I had to wait to get a week later on my fortnightly grocery run. I took the batch of ice cream out of the freezer and just let it sit on the countertop for about half an hour until it melted back into cream. Then I whipped the new all purpose cream in a chilled bowl until soft peaks started to form and then added the melted ice cream to the bowl. This definitely made the cream mixture less salty, but still hits just right. This also made the colour of the ice cream less intense.

Salted Sweet Corn Ice Cream (No-churn)

After adding the cream and melted ice cream together, I whipped it further and then got my stick blender out to blitz the corn into the cream mixture. This basically ensures that the corn flavour is mixed into the cream and also solved the issue of having icy chunks of corn. And violà! Fixed.

BON APPÉTIT

– Ally xx

myTaste.com

Cayenne Shrimp & Corn Chowder

Cayenne Shrimp & Corn Chowder

Hello Everyone! I’ll keep tonight’s introduction short as I haven’t got much to say really. This Cayenne Shrimp & Corn Chowder is the perfect comfort food for the wintry days, or even just those cold, rainy nights. It’s easy, hearty, spicy, sweet, slightly creamy, incredibly smoky, and packed with tons of flavour!

Cayenne Shrimp & Corn Chowder

Shrimp is a popular choice for any meal of the day. Be sure and get the right sized shrimp for your recipe Medium-size shrimp are best for soups, for example, because they are easier to eat with a spoon. The best part of this dish though is that you can control the heat levels by adding more or less cayenne and/or paprika, to taste. If you ask me though, I’d say the more the better because that smokiness is the true star in this chowder!

As I was cooking, I realised that the dish was turning out to be more on the orange side rather than yellow. Oops! Nevertheless, before we dive into tonight’s recipe, please take the time to check out the original where I drew my inspiration from over on Gimmie Some Oven by Ali.

Cayenne Shrimp & Corn Chowder Ingredients

PREP TIME 20 MINS | COOKING TIME 1 HOUR 25 MINS | SERVES 3-4

INGREDIENTS

  • 500g shrimp, heads removed, peeled, and deveined

For the prawn head soup base

  • Shrimp heads and peels
  • 1.5L water
  • 5 garlic cloves, whole
  • 3 celery stalks, roughly chopped
  • 3 dried bay leaves
  • 2 small red onion, quartered
  • 1/2 tbsp salt
  • 1/2 tbsp whole black peppercorns

For the chowder

  • Shrimp meat
  • 400ml coconut milk
  • 1 bag (200g) frozen corn*, thawed
  • 3 celery stalks, sliced
  • 3 large potatoes, peeled and cut into medium-sized cubes
  • 2-3 garlic cloves, minced
  • 1 small red onion, diced
  • 2 tbsp olive oil
  • 2 tsp cayenne pepper powder
  • 2 tsp smoked paprika powder
  • 1/2 tsp dried thyme
  • 1/2 tsp garlic powder
  • Salt and ground black pepper, to taste
  • Chopped spring onions, to garnish

* Alternatively, you can also use fresh corn or canned corn for this recipe; whichever is readily available for you.

METHOD

  1. Prawn Head Soup Base: Add all the ingredients to a large heavy-bottomed pot. Bring to a boil over high heat. Once boiling, turn the heat down to a slow simmer. Make sure to press down on the heads and peels as it simmers away to extract as much flavour as you can. Leave it to simmer for about 30 to 45 minutes.
  2. Once done, strain the soup base into a large mixing bowl and set aside.
  3. Chowder: In the same heavy-bottomed pot, heat olive oil over medium-high. Add the minced garlic and sauté until golden brown and fragrant, about 30 seconds. Be careful to not burn the garlic. Then add in the diced onions, cooking until they soften, about 1-2 minutes.
  4. Add the sliced celery and potatoes to the pot, together with the spices, herbs and season with ground black pepper. Stir and cook for about a minute before adding in the prawn head soup base to the mixture. Bring to a rapid boil.
  5. Once boiling, turn the heat down to low so that the soup reduces to a slow simmer. Simmer away for 10 to 15 minutes, covered. Slowly add in half of the coconut milk and bring back to a slow simmer. Check and stir occasionally to avoid curdles from forming, cooking for a further 5 to 10 minutes. Taste to check if the chowder needs more seasoning or not.
  6. Add in the prawns and thawed sweet corn. If you’re using fresh corn, add them a little earlier to ensure that they are cooked all the way through. Cook for about 5 minutes and then add in the remaining coconut milk. Turn the heat up to medium-high and bring the chowder up to a rapid boil and cook for a further 5 minutes.
  7. Turn the heat off and equally divide the chowder into individual serving bowls. Top with some freshly chopped green onions and serve immediately while hot. Best with a crusty baguette on the side. Enjoy!

Cayenne Shrimp & Corn Chowder

Cayenne Shrimp & Corn Chowder

BON APPÉTIT

– Ally xx

myTaste.com

Mexican Sweet Corn Cake

Mexican Sweet Corn Cake

Hello Everyone! Tonight’s recipe is one that I came across while I was doing some research for my blog. I instantly fell in love with these words, “…soft, moist, tender, savoury, sweet corn…” I knew that this was a recipe that I wanted to tackle, and it did not disappoint! It was tender. It was moist. It was… dangerous. Dangerous in a way that you can literally take the whole pan with you and hide; devouring it all by yourself. It’s that good.

This Mexican Sweet Corn Cake is deliciously moist, buttery, and crumbles as you dig into it (but in no way means that it’s dry). This corn cake utilises corn in 3 ways: masa harina (or corn flour), regular corn meal, and is flecked with sweet corn niblets/whole corn kernels. That’s three times the corn flavour! In addition, you can roast the corn kernels first for extra flavour and flair!

Mexican Sweet Corn Cake

The cake is baked in a water-bath, sort of like a cheesecake so that it won’t crisp or turn golden; so it’s kind of like a cake-y cornbread. You could have this savoury cake on the side with pretty much any dish, or even on it’s own as a perfect mid-afternoon snack.

It’s a perfect recipe to whip up under quarantine as all ingredients may already be readily available in your pantry. If not, it’s easy to grab them on your next grocery run! If you can’t find masa harina at your local supermarket, then you can swap it out with either all purpose flour or cake flour – which is exactly what I did for this recipe! It wasn’t because I could not source for corn flour; it was simply because I didn’t want to have an opened pack of it sitting in the pantry for centuries (which is what happened, and is still happening, to my pack of cornmeal). The corn flavour still pops through nonetheless, but probably not as powerful as if you would have used masa harina instead.

Anyway, before we dive into tonight’s recipe, please take the time to check out the original where I drew my inspiration from over on Simply Scratch by Laurie.

Mexican Sweet Corn Cake Ingredients

PREP TIME 15 MINS | COOKING TIME 50 MINS | SERVES 6

INGREDIENTS

  • 225g unsalted butter/margarine, softened
  • 1 cup sweet corn (fresh, frozen, or canned), roughly chopped
  • 2/3 cup all purpose flour*
  • 1/2 cup yellow cornmeal
  • 1/2 cup water
  • 1/3 cup white granulated sugar
  • 4 tbsp soy milk
  • 1 & 1/2 tsp baking powder
  • 1/2 tsp salt

* If you have masa harina (cornflour) on hand, then use this instead!
** If you are using canned corn, drain before adding to the batter. If you are using frozen corn, make sure you thaw them first.

METHOD

  1. Preheat oven to 180C (350F or gas mark 4).
  2. In a large mixing bowl using an electric hand mixer, beat the butter until fluffy and light in colour. Add in the all purpose flour (or masa harina), together with the water and continue to mix until just combined.
  3. Add in the corn kernels, cornmeal, sugar, salt, and baking powder, followed by the soy milk. Mix until well combined. Using a spatula, scrape down the sides of the mixing bowl if needed to incorporate any missed dry ingredients.
  4. Pour the batter into a greased 8in x 11in glass baking dish. Spread the batter so that it is evenly distributed and smooth. Cover tightly with foil and place the dish into another baking dish (about 9in x 13in in size) and fill it with water about a third of the way.
  5. Carefully place the dish into the preheated oven and bake for 50 minutes. Once done, remove from the oven and leave it aside to cool down for about 10 minutes.
  6. Slice the cake into 6 equal squares/rectangles. Alternatively, you may use a spoon or an ice cream scoop to dish and serve. Enjoy!

Mexican Sweet Corn Cake

Mexican Sweet Corn Cake

Before I end tonight’s post, I just wanted to give you guys a quick update on how our country has responded to the current global pandemic. We’re currently into Day 58 of Enhanced Community Quarantine here in the Philippines, or as some may jokingly say, Season 3 of ECQ. Our original enhanced quarantine period was only supposed to last a month, from the late afternoon of March 16 until April 15.

Due to the significant increase in positive cases in our country, and the death count being much higher than the recovery count, we were not ready to go out of quarantine. With that ECQ was extended until April 30, and again to May 15. With our numbers still increasing by the hundreds each day, here we are again, under a ‘modified’ enhanced community quarantine until the end of May. On the bright side, at least our recovery rate is much higher than our death counts.

So what have I been up to since we went into quarantine 58 days ago? Well, I’m thankful that I still have a full-time job and that our company was able to carry out a work-from-home set up amidst the pandemic. I don’t go out anymore; only once every two weeks to our local supermarket to stock up on food. We also get our fruits and vegetables delivered to us weekly from a stall just down the road from us; really just to avoid and limit the times we go out of the house.

Other than that, I find myself having more time to do the things I want to do. Even if it means having more time to do nothing at all *cheeky grin* Just kidding! My time in the morning now isn’t being consumed by waking up early to prepare for work, and getting stuck in hour-long traffic going to and coming home from work. In return, I’m less tired during the week, which also means that I don’t find myself having to recover over the weekend. Not having to recover over the weekend also means that I can use my free time more efficiently for recipe research, development, experimentation, and writing for Amcarmen’s Kitchen!

BON APPÉTIT

– Ally xx

myTaste.com