And what a journey it has been indeed! So much has happened this year that it’s been extra difficult to keep up with the blog and my social media accounts associated with Amcarmen’s Kitchen. Just before my blog turned 7 last year, I started a foodie community group on Instagram together with a foodie friend of mine, Chamaine (she also participated in my Auguest 2021 series). From there, we started organising and hosting food collaborations amongst the IG foodie community, internationally. Aside from that, I also expanded my social media reach into the world of TikTok and started uploading video content there. It was also from TikTok where I placed third in a virtual cooking competition, and was invited to join in food campaigns where I won prizes weekly.
To be honest, with all that going on side-by-side with my work and social life, I actually didn’t prepare anything for my blog’s anniversary today. In fact, I was going back and forth with myself whether to whip up something or indulge in a lazy Easter long weekend. Prior to this weekend, I spent the last two weekends (Friday to Sunday) in a classroom from 9am – 7pm where I did a Premiere Pro and After Effects course. So yes, I totally deserve a do-nothing weekend after all that *cheeky grin*.
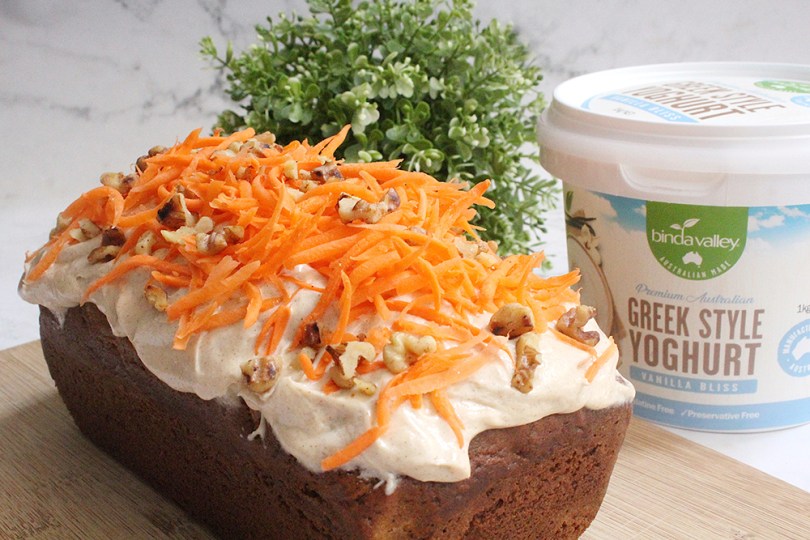
Luckily, because of my oh-so busy schedule, I had this recipe for a Spiced Carrot Cake Loaf with Cinnamon Cream Cheese Frosting that didn’t get posted towards the end of March. Still, it’s perfect for a celebration!
This carrot cake turned carrot cake loaf is dense, yet ultra soft, moist, and flavoured with fall-favourite spices such as cinnamon, ginger, and nutmeg. You can serve it plain, or spruce it up with your choice of nuts, dried fruit, and/or top with some cream cheese frosting. Now if you want to be a little bit extra, all you need is a pinch or two of cinnamon powder to take your frosting to another level. The delicious cinnamon-flavoured cream cheese frosting really heightens each slice of carrot cake loaf!
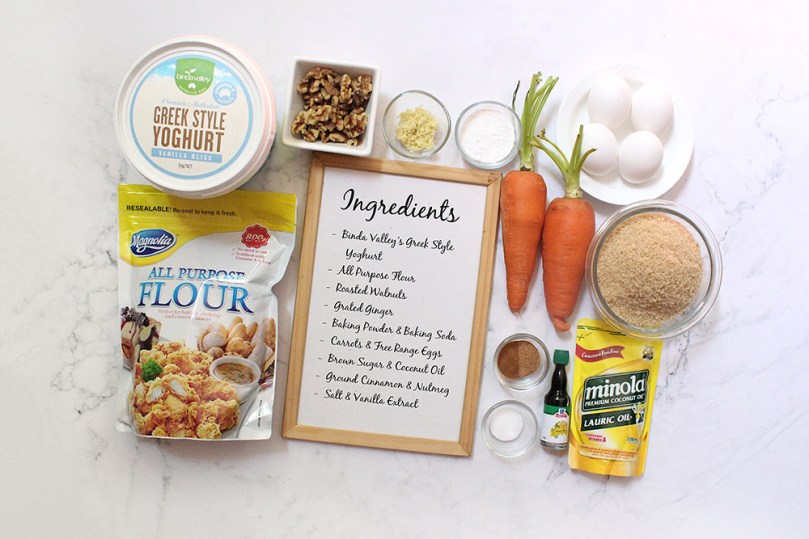
I’ve made this carrot cake loaf three times now, the first time was just because I wanted to bake something that was easy to take to work for a mid-morning or mid-afternoon snack. The second time I baked this loaf was with my boyfriend when he visited for the weekend a few months back. The third time, I was searching for a recipe where I could feature Binda Valley’s Vanilla Bliss Natural Greek Style Yoghurt, which I received courtesy of Gourmet Direct PH a few months back. This is also one of my achievements from last year, to be recognised by a brand and create promotional content for them.
This recipe makes two carrot cake loaves, feel free to double or downsize the recipe, but trust me, you don’t want to be downsizing because one loaf disappears fast! If you can turn a cake into a loaf, you can most definitely turn this loaf into muffins as well!
PREP TIME 15 MINS| COOKING TIME 55 – 65 MINS| MAKES 2 LOAVES
Preheat oven to 180C (350F or gas mark 4) and line two 9×5-inch loaf pans with parchment paper.
Carrot Loaf: Whisk all the dry ingredients, except for the walnuts, together in a large mixing bowl until well combined. Set aside.
In a medium-sized mixing bowl, whisk all the wet ingredients together until well combined.
Pour the wet ingredients into the dry ingredients and gently whisk together until just combined. The batter should be semi-thick in consistency. Fold the chopped walnuts into the batter.
Equally divide the batter between the prepared loaf pans and bake for 55 to 65 minutes, or until a toothpick inserted into the center of the cake comes out clean as baking times may vary.
Remove from the oven once done and leave it to cool completely in its pan on a wire rack.
Cinnamon Cream Cheese Frosting: Using a handheld (or stand) mixer, beat the cream cheese in a medium-sized bowl on medium-high speed until smooth and creamy.
Beat in the butter, and then followed by the confectioners’ sugar, vanilla extract, cinnamon, and a pinch of salt over low speed until smooth and creamy. Taste and adjust to your liking.
Once the carrot cake loaf has cooled, frost with the cinnamon cream cheese and top with roasted walnuts and shredded carrots.
Slice, serve, and enjoy!
Storage tip: Store your carrot cake loaf without the frosting! Cover and store leftover loaf/slices at room temperature for up to 3-4 days or in the refrigerator for up to about 10 days. Store the frosting separately in the refrigerator for up to a week.
Before I end tonight’s post, I just want to say a special thank you to my Mom. She was the one who patiently taught me how to cook my favourite dishes when I was growing up. She was my #1 supporter. Thank you Mama for passing down your knowledge and love for food on to me. I know you’re proudly watching from above. I love you.
Jialing and I have been friends ever since our first year of University back in February of 2011. In fact, our Facebook Friendversary was just a couple of days ago on April 11 and we celebrated a decade of friendship – four years together in Australia, and 6 years of LDF (long distance friendship). Besides us having the same passion for design, we both love everything about food! We even started Muffin Making Monday’s where Jialing would come over to my place every Monday to bake muffins together for breakfast for the upcoming week ahead. We also started something called Fatness Friday’s, but it really only lasted for two weeks I think, where we’d explore new cafés every Friday for lunch after our morning lecture.
A couple of months ago, I think somewhere in February, Jialing ran this brilliant idea with me about doing an interview for my blog anniversary this year! So we scheduled a date in March last month and would you believe, six years of long distance friendship and this was the first time EVER that we did a video and voice call? We would usually just randomly drop WhatsApp messages to each other throughout the day/weeks! After an hour – almost – of banter and a quick catch up, we proceeded with our more than an hour-long interview.
Left: Jialing ; Right: Allison
“What is your most memorable achievement/biggest success?”
I think my most memorable achievement since starting Amcarmen’s Kitchen 7 years ago would have to be my Auguest series. In a nutshell, it’s where I invite other foodie friends, both those I know in person or online through Instagram, to take over my blog for the whole month of August. If you want to know more on the series, I’ll drop a link in this interview: Amcarmen’s Kitchen: Auguest Rundown.
When I first started my series, I began with four people, one of them was even my mom, because I couldn’t find anyone else besides her and you of course! Though this year will be my 6th year in running my Auguest series, I think it really only kicked off just last year, since that’s where I made more foodie friends online. That was during the time where I had just moved back to the Philippines and reached out to a whole different audience and community of local Filipino foodies.
Another memorable achievement, or more like just memorable, that I must mention was last year I started joining more Instagram food challenges and collaborations run by other foodies. Some of the challenges that I joined had prizes, and I’m proud to mention that I won one of them! I’ll also share the link to my entry in this interview: #LODINGNocheBuena Challenge
Amcarmen’s Kitchen: Christmas ‘Spaghetti’ with Meat-free Baubles (Vegan-friendly)
It was a great way for me to showcase my creativity, skills, and techniques to a wider audience range. Other than that, I also get to meet the people who organise these challenges, as well as the people who participate in them. We get to know, connect, and support each other in the long run. From there, I also took the initiative to run my own food challenges and start my own food community on Instagram known as Foodies United PH together with another foodie friend that I met on the social media platform.
I think so far those are my most memorable achievements ever since starting my blog, other than of course the obvious achievement of running Amcarmen’s Kitchen for seven years now!
Jialing: Obviously you know that I am very supportive of your successes, but you also know that I really enjoy your failures.
So my next question is, “what was your biggest blog fail so far?” And make it a good one, and I want photos!
Oh gosh, to be honest, I don’t even document my failures in the kitchen and I don’t ever post a failed recipe on my blog. One of the main reasons why I don’t do that is because people do follow, or are inspired by my recipes, and if I share a failed recipe, then chances are they’re going to fail too because it wasn’t even a successful recipe to begin with.
I remember one of my colleagues asked me a question, “has there been any recipes that [I’ve] cooked that [I] actually don’t like” and I told her that when a recipe doesn’t work or it fails, it doesn’t go on my blog. If I really want it to work though, like if it’s a good recipe and I just somehow mucked it up, then I’ll either try to salvage it – if possible – or try again until I get it right.
This is also one of the reasons why I like to plan and cook my recipes ahead of time so that in case something happens, I have time to think of a new recipe if I really don’t like it at all, or try again and again until I’m happy with it and so that I still have something to share on my blog.
But, if you really want to know some of my kitchen fails – well it’s not so much of a fail, it’s more like what you would call ‘hazardous cooking’ – I remember making a dessert pizza of Mixed Berries and Chocolate. I used chocolate as the ‘sauce’ base to the pizza and I had it baking away in the oven. I briefly took it out to check if the chocolate had melted, and if so, I’d top it off with the berries and place it back into the oven to bake further. I ‘checked’ by sticking my finger into the chocolate sauce that, you know, just came out of a piping hot oven, and to no surprise, burnt my finger. My first instinct was to lick the chocolate off from my finger and in return ended up burning my tongue as well. I usually write about these mishaps in my blog posts towards the end of the recipe so look out for them! They’re usually pretty hilarious and some can be a way to learn how you can salvage certain food if you ever come across the same mishap.
Amcarmen’s Kitchen: Nutella & Mixed Berries Pizza
But wait, do you actually want the recipe fails?
Jialing: No I think that was good, I mean you already kind of mentioned what happens with your recipe process. Unless you have certain failed recipes?
Allison: No I don’t think so, or not that I can remember or name any from the top of my head right now, also because, when I look for recipes or inspiration, I actually look for something that I like, so if it’s something that I don’t like, like you’re not going to catch me making a cucumber recipe, because I don’t like cucumber for example. Unless it’s something like a Greek salad that has cucumbers in it, then I probably would have to because it’s part of the salad, but other than that, it’s not like I’m going to use that as a main ingredient if I can substitute it out.
Jialing: Interesting, so that actually brings me to one of my other questions, but we’ll be skipping a couple, but I think that’s fine, let’s go with the flow of the interview.
One of my questions is actually, “is there anything ingredient that we won’t ever expect to see you doing on your blog? What is your least favourite thing to cook with or something that you would never want to cook with?”
Okay, so I guess it comes down to food preferences as well, like I don’t like cucumbers. I don’t know why, but I just don’t like them. Raisins and cilantro are on my list of foods I don’t like too.
Jialing: Okay so this brings me to the surprise portion of the interview. I’ll come back to the other questions afterwards.
For the past 6 years you’ve been giving me all these super fantastic Auguest challenges, so now for your anniversary, “I’m challenging you to make a dish using the ingredients you hate the most!”
Nooooo! Oh noooooo! Wait so do I have to use all three of them?
Jialing: You can pick two. The dish has to have two of the three ingredients that you mentioned.
Allison: Do I have to eat it?
Jialing: Yeah of course! It has to be good, you even said so yourself “it’s not going on your blog unless you like it.” It’s your anniversary challenge so you have to do it! I mean, you don’t have to do it for your anniversary, but at some point during 2021 you’re going to have to do it.
Allison: Well, I think it would be fun to do it though for my blog’s anniversary. I normally post a recipe for an anniversary cake every year, so I can have another post featuring this ‘dish’ that you’re challenging me to do.
Jialing: Cilantro, cucumber, raisin cake?
Allison: Nooooooo!
Jialing: Anyway, it’s my anniversary present to you because something that you had previously found to be a negative experience, is going to be turned into a positive experience, so I’m changing your life!
Allison: Now that I think of it, I think there’s a recipe that I know of that has both cucumbers and raisins in it, and it’s actually something that I do like, but remove it so that I actually like it. So yeah, I’m going to try that recipe but have it included in it so that I will actually eat it. So yeah, okay I do have a recipe in mind and it actually fits with my theme for this month so that’s good. Challenge accepted! I’m going to accept your challenge and actually do it. Well technically speaking it is actually something that I do like to eat, it’s just that I put the raisins aside.
Jialing: That was my surprise; it came out early so now I can go back to the questions that got skipped.
Now that we’ve talked about what you would never cook, “what recipes on your blog do you actually cook a lot? Which dish – or dishes – is one of your staple things that you have on regular rotation?”
Okay before I answer this question, I have a little disclaimer for everyone. Since the later part of 2019, I’ve unofficially labelled my Instagram page as “Pescatarian, Lacto-Ovo Vegetarian, and Vegan.” Despite that, I still eat chicken regularly, but I don’t share any more chicken recipes on my blog to keep in line with that. So, one of the dishes that I repetitively cook regularly, that you can also find on my blog is Hainanese Chicken Rice.
Jialing: Another dish that is also eaten with cucumber!
Allison: Yes, I don’t put cucumber on mine because the cucumber is more like a decoration on the side rather than it being a main part of the dish. So why waste money for ‘decoration’ if I’m not going to eat it anyway? And then another dish that actually also has cucumber – for decoration – as well and that I regularly cook at home is Nasi Lemak with fried chicken and sautéed water spinach with sambal on the side. Other dishes would have to be the very classic Filipino staples such as adobo and sinigang, choice of protein would range from chicken, to fish, and shrimps.
Amcarmen’s Kitchen: Nasi Lemak
Okay so my next question is, “how has being a food blogger changed the way you view or interact with food?”
I think this would be a good time for a little back story. When I was younger – or when I say I was younger I mean from up until before I left for university – I never actually set foot in the kitchen, or well I have but it wasn’t so that I could help my mom out with either the preparing or cooking of our daily meals. It wasn’t until ten years ago, back in 2011, where I headed off for my first year of university in Sydney, Australia; I was living alone and I had no close relatives or friends.
I didn’t know how to cook at all, or well, I did know a few dishes up my sleeve, but still, I didn’t even know how to make sunny side up eggs or how long to boil an egg for if I wanted soft or hard boiled eggs. I even boiled potatoes whole, not knowing that if I had cut them up into smaller chunks, they’d cook faster and I wouldn’t have to wait an hour to make myself some mashed potatoes! In addition, I had no rice cooker, and I didn’t know how to make rice on the stove so instead, I bought pre-cooked rice that you can just pop in the microwave and it’d be ready in 90 seconds – Uncle Roger, please don’t kill me! Just going by that, I had no idea how I survived my first year living all by myself!
So moving forward, after my first year of university, I spent my summer holidays in the kitchen back home with my Mom. I had asked her to teach me how to cook the basic dishes that she would always cook for us growing up because to be honest, I didn’t want to go through another year living in Australia not knowing how to cook a decent meal for myself.
I don’t know why but I had this fear of recipes. Just reading it and looking at how many ingredients you have to use and the step-by-step method – like it actually really scared me. I eventually overcame that fear and learnt how to make other dishes besides the ones that my mom taught me. Sydney is rich in multiculturalism, both in the diverse race of people living in the city and in the food you can explore. That’s how it triggered my interest to want to cook and experience other cuisines – cuisines you would otherwise never get back home anyway.
After my second year, I returned home once again for the summer holidays and this time I found myself teaching my mom how to cook the recipes that I learnt – I learnt from my mom, and my mom learnt from me. So I guess now, from there, at least we had something in common that we could both do. I remember asking my mom, “what if I wasn’t into cooking, like what would you think of me as a person?” to which she replied, “oh you’d be such a boring person then” with no hint of remorse in her tone for saying that!
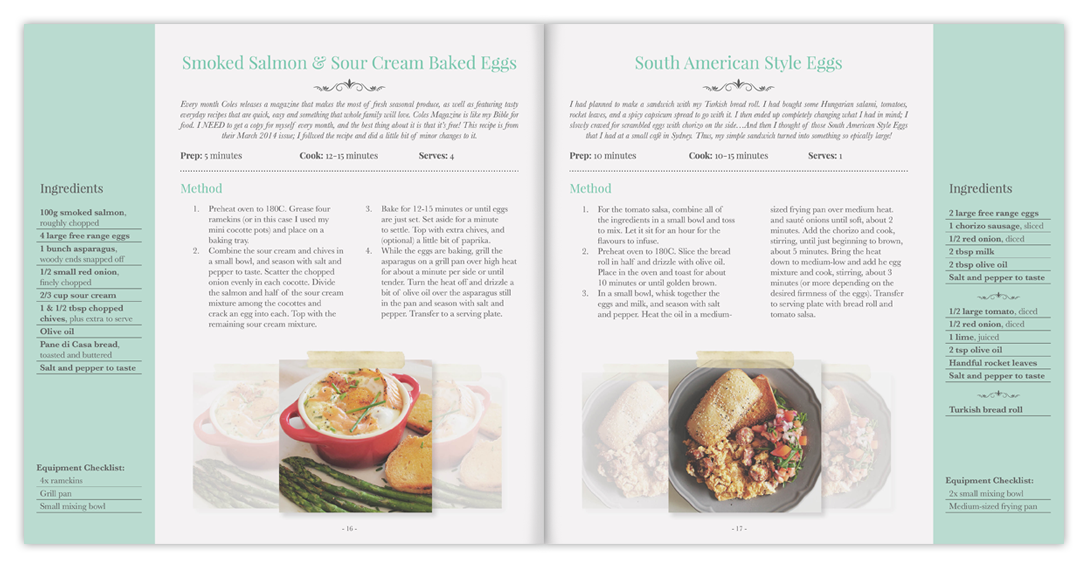
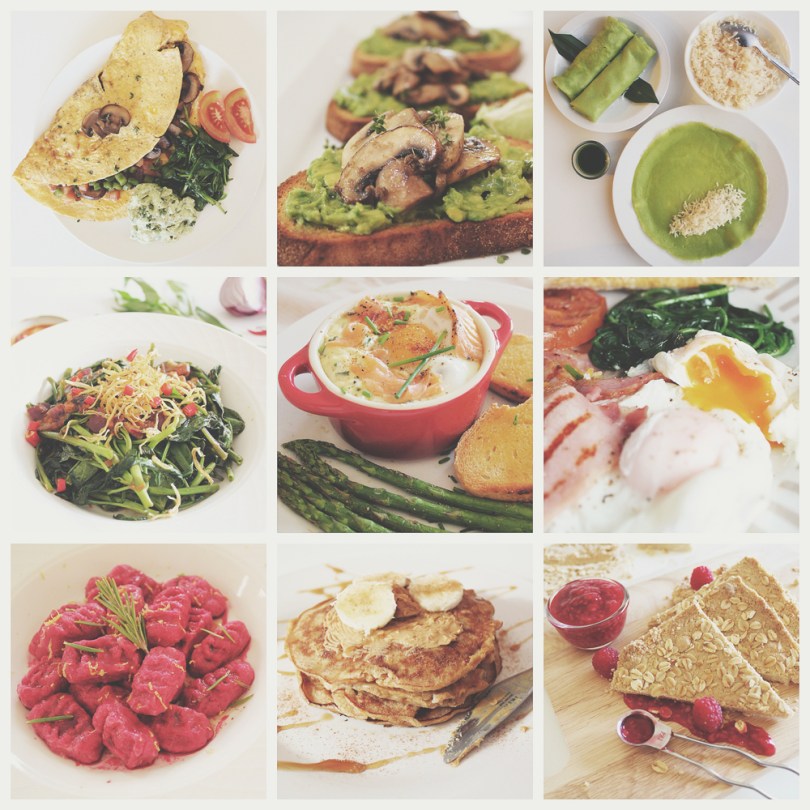
After that, I continued cooking and learning throughout my third and fourth year of university, and of course sharing my knowledge with my mom in between, during my summer breaks. I not only shared my knowledge, but I also shared my food through hosting dinners for my friends and housemates when living in Australia. It wasn’t until my fourth year that I started Amcarmen’s Kitchen – formerly known back then as Kitchen Headquarters), on 16th April 2014. My first post was actually a very spontaneous one – I started a blog but I had nothing to post that day! So I made an omelette with anything and everything that I had leftover in my fridge, just because I didn’t want to do my assignments. I’ll add the link to my very first post in this interview: Cheesy Mushroom Omelette with Avocado Mint Greek Yoghurt & Wilted Spinach. Yes, my ‘anything and everything’ leftover was quite the fancy one *cheeky grin*
Amcarmen’s Kitchen: Cheesy Mushroom Omelette with Avocado Mint Greek Yoghurt & Wilted Spinach
From there, I posted a recipe three times a week, and even had themed days such as our Muffin Making Mondays! Now that I think about it, were you there for the most part of my first year of blogging?
Jialing: Yeah mate, I saw so many of your first couple of years’ recipes! I even remember the board that you used to take all your photos!
Allison: Yeah you were physically there for a majority of them. And yes, for everyone’s information, I used a board from my shelf to use as a white background for my food photos because the table we had at the student housing I was living in had a very dirty plastic table cover. The board that I used though wasn’t particularly big and was square in size; I had to fit everything into a little square, which technically was perfect anyway for Instagram but proved to be difficult when I had so many ingredients to feature and had to squish them all into a square! I think I actually have a picture of the board that you can see in-shot in one of my pictures. I’ll share it in this interview for everyone to see!
Amcarmen’s Kitchen: Hainanese Chicken Rice
So I guess that massive back story explains how I changed the way I view food.
Jialing: Yeah that was a very long term change!
Allison: Indeed! From me not knowing how to cook, to developing a more artistic eye and being very aware of how I want my food to look, or how I want it to be presented, down to what plate I should use. I do have a post on my blog where I talked about My Kitchen Journey – so if you guys actually want to see more of how I took photos of my food back then, it’s all there from my 1st to 4th year of university before I started Amcarmen’s Kitchen. You can actually see how it changed drastically over the years.
And I’ve also started exploring/experimenting with classic dishes and putting a vegan twist to it by using mushrooms or tofu as a meat alternative. I do have some surprises for my blog’s anniversary month based on the current theme that I have going on right now – Flavours of Southeast Asia. You’ll see familiar recipes but with a vegan and/or pescatarian twist to them.
*I decided to add this portion of our interview as a video recording since we went a little off-topic from the original question, but also still somewhat relevant to where my style of cooking has moved towards to ever since I started Amcarmen’s Kitchen, as I talked about my recipe for Crispy Tofu Kare-Kare with Mushroom Bagoong:
Alright, so now that we’ve learnt about your very long seven years of your food journey – from someone who didn’t know how to make rice to someone who has standards on what plate to use when presenting a dish – “what is your biggest piece of wisdom/advice that you want to impart on all your friends and followers?”
Are these tips for people who want to blog or cooking tips in general?
Jialing: I guess it can be either, or even both.
Allison: For cooking tips, there’s not much I can say other than don’t be scared to try new recipes and experiment with different flavours. If you’re scared that you’re not going to like it, my advice would be to go out and try it first – like that’s how I go into cooking different cuisines. For example, if I have no experience in cooking Mediterranean food, I’d go to a Mediterranean restaurant and try their food first to see if I like it or not, and of course to gather inspiration on dishes I would like to recreate at home.
Like speaking in general, you wouldn’t have all the spices and ingredients for Mediterranean cuisines readily available in your home, and if you don’t like it then it’s such a waste of money and of products. So definitely go try it out first – that’s how it started out with my Mom and I – we go to a restaurant, try out a dish and if we like it, we try to recreate it at home with our own twist. Because of that, whenever we go to a restaurant, we never order something that we can actually cook at home because for my Mom, “I can cook it so why should I order it?” and that’s kind of my mentality now as well!
In terms of blogging, all I can say is that if you really like to write or if it’s something that you like to do, I would recommend that you try it out. However, it’s not necessarily for everyone because it can be time consuming. I used to post three times a week, and that was when I was still studying in Australia. I had more free time then because there were days that I didn’t have classes or work, whereas now I work an 8-5 schedule, 5 day a week – 6 days when I was working in Brunei. Weekends are the only time I get to rest but it’s also the only time that I actually get to cook for my blog. If you’re going to start a blog, I guess don’t be too ambitious like me with three posts a week, unless you have the time. It takes me the whole morning to cook a dish for my blog; I’d start at 9 in the morning and go up until noon just to make one dish while documenting the whole process too, and that’s not even including the writing part and editing of photos and videos yet!
It is tough, but if I can do it while having a full time job, I’m sure you can too. If it’s your passion and if it’s what you want to do, you’ll never get tired of it.
Jialing: Nice one! So don’t be afraid to try new things with food, and blogging is not for everyone, but you never know! So I guess we’ll wrap things up here, thank you so much for allowing me to interview you, and happy anniversary Amcarmen’s Kitchen!
Allison: Thank you so much as well for this fun interview!
Hello Everyone! Yes, I am aware that it has only been two days since my last post (I post a new recipe every Wednesday night), but today, the 16th of April 2021 is a very special day because:
AMCARMEN’S KITCHEN TURNS SEVEN!
I know I’ve told this story countless times, every year I think if I’m not mistaken, but this is really more for my new followers and new friends I’ve made in the past year, or even just those who happen to stumble upon this post while searching for recipes or inspiration.
Long before I started Amcarmen’s Kitchen, I was already posting my kitchen adventures on my personal Facebook page when I left for university back in 2011. I started it as a way to document the food that I was eating, you know, being a 19 year old girl who left home with zero experience in cooking. Honestly, the food I was making, super cringe-worthy, but nevertheless, I’m glad I did that because it’s always great to look back and compare yourself to where you are now, especially during times like this. If you want to read more about my journey leading up to when I first started this blog, you can read all about it here: My Kitchen Journey.
Fast forward from 2011 to 2014, I started Amcarmen’s Kitchen exactly seven years ago today, on April 16 of 2014; it was a fine Wednesday afternoon during my fourth year of university. It was the Easter holidays and I had zero willpower to tackle the mountain of assignments I had to complete before the holidays were over. Instead, I decided to explore the world of wordpress, and before I knew it, Amcarmen’s Kitchen (formerly known then as Kitchen Headquarters) was born.
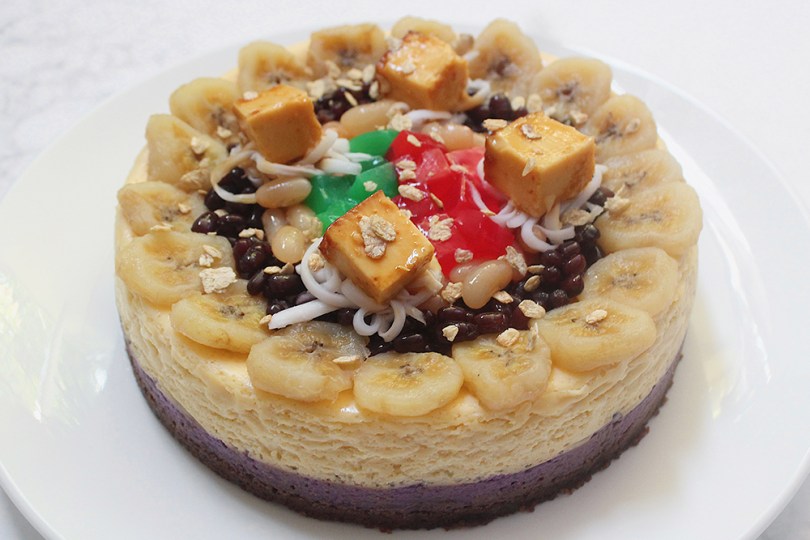
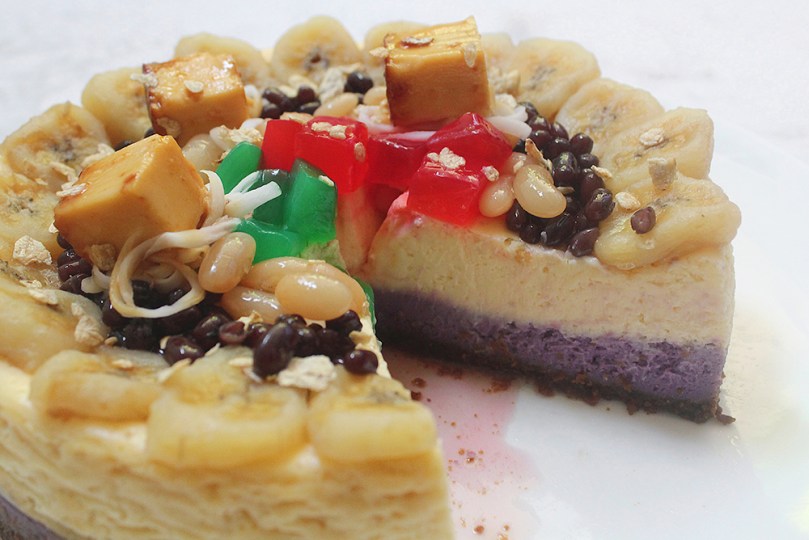
To celebrate today’s occasion, as per tradition on my blog every year, I’ve baked a cheesecake inspired by a very popular dessert here in the Philippines known as Halo-Halo. The word, directly translated actually means ‘mix-mix’ in English, and is essentially a mixture of, but not limited to, crushed ice, evaporated milk or condensed milk, and various ingredients including, ube, sweetened beans, coconut strips, sago, gulaman (agar), pinipig rice, boiled taro or soft yams in cubes, fruit slices, flan, and topped with a scoop of ube ice cream. Though popular all year round, it’s most especially enjoyed during the hot summer days.
I came across the idea of translating this dessert into a cheesecake about a year and a half ago during a work event. A few colleagues of mine and myself took a short break from event rehearsals and stumbled upon a coffee and cakes corner in the lobby of the hotel we were at. While they were ordering coffee, I spotted a Halo-Halo Cheesecake on their cake shelf and was immediately wowed by such an ingenious idea! I unfortunately did not order a slice at that time, only because I was contemplating on whether I should, or shouldn’t (it was a bit pricey think), but when I finally made the decision to order a slice, on a different day, the day of the actual event, they didn’t have any left, or didn’t make a batch that day. So as Amcarmen’s Kitchen’s anniversary drew near, I knew that that was the cake that I was going to make for this special occasion!
PREP TIME 15 MINS| COOKING TIME 1 HOUR 20 MINS| SERVES 8-10
Prepare your spring-form pan (about 8” in diameter) and line the bottom and inside with parchment paper, and the outer with aluminium foil. Lightly grease the bottom and sides with a touch of unsalted butter.
Crumb Base: Add the crushed Lotus Biscoff biscuits, salt, and melted butter together in a small mixing bowl. Mix together until well combined.
Press the crumb into the base of your prepared spring-form pan. Set aside in the fridge for about 15 minutes to set while you prepare your cheesecake mixture.
Cheesecake Mixture: Using an electric mixer fitted with a beater attachment, beat, on medium speed, the cream cheese and sugar together in a large bowl until smooth.
With the mixer running, add in the eggs, all purpose cream, and vanilla extract. Mix for a further 2 minutes.
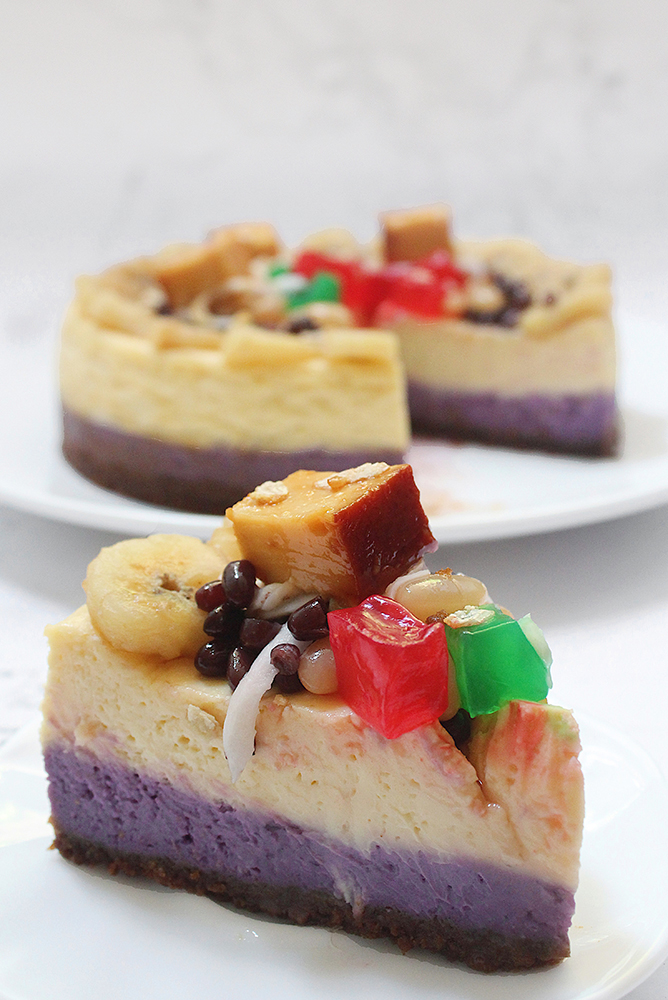
Separate one third of the mixture into another mixing bowl. Add the ube jam and ube extract to the cheesecake mixture and slowly beat until combined.
Pour the ube cheesecake mixture into the prepared spring-form pan, evenly covering the biscuit base. Bake in the oven for about 20 minutes, or until just set.
Once set, remove from the oven and then pour the remaining cheesecake mixture into the spring-form pan. Continue to bake in the oven for another 45 – 50 minutes, or until set.
Remove from the oven and let it cool down completely in its pan before placing it into the refrigerator overnight.
Assemble: Decorate as you wish and serve chilled. Enjoy!
As always, before I end tonight’s post, I just want to say a special thank you to my Mom. She was the one who patiently taught me how to cook my favourite dishes when I was growing up. She was my #1 supporter. I lost her in September 2019 due to a fatal stroke which was caused by a sudden rupture of a vein in her brain, but before all that she had underlying illnesses such as diabetes, high blood pressure, and chronic kidney disease. One of the main reasons why I drastically cut out meat such as beef and pork from my diet and started eating healthier (as reflected in my blog for the past 2 years). Thank you Mama for passing down your knowledge and love for food on to me. I know you’re proudly watching from above. I love you.
Lastly, next to my Mom is of course, my very supportive boyfriend. Ever since the day we met, you’ve been proudly sharing my recipes for your family and friends to see. And for that, thank you for your continuous encouragement and for motivating me to continue doing what I love to do! I love you.
Stay tuned tomorrow as I have another special post to share with you all!
Hello Everyone! Do you have a toddler in front of the TV right now totally hypnotised by Sesame Street? Do you hear the phrase “C is for cookie” at least once a day? Then your kid is probably a true Cookie Monster fan. Well, I don’t have kids of my own (yet) and I was never really a fan of Sesame Street when growing up.
Despite that, I wanted to share a recipe with everyone that screams the colour blue, and when doing some research one fine weekend, Cookie Monster desserts flooded Pinterest and Google Images. So embrace your little one’s love by adding some Cookie Monster fun to this dessert. This super simple kid-friendly No-churn Cookie Monster Ice Cream is loaded with Oreo cookies and chocolate chip cookies that make for a great combo. In just a few minutes time, you can have this fun cookie-loaded ice cream in your freezer. Plus the recipe only needs cookies, sweetened condensed milk, cream, and vanilla. Super simple.
Before we dive into tonight’s recipe, please take the time to check out the original where I drew my inspiration from over on Baking Beauty by Krystle.
PREP TIME 4 HOURS*| COOKING TIME —| SERVES 6-8
* For freezing time, minimum 4 hours or up to 24 hours.
INGREDIENTS
2 cups (500ml) all purpose cream, chilled
1 can (218g) sweetened condensed milk
2 tbsp vanilla extract
1/2 to 1 tsp blue food colouring, may need more or less for your desired shade of blue
Chocolate chip cookies (such as Chips Ahoy), roughly chopped
Chocolate sandwich cookies (such as Oreos), roughly chopped
METHOD
In a chilled medium-sized mixing bowl, whip the all purpose cream using an electrical hand-held mixer until soft peaks start to form.
Add the sweetened condensed milk together with the blue food colouring and vanilla. Continue to whip to soft peaks, it should be fluffy and mousse-like.
Gently fold in half of the chopped cookies and transfer to an airtight container. Sprinkle the tops with the remaining cookies and freeze for 4 hours or up to 24 hours. Let sit at room temperature for about 15-20 minutes before scooping and serving. Enjoy!
Store-bought cookies work really well with this recipe as their crunchy texture stands up to the ice cream. You may also make your own homemade cookies, just make sure they’re super crunchy.
Hello Everyone! Yes I am fully aware that it’s Thursday today, which means I’m a day late from my normal upload schedule of every Wednesday night (Philippine time). There’s a reason for this, because:
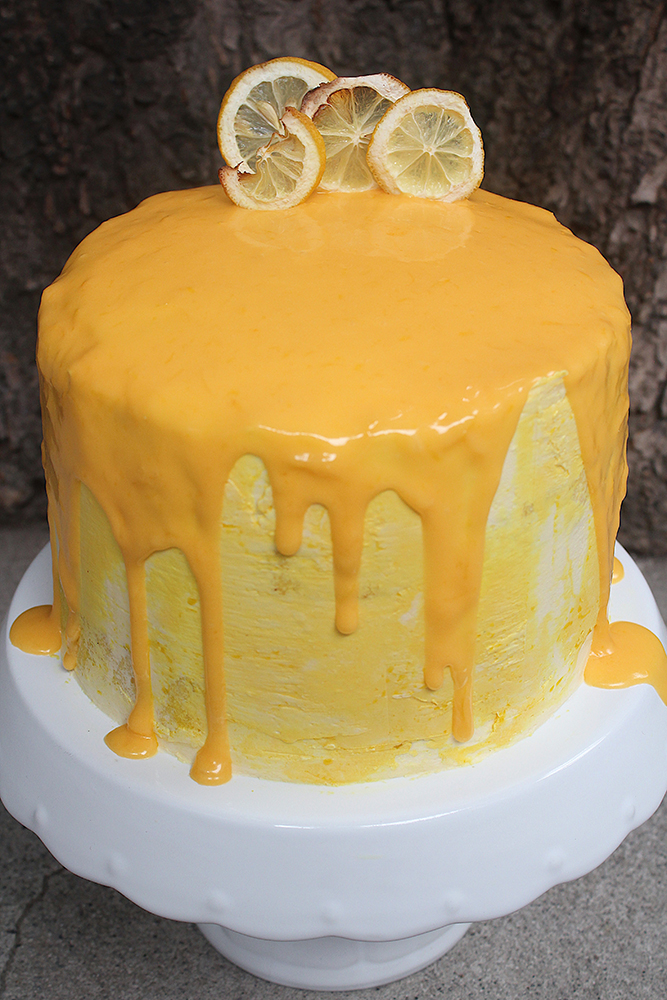
AMCARMEN’S KITCHEN TURNS SIX TODAY!
For my new followers and friends who don’t know the story behind my blog, before I got it up and running, I already had an interest in cooking. I was already sharing photos of my kitchen adventures on Facebook throughout my first year in university up until my third year. Throughout these years, I kept getting comments and messages from family and friends, encouraging me to start up a blog and share my recipes online.
Finally, after many years of encouragement and pure procrastination, I started what was formerly known as Kitchen Headquarters back in April 16 of 2014. It happened when I was 2 months into my last year of university and in the middle of my mid-semester Easter break; not wanting to tackle the many assignments I had on my to-do list before resuming classes.
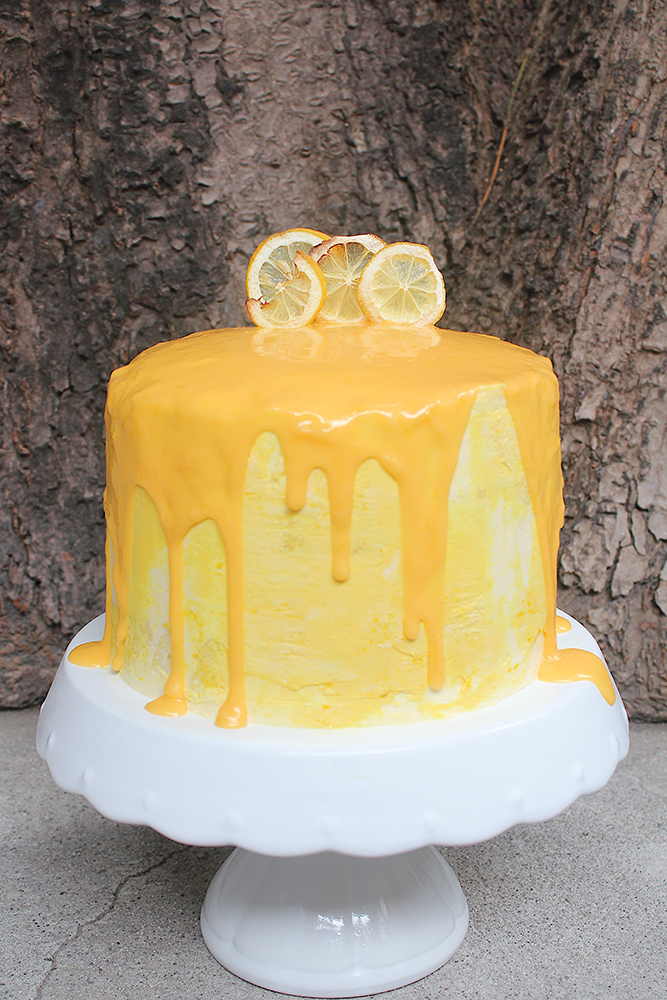
To celebrate today’s occasion, I’ve baked a Lemon Sunshine Cake. It strikes the perfect balance between tart and sweet with homemade lemon curd, a moist lemon cake, and a rich, creamy vanilla buttercream frosting. It’s delicious and sure to brighten your day!
Before we dive into tonight’s recipe, please take the time to check out the original recipe that I drew my inspiration from over at The Simple Sweet Life by Claire.
PREP TIME 2 HOURS & 30 MINS| COOKING TIME 35 MINS| SERVES 10-12
INGREDIENTS
For the lemon curd
60g unsalted butter, cubed
4 free-range egg yolks
1/2 cup white granulated sugar
1/4 cup fresh lemon juice (about 1 large lemon)
1 tbsp lemon zest
For the lemon cake
200g unsalted butter, melted
6 large free-range eggs
3 cups cake flour
1 & 1/2 cup white granulated sugar
1 cup soy milk
6 tbsp fresh lemon juice
2 tbsp lemon zest
4 tsp baking powder
For the vanilla buttercream frosting
500g unsalted butter (cold), cubed
10 free-range egg whites*
2 cups white granulated sugar
10 tbsp water
1 tsp vanilla extract
Yellow food colouring (optional)
* Don’t throw away the egg yolks! You can keep them in the fridge for up to two days while you decide what you can make with them. I made an easy Leche Flan (Crème Caramel) recipe. If you’re feeling a little bit creative and inspired, try turning them into Crispy Fried Leche Flan instead!
METHOD
Lemon Curd: Whisk together the sugar, lemon juice and zest, and egg yolks in a heat-proof bowl over a pot of boiling water.
Cook the mixture, stirring occasionally, until it thickens. It should almost have the consistency of a pudding. Once the lemon curd has thickened, carefully remove the bowl from the pot of boiling water and allow to cool for about 10 minutes.
Slowly incorporate the cubed butter into the slightly cooled curd mixture. Cover and then allow for the curd to cool completely in the refrigerator before use.
Lemon Cake: Preheat oven to 180C (350F or gas mark 4).
Add the eggs and sugar in a large mixing bowl. Using a handheld electric mixer on high speed, whip them together until light and fluffy.
Add the dry ingredients (flour and baking powder) and mix on low speed until just combined. Repeat with the remaining ingredients.
Evenly distribute the batter into four 8” parchment paper-lined and greased cake pans. Bake for 22 to 25 minutes or until a toothpick inserted in the centre of the cakes come out clean. Remove from the oven and set aside to cool for about 5 to 10 minutes before turning them out onto a wire rack to cool down completely.
Vanilla Buttercream Frosting: In a small saucepan, combine the water and sugar and bring to a boil over high heat, cooking until the sugar becomes clear.
While the syrup cooks, whip the egg whites in a large mixing bowl until stiff peaks form.
With the mixed running on high, slowly pour the sugar syrup into the egg whites and whip until the mixture has cooled down to room temperature.
Turn the mixer speed down to low and slowly incorporate the butter and vanilla extract. Continue beating until the frosting is thick and smooth.
Assembly: If necessary, level your cakes before layering for assembly. Place one cake layer on a cake board and spread a layer of frosting on top.
Using an offset spatula, carve out an indent in the frosting and fill with the lemon curd. Repeat with the second and third layer and then top with the fourth. Coat the outside with a thin crumb coat and allow for the cake to set in the refrigerator for about 15 to 20 minutes to set.
Optional: Equally divide the remaining frosting into three batches. Tint each batch a different shade of yellow.
Cover the cake with the frosting and use an offset spatula or bench scraper to smoothen the frosting and remove any excess. Feel free to get creative in how you’re going to use the colours to decorate and present your cake.I topped the cake with the remaining lemon curd and added a few slices of baked/dehydrated lemon slices for that finishing touch.
Place in the refrigerator to chill before serving. Enjoy!
Here are some helpful tips to note when making this Lemon Sunshine Cake:
Make the lemon curd in advance: You can make the lemon curd a week and store it in the refrigerator if you’re looking to save some time when you come around to making this cake.
Crumb coating: Spreading a thin layer of frosting around the sides and top of the cake, and then refrigerating it will lock in any crumbs and keep them from reaching the surface of your frosted cake.
The trick for smooth frosting: You’ll need a rotating cake stand and a bench scraper. Place the small end of the bench scraper on the cake stand, long end against the frosting and turn the table. Once excess frosting is removed, heat the scraper in hot water, wipe and drag around the outside of the cake.
Chill your cake: Cool cake is easier to cut and handle, so chilling your cake for a short while before use will make this process easier.
Before I end tonight’s post, I want to thank everyone for all the love and support. Of course all the hard work that goes into Amcarmen’s Kitchen wouldn’t have been possible without my #1 supporter, my Mom. I asked my Mom to teach me how to cook after trying to survive off regular takeaway meals from the nearest shop or my attempts at home-cooked food of very poor quality during my first year away from home.
I have my Mom to thank for the days she had to put up with my very little knowledge in the kitchen, and my inability to choose the best produce when she would bring me along to her trips to the market. Thank you Mama for passing down your knowledge and love for food on to me. I know you’re proudly watching over me.
Lastly, I want to thank a very special someone in my life. Since the day we first started talking to each other, you’ve always been very proud and supportive by sharing my recipes each week. And for that, thank you for encouraging and motivating me to continue doing what I love to do!
Hello Everyone! Firstly, I would like to apologise if this ends up all over the place in terms of the written content, and if there will be a lot of typos and grammatical errors. I was up at 3:45am this morning to get ready to be out of the house at 5:30am for an early Visita Iglesia Pilgrimage with the ladies from our neighbourhood association. Visita Iglesia, or known as the Seven Churches Visitation is a pious Roman Catholic Lenten tradition to visit seven churches on the evening of Maundy Thursday or Good Friday and recite the Stations of the Cross. Until the 1970s, pilgrims recited all fourteen stations in every church, but the more recent form is to pay two stations per church visited. We visited seven churches in the province of Batangas and Tagaytay. This was the very first time I’ve ever been on a Visita Iglesia Pilgrimage and the beautiful churches that we have in the Philippines astounded me.
Moving forwards, yes I am well aware that it is only a Tuesday but today is a very special day for Amcarmen’s Kitchen! I asked my followers over on Instagram to guess why it is a special day, and shared some throwback pictures that were posted on this day from the past as clues. Unfortunately, no one took part in guessing what day it is today *sad face*
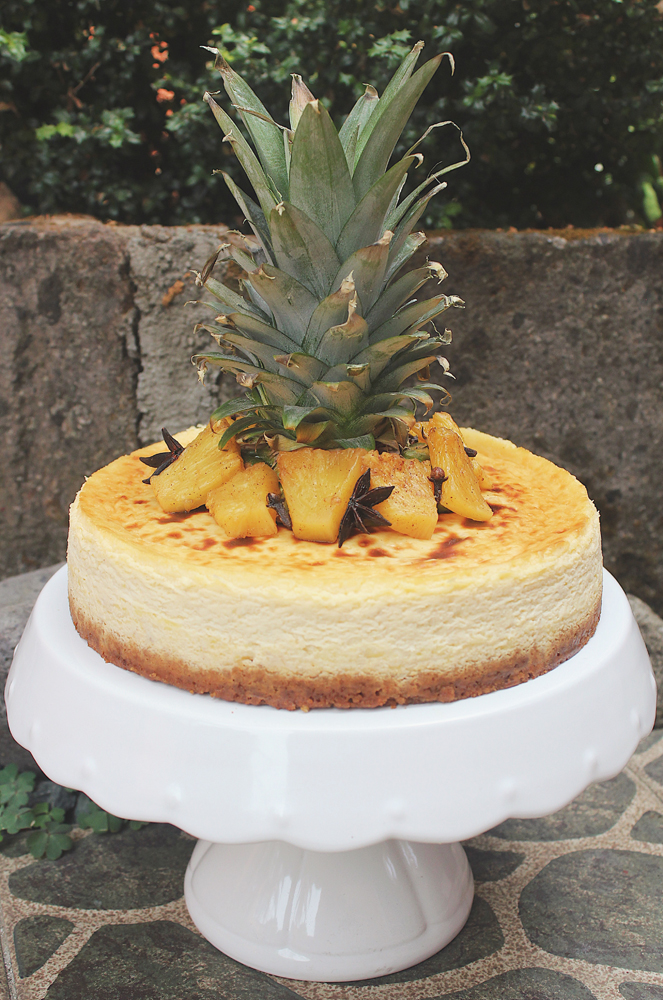
AMCARMEN’S KITCHEN TURNS 5 TODAY!
I say this every year, but I will forever be thankful for all the support from my family and friends. Thank you to the friends who have encouraged and praised my dishes ever since before Amcarmen’s Kitchen was born. Thank you to that one specific person who gave me that push I needed to actually start up my own blog. We don’t talk anymore just because we saw too many things differently, and thus unfortunately are not friends anymore. Thank you to my family and friends who have been there to gobble up the results of my cooking adventures. Of course, a very big thank you to my Mom as well for many things. The main being for teaching me how to cook the basics; it was from here that I developed my skills and techniques in cooking, and expanding my knowledge of various cuisines across the globe. And of course, for (sometimes) being the one that actually preps and cooks the food!
One day, can’t remember when anymore, I was scrolling through Instagram and came across this recipe for a Pineapple & Passionfruit Cheesecake by Ben Milgate and Elvis Abrahanowicz on SBS Food. I immediately knew that this was the cake that I was going to whip up for the 5th anniversary of Amcarmen’s Kitchen. I changed the recipe up a bit, firstly by incorporating the spice-roasted pineapples that I experimented with at the beginning of the month for my nice cream. I really loved the flavour profile of it and so I decided to use that into the cheesecake. I’ve left the passionfruit out only because I could not find any at the markets or supermarkets around my area. If you have passionfruit on hand then by all means add it to the recipe. For the base, I’ve swapped out the Anzac mix and just crushed up some ginger nut biscuits. The fiery, gingery flavour works super well with the spice-roasted pineapple.
PREP TIME 25 MINS| COOKING TIME 1 HOUR 20 MINS| SERVES 8-12
INGREDIENTS
For the spice-roasted pineapple
1 large pineapple, peeled and cut into bite-sized chunks
5 pcs whole cloves
3 pcs star anise
2 cinnamon sticks
2 tbsp brown sugar
1 & 1/2 tbsp Tequila or Vodka (optional)
For the crumb base
300g Ginger Nut Biscuits, crushed
100g unsalted butter, melted
1 tsp salt
For the cheesecake mixture
Spice-roasted pineapple purée
500g cream cheese, softened
200ml cream
2 large free-range eggs
1/2 cup white granulated sugar
Juice of half a lemon
METHOD
Spice-roasted Pineapple: Preheat oven to 220C (425F or gas mark 7).
Toss the pineapple, sugar, spices, and everything nice (liquor) in an oven-safe baking dish. Sorry, I could not resist not say that!
Roast in the oven for about 20 minutes. Once done, set aside to completely cool down before puréeing the pineapple. Set some pineapple chunks aside for decoration later.
Crumb Base: Meanwhile, add the crushed ginger nut biscuits, salt, and melted butter together in a medium-sized mixing bowl. Mix together until well combined.
Grease an 8-inch spring-form cake pan and line it with parchment paper. Cover the outside of the pan with tin foil. Press the crumb into the base of the cake pan. Set aside in the fridge for about 15 minutes to set.
Turn the oven temperature down to 130C (250F or gas mark 1).
Cheesecake Mixture: Using an electric mixer fitted with a paddle attachment, beat, on medium speed, the cream cheese and sugar together in a large mixing bowl until smooth.
With the mixer running, add in the eggs and cream, mixing for a further 2 minutes.
Pour the mixture into the prepared spring-form cake pan, evenly covering the biscuit base, then drizzle over the spice-roasted pineapple purée. Use a skewer to gently swirl the purée through the cheesecake mixture.
Place the cake pan in a water bath and bake for 1 hour, or until just set. Allow to cool down to room temperature and then chill in the fridge for about an hour before serving.
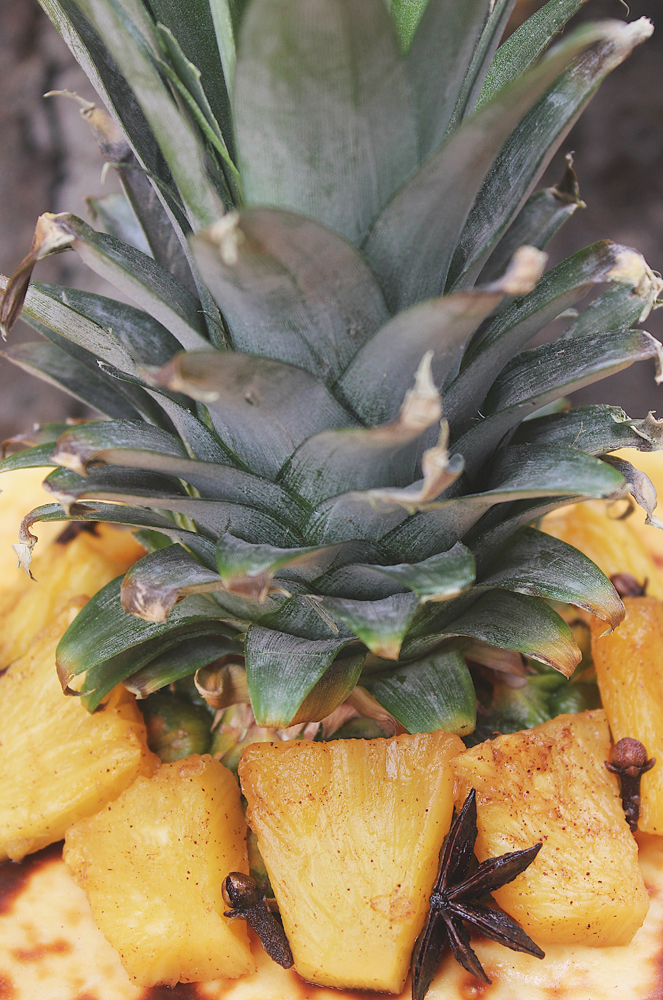
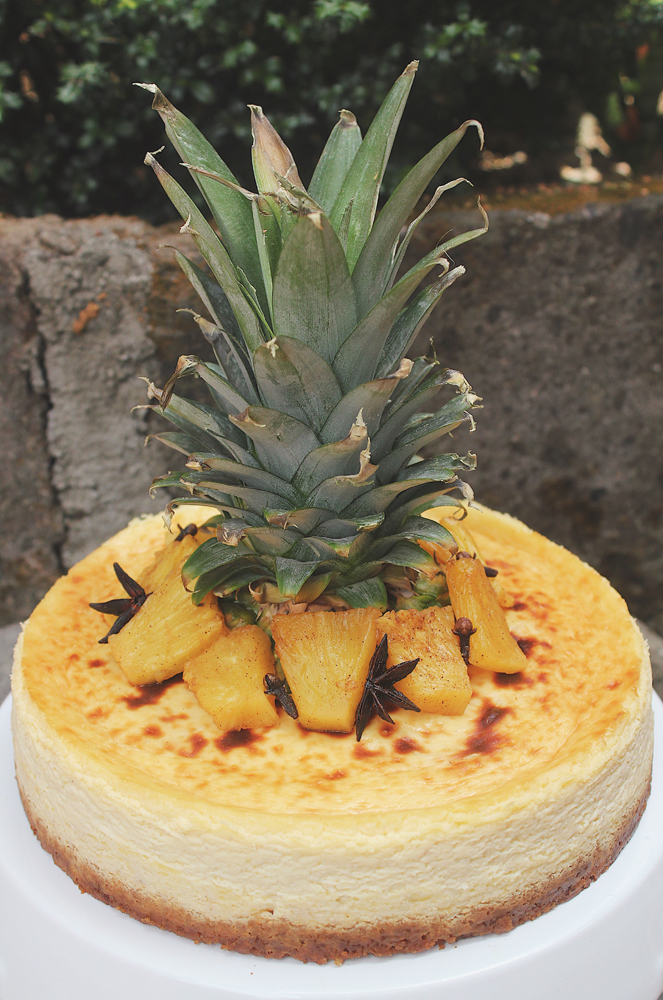
Decorate: Just before serving, top the cheesecake with the crown of a pineapple, and with the remaining spice-roasted pineapple chunks.
Hello Everyone! I’ve got a special post for you this evening as today marks 4 years of Amcarmen’s Kitchen! Don’t worry, I’ll still post a Breakfast Smoothie Bowl up for you guys most probably towards the end of the week since I already had the post and pictures prepared for it.
Anyway, technically I started this blog on April 16th, but it wasn’t until 2 days after on the 18th that I posted my very first recipe! You can check it out here: Cheesy Mushroom Omelette with Avocado Mint Greek Yoghurt & Wilted Spinach. Yes, you could say I was less talkative (wordy) for my first few posts, mainly because I had no clue on what else I could write about. When I started this blog out of pure procrastination way back in 2014 during my uni mid-semester break, I didn’t think I would be able to make it this far to be honest! I did slack behind a bit (a lot) towards the end of last year as it wasn’t easy juggling both a very demanding job, this blog, time for family and friends, and wanting some free time to myself as well. I have been doing a better job at keeping up so far, but it’s too early to tell to be honest, since I only just started getting back into this last month.
I want to say that I promise that I will try to do better this year, but even I know that that’s a promise that I won’t be able to keep, so bear with me my dear followers! I know it is not in any way an obligation for me to share with you guys every single week, but I feel a sense of accomplishment for when I do so, and I don’t ever want this blog to drift away. It’s the only passion that I have going on for me right now because of my busy work schedule, and I don’t want all the hard work I’ve put into this blog for the past now coming 4 years to just become all for nothing.
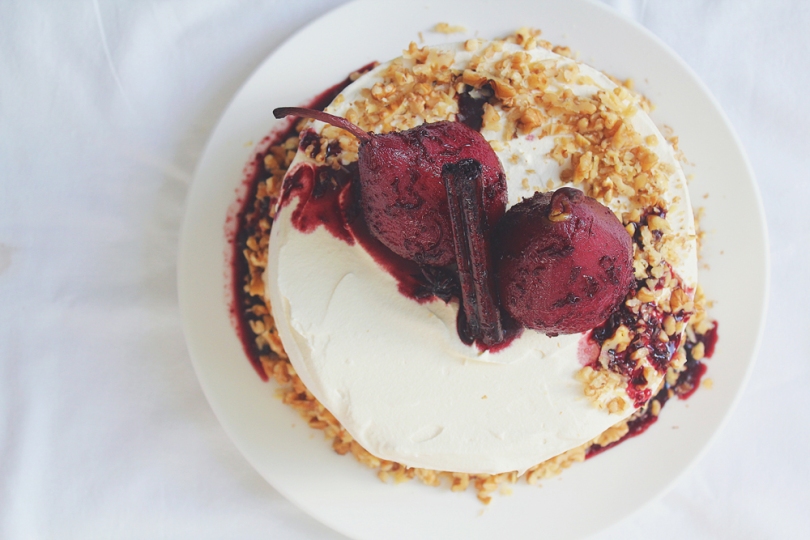
With that being said, tonight I will be sharing a recipe that I tackled last November actually… For my 26th birthday! I never got around to posting it, and since I literally just got back from Hong Kong last night and had to report straight to work this morning, I’ve had no time to bake a new cake to celebrate Amcarmen’s Kitchen turning 4. So here’s my Pear & Walnut Cake that I drew inspiration from Olivia over on Liv for Cake. The cake itself was moist, not too sweet and had a lovely texture from the soft pear chunks and crunchy toasted walnuts. The honey buttercream was light and fluffy, beautifully contrasted by the deep red pears sitting atop a white-frosted cake.
(Apologies for not having an ingredient shot like how I normally do for almost all my recipe posts, but the photo didn’t turn out so great so I just decided not to post it)
PREP TIME 20 MINS| COOKING TIME 30 MINS| SERVES 8-10
INGREDIENTS
For the pear and walnut cake
2 & 1/4cups plain flour
1cupbuttermilk, atroom temperature
1cup toasted walnuts, roughly chopped (plus extra to top)
180g unsalted butter, at room temperature
3/4cup brown sugar
3/4cupgranulated sugar
3large free range eggs, atroom temperature
2 large pears, peeled, cored, and coarsely shredded
Spiced Red Wine Poached Pears: Follow the recipe method provided in the link above.
Pear and Walnut Cake: Preheat oven to 180C (350F or gas mark 4). Grease and flour two 8-inch cake rounds and line with parchment paper.
In a medium-sized bowl, whisk the plain flour, baking powder, ground cinnamon, and salt until well combined. Set aside.
Next, using a stand mixer fitted with a paddle attachment, cream the butter and sugar on medium-high speed until the mixture becomes pale and fluffy (approximately 3 minutes). Reduce the speed and add the eggs in one at a time to allow to fully incorporate after each addition. Add the vanilla extract.
Alternate adding the flour mixture and buttermilk, beginning and ending with flour (3 additions of flour and 2 of milk altogether). Make sure to fully incorporate after each addition. Then, gently fold in the toasted walnuts and shredded pears, and divide the mixture evenly between the two pans.
Bake for 50 to 55 minutes or until a toothpick inserted into the centre of both cakes come out mostly clean. Place the cakes on wire rack to cool for about 10 minutes and then turn out onto the wire rack to cool further.
Honey Swiss Meringue Buttercream: Place the egg whites and sugar into the bowl of a stand mixer, and whisk until combined.* Place the bowl over a double boiler on the stove and whisk constantly until the mixture is hot and no longer grainy to the touch (approximately 3 minutes), or until it registers 70C/160F on a candy thermometre.
Place the bowl back on your stand mixer and whisk on medium-high speed until the meringue is stiff and has cooled (the bowl is no longer warm to the touch (approximately 5 to 10 minutes).
Switch to a paddle attachment and slowly add in the butter (cubed). Mix until smooth.** Add the honey and whip until smooth. Set aside.
Assembly: Place one layer of cake on a cake stand or serving plate. Top with approximately 1 cup of the buttercream and repeat with the remaining layer. Crumb coat the cake and place in the fridge to chill for about 20 minutes.
Continue to frost the top and sides of the cake in a rustic manner. If desired, add toasted walnuts along the bottom and top, and place the poached pears on top. Secure pears in place with toothpicks and drizzle with the poaching syrup.
Serve and enjoy!
* Ensure that there are NO traces of egg yolks in your whites and that your mixer bowl and whisk is completely grease free or your meringue won’t stiffen.
** The buttercream may look like it’s curdled at some point. Keep mixing until it is completely smooth.
Hello Everyone! Today is a very special day, and for two reasons too! Today is special because God so loved the world that he gave his one and only Son, that whoever believes in him shall not perish but have eternal live (John 3:16 ESV). A very Happy Easter to all who celebrate the resurrection of Jesus Christ.
Besides today being Easter Sunday, today is also special because Amcarmen’s Kitchen turns 3! On this day 3 years ago I was sitting in my room, quite possibly still in my pyjamas at that time, blankly starting at my list of assignments to complete before the end of the Easter mid-semester break on my second-last semester of my degree. Knowing that I had so much to do in so little given time, I thought the only right thing to do at that moment was to take a nap and hopefully, magically, all my assignments would have been completed by the time I woke up from my nap… Well, that wasn’t what happened, but instead I decided to spontaneously delve into the world of WordPress, and *poof!* Kitchen Headquarters was born. Yes, Amcarmen’s Kitchen was previously known as Kitchen Headquarters in 2014 for a good year and a half before I did a whole rebranding in mid-2015.
As it has been for the past 2 years, I decided to make, not bake, a cake for Amcarmen’s Kitchen, and basically for my family and I to enjoy on behalf of my blog haha. I decided to try something new, while of course still sticking to the theme of using avocado in all my recipes for the month of April. Before we dive into today’s recipe, please do check the original by Sheilla on Chef Sheilla.
PREP TIME 15 MINS| SETTING TIME 2 HOURS| SERVES 8-10
INGREDIENTS
For the avocado lime cheesecake mixture
250g cream cheese, softened
50g unsalted butter, melted
300ml crème fraîche
1 large avocado, mashed
1 sachet (7g) clear gelatin or agar-agar powder
1 cup granulated sugar
Juice and zest of 2 limes
1 cup ground digestive cookies
1 lime, for garnishing
METHOD
Combine the ground digestive cookies and melted butter in a medium-sized bowl and mix until moist crumbs form. Press the crumb mixture onto the bottom of a 10″ springform pan that has been lined with parchment paper. Chill in the freezer for about 10 minutes to set.
Take 100ml of the crème fraîche and combine it with the gelatin or agar-agar powder in a small saucepan. Stir for about 2 minutes until all the gelatin granules has dissolved. Turn the heat to medium and bring to a boil, stirring for a few minutes until the gelatin has completely melted. Remove from the heat and strain through a fine sieve. Set aside.
Add the mashed avocado, cream cheese, sugar, the remaining 200ml of crème fraîche, lime juice, and lime zest to a large mixing bowl and using an electric mixer with a paddle attachment, mix everything together until smooth and well-combined. Pour in the gelatin-cream mixture and continue to mix until creamy and smooth in texture.
Pour the avocado lime cheesecake mixture into the prepared springform pan and smoothen the top. Chill in the freezer for at least two hours for it to set.
Release the cheesecake from the springform pan and serve right away! Garnish the top with some lime slices and zest. Enjoy!
The taste: amazing! The flavour of the avocado definitely shone through, and the hint of tangy flavour from the lime made the whole dessert refreshing in taste. The texture… Well let’s just say that it is supposed to be creamy and smooth, mine wasn’t as smooth as it could be. It has nothing to do with the original recipe; I think that I may have slipped up somewhere along the way. The obvious was probably that I was on the verge of over whipping the cheesecake mixture that the fresh cream started forming little clumps – I stopped before it severely over whipped. Also, I probably didn’t add enough gelatin to the cheesecake mixture so it didn’t quite set right. I only added half of the sachet in even though the original said ‘1 sachet’ – in my defense I didn’t know if Sheilla’s 1 sachet was the same quantity-wise as my 1 sachet. Oh well, I’ve adjusted the quantity of the gelatin in this recipe so hopefully the one listed above works!
Before I end tonight’s post, I’d just like to take this opportunity to thank first and foremost, my Mom who taught me how to cook. I also thank my other family members and friends who encouraged me to start up my blog because if it weren’t for them, Amcarmen’s Kitchen wouldn’t be here today, and I probably wouldn’t have continued pursuing my passion for cooking at home. Let’s face it, when I cook, I cook for my blog, and my family just so happens to be around to eat it after haha! Finally, to those who think I am just wasting my time on this, or assume that I work in a restaurant as a waitress because I didn’t actually go to culinary school to be able to work in a commercial/professional kitchen, take your negativity elsewhere. I have a degree in Design and I am working in the country’s leading Advertising Agency as a Creative Design and Events Management Executive, as well as a Copywriter. Thank you very much.
Hello Everyone! Before I begin, I just want to say that this post won’t be as detailed and properly written as the previous two I’ve posted. When I say properly written, I mean like very sort of, professionally done. Those two were actually 3rd and 4th year university projects and thus had some sort of professionalism towards the way I wrote – yes, I copied word from word everything I wrote from my research booklet. So would that be considered as plagiarism? My tutors would say so *insert smiling face with tears of joy emoji*
Anyway, as you all know (if you’ve read the about me section of my blog at least once), I started Amcarmen’s Kitchen on April 16, 2014, and if you have been following since the very beginning, you’d remember how tacky my blog was for the first year and a half of its existence. Then a few months ago, back in June, I decided that I wanted to redesign my blog. I am still using a free theme supplied by WordPress, and I will be sticking to it just because it’s clean and minimal which I like, and it’s default colour theme already expresses me as a person, and as a designer. With this, I have based all my other design deliverables on this colour theme.
Before I continue, I also just want to say that I recently started what I want it to become into an annual series, a food bloggers edition of Auguest. If you head on over the the Auguest tab, or click here, you can read more about what this is all about. Also, if you are reading this and are a cook, food blogger, or instagrammer, please contact me if you want to be a part of next year’s Auguest series! My contact details can be found below.
Branding & Logo
When I finalised the reimaging and rebranding of my blog, I decided that I needed a logo to represent the new theme, The Third Culture Foodie. In a nutshell, the theme is based on me being a third culture kid and really diversity is really what I am about. Having lived and studied in Australia, I have learnt that it is a highly multicultural country in both race and food offered. This is why I know a lot of dishes outside my roots and why I am always interested in learning new dishes from different cultures. Therefore, the logo is pretty much self-explanatory and related back to everything that I have just said.
Business Card
I first got the idea of making business cards when I attended a talk on the Business of Food Blogging, hosted by General Assembly. I met a fellow food blogger, Brendon from Brendon The Smiling Chef, that night who gave out business cards and I even said to him that that was such a great idea to get, not only your contact details out, but to also promote your blog when you meet new people. So, when he held a Food Bloggers Instagram Meet Up at a restaurant in North Strathfield a few months ago, I made sure to get some cards printed out to give out to the other food bloggers at the event, all of which, except for Brendon who organised it of course, I had never met before.
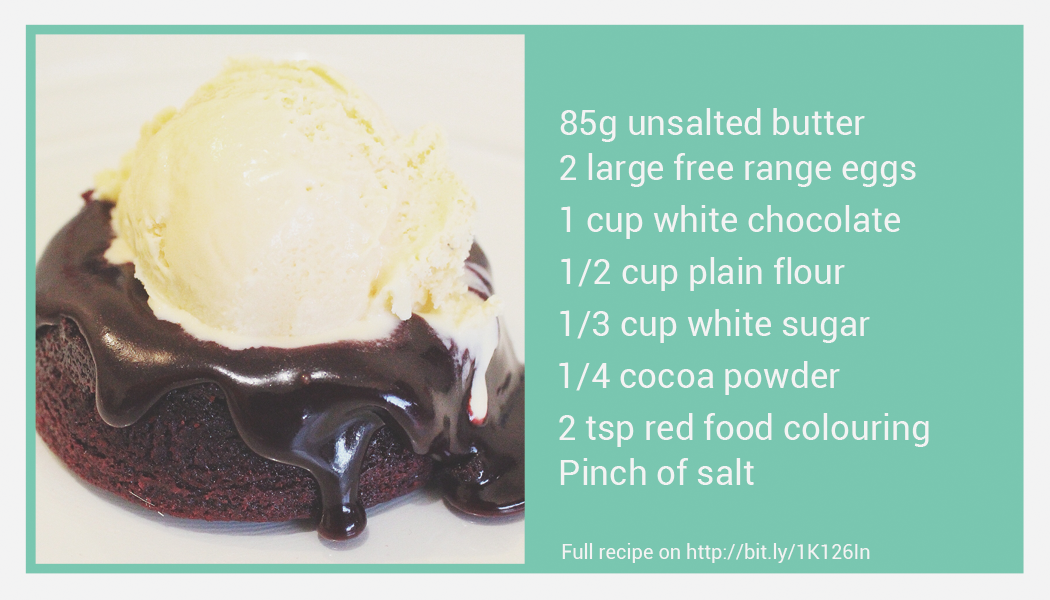
At that time, I had a much simpler business card design which basically just had my logo and name on one side, and all the social media links and contacts on the other. I did this very quickly just so that I’d have something to hand out on that night. Since then I’ve decided to redo my business card and came up with the designs above. Basically, one side of the business card is unique in a sense that it will feature a different recipe – well, not the full recipe, just a list of ingredients and then a bit.ly link to the full recipe on the blog. I was thinking of printing 5 different recipes for my business cards.
Quotes
This was something that I had only started recently when I decided to have monthly themes on my blog. When the new month kicks in, I post a quote on my Instagram page to let my followers know of the upcoming theme on the blog. It’s no brainteaser really as they quite obviously state what to expect. The quotes aren’t original; I usually just do a Google search for some quotes and usually pick the funniest or wittiest ones.
Social Media
You can find Amcarmen’s Kitchen on Facebook and Instagram – please support by following my social media pages 🙂
Website
Before I end, I just want to say that looking back at everything with Amcarmen’s Kitchen, I’ve realised how much time and effort I’ve put into, not just my cooking, the styling, photography involved in shooting my dishes, and producing a blog post 3 times a week, I also put a lot of time into the design of my blog and keeping up to date with social media; not to mention with the cookbook coming along as well! Not many people realise how much time and effort goes into running a blog.
Sneak Peak: Amcarmen’s Kitchen Cookbook
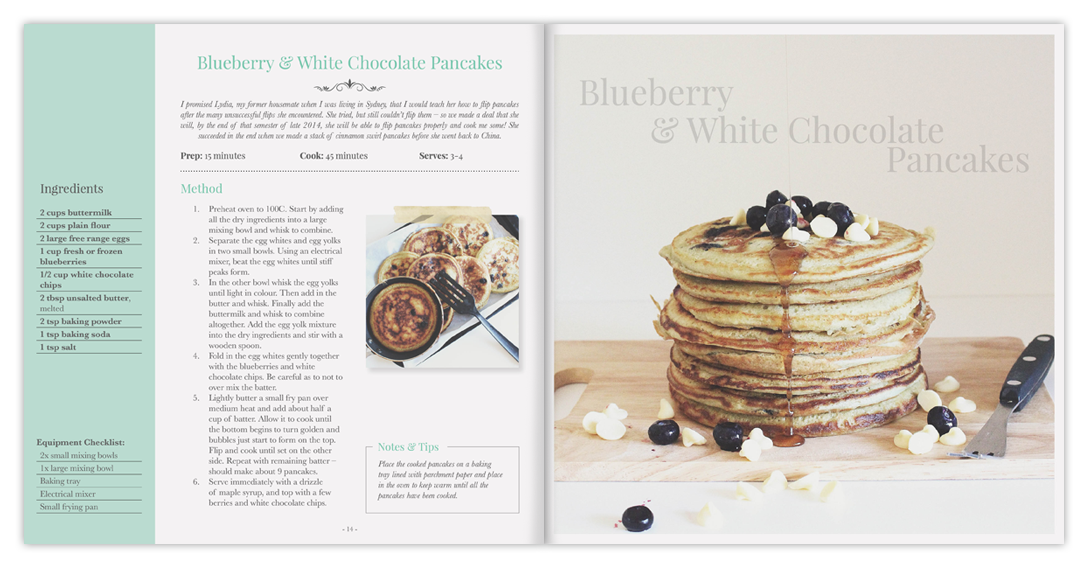
I know some would’ve just scrolled through to see this part of the post because you’re all excited about this; I do thank those who took the time reading and going through everything else. Anyway, I have mentioned this to a handful of my closest friends before, like a really really REALLY long time ago, and I’m hoping that the wait will be over soon! I’m currently in the process of redesigning my cookbook for the nth time and I did say to some that I had planned to get this out by mid this year (which obviously didn’t happen), but I am hoping that I can get this done by early to mid 2016. For now, enjoy this 4-page preview. My first cookbook (when it does eventually get printed), will feature 50 of my most favourite recipes!
Hello everyone! Apologies on a slow week of posting. I’ve been busy with a lot of uni work – meeting and chasing deadlines altogether as I run the final month of semester. Anyway, all that aside, last month today I started up this blog and uploaded my very first post! I’ve uploaded 18 posts, gained 45 followers and 418 views in 22 different countries! Thank you so much to those who like and comment on my posts, it really means a lot to me.
A few days ago I was looking through photos from my first year of moving to Australia for my university studies. I came across a folder titled “Epic Meal Time Sydney” and my goodness, I could not stop cringing. “Did I really eat like that?” “Oh my God!” were the words that kept replaying in my mind as I went through every picture. Every picture was cringe-worthy. And it was at that moment that I decided that I would write about my journey from a terrible cook to a ‘Kitchen Goddess’ (to quote a friend of mine who called me that, and also said that my husband, when existent, will be a very lucky man). I wouldn’t call myself a Kitchen Goddess to be honest, I’m no Masterchef or anything, but I do admit that I’ve come a long way from when I first started out 3 years ago. It actually surprises me how much I’ve improved in a short span, considering I also have uni to worry about, as well as having a social life.
So, today’s post will not be a recipe, but I would like to share with all of you my journey. I left the nest back in February 2011 to embark on another chapter in my life, university life, at the College of Fine Arts in NSW, Australia. I lived on my lonesome in a studio apartment about a 15-20 minute walk from the heart of the Sydney CBD.
Before moving out of home, rice was a big part of my diet. However, I lived off a no-rice diet only because I didn’t own a rice cooker to begin with, and I never bothered or even considered getting one. When I wanted to eat rice, I would actually buy pre-cooked packed rice from Coles and all I had to do was chuck it in the microwave for 90 seconds and, rice! I am actually ashamed of having done that – I could’ve just made rice in a pot, but I didn’t. Cringe. I knew a few dishes just by eating the dishes that my Mom made when I was growing up, so at least that was a small plus. But, I basically made food that was sufficient enough for me in a sense that I didn’t care much for how it tasted like or how good it looked on the plate, I just just made whatever I could to fill my tummy when I was hungry. I was even too lazy to make my own sauce to go with my pasta that I actually lived off buying those packed pastas with powdered sauces for a year. All I had to do was put it in a pot with water, simmer until pasta was cooked, garnish with bacon, and done. Penne with Alfredo Sauce was my favourite. Cringe. Towards the end of my first year I became even lazier and start getting takeout food, almost at least 3-4 times a week for dinner. Cringe. And of course, who could forget instant noodles on a weekly basis. Cringe. Plus, I didn’t even know how to make a perfect sunny-side up egg to go with my instant noodles. Cry.
1st Year Kitchen Adventures
It was at that moment that I knew that I needed to do something about this, and so when I went back home for that Summer, I asked my Mom to teach me how to cook. Yes, before actually leaving for university, my Mom never really taught me how to cook, but then again I guess I never made the effort to learn how to cook during my 9-month hiatus from when I graduated high school before heading off to university. So I guess in a sense it was my fault. Being the great Mother she is, she taught me how to cook the classics, the food that I grew up with, delicious home-cooked Filipino food. It was also at this point that I discovered my love for food that I even started compiling recipes together into a cookbook just for myself.
I’ve mentioned this secret cookbook project to a few of my family members and friends, and I even showed them little snippets of what will be inside the cookbook. They’ve encouraged me to publish the cookbook and all of them are excited and waiting for the launch of it! The cookbook is still in the making. To be honest, I’ve not actually looked at it since late 2012. I am still keen on getting it published, I just have to tweak the design and add more recipes, which I will only probably be able to get onto when I finish my final year by the end of this year. So faithful fans, a little more patience! The cookbook will definitely come out!
By my second year (2012), I stopped buying pre-cooked rice and those instant pasta with powdered sauce packets from Coles. I stopped getting cheap takeouts and making instant noodles. Well, okay, I still had instant noodles, but probably on a monthly or even 3-month basis. I can also make perfect sunny-side up eggs! Achievement unlocked. I was a much better cook than I was when I started out in a sense that I knew a lot more dishes and I wasn’t afraid of improvising in the kitchen just a little bit. It was here as well that I overcame my fear of recipes. I can’t exactly explain the reasoning behind this, but I was afraid of reading and following recipes. I don’t know, for some reason it made me feel incompetent and vulnerable – again, I don’t know why I felt this. Also, during this year I moved out from living alone in the city to living with a flatmate up across the Harbour Bridge in the Lower North Shore. My flatmate was a relatively good cook too, so it made me want to be a better cook as well because we had a roster and cooked for each other every other day. I didn’t want to be judged for making terrible food, neither did I think it would be fair to get a good meal from her, and served her sh*t on my part.
2nd Year Kitchen Adventures
Third year was pretty much the same, I was still living with my flatmate so the standard of cooking remained pretty much the same. I improved on being able to follow recipes and try new things. I also made an effort in the presentation of my food. It was also in this year where I started to integrate food, or the concept/idea of food into my design. This then eventually led to my interest in wanting to work for a cookbook publishing or food magazine company, and ultimately what and who I want to be when I graduate. When I first started my course, I had no idea what kind of designer I wanted to be, and I never knew that I could find myself through food. I have no one else to thank but my Mom once again. Thank you for teaching me how to cook. I thank you because this has led me down a path that I am passionate about. Thank you so much. Also, I am more confident about my food that I am now able to share with my friends, and I think they love me for that if I’m not mistaken!
3rd Year Kitchen Adventures
I am now in my fourth and final year of my studies. I moved out from the Lower North Shore area and now ‘kind of’ living alone in the Eastern Suburbs. I say kind of because I live in a town house with 20 other students so it still feels like I have housemates, some I am closer to than others. This blog will be a representation of how I’ve progressed as a part-time uni student and part-time amateur cook. I am already looking forward to all my upcoming design and kitchen adventures! I hope you’ve enjoyed reading this post, and I hope that this has inspired those who don’t know how to cook, are lazy to cook, or are already cooking but want to improve, that indeed it’s not an easy journey, but you will get there eventually 🙂


 Left: Jialing ; Right: Allison
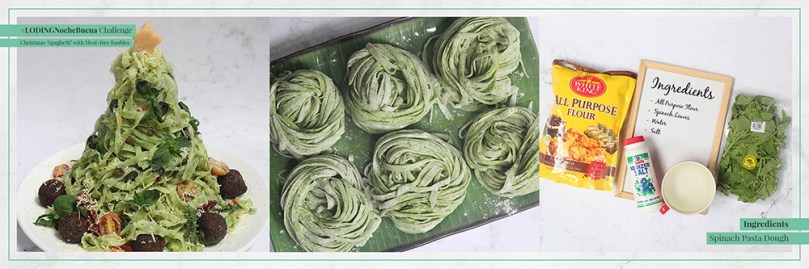 Amcarmen’s Kitchen: Christmas ‘Spaghetti’ with Meat-free Baubles (Vegan-friendly)
 Amcarmen’s Kitchen: Nutella & Mixed Berries Pizza
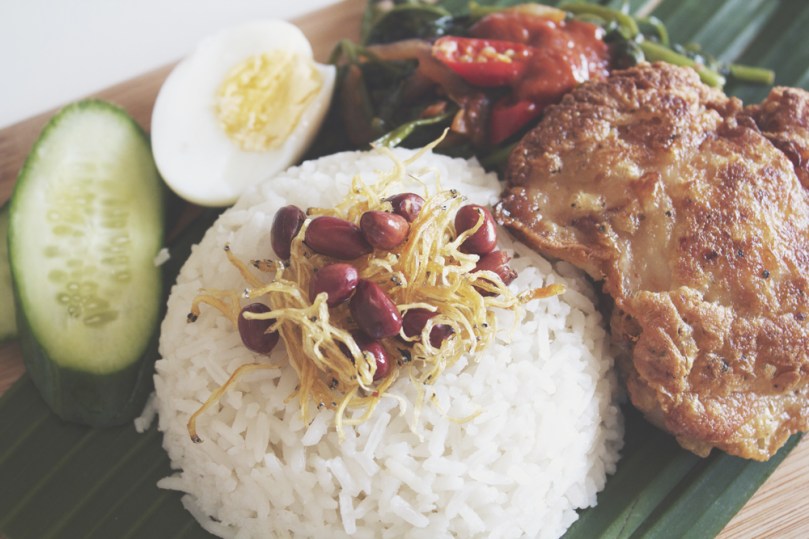 Amcarmen’s Kitchen: Nasi Lemak
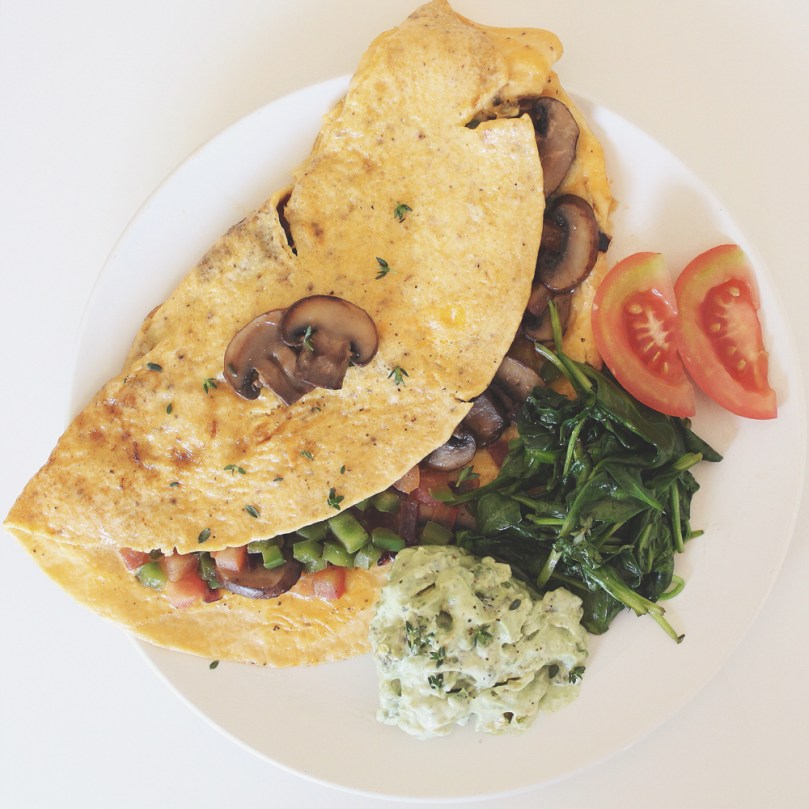 Amcarmen’s Kitchen: Cheesy Mushroom Omelette with Avocado Mint Greek Yoghurt & Wilted Spinach
 Amcarmen’s Kitchen: Hainanese Chicken Rice