Fudgy Avocado-Chilli Brownies

Fudgy Avocado-Chilli Brownies

Hello Everyone! Firstly, apologies for not getting this post up last week as originally planned. It has been a crazy hectic week with early days and late nights in the office – even working the weekends ‘til late to meet deadlines for an event that our department/team organised on this day just last week. So because of that, I barely had any time to sit down and comfortably write this post with a stress-free state of mind. Having said that, here I am, back on track again to share a deliciously (healthy?) dessert that’s sure to knock your socks off!

The first time I experienced a Chilli-Chocolate flavour combination was when I was still studying in Sydney for my Bachelor’s of Design Degree. I remember I was at Circular Quay with a friend, and one of the gelato stalls there (can’t remember the name) was having a chocolate gelato fest! I clearly remember the difficulty I had in choosing a chocolate flavour out of the possible 10 or 15 they had available. For those of you who don’t know me, I like my chocolate like how I like my men – dark. Just kidding – I just wanted to say that. I have no particular preferences on skin colour or race when it comes to men. Tangent aside; I’m just not very fond of milk or white chocolate unless I really REALLY crave for it. Well technically I’m not very fond of chocolate altogether unless I really want something chocolatey for dessert.

Fudgy Avocado-Chilli Brownies

Finally getting back to the original story, I remember having doubts on choosing just a regular Dark Chocolate Gelato, or one called Death by Chocolate which was essentially the Dark Chocolate Gelato, but with chilli in it. Me being adventurous to a certain extent (hey we all gotta draw a line somewhere!), I decided to go for the Death by Chocolate since never had I ever, up until that moment of course, tried the pairing of chilli and chocolate before. Boom. My life changed. It was a magical moment. The subtle yet just enough kick of heat that played on my tongue together with the cold creamy gelato that was slightly sweet and slightly bitter at the same time was to die for. It truly did live up to its name – Death by Chocolate. Ever since then, Chilli and Chocolate became my new best friends.

So what about Chocolate and Avocado? How did they also become my new best friends? Well, a couple of years back, when I was still studying abroad, I was out having a weekend (or maybe it was a weekday during the winter holidays) brunch with some of the people/friends I lived with. We went to a place known as Rustic Pearl in Surry Hills. When we were ordering our drinks to start off with, I was super curious about their Chocomolé Smoothie – Chocolate and Guacamole I presumed from its name after reading “with avocado and cocoa.” As usual, I was being my adventurous self and decided to try this foreign-to-me flavour pairing of Avocado and Chocolate. Did it change my life? Why yes. Yes it did. I still can’t quite describe the sensation nor taste of the pairing, but I absolutely love it.

Fudgy Avocado-Chilli Brownies

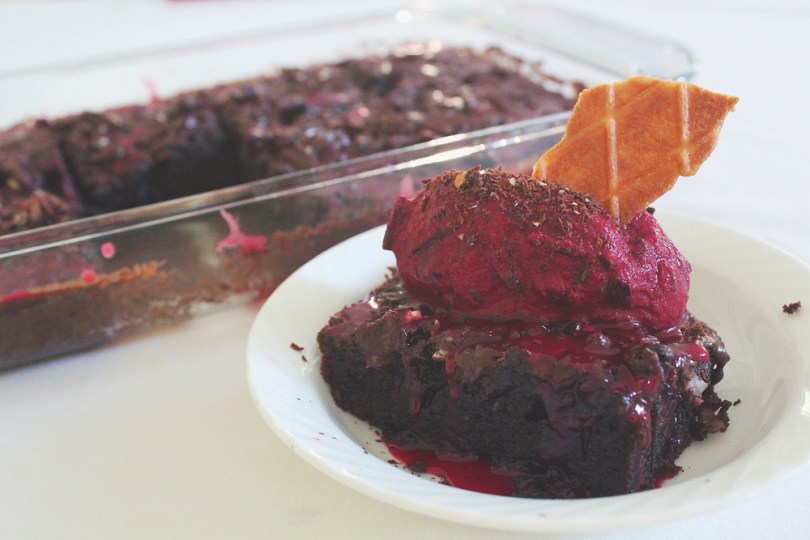
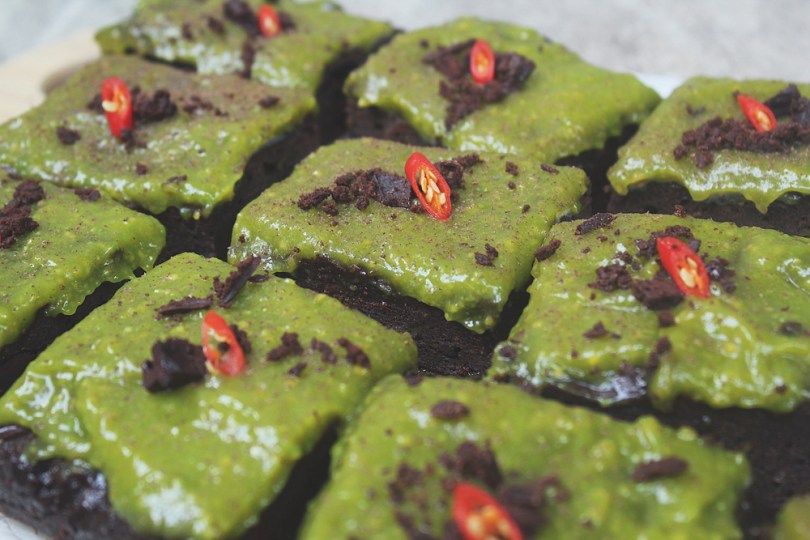
Therefore, Avocado, Dark Chocolate, and Chilli? Explosive. Every time I want to be adventurous and try something new when it came to gelato flavours, I always say to myself, “no, you need Avocado and Dark Chocolate-Chilli Gelato.” I had been craving brownies for the longest time ever, and this was the perfect opportunity to whip them up and feature them on the blog since it fit with the theme I made it fit with the theme by incorporating avocados into them. These brownies are dense, thick, fudgy, and rich. The frosting though compliments the richness perfectly since it is light in flavour. Yes the frosting tastes like avocado, and no, the brownies do not even if they have avocado mixed into them.

Anyway, apologies for the super long introduction – hope it made up for not posting last week *cheeky grin* but before we pop on over to the recipe below, please do check out the original recipe by Jessica over on How Sweet Eats.

Fudgy Avocado-Chilli Brownies Ingredients

PREP TIME 15 MINS | COOKING TIME 30 MINS | MAKES 12 BROWNIES

INGREDIENTS

For the brownie batter

  • 2 large ripe avocados, peeled, pitted, and mashed
  • 2 large free-range eggs
  • 1-2 red bird’s eye chillies, minced
  • 200g high-quality dark chocolate, melted
  • 50g high-quality dark chocolate, roughly chopped
  • 3/4 cup all-purpose/plain flour
  • 1/2 cup white granulated sugar
  • 1/4 cup unsweetened cocoa powder
  • 3 tbsp extra virgin olive oil
  • 1 tsp vanilla extract
  • 1/2 tsp baking powder
  • 1/4 tsp salt

For to avocado frosting

  • 1 large ripe avocado, peeled, pitted, and mashed
  • 2 & 1/2 cups confectioiner’s sugar
  • 1/4 tsp vanilla extract

METHOD

  1. Preheat oven to 180C (350F or gas mark 4), and generously grease a 9in x 13in baking dish with unsalted butter or non-stick cooking spray.
  2. Fudgy Brownies: Whisk the mashed avocados, melted chocolate, and minced chillies in a large mixing bowl before adding in the white granulated sugar. Whisk again until well combined. Add in the eggs, together with the vanilla extract and mix well.
  3. Sift in the plain flour, cocoa powder, baking powder, and salt into the avocado-chocolate mixture. Mix with a large spoon until JUST combined – be careful as to not overmix the batter.
  4. Stir in the extra virgin olive oil until it is well distributed into the batter and is somewhat smooth in consistency. Gently fold in the chopped chocolate, and then spread onto the prepared baking dish.
  5. Bake for 28-32 minutes, or until the middle has set. You can check this by inserting a toothpick into the centre. If it comes out clean, then the brownies are done. Remove from the oven and set aside for it to completely cool down.
  6. Avocado Frosting: Add the mashed avocado and vanilla extract into a medium-sized mixing bowl. Whisk until combined. Slowly incorporate the confectioner’s sugar into the avocado mixture and whisk until a smooth frosting forms.
  7. Frost the brownies once they have cooled down and top with extra chopped chocolate bits and chilli slices for an added extra kick of heat. Serve and enjoy immediately!

Fudgy Avocado-Chilli Brownies

Tip: If you’re going to pop them in the fridge to eat the next day, and the succeeding days to come, I recommend letting them come back up to room temperature before eating them. They can be even denser and slightly dry after coming out of the fridge.

Fudgy Avocado-Chilli Brownies

BON APPÉTIT

– Ally xx

myTaste.com

Advertisement
Beetroot Brownies with Chocolate Chunk Beet Ice Cream

Beetroot Brownies with Chocolate Chunk Beet Ice Cream

Hello Everyone! Firstly, I’d like to apologise to the moon and back to all my friends and followers for not posting in what seems like (or quite frankly has been) forever! A lot of things have been going on for the past few months, both in my personal and work life that I found it difficult to balance alongside with keeping up with Amcarmen’s Kitchen. The truth is, I haven’t had the time to write, or let’s just say that I did have the time, but I was either using my time unproductively or for something else instead of sitting down and getting back on track with posting. So yes, I am very sorry for the lack of consistency of posting on the blog in the recent months, but I’m planning on getting back on board with this for the remaining 3 months of 2017 (hopefully). It will however be a little scattered in a sense that you won’t see a set theme for the month just because I still have an archive of recipes that never got posted from the previous months.

Beetroot Brownies with Chocolate Chunk Beet Ice Cream

Back in July I started to hero beetroot in my cooking, and I shall continue that for the next two weeks (I think) before I share other recipes that still stick with the theme for 2017 which is Blood Pressure Friendly foods. Before I jump onto the recipe, I’d like to thank my friends Simon Swadling and Jialing Mew for contributing their recipes for this year’s Auguest – and yes, another thing that I did not plan properly for with everything going on so I apologise that I could only round up these amazing two friends for you!

Anyway, so somewhere down the path of whipping up this batch of beetroot brownies, which by the way includes Whittaker’s (New Zealand) Kaitaia Fire Chili Pepper Spice Dark Chocolate, I made the realisation that I basically just made red velvet brownies *cheeky grin* but of course, what makes a nice warm slice of heaven without ice cream? Specifically Chocolate Chunk Beet Ice Cream? Even MORE specifically, chunks of chocolate from Whittaker’s (New Zealand) Hawke’s Bay Black Doris Plum and Roasted Almonds Dark Chocolate? I think I just drooled. Cold ice cream with a kick of spice in it to really heighten the flavours atop a chocolatey, chewy, and moist brownie drizzled with a vibrant beetroot icing glaze? I’ll have the whole batch please thank you very much.

The original recipe to the brownies can be found over on BBC Good Food, and the original recipe to the beetroot ice cream can be found on Vegan Heaven.

PREP TIME 25 MINS | COOKING TIME 45 MINS | SERVES 12 SLICES

Note: Make the ice cream either the day before or a few hours (4-5 hours) to allow for freezing time before baking your brownies.

INGREDIENTS

Beetroot Brownies Ingredients

For the brownies

  • 500g whole raw beetroot, washed
  • 250g dark chocolate (70% cocoa), chopped*
  • 100ml olive oil
  • 3 large free range eggs
  • 1 & 1/4 cup plain flour
  • 3/4 cup granulated sugar
  • 2/3 cup cocoa powder
  • 1/3 cup macadamia nuts, roughly chopped
  • 2 tsp vanilla extract
  • 1 tsp baking powder

For the beetroot icing glaze

  • 1 cup icing sugar
  • 1 tbsp beetroot juice

Chocolate Chunk Beet Ice Cream Ingredients

For the ice cream

  • 500g whole raw beetroot, washed
  • 1 cup thick full fat coconut milk
  • 1/4 cup honey
  • 3 tablespoons chopped dark chocolate (Whittaker’s (New Zealand) Hawke’s Bay Black Doris Plum and Roasted Almonds)
  • 1 piece thumb-sized ginger, grated

*As mentioned earlier, I used Whittaker’s (New Zealand) Kaitaia Fire Chili Pepper Spice Dark Chocolate. But since I only had 100g of this, I used regular dark chocolate for the brownies and added half of the Whittaker’s chocolate to the mix, while the other half sprinkled on top of the baked brownies.

METHOD

  1. Boil the beetroots for both for the brownies and ice cream, in a pan of boiling salted water for 15-20 mins or until tender. Drain and leave to cool before peeling (wear clean rubber gloves to peel if you want to avoid beet-stained hands).
  2. Chocolate Chunk Beet Ice Cream: Roughly chop the cooked beets into small chunks and place them together with the coconut milk, honey, and the grated ginger in a food processor and blend until smooth.
  3. Transfer the beetroot-coconut mixture in a freezer-safe container, stir in the chococalte chunks and freeze for about 4-5 hours, whisking slightly every 20-30 minutes to avoid it getting too icy.
  4. Beetroot Brownies: Preheat oven to 180C (350F or gas mark 4) and grease a 10cm x 25cm baking dish. Chop a third of the cooked beetroots into small cubes and blitz the remainder in a blender or food processor to a paste. Sit the paste in a sieve over a bowl – just until you have collected 1-2 tbsp juice. Save the juice for the icing, and mix the olive oil into the beetroot paste. Set both aside.
  5. Bring a pan of water to a bare simmer and place a heatproof bowl with the chopped chocolate. Lightly stir until the chocolate had melted then set aside to cool slightly.
  6. Use an electric whisk to beat the eggs, sugar, and vanilla together in a large mixing bowl until light, fluffy, and tripled in size. Carefully fold the eggs into the beetroot and olive oil mixture, followed by the melted chocolate. Fold in the flour, cocoa powder, and baking powder, then add macadamia nuts and the chopped beetroot.
  7. Pour the mixture into your prepared baking dish and bake for 20-25 mins. The brownies should still be slightly gooey in the middle. Set aside to allow to cool slightly. While cooling, you can thaw your beetroot ice cream for 5-10 minutes before scooping and serving
  8. Mix enough reserved beetroot juice with the icing sugar to get a runny icing – dilute with water if you need. Remove brownies from the tin, drizzle with the icing and cut into squares.
  9. Enjoy a sinful slice or two, or more (who’s gonna stop you?) with family and/or friends, or you know, just by yourself *cheeky grin*.

Beetroot Brownies with Chocolate Chunk Beet Ice Cream

Beetroot Brownies with Chocolate Chunk Beet Ice Cream

BON APPÉTIT

– Ally xx

myTaste.com

Red Velvet Cheesecake Brownies

Red Velvet Cheesecake Brownies

Hello Everyone! First off, I’d like to apologise for not posting a recipe over the weekend – reason being just that I haven’t had the time to sit down and write one, and even better, my laptop charger decided that it was time for it to die. Also, another heads up, I will be leaving Lucena tomorrow and back to Bulacan where I will once again have no connection, so this will be the last post for March! I will see you again in April when I come back from my vacation!

Red Velvet Cheesecake Brownies

Moving on, today’s recipe is a belated one as it was meant to go up on Valentine’s Day. But for those who have been following for a while, you would’ve known that that was a busy week for me. I spent late morning/early afternoon of Valentine’s Day with a few of my very close friends over brunch at Cuckoo Callay for their Bacon Festival. I spent the rest of the day finalising my packing, moving all my things to a friends house, and having dinner with Vidhya that night. I left Sydney the next day.

I’ve made these a total of 3 times now. The first two were a complete fail and the third time was ALMOST a fail but worked out in the end. The first time I filled my square pan right to the top. I forgot how deep that pan was but nevertheless the brownies were too thick. The top started to brown a lot and it was nowhere close to being halfway done. The second time I tried it, I made the same mistake, but it wasn’t that I didn’t learn from my first mishap, it was another miscalculation on my side. I used a bigger dish this time, but one recipe wasn’t enough to fill it, do I doubled the quantities. It didn’t fill up all the way to the top, but it was still too thick. The brownie cooked about 3/4 of the way and the bottom was still batter. The second time I made it, I had planned on bringing it to office as a treat for my boss and managers, but because I didn’t want to bring in underdone brownies, I waited until my next day off to make the brownies again and finally bring them in on my last day of work.

Red Velvet Cheesecake Brownies

Now for the third batch, I used 1 and a half recipes this time and it was just the right thickness, FINALLY. When I said that it was an almost fail, it was because it was taking three times as long as it should to bake in the oven. The reason is because firstly, the oven at the lodge in Sydney is just unreliable. Secondly, I noticed that the top was starting to brown and the brownies aren’t all the way cooked yet, so I resulted to having to cover the top with foil so that it’d stop browning any further. Anyway, it got there in the end and it was a huge hit in the office! And Vidhya loved it as well, even though the had some from the first batch.

The original recipe can be found on Sally’s Baking Addiction. As stated before, I used 1 and a half recipes (just for the red velvet batter, I stuck to the same quantities for the cheesecake mix) from Sally’s so that my brownies were of the right thickness for my baking dish (about 8″ x 13″). Also, since at that time I was in midst of clearing out my pantry, I only had about a half cup of plain flour left, and quite a bit of self rising. I didn’t want to use self rising because I didn’t want it to rise, and Vidhya wasn’t home so I couldn’t borrow her plain flour. So I ended up using what’s left of Jialing’s wholemeal flour that she left at my place. I don’t exactly know if using wholemeal changes the texture or the taste, but it worked out in the end.

Red Velvet Cheesecake Brownies Ingredients

PREP TIME 15 MINS | COOKING TIME 45 MINS | SERVES 6-8

INGREDIENTS

For the red velvet brownies

  • 1 & 1/2 cups sugar
  • 1 cup wholemeal flour
  • 170g unsalted butter
  • 3 large free range eggs
  • 6 tbsp unsweetened cocoa powder
  • 1 tbsp vanilla extract
  • 1 & 1/2 tbsp liquid or gel red food colouring
  • 1 tsp white vinegar
  • 1/4 teaspoon salt

For the cheesecake mix

  • 8 ounces cream cheese, softened
  • 1 large free range egg, yolk only
  • 1/4 cup sugar
  • 1/2 tsp vanilla extract

METHOD

  1. Preheat oven to 180C. Grease an 8×13 baking dish with a little butter. Set aside.
  2. Red Velvet Brownie Mix: Beat the eggs together in a small bowl and set side. Then melt the butter in a large microwave safe bowl in 30-second increments until fully melted.
  3. Stir in the sugar, vanilla extract, cocoa powder, salt, food coloring, and vinegar, mixing each of the ingredients into the batter in that order.
  4. Whisk in the eggs, then fold in the flour until completely incorporated. Do not overmix.
  5. Pour the brownie batter into prepared baking pan. Leave about 3 or 4 tablespoons to top the mixture later for the top.
  6. Cheesecake Mix: Beat the softened cream cheese, sugar, egg yolk, and vanilla extract in a medium-sized bowl using a hand-held electrical mixer on medium speed. Make sure that the mixture is completely smooth (about a minute or so).
  7. Dollop spoonfuls of the cream cheese mixture on top of the prepared brownie batter and top with the remaining tablespoons of brownie batter. Glide a knife through the layers, creating a swirl pattern.
  8. Bake the brownies for 45 minutes or until a toothpick inserted in the middle comes out clean. Once down, allow the brownies to cool completely before cutting into squares.
  9. Cover the brownies and store at room temperature for 3 days or in the refrigerator for up to 6 days.

Red Velvet Cheesecake Brownies

Red Velvet Cheesecake Brownies

BON APPÉTIT

– Ally xx

myTaste.com