Mediterranean Baked Fish

Mediterranean Baked Fish

Hello Everyone! Two days ago I shared a post on my Instagram for an open collaboration that me and two of my foodie friends organised and hosted. It was for National Pack Your Lunch Day (March 10) and out of the three main components that made up my lunchbox, one of them was this Mediterranean Baked Fish.

This recipe is loaded with fresh Mediterranean, Greek flavours of olive oil, lemon, and capers. This combination enhances the flavour of the fish, while still allowing it to shine through as the star! Feel free to switch up the kind of fish that’s not only suitable to your liking, but what’s also fresh and available locally. Choose white fish that’s mild in flavour such as cod, haddock, striped bass, mahi-mahi, or grouper fish. I went with tilapia as that’s what’s affordable and readily available here in the Philippines.

Mediterranean Baked Fish

When it comes to baking fish, you don’t want to over cook it. As soon as the fish starts to flake easily, it’s done! For me, it took between 10 to 12 minutes for my fish to turn out perfect, but there are several factors that can differ the cooking time. For example, everyone’s oven cooks differently. Everyone’s fish fillet may be of a different size, shape, or thickness, and everyone’s baking dish heats up differently. Use your gut feeling when it comes to baking time here!

Mediterranean Baked Fish Ingredients

PREP TIME 10 MINS | COOKING TIME 10-12 MINS | SERVES 4

INGREDIENTS

  • 500g tilapia fillets (skinless and boneless)
  • 3 garlic cloves, thinly sliced
  • 2 tbsp capers
  • 1 tbsp olive oil
  • 1/2 tsp ground black pepper
  • 1/2 tsp ground coriander
  • 1/2 tsp ground paprika
  • 1/2 tsp salt
  • Fresh basil leaves, roughly chopped
  • Juice of half a lemon
  • Lemon slices
  • Zest of 1 lemon

METHOD

  1. Preheat oven to 218C (425F or gas mark 7) and grease a baking dish with a bit of olive oil or butter.
  2. Place the tilapia fillets in the basking dish and rub all the ingredients into the fish, making sure to coat them all. Arrange the fillets in the baking dish and top with the lemon slices. Set aside for about 15 minutes for the spices to infuse into the fish.
  3. Bake in the oven for 10 to 12 minutes, until the fish flakes easily with a fork.
  4. Garnish with more freshly chopped basil and serve with a warm salad or seasonal greens. Enjoy!

Mediterranean Baked Fish

BON APPÉTIT

– Ally xx

Follow me on my social media accounts:
Facebook: Amcarmen’s Kitchen
Instagram: @amcarmenskitchen
TikTok: @amcarmenskitchen

myTaste.com

Advertisement
Herb & Caper-crusted Salmon

Herb & Caper-crusted Salmon

Hello Everyone and happy first of July! If you’re a little pressed for time when it comes to preparing and cooking, this should be one of your go-to, quick yet healthy and light weeknight dinner recipes. The salmon is full of fresh flavours, tang, and heat! It could not be any simpler to make and goes from fridge to table in 20 minutes, even including all the sides you need to make this a complete meal! Simply chop up your herbs and capers, slather it onto your salmon filets, then bake. Easy peasy lemon squeezy right?

Herb & Caper-crusted Salmon

Salmon is one of the most nutritious foods you can find. This popular fatty fish is loaded with nutrients and may reduce risk factors for several diseases. It’s also super tasty, versatile, and widely available. Salmon is rich in long-chain omega-3 fatty acids, which have been shown to reduce inflammation, lower blood pressure and decrease risk factors for disease. Salmon is also rich in high-quality protein, which is needed to heal, protect bone health, and prevent muscle loss, among other benefits. The list goes on.

Before we dive into tonight’s recipe, please take the time to check out the original where I drew my inspiration from over on Iowa Girl Eats by Kristin. The original recipe crusts the salmon with a caper and dill-infused gremolata – which is just a fancy name for chopped parsley, lemon zest, and garlic. I used basil and green onions/scallions in place of the dill and parsley only because I could not find those herbs at the grocers. I think it worked well with the herb substitutes that I used, so don’t be afraid to mix up your herbs for the crust to what’s readily available at your local grocers.

Herb & Caper-crusted Salmon Ingredients

PREP TIME 10 MINS | COOKING TIME 7-9 MINS | SERVES 4

INGREDIENTS

  • 4 salmon filets, about 150g per filet
  • 2-3 garlic cloves, minced
  • 2 red bird’s eye chillies, minced
  • 2 stalks green onion, roughly chopped
  • 1 & 1/2 tbsp capers, drained, rinsed, and roughly chopped
  • Olive Oil
  • Salt and freshly ground pepper, to taste
  • Zest of 1 lemon

METHOD

  1. Preheat oven to 200C (400F or gas mark 4), and line a baking sheet with foil. Grease with a little bit of oil or butter and set aside.
  2. Mix the chopped/minced basil, green onions, chillies, capers, lemon zest, garlic, salt, and black pepper to the centre of a large plate. Squeeze a bit of lemon juice into the mixture to moisten.
  3. Rub the salmon filets with olive oil and then season generously with salt and freshly ground black pepper. Press the top and sides of each filet into the herb and caper mixture to create an even crust.Place the filets onto the prepared baking sheet and bake for 7-9 minutes. Be careful and do not over bake them!
  4. Once done, transfer the salmon filets to individual serving plates. Serve with a squeeze of fresh lemon juice on the salmon fillets, and some creamy mashed potatoes on the side with blanched asparagus or any other greens of choice. Enjoy!

Herb & Caper-crusted Salmon

Herb & Caper-crusted Salmon

BON APPÉTIT

– Ally xx

myTaste.com

Super Green Shakshuka

Super Green Shakshuka

Hello Everyone! I can’t believe that we’re already halfway through the year! Metro Manila has now shifted from Enhanced Community Quarantine to General Community Quarantine since the beginning of this week and I honestly don’t know what’s going to happen. We haven’t even started to flatten the curve, and here we are letting people out and go back to work with positive cases rising much higher than when we were under enhanced quarantine.

I’ll unfortunately be reporting back to the office starting this coming Monday and Tuesday, twice a week while the other 3 days will be to continue working from home. I honestly don’t see the point in risking my health and my life just to go into the office two times a week when there is still so much uncertainty with the on-going pandemic, especially when it’s ten times harder to get anywhere via public transport due to capacity limitations to comply with social distancing. It was hard enough to get a ride to and from work pre-pandemic times, what more now? I remember waiting almost an hour for a ride home on many occasions, now I’ll probably be waiting 2 or even more hours just to get home, exposed in the open to the virus. While there’s a shuttle service initiated by the company I’m working for to avoid this issue, I don’t know how long they’ll be able to keep up with a door-to-door pick-up/drop-off service.

Super Green Shakshuka

Anyway, mini tangent/rant aside, a new month means it’s time to move onto the next colour of the rainbow for this year’s theme on Amcarmen’s Kitchen! The recipe that I’ll be sharing with you tonight is inspired by a dish that I had way back when I was still living and studying in Australia. It was in fact a weekend farewell brunch for me as I left the country the following day for good after having completed my degree and graduated a couple months back before this weekend brunch gathering.

I first came across the idea of a green shakshuka at SHUK North Bondi. Green shakshuka puts a healthy green spin on the classic Middle Eastern shakshuka recipe. Traditionally, a shakshuka is a mixture of simmering tomato sauce and spices, topped with gently poached eggs. Within the tomato sauce there’s diced onions, garlic and bell peppers. Lastly, it’s garnished with freshly chopped herbs such as cilantro and parsley.

The great thing about a shakshuka is its versatility. Similar to how you can toss most ingredients from your fridge into a smoothie, the same can be said for a shakshuka. For this green shakshuka, I’ll be replacing the tomato sauce and bell peppers with an abundance of sautéed green vegetables.

Super Green Shakshuka Ingredients

Whatever veggies you’ve got lying around, just throw them in! For my improvised take on this recipe, I’m going with broccoli and asparagus for some bite, and leafy greens such as locally grown kale, spinach, chilli, and malunggay leaves. I also threw in some green chillies for a kick of heat and some fresh basil and green scallions for freshness.

Super Green Shakshuka Ingredients

PREP TIME 10 MINS | COOKING TIME 30 MINS | SERVES 3

INGREDIENTS

  • 3 large free range eggs
  • 1 cup broccoli, roughly chopped
  • 1 cup kale leaves, roughly chopped
  • 1 cup spinach leaves
  • 3/4 cup chilli leaves, stemmed
  • 1/2 cup asparagus, roughly chopped
  • 1/4 cup malunggay leaves, stemmed
  • 2-3 garlic cloves, finely minced
  • 2 large green chillies, sliced
  • 2 small red onions, finely diced
  • 2 small red bird’s eye chillies, sliced
  • 1 stalk green scallions, chopped
  • 3 tbsp olive oil
  • 2 tsp black olives, sliced
  • 2 tsp capers
  • Handful basil leaves, roughly chopped
  • Salt and ground black pepper, to taste
  • Shaved parmesan cheese

Optional (to serve with)

  • 1 large avocado, peeled, pitted, and sliced (optional)
  • Crusty bread, toasted

METHOD

  1. Heat olive oil in a non-stick sauté pan over medium heat. Add the minced garlic and sauté until golden brown and fragrant, about 30 seconds. Be careful to not burn the garlic. Then add in the diced onions together with half of the sliced green chillies and the white parts of the scallions, cooking until they soften, about 1-2 minutes.
  2. Next, add in the chopped broccoli and cook for about a minute before adding the chopped asparagus in. Season with a touch of salt and freshly ground black pepper. Give it a good mix and cook for a further minute or so until they start to soften a bit.
  3. Add in the chopped kale and spinach leaves with just a touch of water. Cover for about 30 to 45 seconds to allow the steam to wilt the leaves. Add in the chilli leaves followed by the malunggay leaves and give it a good mix. Cook, uncovered, for about a minute or two; turning the heat down to low at this point so that your veggies do not overcook.
  4. Flatten the veggie mixture with a spatula and create 3 small wells. Crack an egg into each well and season with a touch of salt freshly ground black pepper. Add the sliced black olives, capers, red and green chillies, and green scallions. Cook the eggs until done to your liking. You can also cover to steam and cook the eggs faster (about two minutes for cooked whites and a lovely runny yolk). Heat off, and sprinkle with the chopped basil leaves to garnish.
  5. Serve immediately with your choice of sliced avocado or crusty bread, or ever both for a heavy brunch. Enjoy!

Super Green Shakshuka

You can easily double this recipe to serve more hungry tummies. It’s an easy, one-pan dish filled with lots of green goodies and poached eggs. Whether you eat it for breakfast or dinner, it’s a hearty, nutrient-packed meal that will last you through any season!

Super Green Shakshuka

BON APPÉTIT

– Ally xx

myTaste.com

Ropa Vieja con Huevos Rancheros

Ropa Vieja con Huevos Rancheros

Hello Everyone! You guys must be thinking that I’m on a roll here! Three consecutive recipes?! Don’t get used to it because it’s just for this one time to get everything wrapped up for this month so that I can start a new theme for the month of June! I did mention in a couple of posts back that for the month of June, I’ll be switching up my upload schedule day to Mondays, and the reason does indeed correlate to the theme. I’ll keep everyone on their toes for a while longer and come Monday, all will be revealed!

I had lots of fun last night a my friend’s place for sungkai (iftar) and of course to celebrate her daughter turning 1! Tonight’s post is a little later than usual this time around because I literally just came back from another night out for a sungkai catch up dinner with friends. I’ve probably mentioned this before in a post somewhere on this blog, but I’ll mention it again just to clear things up – I’m not a Muslim. I don’t practice ramadhan which then subsequently means that I don’t have to break fast for iftar. Yes I was born and bred in a Muslim country, and even though I have been exposed to these practices for practically my whole life, I wasn’t born into the religion (hint on the ‘Third Culture Foodie’!).

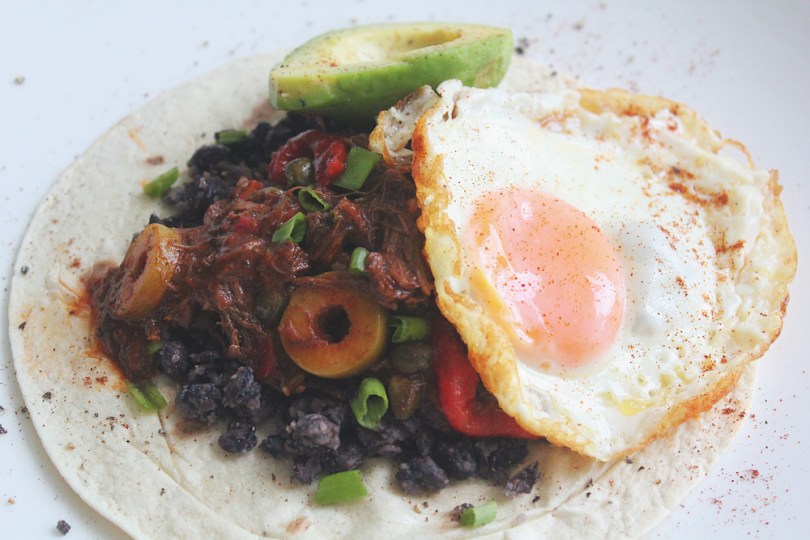
Anyway, tonight’s recipe is sort of another way you can use leftover Ropa Vieja to make similar, but not so Eggs Benny dish. Okay, I mentioned in yesterday’s post about this Latin American café that Jialing and I found during one of our “Fatness Fridays” adventures. While I thought back to this day, I was totally convinced that the Huevos Rancheros dish that I had was a marriage of it and the Ropa Vieja sandwich that Jialing had, but it wasn’t until I scrolled through hundreds of Instagram photos on my feed to recall the dishes to find out that they were two separate things.

Ropa Vieja con Huevos Rancheros

In my last post I said that a Ropa Vieja Eggs Benny came into mind – which it did, but that wasn’t they way I had initially imagined it. In fact, this Ropa Vieja con Huevos Rancheros was how I pictured the ‘Eggs Benny’ dish to look, but in the end I decided to reimagine it just because this didn’t really have the feel of an Eggs Benny dish. However, I didn’t want this dish to end up in my archive of ‘will never get around to posting’ but since this dish is sort of related to the last two I posted, I thought I’d share the recipe with you! I mean, it’s essentially, well practically identical to the last recipe, just a few minor differences, especially with the plating.

Huevos Rancheros, or in English “rancher’s eggs”, is a traditional breakfast dish served as a mid-morning fare on rural Mexican farms – hence its name. The dish is made up of fried eggs that is served atop a lightly fried tortilla (traditionally corn, but other adaptations have used wheat tortillas instead), with a tomato-chilli sauce, refried beans, and slices of avocado or guacamole. You could say that my adaptation to marry Ropa Vieja and Huevos Rancheros together is an amped up version of a humble and traditional Huevos Rancheros brekkie.

Ropa Vieja con Huevos Rancheros Ingredients
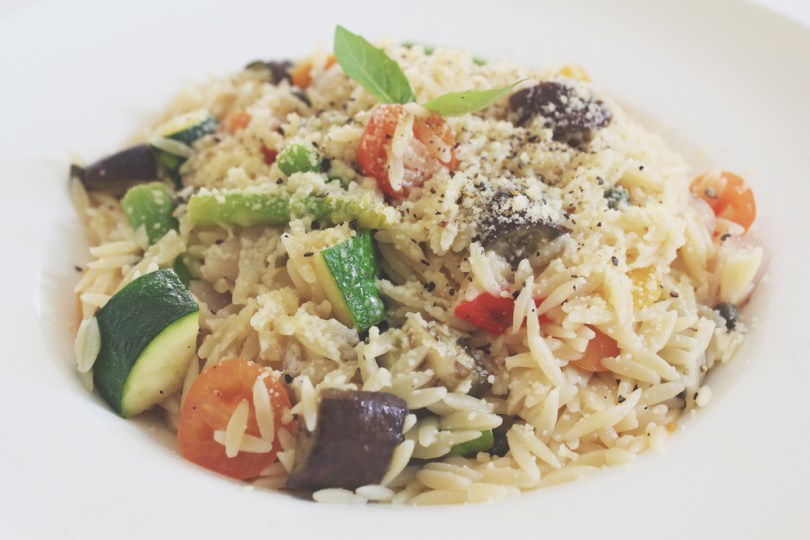
Ignore the other ingredients photographed but not mentioned below – the other ingredients are of the ropa vieja dish to accompany this dish!

PREP TIME 5-10 MINS | COOKING TIME 10-15 MINS* | SERVES 3

*Provided that you’ve made your Ropa Vieja ahead of time, i.e. the night before, if not then make sure you allocate yourself 3-4 hours altogether for this recipe

INGREDIENTS

  • Leftover Ropa Vieja
  • 3 super soft flour tortilla wraps
  • 3 large free range eggs
  • 2 large avocados, pitted, peeled, and halved**
  • 1 can (16oz) organic black beans, drained, blanched in hot water, and smashed
  • Chopped spring onions, to garnish
  • Tabasco sauce, to taste

**Squeeze a touch of lemon or lime juice to prevent it from browning

METHOD

  1. If you haven’t pre-made your Ropa Vieja for this recipe, then start of with this before moving on to the other components of the dish. Allocate yourself about 3-4 hours prior.
  2. Heat about a tablespoon of olive oil in a small frying pan. Crack the egg in and fry until the edges start to brown. I personally like my sunny-side up eggs this way – the browned edges gives a nice nutty flavour to the whites which is total yum! Repeat for the remaining eggs.
  3. In a medium-sized non-stick frying pan, lightly heat the tortilla wraps until they start to slightly brown. Remove from the pan and repeat for the remaining wraps.
  4. Place the tortilla wrap on a plate and top with the smashed black beans. Make a nest in the middle and top with the ropa vieja, sunny-side up egg, and halved avocado to the side. Drizzle a bit of tabasco sauce over and sprinkle some chopped spring onions. Serve and enjoy!

Ropa Vieja con Huevos Rancheros

Tune in on Monday for an all new theme and a bunch of yummy recipes!

BON APPÉTIT

– Ally xx

myTaste.com

Ropa Vieja Eggs Benedict

Ropa Vieja Eggs Benedict

Hello Everyone! I’m getting this post up way earlier than I usually do just because I’m about to leave and head on over to a friend’s house to celebrate her daughter turning 1 today! I can’t believe the little munchkin is a year older already – it felt just like yesterday I was holding her in my arms just only being 2 or 3 months old. Gosh how time flies by so quickly! With that being said, I honestly have no idea what time I’ll be back home tonight and thus the early upload.

Tonight’s recipe is a branch off from the Ropa Vieja recipe that I posted just last night. When I was thinking of what other Eggs Benny recipes I could whip up to share with you guys, I immediately thought back to the time Jialing and I had our weekly “Fatness Friday” sessions in-between our classes in search of great food at cafés and/or restaurants that we have yet to explore. One Friday afternoon, we came across a Latin American café in Surry Hills (no, not Cafe con Leche hehe) I don’t actually remember the name of the place. Jailing had the Ropa Vieja sandwich while I had their Huevos Rancheros, and BOOM! A Ropa Vieja Eggs Benedict dish came into mind.

Ropa Vieja Ingredients

PREP TIME 5-10 MINS | COOKING TIME 10-15 MINS* | SERVES 3

*Provided that you’ve made your Ropa Vieja ahead of time, i.e. the night before, if not then make sure you allocate yourself 3-4 hours altogether for this recipe

INGREDIENTS

For the eggs benedict

  • Leftover Ropa Vieja
  • 3 English muffins, halved, slightly toasted, and buttered
  • 3 large free range eggs
  • 1 large avocado, peeled, pitted, and smashed**
  • 1 can (16oz) organic black beans, drained, blanched in hot water, and smashed
  • Chilli flakes, to garnish (optional)
  • Chopped spring onion, to garnish

For the tabasco hollandaise sauce

  • 3 large free range eggs, yolks separated
  • 175g unsalted butter, cut into cubes, at room temperature
  • 2 tbsp water
  • 2 tbsp fresh lemon juice
  • 1 tbsp tabasco sauce, less or more to adjust to your liking
  • Fresh Thyme Leaves
  • Ground salt and black pepper to taste

**Squeeze a touch of lemon or lime juice to prevent it from browning

METHOD

  1. If you haven’t pre-made your Ropa Vieja for this recipe, then start of with this before moving on to the other components of the dish. Allocate yourself about 3-4 hours prior.
  2. Tabasco Hollandaise Sauce: While the balsamic reduction is underway and slowly simmering, start on the Hollandaise sauce. Place a heatproof bowl over a medium saucepan that is quarter-filled with water. Make sure that the bowl should fit snugly into the pan without touching the water (lift the bowl to check and remove some water if it does). Bring the water to a boil over high heat, then reduce heat to very low so the water is barely simmering (there should be almost no movement at all). It is important that the water is barely simmering while making the sauce – if it is too hot, the egg yolks will cook too much and the sauce will curdle.
  3. Place the egg yolks and the 2 tablespoons of water in the heatproof bowl and place over the pan. Whisk the mixture constantly for 3 minutes or until it is thick and pale, has doubled in volume and a ribbon trail forms when the whisk is lifted.
  4. Add the butter a cube at a time, whisking constantly and adding another cube when the previous one is incorporated completely (about 10 minutes to add it all in). If butter is added too quickly, it won’t mix easily with the egg yolks or the sauce may lose volume. At the same time, it is important that the butter is at room temperature and added a cube at a time, so that it doesn’t take too long to be incorporated – if the sauce cooks for too long, it can curdle.
  5. Remove the bowl from the pan and place on a heatproof surface. The cooked sauce should have the consistency of very lightly whisked thickened cream. Whisk in the lemon juice, tabasco sauce, fresh thyme leaves, and season with salt and pepper. Set aside.
  6. Poached Eggs: Bring small saucepan of water to the boil over medium-high heat, then reduce the heat to low-medium – the water should be just simmering. Add in the vinegar and stir. Crack one egg into a small bowl and quickly, but gently pour it into the water. Repeat with the other egg. A really soft poached egg should take around 2 minutes, but if you want it a bit more firm, it will take about 4 minutes. To check if they’re cooked right, carefully remove the egg from the pan with a slotted spoon and give the yolk a gentle push (you can tell just by your instincts if it is under or over – or perfect)!
  7. Assembly: Spread the smashed avocado on the toasted and buttered English muffin half and top with the smashed black beans. Build up with the ropa vieja followed by the poached egg. Drizzle a generous amount of the tabasco hollandaise sauce and sprinkle some chilli flakes and chopped spring onions. Serve and enjoy!

Ropa Vieja Eggs Benedict

Ropa Vieja Eggs Benedict

Next month I’ll start off with a whole new theme so stay tuned for that! To give you guys a clue, I’ll be switching up my upload schedule day to Mondays just for the month of June. Yes, the fact that I’ll be posting on Mondays does correlate to the theme! My loyal and long term followers may know, and to anyone who wants to take a stab and guess, comment down below!

Don’t forget that the overall theme for Amcarmen’s Kitchen for 2018 is Breakfast Eats!

But before that, I have one more recipe that will go up tomorrow night so stay tuned for that to know what else you can do with leftover Ropa Vieja!

BON APPÉTIT

– Ally xx

myTaste.com

Ropa Vieja

Ropa Vieja

Hello Everyone! So if you read last week’s post, you’ll know that tonight is part 1 of the actual recipe that I’ll be sharing tomorrow night. I’ve decided to split it up just for easy future reference, i.e. if you’re just looking for a mouth-watering Ropa Vieja recipe without it being in an Eggs Benny, then this is it! I first came across this dish during my university years in Australia. It wasn’t even the main highlight of the dish, rather a small side to go with the Colombian-style Arepas that was  my absolute favourite brunch dish then *drools just thinking about how much I miss having it in my tummy* It was a little place that Jialing had stumbled upon when she took the wrong bus to uni and got off at a stop that was just opposite Cafe con Leche.

Ropa Vieja is actually a Spanish term that directly translates to “old clothes” as the shredded beef and vegetables that are the main components of the dish resemble a heap of colorful rags. Though the dish dates back to the Middle Ages of Spanish Sephardi, it was then taken to Cuba where the Cubans made it their own. Ropa Vieja is now one of Cuba’s most popular and beloved dishes; in fact, so popular in fact that it is one of the country’s designated national dishes! It is also popular in other areas or parts of the Caribbean such as Puerto Rico and Panama.

The traditional method of braising the meat is in water. However, for this recipe, I am going to release all those flavourful beef juices directly into the sauce together with carrots, celery, bay leaves, onion, and garlic to get all the flavours of a stock going at the same time. This infuses the sauce with some umami-flavour qualities and natural sweetness from the vegetables, making everything of braising by this method super rich and mouth-watering. Do check out the original recipe by Kimberly from The Daring Gourmet.

Ropa Vieja Ingredients

Ignore the avocado, black beans, and the egg in the shot above, that’s for the Eggs Benedict recipe to follow tomorrow!

PREP TIME 15 MINS | COOKING TIME 4 HOURS 30 MINS | SERVES 8-10

INGREDIENTS

  • 1kg tender beef chuck
  • 1 cup beef broth*
  • 1/2 cup dry white wine**
  • 4 chipotle peppers in adobo sauce, sliced
  • 4 garlic cloves, minced
  • 2 dried bay leaves
  • 1 can (16oz) chopped tomatoes with sliced olives
  • 1 brown onion, halved and sliced thinly
  • 1 large carrot, sliced
  • 1 large celery stalk, sliced
  • 1 medium-sized red, yellow, and green capsicum
  • 1 heaped tbsp tomato paste
  • 1 tbsp baby capers, rinsed and drained
  • 2 tsp chilli powder
  • 2 tsp dried oregano
  • 2 tsp ground cinnamon
  • 2 tsp smoked paprika
  • 2 tsp sea salt
  • 1/2 tsp freshly ground black pepper
  • 1/8 tsp ground cloves
  • 1/8 tsp ground nutmeg
  • Chopped spring onion, to garnish

*Or 1 beef bouillon cube dissolved in 1 cup of hot water

**The first time I made this dish, I omitted the dry white wine only because I didn’t have any on my pantry shelf at that moment. For those who are living in, or know about Brunei, it’s not as easy as popping over to the shops to buy a bottle. Anyway, I found that the flavours weren’t really brought out as much as when I attempted this dish for a second time with the wine. It felt flat like that pop or zing was missing from it.

METHOD

  1. Pat the beef dry and rub all over with the dried herbs, spices, and seasoning -dried oregano, chilli powder, ground cinnamon, ground cloves, ground nutmeg, smoked paprika, sea salt and ground black pepper.
  2. Heat about a tablespoon in a slight large Dutch oven over high heat. Once it is very hot and starts to smoke a bit, add the beef and brown generously on all sides. Once done, transfer the beef to a plate. Do not discard the drippings and blackened bits in the pot. They are key to the flavour!
  3. Turn the heat down to medium, then add the minced garlic and cook until slight golden and fragrant. Follow with the sliced onion, cooking until softened before adding the sliced carrots and celery, and the chopped chipotle peppers. Cook for about 15 minutes until caramalised. Deglaze the pot the the dry white wine and bring it to a rapid boil, scraping up the browned bits at the bottom of the pot.
  4. Add the chopped tomatoes, tomato paste, beef broth, and bay leaves. Leave to simmer for about 5 minutes.
  5. Return the beef and bring to a boil. Reduce the heat down to low, then cover and simmer for 3-4 hours or until the beef is fork tender and falls apart easily.
  6. While the beef is slowly simmering away, you can move onto roasting your capsicums. Turn a stovetop burner to its highest setting and place the capsicum directly on the flame. Use a pair of tongs to turn them over until the skin has completely blackened. Put the capsicum in a heat-proof mixing bowl and cover with plastic wrap. The skin will loosen as it steams, and once it has cooled down a bit, you can easily remove the skin with your fingers under running water. Slice thinly.
  7. Once the beef is done, discard the celery, carrots, and bay leaves. Remove the beef from the sauce, transfer to a plate and shred. Return the shredded beef to the pot and stir in the roasted capsicum and baby capers. Season with salt and pepper to taste and leave uncovered to simmer until the sauce has thickened, about a further 15-20 minutes.
  8. Serve the beef in a large serving dish and enjoy! Best served with steamed rice and black beans on the side.

Ropa Vieja

Ropa Vieja

As per Kimberly, for a variation on traditional beef you can also use pork or chicken, bone-in/skin-on for the most flavour, or boneless breast or thighs. I might try this recipe out with succulent pork shoulders next time *already drooling*.

BON APPÉTIT

– Ally xx

myTaste.com

Smashed Avo Toast (9 ways)

Hello Everyone! Finally I am back on track with my posts and the theme for the month of April is Avocado! All you need is about half a medium-sized avocado everyday as it provides 1% of the calcium, 5% of the magnesium, and 10% of the potassium that you need daily. Avocados are a good source of potassium, which can help lower blood pressure, and in addition, the dark green flesh just under an avocado’s brittle skin contains large amounts of disease-fighting compounds. Though avocados are proven to help lower blood pressure and an abundance of health benefits, we have to be weary of how much we intake daily as they are also high in calories.

Tonight, I will be sharing 9 different ways you can start your mornings with a smile on your face with 9 different smashed avocado toasts! Of course, don’t limit yourselves to just these 9 recipes; I encourage you to get creative with your smashed avo toasts and share your creations with me on Instagram using the hashtag #amcarmenskitchen

1. Five Pepper Smoked Salmon with Red Onions, Capers & Chilli Flakes

Five Pepper Smoked Salmon with Red Onions, Capers & Chilli Flakes

PREP TIME <5 MINS | COOKING TIME  | SERVES 2

INGREDIENTS

  • 2 slices multigrain brown bread
  • 1/2 avocado, smashed
  • 1 small red onion, cut into rings
  • 2 tsp capers
  • Smoked salmon slices with five peppers

METHOD

  1. Lightly toast bread in a toaster for about 1-2 minutes.
  2. Spread a generous amount of the smashed avocado onto the toast and top with smoked salmon, red onion rings, and capers. Sprinkle with a touch of chilli flakes for an added kick (optional).
  3. Enjoy!

2. Medley of Grape Tomato Caprese Salad with Balsamic Reduction

Medley of Grape Tomato Caprese Salad with Balsamic Reduction

PREP TIME <5 MINS | COOKING TIME 5 MINS | SERVES 2

INGREDIENTS

  • 2 slices multigrain brown bread
  • 1/2 avocado, smashed
  • 1 punnet (250g) grape tomato medley, halved
  • 4 cherry bocconcini cheese, sliced
  • 4 tbsp balsamic vinegar
  • Ground sea salt and black pepper, to taste
  • Olive Oil
  • Sweet basil leaves

METHOD

  1. Combine the grape tomatoes, bocconcini slices, and sweet basil leaves in a small bowl. Drizzle with olive oil and season with a touch of ground sea salt and black pepper to taste. Set aside and leave to macerate.
  2. Meanwhile, heat the balsamic vinegar in a small non-stick saucepan over medium-high heat. Simmer, continuously stirring to check on the consistency of the glaze, until the vinegar reduces to a thick sauce, about 5 minutes. Remove from the heat and leave to cool down for a bit.
  3. Lightly toast bread in a toaster for about 1-2 minutes.
  4. Spread a generous amount of the smashed avocado onto the toast, top with the tomato cappers salad, and drizzle the balsamic reduction over the salad.
  5. Enjoy!

3. Sliced Banana & Pumpkin Seeds drizzled with Honey

Sliced Banana & Pumpkin Seeds drizzled with Honey

PREP TIME <5 MINS | COOKING TIME  | SERVES 2

INGREDIENTS

  • 2 slices multigrain brown bread
  • 1/2 avocado, smashed
  • 1 large banana, sliced
  • Honey
  • Pumpkin seeds

METHOD

  1. Lightly toast bread in a toaster for about 1-2 minutes.
  2. Spread a generous amount of the smashed avocado onto the toast, top with banana slices and pumpkin seeds, and drizzle with honey.
  3. Enjoy!

4. Soft-boiled Egg with Chilli Flakes & Parsley

Soft-boiled Egg with Chilli Flakes & Parsley

PREP TIME <5 MINS | COOKING TIME 6 MINS | SERVES 2

INGREDIENTS

  • 2 slices multigrain brown bread
  • 1/2 avocado, smashed
  • 2 large free range eggs
  • Chilli Flakes
  • Parsley, roughly chopped

METHOD

  1. Bring a small pot of water to a rolling boil. Once boiling, reduce the water to a rapid simmer before gently lowering the eggs one by one into the pot. Cook for 5 minutes for a runny yolk, or 7 minutes for a barely set yolk. Once done, remove from the heat and place in an ice bath to stop the cooking process. Once cool, peel the shell off and slice.
  2. Lightly toast bread in a toaster for about 1-2 minutes.
  3. Spread a generous amount of the smashed avocado onto the toast, top with the sliced eggs, and sprinkle with a touch of chilli flakes, and parsley.
  4. Enjoy!

5. Sliced Strawberries & Crumbled Goat’s Cheese with Balsamic Reduction and Peppermint Leaves

Sliced Strawberries & Crumbled Goat's Cheese with Balsamic Reduction and Peppermint Leaves

PREP TIME <5 MINS | COOKING TIME 5 MINS | SERVES 2

INGREDIENTS

  • 2 slices multigrain brown bread
  • 1/2 avocado, smashed
  • 4 large strawberries, sliced
  • 4 tbsp balsamic vinegar
  • Goat’s cheese, crumbled

METHOD

  1. Heat the balsamic vinegar in a small non-stick saucepan over medium-high heat. Simmer, continuously stirring to check on the consistency of the glaze, until the vinegar reduces to a thick sauce, about 5 minutes. Remove from the heat and leave to cool down for a bit.
  2. Lightly toast bread in a toaster for about 1-2 minutes.
  3. Spread a generous amount of the smashed avocado onto the toast, top with the sliced strawberries, crumbled goat’s cheese, and drizzle the balsamic reduction over the strawberries.
  4. Enjoy!

6. Sautéd Brown & Shimeji Mushrooms topped with Fried Enoki & Parsley

Sautéd Brown & Shimeji Mushrooms topped with Fried Enoki & Parsley

PREP TIME <5 MINS | COOKING TIME 8 MINS | SERVES 2

INGREDIENTS

  • 2 slices multigrain brown bread
  • 1/2 avocado, smashed
  • 4 large brown mushrooms, sliced
  • 1/2 bunch (100g) shimeji mushrooms
  • 1/2 bunch (50g) enoki mushrooms
  • 2-3 garlic cloves, minced
  • Ground sea salt and black pepper, to taste
  • Knob of unsalted butter
  • Olive oil
  • Parsley, roughly chopped

METHOD

  1. Melt the unsalted butter in a small frying pan over medium-high heat and add about a teaspoon of olive oil.
  2. Sauté the minced garlic until golden brown and fragrant, about 30 to 45 seconds. Add in the sliced brown mushrooms and shimeji mushrooms and cook until tender, about 3-4 minutes.  Season with pinch of ground sea salt and black pepper. Once tender, remove from the pan and set aside.
  3. In the same pan, heat about 3 tbsp of olive oil over high heat until slightly smoking. Add the enoki mushrooms in and fry until golden brown in colour, about 2-3 minutes. Once done, transfer to a small plate lined with a paper towel. Set aside.
  4. Lightly toast bread in a toaster for about 1-2 minutes.
  5. Spread a generous amount of the smashed avocado onto the toast and top with the sautéd garlic mushrooms and the fried enoki mushrooms. Garnish with a touch of ground black pepper and parsley.
  6. Enjoy!

7. Diced Mango with Chilli Powder & Peppermint

Diced Mango with Chilli Powder & Peppermint

PREP TIME <5 MINS | COOKING TIME  | SERVES 2

INGREDIENTS

  • 2 slices multigrain brown bread
  • 1/2 avocado, smashed
  • 1 small mango, diced
  • Chilli powder
  • Peppermint leaves

METHOD

  1. Lightly toast bread in a toaster for about 1-2 minutes.
  2. Spread a generous amount of the smashed avocado onto the toast and top with the diced mangoes, chilli powder, and peppermint leaves.
  3. Enjoy!

8. Roasted Chickpeas & Parsley

Roasted Chickpeas & Parsley

PREP TIME <5 MINS | COOKING TIME 10 MINS | SERVES 2

INGREDIENTS

  • 2 slices multigrain brown bread
  • 1/2 avocado, smashed
  • 1 can (200g) chickpeas, drained
  • 2 tsp ground smoked paprika
  • Ground sea salt and black pepper, to taste
  • Olive oil
  • Parsley, roughly chopped

METHOD

  1. Preheat oven to 200C (400F or gas mark 6). Line a baking tray with aluminium foil. Set aside.
  2. Add the drained chickpeas in a small bowl together with the ground smoked paprika, sea salt, black pepper, and a drizzle of olive oil. Toss to coat.
  3. Spread the chickpeas onto the prepared baking tray and roast in the oven for about 10 minutes. Once done, remove from the oven.
  4. Lightly toast bread in a toaster for about 1-2 minutes.
  5. Spread a generous amount of the smashed avocado onto the toast and top with the roasted chickpeas and parsley.
  6. Enjoy!

9. Chorizo Sausage & Sweet Corn

Chorizo Sausage & Sweet Corn

PREP TIME <5 MINS | COOKING TIME 4-6 MINS | SERVES 2

INGREDIENTS

  • 2 slices multigrain brown bread
  • 1/2 avocado, smashed
  • 1 chorizo sausage, sliced
  • 1 can (200g) sweet corn kernels, drained
  • Olive oil

METHOD

  1. Heat olive oil in a small frying pan over medium-high. Pan-fry the chorizo slices until browned, about 2-3 minutes per side. Once done, transfer to a plate lined with a paper towel. Set aside.
  2. Bring a small pot of water to a rolling boil and blanch the sweet corn kernels for about a minute or two. Drain and set aside to cool down for a bit.
  3. Lightly toast bread in a toaster for about 1-2 minutes.
  4. Spread a generous amount of the smashed avocado onto the toast, top with the pan-fried chorizo sausages and sweet corn kernels, and drizzle with a bit of the chorizo oil (optional).
  5. Enjoy!

Just a little side note before I end tonight’s post, I spent the whole day amending quite possibly the same artwork because their comments/amendments were all on an installation basis. Such completely waste of time which then prevented me from actually completing the work I had set to do today because I had to keep going back and forth to the same bloody artwork.

​BON APPÉTIT

– Ally xx

myTaste.com

Risoni al Ratatouille

Risoni al Ratatouille

Risoni al Ratatouille

Hello Everyone! Today is the last day of Pasta Month; sad to be ending as I actually have a whole lot more pasta dishes that I want to try out, but also happy to move onto a new theme for next month! Just a heads up though – the likelihood of a theme not happening is quite possible. I did have a theme in mind, and I’ve already prepared and cooked two dishes for it in advanced, the only problem is getting two more made for next month’s theme is quite unlikely. I say this because I am heading off to the Philippines on Saturday for about a month! Because of that, I probably won’t have time to cook. I also will not be sure if I will have Internet connection during my stay there so the likelihood of me uploading content for the month of July might not happen as well. So I guess I’ll just see how it goes – if posting on my blog is a problem, then you can follow me over on Instagram @amcarmenskitchen to follow my food journey while I am in the Philippines – I’ll make sure to keep that up to speed 🙂

Anyway, so okay, the dish is not quite a Ratatouille (I just thought naming it for this post would make it sounds fancier than it looks, hehe) – more like it’s inspired by some of the vegetables used to make a ratatouille *cheeky grin* but nonetheless, it still tastes pretty good for something that I just “whipped up” with the ingredients lying in the fridge and the pantry. You can bulk this dish up by adding meat or seafood if you wish, but I decided to keep this dish vegetarian.

Risoni al Ratatouille Ingredients

PREP TIME 10 MINS | COOKING TIME 15 MINS | SERVES 6

INGREDIENTS

  • 500g risoni, or other shaped pasta
  • 3-4 garlic cloves, minced
  • 2-3 red bird’s eye chilies, sliced
  • 2 medium-szied Lebanese eggplants, sliced into 1-inch thick chunks and then quartered
  • 1 medium-sized zucchini, sliced into 1-inch thick chunks and then quartered
  • 1 onion, diced
  • 1 punnet (125g) cherry tomato medley, sliced
  • 1/2 bunch asparagus, woody ends snapped off and cut into thirds
  • 1 tbsp baby capers, washed and drained
  • Freshly squeezed lemon juice from 1 lemon
  • Ground sea salt and black pepper, to taste
  • Handful of grated parmesan cheese
  • Olive oil

METHOD

  1. Bring a large pot of salted water to a boil. Once boiling, add in the risoni pasta and cook according to packet instructions or until al dente (mine was about 11 minutes).
  2. While your pasta is cooking away, heat some olive oil in a large frying pan. Sauté the garlic and chilies until golden brown and fragrant, about a minute, and then add in the onions, cooking until soft for another minute or two.
  3. Add in the asparagus, together with the zucchini and eggplant, cooking until soft for about 6-7 minutes. Season with a bit of ground salt and black pepper. Add in the cherry tomatoes and leave to cook for a further 4-5 minutes. Lastly, add in the capers and then turn the heat off.
  4. Once the risoni is done, drain, and then return to the pot. Add in the stir-fried veggies to the pot with the risoni and then give it a good mix.
  5. Divide the risoni equally into 6 portions and then top with a generous handful of  grate parmesan cheese and some ground black pepper. Serve immediately and enjoy!

Risoni al Ratatouille

BON APPÉTIT

– Ally xx

myTaste.com

Salsa Verde

Salsa Verde

Salsa Verde

Hello Everyone! A new month means a new theme on the blog – and I’m sorry to start off on a negative note but I had plans to do a month-full of recipes that emphasise mangoes as the hero of the dish since it’s been in season for a while now here in Brunei. However, if you’re a regular reader on my blog, you’ll know that I have been working for the past 4 Sunday’s (which is basically my only time to enjoy myself in the kitchen), and because of that, I haven’t actually prepared any dishes for the theme that I had planned for my blog. I also haven’t been cooking any other dishes since my last free Sunday back in April, and so I decided that for this month, there will be no theme for the blog. Do not fret though! I will still be posting recipes, but they will be recipes that I have cooked up in the past – some taking us back towards the end of last year – that I didn’t get around to posting or fitting into a theme every month.

Tonight, I will be sharing with you, a recipe that I came across when I was exploring the Sydney Fish Markets for the nth time. Most of the fresh seafood stores there provide mini recipe cards to encourage the public to purchase their fresh catch. Every time I visited, I would always grab a recipe card, and one of the recipes that I was interested in was for Seared Tuna with Salsa Verde – and that’s what I’ll be sharing with you today, a recipe for an easy, simple, yet yummy Salsa Verde with pan-fried salmon in my case, but it’s completely up to you on what type of fish you’d like to pair it with!

For those of you who don’t know, Salsa Verde literally just means green sauce that contains mainly herbs, common in Italian, French, German, Spanish, and Mexican cuisines, each with their own twists and variants. The recipe that I will be sharing tonight gears more towards Mexican  where it is typically made up of puréed cooked or raw tomatillos, with jalapeños or other chili peppers, white onion, cilantro, and sometimes lime to enhance the taste. Salsa verde can range in spiciness from mild to mouth-searing. It may be served warm or cold, as a condiment – a dip for tortilla chips and served with tacos, or paired with grilled pork, grilled meats, and even fish.

Salsa Verde Ingredients

PREP TIME 10 MINS | COOKING TIME — MINS | SERVES 250ml

INGREDIENTS

  • 1/2 cup grapeseed oil
  • 1 bunch basil leaves
  • 1 bunch flat-leaf parsley leaves
  • 7 anchovy fillets
  • 4 garlic cloves
  • 2 tbsp baby capers in brine, rinsed
  • Juice of 1 lemon

METHOD

  1. Combine all the ingredients in a food processor or blender and process until smooth.
  2. Serve and enjoy as a condiment with your choice of dish (a dip for tortilla chips and served with tacos, or paired with grilled pork, grilled meats, and even fish). This recipe makes enough sauce to fill about a 250ml sized jar and can be kept in the fridge for up to a week.

Salsa Verde

Salsa Verde with Pan-fried Salmon

BON APPÉTIT

– Ally xx

myTaste.com

Smoked Salmon Pizza

Smoked Salmon Pizza

Hello Everyone! This pizza was actually the last pizza I made before flying off, so it was basically a pizza with anything I had left in the fridge to top it off with (except for the smoked salmon though, I bought that especially for this pizza). I have a few others up my sleeve but I haven’t had the chance to try them out. Maybe I’ll do another pizza series later on in the year when I get around to making them again.

If you read my very first post on the pizza series, you would’ve read somewhere that I was inspired to make my own pizzas from a DIY pizza night that my friend Tara held for her birthday last year. I made sort of the similar thing as tonights post. What I had planned was to do another stuffed crust pizza recipe, but I realised, once I had lined the walls of the pizza and sealed it, the dough that I rolled out was too thin in the middle. So what I ended up doing was folding the dough back in and instead of it being a stuffed crust pizza base, I incorporated the mozzarella cheese into the dough.

Smoked Salmon Pizza

PREP TIME 10 MINS | COOKING TIME 10-15 MINS | SERVES 3-4

INGREDIENTS

METHOD

  1. Preheat oven to 220C. Place your pizza stone in the oven as well to heat it up.
  2. Roll out your dough to a circle the same size as your pizza stone on a lightly floured surface as thick or thin as you want.
  3. Top with a handful of mozzarella cheese and fold the dough in again to incorporate the cheese into the dough. Or, if you prefer a stuffed crust, brush around the edge with a little water, then create a wall of the mozzarella cheese all the way around. Fold the edge over the mozzarella wall and seal it in by pressing down on the damp dough to form a stuffed crust.
  4. Spread a thin layer of sauce onto the dough. Be very careful not to overdo the sauce; if you use too much sauce, it’ll be too rich and also will bubble over the pizza and burn. A quarter cup to a third is just about right per pizza.
  5. Top the pizza with the bocconcini, capers, and red onion. If these aren’t quite to your fancy, then get creative and top your pizza with your favourite toppings.
  6. Carefully remove the stone from the oven and quickly slide the pizza over the top of the stone. Place it back in the oven and bake for about 5-7 minutes. Remove from the oven and top the pizza with the smoked salmon. Then put it back in the oven for a further 2-3 minutes or until cooked all the way through. It should not take more than 15 minutes in total.
  7. Remove from the oven and top with fresh rocket leaves and chilli flakes before serving.

Smoked Salmon Pizza

Smoked Salmon Pizza

BON APPÉTIT

– Ally xx

myTaste.com