Auguest 2021: Karina Pineda

Ginataang Kalabasa (Squash with Coconut Milk)

“Take off on a food journey that is both healthy and happy.” — Karina Pineda

Auguest 2021: Karina Pineda

Hello Everyone! Karina here again returning for the second time on Amcarmen’s Kitchen! When Allison had invited me to join this year’s Auguest series, she told me that the theme would be Flavours of Southeast Asia. She also gave me the liberty to choose from a list of available countries, and fortunately, the Philippines still had an available slot and I grabbed it immediately. Aside from being Filipino, I’ve always appreciated Philippine cuisine — from the variety of flavours it has to offer, to the culture and history it’s rich in. I want to celebrate my country through my entry.

My chosen dish is Ginataang Kalabasa (Squash with Coconut Milk). I also put a twist to the traditional recipe by adding ground tofu. Following the guidelines, I decided to make something vegetarian to show that Filipino food goes beyond adobong manok, lechon kawali, balut, and other meat dishes. We, Filipinos, actually have a number of equally delicious vegetable meals!

Ginataang Kalabasa (Squash with Coconut Milk) Ingredients

PREP TIME 10 MINS | COOKING TIME 20 MINS | SERVES 2-3

INGREDIENTS

  • 500g kalabasa (squash), cubed
  • 2 to 2 1/2 cups of fresh gata (coconut milk)
  • 1/4 block of firm tofu, ground
  • Garlic cloves, minced
  • Ground black pepper (to taste)
  • Cooking oil

METHOD

  1. Mince the garlic cloves and mash the tofu until it resembles ground meat/tofu scramble.
  2. Sauté the minced garlic cloves in a deep pan until slightly roasted.
  3. Add the kalabasa (squash) cubes and cook for about 2-3 minutes.
  4. Pour the gata (coconut milk) into the pan, and sprinkle with some ground black pepper to taste.
  5. Let it boil until the kalabasa is soft and cooked through, no more than 15 minutes. Stir occasionally and allow the coconut milk to thicken.
  6. While waiting for the mixture to boil, cook the ground tofu in a separate pan until slightly roasted.
  7. Once done, add the cooked ground tofu to the kalabasa and gata.
  8. Transfer the ginataang kalabasa to a serving bowl and enjoy on its own or paired with your favorite ulam (viand)!

Ginataang Kalabasa (Squash with Coconut Milk)

Photo Courtesy & Recipe Copyright © 2021 | Karina Pineda (@wanderlittlegirl)

BON APPÉTIT

– Karina Pineda

myTaste.com

Ube Champorado

Ube Champorado

Hello Everyone! Everything is about ube these days; ube ice cream, cakes, and desserts and all that. ‘New’ recipes are being developed all the time – new meaning adding an ube twist to already classic favourites. The latest ube trend/craze to come out of this quarantine is of course none other than the overrated Ube Cheese Pandesal.

Ube Champorado

Like this Ube Champorado, it is as good as our favourite original chocolate version. Almost two years ago (just shy of a few days actually), I made the classic version of this champorado using tablea chocolate. In that post, I talked about pairing a sweet rice pudding with dried, salted fish. I remember getting messages from friends when I posted a photo of the dish on IG; all with the same “wow, that’s interesting!” reaction. There are a lot of desserts out there that embrace the salty-sweet combination; salted caramel and salted chocolate being the top two favourite bases to endless dessert options!

This Ube Champorado with dried salted fish is no exception. It adds pops of salty surprises to each spoonful of the sweet ube rice porridge that you take. If the combination is off putting for you, then you could get away with adding a pinch of rock salt into your champorado – but it won’t be the same. For all the ube lovers out there, this is an ideal breakfast, snack, or dessert for any occasion!

Ube Champorado Ingredients

PREP TIME 5 MINS | COOKING TIME 25 MINS | SERVES 6

INGREDIENTS

  • 4 cups filtered water
  • 1 cup (250g) white glutinous rice, rinsed
  • 1 cup ube jam/halaya
  • 1/2 cup coconut milk
  • 1 tsp ube extract
  • Pinch of salt

METHOD

  1. Add the rinsed glutinous rice together with the water in a medium-sized stockpot over medium heat. Bring to a boil and then lower the heat down to a simmer. Cook until the rice is almost tender, about 15 minutes. Stir regularly to avoid scorching and sticking. Add more water if necessary to achieve your desired consistency.
  2. Stir in the ube jam/halaya, ube extract, coconut milk, and season with a pinch of salt. Taste and adjust if needed. Cook, still continuously stirring, until tender and the ube is mixed in well with the rice, a further 10 minutes or so.
  3. Once done, ladle the champorado into individual serving bowls and top with a swirl each of the ube condensada and coconut milk. You may also top them with fried boneless dilis if you’re feeling adventurous.
  4. Enjoy immediately while steaming hot on a chilly and crisp morning!

Ube Champorado

You may use fresh/raw ube for this recipe, however, so using store-bought ube jam/halaya, ube extract, or ube powder is just as good; quick and hassle free as how champorado should be. Having to work with fresh Ube will totally ruin that aspect of a no-fuss champorado for me.

Ube Champorado

BON APPÉTIT

– Ally xx

myTaste.com

Pulut Tai Tai (Blue Glutinous Rice Cakes)

Pulut Tai Tai (Blue Glutinous Rice Cakes)

Hello Everyone! Pulut Tai Tai is a Nyonya kuih made of fluffy glutinous rice that is steamed in coconut milk, and tinted with a beautiful natural blue colour from butterfly pea flowers. You can leave it out if you can’t find butterfly pea flowers, as it’s mostly for the colour, but it wouldn’t be as elegant-looking without it.

It is typically served with a coconut-pandan spread where the contrasting colours of green together with the vibrant blue and white of the glutinous rice makes the kuih all the more delightful and pleasing to the eyes of the beholder. In addition to colour, the slight tinge of saltiness of the glutinous rice coupled with the sweetness of the kaya makes this kuih a delight to savour.

Pulut Tai Tai (Blue Glutinous Rice Cakes)

Tai Tai refers to a rich man’s wife who enjoys a life of leisure. It is said that this specific kuih was only served to the wives of rich men back then. This kuih is also known as Pulut Tekan which literally translates to ‘pressed glutinous rice.’

Before we dive into tonight’s recipe, please take the time to check out the original recipe for these Blue Glutinous Rice Cakes over on Bake with Paws by Yeanley.

Before I tackled this recipe, I read that soaking the glutinous rice with the addition of vinegar or lemon juice will reduce the phytic acid found in the grain. It also helps in breaking down the gluten and aids for better absorption of the blue colour from the butterfly pea flowers. Now, while I included lemon in the ingredients shot below, I in fact did not use the lemon at all for one main reason – the addition of acidity to the butterfly pea flower infused water would make it turn violet in colour. Since I am all about sharing blue recipes for this month, that’s definitely not what I want. I found that the glutinous rice absorbed the blue colour well anyway without the need for vinegar or lemon juice.

Pulut Tai Tai (Blue Glutinous Rice Cakes) Ingredients

PREP TIME 20 MINS* | COOKING TIME 30-45 MINS | SERVES 4-6

* Additional 4 hours min. overnight max. for soaking time

INGREDIENTS

  • 2 cups white glutinous rice
  • 1 cup coconut milk
  • 2/3 cups water
  • 3/4 tsp salt
  • 25 pcs dried butterfly pea flowers
  • Banana leaves
  • Pandan (screwpine) leaves
  • Lemon juice (optional)

METHOD

  1. Bring a small saucepan of water and the dried butterfly pea flowers to a boil, over high heat. Let it simmer for a few minutes and then remove from the heat. Cover and leave to steep for 10 minutes before straining. Press down on the flowers to extract the blue colour from the flowers. Set aside to cool.
  2. Wash the glutinous rice until the water is clear. Soak 1/3 of the glutinous rice with the blue-infused water and the remaining 2/3 in water. Soak for at least 4 hours or overnight. After 4 hours or the next day, drain them both separately.
  3. Prepare your steamer by lining with clean banana leaves. Light grease with a touch of coconut oil and top with pandan leaves followed by the glutinous rice; blue rice on one side and white on the other.
  4. Mix the coconut milk and salt together. Pour half of the coconut milk mixture over the rice and mix well. Steam over high heat for 20 minutes. After 20 minutes, remove from the steam and fluff the rice. Add the remaining coconut milk mixture and then return it to the steamer to cook for a further 10 to 15 minutes.
  5. Line a square pan with banana leaves and lightly grease with coconut oil. Transfer the cooked rice to the pan, alternating between the white and the blue rice. Level the surface and cover with more banana leaves. Place another pan on top of it and weigh it down with heavy objects to compress the rice. Set aside to cool.
  6. Cut into small rectangular pieces and serve with some homemade Nyonya-style kaya. Enjoy it as a mid-afternoon snack!

This kuih can be kept for a couple of days if stored in the refrigerator. Before consuming it again, steam or heat it in a preheated oven at 70C for 10 minutes to soften it.

Pulut Tai Tai (Blue Glutinous Rice Cakes)

PS: Before I end tonight’s post, let’s see if a particular someone actually reads my blog from start to finish *cheeky grin* I would like to take this opportunity to wish a special person in my life, a Happy Birthday! I hope you like the little gift I had sent to you earlier this afternoon. I wish you an abundance of happiness, good health, peace, and prosperity in life. To many more birthdays and hopefully I can spend them all with you by your side!

BON APPÉTIT

– Ally xx

myTaste.com

Auguest 2020: Azrina Hidup

Thai Green Curry Mussels

“Cooking feeds the soul, both the cook and the people who are eating. For me, cooking is an act of love, a gift, and a way of sharing. It puts a smile in my heart when I put a lot of thought and care into preparing a dish. At home, cooking symbolizes love and family.” — Azrina Hidup

Auguest 2020: Azrina Hidup

Hello everyone! My name is Azrina Hidup and I am half Filipina and half Bruneian. I would like to thank my beautiful friend, Allison, for the opportunity to be featured on her blog along with other amazing foodies and chefs.

I am always the happiest girl when I get to put my apron on. It was my dream to enter ‘Le Cordon Bleu’ Culinary School, but somehow I ended up doing Political Science. My passion for cooking though, doesn’t stop. Every weekend I will be on my #apronmodeon doing recipe testing and feeding my family with my cooking.

I love creating different dishes. I love travelling for food and what I usually love doing when I travel is to explore and try the local cuisine. I will always try to remember the taste and look of the food so I can recreate them back home for my loved ones to try.

Thai Green Curry Mussels

Most of all, I strongly believe that cooking is more than just an act to fill the empty stomach. Cooking for me is an act of love, a gift, and a way of sharing. It puts a smile in my heart when I put a lot of thought and care into preparing a dish. I grew up with home cooked food, and growing up with my mom’s cooking inspires me a lot to develop my passion for cooking. For me, cooking and home cooked meals symbolize family and love.

For Allison’s Auguest series, I will be sharing my favourite Thai dish which is green curry. Tonight I have made Thai Green Curry Mussels with Homemade Green Curry Paste. Thai green curry is absolutely delicious when served with steamed rice. Nyums!

Thai Green Curry Mussels Ingredients

PREP TIME 30 MINS | COOKING TIME 20-25 MINS | SERVES 4-5

INGREDIENTS

For the green curry paste

  • 15-20 Thai basil leaves
  • 6 Thai green chillies (remove the seeds if you prefer it to be less spicy)
  • 3-4 cloves of garlic
  • 3 long green chillies
  • 2 stalks lemongrass, bottom part only, thinly sliced
  • 1-2 shallots
  • 1 & 1/2 inch size piece of galangal
  • 1 & 1/2 inch size piece of ginger
  • 1 lime
  • 1 tbsp of coconut milk
  • 1-2 tsp of kaffir lime zest
  • 1-2 tsp of shrimp paste (belacan)
  • 1/2 tsp white peppercorns
  • Cilantro leaves and roots
  • Coriander seeds
  • Cumin powder
  • Salt, to taste

Homemade Thai Green Curry Paste

For the Green Curry Mussels

  • Mussels
  • 1 cup fresh coconut water
  • 1 cup seafood stock*
  • 1 can (approx. 440g) coconut milk
  • 3 pieces kaffir lime leaves (torn to smaller pieces)
  • Basil leaves (5-6)
  • Fish sauce, to taste
  • Palm sugar, to taste
  • Squeeze 1-2 fresh limes
  • Thai eggplants
  • Cilantro and basil leaves for garnish (cut/torn to smaller pieces)

* For this recipe, I used homemade prawn stock. You may use any kind of stock as a substitute.

Thai Green Curry Mussels Ingredients

METHOD

  1. Thai Green Curry Paste: Toast coriander seeds simply by heating them in a skillet over medium-high heat. Then, finely grind using a mortar and pestle.
  2. In the same skillet, toast the shrimp paste/belacan and set aside.
  3. Slowly add the rest of the ingredients for the green curry paste to the mortar and pound until fine, adding liquid so that the mixture will become paste-like in texture. For this recipe, I used coconut milk as the liquid.
  4. Taste the curry paste and add season with salt to your preference and add a squeeze of lime juice.

Tip: You may also use an electric blender to speed up the process (and really make your life a little easier), if you prefer. For the coriander seeds, grind them first into a powder with the mortar and pestle. Then use the electric blender to grind all the remaining ingredients together. Similarly, add liquid to get the blender going. Since this will be used for a green curry dish, I highly suggest to use coconut milk as your liquid base.

  1. Thai Green Curry Mussels: Over medium heat, reduce half the can of the coconut milk in a heavy-bottomed pot until it becomes thick.
  2. Add the homemade green curry paste and sauté. Make sure to stir constantly for 2-3 minutes until fragrant/aromatic.
  3. Add the seafood stock, remaining half can of the coconut milk, kaffir lime leaves, and basil leaves. Leave to simmer gently for about 5-10 minutes, keeping the heat on medium.

Tip: You may also blend the basil leaves and some coconut milk into an electric blender to get nice green color soup.

  1. Add palm sugar and fish sauce to taste.
  2. Add coconut water and eggplants. Cover the pot until the eggplants are cooked through, about 3-4 minutes.
  3. Add in the mussels and cover until mussels are cooked, about 5 minutes.
  4. Garnish with chopped basil and cilantro. Add lime juice just before serving. Best to enjoy with steamed rice!

Thai Green Curry Mussels

Thai Green Curry Mussels

Photo Courtesy & Recipe Copyright © 2020 | Azrina Hidup (@azrinoh501)

BON APPÉTIT

– Azrina Hidup

myTaste.com

Seri Muka Kuih

Seri Muka Kuih

Hello Everyone! Our last recipe for the month of June is an amazing Malaysian and Nyonya kuih made of glutinous rice, coconut milk, sugar, and pandan leaves. Kuihs (or kuehs) are common snacks of the Hokkien, Teochew and Peranakan cuisine.The terminology is actually a general description for bite-size pastries/nibbles. These traditional delights come in many different forms and are either sweet or savoury snacks/desserts.

Seri Muka literally translates to beautiful face in Malay. It is a two-layered cake that consists of a glutinous rice layer steamed with coconut milk and topped off with a sweet and silky smooth pandan custard layer (hence the green colour). It’s heady with the flavour of coconut milk, a key ingredient used to impart a creamy taste when cooking the glutinous rice and making the custard layer.

Seri Muka Kuih

My fondest memory of Seri Muka would have to be during the festive season of the Islamic New Year. These pretty faces, alongside other kuihs of course, were served at almost every Malay household I would visit during that time of the year. The soft, sticky rice underneath with just a hint of saltiness pairs so deliciously with the decadently sweet pandan custard on top.

Before we dive into tonight’s recipe, please take the time to check out the original where I drew my inspiration from over on Rasa Malaysia by Bee. Seri Muka can also be found in the Indonesian province of South Kalimantan, and is also known as Kuih Putri Salat in Singapore.

Seri Muka Kuih Ingredients

PREP TIME 35 MINS | COOKING TIME 50 MINS | MAKES 14-16 SLICES

INGREDIENTS

For the bottom layer

  • 1 & 1/3 cups glutinous rice, soaked in water for 30 minutes
  • 1 cup thin coconut milk (1/2 cup coconut milk plus 1/2 cup water)
  • 2 pandan leaves
  • 1 tsp salt

For the top layer

  • 1 cup thick coconut milk (or coconut cream)
  • 1/2 cup pandan juice*
  • 1/2 cup white granulated sugar
  • 2 large free-range eggs
  • 2 large free range egg yolks
  • 5 tbsp all purpose flour
  • 2 tbsp cornstarch

*For the pandan juice

  • 8-10 pandan leaves
  • 1/2 cup water

METHOD

  1. Bottom Layer: In a large mixing bowl, combine all the ingredients needed, except for the pandan leaves, to make the bottom layer. Evenly spread onto a lightly greased 8in x 11in rectangular baking dish and add the in pandan leaves, making sure that they are submerged in the rice mixture. Steam over high heat for 20 minutes. Meanwhile, prepare the pandan juice for the top layer.
  2. Pandan Juice: Place the pandan leaves together with the water in a food processor or heavy-duty blender, and blitz/blend for a few minutes until the pandan leaves have been finely puréed.
  3. Pour the blended pandan-infused water over a fine sieve and into a small bowl. Strain the liquid from the pandan leaf pulp, pressing down firmly with the back of a spoon to extract all of the juice from the pulp. Discard the pandan leaf pulp.
  4. Top Layer: Mix all the remaining ingredients for the top layer in a medium-sized heatproof bowl until well combined.
  5. Create a bain-marie (double-boiler) by pouring some water into a pot that is slightly larger than your heat-proof bowl. Very important, check to see if your bowl can sit on top of the pot without any water touching the bottom of the bowl.
  6. Heat your pot of water over low-medium and bring to a slight simmer. Once slightly simmering, place the bowl with the pandan, coconut milk, and egg mixture over it. Cook until the mixture thickens slight, but is still runny enough to pour, about 8-10 minutes.
  7. Seri Muka Kuih: Once the rice layer is done, discard the pandan leaves. Stir and flatten the rice with the back of a spoon, making sure that it is compact. Using a fine sieve, strain the pandan, coconut milk, and egg mixture over the cooked rice. Return to the steamer and steam over medium heat for 30 minutes.
  8. Remove from the steamer once done and leave aside to completely cool down before cutting them into diamond or rectangular-shaped bite-size pieces. Serve with a hot cup of coffee or tea for a lovely mid-afternoon snack. Enjoy!

Seri Muka Kuih

Seri Muka Kuih

BON APPÉTIT

– Ally xx

myTaste.com

King Mackerel Halang Halang (Visayan Spicy Mackerel Stewed in Coconut Milk)

King Mackerel Halang Halang (Visayan Spicy Mackerel Stewed in Coconut Milk)

Hello Everyone! I remember the first time I came across this dish; I was on the phone with my Dad asking him what he would like to eat for the upcoming week before his trip back here to the Philippines. He doesn’t get to eat much home-cooked Filipino food in Indonesia so every time he’s back home, I make sure to include in our weekly menu the things that he wants to eat, even if it is against his diet *facepalm*

One of the dishes he mentioned was Chicken Halang Halang. “What?” I said in confusion as I have never heard of this dish before. The way my dad explained it to me was “it’s like the Visayan version of Chicken Adobo.” But it is actually far from that. This dish more closely represents a cross between Tinolang Manok and Ginataang Manok.

King Mackerel Halang Halang (Visayan Spicy Mackerel Stewed in Coconut Milk)

Halang Halang is a Visayan dish where your choice of meat is stewed in a spicy coconut milk sauce. The word halang when directly translated to English, means spicy because of the use of chillies as one of the main ingredients in this dish. So essentially, the dish is called, in English, “Spicy Spicy” *cheeky grin* The coconut milk maintains the creaminess and richness of the dish while it tempers the spiciness of the chillies. It also has a hint of lemongrass, making the dish amazingly aromatic and taste super fresh.

Like most dishes, there are endless possibilities in making Halang Halang. I decided to attempt this dish using fresh King Mackerel steaks that I bought at the markets before we went into Enhanced Community Quarantine. It is definitely an exceptional dish that you can serve at home on a regular basis.

Delicious, no fuss, and easy to make.

King Mackerel Halang Halang (Visayan Spicy Mackerel Stewed in Coconut Milk) Ingredients

PREP TIME 10 MINS | COOKING TIME 25 MINS | SERVES 6

INGREDIENTS

For the king mackerel steaks

  • 6 large King Mackerel steaks
  • 3 tbsp coconut oil
  • 1 tsp ground black pepper
  • 1 tsp ground turmeric
  • 1 tsp salt
  • 1 tsp yellow curry powder

For the halang halang gravy

  • 5 garlic cloves, minced
  • 3 stalks lemongrass, lightly pounded
  • 2 small red bird’s eye chilli, sliced
  • 1 large green chilli, sliced
  • 1 small red onion, diced
  • 1 thumb-sized ginger, julienned
  • 1 thumb-sized turmeric, julienned
  • 1 can (400ml) coconut milk
  • 3 tbsp fish sauce
  • Handful of chilli leaves

METHOD

  1. Combine the seasonings and spices in a small bowl. Generously rub the spices into the fish steaks, making sure to cover all sides. Leave to sit for about 10 minutes.
  2. In a large frying pan, heat 3 tablespoons of coconut oil over medium high. Make sure that the pan is scorching hot, but not smoking, before putting the fish in as this will prevent the steaks from sticking to the pan.
  3. Carefully place the steaks into the pan and fry for about 3 minutes per side, or until lightly browned to seal in all the flavours. Depending on the size of your frying pan, or the size of your steaks, you may need to work in batches. Once done, transfer to a plate lined with a paper towel to soak up any excess grease.
  4. Turn the heat down to medium. In the same frying pan, sauté the garlic, onion, ginger, turmeric, and chillies until golden and fragrant, about a minute or two.
  5. Slowly pour in half of the coconut milk into the pan and add the lemongrass stalks. Cover the pan and leave to simmer for about 20 minutes. Check and stir occasionally to avoid curdles from forming.
  6. Pour the remaining coconut milk into the pan and slowly return the king mackerel steaks to the pan. Cover and bring back up to a rapid simmer. Once simmering, turn the heat off and add the chilli leaves.
  7. Transfer to a serving plate and top with extra slices of red and green chillies for an extra kick of spice. Serve with hot steamed rice and enjoy!

King Mackerel Halang Halang (Visayan Spicy Mackerel Stewed in Coconut Milk)

This dish is guaranteed to tempt you to increase your rice intake. If you plan to stick with just a cup of rice – or just half like myself – make sure that you condition yourself beforehand because there’s a high chance that you’ll give in to the temptation. I know because I did. Oops.

BON APPÉTIT

– Ally xx

myTaste.com

Vegan Gajar Ka Halwa (Indian Carrot Pudding)

Vegan Gajar Ka Halwa (Indian Carrot Pudding)

Hello Everyone! I’m about to switch things up a bit tonight and share with you a recipe from a country that I have yet to culinarily explore. Amcarmen’s Kitchen is afterall, a Third Culture Foodie! It’s a bright orange Indian carrot pudding that is absolutely decadent and is sure to please, not only yourself, but your guests as well.

Gajar Ka Halwa, is a delicious and rich carrot pudding that’s perfect for any celebration. In India, this dessert is enjoyed mainly on the occasion of Diwali, Holi, Eid al-Fitr, and Raksha Bandhan. It can be served hot or cold. The classic Indian dessert is traditionally made using ghee and full-fat milk, but of course, you can easily substitute those dairy products out for non-dairy products for a vegan option of this dish, but apparently it won’t taste as great. I can’t judge for myself as I haven’t tasted the traditional version.

Vegan Gajar Ka Halwa (Indian Carrot Pudding)

Also, I just want to add that I had a hard time sourcing cardamom in store here in the Philippines. Cardamom has a complex flavour of fruity, nutty, spicy, woody, and citrusy that’s hard to replicate with other spices. However, cardamom substitutes like ginger, nutmeg & cinnamon are the closest.

If you too have difficulty in sourcing cardamom, I found online that you can mix together equal parts ground cinnamon and nutmeg and use in place of the cardamom called for in your recipe – which I already conveniently had both lying around at home in the pantry. If you don’t have nutmeg, then try equal parts cinnamon and ground ginger or equal parts cinnamon and ground cloves instead.

Before we delve into tonight’s recipe, please do check out the original by Ashley of My Heart Beets.

Vegan Gajar Ka Halwa (Indian Carrot Pudding) Ingredients

PREP TIME 5-10 MINS | COOKING TIME 25 MINS | SERVES 2

INGREDIENTS

  • 2 medium-sized carrots, peeled and grated/shredded
  • 1/4 cup full-fat coconut milk
  • 1/3 cup white granulated sugar
  • 3 tbsp water
  • 2 tbsp coconut oil
  • 1/8 tsp ground cardamom (or 1/16 tsp ground cinnamon and 1/16 tsp ground nutmeg)
  • Handful of chopped pistachios or other nuts, to garnish

METHOD

  1. Add the shredded carrots, coconut milk, and water to a large, heavy-bottomed pot. Cover and bring to a rapid simmer.
  2. Once simmering, add the sugar and cook for a further 6 to 7 minutes, or until most of the liquid has reduced.
  3. Add the coconut oil and stir-fry the carrots for a further 6 to 7 minutes, or until the carrots become dry and the coconut oil separates from the mixture. The carrots should look dark orange or reddish in colour.
  4. Add the ground cardamom and mix well.
  5. Transfer to individual serving ramekins and top with the chopped pistachios. Enjoy!

Vegan Gajar Ka Halwa (Indian Carrot Pudding)

Note: You can easily double or triple this recipe if you plan on making this dessert for a crowd.

BON APPÉTIT

– Ally xx

myTaste.com

Spicy Chipotle Adobo Ribs sa Gata

Spicy Chipotle Adobo Ribs sa Gata

Hello Everyone! Okay I lied… Well not exactly. You see, last week I said that that would be my last Coconut post for the month. Technically it is since it’s already February, but I do have one more Coconut post to share *cheeky grin* The recipe that I’m going to share with you guys tonight was actually not planned at all. I didn’t want this to end up in my already growing archive of recipes that I never get around to posting because it doesn’t fit with the current theme that I have going. Lucky for me tonight’s dish still fits! Let’s just say that this is a special Chinese New Year post to welcome in the Year of the Pig!

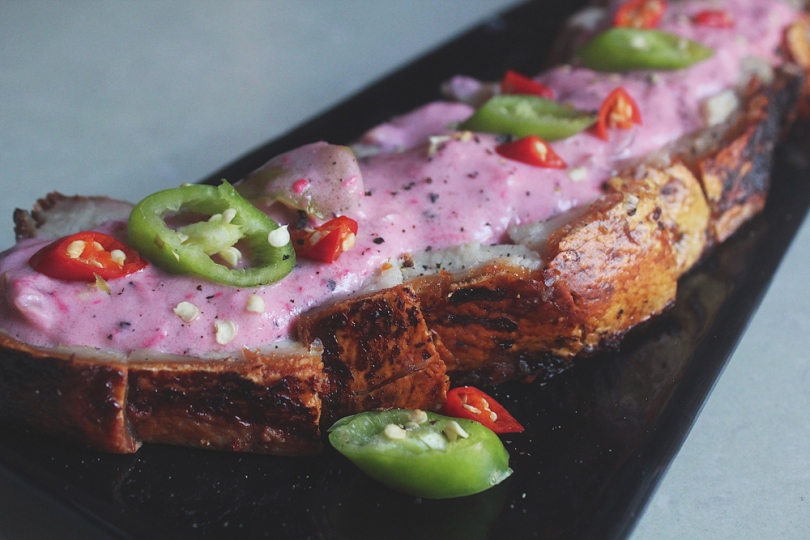
I saw a post on Instagram a while back, towards the beginning of the year I believe, of a new dish that Max’s Restaurant put out which is their Adobo Ribs. I haven’t had the chance to try it yet, but it made me want to try it out at home for myself, with my own twists of course – the twists being adding chipotle peppers for a spicy kick and stewing them in coconut milk as well – to fit with the theme of course *cheeky grin*

Spicy Chipotle Adobo sa Gata (Marination Process)

Adobo can mean marinade, sauce, or seasoning. It is a highly popular Filipino dish amongst locals and even foreigners. I remember when I was still studying in Australia, my taxi driver asked me where I was from. I told him that I was born in Brunei, but a Filipino by blood. To which he replied, “Oh I love the Philippines! And I love… What’s that dish called? Chicken Adobo!” Basically any non-Filipino that I’ve talked to throughout the years, Chicken Adobo and Sinigang are their favourite Filipino dishes.

Anyway, the cooking process of adobo is indigenous to the Philippines. Pre-colonial Filipinos often cooked or prepared their food with vinegar and salt to keep them fresh longer in the tropical climates of the country. To make adobo, you start off by marinating any variant of meat, seafood, or vegetables in vinegar, soy sauce, fresh garlic, black peppercorns, and dried bay leaves. It is then simmered in the marinade until the meat is tender. The dish is characteristically salty and sour in taste.

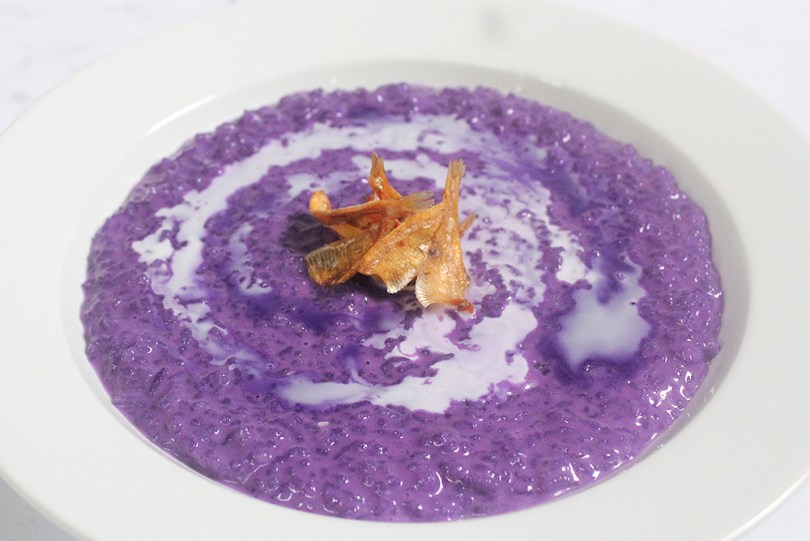
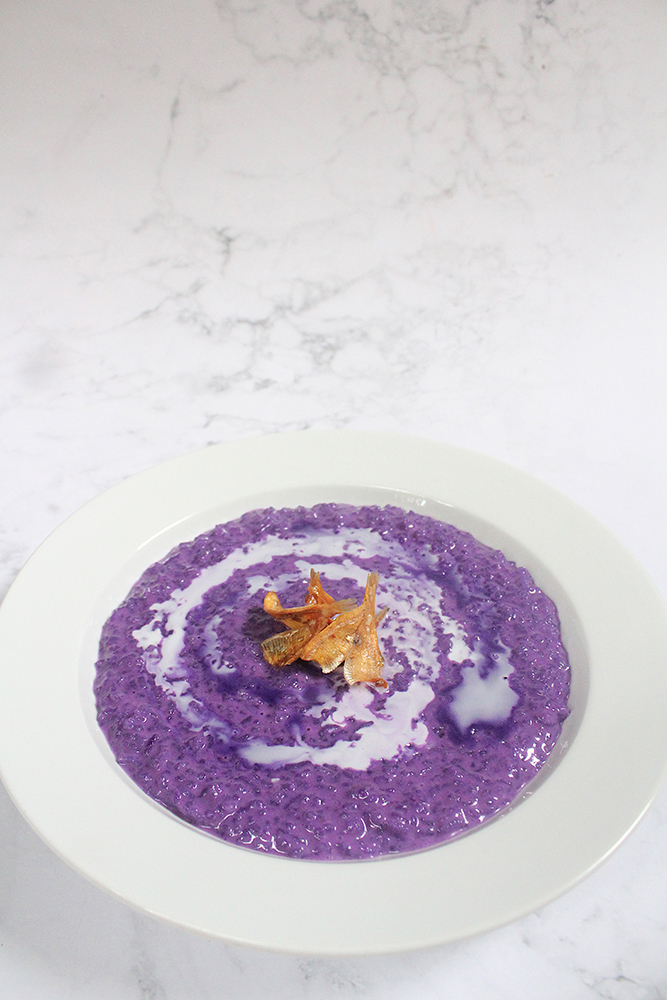
Now adding gata to the classic adobo makes the dish not only hearty, but also rich and creamy. Would you believe me if I said I’ve never had adobo sa gata before? I mean, I’ve had adobo countless of times growing up, but never with gata – until about a few weeks ago when we had lunch out after our Sunday morning mass. It felt like I had discovered a whole new world of adobo!

Spicy Chipotle Adobo sa Gata Ingredients

PREP TIME 1 HOUR | COOKING TIME 45 MINS | SERVES 4
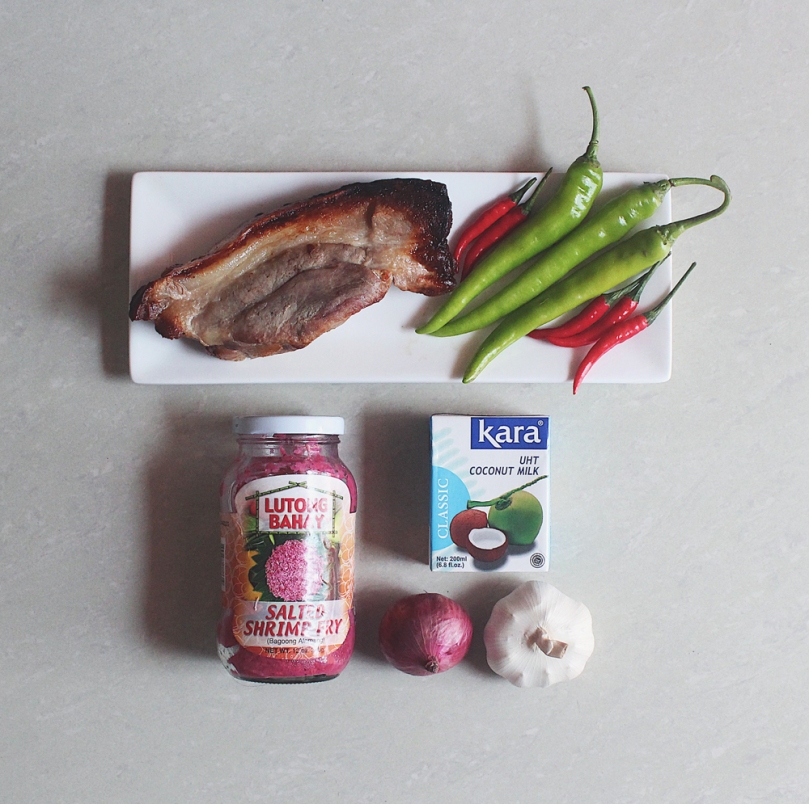
INGREDIENTS

  • 1 kg pork ribs
  • 5-6 dried bay leaves
  • 3 chipotle peppers in adobo sauce, sliced or minced
  • 3 garlic cloves, crushed
  • 2 garlic cloves, sliced thinly
  • 1/2 cup coconut milk (fresh, canned, or frozen)
  • 1/2 cup water
  • 1/2 cup white vinegar
  • 1/4 cup dark soy sauce
  • 1 tbsp whole black peppercorns
  • Red bird’s eye chilli, to garnish

METHOD

  1. In a large cooking pot, add the pork ribs together with the soy sauce, crushed garlic, whole black peppercorns, dried bay leaves, and chipotle peppers. Marinate for a minimum of 20 minutes. If you have time, marinate for an hour for the flavours to really infuse into the meat.
  2. Add the vinegar and water. Cover and cook over medium-high heat for about half an hour. Once done, turn the heat off and leave it aside, covered, for a further half an hour. The residual heat* from the cooking process will further cook and tenderise the meat.

*Residual heat, or residual cooking, or carry-over cooking, is when food continues to cook after it has been removed from a heat source. The heat held within the food itself raises its overall temperature before it starts to cool down.

  1. Meanwhile, heat about 2-3 tablespoons of oil in a small frying pan. Fry the garlic slices until golden brown, about 2-3 minutes. Drain and set aside.
  2. Turn the heat back on again on low and bring it back to a slow simmer. Once simmering, add the coconut milk in. It is important to slowly bring it back up to a simmer to avoid curdling the coconut milk. This happens when it is heated too quickly. Cook for a further 15 minutes.
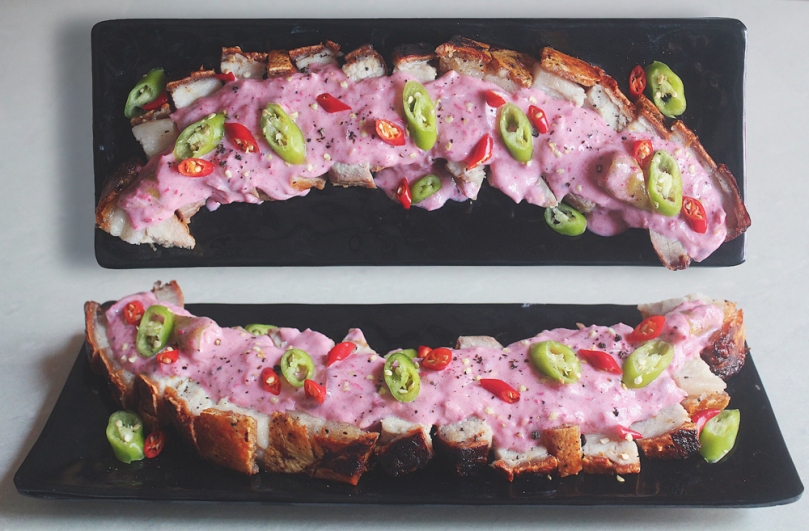
  3. Once done, turn the heat off and transfer to a serving plate. Garnish with the fried garlic slices and chopped bird’s eye chillies. Serve with steamed jasmine rice and enjoy!

Spicy Chipotle Adobo sa Gata

Spicy Chipotle Adobo sa Gata

And with that, I would like to wish all my Chinese Family, Friends, Followers, and all those who are celebrating, a Happy Chinese New Year! May the Year of the Earth Pig bring you happiness, prosperity, good health, peace and success! 恭喜发财 Gōngxǐ fācái!

BON APPÉTIT

– Ally xx

myTaste.com

Crispy Pork Bicol Express

Crispy Pork Bicol Express

Hello Everyone! I can’t believe that this is the last recipe for my Coconut series on the blog – time sure does fly by in the wink of an eye. I’ve enjoyed cooking up a coconut storm in the kitchen for the past month, though I’ve realised that all my recipes (expect for one) focused on using Coconut Milk instead of the actual fruit itself *whoops* Nevertheless, I still covered the brief for the month… Hopefully. I did say in my very first post of the year that I will be “cooking with fruits or their… Derivatives“.

For my last Coconut recipe of the month, I will be sharing with you the ultimate Filipino Comfort Food (well let’s face it, almost every Filipino dish is worthy of the ‘ultimate’ title), known as Bicol Express.

Now, I can get into the whole in-depth history of its origins and disputes, but I honestly have no mental power right now to paraphrase the information I’ve read up on. For those who are interested, here’s an article on Market Manila I stumbled upon while trying to figure out why this dish is named ‘Bicol Express’ – which by the way until now remains a mystery to me. Other than it being a catchy name, it’s name is also derived from an overnight passenger train service from Manila to the Bicol region; a region in the Philippines that is famous for their spicy cuisine.

Crispy Pork Bicol Express

Bicol Express is a dish made from pork, bagoong (salted shrimp fry), coconut milk, and lots and lots of chillies that is of course adjustable to your tolerance of spice. Bicol Express is traditionally cooked by stewing the ingredients altogether while crisping up the pork first is just another creative way of enjoying the dish. I prefer it this way just because I love a nice crisp skin when it comes to pork. Roasting it rather than deep-frying it also makes me feel a little less guilty *cheeky grin* but unfortunately, truth be told that this dish is not exactly waist-friendly. Succulent pork belly cubes and a creamy coconut sauce does come with a price to pay!

Crispy Pork Bicol Express Ingredients

PREP TIME 10 MINS* | COOKING TIME 50 MINS | SERVES 4

*Allow of 24 hours of resting time in the fridge for the pork belly after boiled.

INGREDIENTS

For the lechon kawali

  • 1 kg pork belly
  • 6 dried bay leaves
  • 1 tsp ground salt
  • 1 tsp whole black peppercorns
  • Extra salt, for roasting

For the Bicol Express sauce

  • 2 cups coconut milk (fresh, canned, or frozen)
  • 1/2 cup pork stock (from boiling the pork)
  • 5 red bird’s eye chillies, sliced
  • 3 long green chillies, sliced
  • 2-3 cloves garlic, minced
  • 1 small red onion, roughly chopped
  • 3 tbsp bagoong alamang (salted shrimp fry)
  • Ground black pepper, to taste

METHOD

  1. Lechon Kawali: Score the pork belly skin with a very sharp knife. Place the meat in a large pot with water, 1 tsp of the whole peppercorns and half of the bay leaves. Boil for 20 minutes. Remove from the heat and drain, placing in a large bowl and let to cool to room temperature.

Tip: Do not throw out the remaining pork stock. Reserve the pork stock to make other dishes or to use as a soup base. Keep in the fridge for up to 5 days or in the freezer for up to 1 month.

  1. Once the meat has cooled down, refrigerate uncovered for at least 24 hours for a better result. Refrigerating the meat will help to draw out any remaining moisture. Remove from the refrigerator and bring back to room temperature prior to roasting in the oven.
  2. Preheat oven between 220-240C (425-475F or gas mark 7-9). Rub oil and plenty of salt into the scored skin, really getting it into the slits of the score marks. The fat under the skin will react to the salt and that is what makes the skin puff up and crisp up.
  3. Roast in the oven for 20 minutes and then bring the temperature down to 160C (325F or gas mark 3) and roast for another 10 minutes. Remove from the oven and let the meat rest for 20 minutes. Then cut the pork into chunks and plate.
  4. Bicol Express Sauce: While the pork is roasting in the oven, prepare the Bicol Express sauce by heating about a tablespoon of oil over medium-high in a medium-sized cooking pot. Sauté the minced garlic until golden brown and fragrant, about 30 seconds, and then add in the onions. Cook until soft, a further minute or so.
  5. Add the salted shrimp fry and cook for about 3-4 minutes before adding the coconut milk and pork stock. Lower the heat down and bring to a slow boil. It is important to bring it back to a boil slowly to avoid curdling the coconut milk. This happens when it is heated too quickly.
  6. Season the sauce with ground black pepper and add in the sliced red and green chillies (reserve some for garnishing later). Continue to cook the sauce until it starts to thicken and reduce by half, about 10-15 minutes further on low heat.
  7. Once the sauce is done, pour over the plated crispy pork belly chunks and garnish with the fresh chillies.
  8. Serve with steamed jasmine rice and pair with some sautéed long beans in garlic (or any other favourite vegetable dish of yours) to balance out the richness of the Bicol Express. Enjoy!

Crispy Pork Bicol Express

Before I end tonight’s post, I just want to say that next week I will be back with a new fruit to hero with my upcoming recipes to share so stay tuned for that!

BON APPÉTIT

– Ally xx

myTaste.com

Ginataang Halo-Halo (Binignit)

Ginataang Halo-Halo (Binignit)

Hello Everyone! For some reason I felt that the week went by so slowly, yet so fast at the same time. Has anyone ever had this feeling before? Maybe it’s because I’m growing bored of being home all week for the past several months. For those of you just tuning in, I quit my job back in Brunei last August 2018 and until present day have yet to find a new job to keep me busy. I’ve applied to many places and attended a handful of interviews, but none have been successful so far. I’m hoping to find a job soon – my savings are slowly deteriorating away…

Ginataang Halo-Halo (Binignit)

Anyway, small tangent aside, Ginataang Halo-Halo, or also known as Binignit in some parts of the Philippines, is a popular Filipino dessert dish. Aside from it being a dessert, it is also widely served as a mid-afternoon snack.

As mentioned in previous posts, Ginataan is a cooking process that involves stewing in coconut milk/cream. Halo-Halo, when directly translated into English means mix mix, is referred to the combination of different ingredients that are used to complete the dish – a mix mix of various root vegetables such as sweet potatoes, yams, and taro, plantains, tapioca pearls, and glutinous rice balls (bilo-bilo) are simmered in coconut milk. Bilo-bilo are glutinous rice balls simply made from a mixture of glutinous rice flour and water. You don’t have to add any colouring to them, I just made mine purple to add colour to the dish.

Ginataang Halo-Halo (Binignit) Bilo-Bilo

Most, or all recipes I guess of Ginataang Halo-Halo have shredded langka (jackfruit) in them. I personally don’t like langka, which is why I’ve omitted them from my recipe. Instead, I wanted to replace them with shredded young coconut flesh which I didn’t end up adding to the dish because they went off in the fridge having kept them in there for a few days before using it *whoops*

Ginataang Halo-Halo (Binignit) Ingredients

PREP TIME 25 MINS | COOKING TIME 2 HOURS | SERVES 6-8

INGREDIENTS

  • 3 cups coconut milk (fresh, canned, or frozen)
  • 2 cups water
  • 1 cup young coconut flesh, shredded
  • 3/4 cup white granulated white sugar
  • 2 tsp vanilla extract or essence
  • 3-4 pcs ripe plantains (saba), sliced
  • Medley of sweet potatoes (I used 1 medium-sized each of orange, yellow, and white), diced

For the bilo-bilo (makes about 20-24 balls)

  • 1 cup glutinous rice flour
  • 1/2 cup water
  • 1 tbsp purple food colouring (optional)

For the tapioca pearls

  • 1 cup big tapioca pearls (sago)
  • 6 cups water

METHOD

  1. Tapioca Pearls: Add the water to a large cooking pot and bring to a boil over high heat. Add in the tapioca pearls. Turn the heat down to medium, cover, and leave to boil for about 50 minutes. Check and stir every 10 minutes. Add more water if needed to prevent the pearls from sticking to the bottom of the pot and burning. Once done, turn the heat off and set aside.

Tip: For better results, leave the pearls in the cooking pot until it reaches back to room temperature. One hour of boiling will completely cook the pearls, but the core will still be slightly opaque. Leaving the pearls in the cooking pot for several hours (with the heat turned off) gives them a chance to absorb more water. Which makes the core translucent overtime.

  1. Bilo-bilo: Combine the purple food colouring and water together and add to the glutinous rice flour. Mix thoroughly – a soft yet sticky mixture should take form.
  2. Scoop about 1 & 1/2 to 2 teaspoons of the mixture and roll into a ball shaped figure using the palm of your hands. Wet your palms with a bit of water to prevent the mixture from sticking to your hands.
  3. Place the balls on a plate or container that has been dusted with a bit of glutinous rice flour to prevent them from sticking to the plate. Set aside.
  4. Ginataang Halo-Halo: Add the 2 cups of water to a large cooking pot and bring to a boil over medium-high heat. Add 3/4 cup of the coconut milk and bring to a slow boil. It is important to bring it back to a boil slowly to avoid curdling the coconut milk. This happens when it is heated too quickly.
  5. Once boiling again, add in the sweet potatoes and simmer for about 8 minutes.
  6. Pour in the remaining coconut milk together with the sugar, and glutinous rice balls. Stir and simmer for a further 5-7 minutes. Then add in the sliced plantains and simmer for an additional 2 minutes.
  7. Add in the young coconut flesh together with the cooked tapioca pearls. Stir for about a minute and then turn the heat off.
  8. Transfer to a large serving dish, or individual bowls. Serve either hot or cold and enjoy!

Ginataang Halo-Halo (Binignit)

I definitely prefer to have this dish warm for an afternoon snack. To have this right after a main meal might be too heavy for a dessert – just my opinion! And no! You don’t need basil leaves for this dish. It just so happens that I had some lying around from a dish I made for lunch that day and used a sprig of it to add some green for photography purposes only *cheeky grin*

BON APPÉTIT

– Ally xx

myTaste.com