White Chocolate & Macadamia Red Velvet Cookies

White Chocolate & Macadamia Red Velvet Cookies

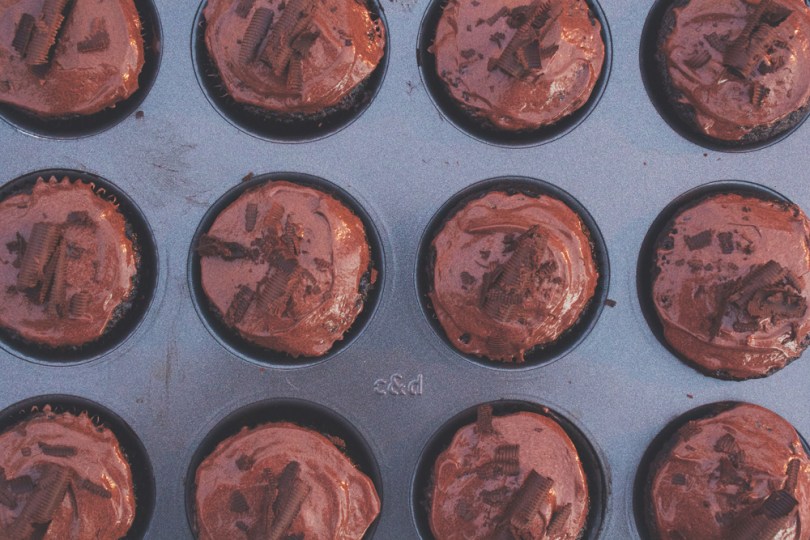
Hello Everyone! I don’t think I ever mentioned it in the past 3 posts for the month of November, but I’m pretty sure that most of you who follow my blog are smart little ducklings and have already probably figured out that the theme for Amcarmen’s Kitchen this month is all about Procrastibaking – well, really, not really. The theme isn’t just centred around baking, but it is most definitely about baking with… CHOCOLATE! How did I come up with this month’s theme you ask (well if you didn’t ask then read ahead hehe), I wanted to bake a Chocolate cake for my birthday this month, and I had two chocolate-linked recipes sitting in my archives waiting to be post up on my blog, and so… Baking with Chocolate came into play!

Or you could probably just say that I’ve been lazy and haven’t been in the mood to cook on Sundays for the past few weeks – which is partially true. It’s not that I was being lazy – it was more like I wanted to have a Sunday to myself doing whatever I want, meaning doing nothing actually *cheeky grin* instead of slaving away in the hot kitchen the whole afternoon. I’ve probably mentioned this in a post before, but for those of you who don’t know, I work 6 days a week from 8am to 5pm. By Sunday, all I want to do is just sit back and do nothing, however, if I did do that, I wouldn’t be able to keep up with Amcarmen’s Kitchen any longer.

White Chocolate & Macadamia Red Velvet Cookies

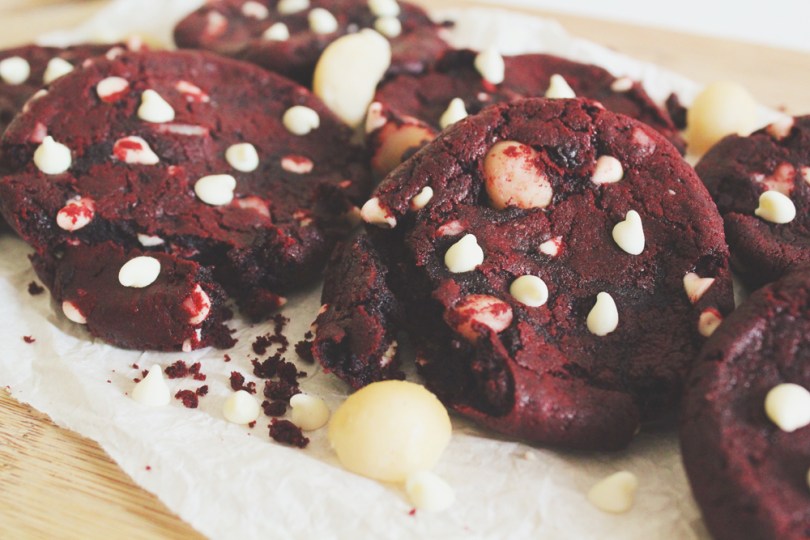
Anyway, enough of my rants, let’s move on to tonight’s recipe – an adaptation from none other than my favourite baker out there, Sally’s Baking Addiction. You can find the original recipe for these cookies over on her blog. If you went over to visit her blog, you’d notice that they are actually Red Velvet Chocolate Chip Cookies, but I decided to do a little twist and use white chocolate chips instead and pair them with macadamia nuts! The perfect combination in my opinion! I’d like to take this opportunity to share a recipe by a friend of mine, also known as Brendon The Smiling Chef, for his “I Love You This Much” Giant Red Velvet Cookie. I remember the time we met up and cooked together for my Auguest series last year, Brendon baked a Giant Chocolate Chip Cookie from the left over cookie dough he had from his “Cookies & Cream” inspired dessert. I think I might bake a Giant Cookie for next week actually!

White Chocolate & Macadamia Red Velvet Cookies Ingredients

White Chocolate & Macadamia Red Velvet Cookies

PREP TIME 1 HOUR 10 MINS* | COOKING TIME 10 MINS | SERVES 18 COOKIES

*Includes chilling time

INGREDIENTS

  • 1 & 1/2 cups + 1 tbsp plain flour, spooned and leveled
  • 1 cup semi-sweet white chocolate chips (plus a few extra for after baking)
  • 3/4 cup packed light (or dark) brown sugar
  • 1/2 cup raw macadamia nuts, roughly chopped
  • 1/4 cup granulated sugar
  • 1/4 cup unsweetened natural cocoa powder
  • 115g unsalted butter, softened to room temperature
  • 1 large free range egg, room temperature
  • 1 & 1/2 tbsp red food colouring
  • 1 tbsp milk
  • 2 tsp vanilla extract
  • 1 tsp baking soda
  • 1/4 tsp salt

METHOD

  1. In a medium-sized bowl, whisk together the flour, cocoa powder, baking soda, and salt together until incorporated well. Set aside.
  2. In a large bowl, beat the softened butter using a handheld or stand mixer with a paddle attachment on high speed until creamy, about 1 minute. When necessary, scrape down the sides and the bottom of the bowl. Add in the brown and granulated sugar, beating until combined and creamy, about another minute. Then, beat in the egg, milk, and vanilla extract, scraping down the sides and bottom of the bowl as needed. Once mixed, add the food colouring and beat until combined.
  3. Turn the mixer off and pour the dry ingredients into the wet ingredients. Turn the mixer on and slow beat on low speed until a very soft dough is formed. Beat in more food colouring if you’d like the dough to be a brighter red.
  4. Add in the white chocolate chips, and roughly chopped macadamia nuts and use a spatula to combine with the dough mixture. At this point, the dough will be sticky.
  5. Cover the dough tightly with aluminum foil or plastic wrap and chill for at least 1 hour (and up to 3 days). Chilling is mandatory.
  6. Preheat the oven to 180C (350F or gas mark 4) (177°C). Line two large baking trays with parchment paper or silicone baking mats and set aside.
  7. Scoop about 1 and 1/2 tablespoons of dough and roll into a ball, as pictured above. Place 9 balls onto each baking sheet and bake each batch for about10-11 minutes. The cookies may have only spread slightly and that’s ok. Simply press down on the warm cookies to slightly flatten and form crinkles. Stick a few chocolate chips into the tops of the warm cookies (optional and only for looks).
  8. Allow the cookies to cool on the cookie sheet for 5 minutes before transferring to a wire rack to cool down completely. Enjoy and share with family and friends!

White Chocolate & Macadamia Red Velvet Cookies

White Chocolate & Macadamia Red Velvet Cookies

BON APPÉTIT

– Ally xx

myTaste.com

Double Chocolate Crinkle Cookies

Double Chocolate Crinkle Cookies

Hello Everyone! For those who follow me on my personal social media pages will most definitely know that I’ve probably celebrated my turning of a quarter of a century one too many times that I guess an average person would celebrate their birthday. To quote a friend “[I] only turn 25 once” I think she meant that in a way that I probably had too many celebrations – but of course I’m going to take that as yes, I only turn 25 once so I’m going to go all out and use my birthday as an excuse to eat all the cake and food without feeling guilty *cheeky grin* Okay, so it’s been exactly a week now since I turned 25 so I guess it’s only fair to put a cease to the celebrations and start hitting the gym to burn off all the cake (3 cakes in total to be honest).

That aside, tonight’s recipe that I will be sharing is one that I whipped up last year for Christmas. I baked a batch of soft, chewy Double Chocolate Crinkle Cookies long with some traditional Sugar Cookies to take to the office with me on Boxing Day, to share with my colleagues – I know right. I’m so nice. Anyway, you might realise  in the photos that the cookies may look like they have a hint of red to them – well, I tried adding a little bit of red food colouring (what I had left of it anyway) to make it look like a red velvet crinkle cookie, but I guess I didn’t have enough coloring for it to really shine through.

Double Chocolate Crinkle Cookies IngredientsOh you know – just my little owly friend that also happens to be one of my measuring spoons basking in a bowl of flour mixture.

Anyway! Before I head onto the recipe, please take the time to check out the original over on Sally’s Baking Addiction. I think I have said this before, but nonetheless, I will say it again. Sally’s recipes are definitely spot on and easy to follow. I don’t think that I’ve ever screwed up a recipe of hers when in the kitchen myself. Somewhere in the past, I attempted to bake crinkle cookies after seeing my Aunt post her cookies on her Facebook page. I followed a recipe, not Sally’s of course and they ended being a total FAIL. I was so sad because I had baked them to share with friends – which I did anyway, and I think they were just being nice and said that the cookies were ‘still’ good haha.

Double Chocolate Crinkle Cookies Ingredients

PREP TIME 3 HOURS 30 MINS* | COOKING TIME 10 MINS | SERVES 20 COOKIES

*Includes chilling time – it is highly recommended that you chill the cookie dough for at least 3 hours. The longer, the better! Chilling helps the flavors to develop, prevents spreading, and makes the otherwise sticky cookie dough easy to handle.

INGREDIENTS

  • 1 cup all-purpose flour, levelled
  • 1 cup confectioners’ sugar, for rolling
  • 1/2 cup & 2 tbsp unsweetened cocoa powder
  • 1/2 cup granulated sugar
  • 1/2 cup packed light or dark brown sugar
  • 180g Belgian dark chocolate, roughly chopped
  • 115g unsalted butter, softened to room temperature
  • 1 large free range egg, at room temperature
  • 1 tsp baking soda
  • 1 tsp pure vanilla extract
  • 1/8 teaspoon salt

METHOD

  1. Using a hand-held electric mixer, beat the butter in a large mixing bowl for about 1 minute on medium speed until completely smooth and creamy. Then, add in the granulated sugar and brown sugar, continuing to beat on medium-high speed until fluffy and light in colour. Beat in the egg and vanilla extract on high speed. Scrape down the sides and bottom of the bowl as needed. Set aside.
  2. In a separate medium-sized bowl, whisk the flour, cocoa powder, baking soda, and salt together until combined. On low speed, slowly mix into the wet ingredients until combined. The cookie dough will be quite thick. Switch to high speed and beat in the roughly chopped Belgian chocolate. At this point, the cookie dough will be sticky. Cover dough tightly with aluminum foil or plastic wrap and chill for at least 3 hours and up to 3 days. Chilling is mandatory for this cookie dough.
  3. Remove the cookie dough from the refrigerator and allow it to sit at room temperature for about 20 minutes; if the cookie dough was chilled longer than 3 hours, then let it sit at room temperature for about 30 minutes. This makes the cookie dough easier to scoop and roll.
  4. Preheat oven to 180C (350F or gas mark 4). Line two large baking sheets with parchment paper or silicone baking mats, and then set aside.
  5. Scoop and roll the dough, about 1.5 tbsp of dough each, into balls. Roll each ball generously in the confectioners’ sugar and place them on the prepared baking sheets.
  6. Bake the cookies for about 8-9 minutes. The baked cookies will look extremely soft in the centers when you remove them from the oven. Allow them to cool for 5 minutes on the cookie sheet; they will slightly deflate as you let them cool. Transfer to a cooling rack to cool completely. Once cooled, enjoy and share with family and friends!

Double Chocolate Crinkle Cookies

Double Chocolate Crinkle Cookies

Cookies stay fresh covered at room temperature for up to 1 week. Baked cookies freeze well – up to three months. Unbaked cookie dough balls (that are not coated in confectioners’ sugar) freeze well – up to three months. Coat the frozen cookie dough balls in confectioners’ sugar, then bake for about 10 minutes. No need to thaw them.

BON APPÉTIT

– Ally xx

myTaste.com

Chilli Chocolate & Cinnamon Cake

Chilli Chocolate & Cinnamon Cake

Hello Everyone! Well… Today has been quite an eventful day! For my followers who do not know, today marks my quarter of a century years young! 25 years of achievements and failures has brought me to where I am today.

Round 1 of Birthday Celebrations

My colleagues surprised me with a cake earlier this afternoon – quite funny as the whole morning they kept telling me not to expect anything because they didn’t have a surprise for me, nor did they have cake. By afternoon, my Manager called me to their department, asking me to help her with a design that I had helped her with earlier in the afternoon. Being the gullible person that I am, I went up to her, and that’s when the rest started singing Happy Birthday and brought out the cake (mini tower of cream puffs). So I’d like to take this opportunity to thank everyone in the office who greeted me today – and for the surprise!

Round 2 of Birthday Celebrations

Round 2 of celebrations began earlier tonight as well, with my Mom, Sister, and my Godmother. We had Japanese for dinner and of course, the restaurant staff sang Happy Birthday to me as they brought out the cake that I had baked for myself for my birthday – which is tonight’s recipe! Original recipe can be found over on Dish.

Dense, rich and moist with a little hint of chilli and cinnamon – everything a great chocolate cake should be, and even more delicious when served with candid pepitas. — Claire Aldous.

Chilli Chocolate & Cinnamon Cake Ingredients

PREP TIME 15 MINS | COOKING TIME 20-25 MINS | SERVES 10-12

INGREDIENTS

For the cake:

  • 200g Lindt Chilli Chocolate, roughly chopped
  • 200g unsalted butter, cubed
  • 2 large free range eggs, lightly beaten
  • 1/2 cup caster sugar
  • 2 tbsp plain flour
  • 1 tsp ground cinnamon
  • 1 tsp vanilla extract
  • 1/2 tsp salt
  • 1/4 tsp ground cayenne pepper (optional if you’d like a little more kick to your chilli chocolate cake)

For the glaze:

  • 100g dark chocolate
  • 100ml thickened cream

METHOD

  1. Preheat the oven to 170C (325F or gas mark 3).
  2. Melt the butter and chocolate in a heat-proof bowl in the microwave at 30-second intervals and stirring until the butter and chocolate has melted. Once melted, stir in the sugar and vanilla extract, setting aside to cool for 10 minutes.
  3. Once cooled, gradually stir in the eggs and then fold in the flour, salt, cinnamon, and cayenne pepper. Pour into a buttered cake tin and smoothen the top.
  4. Bake for 20-25 minutes until the centre of the cake is set but not too firm. Once done, transfer to a rack and leave to cool completely in the tin.
  5. While the cake is cooling down, get started on the glaze by melting the dark chocolate in a heat-proof bowl set over a pan of simmering water, stirring occasionally. Do not let the base of the bowl touch the water. Once the chocolate has melted, slowly add in the cream, stirring gently. Remove from the heat.
  6. Transfer the cake to a dish and pour the glass over. Finish with a light dust of confectioners’ sugar and enjoy with family and friends!

Chilli Chocolate & Cinnamon Cake

Chilli Chocolate & Cinnamon Cake

BON APPÉTIT

– Ally xx

myTaste.com

Death by Chocolate Cupcakes

Death by Chocolate Cupcakes

Hello Everyone! It’f finally November which means, other than a new theme on the blog as usual, it is also my birthday month! I’ll be 25 in exactly a week and I’ve got a few get-togethers planned with family, friends, and colleagues. I actually baked these cupcakes last year for my Manager’s birthday. The week before her birthday I shared the leftover red velvet cupcakes that I had baked for halloween with my colleagues. When I offered her the cupcakes, she told me that she didn’t like red velvet, and that chocolate was more her thing. So, my colleagues told me that I should bake her some chocolate cupcakes for her birthday. I’m not sure if she liked them, but my colleagues and I definitely did!

Death by Chocolate Cupcakes

These cupcakes  are not overly sweet, but rather deep and intense in pure chocolate flavour. They are dark chocolate cupcakes with a thick dark chocolate frosting on top and sprinkled with dark chocolate shavings. The mixture of melted chocolate and cocoa powder to make these cupcakes ultra fudgey, rich, and moist. Are you salivating yet? Well, if you aren’t then please go away – if you can’t salivate over fudgey dark chocolate cupcakes then we cannot be friends *cheeky grin*

Today is actually her birthday, and we tried to surprise her today which ended up being a massive fail. Well, it’s hard to surprise someone who already expects a surprise – my colleague was right, we should’ve just not surprised her as that would’ve been the ultimate surprise. She’ll probably get mad at us for forgetting, but then again she’ll definitely know that we didn’t forget and still expect a surprise in some way or another. Maybe that will be the plan for next year?

Anyway, Please take the time to check out the original recipe over on Sally’s Baking Addiction. Anyway, I don’t want to take you guys on a massive tangent so let’s move on to the recipe for tonight!

Death by Chocolate Cupcakes Ingredients

PREP TIME 12 MINS | COOKING TIME 18 MINS | SERVES 12 CUPCAKES

INGREDIENTS

For the dark chocolate cupcakes

  • 3/4 cup (95g) all-purpose flour
  • 1/2 cup buttermilk*
  • 1/2 cup granulated sugar
  • 1/2 cup unsweetened cocoa powder
  • 1/4 cup light brown sugar
  • 115g unsalted butter
  • 60g semi-sweet baking chocolate
  • 2 large eggs, at room temperature**
  • 1 tsp vanilla extract
  • 3/4 tsp baking powder
  • 1/2 tsp baking soda
  • 1/4 tsp salt

For the dark chocolate frosting

  • 2 & 3/4 cup confectioners’ sugar
  • 2/3 cup unsweetened cocoa powder
  • 95ml heavy cream
  • 90g unsalted butter, softened to room temperature
  • 1 tsp vanilla extract

Optional

  • Semi-sweet chocolate chips or shaved dark chocolate for decoration

*Room temperature eggs are required for this recipe. To bring eggs to room temperature quickly, put them in a glass of warm water for 5-10 minutes.

**Buttermilk is required for this recipe. If you do not have buttermilk, make your own by mixing 2 teaspoons white vinegar or lemon juice with 1/2 cup milk. Stir and let sit for 5 minutes.

METHOD

  1. Preheat the oven to 180C (350F or gas mark 4). Line a 12-cup cupcake/muffin pan with cupcake liners and set aside.
  2. For the cupcakes: Melt the butter and chocolate together in the microwave at 30-second intervals, stirring between each time until smooth. Once smooth, set aside to slightly cool. You may also melt the butter and chocolate over low heat on the stovetop.
  3. In a medium-sized bowl, combine the cocoa powder, flour, baking soda, baking powder, and salt together, and then set aside.
  4. In a large bowl, whisk the eggs, sugar, brown sugar, and vanilla together until smooth. Then, add in the cooled butter and chocolate mixture, whisking until smooth. Add half of the flour mixture, then half of the buttermilk. Repeat until everything is added, stirring until just combined; be careful to not over mix otherwise the batter will be very thick like pudding. Fill the cupcake liners about 2/3 of the way full with batter.
  5. Bake for 18 minutes, or until a toothpick inserted into the centre of the cupcake comes out clean. Allow to cool completely before frosting.
  6. For the frosting: Sift the confectioners’ sugar and cocoa powder together to assure there are no lumps, and then set aside.
  7. With a handheld or stand mixer fitted with a paddle attachment, beat the butter on medium speed until creamy – about 2 minutes. Gradually add the sifted sugar and cocoa powder mixture alternately with the heavy cream and vanilla extract. Beat on low speed after each addition. Once all added, beat on high speed until creamy and combined for at least 2 minutes. Add a pinch of salt if frosting is too sweet.
  8. Frost the cooled cupcakes and top with chocolate chips or shaved dark chocolate as desired. Cupcakes stay fresh at room temperature in an airtight container for up to 4 days. Store covered in the refrigerator is desired for up to 1 week.
  9. Share and enjoy amongst family and friends!

Death by Chocolate Cupcakes

Death by Chocolate Cupcakes

BON APPÉTIT

– Ally xx

myTaste.com

Poached Pears with Chocolate Chia Mousse

Hello! I’m Jialing and I will be taking over Amcarmen’s Kitchen for today. I will confess that today’s blog was very close to being a two-step tutorial on how to boil a cup of water and make tea – the only semi-regular dietary part of my life that does not involve any animal by-products.

As someone who has clearly only ever eaten vegan food a handful of times (I genuinely thought that the vegan theme was intended as a joke when I first agreed to do a recipe), I found this year’s Auguest theme to be a punishment. I mean challenge. I ended up ransacking my own pantry and refrigerator for inspiration, confirming with Allison and Google about what ingredients could and couldn’t be used by vegans. What seems like day later, I emerged triumphant – pears, wine, cocoa powder, and a questionable bag of chia seeds (waste not, want not…) sat atop my counter, ready for the arduous vegan road ahead.

Now, onto the recipe, poetically inspired by the very essential act of boiling water.

Poached Pears with Chocolate Chia Mousse Ingredients

PREP TIME min. 24 HOURS* | COOKING TIME 40 MINS | SERVES 4

*The chocolate chia mousse will need to be prepared the day before to allow chia seeds time to soak

INGREDIENTS

For the chocolate chia mousse

  • 1 & 1/2 cups almond milk
  • 1/3 cup chia seeds
  • 1/4 cup cocoa powder
  • 4 tbsp 100% pure maple syrup**
  • 1/2 tsp vanilla extract
  • Strawberries for garnish

For the poached pears

  • 4 buerre bosc pears, peeled
  • 1/2 bottle moscato or other sweet dessert wine***
  • 3 tbsp 100% pure maple syrup**
  • 3 star anise
  • 2 cinnamon sticks
  • 2 tsp cloves
  • Pinch of nutmeg
  • Water

**Maple-flavoured syrup isn’t vegan, so be sure to check the label!
***Find your fave vegan wines here http://www.barnivore.com/wine

METHOD

  1. Chocolate Chia Mousse: Prepare the chocolate chia mousse the day before, to allow chia seeds time to soak. Combine the cocoa powder, vanilla, and maple syrup, stirring until well mixed.
  2. Slowly pour in almond milk, stirring until mixture is smooth. Add chia seeds and stir until well-incoporated. Leave in fridge to soak overnight, stirring mixture once in between.
  3. Once the chia seeds have fully absorbed the liquid, they will increase significantly in size and have a gelatinous texture. Transfer to a blender or food processor and blitz until smooth and creamy. Tip: leave the chia mixture unblended and top with fresh fruit and desiccated coconut as a healthy and envy-worthy breakfast.
  4. Poached Pears: In a sauce pot large and deep enough to hold pears, combine wine, maple syrup, cinnamon sticks, star anise, cloves, nutmeg, and just enough water to cover pears.
  5. Bring the wine and spices to the boil over high heat.
  6. Add the pears, positioning them so that they are completely submerged, and continue to boil for another 25 minutes, until pears are cooked through and tender. Be sure to turn pears for even cooking, particularly when liquid gets low, keeping in mind that the bottoms of the pears will take longer to cook than the tops.
  7. Once pears are cooked, remove from the pot, reserving the syrup, and set aside to cool.
  8. Carefully simmer remaining syrup until reduced to about 1/2 cup.
  9. To serve, divide mousse into small bowls or stemless glasses and garnish with sliced strawberries. Place a pear on each plate, next to the mousse. Drizzle the pear with syrup. Enjoy!

Poached Pears with Chocolate Chia Mousse

Recipe Copyright © 2016 | jialingmew

ENJOY YOUR MEAL!

Jialing.

myTaste.com

Auguest 2016: Wong Miao Hui

Raw Nutty Orange & Blueberry Vegan ‘Cheesecake’

The perfect vegan dessert for your next dinner party.

Hey there! My name is Miao, pronounced “Meow” and I am currently located in Singapore. I’ve known the lovely Allison for a good 12 years now, perhaps for even longer! We attended the same high school back in Brunei. A few years went by before we recently got in contact again, and this time we had more in common than ever before­ – the both of us had branched from loving food, to loving to cook food during our years of studying abroad. Our enthusiasm was shared over social media and it was agreed that we had to, had to, collaborate in hosting a dinner party the very next time we stood on common soil.

Dinner parties are great! They indulge our senses through so many different factors; from the atmospheric music playing in the background, the vibrant and dramatic display of what’s being served, to the tantalising aroma of something sizzling, something roasted, something seasoned in the air. In every way, a dinner party is an experience of art, as a guest you are inclined to explore the texture of your dish and savour the flavours, forming an opinion that’ll later be added to the table’s conversation. For people who love to cook, a dinner party is an exciting show to curate.

I’ve hosted a few dinner parties since the start of my time in Singapore, and every time it’s been the perfect way to rekindle old friendships, create new memories, and to sprout conversations between acquaintances. Well what’s a dinner party without its guests? Allison and I rounded up a few other pals from our high-school days along with a few foodies I’ve grown to love in Singapore.

One seat at the table was reserved for our vegan friend, adding a little variety to the collective diet. Accommodating to a vegan was completely new to me, the savoury vegan recipes weren’t all that hard to comprehend, but because I specialise in baking cakes, deciding what to create for dessert took a little more time for consideration. We made an array of dishes for the mains, including both vegan approved recipes and recipes with meat, while trying as much as possible to have everyone enjoy similar flavours. The dessert was to mark the finale of the show, and it only seemed appropriate to have everyone leave with the same experience and same lingering flavour in their mouth.

Well, after some time browsing through recipes online, I realised just how darn easy vegan desserts are to make! And they can still be just as rich and indulgent as desserts with animal products – like the vegan ‘cheesecake’ I’m about to introduce. Now I sit here still thinking how I wasn’t introduced to vegan desserts any earlier; they’re healthier, somewhat more refreshing and require less cleaning up. So without further ado, here is the perfect dessert recipe for your next dinner party with or without your vegan buddies.

Raw Nutty Orange & Blueberry Vegan 'Cheesecake'

PREP TIME 15-20 MINS | FREEZE TIME min. 12 HOURS | SERVES 8

INGREDIENTS

For the nutty crust 

  • 2 cups raw nuts
  • 1/2 cup medjool dates
  • 1/2 cup dried cranberries
  • Pinch of salt

For the orange ‘cheesecake’

  • 3 cups cashews
  • 3/4 cup fresh orange juice
  • Juice of one lemon
  • 1/2 cup melted coconut oil
  • 1/2 cup agave or maple syrup
  • Orange zest from all the juiced oranges
  • Pinch of salt

For the blueberry layer

  • 2 cups frozen blueberries
  • 1/4 cup of the orange ‘cheesecake’ mixture

METHOD

  1. To make the crust: Process all ingredients for the crust in a food processor, until the nuts become crumbs and the mixture sticks together when you press it. Press into the bottom of an 8 inch spring-form pan to form the first layer of your cake. Leave in the fridge to chill.
  2. To make the orange cheesecake layer: Excluding the orange zest, blend all other ingredients in your blender at high-speed until very smooth, then with a spoon add in the orange zest to taste. Take out 1/4 cup of the mixture for the blueberry layer, pour the remaining mixture onto the chilled crust and then leave it in the freezer.
  3. To make the blueberry layer: Simply blend the blueberries and the 1/4 cup of cheesecake mixture with your food processor. Spread this evenly over your cheesecake and keep it in the freezer or fridge overnight. I prefer keeping it in the freezer as I live in a tropical climate and it only takes 15 minutes for the cake to soften for serving.
  4. You can serve the cake with blueberries or sliced oranges for that additional wow factor.

Raw Nutty Orange & Blueberry Vegan 'Cheesecake'

Raw Nutty Orange & Blueberry Vegan 'Cheesecake'

Recipe Copyright © 2016 | misohui

Enjoy!

Miao.

myTaste.com

Moist Mango Pound Cake

Moist Mango Pound Cake

Moist Mango Pound Cake

Hello Everyone! Yes, I am aware that it is a Sunday and it’s not my regular posting day. It’s just that today is a very special day because today I would like to wish the Happiest of Birthdays to the woman I call my Mother. My greatest wish is to grow up and become just like you. Thank you for all of your strength, advice, and of course your impeccable cooking skills that has helped me become the person I am today. Love you ❤

Happy Birthday Mama G 2016
My Mom & I at Bondi Beach, Bondi, NSW last June 2015

For the Month of May, I thought about sharing recipes, both savoury & sweet, that include mangoes since they have been in season since last month – but I will get into this theme for Wednesday’s post. Since we’re praising mangoes, I decided to bake a Moist Mango Pound Cake for my Mom’s 56th Birthday today. It’s actually not as grand as the cakes I’ve made for past birthdays, and it’s only because I wanted something quick and simple, yet still very tasteful since I had work commitments earlier on the day. I woke up early this morning to have breakfast and then got cracking on baking the cake before I took my shower and headed out to the venue for work. So I guess it was safe to say that I had a very hectic and busy morning, a lazy afternoon, and a night at Capers Italian Restaurant & Pizzeria to celebrate my Mom’s birthday.

Moist Mango Pound Cake Ingredients

PREP TIME 15 MINS | COOKING TIME 1 HOUR 15 MINS | SERVES 8

INGREDIENTS

  • 1 & 1/2 cups plain flour
  • 1/3 cup white sugar
  • 1/4 cup coconut cream (or use heavy cream if not available)
  • 170g unsalted butter, at room temperature
  • 2 large free range eggs
  • 1 tsp vanilla extract
  • 1/4 tsp baking powder
  • 1/4 tsp baking soda
  • 1/4 tsp salt
  • Flesh of 2-3 mangoes, puréed* (yielding about 3/4 cups)
  • Fresh mangoes, diced
  • Confectioners’ sugar

*Purée your mangoes by adding them to a blender with about a tablespoon of water to ease the blending process. Pulse until smooth.

METHOD

  1. Preheat oven to 170C (325F or gas mark 3). Prepare a 7″ round pan (or square) by rubbing some butter and flour on the base and sides of the pan. Set aside.
  2. Sift the plain flour, baking powder, baking soda, and salt in a medium-sized bowl. Set aside.
  3. Using an electric hand-held mixer, cream the butter and sugar together in a large mixing bowl until it turns pale yellow in colour – it should be creamy and not gritty in texture (sugar fully dissolved).
  4. Add in one egg at a time, beating on low well after each addition. Then add in the coconut cream, vanilla extract, and mango purée. Continue beating on medium for a good 4 minutes or until the mixture is creamy and has good volume.
  5. Add the flour mixture to the wet ingredients, about a third at a time, folding it in gently after each addition. Be careful as to not over mix your batter, use gentle strokes until the flour is just moistened.
  6. Transfer the batter to your prepares baking pan and bake in the oven for 60-75 minutes or until the cake is golden brown in colour and a toothpick inserted into the middle of the cake comes out clean. Remove from the oven and leave it to cool for about 5-10 minutes.
  7. Loosen the edges with a knife and transfer the cake onto a wire rack to completely cool down. Once cooled, top your cake with some fresh diced mango and some confectioners’ sugar. Serve and enjoy!

Moist Mango Pound Cake

Moist Mango Pound Cake

Moist Mango Pound Cake

BON APPÉTIT

– Ally xx

myTaste.com

Strawberry & Watermelon Cake

Strawberry & Watermelon Cake

Strawberry & Watermelon Cake

Hello Everyone! If you’ve been following my blog from the very beginning, then you’ll know that today is a very special day indeed! My blog officially turns 2 years old today! My how time has flown by so quickly! I’m sure most of you know the story of how I came around to starting up my blog – but for those new comers out there, here is the story again:

I started up this food blog exactly two years ago during spring break, and instead of slaving away on the many assignments/projects I had at that time, I decided to spontaneously start up a blog, out of pure procrastination really. I wasn’t sure of how long I’d be able to keep up with this blog (because I have tried many times and failed), but I am happy that I am able to finally keep one up and running, even though I’m only posting once a week instead of 3 times a week like before I started working. on several occasions, I’d ask my Mom, “What would happen if I didn’t have a food blog?” And she would always reply the same way every time I asked her, “You’d be the most boring person ever.” Haha. Thanks. I definitely have her to thank for teaching me how to cook; well actually I’d like to say thanks to the fact that I got into a university away from home and family as it not only taught me how to be independent, it also showed me how bad I was at cooking for myself during my first year at uni.

Like last year, to celebrate my blog turning 2 today, I decided to bake a cake for this occasion. I actually did a test bake two weeks ago since this is the first time I was following this recipe – I didn’t want to fail miserably and have nothing to post for this special occasion. I’m glad I did that test bake because there was a major backfire *oops*. Well, it wasn’t such a huge backfire, but it was because it was a significant part of what binds the cake together so without it, the cake would’ve been pretty dry. I’m talking about the rose-scented cream here. The first try, I actually bought the wrong type of thickened cream – I bought the light thickened cream only because that’s what I saw on the shelf. So I whipped it for a good, I don’t know, probably a total of 15-20 minutes or so and it what not whipping at all. Then I realised it was because it was light cream which does have enough fat content to fully whip. So that was a fail, and by that time I was quite tired and frustrated over the cream that I decided to just leave it and try again the following week.

The second time around, I bought regular thickened cream and it whipped fine – too fine that I had over-whipped it and it became quite clumpy. You can actually rescue over-whipped cream by adding more cream, but at that time, I had poured the whole bottle of cream into the mixer. So what did I do? I had to ask my mom to drive me to the grocers again to buy more cream, and finally after the third attempt with this rose-scented cream, I managed to get it right! I didn’t want to waste the other batch of over-whipped cream and so I kept whipping it until it started to come together as homemade butter. After I had whipped it into butter, I had a taste of it and then realised that I had just made sweet rose-scented butter – which in my opinion was a bit ew since I’ve never tasted sweet butter with a hint of rose flavour in it. Haha! So yeah.

Strawberry & Watermelon Cake

Anyway, I took inspiration to bake this cake from one that I tried from Black Star Pastry when I was still living in Sydney. Since it’s debut into the world of pastries, it is known to be the most Instagrammed cake.  Also, the original recipes uses silvered pistachios, but I used pepitas instead. The only reason was that pistachios here for some reason are always brown, like not even green, and I didn’t want to put something brown to top of my beautiful cake so I went for green pepitas instead. Another thing, I couldn’t find rose petals anywhere here in Brunei. So, I decided to go through boxes of teas to read their labels, looking for any that had rose petals in them. I was lucky that one of the teas that I brought home from Sydney last year had rose petals in them!

Don’t forget to check out the recipe that I followed to make this cake over on Gourmet Traveller. You can get creative and make a cake in any shape you want. When I had this at Black Star Pastry, it was square in shape and probably no bigger than about 8cm x 8cm x 8cm in size (maybe). I made mine into round cakes (about 3 in total with this recipe) with a diameter of about 7.5cm.

Strawberry & Watermelon Cake Ingredients

PREP TIME 20 MINS* | COOKING TIME 15 MINS | SERVES 3

*plus 1-2 hours of chilling time

INGREDIENTS

  • 10 seedless red grapes, sliced thinly
  • 250g seedless watermelon, about 0.5cm thick slices
  • 1 punnet (125g) strawberries, halved
  • 1/4 cup almond meal
  • 1/4 cup rosewater
  • 4 tbsp caster sugar
  • 1 tbsp pepitas
  • 1 tbsp dried rose petals

For the Almond Dacquoise

  • egg whites
  • 2/3 cup almonds, coarsely chopped
  • 2/3 cup pure icing sugar, sieved
  • 1/2 cup caster sugar

For the Rose-scented Cream

  • 100ml thickened cream
  • 1 tbsp caster sugar
  • 1 tbsp rosewater

METHOD

  1. For the almond dacquoise: Preheat oven to 200C. Process almonds in a food processor until finely ground, then combine in a bowl with icing sugar. Whisk eggwhites in an electric mixer until soft peaks form (3-4 minutes), then gradually add caster sugar and whisk until stiff peaks form (1-2 minutes). Gently fold through almond mixture, spread on a 30cm x 40cm oven tray lined with baking paper and bake until golden (10-15 minutes). Set aside to cool on tray, and then using a round cutter, cut the dacquoise into 6 circles.
  2. For the watermelon layer: Cut the watermelon into half a centimetre thick rounds using the same cutter used to cut the dacquoise. Arrange watermelon rounds in a single layer on a wire rack. Sprinkle with 20ml rosewater, then scatter with 2 tbsp sugar. Stand to macerate (30 minutes), then pat dry with absorbent paper.
  3. For the rose-scented cream: Whisk cream and sugar in an electric mixer until soft peaks form, gradually add rosewater and whisk until stiff peaks form (do not over-whisk!!!).
  4. Assembly: Staring with a watermelon slice as your base, spread about a tablespoon and a half of rose cream evenly over  it and then top with a layer of dacquoise. Scatter a pinch of almond meal and then top with more cream. Repeat, and then top of the last dacquoise layer with a bit of cream to hold the strawberry chunks, slices of grapes, and other toppings. Refrigerate until firm (1-2 hours).
  5. Serve and enjoy chilled!

Strawberry & Watermelon Cake

Strawberry & Watermelon Cake

BON APPÉTIT

– Ally xx

myTaste.com

Buko Pandan

Buko Pandan

Hello Everyone! We’re on our second last day of Festive Filipino Foods! If you have been living under a rock and basically haven’t been following my blog for the past week and a half, I have been posting a recipe every single day for the past 10 days now (tonight will be the 11th of 12 posts) cooking up recipes leading up to Christmas Day. Tonight, I will be sharing one final dessert recipe before I close this series for the month of December. I have saved the best savoury dish for last tomorrow, and if you’d like to take a stab at what I’ll be making, here are some clues: Spanish-inspired with lots and lots of seafood including prawns, clams, mussels, and calamari.

But enough of the seafood talk, that will be for tomorrow – tonight I will be sharing with you a recipe for a dessert that is a classic Filipino favourite known as Buko Pandan, that originated from the island province of Bohol in the Central Visayas region. It is a dessert dish found on the tables at every fiesta and family gatherings. The two main ingredients for this dessert are buko, which is a young coconut, and screwpine leaves which are locally known as pandan leaves. You can find these leaves in most Asian grocery stores, but if you’re a lucky duck like me, you might have a neighbour that grows these leaves and you have full access to it for free. However, you can use bottled pandan extract if this is more convenient for you.

At first glance, this sumptuous dessert can be mistaken for Buko Salad because of the similarity in texture and dairy ingredients used. However, the green gelatin which contains the aroma and flavor of the Pandan gives the distinction. — Vanjo Merano from Panlasang Pinoy

The dessert is usually topped with pinipig (immature grains of glutinous rice pounded until flat before being toasted), but I just went for what I had in the pantry, which is cornflakes and it’s just as good because you get that crunch in the dish anyway from it too. Rice Krispies may be used as well. I don’t think it is really added, but I like my Buko Pandan Dessert with large sago pearls, which is why I have added it to the dish. I’ve read that you can also add palm seeds or nata de coco in your dessert too if you like.

ps: before I move on to the recipe, I’d like to first apologise once again for a later than usual post. We’ve had a busy morning/afternoon cooking up a storm in the kitchen for our Noche Buena, and I only had time to write this post in between cooking/waiting times, and after all the cleaning up after our dinner.

Buko Pandan Ingredients

PREP TIME 15 MINS | COOKING TIME 90 MINS | SERVES 10-12

INGREDIENTS

  • 3 young coconuts, flesh removed and cut into strips
  • 1L water
  • 1 packet (200ml) crème fraîche
  • 1/2 can (190g) condensed milk
  • 1 packet (10g) unflavoured green agar-agar powder, or simply just gelatine powder
  • 1 cup large sago balls
  • 1 cup white sugar
  • 2 tsp pandan extract*
  • Handful of cornflakes

*You can extract your own from pandan leaves, and here’s how you can do it: Place the pandan leaves and water into a blender (1 bunch (12 leaves) to about a half cup of water). Blend until the leaves are chopped very finely. Pour contents through a fine sieve and press against it using a spoon to draw out any extra juice. Discard the leaves. Tip: if you keep the extract in a sealed bottle, you can keep it for up to one week in the fridge. Do not freeze though.

METHOD

  1. Dissolve the agar-agar powder in 1L of water. Add the sugar, stir, and bring to a boil over low heat for about 10-15 minutes. Once done, pour into a large square mould (about 10″ in size) and leave it aside to cool down before placing it in the fridge to completely set.
  2. Meanwhile, bring a large pot of water to a boil, about 2L. Once boiling, add the large sago balls in and cook until tender – mine took more than an hour to cook through, about an hour and 20 minutes to be exact.
  3. While the sago is cooking away, mix all the ingredients together (except for the cornflakes) in a large bowl. Check to see if your gelatine has set, and once it has, cut it into small chunks and mix in the bowl together with all the other ingredients.
  4. Once the sago is done, drain and add it to the mixture. Give it once good final mix and then place in the fridge for about 3-4 hours before serving.
  5. Serve chilled, topped with cornflakes, or anything crunchy, and enjoy!

Buko Pandan

Buko Pandan

BON APPÉTIT

– Ally xx

myTaste.com

Cassava Cake

Cassava Cake

Hello Everyone! Once again, apologies for another later than usual post. I just got home after doing some gift shopping for a friend’s wedding this Sunday, and a Secret Santa exchange gift on Monday. After my shopping spree, I had a nice and filling dinner with my Mom and sisters at Rack & Brew, a café cum boutique. I’ve always wanted to try out the food from this place since it opened late this year somewhere in September, and I finally got around to tonight.

For those of you who have been following my blog on a daily basis for the past week, you would’ve known that I made something called Pichi-Pichi on Sunday using grated cassava. Tonight, I’m going to share with you another cassava recipe in case you have any leftovers that you didn’t get around to using for your pichi-pichi. Some of the ingredients are similar (just that this requires less!), but what differentiates one from the other is the method of cooking. Pichi-Pichi is steamed, while tonight’s recipe for cassava cake is oven-baked. I do recommend that when you go out to buy cassava, buy a few kilos (up to 3 or 4 is sufficient), so that you can just peel and grate everything all in one go and cook it up in many different ways. Also, grated cassava freezes well for up to 3 months, just defrost before using.

Cassava cake is a classic Filipino dessert, or a hefty afternoon snack made from grated cassava and coconut milk. My Mom always makes hers with pure cassava (no added flour like the pre-made ones we find in the shops/restaurants where the ratio feels like 98% flour and 2% cassava), and fresh coconut milk squeezed from the flesh of a mature coconut. You may add more coconut milk on top of the cassava once it is baked about halfway through, or you can top with off with other favourites such as macapuno or a non-traditional topping such as custard. My Mom likes hers plain, and it tastes just as good.

Cassava Cake Ingredients

PREP TIME <5 MINS* | COOKING TIME 40-45 MINS | SERVES 8-10

*This assumes that you have grated cassava readily available (fresh or frozen).

INGREDIENTS

  • 4 cups grated cassava
  • 2 cups fresh coconut milk (from a can is fine as well)
  • 1 can (380g) condensed milk
  • 50g unsalted butter, melted

METHOD

  1. Preheat oven to 190C. Grease 2 x 10″ square pans with a bit of butter. Set aside.
  2. Add all the ingredients together in a large mixing bowl and mix using a spatula until well combined.
  3. Pour the batter equally into the prepared pans and place in the oven for about 40-45 minutes, or until the tops have browned and a toothpick inserted into the centre of the cake comes out clean.
  4. Remove from the oven and leave it to cool down a bit on a wire rack. Once they have cooled down slightly, cut them into medium-sized squares.
  5. Serve warm and enjoy!

Cassava Cake

BON APPÉTIT

– Ally xx

myTaste.com