Hello Everyone and welcome back to an all new Review Sunday! Before I begin, I hope you’ve been enjoying the recipes produced by my guest bloggers, my one true love, Jialing Mew, and of course my new friend Brendon D’Souza, for the past two weeks. I’ve really enjoyed hanging out with them and cooking with them in the kitchen before I left to come back home to Brunei. Stay tuned for the next two weeks, I’ve got another friend who will be guest blogging, and a special someone whom without her, this blog may not even exist!

So anyway, for those who have been following my blog for a while now, or those who just know me personally, will know that The Ground of Alexandria is a place I keep going back to for the food and just the overall vibe of the place… oh and for the cute waiters at the Potting Shed as well *cheeky grin* If I did not already mention this in my previous review on the Potting Shed, there is another café/restaurant as well as various food stalls in and around the Grounds. I’ve been to and had food at the Garden Bar three times now and the food never fails to impress my tastebuds and fill my tummy up with delight. The first time I was here, I went alone for the Christmas Markets back in 2014, shopping for gifts for my friends, eating food, and meeting Santa Claus! Would you believe that that was the very FIRST time I ever got to meet Santa and sort of sit on his lap? Yeah, what a childhood I’ve had right? Anyway, Santa said to me “it must be my lucky day!” referring to the fact that he’s had a couple of women taking photos with him before me.

The second time I came back to the Ground and had food at the Garden Bar was with my family when they came to visit for a holiday and my graduation ceremony in early May of this year. I decided to take them to the Garden Bar and enjoy the eats of the various food stalls. There were a lot of people, as usual, and it was difficult to snag a seat for four, but luckily we were able to find one under the lovely winter sun within 15 minutes of arriving. My Mom and my sisters fell completely in love with the food, as well as the atmosphere and overall vibe of the place – just like me. The third time I came back and had food from the Garden Bar was during a catch up session with Vidhya – well, I had been stalking the Instagram page of the Grounds and found out they were selling waffles that weekend so I HAD to go (and drag Vidhya along of course since we planned to hang out that day). Vidhya, if you’re reading this, correct me if I am wrong, I think I made you fall in love with the Grounds as well!


THE GARDEN BAR BREKKY: BRUNCH BURGER
with halloumi, caramelised onions, and rocket on a brioche bun ($10.00)
add chorizo (+$3.00)
I ordered this burger before when I went to the Grounds by myself during the Christmas festivities. I ordered it with the chorizo, but then completely forgot to add on that as an extra when I ordered it for the family to share. So instead it was a vegetarian burger with extra garlic sauce; nonetheless, it tasted great without, but still would’ve been even better with the chorizo! I think I’ve mentioned this before in many blog posts, and many of my friends know this – I’m not a huge fan of burgers, and even though this tasted pretty good, I am still not a fan of them.

THE GARDEN BAR LUNCH: JUMBO SALT & PEPPER PRAWNS
crumbed and dressed with garlic, lime, coriander or chilli ($15.00)
THIS. That’s all I pretty much need to say about these prawns really; cooked, crumbed, and seasoned perfectly. The prawns melted in your mouth at every bite and tasted so well with the extra chimichurri sauce I drizzled on top! The prawns were by far my favourite dish from the Garden Bar – was sad to find out that they weren’t on the menu when I returned with Vidhya for round 2! (Side note: extra sauce comes at no price! They’re at the collection counter in massive bottles waiting to be drizzled onto your food!)

THE GARDEN BAR LUNCH: CHICKEN WINGS (feast for one, 8 wings)
crumbed and accompanied with fiery chilli or BBQ basting sauce ($12.00)
Another one of my favourites from the Garden Bar; we ordered the fiery chilli wings and though it wasn’t the fiery that we’re used to, it was still deliciously good, juicy and tender! If you’re tastebuds don’t fancy some spicy wings, I’m sure that the BBQ won’t disappoint. There’s also another option if you want more wings, which is 20 wings for $20.00!

THE GARDEN BAR LUNCH: BBQ CHICKEN ROLL
spit roasted over ironbark & charcoal, served with salsa and your choice of sauce ($12.00)
This Vidhya had when I took her to the Grounds; you have the choice between chicken, beef, or lamb as your meat, and you can either have it as a roll or a salad. Vidhya of course, only eats chicken, thus the chicken roll. I can’t remember if I had a little taste of the roll or not – I’m guessing I didn’t since I can’t remember, but anyway, I’m sure the roll tasted really good since pretty much everything on their menu had been spot on for me. Vidhya seemed to enjoy it 🙂

THE GARDEN BAR LUNCH: SMASHED AVOCADO
with tomato, feta, dried chilli flakes, and fresh mint from the garden ($9.50)
I’m usually not a fan of ordering smashed avocado when it comes to eating out. The reason being is that it’s basically just a piece of toast with smeared with smashed avocado and topped with feta, tomatoes, etc. Something that I can easily whip up myself at home to be honest. But alas, I knew that going out with Vidhya for “brunch” would turn into late lunch – and surprise surprise! We ended up getting to the Ground at 1pm when we decided to meet up at 11:30am. Anyway, yes so my instincts were right to have something to eat before meeting up with Vidhya to eat again 😛 So since I wasn’t overly starving, smashed avocado was the only light thing on the menu besides the roll/salad, or burger. Nonetheless, I did enjoy the smashed avocado – I mean, you can’t really stuff that up I guess.

SIDES: SWEET POTATO FRIES ($8.00)
When you see sweet potato fries on the menu, how can you ignore it?! Drizzled with extra garlic aïoli sauce ❤
 ORGANIC JUICES: TROPICAL FLAIR
watermelon, pineapple, apple, lime ($8.00)
Refreshingly good!
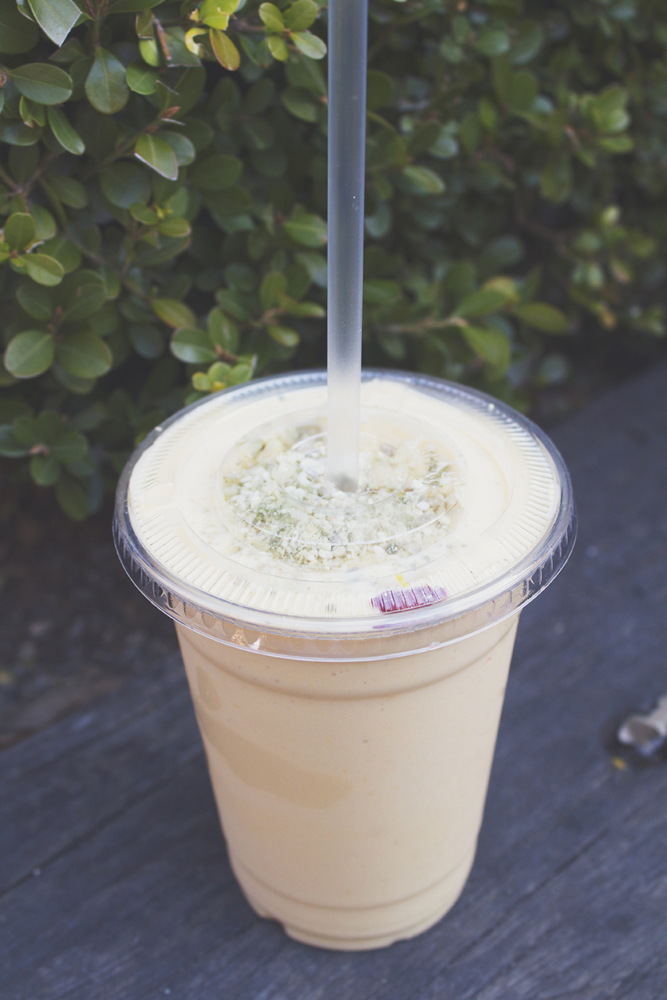 GARDEN SMOOTHIES: MANGO
fresh ripe mango, dried mango, and natural low-fat yoghurt with the goodness of chia and flax seeds ($8.50)
Though it wasn’t mango season the time I ordered the drink, it tasted heavenly!

CHOCOLATE AND RED VELVET WAFFLES ($9.00)
THIS IS THE REAL DEAL HERE; basically the main reason why I keep going back to the Grounds. I cannot stress out how many times I’ve been to the Grounds for the waffle stall that left me disappointed on so many occasions. I say disappointed because no matter when, and every time I find myself at the Grounds, the waffle stall was ALWAYS closed. There was one time I even waited around at the Grounds for 2 hours for the stall to open and kept pestering the lady at the dessert stall, asking when the waffle stall would open. I got tired of waiting, and eventually just had food from the Garden Bar and then left. When the Grounds posted a picture of their Chocolate and Red Velvet Waffles on Instagram, I knew I had to make a trip over for them; I was overly happy! Even though I was already so full from all the food I had that day prior to waffle eating, I finished all three waffles (with the help of Vidhya who took one or two small bites because she too was already full). Definitely worth my 9 bucks!

Once again, the Grounds of Alexandria never fail to disappoint me every time I visit. Each time I visit is a different experience; also because I’m with different people whenever I pay a visit to explore the gardens, the markets, indulge in the food. and of course say hi to the various farm animals such as Kevin Bacon the resident pig. The atmosphere and overall vibe of the place is a sure 10 out of 10 for me – it can get very crowded during sunny weekends, but nevertheless, it’s all part of the experience really; I mean, it’s crowded for a reason! Food I’d give a 9 out of 10 (only because I feel I’d be too biased if I gave them a 10 out of 10 for food even though they really deserve the 10). Seating can be a bit of a hassle to find especially when the Grounds is packed with people and kids. Vidhya and I ended up sitting on the ledge of one of the garden beds along with other people, but if you’re okay with that, I see no problem here. The Garden Bar has a good value for money, definitely much cheaper than the Potting Shed for reasons that are apparent anyway in terms of the quality of the food served and the ambience of the Potting Shed in comparison to the gardens. If you haven’t seen my review for the Potting Shed, or want to recap on the dishes from there (the menu might be different from my review and now since seasons have past), click here.

Garden Bar at the Grounds
Building 7A
No. 2 Huntley Street
Alexandria, New South Wales
Australia, 2015
– Ally xx