Pork Spare Ribs Sinigang

Pork Spare Ribs Sinigang

Hello everyone! So I realised that I haven’t actually posted any Filipino recipes since starting this blog. For those of you who don’t know, a big part of my diet consists of delicious homemade Filipino food cooked by my Mama while growing up. Her food was always the best. And today I want to share with you a nice sour soup that’ll definitely warm up your insides during a cold winter. Well, growing up in the tropics didn’t stop us from having a nice bowl of this soup! I’m actually quite proud to be Filipino because there is nothing that I love more than Filipino food.

Sinigang is characterised by its sour and savoury flavour that is traditionally tamarind based. There are other base variations where the soup obtains its sourness from such as guava, calamansi, bilimbi, or unripe mango. Seasoning powder or bouillon cubes based on tamarind is also used in place of natural fruits. This dish can be made with any type of meat ranging from fish, pork, beef, shrimp, or chicken, stewed with tamarinds, tomatoes, and onions as its base. The dish is then accompanied with various vegetables such as okra, gabi (baby taro), daikon (white radish), kangkung (water spinach), snake beans, and eggplant. Often, chillies or peppers would be added to the dish in order to enhance the taste while adding a little spice.

PREP TIME 10 MINS | COOKING TIME 1 HOUR 15 MINS SERVES 4-6

INGREDIENTS

  • 1 kg pork spare ribs
  • 2 small spanish red onions, quartered
  • 2 red bird’s eye chillies
  • 1 large tomato, cut into wedges
  • 1 medium sized daikon, peeled and sliced
  • 5 small baby taro, peeled
  • 1 bunch kangkung, washed, leaves separated from the stems, and stems cut into short lengths
  • 1 tbsp tamarind soup base
  • Ground salt
  • Fish sauce (optional)

METHOD

  1. Add the pork ribs into a large pot with water filled to about halfway. Boil the ribs on high heat for 30 minutes, then add the chillies, onions, tomatoes, and season with salt. Boil for another 30 minutes.
  2. Add the baby taro and let to simmer for 5 minutes before adding the daikon in. Simmer for another 5 minutes. Remove 2 of the baby taro and push them through a sieve. Return to the soup to thicken the base and make it richer (this is optional).
  3. Add the tamarind soup base, if you want your soup a little less sour, add in a teaspoon at a time to adjust to your liking (I love my sinigang soup really sour!). Add a few drops of fish sauce if the soup is tasting a bit bland.
  4. Remove from the heat and add the kangkung in. Serve immediately with rice.

Pork Spare Ribs Sinigang

Filipino is not a very famous cuisine as that of its Thai and Vietnamese neighbours. I only know of one Filipino restaurant here in Sydney, and only 1 grocer in Chatswood that sells all things Filipino. Otherwise there are only a small selection of Asian grocers that carry Filipino ingredients like mang tomas sauce, bagoong, tamarind soup base, etc. There’s more to Filipino food than the mind-boggling balut (duck embryo) as we are blessed with an abundance of seafood, tropical fruits and creative cooks. Also, with more than 7,000 islands and a colourful history, we have some delicious dishes of our own.

BON APPÉTIT

– Ally xx

myTaste.com

Prawns with Salted Duck Egg Sauce

Prawns with Salted Duck Egg Sauce

Hello everyone! Apologies for the lack of posts over the week. I assure you all that I am still eating well and I have not gone back to consuming instant noodles 🙂 The lack of posts is usually because I’ve already uploaded the recipe for it, or that what I’ve made is just a simple lunch/dinner that wasn’t photo-ready, and even also because I use natural lighting for all my photos, so when the sun is down, no photo = no post. And yes, my friends can vouch for the existence of many other photos that I have been accumulating over the past 3 years from when I first started to cook. The reason why I don’t want to use old photos is because some of them are out of focus, not presented well, or not the correct lighting, and basically…all over the place? I’m not too sure how to word the last one, but what I’m trying to say is that I’ve kind of adapted to the whole white background scene for my photographs, and I want to keep it consistently like that (unless of course for food that is not my own). I’m a little bit OCD so I like all my photographs to have the same style…for now.

Anyway, enough of the rant, about my apparent perfectionism, today I decided to make one of my favourite dishes, Prawn with Salted Duck Egg Sauce. If you read my previous post last week, I posted a recipe similar to this but with fried chicken instead. I also mentioned that I first tried this dish with prawns but have never actually made it for myself with prawns. So last week Saturday when I went to Paddy’s Market with Lina and Marissa, I bought myself some fresh tiger prawns to make this dish.

I must admit, I love prawns, but I barely cook with it only because I always have this tendency to overcook them. I always end up with dry and tough prawns which is a shame because, when cooked right, they’re just melt in your mouth delicious. I can never cook them to perfection as well because I’m always scared of them actually being undercooked. I am proud to say though that I was able to cook these prawns to melt-in-the-mouth perfection. I have never been happier. Plump, firm but tender, succulent, fresh prawns. Truly foodgasmic. Also a quick and simple dish that requires probably less than 10 minutes to cook. The only down side is that prawns are never cheap. Here at least that is…the ones I used here were almost $30 per kilo while I know I can get even fresher prawns back home for less than $10 per kilo.

PREP TIME 5 MINS | COOKING TIME 20-25 MINS SERVES 2-3

INGREDIENTS

  • 400g fresh tiger prawns, shelled and deveined (to save time, you can buy prawns that have already been shelled and deveined)
  • 2 salted duck egg yolks, steamed and smashed
  • 2 sprigs fresh curry leaves (dried leaves can be used as well if not available)
  • 2 red bird’s eye chillies, chopped
  • 2 cloves garlic, finely diced
  • 1 can (350ml) evaporated milk
  • 2 tbsp extra virgin olive oil
  • Ground salt and pepper

METHOD

  1.  Heat oil in a large frying pan over high heat. Sauté the garlic, curry leaves and half of bird’s eye chillies until fragrant. Stir in the egg yolks until they start to foam. Add the evaporated milk and bring to a boil until the sauce has slightly thickened. *This recipe calls for 350ml of evaporated milk, if you want a drier dish, then use less milk
  2. Season the prawns with salt and pepper and then add to the sauce mixture. Turn the heat down to medium and let the prawns simmer for 3-4 minutes. Once the prawns have turned pink, remove from the heat and garnish with remaining chillies. Serve immediately with steamed rice.

Prawns with Salted Duck Egg Sauce

BON APPÉTIT

-Ally xx

myTaste.com

Spinach & Ricotta Triangles

Spinach & Ricotta Triangles

Food Party for 3

Hello everyone! Today has been quite an eventful day filled with food. It kicked off with early start to a Saturday morning where two of my other housemates Lina & Marissa, and myself, caught a bus to Paddy’s Market to shop for some fresh produce. It was Lina’s first time to Paddy’s Market and I think she really enjoyed the fresh produce, and found it a little bit overwhelming at the same time. We shopped for our own food, as well as ingredients for our picnic that we had planned for the afternoon as well. I think I spent about $45 dollars in total for fresh vegetables, meat and seafood – half of the budget went to the seafood though, but then you can imagine buying the rest of the stuff for $20 which I think will last me the whole week plus 1 or 2 days max.

And of course, on our way back we stopped by Chinatown to grab some delicious cream puffs from Emperor’s Cream Puff. I told Marissa to get a box of 20 to share between the 3 of us. She told me while she was lining up, she doubted whether we could finish the whole box. Well, we did. Half of the box was practically devoured in less than 5 minutes, and the rest we finished up on the bus trip back home.

On today’s menu for the picnic, we had Chicken & Pea Soup, Chorizo & Caramelised Onion Sausage Rolls, Penne Salad, Spinach & Ricotta Triangles, and for dessert, Marissa’s Egg Custard (gone wrong, long story short, it ended up becoming steamed eggs). We also had an array of white wine: Chardonnay, Pink Moscato & Sauvignon Blanc, and a bottle of Apple & Pink Grapefruit Schweppes.

I think we overestimated the amount of food for 3 people, (and eventually became 4 as we invited our other housemate Sam to join us), for we had SO much food. All in all it was a fun day, well anything that involves food is always fun!

Penne Salad
Lina’s Penne Salad with fresh capsicums, corn, tomatoes, and sautéd garlic, mushrooms and zucchini. Drizzled with lemon juice and a touch of vinegar, seasoned with salt and pepper

Chicken & Pea Soup
Marissa’s Chicken and Pea Soup (see original recipe here on Taste). Basically substitute the ham for the chicken drumettes, and without the salami bites

Mexican Chorizo & Caramelised Onion Sausage Rolls
My Mexican Chorizo & Caramelised Onion Sausage Rolls


Today, besides my Mexican Chorizo & Caramelised Onion Sausage Rolls, I also decided to make some Spinach & Ricotta Triangles to add the dishes for Lina is a vegetarian. These triangles are a quick and easy family food, perfect for entertaining food or for a vegetarian lunch or dinner, served with a salad.

Spinach & Ricotta Triangles

PREP TIME 20 MINS | COOKING TIME 15-20 MINS |
MAKES 
27 TRIANGLES

INGREDIENTS

  • 3 sheets frozen puff pastry, semi-thawed
  • 100g fresh loose leaf baby spinach, washed and dried
  • 250g ricotta cheese
  • 1/4 cup grated parmesan cheese
  • 1 stalk fresh mint leaves, finely chopped
  • Zest of one lemon
  • Ground salt and pepper
  • 1 egg, beaten
  • 1 tbsp milk

Spinach & Ricotta Triangles

METHOD

  1. Preheat oven to 200C. Combine the egg and milk in a small bowl. Add the remaining ingredients in a medium bowl and mix with a spoon.
  2. Cut puff pastry sheets into 9 squares. Add about a teaspoon (or more) of the mixture in the middle of the pastry square and fold over into a triangular shape. Brush the ends with the beaten egg and milk mixture to secure. Using the tips of the back of a fork, gently press down on the edges to seal the joins. Repeat for the remaining squares.
  3. Space them out on a tray lined with baking paper. Brush the tops with the rest of the egg wash and bake in the oven for 15-20 minutes or until puffed, golden and cooked through.
  4. Serve with salad on the side.

Spinach & Ricotta Triangles

BON APPÉTIT

– Ally xx

myTaste.com

Mini Sausage Rolls with a Hazelnut-dressed Mixed Leaf Salad

Hello Everyone! A few days ago I decided to make sausage rolls just because I wanted to. You could argue though, why go through all the trouble to make your own when you can easily just by pre-packed frozen sausage rolls from the supermarket? I guess this way you can be a little bit more creative in what you want in your sausage rolls rather than the generic minced beef that supermarkets sell. You can basically wrap any sort of flavoured sausages in puff pastry (homemade or store bought, doesn’t really matter)! For today’s recipe, I went on and made myself some Mexican Chorizo with Caramelised Onion sausage rolls.

Chorizo, for those of you who don’t know, is a name given to a variety of sausages, both fresh and cured. The two most common types of chorizos are:

  • Spanish Chorizo – cured, or hard, sausage made from coarsely chopped pork. It has a deep, smoky flavour due to the heavy amounts of paprika in the spice mix. Also, it can be eaten without cooking because it has been cured.
  • Mexican Chorizo – ground, rather than chopped, and the sausage is fresh rather than cured. Also, the red colour comes from the spicy red pepper rather than the smoked paprika. It must be cooked prior to eating.

PREP TIME 20 MINS | COOKING TIME 15-20 MINS SERVES 24 ROLLS

INGREDIENTS

For the sausage rolls

  • 3 Mexican chorizo sausages, removed from casing
  • 2 sheets frozen puff pastry, semi-thawed
  • 1 large red onion, halved and then sliced
  • 1 egg, beaten
  • 1 tbsp milk
  • Sesame seeds
  • Knob of unsalted butter
  • Tomato sauce, to serve (optional)

For the salad (original recipe from Coles)

  • 1 packet (120g) Coles brand 4 leaf salad mix
  • 2 tbsp hazelnuts
  • 1/4 cup extra virgin olive oil
  • 1 tbsp white wine vinegar
  • 1/2 tsp white sugar
  • Ground sea salt and pepper to taste

Mini Sausage Rolls with a Hazelnut-dressed Mixed Leaf Salad

METHOD

  1. Preheat oven to 200C. Roast hazelnuts on a baking tray for 5 minutes. Transfer to a clean tea towel and let to cool.
  2. In a medium pan, melt butter and sauté onions until soft and caramelised. Remove from heat and set aside.
  3. Cut puff pastry sheets into 8 rectangles (halved and 4 cuts across). Add about a teaspoon of sausage meat to one end of the rectangle and top with caramelised onions. Tightly roll the pastry around the sausage meat and brush the ends with the beaten egg and milk mixture to secure. Using the tips of the back of a fork, gently press down on the edges to seal the join.
  4. Space them out on a tray lined with baking paper. Brush the tops with the rest of the egg wash and sprinkle with sesame seeds. Bake in the oven for 15-20 minutes or until puffed, golden and cooked through.
  5. Meanwhile, return to the hazelnuts. Rub to remove the skins then roughly chop. Combine the oil, vinegar and sugar in a small bowl and season with a touch of ground sea salt and pepper. Stir in the hazelnuts. Place the salad leaves in a large bowl and add the dressing. Toss to combine. Serve with fresh out of the oven sausage rolls.

Mini Sausage Rolls with a Hazelnut-dressed Mixed Leaf Salad

BON APPÉTIT

– Ally xx

myTaste.com

Clam Corn Chowder

Clam Corn Chowder

Happy Hump Day Everyone! The weather has been nice and warm all week, which is a bit unusual since it’s nearing the end of fall and entering winter next month – I’m not complaining though! And yes, I know that Australian winters aren’t as cold as Northern American and European countries, it’s cold for me because coming from the tropics, it doesn’t get as cold as 24C. I love the heat! I’ve been planning on making this dish for a while now, as in a few weeks ago when the weather dropped to about 10-15C, but I never got around to. I had half a pack of vongole left from my spaghetti alle vongole in the freezer and I wanted to cook it. So yesterday for dinner I decided to make Clam Corn Chowder.

I made this dish once before last year when I went on holiday with my flatmate and two other friends. It was a great winter weekend away at Port Stephens – though it was in the middle of winter, we did very non-wintry activities: parasailing, camel riding and sand boarding. The evenings were a little chillier, and we also had a ‘Christmas in July’ dinner night, where I whipped up a nice pot of Clam Corn Chowder; full of sweet corn, smoky bacon, and delightfully briny clams.

Also, please check out the original recipe that I followed here: Epicurious.

PREP TIME 10 MINS | COOKING TIME 20 MINS | SERVES 4-6

INGREDIENTS

  • 1kg NZ Westhaven Vongole
  • 3 hickory smoked bacon slices, diced
  • 1 can (400g) super sweet corn kernels, drained
  • 500g potatoes, wash, peeled and cubed
  • 2 cups fish stock (clam juice preferable if available)
  • 1/2 cup water
  • 3 stalks scallions, chopped
  • 1 cup whole milk
  • 1/2 cup thickened cream
  • 2 tbsp unsalted butter, divided
  • Ground salt and pepper to taste

METHOD

  1. In a large pot, melt 1 tbsp of the butter and sauté bacon until lightly browned, but not crisp, over medium heat. Add in the scallions (pale white parts) and cook, stirring for 2 minutes. Add in the corn and potatoes, and sauté for 2-3 minutes. Then add in the fish stock, water, and season with pepper. Bring to a boil, uncovered.
  2. Add the clams in and bring to a boil again, uncovered. Stir occasionally until the clams open (about 5-8 minutes). Discard any clams that remain unopened after 8 minutes.
  3. Add the milk and cream to the chowder, remaining butter, and season with salt. Cook until heated through but do not let it boil. Garnish with green scallions and serve with buttered bread roll.

Clam Corn Chowder

BON APPÉTIT

– Ally xx

myTaste.com

Fried Chicken with Salted Duck Egg Sauce

Fried Chicken with Salted Duck Egg Sauce

Hello Everyone! Today for lunch I decided to pull out an old recipe that I have been making for a while now. I first came across a similar dish back in 2009/2010 maybe, at a restaurant back home, Mangrove Paradise Restaurant, where one of the waiters recommended the stir fried prawns with salted egg sauce. I am so glad that they made that recommendation because the dish was simply divine! I never tried to recreate this dish at home because, if you read my story on My Kitchen Journey, I was never really into cooking until 2 years ago really.

I was looking up recipes online one day figuring out what to make, and then I remembered this dish. I searched and searched online but could not find the one that I specifically had. I came across variations of the dish, but it wasn’t what I wanted to make. I then came across this recipe from yummylittlecooks which was close enough. I tweaked the recipe and method a bit, but I actually haven’t tested this recipe out with prawns, which I should definitely do next time, with some fresh curry leaves (I couldn’t find any this week so I resulted to used dried ones). They go so well with fried chicken though!

PREP TIME 1 HOUR | COOKING TIME 20-25 MINS SERVES 4-5

INGREDIENTS

  • 1/2 cup canola oil for shallow frying

For the marinade

  • 15 pcs chicken mid-wings, washed and cleaned
  • 1/2 tsp salt
  • 1 tsp sesame oil
  • 2 tbsp water
  • 2 tbsp cornflour
  • 2 tbsp plain flour
  • Dash of ground black pepper

For the sauce

  • 3 salted duck egg yolks, steamed and smashed
  • 2 sprigs fresh curry leaves (dried leaves can be used as well if not available)
  • 3-4 red bird’s eye chillies, chopped
  • 1 can (350ml) evaporated milk

METHOD

  1. Combine all the marinade ingredients in a large bowl and mix the chicken around until well coated. Cover the bowl with cling wrap and leave to marinade for 1 hour. Do not refrigerate it to bring the meat down to room temperature before cooking.
  2. Preheat oven to 180C. Heat up oil in a large frying pan an working in batches, shallow dry the chicken until skin is crispy and golden (about 4-5 minutes per side). Remove from the heat and place on a baking tray lined with aluminium foil.
  3. Place the wings in the oven for a further 8-10 minutes to finish off in the oven. *In the past I have found that my wings were still a bit raw on the inside after frying, and frying them longer in the pan would either burn my wings or make it go dry, which is why I added this step in to finish cooking the wings without burning, and the wings remained crispy on the outside and juicy on the inside
  4. Meanwhile, drain some on the oil from the pan and sauté the egg yolks, curry leaves and half of bird’s eye chillies until fragrant. Add the evaporated milk and bring to a boil until the sauce has slightly thickened. *This recipe calls for 350ml of evaporated milk, if you want a drier dish, then use less milk
  5. Place the chicken wings on a shallow serving bowl and pour the sauce over the top. Garnish with the remaining chillies and curry leaves. Serve with steamed rice.

Fried Chicken with Salted Duck Egg Sauce

BON APPÉTIT

-Ally xx

myTaste.com

My Kitchen Journey

My Kitchen Journey

Hello everyone! Apologies on a slow week of posting. I’ve been busy with a lot of uni work – meeting and chasing deadlines altogether as I run the final month of semester. Anyway, all that aside, last month today I started up this blog and uploaded my very first post! I’ve uploaded 18 posts, gained 45 followers and 418 views in 22 different countries! Thank you so much to those who like and comment on my posts, it really means a lot to me.

A few days ago I was looking through photos from my first year of moving to Australia for my university studies. I came across a folder titled “Epic Meal Time Sydney” and my goodness, I could not stop cringing. “Did I really eat like that?” “Oh my God!” were the words that kept replaying in my mind as I went through every picture. Every picture was cringe-worthy. And it was at that moment that I decided that I would write about my journey from a terrible cook to a ‘Kitchen Goddess’ (to quote a friend of mine who called me that, and also said that my husband, when existent, will be a very lucky man). I wouldn’t call myself a Kitchen Goddess to be honest, I’m no Masterchef or anything, but I do admit that I’ve come a long way from when I first started out 3 years ago. It actually surprises me how much I’ve improved in a short span, considering I also have uni to worry about, as well as having a social life.

So, today’s post will not be a recipe, but I would like to share with all of you my journey. I left the nest back in February 2011 to embark on another chapter in my life, university life, at the College of Fine Arts in NSW, Australia. I lived on my lonesome in a studio apartment about a 15-20 minute walk from the heart of the Sydney CBD.

Before moving out of home, rice was a big part of my diet. However, I lived off a no-rice diet only because I didn’t own a rice cooker to begin with, and I never bothered or even considered getting one. When I wanted to eat rice, I would actually buy pre-cooked packed rice from Coles and all I had to do was chuck it in the microwave for 90 seconds and, rice! I am actually ashamed of having done that – I could’ve just made rice in a pot, but I didn’t. Cringe. I knew a few dishes just by eating the dishes that my Mom made when I was growing up, so at least that was a small plus. But, I basically made food that was sufficient enough for me in a sense that I didn’t care much for how it tasted like or how good it looked on the plate, I just just made whatever I could to fill my tummy when I was hungry. I was even too lazy to make my own sauce to go with my pasta that I actually lived off buying those packed pastas with powdered sauces for a year. All I had to do was put it in a pot with water, simmer until pasta was cooked, garnish with bacon, and done. Penne with Alfredo Sauce was my favourite. Cringe. Towards the end of my first year I became even lazier and start getting takeout food, almost at least 3-4 times a week for dinner. Cringe. And of course, who could forget instant noodles on a weekly basis. Cringe. Plus, I didn’t even know how to make a perfect sunny-side up egg to go with my instant noodles. Cry.

My Kitchen Journey
1st Year Kitchen Adventures

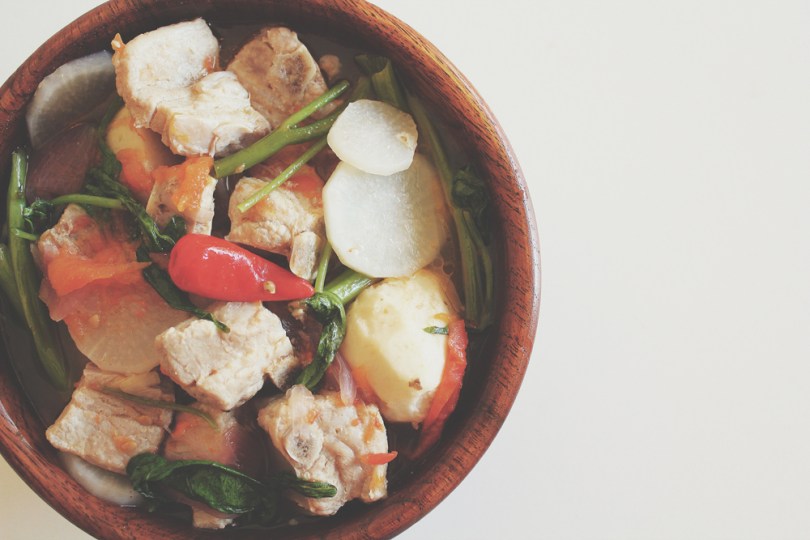
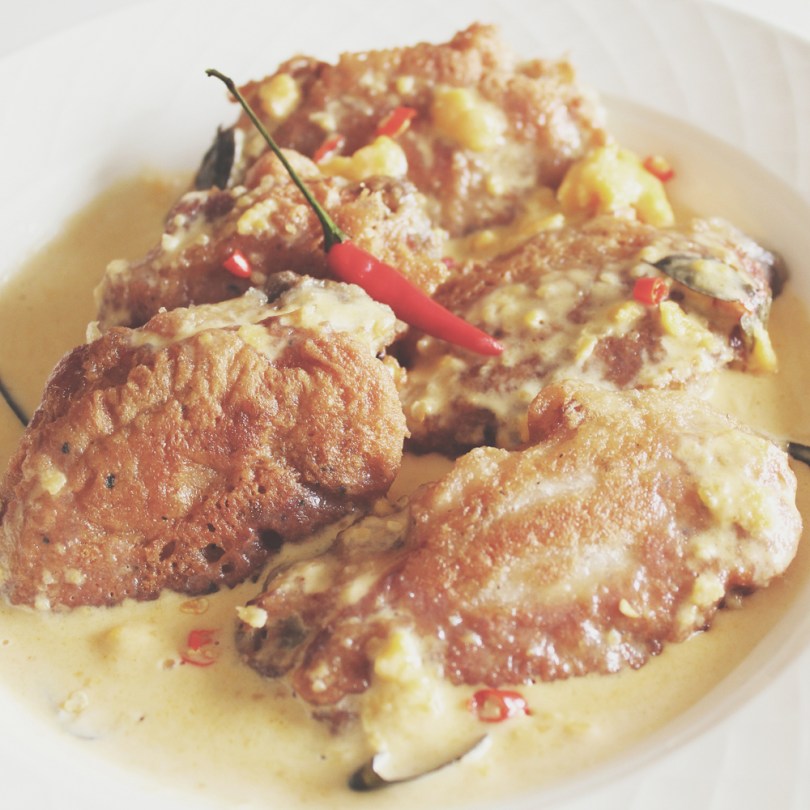
It was at that moment that I knew that I needed to do something about this, and so when I went back home for that Summer, I asked my Mom to teach me how to cook. Yes, before actually leaving for university, my Mom never really taught me how to cook, but then again I guess I never made the effort to learn how to cook during my 9-month hiatus from when I graduated high school before heading off to university. So I guess in a sense it was my fault. Being the great Mother she is, she taught me how to cook the classics, the food that I grew up with, delicious home-cooked Filipino food. It was also at this point that I discovered my love for food that I even started compiling recipes together into a cookbook just for myself.

I’ve mentioned this secret cookbook project to a few of my family members and friends, and I even showed them little snippets of what will be inside the cookbook. They’ve encouraged me to publish the cookbook and all of them are excited and waiting for the launch of it! The cookbook is still in the making. To be honest, I’ve not actually looked at it since late 2012. I am still keen on getting it published, I just have to tweak the design and add more recipes, which I will only probably be able to get onto when I finish my final year by the end of this year. So faithful fans, a little more patience! The cookbook will definitely come out!

By my second year (2012), I stopped buying pre-cooked rice and those instant pasta with powdered sauce packets from Coles. I stopped getting cheap takeouts and making instant noodles. Well, okay, I still had instant noodles, but probably on a monthly or even 3-month basis. I can also make perfect sunny-side up eggs! Achievement unlocked. I was a much better cook than I was when I started out in a sense that I knew a lot more dishes and I wasn’t afraid of improvising in the kitchen just a little bit. It was here as well that I overcame my fear of recipes. I can’t exactly explain the reasoning behind this, but I was afraid of reading and following recipes. I don’t know, for some reason it made me feel incompetent and vulnerable – again, I don’t know why I felt this. Also, during this year I moved out from living alone in the city to living with a flatmate up across the Harbour Bridge in the Lower North Shore. My flatmate was a relatively good cook too, so it made me want to be a better cook as well because we had a roster and cooked for each other every other day. I didn’t want to be judged for making terrible food, neither did I think it would be fair to get a good meal from her, and served her sh*t on my part.

My Kitchen Journey
2nd Year Kitchen Adventures

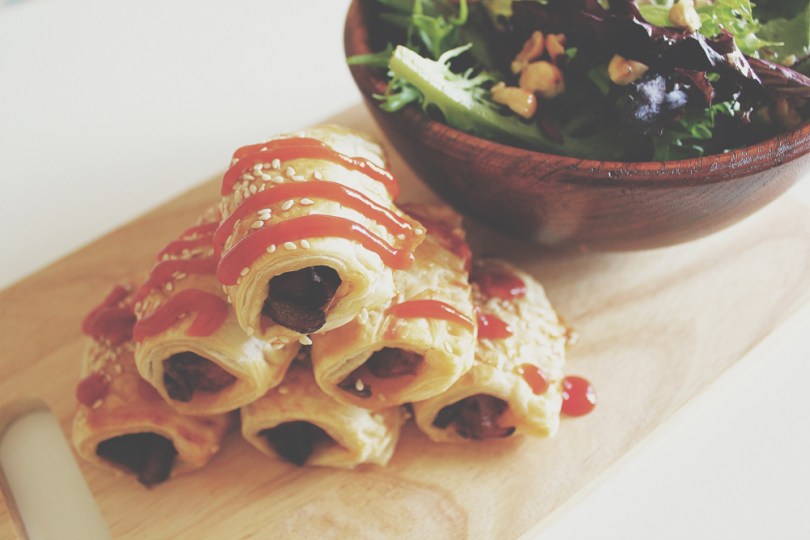
Third year was pretty much the same, I was still living with my flatmate so the standard of cooking remained pretty much the same. I improved on being able to follow recipes and try new things. I also made an effort in the presentation of my food. It was also in this year where I started to integrate food, or the concept/idea of food into my design. This then eventually led to my interest in wanting to work for a cookbook publishing or food magazine company, and ultimately what and who I want to be when I graduate. When I first started my course, I had no idea what kind of designer I wanted to be, and I never knew that I could find myself through food. I have no one else to thank but my Mom once again. Thank you for teaching me how to cook. I thank you because this has led me down a path that I am passionate about. Thank you so much. Also, I am more confident about my food that I am now able to share with my friends, and I think they love me for that if I’m not mistaken!

My Kitchen Journey
3rd Year Kitchen Adventures

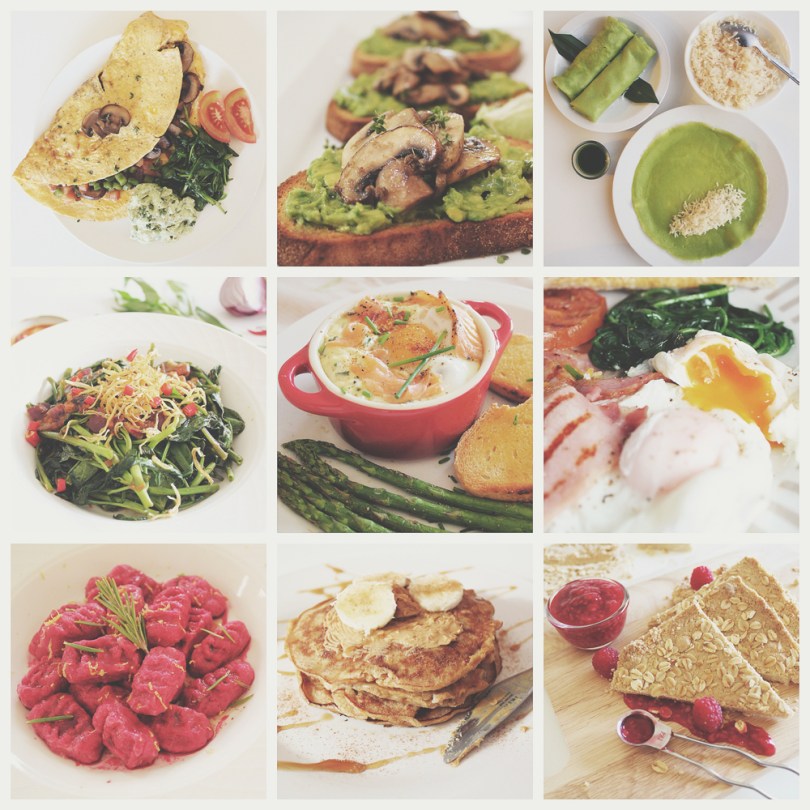
I am now in my fourth and final year of my studies. I moved out from the Lower North Shore area and now ‘kind of’ living alone in the Eastern Suburbs. I say kind of because I live in a town house with 20 other students so it still feels like I have housemates, some I am closer to than others. This blog will be a representation of how I’ve progressed as a part-time uni student and part-time amateur cook. I am already looking forward to all my upcoming design and kitchen adventures! I hope you’ve enjoyed reading this post, and I hope that this has inspired those who don’t know how to cook, are lazy to cook, or are already cooking but want to improve, that indeed it’s not an easy journey, but you will get there eventually 🙂

My Kitchen Journey
4th Year Kitchen Adventures, and continuing…

– Ally xx

Spaghetti alle Vongole

Spaghetti alle Vongole

Spaghetti alle Vongole (basically ‘spaghetti with clams’ in Italian) is one of my all time favourite seafood pasta, alongside with probably almost ALL seafood pastas out there to be honest. I cooked this up over the weekend but hadn’t found the time to upload it then, so here it is now. It is a dish that is highly popular throughout the central regions of Italy, including Rome, as well as further south in Campania. Italians prepare the dish in two ways:

  • in bianco: with oil, garlic, parsley, and sometimes a splash of white wine; or
  • in rosso: like the former but with tomatoes and fresh basil, the addition of tomatoes being more frequent in the south.

Cheese and cream are sometimes added to the dish in most Italian-American recipes. However, these ingredients are quite alien to the spirit of Italian cooking. In the true spirit of Italian cooking, cheese is never added to this dish, accentuating the simple flavours of the clams and of good quality olive oil.

PREP TIME 5 MINS | COOKING TIME 10 MINS SERVES 2-3

INGREDIENTS

  • 1kg NZ Westhaven Vongole
  • 300g angel hair pasta
  • 2 cloves garlic, crushed and finely chopped
  • 2 red bird’s eye chill, sliced
  • 1 punnet (250g) cherry tomatoes, quartered
  • 1/4 cup extra virgin olive oil
  • 3/4 cup fish stock*
  • 3/4 cup Chardonnay
  • 1/2 cup fresh Italian parsley, chopped
  • Ground salt

*I would usually go for clam juice, but I couldn’t find any at the supermarkets.

METHOD

  1. In a large saucepan over medium heat, sauté the garlic and chillies in the olive oil until fragrant and the garlic is golden brown, about a minute. Then add the clams, fish stock, and wine. Cover and simmer over medium heat, shaking the pan occasionally until all the clams open. Add in the cherry tomatoes and remove from the heat.
  2. While the clams are simmering, bring a large pot of salted water to a boil. Add the pasta and cook, stirring frequently, until al dente (read packet instructions, 4-5minutes for angel hair pasta). Drain the pasta and transfer to the saucepan and toss well with the clam sauce and parsley. Serve immediately.

Spaghetti alle Vongole

BON APPÉTIT

– Ally xx
myTaste.com

Banana, Blueberry & Peanut Butter Teddy Toasts

Banana, Blueberry & Peanut Butter Teddy Toasts

Good afternoon everyone! Maybe still morning for others, even maybe early morning or late evening. Today’s post is very simple, no method needed really. I made this a while back and was inspired by an Instagram photo that my sister tagged me in. A creative fix to shake away the Monday Blues! That’s really all I have to say today 🙂

PREP TIME 5 MINS | COOKING TIME  SERVES 1

INGREDIENTS

  • 3 slices of Wholemeal Omega-3 Chia Bread, from Baker’s Delight
  • 1 large banana
  • 1 punnet (125g) fresh blueberries
  • Crunchy peanut butter
  • Honey & maple syrup blend, to drizzle

I just realised when writing the ingredient list out, how stupid it looked when I first wrote “9 slices of bananas” and “9 blueberries” 😛

Banana, Blueberry & Peanut Butter Teddy Toasts

BON APPÉTIT

– Ally xx
myTaste.com

Oatmeal Shortbread with Raspberry Compote

Oatmeal Shortbread with Raspberry Compote

Mother's Day 2014“We laugh, we cry, we make time fly. We are best friends, my Mom and I.” – (The photo above was taken back in December during our family trip to Thailand at the Chiang Mai Zoo, it was the most recent one I could find of the both us where we actually looked decent).

Happy Mother’s Day to all mothers and moms-to-be out there in the world, especially to a woman so dear to me, Mama G. Thank you for always being there for me. I should tell you how much a love you every single day, but I don’t. So here it is: I LOVE YOU.

So for today’s recipe, I decided to make oatmeal shortbread with a raspberry compote to commemorate Mother’s Day. If you have read my previous post last week on my Mother’s Birthday, you’ll know that a) she’s actually in another country, 2 hours behind, and b) she’s a diabetic. So today’s recipe is diabetic-friendly, and again she won’t be here to actually eat it, but maybe next year when I’m definitely back home for her birthday and Mother’s Day, I’ll whip it up for her again. For now, she’ll just have to enjoy looking at the pictures.

Note, I followed Martha Stewart’s Oatmeal Shortbread recipe for this so please check out the original on Yummly. The original recipe uses confectioners sugar, and I went online to see if there are any substitutes for this and I came across this website: Fitday. Basically you mix an artificial sweetener, such as Equal or Splenda, and cornstarch, and grind it in a blender.

PREP TIME 5 MINS | COOKING TIME 30-35 MINS SERVES 3-4

INGREDIENTS

For the Oatmeal Shortbread

  • 1/2 cup plus 2 tbsp extra old-fashioned rolled oats (not quick-cooking)
  • 3/4 cup plain flour, levelled
  • 1/3 cup confectioners sugar substitute (see above)
  • 1/2 tsp ground salt
  • 120g unsalted butter, cubed

For the Raspberry Compote

  • 1 punnet (125g) fresh raspberries
  • 1 tbsp granulated sugar substitute (I used Equal in this case)
  • 1 tbsp fresh lemon juice
  • 1/4 tsp cornstarch

METHOD

  1. Meanwhile, combine all the raspberry compote ingredients in a small saucepan. Simmer for 10 minutes over medium-low heat, stirring occasionally. Once the raspberries fall apart and the sauce is thickened, remove from heat. Allow it to cool down to room temperature before serving.
  2. Combine the flour, sugar, salt, and 1/2 cup of the cooled oats in a food processor. Process for about 1 minute or until finely ground. Then add in the butter. Pulse until the mixture’s consistency is of a coarse meal. Transfer to an 8-inch square baking pan and press firmly into bottom. Sprinkle remaining oats on top, and press gently.
  3. Bake for about 30-35 minutes until firm and lightly browned. Using a paring knife, immediately score shortbread into squares, and then score each square diagonally into 2 triangles. Place the baking pan on a wire rack and allow to cool on a wire rack. Gently invert, and break along scored lines. Serve with the raspberry compote.

Oatmeal Shortbread with Raspberry Compote

BON APPÉTIT

– Ally xx

myTaste.com