Auguest 2019: Brendon D'Souza

Potato Gnocchi with Red & Yellow Peppers

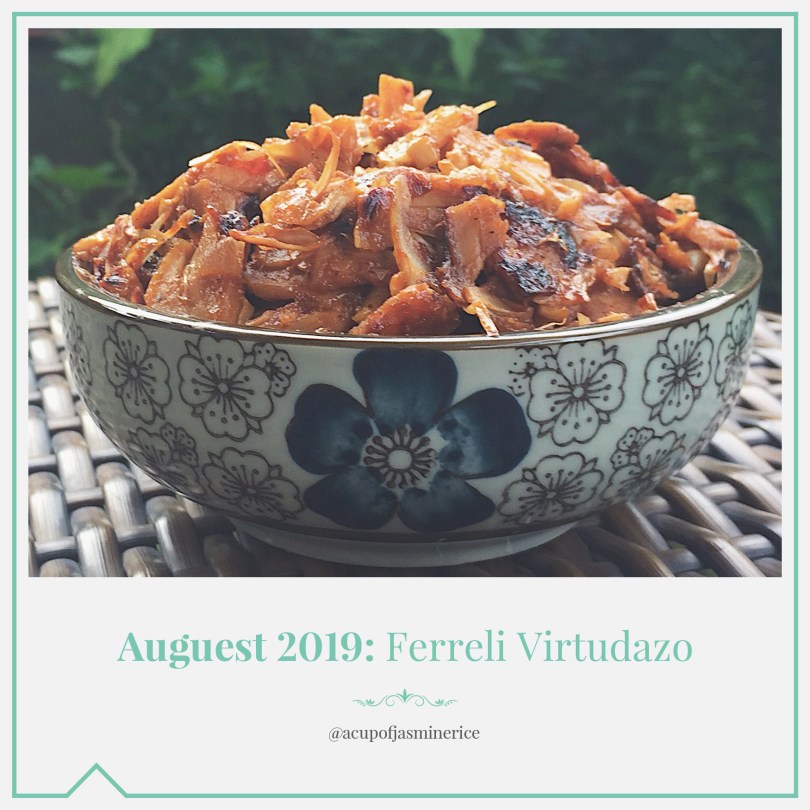
Hi Foodies, it’s Brendon D’Souza from @brendonthesmilingchef here.

It’s an honour to take part in Auguest once again this year at AMCarmen’s Kitchen. Allison and I met in Sydney a few years ago through Instagram, and then in-person at a food blogging event I hosted. Since then we’ve had countless foodie adventures together.

I started a food blog called Brendon The Smiling Chef around 2012, following the success of a recipe column of the same name. I wrote, styled, and photographed the recipes of my favourite dishes and reviewed some of my favourite restaurants and cafes. The blog continued to run until around 2016. I then focused on photography and a few other passions, worked for tech startups like Deliveroo and Tix and eventually landed a role at a global workspace provider. Earlier this year I launched my photography business Sydney Food Photography. I’ve been lucky to collaborate with some amazing brands like Samsung, OzHarvest and more.

Potato Gnocchi with Red & Yellow Peppers

When I received the theme for this year, I knew I wanted to take a playful twist on the definition of fruit. Potatoes are called pomme de terre in French which could literally translate to ‘apple of the earth’ and peppers (or capsicums as we call them in Australia), are also technically a fruit of the nightshade family (Solanaceae).

Gnocchi are delightful potato dumplings made with a few simple ingredients. They are one of my favourite comfort food this winter and pair very well with a tangy roasted pepper sauce.

Potato Gnocchi with Red & Yellow Peppers

PREP TIME 25 MINS | COOKING TIME 1 HOUR 30 MINS | SERVES 6

INGREDIENTS

For the gnocchi

  • 500g potatoes, skin on
  • 200g plain flour + extra
  • 1 free-range egg yolk, lightly beaten
  • Salt and pepper, to taste

For the peppers

  • 1 large red pepper, sliced
  • 1 large yellow pepper, sliced
  • 1-2 cloves garlic, sliced
  • 1-2 tbsp olive oil + extra

To serve

  • 250g cherry tomatoes, halved
  • Handful chopped parsley
  • Grated Grana Padano or other hard Italian cheese, to serve

Potato Gnocchi with Red & Yellow Peppers

METHOD

  1. Preparing the Potatoes: Place the potatoes in a large pot and cover with cold water. Place over high heat and bring to a boil. Continue to boil until cooked through. A knife should glide through the potato when it’s cooked. Remove from the heat and drain. Cover the potatoes with cold water and set aside to cool.
  2. Roasted Peppers: Pre-heat the oven to 180ºC/160ºC fan forced. Toss the peppers with a little olive oil and garlic slices. Spread in a single layer in a roasting pan and roast for 20-25 minutes until the peppers have softened and start to caramelise around the edges. You may need to stir the peppers in the pan while roasting. Remove from the oven and set aside.
  3. Potato Gnocchi: Once the potatoes have cooled, peel and then mash. Add the 200g of flour, egg yolk, salt and pepper and mix with a wooden spoon to form a pliable dough. If the mixture looks a little sticky, add more flour until it forms a ball. It will look and feel like play dough.
  4. Bring a large pan of salted water to a boil. Sprinkle a chopping board with some extra flour. Divide the dough into quarters and roll to form a 1.5cm thick sausage. Cut the sausage into 1cm thick slices with a sharp knife dipped in some cold water. This helps to prevent the dough from sticking. I like to make my gnocchi a little rough and leave them as discs.
  5. Cook the gnocchi in small batches for 2-3 minutes. They will float to the surface when they have cooked through. Remove to large heatproof bowl and toss with a little olive oil to prevent sticking.
  6. Add the roasted peppers, cherry tomatoes, and parsley to the gnocchi and toss to combine. Drizzle with olive oil and grated Grana Padano to serve and enjoy!

Potato Gnocchi with Red & Yellow Peppers

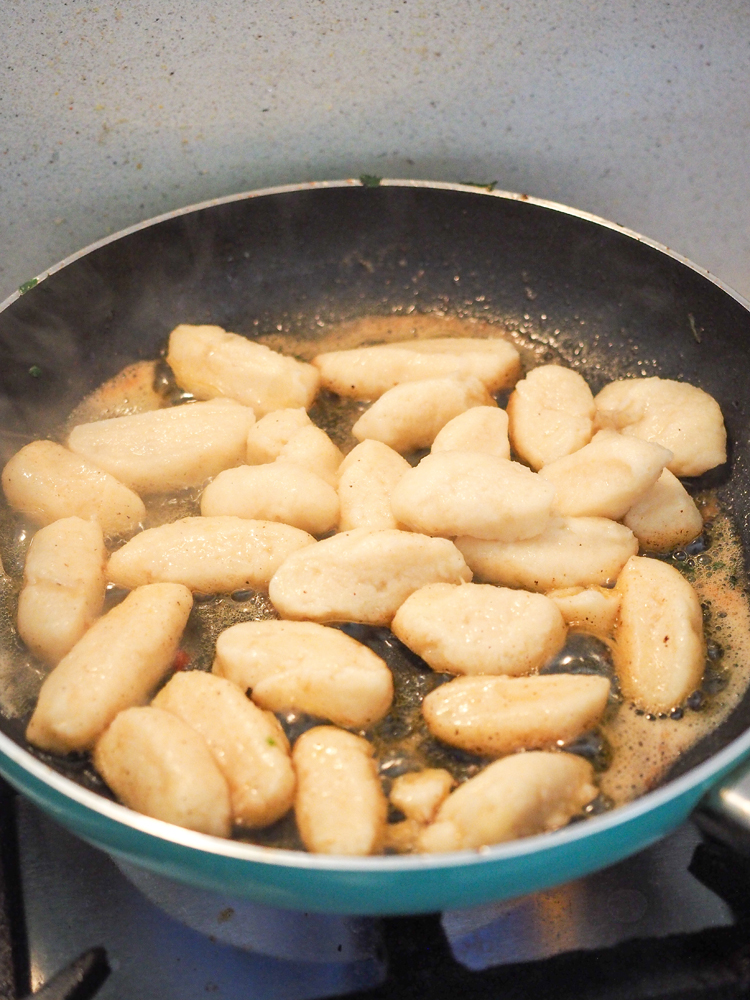
Optional extra: I love the taste and texture of pan-fried gnocchi. To do so, heat a frying pan over a medium-high heat. Add 1 tsp butter and a drizzle of olive oil. When hot, add the gnocchi in batches and sauté until golden brown.

Potato Gnocchi with Red & Yellow Peppers

Check out my foodie adventures on Instagram at @brendonthesmilingchef

Photo Courtesy & Recipe Copyright © 2019 | Brendon D’Souza

BON APPÉTIT

– Brendon D’Souza

myTaste.com

Advertisement
Auguest 2019: Ferreli Virtudazo

Vegetarian “Pulled Pork”

I’m Ferreli, the woman behind @acupofjasminerice. I started my account in 2016 as a form of creative outlet. I needed to do something different besides my corporate job. I can’t remember if I came up with that handle because acupofjasminetea was already taken or I was in a phase where I ate ONLY jasmine rice. Haha! For others I only post pictures of food; for me it’s a form of self-expression. It’s also putting myself out there as I reveal bits and pieces of me in the captions and engage with people who comment on my posts.

I started my love for cooking when I was very little. I could think back to the time I made pancakes with my grandmother and fried shrimp crackers with my mom. Those were my early memories of cooking. I think I was 5 years old then! As a child, it was all play. Now that I’m an adult, my perspective of cooking has evolved and so has my palate. These days, most of my posts are inspired by food trends. I take delight in recreating dishes I’ve seen on Youtube and Instagram.

Vegetarian “Pulled Pork”

I don’t recall who followed who but I remember that my initial interactions with Allison was with her “guess the next dish” on Instagram. I soooo take pride on my correct answers. Lol! I also couldn’t help but be amazed if I guessed it wrong. I’d go “Wow! I didn’t think of that!” I also like that she follows themes because being organized is important to me. I recently tried to be consistent with my themes as well.

I’m excited and honored to be one of her Au-guests. Her theme this month is about fruits and it’s something I can incorporate with food trends. I chose jackfruit or langka because it is gaining popularity stateside. Instead of making a local dish (I can only think of Ginataang Langka. Hehe.), I decided to go for Vegetarian Pulled Pork because it’s something new for me. I’ve found recipes as old as 3 years but I only got to see it on IG about a month ago or so. I’m calling it vegetarian instead of vegan because I’m not sure if the ingredients of the barbecue sauce are all plant-based.

I hope you enjoy making AND eating this dish as much as did. It’s easy to make and it’s something you can add to your #meatlessmonday entry 😉

Recipe adapted from:

Vegetarian “Pulled Pork”

PREP TIME 10 MINS | COOKING TIME 1 HOUR | SERVES 4

INGREDIENTS

  • 1 pack (approx. 350g) pre-sliced young jackfruit
  • 4 small red onions, chopped
  • 3 cloves garlic, minced
  • 1 cup barbecue sauce*
  • 1/2 cup water
  • 2 tbsp sunflower oil (or any cooking oil is fine)
  • 1 tsp smoked paprika
  • 1/2 tsp onion powder
  • 1/2 tsp garlic powder
  • 1/2 tsp chili powder
  • 1/2 tsp brown sugar

*If you want to make a vegan version of this dish, you may source for plant-based barbecue sauce as a substitution.

METHOD

  1. Chop the young jackfruit to smaller pieces so the core gets broken down and the “flesh” appears to have the pulled pork texture.
  2. Heat oil in a large pan and sauté the onions and garlic until slightly softened.
  3. Add in the jackfruit, spices, and brown sugar. Mix well.
  4. Add in water and simmer for 30 minutes until the jackfruit is tender and the liquid has almost been absorbed.
  5. Mash the jackfruit with a masher (I don’t have any so I used a wooden spoon. Lol!) until you achieve your desired pulled pork texture and the liquid has fully evaporated.
  6. Coat the jackfruit in barbecue sauce and toss well.
  7. Let sit for 3-5 minutes to brown the jackfruit and to give it a charred appearance.
  8. Serve warm and enjoy!

Vegetarian “Pulled Pork” Sliders

After a number of taste tests, my coworkers have said it really tasted like pork. At the same time, they could tell that the last batch I made (pictured) didn’t have the pulled pork feel because I didn’t shred it enough. So, chopping the core and mashing it thoroughly is really important if you want to really go for the pulled pork “look and feel”.

In addition, I agree with several blogs that I’ve read that the barbecue sauce can make or break this dish. I recommend the smoky flavor kind. Some blogs would also suggest pairing it with coleslaw. I’m not into mayo though… My coworkers and I enjoyed eating it plain with pickled jalapeños or kimchi on the side. We also had fun having it as pulled pork sliders. We just packed it and the pickled veggies in a tiny dinner roll and gobbled it up in one bite. Haha!

Vegetarian “Pulled Pork” Sliders

Photo Courtesy & Recipe Copyright © 2019 | Ferreli Virtudazo

BON APPÉTIT

– Ferreli Virtudazo

myTaste.com

Avocado & Shiitake Rice Paper Rolls

Avocado & Shiitake Rice Paper Rolls

Hello Everyone! I feel like keeping this short one tonight – only because I really don’t have much to say about the dish itself, nor do I have a back story like I did last week about it. Yet again, I have to say that this isn’t one of the prettiest dishes I’ve put up – to be honest, I didn’t really put much thought in how I could have presented this dish. I really had to up the saturation when editing the photographs because it just looked so dead in terms of colour, and of course, composition.

Avocado & Shiitake Rice Paper Rolls

Despite that, this is an easy to make and perfectly healthy snack if you only plan on eating 1 roll, a light dinner if eating 2, and a hefty lunch if you’re planning on eating 4 or more of these! Don’t be deceived like I was – I thought 3 rolls wasn’t going to fill me up for dinner – how wrong I was! I was already struggling towards the end of my second roll!

They’re perfect for a delectable spring or summer dish, with crispy, crunchy, creamy textures and bright, bold flavours. I mean, despite the rain we’ve been having lately, we’ve also seen some beautiful sunny days. Before we head on over to the recipe for tonight, please do check out the original recipe that I adapted from Kristina on Spabettie.

Avocado & Shiitake Rice Paper Rolls Ingredients

PREP TIME 20 MINS | COOKING TIME 10 MINS | MAKES 12 ROLLS

INGREDIENTS

For the rice paper rolls

  • Half pack (125g) cooked rice noodles, drizzled with sesame oil
  • 12 rice paper wrappers
  • 12 large dried shiitake mushroom slices, rehydrated
  • 1 large ripe avocados, peeled, pitted, and sliced
  • 1 small red bell pepper, sliced into matchsticks and blanched
  • 1/4 cup roasted peanuts, roughly chopped
  • Bunch of spring onion, cut into matchsticks and blanched

For the spicy peanut sauce (Recipe adapted from Food in a Minute)

  • 1 small garlic clove, finely minced
  • 1/2 small red onion, finely minced
  • 1/2 cup creamy peanut butter
  • 1/2 cup water
  • 1/4 cup roasted peanuts, roughly chopped
  • 2 tsp chilli powder

METHOD

  1. Spicy Peanut Sauce: Heat a dash of cooking oil (about a tablespoon) in a small saucepan. On low heat, add the minced garlic and sauté until golden in colour and fragrant, about 30 seconds. Then, add the minced onion to the pan and cook for a further 30 to 45 seconds, until slightly softened. Be careful as to not brown/burn the garlic.
  2. Add the peanut butter, roasted peanuts, chilli powder, and water to the pan and stir until smooth. Remove from the heat and set aside.
  3. Rice Paper Rolls: Have two large plates ready, one filled with water and the other for filling/rolling your rice paper rolls. Ensure all your ingredient fillings are also prepared and ready for rolling!
  4. Place a wrapper into the plate with water, flipping so that both sides of the wrapper is soaked. Remove from the water while still firm and place on the other plate and begin to build up your roll.

Tip: Do not over soak the rice paper sheet as it will soften as it sits. This is so that it will not soften to the point that it sticks to the surface of the plate or rips when handling.

Avocado & Shiitake Rice Paper Rolls

  1. Place 2-3 slices of avocado and red bell pepper matchsticks in the middle of the rice paper, with 1-2 slices of shiitake mushroom (depending on its size), and a handful of sesame rice noodles. Top with a tablespoon of the spicy peanut sauce, pinch of crushed roasted peanuts, and a spring onion matchstick.
  2. Roll like a burrito by folding the short sides over, then turning and folding one long side over. Roll, tuck, roll, tuck, until completely enclosed. Repeat for the remaining rice paper sheets – should make at least 12 rolls.
  3. Serve immediately with a side of spicy peanut sauce for dipping. Enjoy!

Avocado & Shiitake Rice Paper Rolls

BON APPÉTIT

– Ally xx

myTaste.com

Fudgy Avocado-Chilli Brownies

Fudgy Avocado-Chilli Brownies

Hello Everyone! Firstly, apologies for not getting this post up last week as originally planned. It has been a crazy hectic week with early days and late nights in the office – even working the weekends ‘til late to meet deadlines for an event that our department/team organised on this day just last week. So because of that, I barely had any time to sit down and comfortably write this post with a stress-free state of mind. Having said that, here I am, back on track again to share a deliciously (healthy?) dessert that’s sure to knock your socks off!

The first time I experienced a Chilli-Chocolate flavour combination was when I was still studying in Sydney for my Bachelor’s of Design Degree. I remember I was at Circular Quay with a friend, and one of the gelato stalls there (can’t remember the name) was having a chocolate gelato fest! I clearly remember the difficulty I had in choosing a chocolate flavour out of the possible 10 or 15 they had available. For those of you who don’t know me, I like my chocolate like how I like my men – dark. Just kidding – I just wanted to say that. I have no particular preferences on skin colour or race when it comes to men. Tangent aside; I’m just not very fond of milk or white chocolate unless I really REALLY crave for it. Well technically I’m not very fond of chocolate altogether unless I really want something chocolatey for dessert.

Fudgy Avocado-Chilli Brownies

Finally getting back to the original story, I remember having doubts on choosing just a regular Dark Chocolate Gelato, or one called Death by Chocolate which was essentially the Dark Chocolate Gelato, but with chilli in it. Me being adventurous to a certain extent (hey we all gotta draw a line somewhere!), I decided to go for the Death by Chocolate since never had I ever, up until that moment of course, tried the pairing of chilli and chocolate before. Boom. My life changed. It was a magical moment. The subtle yet just enough kick of heat that played on my tongue together with the cold creamy gelato that was slightly sweet and slightly bitter at the same time was to die for. It truly did live up to its name – Death by Chocolate. Ever since then, Chilli and Chocolate became my new best friends.

So what about Chocolate and Avocado? How did they also become my new best friends? Well, a couple of years back, when I was still studying abroad, I was out having a weekend (or maybe it was a weekday during the winter holidays) brunch with some of the people/friends I lived with. We went to a place known as Rustic Pearl in Surry Hills. When we were ordering our drinks to start off with, I was super curious about their Chocomolé Smoothie – Chocolate and Guacamole I presumed from its name after reading “with avocado and cocoa.” As usual, I was being my adventurous self and decided to try this foreign-to-me flavour pairing of Avocado and Chocolate. Did it change my life? Why yes. Yes it did. I still can’t quite describe the sensation nor taste of the pairing, but I absolutely love it.

Fudgy Avocado-Chilli Brownies

Therefore, Avocado, Dark Chocolate, and Chilli? Explosive. Every time I want to be adventurous and try something new when it came to gelato flavours, I always say to myself, “no, you need Avocado and Dark Chocolate-Chilli Gelato.” I had been craving brownies for the longest time ever, and this was the perfect opportunity to whip them up and feature them on the blog since it fit with the theme I made it fit with the theme by incorporating avocados into them. These brownies are dense, thick, fudgy, and rich. The frosting though compliments the richness perfectly since it is light in flavour. Yes the frosting tastes like avocado, and no, the brownies do not even if they have avocado mixed into them.

Anyway, apologies for the super long introduction – hope it made up for not posting last week *cheeky grin* but before we pop on over to the recipe below, please do check out the original recipe by Jessica over on How Sweet Eats.

Fudgy Avocado-Chilli Brownies Ingredients

PREP TIME 15 MINS | COOKING TIME 30 MINS | MAKES 12 BROWNIES

INGREDIENTS

For the brownie batter

  • 2 large ripe avocados, peeled, pitted, and mashed
  • 2 large free-range eggs
  • 1-2 red bird’s eye chillies, minced
  • 200g high-quality dark chocolate, melted
  • 50g high-quality dark chocolate, roughly chopped
  • 3/4 cup all-purpose/plain flour
  • 1/2 cup white granulated sugar
  • 1/4 cup unsweetened cocoa powder
  • 3 tbsp extra virgin olive oil
  • 1 tsp vanilla extract
  • 1/2 tsp baking powder
  • 1/4 tsp salt

For to avocado frosting

  • 1 large ripe avocado, peeled, pitted, and mashed
  • 2 & 1/2 cups confectioiner’s sugar
  • 1/4 tsp vanilla extract

METHOD

  1. Preheat oven to 180C (350F or gas mark 4), and generously grease a 9in x 13in baking dish with unsalted butter or non-stick cooking spray.
  2. Fudgy Brownies: Whisk the mashed avocados, melted chocolate, and minced chillies in a large mixing bowl before adding in the white granulated sugar. Whisk again until well combined. Add in the eggs, together with the vanilla extract and mix well.
  3. Sift in the plain flour, cocoa powder, baking powder, and salt into the avocado-chocolate mixture. Mix with a large spoon until JUST combined – be careful as to not overmix the batter.
  4. Stir in the extra virgin olive oil until it is well distributed into the batter and is somewhat smooth in consistency. Gently fold in the chopped chocolate, and then spread onto the prepared baking dish.
  5. Bake for 28-32 minutes, or until the middle has set. You can check this by inserting a toothpick into the centre. If it comes out clean, then the brownies are done. Remove from the oven and set aside for it to completely cool down.
  6. Avocado Frosting: Add the mashed avocado and vanilla extract into a medium-sized mixing bowl. Whisk until combined. Slowly incorporate the confectioner’s sugar into the avocado mixture and whisk until a smooth frosting forms.
  7. Frost the brownies once they have cooled down and top with extra chopped chocolate bits and chilli slices for an added extra kick of heat. Serve and enjoy immediately!

Fudgy Avocado-Chilli Brownies

Tip: If you’re going to pop them in the fridge to eat the next day, and the succeeding days to come, I recommend letting them come back up to room temperature before eating them. They can be even denser and slightly dry after coming out of the fridge.

Fudgy Avocado-Chilli Brownies

BON APPÉTIT

– Ally xx

myTaste.com

Dragon & Lychee Pork

Dragon & Lychee Pork

Hello Everyone! It’s insane just thinking about how we’re already three-quarters of the way through the middle of the year! Have you achieved some of the things on your New Year’s Resolution that you set out at the beginning of the year? I personally don’t make resolutions, only because I never end up ticking off the things I set out to do, or I stop doing them after the first month. Exercise more? Sure. Goes on a morning run for a week, then decides sleeping in is way better than going for a run!

Instead of making resolutions, I set a motto to live by for the year. I entered the year with a few challenges that I brought in with me from 2018, and I said that with these, and the challenges ahead for 2019, that whatever happens, happens. I’ll tackle every challenge and obstacle with a go with the flow mindset. With that being said, before I leap into that mindset, I still have to be proactive in finding solutions to the challenges I face; it’s more of applying this motto to whatever the result may be, positive or negative. I can safely say that this mindset has helped me in overcoming a bulk of my challenges that I brought in from 2018; thankfully positive in its own way. It may not have turned out as I had originally planned in the timeframe I gave myself – but in the end, I got there with Plan B.

Dragon & Lychee Pork

Alas, tangent aside, before we move on to the recipe for tonight, please go and check out the original recipe by Chun Rong over on XLBCR: Singapore Food & Travel Guide Blog. I guess you could say that my dish is nowhere as near as Chun Rong’s dish – in terms of look, but I can assure you that taste-wise, it definitely hit the mark. This Dragon & Lychee Pork dish is similar to the infamous and very much loved Classic Sweet and Sour Pork.

The dish itself was to die for – succulent and crispy pork paired with a sticky sweet sauce? Yes please. However, there was one thing about the dish that played tricks with my mind – and I guess this is something that only Filipinos will understand. The dish – because of its colours – reminded me of binagoongan, and because of this, with every mouthful that I took, I expected a pop of salty flavours to dance in my mouth. So in my head, I thought that this was just a very badly seasoned binagoongan dish. I had to keep telling myself that it’s not meant to be salty!

Dragon & Lychee Pork Ingredients

PREP TIME 30 MINS | COOKING TIME 45 MINS | SERVES 6

INGREDIENTS

For the pork marinade

  • 500g pork belly (liempo), cut into thick chunks
  • 1 large free-range egg, lightly beaten
  • 1/4 cup cornstarch
  • 2 tbsp light soy sauce
  • 1 tbsp sesame oil

For the sauce

  • 3/4 cup dragon fruit and lychee jam*
  • 2 tbsp water
  • 2 tbsp white granulated sugar
  • 2 tbsp white vinegar

To garnish

  • Chopped scallions
  • Sesame seeds

To serve with

  • Garlic fried rice
  • Blanched okra

*For the dragon fruit and lychee jam (Recipe adapted from Linda’s Cravings)

  • 1 medium-sized dragon fruit (about 600g in weight), cut into chunks
  • 1 can (255g) lychees in syrup, drained and roughly chopped
  • 1 cup white granulated sugar
  • Juice of 1 lemon
  • Lemon rind

Dragon & Lychee Pork

METHOD

  1. Dragon Fruit & Lychee Jam: Add the dragon fruit, lemon rind, lemon juice, and sugar in a medium-sized sauce pot. Bring to a boil over high heat. While boiling, press down on the lemon rind to extract its natural pectin. Turn the heat down to medium and continue to simmer for about 30 to 45 minutes or when the mixture has thickened. Add the lychees in at the last 20 minutes or so. When done, remove from the heat and set aside.
  2. Dragon Fruit & Lychee Sauce: Mix 3/4 cup of the dragon fruit and lychee jam together with the water, sugar, and white vinegar. Set aside.

Tip: If you have any leftover jam left, transfer to a sterilised glass jar and seal. Great on wholemeal toast with ricotta cheese for a delectable breakfast. Just be sure to consume the jam within 2 weeks.

  1. Fried Pork: In a large mixing bowl, marinate the pork chunks in soy sauce, sesame oil, and egg. Set aside in the fridge for at least 15 minutes to half an hour. Add in the cornstarch to mix, just before frying. You may opt to deep or shallow fry the pork – I personally don’t like deep frying so I opted for the latter. Of course cooking times will vary.
  2. If shallow frying, add about 3 tablespoons of cooking oil in a large frying pan over medium-high heat. Lay the pork chunks into the frying pan and fry until golden brown and crisp, about 4 to 5 minutes per side. You may or may not have to work in batches for this. Once done, remove from the pan and set aside.
  3. Dragon and Lychee Pork: In the same frying pan, discard any excess oil. Over medium low heat, add the dragon fruit and lychee sauce. Taste and adjust first according to your liking. Add the fried pork, lightly tossing and coating the sauce over and then you’re done!
  4. Transfer to a serving plate, or serve in the casing of a hollowed out dragon fruit half. Garnish with chopped scallions, sesame seeds, and diced dragon fruit.
  5. Serve with garlicky fried rice and blanched okra for a full meal. Enjoy!

Dragon & Lychee Pork

BON APPÉTIT

– Ally xx

myTaste.com

Dragon-flamed Tuna Belly with Fiery Dragon Fruit Salsa

Dragon-flamed Tuna Belly with Fiery Dragon Fruit Salsa

Hello Everyone! I know I made it sound like I’d be gone for a while over on my IG stories last month, but I’m back feeling inspired and motivated to push through the year with fun recipes that I have been putting together during my short hiatus for Amcarmen’s Kitchen.

For the month of June I’ll be featuring one of my favourite fruits of all time – Pitaya or also known more commonly in English as Dragon Fruit, more specifically the red-fleshed variety. The name ‘Dragon Fruit’ was derived from the overall exterior aesthetic of the fruit, which has a leather-like skin and prominent scaly spikes. Pitaya (or pitahaya) is the name derived from Mexico, which refers to the name of tall cacti species with flowering fruits.

Fiery Dragon Fruit Salsa

Dragon Fruits grow on long, thin, and vining cactuses (yes, this is also a valid pluralisation of the word cactus). On the outside, Red Dragon Fruits look almost identical to the white-fleshed variety. The pulp of a Dragon Fruit has a texture that is similar to a kiwi, with small and black edible seeds throughout. Red Dragon Fruits are sweet, but not as sweet as the white-flesh variety, and has a mild acidity to it. In addition, these fruits pack a lot of nutrients that are beneficial for our health. They are low in calories and are a good source of iron, magnesium, and vitamins C & E. Dragon Fruits also contain prebiotics, which helps promote the growth of healthy bacteria and potentially improve the balance of them in your gut.

Dragon-flamed Tuna Belly with Fiery Dragon Fruit Salsa

Tonight, I’ll be whipping up an easy one for y’all. The recipe title may sound intimidating, but it’s really all “just for fancy show” to draw creative links between the fruit itself, and Dragons. Read below for further details on coming up with the name for this dish. This salsa recipe can be modified based on the availability of seasonal ingredients and what you have readily available in your pantry. So feel free to get creative here! You may also substitute the dragon fruit for kiwi, mango, nectarines, or peaches. Just make sure to use a firm and barely ripe fruit so that it will hold its shape in the salsa.

Fiery Dragon Fruit Salsa Ingredients

PREP TIME 20 MINS | COOKING TIME 30 MINS | SERVES 4

INGREDIENTS

  • 1 kg fresh tuna belly slab, washed and pat-dried
  • Olive oil
  • Sea salt and freshly ground black pepper, to season

For the salsa

  • 1 small dragon fruit, diced*
  • 1 small red onion, minced
  • 1 red bird’s eye chilli, seeds in and minced
  • 1 tbsp red wine vinegar
  • Drizzle of olive oil
  • Handful of finely chopped basil leaves
  • Sea salt and freshly ground black pepper, to taste

*The grocer that I bought them from only had gigantic dragon fruits, where the one I bought and pictured for this recipe was about 800g! In this case, I only used half of the fruit for the recipe.

METHOD

Breaking down a dragon fruit may look intimidating, but it really is quite simple.

  1. Fiery Dragon Fruit Salsa: Slice the fruit in half lengthwise and spoon around the outer edge of the fruit to scoop out the flesh. Dice and place in a medium-sized mixing bowl together with the minced onion, chillies, basil leaves, vinegar, and olive oil. Stir to combine and season to taste. Set aside in the fridge for the flavours to infuse and chill.
  2. Dragon-flamed Tuna Belly: Rub the tuna belly with olive oil and season with sea salt and freshly ground black pepper.
  3. Dracarys.

If you don’t understand step #3, then skip ahead to step #4 (also, this means we can’t be friends… Just kidding! *cheeky grin*)

  1. Flame-grill on lightly greased grates over hot coals for about 3 to 5 minutes on each side or until the fish flakes easily with a fork. Feel free to adjust grilling time depending on how you like your tuna to be cooked.
  2. Remove from the heat and transfer to a serving plate. Serve hot with the Dragon Fruit Salsa and a salad for a complete meal. Enjoy!

Dragon-flamed Tuna Belly with Fiery Dragon Fruit Salsa

Just before I wrap things up with tonight’s post, I just wanted to mention that the featured recipe is actually a mash-up of ideas between a friend and myself. I already had the choice of fruit in mind that I wanted to work with for the month and what to make of it to pair with a beautiful slab of tuna belly. He suggested that I cut the fruit in half, scoop out its flesh, chop it up, and serve it in its skin/casing. I mentioned that I already had the idea to make a fiery (spicy) Dragon Fruit Salsa to go with the tuna belly, to which I said I could take his idea of serving the salsa in the dragon fruit skin. In the end I put that idea aside just because there wasn’t much contrast with the colours of the salsa and the dragon fruit skin. Nonetheless, I’ll keep this idea for another dish!

In addition, while exchanging ideas, I mentioned that I thought of grilling the tuna belly, to which he suggested to play with the idea of ‘dragon’ in the name of the dish and hence Dragon-flamed Tuna Belly. It is still essentially flame-grilled tuna belly but Dragon-flamed sounded way more cool.

BON APPÉTIT

– Ally xx

myTaste.com

Thai-style Pineapple Fried Rice

Thai-style Pineapple Fried Rice

Hello Everyone! Oh how it has been one heck of a super hectic and stressful week! So hectic that even until today I haven’t had the time to sit down and watch the second episode of the final season of Game of Thrones! *gasp* With that being said, I do have an important announcement to make which you can read about at the end of this post.

Moving on, we’re on our last Pineapple recipe for the month! How crazy is that?! It’ll be May already next week, and in another blink of an eye, we’ll be at the halfway mark of the year! Tonight I’ll be sharing a recipe that I first tried during my travels to Thailand – now I’ve been there a couple of times already so I can’t remember when exactly was the first time I had it there, whether 6, 10, or 15 years ago.

Cooking fried rice is fun as it is super quick to make and it allows you to get creative with the choice of proteins and vegetables that go into the mix. It can easily be a sort of clean-out-the-fridge. The end result, a tasty and satisfying weeknight meal to eat!

Thai-style Pineapple Fried Rice

Thai-style Pineapple Fried Rice is a refreshing twist to a classic/normal fried rice. It is one of Thailand’s signature dishes, It is often platted in a carved-out pineapple bowl to make it, not only delectable, but even more gorgeous to look at! The slightly tangy and sweet taste of the fresh pineapple is so enticing and the combination of spices just takes it up a notch. Not only that, it is so much cheaper and healthier than take-out fried rice.

Feel free to get creative and use your favourite kind of protein in this dish, i.e. ham, chicken, pork, or prawns. You may even keep it vegetarian with just the pineapple or bulk it up with tofu! Of course, don’t forget to switch out the fish sauce with salt if you’re going vegetarian with the dish. The version that I will be sharing with you guys tonight is pescatarian-friendly. It’s a true crowd-pleaser and is sure to be a hit at the table.

Thai-style Pineapple Fried Rice Ingredients

PREP TIME 15 MINS | COOKING TIME 15 MINS | SERVES 4-6

INGREDIENTS

  • 3 to 4 cups cooked rice (preferably several days old)
  • 1 fresh, almost ripe pineapple (see method below on how to prepare)
  • 250g prawns, shelled with the tails left on and deveined
  • 3-4 garlic cloves, minced
  • 1 large free range egg, lightly beaten
  • 1 red bird’s eye chilli, sliced
  • 1 small red onion, diced
  • 1/4 cup frozen mixed vegetables (green peas, carrots, and corn kernels, thawed)
  • 1/4 cup roasted cashews or peanuts
  • 1 sprig afro parsley

For the sauce

  • 3 tbsp fish sauce
  • 1 tbsp light soy sauce
  • 1 tbsp water
  • 2 tsp Thai curry powder (or regular yellow curry powder)
  • 1/2 tsp white granulated sugar

METHOD

  1. Preparing the Pineapple: Cut the pineapple lengthwise, crown included.
  2. Take one half of the pineapple and run a sharp knife around the border of the pineapple. Make sure to leave a couple of centimeteres from the edge for a firm border.
  3. Slice the pineapple into large cubes and then carve out the flesh. Repeat for the other half of the pineapple.
  4. Cut the carved out pineapple cubed into smaller bite-sized pieces and set aside.
  5. Dry out the carved out pineapple bowls in the oven at 160C (320F or gas mark 2) for about 3-5 minutes.
  6. Fried Rice: If using old rice, oil your fingers with about a tablespoon of cooking oil and work your way through the rice with you hands. Separate any chunks back into grains and then set aside.
  7. Combine the ingredients for the sauce in a small bowl. Stir to dissolve the curry powder and sugar, and then set aside.
  8. Heat a wok or a large frying pan over medium high. Add about 2 tablespoons of cooking oil and swirl around. Add the minced garlic and sauté until golden brown and fragrant, about 30 seconds. Add in the sliced chillies and diced onions. Cook for a further minute.
  9. Add in the prawns and stir-fry until they turn pink and plump, about 2 to 3 minutes. Push the ingredients to the side of the wok/pan and then pour in the lightly beaten egg. Quickly stir the egg to cook (like scrambled eggs).
  10. Now add in the rice, pineapple chunks, and thawed mixed vegetables. Drizzle the sauce mixture over the rice and gently stir-fry to combine all the ingredients together. You want to be able to hear the rice “dance” (make popping sounds) as it fries for about 5 to 10 minutes.
  11. As it cooks, taste and adjust the flavours to you liking, i.e. if it needs more salt, add more fish sauce. Towards the end of the cooking time, add in the roasted cashews or peanuts.
  12. Remove from the heat and serve into your prepared pineapple bowls. Top with the prawns, fresh chillies, and afro parsley. Serve and enjoy!

Thai-style Pineapple Fried Rice

So yes, here’s the important update/notice I mentioned at the beginning of this post. I’m going to be taking a month off from Amcarmen’s Kitchen to plan better content for the upcoming months ahead. It has been quite a hectic month for me, as we’ll be moving houses this week. Thus, I haven’t had the time to really sit down and plan out dishes in advance for the month of May. Having said that, once we’ve settled into the new house by the end of the week, I can assure you that I will head straight back into planning and will be back again in June!

For now, TTFN – ta ta for now!

BON APPÉTIT

– Ally xx

myTaste.com