Pancit Bihon Guisado (Filipino Style Stir-Fried Rice Noodles)

Pancit Bihon Guisado (Filipino Style Stir-Fried Rice Noodles)

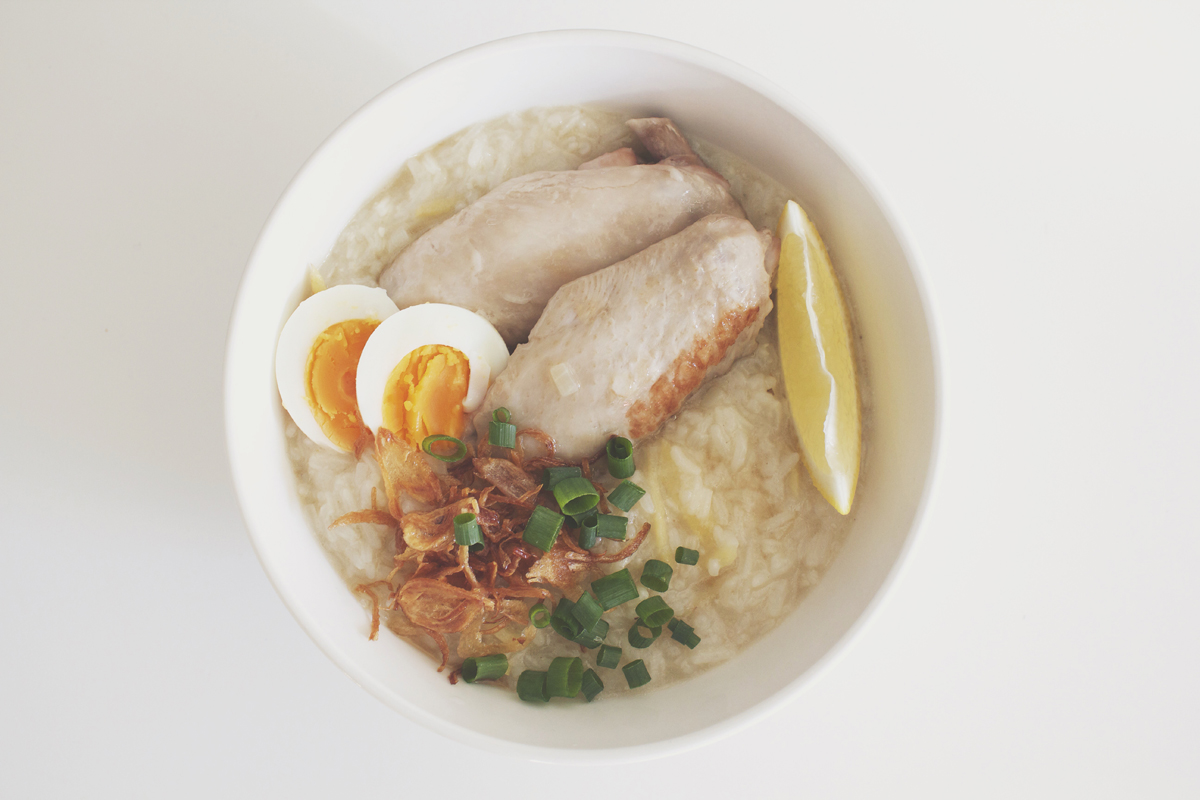
Hello Everyone! It a whole new month and you already know what that means! A new month on Amcarmen’s Kitchen means a new theme, and for the month of November, I will be sharing with you guys some of my favourite noodle dishes of all time! But before I begin, I’d just like to apologise for my later than usual post – I’ve been super busy for the past three weeks with things I cannot say yet for security reasons, but yes, super busy that I am always mentally drained and find it difficult to just sit down and concentrate on writing for my blog. I’ll probably be able to tell you guys everything somewhere in February next year, but if you really want to know, you can ask me privately. If I don’t tell you, then you’re probably one of the reasons why I can’t talk about why I’ve been busy on any form of social media 😉

Anyway, noodles were first introduced into the Philippines by the Chinese, and since then, noodles have been adopted into local cuisine with endless variations, those popular being pancit bihon guisado, pancit palabok, pancit canton, pancit habhab, etc. The term pancit is actually derived from the Hokkien piān-ê-si̍t (pian i sit) which literally means convenient food. Tonight, I will be kicking it off with a noodle that has been served on our tables countless times over my childhood years up until now – Pancit Bihon Guisado!

Pancit Bihon Guisado (Filipino Style Stir-Fried Rice Noodles)

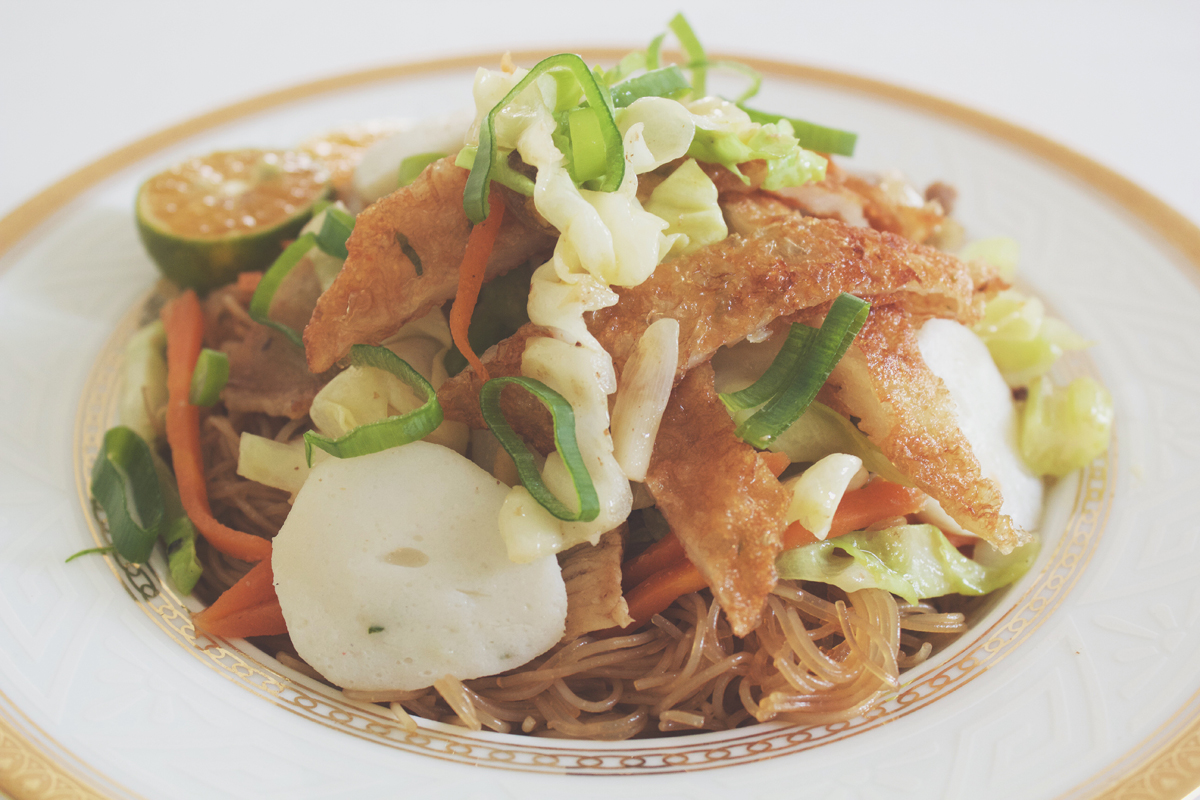
When one says pancit, it is usually associated with bihon, which is a recipe that uses very thin rice noodles, fried with soy sauce, some citrus, possibly with some fish sauce as well, and some variation of sliced meat and chopped vegetables. The composition of bihon varies quite a lot because it depends on your personal recipe. I can say that the recipe that I will be sharing with you today did even start out like this when my mom first made it for the family – the ingredients have definitely changed over the years! So don’t be afraid to improvise or get creative with the ingredients; s’long as you’ve got the base of the noodles covered with this recipe. You can even take all the meat out and replace the chicken stock with veggie stock for an all vegetarian pancit bihon guisado!

Pancit Bihon Guisado (Filipino Style Stir-Fried Rice Noodles) Ingredients

PREP TIME 15 MINS | COOKING TIME 30-45 MINS | SERVES 8-10

INGREDIENTS

  • 450g bihon noodles
  • 100g fish balls, halved
  • 100g thin fish cake, sliced diagonally
  • 3 pcs dried bay leaves
  • 2-3 garlic cloves, minced
  • 2 celery stalks, sliced
  • 2 pcs thin sliced pork belly, cut into 1cm chunks
  • 1 carrot, julienned
  • 1 chicken crown, breasts removed and sliced, bone reserved
  • 1 small brown onion, diced
  • 1/2 a head of cabbage, sliced
  • 4-5 cups chicken stock
  • 1 tbsp dark soy sauce
  • 1 tbsp fish sauce
  • 1 tbsp oyster sauce
  • Ground black pepper and salt, to taste
  • Spring onions, sliced
  • Whole black peppercorns

METHOD

  1. Add the reserved chicken bone, dried bay leaves, about a teaspoon or two of whole black peppercorns, and salt to a medium-sized pot filled with about 1.5L of hot/boiling water. Turn the heat up to high and leave to boil for about 30 minutes.
  2. Meanwhile heat a large frying pan over medium-high and add in the chunks of pork belly. Cook until browned. The oils released from the pork belly should be enough to sauté the garlic and cook the onions, but if needed, add a little bit more oil if there isn’t enough. Then add the minced garlic and sauté until fragrant and golden brown, about a minute, then followed by the diced onions. Cook until soft, about 2 minutes in total.
  3. Add in the sliced chicken breasts, fish balls, and sliced fish cakes. Season with a bit of salt and ground black pepper and give it a good mix. Cook for about 5 minutes. Then add in the carrots and celery. Mix well and leave to cook for a further 2-3 minutes. Lastly, add in the cabbage and spring onions, and cook until just slightly wilted. Once done, transfer to a bowl and set aside.
  4. In the same frying pan, add the chicken stock to the pan together with the soy sauce, fish sauce, and oyster sauce. Bring to a boil. Once boiling, add the bihon noodles in and cook until all the liquid has evaporated. Make sure that while cooking, you mix and untangle them periodically. Altogether this should take about 10 minutes. Halfway through, add in half of the cooked meat and vegetables to the noodles and mix well.
  5. Serve immediately topped with the extra meat and vegetables, and with calamansi, or alternatively a lemon wedge. Enjoy!

Pancit Bihon Guisado (Filipino Style Stir-Fried Rice Noodles)

Pancit Bihon Guisado (Filipino Style Stir-Fried Rice Noodles)

BON APPÉTIT

– Ally xx

myTaste.com

Halloween Special: Creepy Broken Glass Cupcakes!

Halloween Special: Creepy Broken Glass Cupcakes!

Halloween Special: Creepy Broken Glass Cupcakes!

Hello Everyone! Where do I even begin? Well, how about I start off by wishing everyone a Happy Halloween! So one day, probably about a few weeks ago, I was browsing through my Reader page on WordPress and going through some of the recipes of other bloggers/writers that I follow. I came across a recipe over at Easy Baked which, if I can recall, were for some sort of cupcakes all decked up for Halloween. I really loved the bright purple, orange, and green colours that Ruthanne used to decorated her Halloween-inspired baked goodies. It was from there that I followed a link to her Creepy Broken Glass Cupcakes and I knew from that very moment that I had to tackle that recipe.

I haven’t seen anything quite like that before, and I thought it would be a nice, and fun baking activity on a Sunday afternoon (yes, I actually baked this last Sunday only because I knew I would have time to do so during the week leading up to Halloween, nor on Halloween Day). Also, Ruthanne notes that this is not an original idea of hers as she has seen many examples of these cupcakes online, but rather she made it her goal to create this recipe in the easiest way possible with fewer steps.

Halloween Special: Creepy Broken Glass Cupcakes!

Anyway, this recipe gave me a bit of a headache – well, just the broken glass candy part, and a little bit of the red velvet cupcake as well. Let’s just say that with the red velvet, it did not rise as I had wanted it to or hoped, and it wasn’t very red because of the lack of colouring (I used less because my bottle of red ran out). I had actually attempted to make this recipe 2 weeks ago, but because I was so defeated and tired by the end of the afternoon, I gave up and decided to try it out again the following weekend. At least when I tried that week, I managed to get 50% of the recipe done – the frosting and edible blood. I just kept them in the fridge until the following week when I rebaked my muffins and gave the broken glass candy another go (still was not perfect, but made do with what I had).

Basically, with the glass candy, I couldn’t get the sugar to harden – as in it was mushy as still syrup-like. Apparently, as I read in the comments section of Ruthanne’s blog, another person had the same problem and it was purely because the sugar wasn’t cooked for long enough. So make sure that if you want to try this recipe out, cook it just enough so that you won’t get a mushy mess! But obviously not for too long as it will turn amber in colour which, in this case, is not what you want.

Halloween Special: Creepy Broken Glass Cupcakes! Ingredients

PREP TIME 20 MINS | COOKING TIME 25 MINS | SERVES 12 CUPCAKES

INGREDIENTS

For the cupcake batter

  • 185g butter, at room temperature, plus extra melted, to grease
  • 125ml buttermilk
  • 2 large free range eggs
  • 2/3 cup caster sugar
  • 1/2 cup self-raising flour, sifted
  • 1/4 cup plain flour, sifted
  • 2 tbsp cocoa powder
  • 2 tbsp red food colouring
  • 1/4 tsp baking soda

For the cream cheese frosting

  • 250g cream cheese, at room temperature
  • 60g butter, at room temperature
  • 1/3 cup icing sugar, sifted
  • 1/4 tsp vanilla extract

For the ‘broken glass’

  • 1 cup granulated sugar
  • 1/2 cup light corn syrup
  • 1 tsp clear food flavouring (I used lychee)

For the edible ‘blood’

  • 1 can (395g) sweetened condensed milk
  • 1 tbsp red food colouring
  • 1 tsp clear flavouring (I used lychee)
  • Black food colouring

Halloween Special: Creepy Broken Glass Cupcakes!

Halloween Special: Creepy Broken Glass Cupcakes!

METHOD

A tip before starting off: Make the decorations first, the candy glass and edible blood, as you can keep them in the fridge until just before decorating your cupcakes for your party. They can both keep for several days so you can definitely make them ahead of time.

  1. Broken Glass Candy
    • Cover a baking tray with wax paper and grease it liberally with cooking oil spray, or alternatively you can grease it with some butter if cooking spray is not readily available in your pantry.
    • Place the granulated sugar and corn syrup into a microwave safe bowl and mix them together. Cover the bowl with plastic wrap microwave on high for about 3 minutes. Remove from the microwave and CAREFULLY (beware of the hot steam!) remove the plastic wrap. Stir well and cover again with fresh plastic wrap. Microwave again for another 3 minutes, but check the mixture after about 2 minutes just to make sure that it hasn’t coloured – if you cook the sugar/syrup mixture for too long, it will be amber in colour instead of a nice clear glass you want.
    • CAREFULLY remove the bowl from the microwave and CAREFULLY remove the plastic wrap. The mixture will be very hot and sticky so be cautious as to not touch any of the hot candy! Pour the mixture over the greased wax paper and allow it to sit and harden completely (will take a couple of hours).
    • When the candy has hardened, tap a knife into the ‘glass’ to break it into sharp pieces (do be careful at this point because the pieces are actually quite sharp themselves!), and push the pieces up off the was paper and onto a plate.
    • The glass candy can be kept in a ziplock bag or an airtight container for about a week. Moisture (including the moisture from the frosting on the cupcakes) will eventually start to break the glass candy down.
  2. Edible Blood
    • In a small bowl, add the sweetened condensed milk and mix in the flavouring and red food colouring (a bit at a time) until you get a brilliant red colour. Add a tiny bit of black as the colour can go a long way! Mix and adjust until you get a nice dark red colour.
    • Spoon the ‘blood’ into a ziplock bag and seal tightly. Keep refrigerated until use.
  3. Red Velvet Cake Mix
    • Preheat oven to 180C (350F or gas mark 4). Line a 12 hole muffin pan with black paper cases.
    • Sift the baking soda, cocoa powder, plain flour, self-raising flour into a medium-sized bowl and set aside.
    • Meanwhile in a large bowl, cream the butter and the sugar using an electric handheld mixer. Mix until pale and creamy. Add the eggs and beat on slow speed, making sure that it’s all blended in. Add the flour mixture into egg mixture and gently fold it in. Finally, add in the buttermilk and red food colouring. Mix together.
    • Spoon the batter into the prepared muffin cups, filling them 3/4 of the way and bake in the oven for 20-25 minutes or until cooked through. To check if they are done, insert a toothpick in the centre of the muffin.
    • Once done, remove from the oven and allow to cool down for about 5 minutes, then transfer them out of the muffin pans and onto a wire rack to allow them to cool down completely.
  4. Cream Cheese Frosting
    • Smooth the butter, cream cheese, and vanilla together using an electric handheld mixer. Fold in the icing sugar, and then use the mixer again to beat it until it is light and fluffy.
    • Place the frosting into a ziplock bag and refrigerate until use.
  5. Assembly & Decoration
    • Place some parchment paper on your work surface to protect it from all the red colouring from your edible blood, or alternatively you can use a platter or tray that you will be serving the cupcakes on.
    • Snip off a corner of your ziplock bag of frosting and pipe onto the cooled cupcakes. Press 2 to 3 pieces of the glass candy into the top of each cupcake.
    • Snip off a corner of your ziplock bag of edible blood and drizzle over the top of each cupcake and glass candy, allowing it to drip down the sides of both.
    • Serve the same day after decorating, with plates and forks or else you will have red fingers! Enjoy a bloody delicious dessert and a very Happy Halloween to all my family, friends, and followers!

Cupcakes taste best on the same day, though they may be stored covered tightly at room temperature for 3 days (undecorated) or in the refrigerator for 5 days.

Halloween Special: Creepy Broken Glass Cupcakes!

Once again, a very Happy Bloody Halloween to all my family, friends, and followers! I will be back on Tuesday with a new theme for the month of November so stay tuned!

BON APPÉTIT

– Ally xx

myTaste.com

Breakfast Muffins: Pumpkin, Polenta, and Chilli

Breakfast Muffins: Pumpkin, Polenta, and Chilli

Hello Everyone! I can’t believe we’ve come to an end to Breakfast/Brunch Month, which also means that it’s almost the end of October! Once again, where did the days go? Time flies too quickly. Luckily for you guys, today will not be the last post for October for I have a recipe going up on the 31st for a Halloween Special. I won’t say much about it now but the only thing I will say about it is that it’s gonna get bloody!

So anyway, since today will be my last post for Breakfast/Brunch Month, I’m going to end it with a recipe that is sure to knock you socks off! I’ve not tried this recipe before earlier on this week, but I can assure you that for those of you who like a little bit of spice in your life, these muffins pack a good kick! I had actually planned to bake some Chorizo, Corn, and Chilli Streusel muffins two weeks ago to post for today, but we could not find any chorizo at all that week. So I told my mom that I’ll hold off making the muffins since they weren’t going up on the blog for another week or so during that time, but as the days drew closer and chorizo still could not be found – so maybe I will hold off this recipe for another time when chorizo is available.

Thus, I decided to change my recipe – Pumpkin, Polenta, and Chilli Muffins! I kind of like how it is sort of in theme with fall (for the Northern Hemisphere), and Halloween – the pumpkin aspect of today’s recipe that is. The original recipe for these muffins can be found over on Taste;I didn’t really do anything to alter the recipe, only that I added half of the pepitas into the muffin batter mixture. Other than that, I pretty much just followed this quick and easy recipe.

Breakfast Muffins: Pumpkin, Polenta, and Chilli Ingredients

PREP TIME 15 MINS | COOKING TIME 22-25 MINS | SERVES 12 MUFFINS

INGREDIENTS

  • 500g butternut pumpkin, peeled and cut into small chunks
  • 2 & 1/2 cups self-raising flour
  • 3/4 cup milk
  • 1/2 cup coarse polenta
  • 1/2 cup vegetable oil
  • 1 large free range egg, lightly beaten
  • 2 tbsp fresh coriander leaves, finely chopped
  • 2 tbsp pepitas (pumpkin seeds)
  • 1 tbsp caster sugar
  • 2 tsp dried chilli flakes
  • Ground salt and black pepper, to taste
  • Softened butter, to serve

Breakfast Muffins: Pumpkin, Polenta, and Chilli

Breakfast Muffins: Pumpkin, Polenta, and Chilli

METHOD

  1. Preheat oven to 190C (375F or gas mark 5). Grease a 12 hole muffin pan with either cooking spray or with butter.
  2. Place the pumpkin chunks on a baking tray lined with foil and season with a bit of salt, pepper, and coat with olive oil. Bake in the oven for 15-20 minutes or until tender. Once done, remove from the oven and transfer to a heatproof bowl. Using a fork, mash the pumpkin and set aside to cool.
  3. Meanwhile, combine the self-raising flour, sugar, polenta, chilli flakes, coriander, and half of the pepitas in a bowl. Mix until thoroughly combined and then make a well in the centre.
  4. Add the milk, egg, vegetable oil, and pumpkin into the well and then mix until just combined. Your batter will be very thick which is exactly what you want! Season with a bit of salt and pepper, and the spoon the mixture evenly into the prepared muffin pan. Top with the remaining pepitas.
  5. Bake for 22 to 25 minutes or until golden and firm to touch. Remove from the oven and stand in muffin pan for about 5 minutes before transferring them onto a wire rack to cool down completely.
  6. Serve and enjoy warm or cold with softened butter!

Muffins taste best on the same day, though they may be stored covered tightly at room temperature for 3 days or in the refrigerator for 5 days.

Breakfast Muffins: Pumpkin, Polenta, and Chilli

Breakfast Muffins: Pumpkin, Polenta, and Chilli

BON APPÉTIT

– Ally xx

myTaste.com

Breakfast Muffins: Apple Strudel

Breakfast Muffins: Apple Strudel

Hello Everyone! Oh my! I cannot believe that it’s the last week of October already! My has time gone by so quickly this past month. Anyway, it’s been a while since I last baked muffins for breakfast and only because the last time I made muffins was back in Sydney with my Muffin Making Monday partner Jialing. We made a pizza muffin together one afternoon at her place (the recipe isn’t up on my blog yet), and yes that was the last of our Muffin Making Monday days. Since I left Sydney, we’ve talked about how much we miss baking muffins together and even said that we should still continue it… Over Skype! I don’t know how that’s ever going to work anymore since we’re both independent working women with our busy schedules and time differences.

But anyway! I wasn’t aware that it was a Monday when I baked these babies; only Jialing reminded me of it when she asked me what I was doing that day and I said that I was going to bake some muffins. Today’s recipe can originally be found on All Recipes. The recipe says that it should make 12 muffins, but I ended up with 16, maybe I should’ve filled the muffin cups a bit more because some of them were a bit flat, and some had a nice rise to them. Also, since I ended up with 16 muffins, I ran out of crumbed topping so the muffins weren’t very covered with the brown sugar streusel. Anyway, I’ve edited the recipe a bit so that the proportions match up. These muffins are a little bit on the sweet side, so if you’re someone who doesn’t like sweet things for breakfast, then tune in on Thursday for a savoury brekky muffin 🙂 It involves chorizo and has a bit of a spicy kick to it!

Breakfast Muffins: Apple Strudel Ingredients

PREP TIME 20 MINS | COOKING TIME 20 MINS | SERVES 16 MUFFINS

INGREDIENTS

For the muffin batter

  • 2 cups plain flour
  • 3/4 cup white sugar
  • 110g unsalted butter, softened
  • 2 large apples, peeled and roughly chopped
  • 2 large free range eggs
  • 1 & 1/4 tsp vanilla extract
  • 1 tsp baking powder
  • 1/2 tsp baking soda
  • 1/2 tsp salt

For the brown sugar streusel

  • 1/2 cup packed brown sugar
  • 20g unsalted butter
  • 1 & 1/2 tbsp plain flour
  • 1/4 tsp cinnamon

Breakfast Muffins: Apple Strudel

Breakfast Muffins: Apple Strudel

METHOD

  1. Preheat oven to 190C (375F or gas mark 5). Line a 12 hole muffin pan with paper cases. In a medium-sized bowl, combine the plain flour, baking powder, baking soda, and salt. Set aside.
  2. In a small bowl, mix the brown sugar, cinnamon, and plain flour. Add the butter, and using your fingers, crumb the butter into the sugar mixture. Because Brunei is scorchingly hot, I needed to place the streusel in the freezer to stiffen up a bit.
  3. Using an electric handheld mixer, beat the butter and sugar in a large bowl until smooth. Add in the eggs and vanilla extract and continue to beat until well combined. Add in the apples and stir using a rubber spatula. Gradually stir in the flour mixture.
  4. Spoon the batter into the prepared muffin pan, filling them up to about 3/4 of the way, and top with the brown sugar streusel.
  5. Bake for about 20 minutes or until a toothpick inserted in the centre of a muffin comes out clean. Once down, remove from the oven and set aside to cool for about 5 minutes before removing them from the pan. Cool down completely on a wire rack and then they are ready to eat!

Breakfast Muffins: Apple Strudel

Breakfast Muffins: Apple Strudel

Muffins taste best on the same day, though they may be stored covered tightly at room temperature for 3 days or in the refrigerator for 5 days.

BON APPÉTIT

– Ally xx

myTaste.com

Cornflake-crusted French Toast

Cornflake-crusted French Toast

Hello Everyone! I’ve got another french toast recipe with a twist for you again today, but this time there will be no added milo to it. Instead we’re gonna crust our classic french toast with some cornflakes to give it that extra added crunch to an already soggy bread. I came across this idea a couple of months ago back in July when Symmetry Breakfast went viral. They posted a photo of some cornflake-crusted french toast and when I planned for Breakfast/Brunch Month for October, I knew I had to tackle a recipe for that!

I absolutely love their work! If you have been following my Instagram during that month, you would’ve seen that Jialing and I (and Edison) hopped on the #symmetrybreakfast bandwagon for the last remaining week that I was in Sydney. Actually, I might just share the photographs here since I don’t know if I will be posting them on the blog anytime other than now I guess (click on the individual images to view a larger version of them):

Homemade Charred Eggplant & Baby Octopus Shakshuka with Lebanese Bread; Blueberry & Passionfruit Cider French Crêpes with a Honeyed Citrus Creamcheese Filling topped with a Mixed Berry Compte; Orange Sunrise Cocktail Pea and Ham Soup with Stone-baked Pane di Casa and Strawberry & Lime Cider
Potato Hash Crusted Breakfast Quiche with Caramelised Onion, Chorizo, Spinach, and Sunnyside Up Egg with Mixed Leaf Salad and Garlic Butter Bread Beer, Bacon, and Tater Soup (aka “Man Soup”) with Pane di Casa; Russian Earl Grey Tea Fancy Filipino Hotsilog Brekky with Sweet Potato Hash Browns and Brekky Mocktails

L-R: Homemade Charred Eggplant & Baby Octopus Shakshuka with Lebanese Bread; Blueberry & Passionfruit Cider | French Crêpes with a Honeyed Citrus Creamcheese Filling topped with a Mixed Berry Compte; Orange Sunrise Cocktail | Pea and Ham Soup with Stone-baked Pane di Casa and Strawberry & Lime Cider Potato Hash Crusted Breakfast Quiche with Caramelised Onion, Chorizo, Spinach, and Sunnyside Up Egg with Mixed Leaf Salad and Garlic Butter Bread Beer, Bacon, and Tater Soup (aka “Man Soup”) with Pane di Casa; Russian Earl Grey Tea Fancy Filipino Hotsilog Brekky with Sweet Potato Hash Browns and Brekky Mocktails

I know, they’re not quite as symmetrical as the guys from Symmetry Breakfast (we tried to be creative with our symmetry/asymmetry lines), but it still gained a lot of views, likes (especially from Symmetry Breakfast), and new followers! Anyway, yes I realise that I have gone on a bit of a tangent, but I’m pretty sure you enjoyed those photographs (for those who have not seen them that is). So let’s get down to business shall we and get a move on to today’s recipe:

Cornflake-crusted French Toast Ingredients

PREP TIME <5 MINS | COOKING TIME 8-12 MINS | SERVES 2-4*

*Depending if you want one or two slices of french toast per person; recipe is for 4 slices of bread

INGREDIENTS

  • 1 & 1/2 cups of cornflakes, crushed
  • 4 thick slices of bread
  • 1/2 cup milk
  • 1 large free range egg
  • 1 tbsp white sugar
  • 1/2 tbsp vanilla extract
  • 1/4 tsp cinnamon
  • 1/8 tsp ground nutmeg

Optional:

  • Green Kiwi
  • Pineapple
  • Strawberries
  • Honey
  • Powdered sugar
  • Vanilla yoghurt

METHOD

  1. Whisk the eggs together with the milk, sugar, spices, and vanilla extract in a bowl.
  2. Dip both sides of a bread slice to soak up the wet mixture; do not soak it for too long. The dip the soaked sliced bread into the cornflake crumbs and coat.
  3. Place the bread slice into the frying pan and cook until done, 2-3 minutes per side.
  4. Once done, transfer to a plate lined with a paper towel to soak up any excess oils. Repeat for the remaining bread slices.
  5. Top with your favourite toppings, and/or serve with your choice of fruits for a fresh salad on the side. Enjoy!

Cornflake-crusted French Toast

Cornflake-crusted French Toast

BON APPÉTIT

– Ally xx

myTaste.com

Milo French Toast

Milo French Toast

Hello Everyone! Anyway, so it’s week 4 of Breakfast/Brunch month and this week I will be sharing with you my now-favourite french toast recipes. I say ‘now-favourite’ because this is the very first time I’ve attempted these recipes. I’ve had and made french toast before, but the recipes I’ll be sharing with you this week are beyond than that of the classic french toast – they got a certain twist to them that will make you fall in love with french toast all over again.

Today’s recipe is one that I came across on Facebook as I was scrolling through my newsfeed. BuzzFeed Australia posted a video recipe for Milo French Toast. If you love milo and fancy some french toast to go with that, then this recipe was made for you, only that, you get to combine milo together with your french toast – how cool is that? You can top them off simply with some butter and syrup, or you can make it a bit more interesting by topping them off with some of your favourite fruits – I topped mine with some strawberries, crushed pistachios, honey, and a bit of powdered sugar.

I remember growing up, even up until now, my mom would make a classic french toast for breakfast at least once a week. When I came across this recipe and talked to her about it, we decided to try it out. It was a great success in my opinion and I loved it, so did my Mom and sister Angela. Original video recipe can be found on BuzzFeed Australia‘s Facebook page.

Milo French Toast Ingredients

PREP TIME <5 MINS | COOKING TIME 8-12 MINS | SERVES 2-4*

*Depending if you want one or two slices of french toast per person; recipe is for 4 slices of bread

INGREDIENTS

  • 4 thick slices of bread
  • 1/2 cup milk
  • 1/2 cup milo
  • 1 large free range egg
  • 1/2 tbsp vanilla extract

Optional:

  • 1 punnet (250g) strawberries, hulled then halved
  • Handful of pistachios, shelled and lightly crushed
  • Honey
  • Powered sugar

METHOD

  1. Heat a bit of oil in a non-stick frying pan over medium.
  2. Combine the milo, milk, egg, and vanilla extract in a bowl. Mix until well combined.
  3. Dip both sides of a bread slice to soak up the wet mixture; do not soak it for too long.
  4. Place the soaked bread slice into the frying pan and cook until done, about 2-3 minutes per side.
  5. Once done, transfer to a plate lined with a paper towel to soak up any excess oils. Repeat for the remaining bread slices.
  6. Serve up this Aussie twist on a French favourite with some honey and butter if you like, or with some fresh fruits and crushed nuts and enjoy!

This slideshow requires JavaScript.

BON APPÉTIT

– Ally xx

myTaste.com

Arroz Caldo (Chicken Rice Porridge)

Arroz Caldo (Chicken Rice Porridge)

Hello Everyone! Today’s recipe is a dish that is quite well-known in the family, and across the Philippines I presume, as the go to dish when someone is feeling under the weather. In our house, you’d know when someone is sick with the flu when you see this dish on the table for everyone to eat; yes that’s right, you don’t have to be the sick one to have a bowl of arroz caldo! However, besides it well-known as the go to dish for the sick, arroz caldo is also a common breakfast dish as it can be quite filling, providing you with the energy that you’d need to last you until lunch time. It can also be a snack (merienda) dish with tokwa’t baboy (a dish composed of boiled pig’s ears and/or pork belly, and fried tofu with a vinegar, soy sauce, and chilli dip on the side).

Arroz Caldo is actually of Chinese origin as it draws resemblance to a type of risotto-like congee. The name of this dish however, was given by the Spaniards due to pronunciation issues. The dish is also similar to other Filipino porridges such as lugaw and goto, the only distinguishing ingredient would be that arroz caldo mainly uses chicken while goto requires the use of tripe, beef, and innards. Lugaw on the other hand, is as plain as it can get.

So I made this dish back when I was in Sydney, a few weeks before I left in early August. I was staying at Marissa’s place for the time I was there and we both fell ill at one point during my stay. I can’t quite remember who fell sick first and who gave who the sickness, but all I remembered was that I made this dish for the both of us. I even told her the story behind this dish and she even made mention that they have a similar Vietnamese dish known as Cháo Ga (also fed to those who were feeling under the weather).

Arroz Caldo (Chicken Rice Porridge) Ingredients

PREP TIME 10 MINS | COOKING TIME 45 MINS | SERVES 4-6

INGREDIENTS

  • 500g chicken mid-wings, washed and cleaned
  • 1.5L water
  • 2 cups rice, uncooked and washed
  • 4 large free range eggs, hard-boiled and sliced
  • 2-3 garlic cloves, minced
  • 1 large brown onion, sliced
  • 1 lemon (or calamansi if available)
  • 1 thumb-sized ginger, julienned
  • 2 tbsp fish sauce
  • 2 tbsp vegetable oil
  • 2 tsp chicken stock powder
  • Ground black pepper to taste
  • Crispy fried shallots
  • Spring onions, sliced

METHOD

  1. Heat the vegetable oil in a large pot over medium-high. Add the ginger and fry until fragrant, then add in the garlic, sautéing until fragrant and golden brown. Then add in the onions and cook until soft, altogether about 2-3 minutes.
  2. Add the chicken mid-wings to the pot and season with the chicken stock powder and ground black pepper. Give it a good mix and cook for about 6-8 minutes or until the outer layer of the chicken starts to brown. Then add in the water and bring to a boil. Once boiling, cook for a further 5 minutes and then scoop out the chicken mid-wings and set aside*.
  3. Add the washed, uncooked rice and mix well, stirring occasionally. Turn the heat down to low-medium and leave it to simmer until the rice is fully cooked (about 30 to 40 minutes). Stir occasionally just to make sure that the rice doesn’t stick to the bottom of the pot. In the last 10 minutes of cooking time, you may return the chicken mid-wings to the pot to heat them up again before serving the dish.
  4. Taste and if the porridge needs a bit more seasoning, add some fish sauce and adjust to your liking.
  5. Divide the porridge into bowls equally and top with the chicken and sliced hard-boiled eggs. Garnish with a pinch of crispy fried shallots, spring onion, and a squeeze of lemon juice (you may add some saffron threads for aroma and colour).
  6. Serve hot and enjoy!

*You don’t usually scoop the chicken out, but because I didn’t want the chicken to become too soft and start breaking apart, so I took them out. The reason is just because I don’t want them to look aesthetically displeasing on the dish for the photograph really. Otherwise, leaving them in until they fall of the bone is what you would like to achieve with this dish.

Arroz Caldo (Chicken Rice Porridge)

Arroz Caldo (Chicken Rice Porridge)

BON APPÉTIT

– Ally xx

myTaste.com

Breakfast Plate

Breakfast Plate

Hello Everyone! I can’t believe that it’s already October! Where did September go?! So I’m sure all of you are aware that a new month calls for a new theme on the blog for the month of October! Those of you who know me, I am a breakfast/brunch person. I mean, I sometimes skip breakfast when the mornings just get a little too hectic for me; that was during my first few years at uni, but towards the end, I made it a habit to pack my breakfast to uni and/or work and eat it there.

I remember my internship days at Hello Social where I’d always be rushing out in the mornings to catch my bus, which therefore meant that I didn’t have time to sit down and enjoy my breakfast. That was where Muffin Making Mondays with Jialing came in, and when I had run out of muffins to take to work (because we only bake fortnightly), I would pack some fruits and even sometimes a small tupperware of cinnamon toast cereal with one of those small drink cartons of milk. When I’d get to the office, I’d pour the milk over my cereal and enjoy breakfast at my table. There was a time where one of the managers asked me what I was having for breakfast and the thought of me bringing a small carton of milk made her laugh so hard. I told her it was practical 😛 Another time when I was also having cereal, my other manager asked if what I was having was shareable; to his dismay, cereal ain’t shareable! He asked what kind of cereal I brought in and I said cinnamon toast. The other manager said that that was so American of me.

Anyway, I mean, if you didn’t already gather what this month’s theme is from my little story, yes it’s breakfast and brunch month on the blog! For the month of October I will be sharing with you some of my favourite breakfast/brunch recipes! I’ll be kicking off tonight’s post with a dish that I threw together when I was still living in Sydney. I was inspired by a post that I saw on Instagram by Raw Pawpaw Café in Brisbane. I was inspired by their plating of one of their dishes, and decided to plate it up with a few of my favourite ingredients for breakfast. I think most of the preparation of the ingredients in this dish is pretty straight forward, and you can get creative yourself by mixing up the ingredients a bit by adding your own favourite breakfast ingredients!

Breakfast Plate Ingredients

PREP TIME 5 MINS | COOKING TIME 20-22 MINS | SERVES 1

INGREDIENTS

  • 2-3 slices of soy & linseed bread, toasted
  • 2 bacon rashers
  • 2 large free range eggs, at room temperature
  • 1 chorizo sausage, thick slices
  • 1/2 avocado, cut into chunks
  • Bunch of grape vine tomatoes
  • Butter, for spreading
  • Ground salt and black pepper to taste
  • Handful of cup mushrooms, sliced
  • Handful of loose baby spinach leaves
  • Lemon wedges, to serve
  • Olive oil

METHOD

  1. In a small bowl, marinate the avocado chunks with a little bit of olive oil, salt, pepper, and lemon juice. Set aside.
  2. Preheat oven to 200C. Line a baking tray with aluminium foil and toss the grape vine tomatoes in a little bit of olive oil and salt. Roast in the oven fro about 10 minutes, or until the tomatoes have gone soft. Turn the temperature down to about 80-90C just to keep them warm before serving.
  3. Meanwhile, heat a large grill pan over medium high and cook the bacon rashers and chorizo slices, about 3 minutes per side. Once done, transfer to the baking tray and keep warm in the oven.
  4. Add your sliced mushrooms to the same grill pan and cook until browned and softened, about 4-5 minutes altogether. Turn the heat off and transfer to the baking tray and keep warm in the oven.
  5. Place the eggs in a small saucepan, covering the eggs with cold water. Bring to a boil over high heat, and once boiling, reduce the heat down to medium. Simmer gently for about 3 minutes. Remove the saucepan from the heat and using a slotted spoon, transfer to the egg carton.
  6. Plate up accordingly and enjoy your breakfast!

Breakfast Plate

Breakfast Plate

Just a little side note here before I end tonight’s post – I wanted to choose an egg carton that wasn’t grey just so that it doesn’t look dull. I must say it was hard choosing eggs based on the colour carton they come in because most of the non-grey ones were caged eggs (yes, I don’t buy caged eggs). Good thing these eggs that came in the blue carton were free range, and the blue really suited the plating and contrasted the food colours nicely.

BON APPÉTIT

– Ally xx

myTaste.com

Pesang Tilapia (Tilapia in Ginger Stew)

Pesang Tilapia (Tilapia in Ginger Stew)

Hello Everyone! I’m feeling sad, are you? Well, the only reason I’m sad is because Seafood Month has come to an end! I can’t believe the month has flown by so quickly. On the bright side, we get to explore a whole new range of dishes for the month of October! I won’t say yet what I have in store for the blog, so you’ll just have to stay tuned as all will be revealed on Thursday!

Pesang Tilapia (Tilapia in Ginger Stew)

So here we go, on to our last recipe for Seafood Month: Pesang Tilapia! Apparently, frying the fish first is not the traditional method in making Pesang Isda (isda means fish in Tagalog just for those who don’t know), it is actually boiled in the ginger stew until tender, and is actually a much healthier option as opposed to frying the fish. However there are a few pros to frying the fish first, mainly for taste and also technique. Firstly, frying makes the fish and stew taste better, and secondly, frying prevents the fish from flaking, because of its stable texture ,when cooked in the stew for a long time.

I’ve read a couple of recipes online prior to writing this post up, and a few suggestions have come up on what to serve on the side with this dish. One of the most popular is having some miso sauce as a condiment. I usually just have some fish sauce and calamansi mixed together as a condiment. I’ve also tried searching around for recipes that make any mention of serving this dish with some filo-style scrambled eggs but I haven’t seen any. Nonetheless, it actually tastes really good having the scrambled eggs together with the fish!

Pesang Tilapia (Tilapia in Ginger Stew) Ingredients

PREP TIME 5 MINS | COOKING TIME 20-22 MINS | SERVES 4

INGREDIENTS

For the ginger stew

  • 800g whole tilapia fish, scaled, gutted and cleaned*
  • 1L water
  • 2-3 bunches of baby bok choy or pechay, cleaned and ends removed
  • 2-3 garlic cloves, minced
  • 1 brown onion, sliced
  • 1 thumb-sized ginger, peeled and sliced
  • 1/2 cup vegetable oil, for shallow frying
  • Ground salt and black pepper to taste

*Alternatively you can use any other types of fish such as catfish, grouper, mudfish, and/or seabass. I know some people who can’t eat fish if it’s still whole; you can still cook this dish with fish cutlets or fillets.

For the Filipino-style scrambled eggs

  • 3 large free range eggs, beaten
  • 3 small ripe tomatoes, diced
  • 2 garlic cloves, minced
  • 1 brown onion, sliced
  • 2 tbsp vegetable oil
  • 1 tsp black peppercorns
  • Ground salt to taste

METHOD

  1. Heat the vegetable oil in a large frying pan over medium-high. Season the fish by rubbing some salt and black pepper. Once the oil is hot, fry the fish until golden brown. Once browned, flip and fry the other side of the fish, about 6-7 minutes per side. Once done, transfer the fish to a serving dish.
  2. Discard the oil, leaving behind about a tablespoon or two, and in the same pan, fry the ginger slices until fragrant. Add in the garlic and sauté until fragrant and golden brown. Finally, add in the onions and cook until soft, about 2 minutes altogether. Then add the water, whole pepper corns and salt, and bring the stew to a boil.
  3. While the stew is simmering away, move on to making your scrambled eggs. Heat the vegetable oil in a small frying pan over medium-high. Sauté the garlic until fragrant and golden brown. Add in the onions and cook until soft, about 2 minutes. Then add in the tomatoes, salt, and black pepper. Cook until the tomatoes are soft.
  4. Once the tomatoes are soft, pour in the beaten eggs and stir with a spoon, lifting and folding it over from the bottom of the pan, until the eggs are softly set and slightly runny in places. Turn the heat off and leave the eggs for a few seconds to finish cooking. Give a final stir before serving.
  5. Turn the heat off from the ginger stew and add the baby bok choy, leaving to cook for about a minute. Pour the stew over the fried fish and serve immediately with some steamed rice and the scrambled eggs. Enjoy!

Pesang Tilapia (Tilapia in Ginger Stew)

Sautéed Egg for Pesang Tilapia (Tilapia in Ginger Stew)

BON APPÉTIT

– Ally xx

myTaste.com

Calamari Stir-fry with Snow Peas & Ginger

Calamari Stir-fry with Snow Peas & Ginger

Hello Everyone! I’m feeling slightly better than I was on Tuesday, but I’m still trying to battle neck pains and a cough that has been giving me an abdominal workout; I just thought I’d let you know how I’m feeling since I mentioned on Tuesday’s post that I was coming down with a cold. I spent the whole of yesterday trying not to move as my back and arms were killing me. Also, I didn’t have much of an appetite as I realised that I didn’t finish every meal that I had yesterday. Otherwise, the fact that I can speak now makes me happy!

Calamari Stir-fry with Snow Peas & Ginger

Anyway, all that aside, I realised that I still had some squid leftover in the freezer from the time I whipped up those Chorizo-stuffed Squids and my dressed up glass noodle salad known as Yum Woon Sen (ยำวุ้นเส้น). So I decided to make use of them before I’d forget about them and then they’ll end up in the back of the freezer, lost and forgotten for months. Today’s recipe is based on a recipe card that I picked up from the Sydney Fish Markets the time my family came over to visit; it is a simple squid stir-fry paired with some crispy snow peas, flavoured with lots of ginger. Since I wasn’t feeling too well, my Mom did all the preparations and I just threw everything together in the frying pan.

Calamari Stir-fry with Snow Peas & Ginger Ingredients

PREP TIME 10 MINS | COOKING TIME 6 MINS | SERVES 2

INGREDIENTS

  • 250g large squid, cleaned and cut into pieces
  • 100g snow peas, topped and tailed
  • 2-3 garlic cloves, minced
  • 1 small-sized onion, sliced
  • 1 thumb-sized ginger, peeled and sliced
  • 1/2 cup water
  • 1 tbsp oyster sauce
  • 1 tsp cornflour, mixed with 1 tsp water
  • 1 tsp sesame oil
  • Ground salt and black pepper to taste

METHOD

  1. Lightly score the inner surface of the squid, or alternatively, cut into rings.
  2. Heat some vegetable in a medium-sized frying pan over medium-high. Add in the ginger slices and fry until fragrant. Then add in the garlic, sautéing until fragrant and golden brown. Finally, add the onions in and cook until soft, altogether about 2 minutes.
  3. Add the in the snow peas and stir-fry for about a minute.
  4. Throw in the squid, seasoning with a bit of salt and pepper. Stir for about a minute and then add in the water, cornflour mixture, oyster sauce, and sesame oil. Give it a good mix and leave to cook for a further 2 minutes.
  5. Serve immediately with some steamed rice. Enjoy!

Calamari Stir-fry with Snow Peas & Ginger

BON APPÉTIT

– Ally xx

myTaste.com