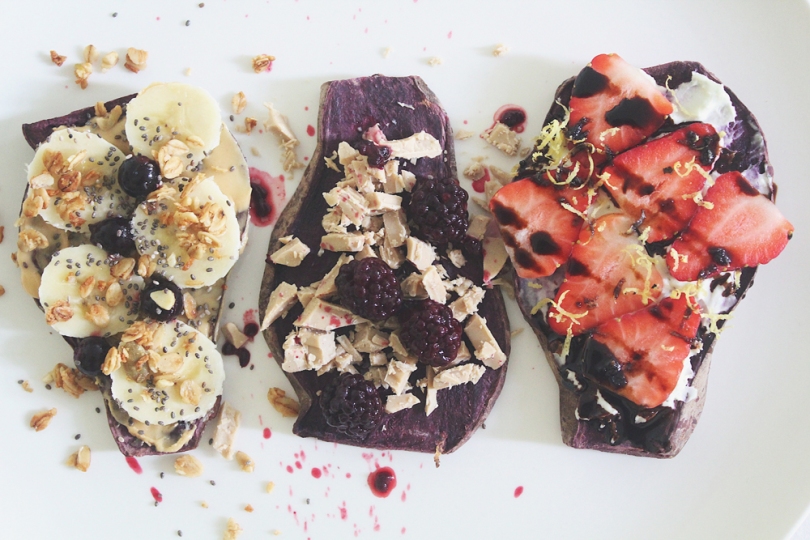
Sweet Purple Sweet Potato Toasts (3 ways)

Sweet Purple Sweet Potato Toasts (3 ways)

Hello everyone! Apologies for not getting this post up last week as it was supposed to – I feel like I’ve been repeating myself in every post so far but yes, things have been hectic. Amongst the hecticness I speak of, my sister also arrived back from Singapore last week. Other than that, nothing exciting has happened over the past week – the week ahead though will definitely be one to remember.

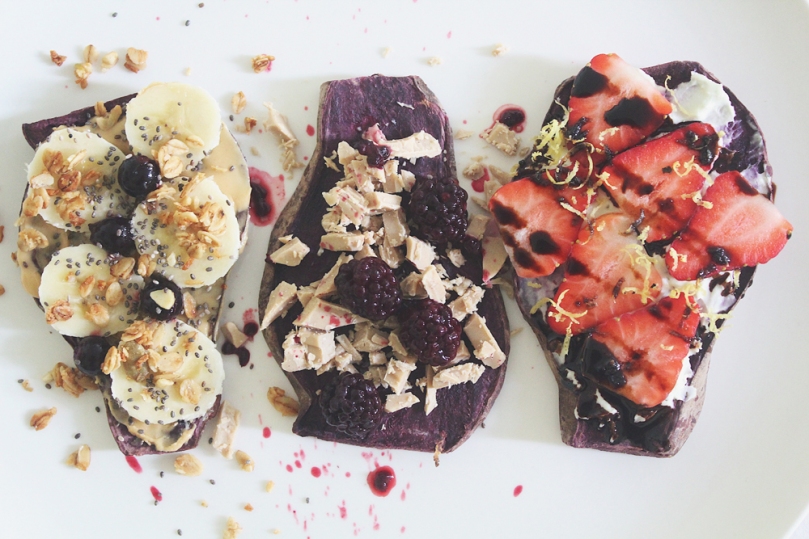
Anyway, I’ll keep tonight’s introduction short and just dive straight into the recipe. To recap, the theme for this month on Amcarmen’s Kitchen is to hero Sweet Potatoes for breakfast! At the beginning of he month, I shared Savoury Orange Sweet Potato Toasts 3 Ways for you, and tonight I’m going to share you a Sweet Purple Sweet Potato Toasts 3 Ways for those who prefer a sweet option rather than savoury to kick start their mornings!
Sweet Purple Sweet Potato Toasts (3 ways)

Preparing your Sweet Potato Toasts

PREP TIME 10 MINS | COOKING TIME 20 MINS* | MAKES 5 SLICES**

*Baking time time will vary depending on the size and thickness of your sweet potato slices.
**Or how-ever-so-many slices you can get from a single sweet potato

INGREDIENTS

  • 1 large purple sweet potato, wash and dried

METHOD

  1. Preheat oven to 180C (350F or gas mark 4). Place a wire rack on a large rimmed baking sheet.
  2. Trim both ends from the sweet potato using a knife and slice them lengthwise into 1/4-inch thick slabs using a knife or mandolin slicer.
  3. Arrange the slabs in a single layer on the wire rack and bake for about 15-20 minutes or until the potatoes are tender, but not fully cooked.
  4. Remove the potatoes from the oven and allow them to cool on wire rack completely before transferring to a storage container. They can be stored in the fridge for up to 4 days.

When it’s go-time simply add the desired number of slices to your toaster and toast away. Setting it on the highest setting takes only one toasting cycle to get them how I like them (warm, bubbly and crispy on the edges). Just be wary that yours may need more or less depending on the toaster that you are using. Adjust to your liking!

Notes/Tips:

    • Look for sweet potatoes that are relatively shaped like a tube so that they’re easier to slice.
    • Don’t remove the skin because fibre in it is good and it helps the slices hold up better during storage.
    • Using a mandolin slicer gives you uniform slices of sweet potatoes, and is easier and safer than using a big knife.
    • Allow them to cool completely after baking before stacking them in a container or they’ll get sweaty and will definitely take longer to toast when you’re ready to eat them.

Now the fun starts – you get to add toppings! The possibilities are pretty much endless but these three are my absolute favourite combinations for a yummy start to my day – the sweet edition!


Blackberries & Buttermilk Caramelised White Chocolate
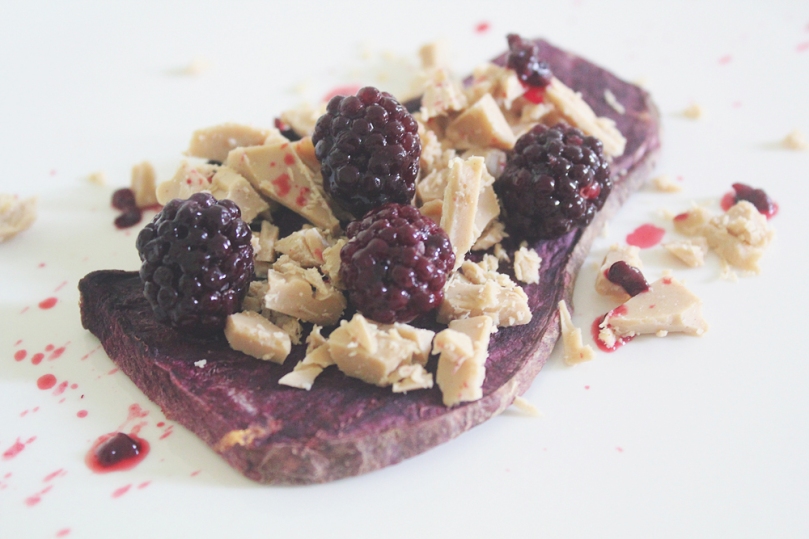
Sweet Purple Sweet Potato Toasts (3 ways): Blackberries & Buttermilk Caramelised White Chocolate

PREP TIME 5 MINS | COOKING TIME 5-10 MINS | SERVES 1

INGREDIENTS

  • Blackberries, fresh or frozen (thawed)
  • Sweet potato slice(s)
  • Whittaker’s West Coast Buttermilk Caramelised White Chocolate (Artisan Collection), roughly chopped

METHOD

  1. Place the sweet potato slices into a toaster and toast on the highest setting until warm, bubbly and crispy on the edges.
  2. Top with the above garnishes and enjoy!

Banana, Blueberries & Peanut Butter
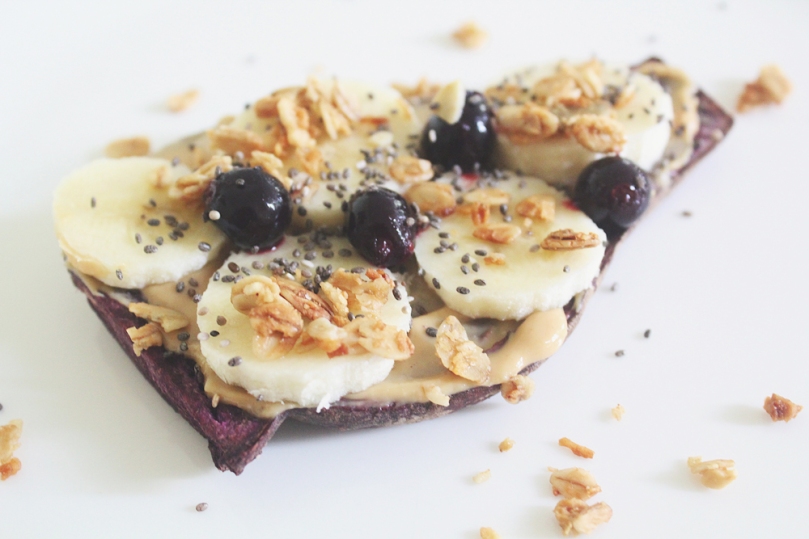
Sweet Purple Sweet Potato Toasts (3 ways): Banana, Blueberries & Peanut Butter

PREP TIME 5 MINS | COOKING TIME 5-10 MINS | SERVES 1

INGREDIENTS

  • Banana slices
  • Blueberries, fresh or frozen (thawed)
  • Chia seeds
  • Granola
  • Peanut butter
  • Sweet potato slice(s)

METHOD

  1. Place the sweet potato slices into a toaster and toast on the highest setting until warm, bubbly and crispy on the edges.
  2. Top with the above garnishes and enjoy!

Strawberries & Goats Cheese with Balsamic Reduction
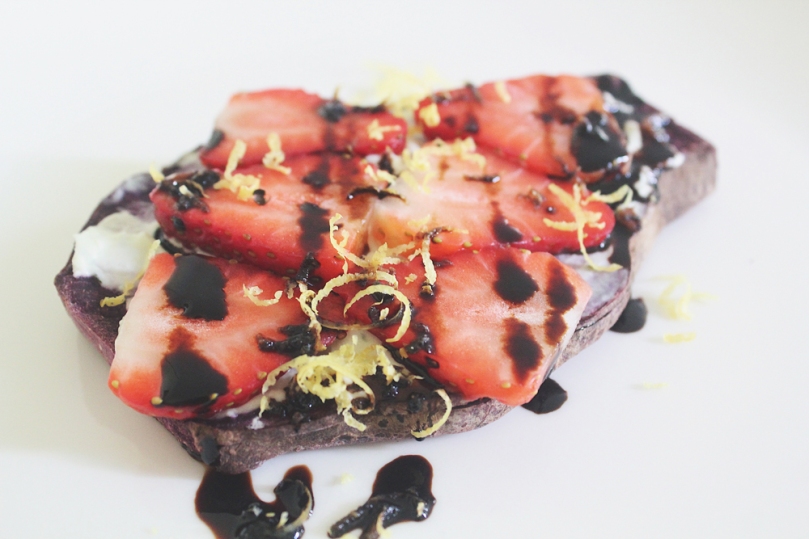
Sweet Purple Sweet Potato Toasts (3 ways):Strawberries & Goats Cheese with Balsamic Reduction

PREP TIME 5 MINS | COOKING TIME 5-10 MINS | SERVES 1

INGREDIENTS

  • Balsamic reduction
  • Goats Cheese
  • Lemon zest
  • Strawberry slices, fresh
  • Sweet potato slice(s)

METHOD

  1. Place the sweet potato slices into a toaster and toast on the highest setting until warm, bubbly and crispy on the edges.
  2. Top with the above garnishes and enjoy!

And there you have it – three simple ways you can make you mornings sweeter, brighter, full of colour, healthier, and energising altogether! I’ll TRY to get the last post for the month up, if not on Wednesday night, then on Thursday night hopefully – fingers crossed!

BON APPÉTIT

– Ally xx

myTaste.com

Homemade Strawberry Jam

Homemade Strawberry Jam

What do you do when you have a punnet or two of strawberries in the fridge that are on the verge of becoming overripe? – Make jam of course! I’m pretty sure you can do many other things with them, but today, I made jam.

I’ve actually had the strawberries in the fridge for almost 2 weeks before I decided to do something of them. I got them from my friend Pam; she was leaving to go back to Singapore that day. I wasn’t going to eat them only because I’m a bit sceptical of any fruit lasting beyond a week. The strawberries were actually still quite firm. They were very dark red in colour and the outside looked like it was starting to dry up. They were nonetheless still quite juicy when I cut them open.

Homemade Strawberry Jam Ingredients

PREP TIME 5 MINS | COOKING TIME 20 MINS MAKES 2 JARS

INGREDIENTS

  • 2 x 125g punnets of strawberries, hulled and halved
  • 2/3 cups caster sugar
  • 1/2 tsp vanilla extract
  • Zest and juice of one lemon

METHOD

  1. Combine all the ingredients in a medium-sized saucepan and cook over very low heat for 20 minutes, until the strawberries release some of their juices and the mixture boils slowly. Cook until thickened.
  2. Pour carefully into sterilised canning jars and either seal or keep refrigerated (see below on sterilising jars).

Sterilising Jars:

Jars should be made from glass with a metal lid that has a rubber seal. To sterilise the jars and lids, wash with hot, soapy water. Rinse well and arrange jars and lids open sides up, without touching, on a tray. Leave in a preheated 80C oven for 25 minutes, or boil the jars and lids in a large saucepan, covered with water, for 15 minutes.

Remember as a rule:

Hot preserves go into hot jars and cold preserves go into cold jars.

Homemade Strawberry Jam

BON APPÉTIT

– Ally xx

myTaste.com

Peach Crumble

Peach Crumble

For my 21st Birthday (which was like a year and a half ago), one of my friend’s from church, Tom, got me a set of 4 mini-cocottes with an accompanying cookbook. It was probably one of the best gifts I’ve ever received – a lot of people back then knew that I am a foodie and that I love to cook. The mistake they always make is that they get me food, such as chocolates and even gingerbread cookies (since my birthday was towards the end of the year, they thought they’d give me a birthday and Christmas gift too). I never really liked receiving food as gifts as I always say “I’m just gonna poop it out later anyway”, but cookware or even tableware? Best.

Note, I’m actually not a very big fan of chocolate. Moist, warm, oozy, chocolate cake: Yes. Chocolate bars, candies: No.

Peach Crumble

From this cookbook, I’ve only actually made two recipes, Shepard’s Pie and of course today’s post, Peach Crumble – which I have made numerous times because I just love it! Even my friends love it! It’s also simple and requires no more than 10 ingredients. I’ve tweaked the recipe a bit in terms of lessening the amount of sugar (I don’t really like my desserts too sweet and sometimes when I see ‘1 cup of sugar’ it scares me a bit). I also used less peaches than what the recipe calls for, and discarded the juice of lemon – in the past I have found the lemon too overpowering, making the dessert very sour. I think the zest adds enough lemony flavour to the crumble.

This is usually a dessert I pull out during the summer as peaches are in season then here in Australia. To my surprise, when I went shopping a few days ago at Coles, I found peaches! At first I was a bit skeptical knowing that they weren’t in season, and then I realised they had been imported from the US. I bought them anyway despite it being a tad bit more expensive than the local peaches during the summertime, because I needed peach crumble in my life right now and I couldn’t sit around and wait for summer to come along. But a warm peach crumble dessert fits perfectly with the cold weather don’t you think?

Peach Crumble Ingredients

PREP TIME 15 MINS | COOKING TIME 20 MINS SERVES 4

INGREDIENTS

  • 3 large ripe peaches
  • 100g cold unsalted butter, cut into little cubes
  • 1 cup plain flour
  • 2/3 cup caster sugar
  • 1/3 cup crumbed walnuts
  • 1/3 tsp ground cinnamon
  • Zest of one lemon

Peach Crumble

METHOD

  1. Preheat oven to 190C. Lightly butter 4 mini-cocottes.
  2. Bring a saucepan on water to a boil and plunge the peaches in one by one for 2 minutes. Remove using a slotted spoon and transfer to a deep dish to cool. Once cool, the skin should easily peel off. Cut into generous chunks or slices and mix with the lemon zest, cinnamon, and half of the sugar. Set aside.
  3. Mix the remaining sugar together with the butter, flour, and walnuts in a bowl. With your fingertips, quickly mix the ingredients together until looks like rough bread crumbs. If your mixture is too warm, put the bowl into the refrigerator for 15 minutes and start again when it has chilled.
  4. Fill each mini-cocottes with the peaches and top with the crumble mixture. Place any remain peach slices on the top.
  5. Place the cocottes on a baking tray lined with aluminium foil. This is to catch any juices that may overflow from the cocottes; saves having to clean the tray later. Place in the oven and bake for 20 minutes, uncovered.
  6. Serve hot out of the oven or at room temperature with vanilla ice cream (optional).

Peach Crumble

Peach Crumble

Additionally, you can use any stone fruit besides peaches, such as apricots and plums – anything that is ripe, available locally, and in season. Reserve and leftover crumble by freezing it in a small ziplock bag.

BON APPÉTIT

– Ally xx

myTaste.com