Strawberry Kiwi Lime Yoghurt Cake

Strawberry Kiwi Lime Yoghurt Cake

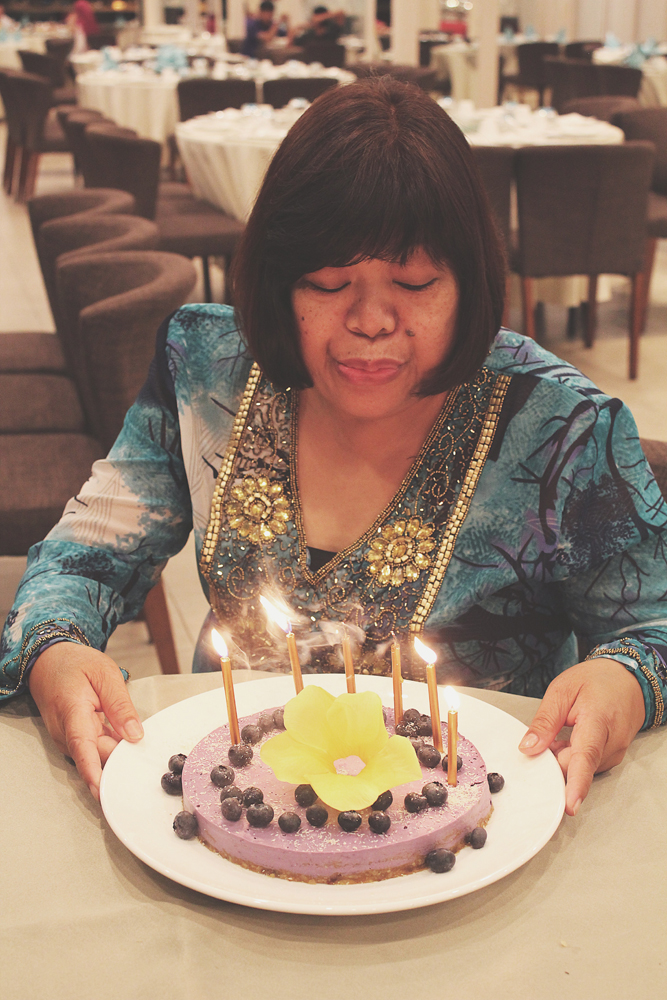
Hello Everyone! I know the last two posts have been a bit of a downer; let’s just say I’m starting to feel a little bit better and more of myself this week so I hope that I will be back to my chirpy self soon. That aside, tonight’s recipe is actually one that I made just almost 2 months ago for a very special occasion; my sister’s 23rd birthday last August 23rd! We celebrated her birthday with a yummy all-you-can-eat Korean BBQ dinner at Seoul Garden followed by a surprise visit from a family friend which at that time we had offered to look after their two little boys for a week since their helper had to go back to the Philippines and they couldn’t find anyone else under short notice. Overall it was a fun evening spent with lots of food, cake, and little, but great company!

Happy 23rd Birthday Angela!

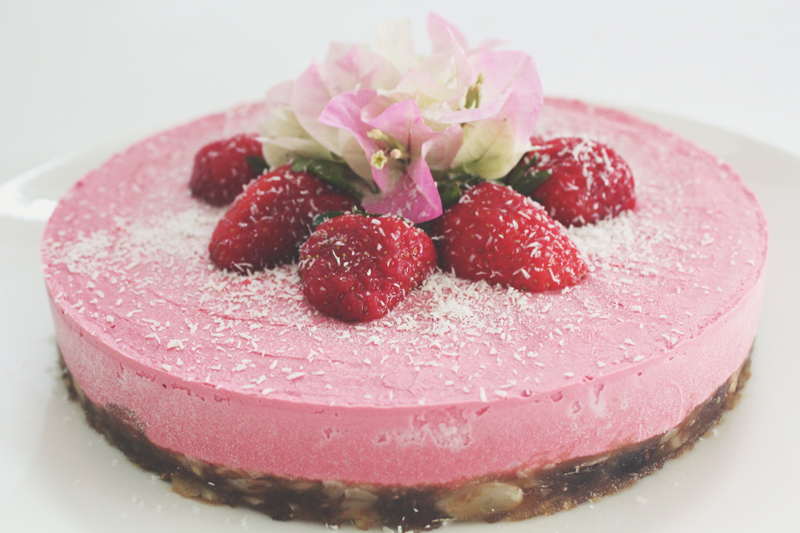
The cake that I decided to make for my sister was inspired by a recipe that I found online when I was researching ways that I could incorporate some of the ingredients from my blood pressure friendly list that I compiled at the beginning of the year. This recipe, from that list, features kiwis, strawberries, bananas, and fat-free yoghurt, all of which help lower your blood pressure. This cake is simple and easy to put together, yet is still delicious and guilt-free for when you reach out for a second heap of serving or three (or four)… Or you know the whole cake *cheeky grin* Not that I have done this myself before, you know, have a whole cake for no one else but just me, myself, and I. Anyway, onward with the recipe shall we? But before that, just a quick mention that the original recipe can be found over on SkinnyMs.

Strawberry Kiwi Lime Yoghurt Cake Ingredients

PREP TIME 10 MINS | FREEZING TIME 3 HOURS | SERVES 10-12

INGREDIENTS

For the base

  • 1/4 cup hazelnuts, finely ground
  • 1/4 cup walnuts, finely ground
  • 1 tbsp coconut oil, melted
  • 1 tbsp honey
  • 1 tbsp unsalted butter, melted
  • 1/4 tsp salt
  • Honey graham crackers (enough to make about 1 cup of crumbs)

For the filling

  • 2 punnets (2 x 250g) fresh strawberries, sliced thinly
  • 1 tub (500g) fat free all natural yoghurt
  • 1 large banana, mashed
  • 3 tbsp lime juice
  • 2 tbsp honey

For the topping

  • 2 kiwis, peeled and sliced into thin circles
  • Sliced strawberries (about 2-3 from the punnet)
  • Extra honey graham cracker crumbs (optional)

PS: Please ignore the egg in the ingredient shot, I actually didn’t use it at all even though it was in the original recipe. I decided to go with a no-bake base and therefore omitted the egg from my recipe.

METHOD

  1. Prepare an 8.5-inch springform pan by lining the bases with baking paper and greasing the edges with a little bit of butter. Add all of the base ingredients into a medium-sized mixing bowl and mix until well combined. Press half of the mixture over the base of the prepared pan and set aside in the refrigerator for about 10-15 minutes or until firm.
  2. In a separate medium-sized mixing bowl, combine the mashed banana, yoghurt, honey, and lime juice, whisking well until smooth. Set aside.
  3. Arrange half of the strawberry slices on top of the cooled crust then pour over half of the yoghurt mixture on top of the strawberries in an even layer.
  4. Repeat by adding the remaining half of the base over the top of the yoghurt mixture, arranging the strawberries slices, and the pouring the remaining half of the yoghurt mixture.
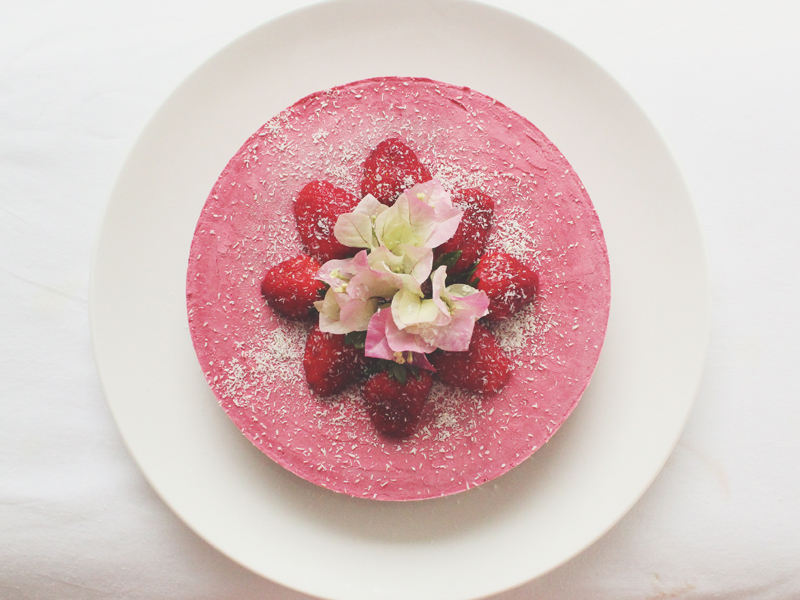
  5. Top the cake with the kiwi slices and strawberries slices before placing in freezer for about 3 hours or until completely frozen.
  6. Serve and enjoy! Tip: to cut, hold a knife under hot water for 10 seconds, dry and cut the frozen cake wile the knife is still warm!

Strawberry Kiwi Lime Yoghurt Cake

Strawberry Kiwi Lime Yoghurt Cake

BON APPÉTIT

– Ally xx

myTaste.com

Advertisement
Vegan No-bake Blueberry & Lemon 'Cheesecake'

Vegan No-bake Blueberry & Lemon ‘Cheesecake’

Hello Everyone and a very happy first day of May! For those of you celebrating Labour Day, I hope you’re having a blast with your long weekend! Unfortunately, Labour Day isn’t celebrated in Brunei, so yes, I worked today *sad face*. Well, I’m actually not here out of my usual posting schedule to talk about Labour Day, in fact, I’m here for a completely different, and special occasion!

Happy Birthday Mom!
Everyday I wake up, I always have you to thank. I have your guidance, your food, your warmth, your love, and your heart: someone who loves me (and the other 2 troublemakers as well) unconditionally. I promise I’m not just saying this because it’s your birthday haha! Happiest of Birthdays Mom!

This year for my Mom’s birthday, I decided to whip up a Vegan No-bake Blueberry & Lemon ‘Cheesecake’ after my huge success with my sister’s vegan ‘cheesecake’ back in August 2016. I’ve been wanting to try out more vegan ‘cheesecakes’ since then and now the opportunity has surfaced once again. This ‘cheesecake’ is completely gluten-free, dairy-free, and egg-free. Before we move on to the recipe, please check out the original over on Call Me Cupcake by Linda. Please take note that I have adjusted the quantities below to make an 8.5-inch round cake.

Vegan No-bake Blueberry & Lemon 'Cheesecake' Ingredients

PREP TIME 20 MINS | CHILL TIME min. 6 HOURS | SERVES 8-10

INGREDIENTS

For the base

  • 1 cup pitted dates, roughly chopped
  • 1 cup almonds, finely chopped
  • 1 tsp salt

For the filling

  • 1 & 1/2 cups cashew nuts, soaked in water overnight then drained*
  • 2/3 cup full fat coconut milk
  • 1/2 cup (50g) fresh or frozen (but thawed) blueberries
  • 6 tbsp coconut oil, melted
  • 4 tbsp freshly squeezed lemon juice
  • 3 tbsp maple syrup, to taste
  • Zest of 1 lemon

For the topping

  • Edible flowers**
  • Fresh blueberries
  • Shredded coconut

*Or soaked in very hot water for an hour if pressed for time

**To my Brunei followers if you could help me out, I don’t know where to find edible flowers here so what I usually do is just pick non-edible flowers from my garden, make sure they get a good wash and then use them only for photographic purposes.

METHOD

  1. Soak the roughly chopped dates in warm water for 15 minutes. Drain and transfer to a small mixing bowl combined with the finely chopped almonds and salt. Using the back of a fork, mash and mix the ingredients together until a paste forms.
  2. Press the mixture into an 8-8.5 inch springform pan (and if you don’t have one, you may use a regular pie/cake tin covered with parchment paper). Place the pan in the freezer while you prepare the ‘cheesecake’ filling.
  3. Put al the ingredients for the the filling in a blender and blend on low until the mixture is as smooth as possible. Pour the filling onto the crust, cover with plastic wrap and freeze for at least 6 hours before serving.
  4. Remove the cake from the pan and top with extra fresh blueberries, shredded coconut, and edible flowers. Leave to thaw in room temperature for about 10-15 minutes before cutting into it; you may run your knife under warm water and dry off to make a cleaner cut. Let each slice of cake thaw for a few more minutes before serving. Enjoy!

Vegan No-bake Blueberry & Lemon 'Cheesecake'

Vegan No-bake Blueberry & Lemon 'Cheesecake'

So usually, it is a habit of mine to read through the recipe first either a few days before, or the night before just so that I have proper planning when it come to buying the ingredients needed to proceed with the recipe. This time around, I completely forgot about doing this – I already had the recipe bookmarked from probably the beginning of the year so I guess this is probably one of the reasons why it completely slipped my mind. Why is it important to read a recipe ahead of time? Well for starters, the cashew nuts in this recipe require to be soaked in water overnight. Did I soak mine overnight? Nope I didn’t. Luckily, this can be rectified as it does say in the original recipe that if you’re in a hurry, you can soak the cashew nuts in very hot water for an hour (which is what I did) hehe.

Also, I missed out on a crucial bit of information which I only saw earlier on this afternoon when I was writing this post: “makes 1 tiny cheesecake (12cm/5-inches)” No wonder my cheesecake looked short and just barely had enough crust to cover the whole bottom. My springform pan is 8.5-inches in size which mean that I could’ve easily just doubled the recipe *face palm* but oh well, I would’ve have had enough ingredients to double the recipe if I had noticed it early and that’s only because I probably wouldn’t have been bothered to drive out to the grocers again to pick up a few more ingredients.

Vegan No-bake Blueberry & Lemon 'Cheesecake'

Happy Birthday Mom!

So what did I learn tonight? READ THE RECIPE FIRST A DAY OR TWO AHEAD OF TIME!

BON APPÉTIT

– Ally xx

myTaste.com

No-bake Avocado Lime Cheesecake

No-bake Avocado Lime Cheesecake

Hello Everyone! Today is a very special day, and for two reasons too! Today is special because God so loved the world that he gave his one and only Son, that whoever believes in him shall not perish but have eternal live (John 3:16 ESV). A very Happy Easter to all who celebrate the resurrection of Jesus Christ.

Besides today being Easter Sunday, today is also special because Amcarmen’s Kitchen turns 3! On this day 3 years ago I was sitting in my room, quite possibly still in my pyjamas at that time, blankly starting at my list of assignments to complete before the end of the Easter mid-semester break on my second-last semester of my degree. Knowing that I had so much to do in so little given time, I thought the only right thing to do at that moment was to take a nap and hopefully, magically, all my assignments would have been completed by the time I woke up from my nap… Well, that wasn’t what happened, but instead I decided to spontaneously delve into the world of WordPress, and *poof!* Kitchen Headquarters was born. Yes, Amcarmen’s Kitchen was previously known as Kitchen Headquarters in 2014 for a good year and a half before I did a whole rebranding in mid-2015.

As it has been for the past 2 years, I decided to make, not bake, a cake for Amcarmen’s Kitchen, and basically for my family and I to enjoy on behalf of my blog haha. I decided to try something new, while of course still sticking to the theme of using avocado in all my recipes for the month of April. Before we dive into today’s recipe, please do check the original by Sheilla on Chef Sheilla.

No-bake Avocado Lime Cheesecake Ingredients

PREP TIME 15 MINS | SETTING TIME 2 HOURS | SERVES 8-10

INGREDIENTS

For the avocado lime cheesecake mixture

  • 250g cream cheese, softened
  • 50g unsalted butter, melted
  • 300ml crème fraîche
  • 1 large avocado, mashed
  • 1 sachet (7g) clear gelatin or agar-agar powder
  • 1 cup granulated sugar
  • Juice and zest of 2 limes
  • 1 cup ground digestive cookies
  • 1 lime, for garnishing

METHOD

  1. Combine the ground digestive cookies and melted butter in a medium-sized bowl and mix until moist crumbs form. Press the crumb mixture onto the bottom of a 10″ springform pan that has been lined with parchment paper. Chill in the freezer for about 10 minutes to set.
  2. Take 100ml of the crème fraîche and combine it with the gelatin or agar-agar powder in a small saucepan. Stir for about 2 minutes until all the gelatin granules has dissolved. Turn the heat to medium and bring to a boil, stirring for a few minutes until the gelatin has completely melted. Remove from the heat and strain through a fine sieve. Set aside.
  3. Add the mashed avocado, cream cheese, sugar, the remaining 200ml of crème fraîche, lime juice, and lime zest to a large mixing bowl and using an electric mixer with a paddle attachment, mix everything together until smooth and well-combined. Pour in the gelatin-cream mixture and continue to mix until creamy and smooth in texture.
  4. Pour the avocado lime cheesecake mixture into the prepared springform pan and smoothen the top. Chill in the freezer for at least two hours for it to set.
  5. Release the cheesecake from the springform pan and serve right away! Garnish the top with some lime slices and zest. Enjoy!

No-bake Avocado Lime Cheesecake

The taste: amazing! The flavour of the avocado definitely shone through, and the hint of tangy flavour from the lime made the whole dessert refreshing in taste. The texture… Well let’s just say that it is supposed to be creamy and smooth, mine wasn’t as smooth as it could be. It has nothing to do with the original recipe; I think that I may have slipped up somewhere along the way. The obvious was probably that I was on the verge of over whipping the cheesecake mixture that the fresh cream started forming little clumps – I stopped before it severely over whipped. Also, I probably didn’t add enough gelatin to the cheesecake mixture so it didn’t quite set right. I only added half of the sachet in even though the original said ‘1 sachet’ – in my defense I didn’t know if Sheilla’s 1 sachet was the same quantity-wise as my 1 sachet. Oh well, I’ve adjusted the quantity of the gelatin in this recipe so hopefully the one listed above works!

Before I end tonight’s post, I’d just like to take this opportunity to thank first and foremost, my Mom who taught me how to cook. I also thank my other family members and friends who encouraged me to start up my blog because if it weren’t for them, Amcarmen’s Kitchen wouldn’t be here today, and I probably wouldn’t have continued pursuing my passion for cooking at home. Let’s face it, when I cook, I cook for my blog, and my family just so happens to be around to eat it after haha! Finally, to those who think I am just wasting my time on this, or assume that I work in a restaurant as a waitress because I didn’t actually go to culinary school to be able to work in a commercial/professional kitchen, take your negativity elsewhere. I have a degree in Design and I am working in the country’s leading Advertising Agency as a Creative Design and Events Management Executive, as well as a Copywriter. Thank you very much.

No-bake Avocado Lime Cheesecake

No-bake Avocado Lime Cheesecake

BON APPÉTIT

– Ally xx

myTaste.com

No Bake Strawberry & Coconut Vegan 'Cheesecake'

No Bake Strawberry & Coconut Vegan ‘Cheesecake’

Hello Everyone! Yes I am aware that it is indeed Tuesday and not a Wednesday – but today is a special day which indefinitely deserves a special post too! Today is the middle child’s 22nd Birthday, and since last year (which was the year I came back to Brunei) I’ve been baking cakes for the family. It was the better solution to, I guess, wanting a specific flavour for an affordable price. I cannot stress enough house much I hate store bought cakes – mainly because of their icing; too thick, too sweet, just… Ugh. I’m not much of a baker since I’m more into savoury foods, but I guess baking a cake 4 times a year (at minimum) isn’t too stressful and helps me practice.

Happy 22nd Birthday Angela!
Happy 22nd Birthday Angela! – early dinner at Balkony today after work. The cake not only looked amazing, but it tasted so good as well! I will definitely try out more no bake vegan ‘cheesecakes’ in the upcoming months – maybe for my Birthday in November!

Today’s recipe shall keep in theme with the theme for this month on Amcarmen’s Kitchen, which is, if you haven’t been following, Yes Ve Gan! A month of tribute to animal-free dishes that are sure to tickle your tummies from a different perspective. Before I had the idea of coming up with an animal-free theme for the blog, I wanted to bake a strawberry shortcake for my sister. I then only just changed my mind earlier last week to do a No Bake Strawberry & Coconut ‘Cheesecake’ for her after being inspired and reminded of the cake that Miao made back in March when we gathered for a dinner and catch up session with friends in Singapore. I think I mentioned in the beginning of the month in a post that it was a pretty darn delicious cake and it made me crave for more! So I thought to myself, why do I give a raw vegan cake a try since, like Miao at that time, I have never done one before! It’s super easy to make and you can substitute the strawberries out for your favourites berries such as raspberries, blueberries, blackberries, or boysenberries.

No Bake Strawberry & Coconut Vegan 'Cheesecake'

This ‘cheesecake’ is completely gluten-free, dairy-free, and egg-free! The recipe makes for one 8″ sized cake, but of course you can always double the recipe to make a bigger one if you wish! Mind you, for those who have not read in an earlier post this month, I haven’t stopped eating animals, dairy, or eggs altogether. I still eat my meat, but not as often as I used to, and I still have my daily dose of cow’s milk in the mornings  to accompany my breakfast. I don’t see myself going completely vegan in the next couple of years – but who knows, that may change over time when I make that shift to loving all animals, and most importantly for a healthier lifestyle. For now, it is something that I want to look into and slowly add this way of eating into my daily diet.

No Bake Strawberry & Coconut Vegan 'Cheesecake' Ingredients

PREP TIME 25 MINS | FREEZE TIME min. 4 HOURS* | SERVES 8-10

*preferably overnight to ensure that the cake is set.

INGREDIENTS

For the crust

  • 250g medjool dates, pitted
  • 3/4 cup sliced almonds
  • Pinch of salt

For the filling

  • 1 cup raw cashews, soaked overnight* and drained
  • 1 punnet (25g) fresh or frozen (but thawed) strawberries
  • 2/3 cup full fat coconut milk
  • 4 tbsp coconut oil, liquified
  • 2 & 1/2 tbsp lemon juice
  • 2 tbsp maple syrup
  • Zest of 1 small lemon

For the topping

  • Fresh strawberries
  • Shredded coconut
  • Edible flowers (optional)

*if you are a bit pressed for time, or decided to make your cake today and hadn’t realised that you needed to soak your cashews overnight, then you can soak them in very hot water for about an hour instead of overnight.

METHOD

  1. Crust: Soak the pitted medjool dates in warm water for about 15-20 minutes and then drain. Put almonds in a food processor and pulse until finely chopped. Add the dates and a pinch of salt, and pulse until a paste forms.
  2. Press mixture into an 8-inch springform pan (if you don’t have a springform pan, use a pie tin or a regular cake pan covered with baking paper). Place the crusted pan in the freezer while you prepare the filling.
  3. Filling: Put all ingredients for the filling in a blender and blend on low until mixture is as smooth as possible. Pour the filling into the crust, cover with plastic wrap and freeze for at least 4 hours.
  4. Remove the cake from the pan and leave to thaw in room temperature for about 10-15 minutes before cutting. Top with fresh strawberries, shredded coconut, and edible flowers.

Tip: Run your knife under warm water (and dry off) before cutting, to make a cleaner cut. Let each piece thaw for a few more minutes before serving.

No Bake Strawberry & Coconut Vegan 'Cheesecake'

No Bake Strawberry & Coconut Vegan 'Cheesecake'

BON APPÉTIT

– Ally xx

myTaste.com

White Chocolate Cheesecake with Mango & Passionfruit (Constructed)

White Chocolate Cheesecake with Mango & Passionfruit

Hello Everyone! Yes I know, it’s only Sunday, but I thought that I’d write up a Sunday Special post to share with everyone. I’ve been resting this past week after what I thought wasn’t such a tiring trip to the Outback, but I think the after effect just came crashing down on me when I got back to Sydney. My body clock hasn’t quite adjusted to my regular sleeping/waking patterns, which kills me because then I feel tired the whole day! Yesterday was somewhat productive but lazy at the same time. Besides an early wake up to send Lydia off at the airport and a gym session with Jialing, I lazed off the whole afternoon/evening. I practically did nothing besides eat and sleep. Hopefully I’ll snap out of this and feel refreshed after the weekend passes – after all, I did not have a weekend for myself as last week I was walking around the base of Uluru and scaling Kata Tjuta (and of course followed by a climb/hike/trek at Kings Canyon on the Monday after that weekend – much tiredness indeed).

Anyway, about a few weeks ago, Lydia asked me to teach her how to make a cake because she wanted to be able to make one for her mother’s birthday when she leaves to go home. She told me she didn’t have an oven though. “Easy!” I said to her as a no-bake cheesecake came into mind. She was a very good student and I am confident that she will be successful in making this for her mother on her birthday!

White Chocolate Cheesecake with Mango & Passionfruit (Constructed)

White Chocolate Cheesecake with Mango & Passionfruit (Deconstructed)

If you’ve been following my blog for a while, or have searched through my archives, you may have seen a post for no-bake mini blueberry cheesecake. So I decided to teach her how to make that but instead with my favourite summer fruit since it’s summertime! I’ve actually made this cake before, 2 years ago I think, when I used to live up in the Lower North Shore together with my old housemate Vanessa. We made this cake together with my friend Edison and Valerie whom we had over for our Annual Easter Dinner. We had a whole leg of lamb and other eats, included this yummy yummy cheesecake. We made a full sized one though, but since I actually only have mini springforms, we decided to make miniature cheesecakes (also easier to eat in small bits and store in a limited space fridge). Before I get onto the recipe, please do take the time to visit food.com where I got the original recipe from.

Besides making whole mini cheesecakes, I also decided to whip up a deconstructed cheesecake and use the stemless wine glasses that I got for free from Coles a while back. At the time, there was a special where if you bought two blocks/tubs of any of the Philadelphia Cream Cheese range, you get a set of 2 stemless wine glasses for free (worth $14.95).

White Chocolate Cheesecake with Mango & Passionfruit Ingredients

PREP TIME 20 MINS* | COOKING TIME  | MAKES 4 CHEESECAKES

*Add 4-5 hours extra (overnight preferably) for chilling time

INGREDIENTS

  • 1 large mango, sliced
  • 2 passionfruit
  • 2 x 250g packets cream cheese, softened
  • 300ml thickened cream, whipped
  • 200g white chocolate chips, melted
  • 100g ginger nut biscuits
  • 60g butter, melted
  • 1/2 cup caster sugar
  • 1/4 cup boiling water
  • 3 tsp gelatin powder

METHOD

  1. Prepare the springform pans by lining the bases with baking paper and greasing the edges with butter. In a food processor, process the ginger nut biscuits until mixture resembles fine breadcrumbs. If you don’t have a food processor handy, add the biscuits into a ziplock bag and use either a metal or wooden spoon to smash the hell out of it! Tip it into a medium sized mixing bowl, add the melted butter a mix until well combined. Press the mixture over the base of the prepared pans. Place in the refrigerator for 20 minutes or until firm.
  2. Next, sprinkle the gelatine powder into a mug and add the boiling water to it. Whisk with a fork until the gelatine powder fully dissolves. Set aside to cool for 15 minutes.
  3. Meanwhile, whip the thickened cream in a small mixing bowl using the electric mixer – be careful as to not over whip the cream otherwise you will end up with a lumpy cheesecake mixture. Set aside. Beat the cream cheese and sugar in a large mixing bowl using the electric mixer until smooth and creamy.
  4. Fold the melted white chocolate and whipped cream into the cheesecake mixture, then, gradually beat in gelatine mixture until combined. Pour the cheesecake mixture into the prepared pans and wrap each with cling film. Place in the fridge for at least 4-5 hours to set (preferably overnight). Top the cheesecakes with the sliced mangoes and passionfruit before serving.

White Chocolate Cheesecake with Mango & Passionfruit (Constructed)

For the deconstructed cheesecake, basically just layer the biscuit base and cheesecake mixture and top with your favourite summer fruits!

White Chocolate Cheesecake with Mango & Passionfruit (Deconstructed)

BON APPÉTIT

– Ally xx

myTaste.com

Mini No-bake Blueberry Cheesecake

Mini No-bake Blueberry Cheesecake

Hello Everyone! Very sorry indeed for the lack of updates! I’ve been quite busy the past two weeks almost since my last post upload. I haven’t had the time to really get into the kitchen and cook up a new dish, or try a new recipe. For starters, uni was hectic last week. I also had a high school friend from Brunei visit me last weekend, ate out lots so expect a few café reviews soon.

And finally, I started my graphic design internship this week with Hello Social, a social media marketing agency that is based in Sydney that works with a variety of businesses to assist in achieving their marketing objective’s, through social media. I am basically now at uni twice a week, and at my internship 3 times a week, which really means that I only have the weekends to really enjoy my cooking. So I’m letting you know now that my posts will not be as regular as they used to be, but I will still upload whenever I take on another culinary adventure in the kitchen. Thank you for understanding.


All that aside! Let’s get on with today’s recipe shall we? So I actually made these (not-so) mini no-bake cheesecakes last week Monday – I just never had the chance to do a write up and post it immediately. Also, I said not-so mini because when I gave one to Marissa, she struggled to eat the whole thing herself in one go. To quote her, “Dude, this is not mini okay?!” She loved it never the less! I honestly wasn’t expecting you to finish the whole thing in one go, even I could only eat half and the other half a bit later!

What actually happened that day was that I had a 9am-12pm Photography class, and interview for my internship straight after, and then a cheesecake bake-off with my food lover Jialing. Well more or like she asked me in advance if she could use my oven (since she doesn’t have one at her place) to bake a cheesecake for her boyfriend and their two-year anniversary! Of course I wasn’t just gonna sit back and watch her make a cheesecake that wasn’t for me to eat as well – so I decided to make a (few) cheesecake(s) too!

Please check out the original recipe here at taste.com.au. Now, this recipe as you can see makes one 6cm-deep, 20cm-round base cheesecake, which equates to about 5 mini tins (I only had 4 with me on hand, so I made the remaining one in two small ramekins and ate it straight out of it – with Jialing of course!

Mini No-bake Blueberry Cheesecake Ingredients

PREP TIME 35 MINS* | COOKING TIME 20 MINS |
MAKES
 4 MINI CHEESECAKES

*Add 4-5 hours extra for chilling time in the fridge

INGREDIENTS

For the cheesecake

  • 2 x 250g packets cream cheese, softened
  • 300ml thickened cream, whipped
  • 250g ginger nut biscuits
  • 125g butter, melted
  • 1/2 cup fresh or frozen blueberries
  • 1/2 cup caster sugar
  • 1/4 cup boiling water
  • 1 teaspoon vanilla extract
  • Icing sugar mixture, to serve

For the blueberry compote

  • 2 cups fresh or frozen blueberries
  • 1/4 cup caster sugar
  • 3 tbsp water
  • 2 tsp lemon juice

Mini No-bake Blueberry Cheesecake

METHOD

  1. To make the blueberry compote, combine 1 cup of the blueberries, water, sugar and lemon juice in a small saucepan. Cook over a medium heat for about 10 minutes. Add the rest of the blueberries and cook for 8 minutes more, stirring frequently. Set aside until needed.
  2. Prepare the springform pans by lining the bases with baking paper and greasing the edges with butter. In a food processor, process the ginger nut biscuits until mixture resembles fine breadcrumbs. Tip it into a medium sized mixing bowl, add the melted butter a mix until well combined. Press the mixture over the base of the prepared pans. Place in the refrigerator for 20 minutes or until firm.
  3. Next, sprinkle the gelatine powder into a mug and add the boiling water to it. Whisk with a fork until the gelatine powder fully dissolves. Set aside to cool for 15 minutes.
  4. Meanwhile, whip the thickened cream in a small mixing bowl using the electric mixer – be careful as to not over whip the cream (this is what I did and ended up with a lumpy mixture, managed to fix it but it still wasn’t a smooth and silky in texture). Set aside. Beat the cream cheese, sugar, and vanilla in a large mixing bowl using the electric mixer. Then, gradually beat in gelatine mixture until combined. Using a rubber spatula, gently fold the whipped cream in.

Now for the fun part! This is where you can get creative with your cheesecakes – and of course, typical me, why make 4 cheesecakes exactly the same when you can use the same ingredients but incorporate them differently into the mixture? But first, let’s separate the cheesecake batter into 2 mixing bowls. Here’s my take on no-bake blueberry cheesecake 4-ways:

Mini No-bake Blueberry Cheesecake
Cheesecake #1: Add the cheesecake mixture into one of the springform pan as is and top with the 1/2 cup of blueberries.

Mini No-bake Blueberry Cheesecake
Cheesecake #2: Same as the first cheesecake, but instead, top with the blueberry compote

Mini No-bake Blueberry Cheesecake
Cheesecake #3: Same as the first two cheesecakes, but instead, marble in the blueberry compote.

Mini No-bake Blueberry Cheesecake
Cheesecake #4: Pour the blueberry compote into the cheesecake mixture and using the electric mixer, beat until well combined. Add the mixture into the last springform pan.

Lastly, remember to wrap each springform pan with cling film and place in the fridge for at least 4-5 hours to set. Top the cheesecakes with a sprinkle of icing sugar before serving.

BON APPÉTIT

– Ally xx

myTaste.com