Kuih Kosui (Rice Cakes with Grated Coconut)

Kuih Kosui (Rice Cakes with Grated Coconut)

Hello Everyone! The Bruneian traditional kuih (or kueh) is similar to many traditional cakes from around the region, such as in Singapore, Malaysia, and Indonesia. Nobody knows where the true origins of each traditional kuih came from in Brunei, but we know it all started from the water village – Kampong Ayer many decades ago. Back in the day, due to limited supply of resources, Bruneian cake makers would make use of natural elements and materials to prepare the cakes, such as wrapping with leaves, and making use of all parts of a coconut or palm tree.

Today, Bruneian kuih-kuih (plural for kuih) are still as popular as ever due to the nostalgia and historical heritage that it carries with every bite. Upon researching traditional kuih-kuih native to Brunei, I came across a website entitled ‘Brunei’s Traditional Sweet Treats You Must Try’. Kuih Kosui was amongst the list, but as it turns out, it is actually native to Malaysia, as most kuih-kuih are.

Kuih Kosui is a saucer-shaped rice cake that is flavoured with either pandan (screwpine leaves) juice or gula melaka (palm sugar). It is also known as Kue Lumpang in native Indonesian language, and is actually very similar to what we have closer to home here in the Philippines, known as kutsinta.

Kuih Kosui (Rice Cakes with Grated Coconut)

Kuih Kosui is very economical to make. The kuih is characterised by its ‘dimple’ in the middle of the cake, lightly sweet taste, soft, yet wobbly and slightly bouncy in texture. They are then topped with a slightly salted, grated coconut topping to give that extra layer of flavour with the classic sweet-salty combination.

Unlike with a traditional kutsinta recipe, the soft, wobbly, and bouncy texture of Kuih Kosui can be achieved without having to add any alkaline water. You just need the right combination of flours and you can still achieve its distinct chewy texture and dimples.

Before we dive into tonight’s recipe, please take the time to check out the original where I drew my inspiration from over on What To Cook Today by Marvellina.

Kuih Kosui (Rice Cakes with Grated Coconut) Ingredients

PREP TIME 15 MINS | COOKING TIME 15-20 MINS | MAKES 14 CAKES

INGREDIENTS

  • 1/2 cup + 1 tbsp + 1 & 3/4 tsp rice flour
  • 2 tsp wheat starch
  • 2 tsp cornstarch
  • 1/4 tsp salt

For pandan flavour

  • 2/3 & 1/4 cup boiling water (cooled for 15 minutes)*
  • 1/2 cup white granulated sugar
  • 1/3 cup pandan-infused water**

For coconut sugar flavour

  • 1 & 1/4 cup boiling water (cooled for 15 minutes)*
  • 1/4 cup coconut sugar
  • 1 tsp white granulated sugar

For the topping

  • Freshly grated coconut
  • Pinch of salt

Notes:

  • *Bring water to a boil and let it cool down for 15 minutes so it should feel lukewarm after that. The warm water will stabilize the starch/flour and they won’t separate when you steam. Make sure not to use boiling hot water as this will cook the starch/flour into a dough.
  • **Place the pandan leaves and water into a blender. Blend until the leaves are chopped very finely. Pour contents through a fine sieve and press against it using a spoon to draw out any extra juice. Discard the leaves.
  • Flour and starch measurements are for one recipe per flavour. If you want to make both flavours at the same time, make sure to measure out another set of flour and starch ingredients.

METHOD

  1. Topping: Add the pinch of salt together with the grated coconut and give it a good mix. Steam over high heat for 10 minutes and set aside once done.
  2. Kuih Kosui: Bring the water in the steamer to a boil and place the empty cups in the steamer. Allow them to heat up for about 5 minutes while you are preparing the batter This step is important to prevent the starch/flour from separating when steaming your rice cakes.
  3. Add the three different types of flour and starches, together with the salt, into a medium-sized mixing bowl. Depending on your chosen flavour, add the sugars, (then the pandan-infused water if making pandan flavour Kuih Kosui), and then the lukewarm water. Stir into a smooth batter until the sugars have dissolved.
  4. Pour the batter into the preheated cups, about 3/4 of the wall full and steam over high heat for 12-15 minutes (18 minutes if your cups are larger).

If your steamer cannot fit all the cups/batter in at the same time, work in batches. Do not pour the mixture into the remaining cups ahead of time and let them sit. The flour and starch mixture tends to settle at the bottom after a while. This is important otherwise your Kuih Kosui won’t turn out right.

  1. After steaming, remove the cups from the steamer and let them cool down for about 5 minutes. They can be easily removed by running a small rubber spatula around the edges to lift them up.
  2. Repeat with the next batch of batter. Make sure the steaming water is back to a rolling boil before steaming. Stir the batter first before pouring into the preheated cups.
  3. Once done, sprinkle with the prepared grated coconut topping. Serve and enjoy as an afternoon snack! Should make around 14 kuih-kuih.

Kuih Kosui (Rice Cakes with Grated Coconut)

If you ever happen to find yourself travelling through Brunei on your next travel adventure, drop by any day or night markets and you’re bound to come across this kuih and many others. If you’re lucky enough, you can even catch the vendor making them fresh on the spot for you.

The best time to find all the local snacks and kuih-kuih in one place is during the holy month of Ramadhan at various food markets. You can find a plethora of local and traditional goodies for you to try. Alternatively, you can also get these at the Gadong Night Market or Tamu Kianggeh throughout the year and more often the vendors would be more than happy to describe each one to you!

BON APPÉTIT

– Ally xx

myTaste.com

Buko Pandan Ice Cream (No-Churn)

Buko Pandan Ice Cream (No-Churn)

Hello Everyone! A traditional Buko Pandan Salad is made with gulaman (jelly) cubes, tropical palm fruits, and shredded young coconut in sweetened cream. It is rich, creamy, and loaded with pandan flavour – a classic Filipino dessert that is a definite crowd favourite. You can check out my very out-dated recipe for it that I tackled back in 2015 by clicking here.

Buko Pandan Ice Cream (No-Churn)

Tonight however, I won’t be sharing with you another Buko Pandan Salad recipe. I thought you might want to enjoy its delicious flavours with a twist. I’ll be turning the traditional salad into an ice cream that can be enjoyed as both a snack or dessert. It’s rich, creamy, full of coconut flavour, and with an intense pandan taste using fresh screwpine leaves. If you don’t have access to fresh pandan leaves, you may also use pandan extract for this – just skip ahead to step 3 in the recipe below!

The process of homemade, no-churn ice cream is super simple. It’s just a matter of whipping together heavy cream, condensed milk, and adding in your choice of flavour/s. Seriously, the hardest part is waiting for the mixture to freeze! The ice cream comes out rich, creamy, and so much better than store-bought with far fewer ingredients. Oh, and did I mention that it’s a lot cheaper too?

Seriously, you’ll be craving for this all year long, especially during the hot summer days!

Buko Pandan Ice Cream (No-Churn) Ingredients

PREP TIME 4 HOURS* | COOKING TIME | SERVES 4-6

*For freezing time, minimum 4 hours or up to 24 hours.

INGREDIENTS

For the ice cream

  • 8-10 pandan leaves
  • 1 can (300g) sweetened condensed milk
  • 1 cup (250ml) all purpose cream
  • 3/4 cup (200ml) thick coconut milk/cream
  • Green buko pandan food colouring/flavouring (optional)

To serve with (optional)

  • Buko pandan jelly
  • Cornflakes
  • Lychees
  • Shredded coconut meat

METHOD

  1. Place the pandan leaves together with the all purpose cream and coconut milk in a food processor or heavy-duty blender, and blitz/blend for a few minutes until the pandan leaves have been finely puréed.
  2. Pour the blended pandan-infused cream and coconut milk over a fine sieve and into a chilled large mixing bowl. Strain the cream mixture from the pandan leaf pulp, pressing down firmly with the back of a spoon to extract all of the liquid from the pulp. Discard the pandan leaf pulp.
  3. Whip the pandan-infused cream using an electrical hand-held mixer until soft peaks start to form. Add the sweetened condensed milk. You may also add a dash of vanilla extract at this point. Continue to whip to soft peaks, it should be fluffy and mousse-like.
  4. Pour into an airtight container and freeze for 4 hours or up to 24 hours. Check the mixture every 30 minutes and mix (“churn”) using a spoon to avoid it turning into granita (coarse flavoured ice).
  5. Let sit at room temperature for about 15 minutes before scooping and serving as it is or with other elements such as fresh coconut meat, buko pandan jelly, other fruits of choice, and crushed cornflakes for that extra added crunch. Enjoy!

Buko Pandan Ice Cream (No-Churn)

Buko Pandan Ice Cream (No-Churn)

BON APPÉTIT

– Ally xx

myTaste.com

Ondeh-Ondeh (Glutinous Rice Balls with Coconut Sugar Filling)

Ondeh-Ondeh (Glutinous Rice Balls with Coconut Sugar Filling)

Hello Everyone! In Singapore, Malaysia, and even in Brunei, Ondeh-Ondeh refers to a glutinous rice ball kuih (sweet snack or dessert). In Indonesia they call it Klepon. There are two versions of Ondeh-Ondeh. One is made with just plain glutinous rice flour and scented with pandan (screwpine) juice, while the other has a little sweet potato added to the dough.

Ondeh-Ondeh (Glutinous Rice Balls with Coconut Sugar Filling)

Ondeh-Ondeh is made with fresh pandan juice and glutinous rice flour rolled in freshly grated coconut with a little surprise on the inside. The surprise makes these balls of Ondeh-Ondeh oh so fun to eat! Its pandan-flavoured skin wraps semi-melted gula melaka (palm sugar) that would burst upon the first bite, like sweet little bombs as the sweetness explodes in the mouth. The slightly salted grated coconut further enhances the deliciousness of this kuih.

Before we dive into tonight’s recipe, please take the time to check out the original where I drew my inspiration from over on Rasa Malaysia by Bee.

Ondeh-Ondeh (Glutinous Rice Balls with Coconut Sugar Filling) Ingredients

PREP TIME 30 MINS | COOKING TIME 5-10 MINS | MAKES 12-14 BALLS

INGREDIENTS

  • 10 pandan leaves
  • 2 cups glutinous rice flour*
  • 1 cup water
  • 100g freshly grated coconut**
  • Coconut sugar***
  • Pinch of salt

* Using only glutinous rice flour will make the ondeh-ondeh rather soft in texture. Although some do enjoy such consistency, tapioca flour may be added to the dough to make it slightly firmer. You may also substitute tapioca flour with corn flour.

** If you are using desiccated coconut for this recipe, add 1 tablespoon of water and half a teaspoon of salt to half a cup of desiccated coconut. Mix well and steam the mixture for 15 to 20 minutes. The reason for steaming is because you want to achieve a fluffier/softer texture, similar to freshly grated coconut.

*** The amazing taste of ondeh-ondeh comes from the gula melaka, a special palm sugar which has a toffee taste to it. You may substitute this for brown sugar, coconut sugar, or other sweeteners if gula melaka isn’t available. That will, however, change the traditional taste of the ondeh-ondeh.

METHOD

  1. Pandan Juice: Place the pandan leaves together with the water in a food processor or heavy-duty blender, and blitz/blend for a few minutes until the pandan leaves have been finely puréed.
  2. Pour the blended pandan-infused water over a fine sieve and into a small bowl. Strain the liquid from the pandan leaf pulp, pressing down firmly with the back of a spoon to extract all of the juice from the pulp. Discard the pandan leaf pulp.
  3. Dough: In a large mixing bowl, combine the glutinous rice flour with the extracted pandan juice and lightly knead to form a smooth dough. Cover the dough and set aside for about 15 minutes to rest.
  4. Ondeh-Ondeh Balls: Bring a large pot of water to rolling boil. Pinch a thumb-sized piece of dough and flatten lightly and thinly. Fill the centre of the dough with about half a teaspoon of coconut sugar. Roll it in your palms to form a smooth ball and then place each ball on a baking tray lined with lightly greased cling film. Repeat until all the dough is used up.
  5. Bring a large pot of water to a rapid boil. Carefully drop each ball into the boiling water. Do not overcrowd the pot. You may need to work in batches depending on how many balls you managed to make with the dough.
  6. When they float to the surface, remove them with a slotted spoon and shake off the excess water. Coat the ondeh-ondeh balls with the slightly salted grated coconut and serve immediately. Enjoy!

Ondeh-Ondeh (Glutinous Rice Balls with Coconut Sugar Filling)

Notes:

Why does the dough crack?
The dough is too dry. Add some water and knead the dough again. Work in batches and store the dough in a bowl with a piece of damp cloth over it to prevent it from getting dry.

Why does the Ondeh-Ondeh burst while boiling?
Sometimes, the dough may crack during the cooking process. This is due to the thinness of the dough. However, remember not to make the dough too thick either. Wrap it closely around the palm sugar to prevent air from getting in. Otherwise it will burst during the cooking process.

Why did the palm sugar not melt?
The ondeh-ondeh wasn’t cooked long enough. To ensure that the pal sugar has fully melted, simmer them over low heat for another 5 to 10 minutes once they start to float. Also, the trick is to shave the palm sugar with a knife or mandoline or simply chop them into small chunks. This way, they would melt faster. Larger chunks may not melt as quickly as smaller pieces.

How long can ondeh-ondeh last for?
Cooked ondeh-ondeh with grated coconut will only last a day because grated coconut spoils easily. If you would want to prepare them in advance, you may refrigerate shaped ondeh-ondeh for up to 5 days covered with plastic wrap. Shaped ondeh-ondeh can also be frozen for up to 6 months if kept in an airtight container or freezer bag. Simply boil refrigerated or frozen ondeh-ondeh before coating them with shredded coconut.

Ondeh-Ondeh (Glutinous Rice Balls with Coconut Sugar Filling)

Before tackling this recipe, I read up on a few different ones online and gathered that on average, these Ondeh-Ondeh Balls take about 10 minutes to cook. I made mine slightly bigger than those in the recipes I looked at, but no way did it take 15 or 30 minutes to fully cook through. It was already way past the 1-hour mark and the balls were still rock hard. At first, I didn’t know where I went wrong… and then it hit me. I was using rice flour instead of glutinous rice flour. What a rookie mistake *facepalm* Nonetheless, after I got around to picking up some glutinous rice flour from the grocers and tackled the recipe again, it was a success!

BON APPÉTIT

– Ally xx

myTaste.com

Seri Muka Kuih

Seri Muka Kuih

Hello Everyone! Our last recipe for the month of June is an amazing Malaysian and Nyonya kuih made of glutinous rice, coconut milk, sugar, and pandan leaves. Kuihs (or kuehs) are common snacks of the Hokkien, Teochew and Peranakan cuisine.The terminology is actually a general description for bite-size pastries/nibbles. These traditional delights come in many different forms and are either sweet or savoury snacks/desserts.

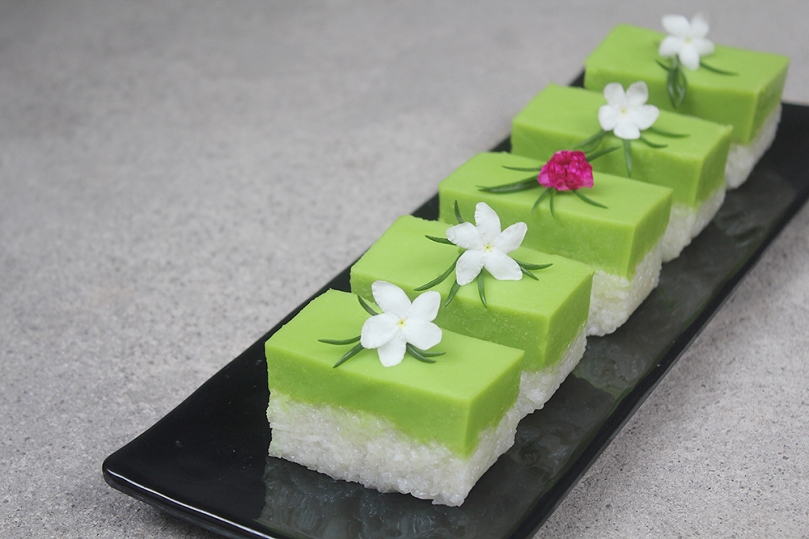
Seri Muka literally translates to beautiful face in Malay. It is a two-layered cake that consists of a glutinous rice layer steamed with coconut milk and topped off with a sweet and silky smooth pandan custard layer (hence the green colour). It’s heady with the flavour of coconut milk, a key ingredient used to impart a creamy taste when cooking the glutinous rice and making the custard layer.

Seri Muka Kuih

My fondest memory of Seri Muka would have to be during the festive season of the Islamic New Year. These pretty faces, alongside other kuihs of course, were served at almost every Malay household I would visit during that time of the year. The soft, sticky rice underneath with just a hint of saltiness pairs so deliciously with the decadently sweet pandan custard on top.

Before we dive into tonight’s recipe, please take the time to check out the original where I drew my inspiration from over on Rasa Malaysia by Bee. Seri Muka can also be found in the Indonesian province of South Kalimantan, and is also known as Kuih Putri Salat in Singapore.

Seri Muka Kuih Ingredients

PREP TIME 35 MINS | COOKING TIME 50 MINS | MAKES 14-16 SLICES

INGREDIENTS

For the bottom layer

  • 1 & 1/3 cups glutinous rice, soaked in water for 30 minutes
  • 1 cup thin coconut milk (1/2 cup coconut milk plus 1/2 cup water)
  • 2 pandan leaves
  • 1 tsp salt

For the top layer

  • 1 cup thick coconut milk (or coconut cream)
  • 1/2 cup pandan juice*
  • 1/2 cup white granulated sugar
  • 2 large free-range eggs
  • 2 large free range egg yolks
  • 5 tbsp all purpose flour
  • 2 tbsp cornstarch

*For the pandan juice

  • 8-10 pandan leaves
  • 1/2 cup water

METHOD

  1. Bottom Layer: In a large mixing bowl, combine all the ingredients needed, except for the pandan leaves, to make the bottom layer. Evenly spread onto a lightly greased 8in x 11in rectangular baking dish and add the in pandan leaves, making sure that they are submerged in the rice mixture. Steam over high heat for 20 minutes. Meanwhile, prepare the pandan juice for the top layer.
  2. Pandan Juice: Place the pandan leaves together with the water in a food processor or heavy-duty blender, and blitz/blend for a few minutes until the pandan leaves have been finely puréed.
  3. Pour the blended pandan-infused water over a fine sieve and into a small bowl. Strain the liquid from the pandan leaf pulp, pressing down firmly with the back of a spoon to extract all of the juice from the pulp. Discard the pandan leaf pulp.
  4. Top Layer: Mix all the remaining ingredients for the top layer in a medium-sized heatproof bowl until well combined.
  5. Create a bain-marie (double-boiler) by pouring some water into a pot that is slightly larger than your heat-proof bowl. Very important, check to see if your bowl can sit on top of the pot without any water touching the bottom of the bowl.
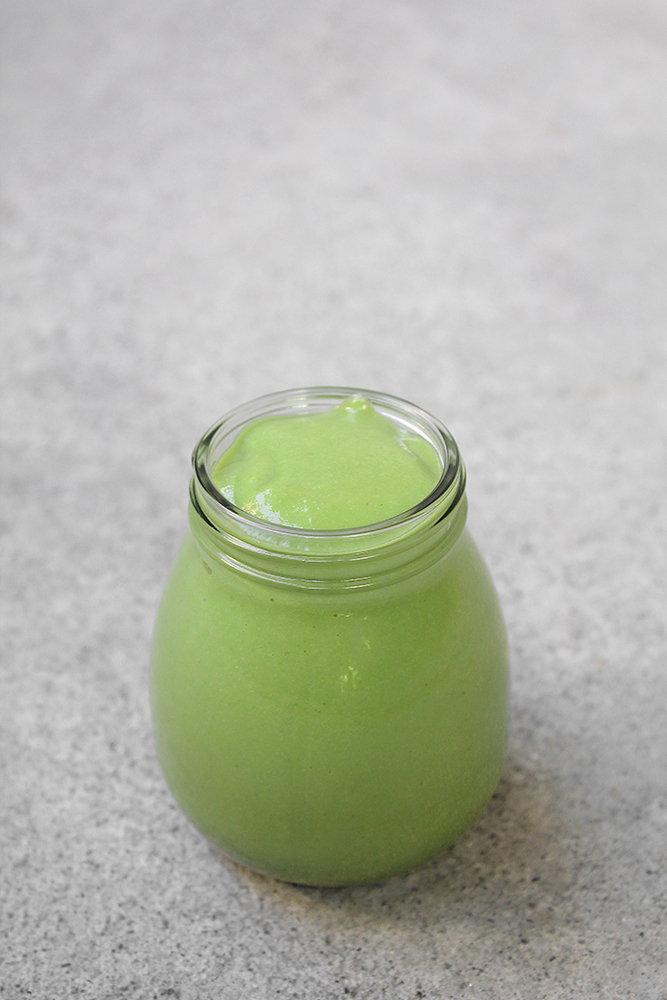
  6. Heat your pot of water over low-medium and bring to a slight simmer. Once slightly simmering, place the bowl with the pandan, coconut milk, and egg mixture over it. Cook until the mixture thickens slight, but is still runny enough to pour, about 8-10 minutes.
  7. Seri Muka Kuih: Once the rice layer is done, discard the pandan leaves. Stir and flatten the rice with the back of a spoon, making sure that it is compact. Using a fine sieve, strain the pandan, coconut milk, and egg mixture over the cooked rice. Return to the steamer and steam over medium heat for 30 minutes.
  8. Remove from the steamer once done and leave aside to completely cool down before cutting them into diamond or rectangular-shaped bite-size pieces. Serve with a hot cup of coffee or tea for a lovely mid-afternoon snack. Enjoy!

Seri Muka Kuih

Seri Muka Kuih

BON APPÉTIT

– Ally xx
myTaste.com

Kaya (Malaysian Pandan Coconut Egg Jam) with Fried Mantou

Nyonya-style Kaya (Malaysian Pandan Coconut Egg Jam)

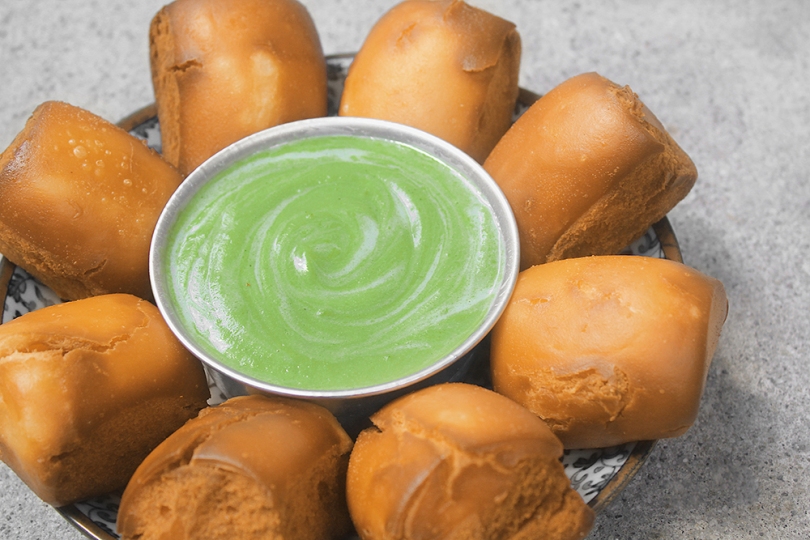
Hello Everyone! Try something new on your morning toast! If you’re looking to change up your breakfast condiment selection from the everyday jams and jellies, try this Pandan Coconut Egg Jam. It will transport you to the tropics with its flavourful, rich, and sweet taste!

Kaya (Malaysian Pandan Coconut Egg Jam) with Fried Mantou

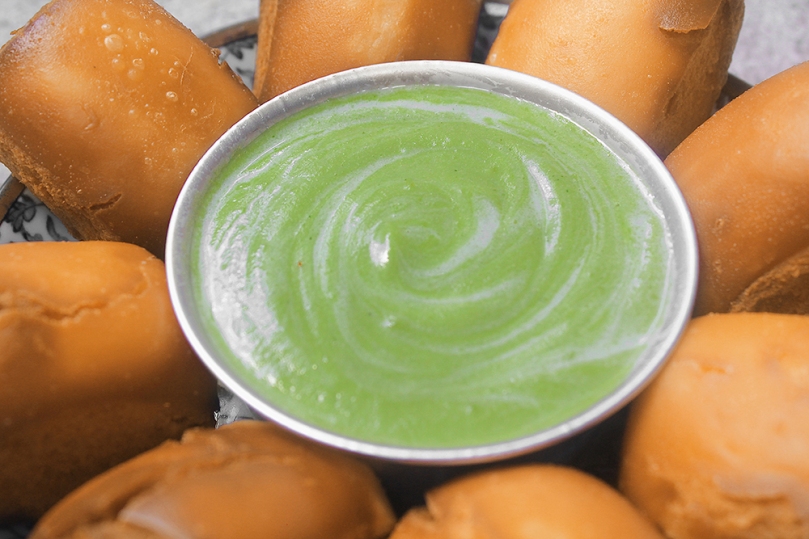
Kaya in the Malay language means “rich”, with reference to the texture of this jam. It is a sweet coconut egg jam that is rich, thick and custard-like in texture, and flavoured with pandan, giving it a fun green colour.

There are two well-known varieties of kaya:

  • Nyonya, which is green in colour
  • Hainanese, which is darker brown in colour and often sweetened with honey

The colour variation depends on the number of eggs, the caramelisation of the sugar, and the amount of pandan leaves used. In the Philippines, a variation of this jam is known as matamís sa báo, but it does not contain eggs and is less thick in texture. In Thailand, it is known as sangkhaya.

Kaya (Malaysian Pandan Coconut Egg Jam) with Fried Mantou

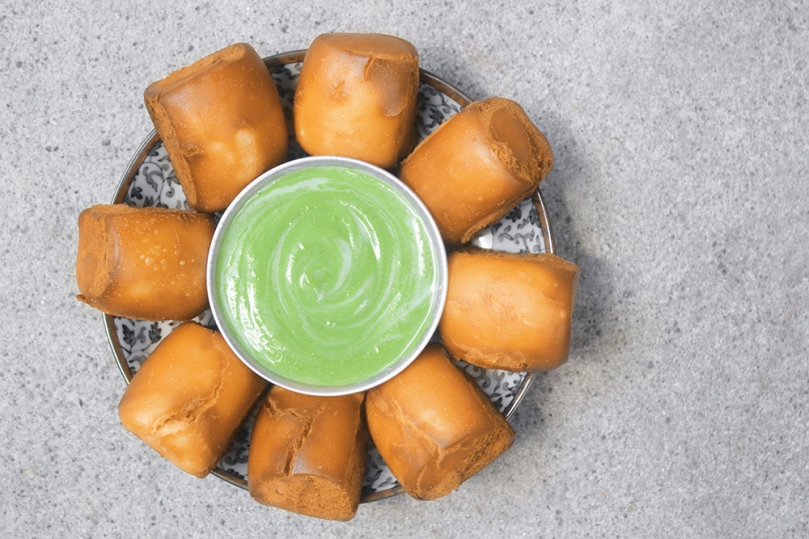
This version of kaya that I will be sharing with you guys tonight is the Nyonya-style one, which gets its aromatic fragrance and natural green colour from the pandan leaf. The idea of treating it as a dip rather than a spread or a filling was inspired from my trip to Thailand a couple years back, in 2013. We (my family and I) were at a roadside stall for dinner and on their menu they had steamed thick-sliced bread with a kaya and condensed milk dip. I decided to recreate this dish to share with you guys tonight, but instead of serving it with steamed bread, I fried some mantou buns for that extra-added crunch on the outer layer while still keeping the inside of the buns soft.

Before we dive into tonight’s recipe, please take the time to check out the original where I drew my inspiration from over on Curious Cuisiniere by Michelle Wong.

Kaya (Malaysian Pandan Coconut Egg Jam) Ingredients

PREP TIME 5 MINS | COOKING TIME 15 MINS | MAKES 1 SMALL JAR

INGREDIENTS

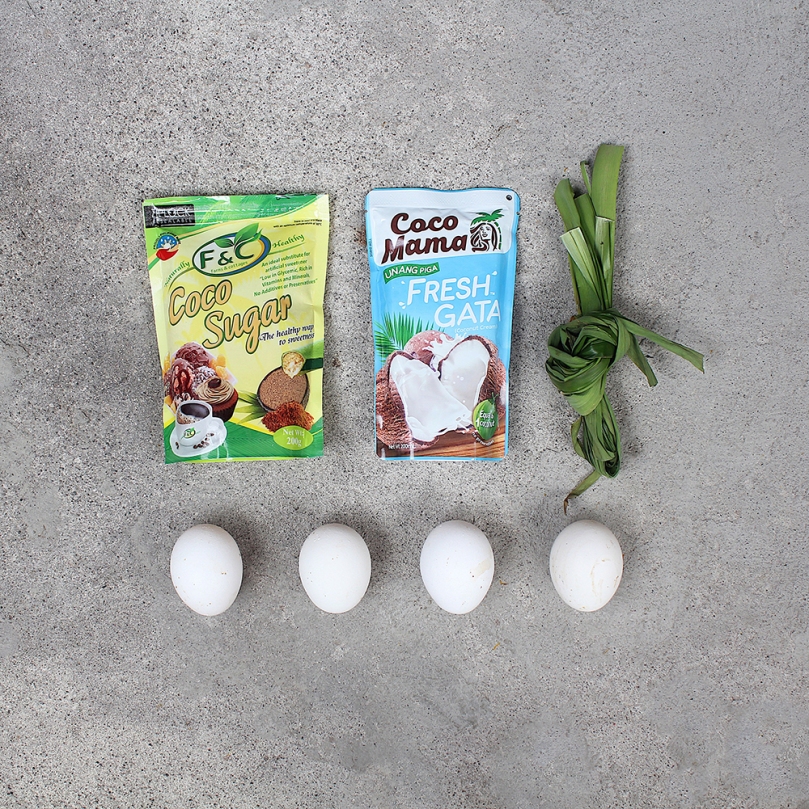
  • 4-5 pandan (screwpine) leaves
  • 200ml coconut milk
  • 4 large free range eggs
  • 1/2 cup coconut sugar

Optional (to serve with)

  • Condensed milk
  • Fried mantou buns

METHOD

  1. Place the pandan leaves together with the coconut milk in a food processor or heavy-duty blender, and blitz/blend for a few minutes until the pandan leaves have been finely puréed.
  2. Pour the blended pandan-infused coconut milk over a fine sieve and into a large bowl. Strain the coconut milk from the pandan leaf pulp, pressing down firmly with the back of a spoon to extract all of the coconut milk from the pulp. Discard the pandan leaf pulp.
  3. In a separate heat-proof bowl, beat together the eggs and sugar, until frothy. Then, add the pandan-infused coconut milk to the egg and sugar mixture.
  4. Create a bain-marie (double-boiler) by pouring some water into a pot that is slightly larger than your heat-proof bowl. Very important, check to see if your bowl can sit on top of the pot without any water touching the bottom of the bowl.
  5. Heat your pot of water over low-medium and bring to a slight simmer. Once slightly simmering, place the bowl with the coconut milk and eggs over it and gently whisk for 10-15 minutes, ensuring no water escapes from the bottom pot. It’s important to keep a low simmer or else the eggs can curdle quickly (refer to notes).
  6. Once done, transfer the kaya to a small serving dish and add just a touch of condensed milk (just enough that it doesn’t become overly sweet) and serve with your choice of steamed or fried bread. Whatever tickles your fancy! Enjoy!

Kaya (Malaysian Pandan Coconut Egg Jam) with Fried Mantou

Transfer the remaining kaya into a sterilised and clean jar. Let it cool before storing in the refrigerator for up to two weeks. Kaya is eaten as a condiment spread on bread or toast, usually as breakfast.

Kaya (Malaysian Pandan Coconut Egg Jam)

Notes:

  • If you don’t have access to fresh pandan leaves, you may be able to find pandan extract which comes in a small bottle or pandan leaf powder, which will work perfectly fine with the recipe.
  • If your eggs curdle during the cooking process, not to fret! Continue to cook for the full 15 minutes, and then transfer the mixture to a blender. Blend until the kaya is smooth.

Growing up in Brunei, Nyonya-style kaya was my go-to choice of spread (together with peanut butter or just butter) on the waffles that you’d get at the local supermarket (Hua Ho) in the snack corner. Their freshly made kaya-filled pancakes, or even the kaya buns on their shelves were also my go-to choice. Also not forgetting the Hainanese kaya-filled cakoi (Chinese youtiao fried dough) from a nearby roadside stall from my workplace that my then workmates and I used to drive to our lunch breaks, and the kaya-buttered toast from a popular Chinese kopitiam known as Chop Jing Chew. These are, if not all, then some of my fondest memories of kaya.

BON APPÉTIT

– Ally xx
myTaste.com

Khao Neoo Mamuang (ข้าวเหนียวมะม่วง) Mango Sticky Rice

Khao Neoo Mamuang (ข้าวเหนียวมะม่วง) Mango Sticky Rice

Hello Everyone! Yes, besides sharing mango recipes on the blog for the month, I’ll also be tackling the fruit with a Thai influence. I mentioned in my post last week that Thai food is one of the many favourite cuisines that I enjoy – and let’s be honest here – I’m in the middle of satisfying my insane cravings for it!

Mango Sticky Rice is a traditional Thai dessert where the main ingredients needed are sticky glutinous rice, canned or fresh coconut milk, palm sugar, and mangoes. Although this dessert originated in Thailand, it is highly consumed throughout the Indo-China region of Southeast Asia such as Laos, Cambodia, and Vietnam. Mango Sticky Rice is usually only eaten during the peak mango season, which is during the summer months of April and May. Notable shops in Bangkok famous for their Mango Sticky Rice will only sell this dessert for 4 months per year from February to June.

Khao Neoo Mamuang (ข้าวเหนียวมะม่วง) Mango Sticky Rice

I can’t remember if the first time I had this dish was during a trip to Bangkok way back when, or at a Thai restaurant when I was still in Brunei – but nonetheless, I remember my Aunt (who is Thai) teaching me how to make this dish a couple of years back. At that time I wasn’t interested in cooking or food, so I didn’t realise then how easy it was to put this dish together and that is really only required the pantry essentials to make. Aside from having to get the mangoes from the market when I wanted to make this dish, I already had sugar, peanuts, coconut milk, and sticky rice at home.

To prepare the dish, the glutinous rice is first soaked in water and then cooked by steaming, or cooked in a rice cooker. I cooked mine over a gas stove together with the sugar and kept a very close eye on it. The coconut milk is heated, without boiling, separately with salt and then added to the cooked glutinous rice to flavour it. Mangoes are then peeled and sliced to serve with the rice, and smothered in more salted coconut milk. The result is just heavenly! If you’re a mango lover like me, then you’re definitely going to fall in love with this exotic Thai dessert.

Khao Neoo Mamuang (ข้าวเหนียวมะม่วง) Mango Sticky Rice

Disclaimer: I do apologise to any of my Thai followers, or any who have just stumbled upon my blog, and this post in particular. I’ve seen so many variations of the spelling for Khao Neoo Mamuang and I’m not sure if I’ve picked the right one! *cheeky grin*

Khao Neoo Mamuang (ข้าวเหนียวมะม่วง) Mango Sticky Rice Ingredients

PREP TIME 1 HOUR | COOKING TIME 30 MINS | SERVES 4-6

INGREDIENTS

  • 2 ripe mangoes, peeled and sliced
  • 1 cup sticky glutinous rice
  • 2 cups water
  • 1/2 cup coconut milk (fresh, canned, or frozen)
  • 2 tbsp white granulated sugar
  • 1/2 tsp salt
  • Roasted peanuts, roughly chopped to garnish

METHOD

  1. Sticky Glutinous Rice: Rinse the sticky glutinous rice and then leave to soak for about an hour. Drain was ready to use.
  2. Transfer the rice to a medium-sized non-stick cooking pot together with the 2 cups of water and the sugar. Bring to a slow simmer over low heat, partially covered with a lid (to leave room for steam to escape).
  3. Once simmering, leave to cook for a further 20 minutes or until the water has been absorbed by the rice. Turn the heat off, but leave the rice in the pot with the lid on tight. Allow it to sit for a further 5 to 10 minutes.
  4. Salted Coconut Sauce: While the rice is cooking away, prepare the salted coconut sauce by adding the coconut milk to a small saucepan together with the salt. Bring to a slow simmer over low heat, about 10 minutes. It is important to heat it slowly to avoid curdling the coconut milk. This happens when it is heated too quickly.
  5. Once done, turn the heat off and set aside. If your rice is already done at this point, then add half of the salted coconut sauce to the rice and give it a good mix. Set aside the other half of the sauce for later.

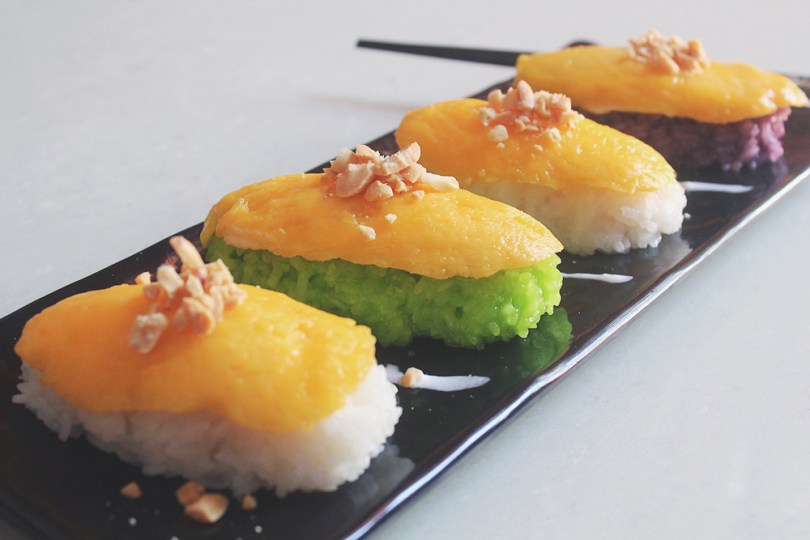
Tips: Experiment with naturally flavouring the sticky rice for another dept of flavour. I used juices from pandan leaves and ube (purple yam) when tackling this recipe. All you have to do is add these flavourings together before cooking the rice.

  1. Shape the sticky rice into logs and place on a serving plate. Top the rice logs with a slice of ripe mango and roasted peanuts.
  2. Drizzle with the remaining salted coconut sauce or use for dipping.
  3. Serve and enjoy while warm!

Khao Neoo Mamuang (ข้าวเหนียวมะม่วง) Mango Sticky Rice

Mango Sticky Rice is usually served differently with one big serving of rice and mango slices on the side. I decided to plate mine up differently after stumbling upon an Instagram post of Mango Sticky Rice “Sushi” hence why they look like nigiri!

BON APPÉTIT

– Ally xx

myTaste.com

Buko Pandan

Buko Pandan

Hello Everyone! We’re on our second last day of Festive Filipino Foods! If you have been living under a rock and basically haven’t been following my blog for the past week and a half, I have been posting a recipe every single day for the past 10 days now (tonight will be the 11th of 12 posts) cooking up recipes leading up to Christmas Day. Tonight, I will be sharing one final dessert recipe before I close this series for the month of December. I have saved the best savoury dish for last tomorrow, and if you’d like to take a stab at what I’ll be making, here are some clues: Spanish-inspired with lots and lots of seafood including prawns, clams, mussels, and calamari.

But enough of the seafood talk, that will be for tomorrow – tonight I will be sharing with you a recipe for a dessert that is a classic Filipino favourite known as Buko Pandan, that originated from the island province of Bohol in the Central Visayas region. It is a dessert dish found on the tables at every fiesta and family gatherings. The two main ingredients for this dessert are buko, which is a young coconut, and screwpine leaves which are locally known as pandan leaves. You can find these leaves in most Asian grocery stores, but if you’re a lucky duck like me, you might have a neighbour that grows these leaves and you have full access to it for free. However, you can use bottled pandan extract if this is more convenient for you.

At first glance, this sumptuous dessert can be mistaken for Buko Salad because of the similarity in texture and dairy ingredients used. However, the green gelatin which contains the aroma and flavor of the Pandan gives the distinction. — Vanjo Merano from Panlasang Pinoy

The dessert is usually topped with pinipig (immature grains of glutinous rice pounded until flat before being toasted), but I just went for what I had in the pantry, which is cornflakes and it’s just as good because you get that crunch in the dish anyway from it too. Rice Krispies may be used as well. I don’t think it is really added, but I like my Buko Pandan Dessert with large sago pearls, which is why I have added it to the dish. I’ve read that you can also add palm seeds or nata de coco in your dessert too if you like.

ps: before I move on to the recipe, I’d like to first apologise once again for a later than usual post. We’ve had a busy morning/afternoon cooking up a storm in the kitchen for our Noche Buena, and I only had time to write this post in between cooking/waiting times, and after all the cleaning up after our dinner.

Buko Pandan Ingredients

PREP TIME 15 MINS | COOKING TIME 90 MINS | SERVES 10-12

INGREDIENTS

  • 3 young coconuts, flesh removed and cut into strips
  • 1L water
  • 1 packet (200ml) crème fraîche
  • 1/2 can (190g) condensed milk
  • 1 packet (10g) unflavoured green agar-agar powder, or simply just gelatine powder
  • 1 cup large sago balls
  • 1 cup white sugar
  • 2 tsp pandan extract*
  • Handful of cornflakes

*You can extract your own from pandan leaves, and here’s how you can do it: Place the pandan leaves and water into a blender (1 bunch (12 leaves) to about a half cup of water). Blend until the leaves are chopped very finely. Pour contents through a fine sieve and press against it using a spoon to draw out any extra juice. Discard the leaves. Tip: if you keep the extract in a sealed bottle, you can keep it for up to one week in the fridge. Do not freeze though.

METHOD

  1. Dissolve the agar-agar powder in 1L of water. Add the sugar, stir, and bring to a boil over low heat for about 10-15 minutes. Once done, pour into a large square mould (about 10″ in size) and leave it aside to cool down before placing it in the fridge to completely set.
  2. Meanwhile, bring a large pot of water to a boil, about 2L. Once boiling, add the large sago balls in and cook until tender – mine took more than an hour to cook through, about an hour and 20 minutes to be exact.
  3. While the sago is cooking away, mix all the ingredients together (except for the cornflakes) in a large bowl. Check to see if your gelatine has set, and once it has, cut it into small chunks and mix in the bowl together with all the other ingredients.
  4. Once the sago is done, drain and add it to the mixture. Give it once good final mix and then place in the fridge for about 3-4 hours before serving.
  5. Serve chilled, topped with cornflakes, or anything crunchy, and enjoy!

Buko Pandan

Buko Pandan

BON APPÉTIT

– Ally xx
myTaste.com

Homemade Soy Milk Ingredients

Homemade Soy Milk

Hello Everyone! I’ve got a few drinks that I want to cover on the blog for the next two weeks; simple but very tasty indeed! Today’s recipe is pretty straight forward, just plain regular soy milk, but definitely much richer than those that you find at the stores/markets because the ones I’ve bought are usually very watered down. By making your own soy milk as well, you ensure that no other extra ingredients go into them, especially sugar in my case (or more like in the case of my mom who is a diabetic).

Homemade Soy Milk Process

Homemade Soy Milk Process

Though it sounds very simple and the process doesn’t require a lot of skill, it requires a lot of time. Firstly having to soak the beans for a couple of hours until they are soft takes about 4-5 hours of waiting (the longer the better I guess). Then having to blend the beans with water and strain out the liquids using a muslin cloth, batch by batch; and then finally boiling it with the pandan leaves for about 30 minutes. Indeed simple, but can be time consuming. Whenever I make soy milk, I always needs another pair of hands in the kitchen and it’s usually my mom who does the straining while I do the blending.

Homemade Soy Milk Ingredients

PREP TIME 5 HOURS 30 MINS | COOKING TIME 30 MINS | SERVES 10-12

INGREDIENTS

  • 1kg soybeans
  • 5 pandan leaves
  • 3 litres water

METHOD

  1. Place the soybeans in a large bowl of water and soak for 4-5 hours or until the beans have doubled in size and have softened. Drain.
  2. Working in batches, add about 2 cups of the softened soybeans into the blender together with about 3 cups of water. Blend until the mixture is smooth.
  3. Pour out the mixture onto a muslin cloth placed over a large bowl. Strain and squeeze out as much of the liquids as possible. Transfer the remaining soybean pulp into another bowl.
  4. Repeat steps 2 and 3 for the remaining soybeans.
  5. Transfer the raw soy milk to a large cooking pot and together with the pandan leaves, boil of about 30 minutes. Stir the mixture at intervals to avoid the milk sticking to the bottom of the pot. Skim the top to get some of the foam off.
  6. Add about a quarter cup of sugar if you wish (we usually add a teaspoon of sugar afterwards in our mug of soy milk), or flavour it up any way you want. Some flavouring suggestions include: chocolate, honey, vanilla, etc.
  7. Drink and enjoy either hot or cold!

Homemade Soy Milk Process

Homemade Soy Milk

PS: Don’t throw the leftover bean pulp away! You can make your very own homemade tofu from it! Visit this the Food Network for more on how to make your own tofu.

BON APPÉTIT

– Ally xx
myTaste.com

Devon on Danks: BREAKFAST WITH THE SAKUMA'S

Devon on Danks

Hello Everyone and welcome back to yet another Review Sunday on the blog! Devon Café is one of those that I’d never fail to go back to for a nice Sunday brunch, well besides the Potting Shed at the Grounds though – I can’t pick between the two! So recently, I think somewhere in mid-November, Devon Café expanded their brand and opened up a new venue over on Danks Street in Waterloo. I quite honestly did not get into the hype of it until late December, after Christmas, before New Years – not that I wasn’t into it, but I just wanted to wait until the hype died down a bit. Knowing that this is Sydney, the hype never dies down! The first time I went here wasn’t that bad though, we managed to get a seat straight away but even so, the place was pretty packed. If we had arrived any later we could’ve easily been standing outside waiting for at least 10 minutes or so for a table for 3. Don’t even get me started on how packed it was on ‘Straya Day, but lucky again we managed to get a table for 2 with ease, but I did feel sorry for the others who had to wait out in the rain for a table.

Devon on Danks: 'STRAYA DAY SPECIAL
‘STRAYA DAY SPECIAL
Medley of tomatoes, avocado, olive oil, and soft-boiled egg, on toast ($16.50)

As mentioned above, this dish was only available during Australia Day. I ordered it because it’s one of their specials and it won’t be on their menu ever again (maybe)! It was a difficult decision because I was eying their ‘Naked’ Bruschetta at that time as well. I actually have no regrets going for this dish because it blew my mind. Yes I know, some tomatoes and avocado on toast – really? The dish was just so flavoursome and fresh at the same time. The crusty white bread added that crunch texture to the palette and was excellent for soaking up the olive oil. The disappointment in this dish though was that my egg was not at all soft nor runny liked I’d expect it to be. Would’ve loved a runny yolk to compliment the crusty bread to soak it all up. Also, $16.50 for this dish? A bit too much in my opinion.

Devon on Danks: BREAKFAST WITH THE SAKUMA'S
BREAKFAST WITH THE SAKUMA’S
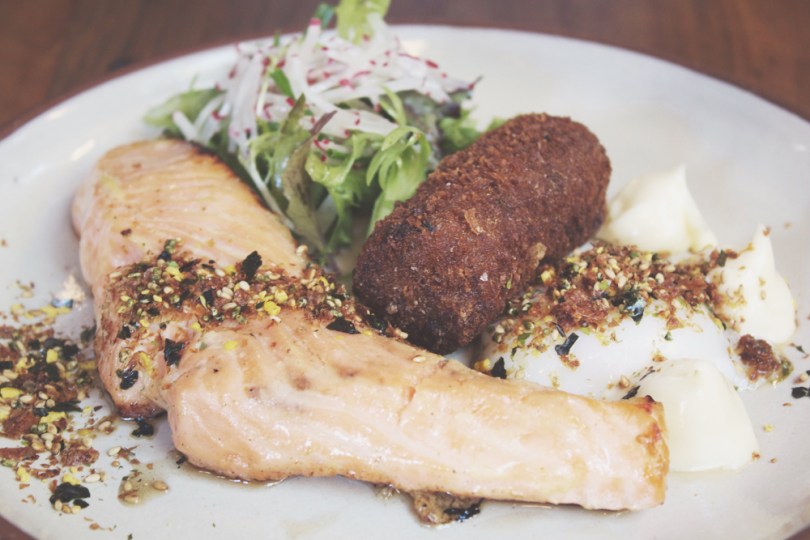
Miso grilled king salmon, smoked eel croquette, 63˚ egg, radish petit salad, and kewpi mayonnaise ($24.50)

This dish is probably Devon’s signature as it appears in both menus at the original Devon and Devon on Danks. My Instagram newsfeed always features this dish from other people’s brunches. I never really had this dish for myself to consume, but I did manage to have a bite from my friend’s plate. According to her, the salmon was cooked to perfection and I can definitely vouch for that statement. The egg was perfectly cooked, and flavour combinations worked well together. She overall liked the dish.

Devon on Danks: LITTLE LOST BREAD
LITTLE LOST BREAD
Brioche French toast, fresh and freeze dried strawberries, balsamic and strawberry gastrique, strawberry cheesecake ice cream, and Arnott’s biscuit crumble ($16.50)

Again, I did not have this dish to myself, but I did manage to have a small bite. My friends, who at that time share this dish as a dessert, really loved this dish, but it was a bit sour for my liking, which I think mainly came from the balsamic. But otherwise, the brioche French toast was amazing, and so was the ice cream that topped it. What I found interesting was that at the end of the description for this dish it said “add bacon $4.00”. BACON? I was so confused and intrigued at the same time, but my friends didn’t want to get the bacon with it.

Devon on Danks: DR SEUSS's GREEN EGGS AND HAM
DR SEUSS’s GREEN EGGS AND HAM
Thick cut bacon, crispy potato, 63˚ egg, green tomato ketchup, pea purée, soybeans, pea tendrils, and jus ($19.00)

This again was a dish that was predominately popping up on my Instagram newsfeed. I think what is attractive about this dish is its name. It brought back many childhood memories and this was a dish that I really wanted to indulge in, but unfortunately lost the battle with Marissa. She told me to order the same thing but I was like NO that’s not point! Because I write a blog, I actually hate it when people order the same thing, because then that means that I have one (sometimes two) less dishes to write about. Which also means that I have to again visit the café/restaurant so that I am not just reviewing two or three dishes. Anyway, tangent aside, the bacon was delish, cooked to perfection, and paired well with the other components in the dish. Marissa seemed to love it too!

Devon on Danks: SOFT SHELL CRAB SALAD ala JAPANOIS
SOFT SHELL CRAB SALAD ala JAPANOIS
Crispy soft shell crab with sichimi pepper, wasabi mayo, tobiko, nori, pickled cucumber, daikon, carrot, and shiso ($19.90)

Originally, this dish was meant to be a soft shell crab roll. I don’t know what happened, like whether they ran out of rolls or whatever other reason, this time when I came back with Tara, they had blacked out the ‘roll’ on their menu and changed it to a salad. Despite it not being a roll anymore, the dish was beautifully presented and was very flavoursome. The soft shell crab was crunchy and was packed with a lot of spice, quite possibly from the wasabi. That was on point for me. The salad was flavourful, but in the end I kept thinking that the dish looked really small, and for roughly $20.00, it almost seemed that you didn’t a good value for your money. I’ve had soft shell crab salad elsewhere before at a Japanese restaurant and it was about $11.00 for more than just ONE crab.

Devon on Danks: LUCKY DUCK
LUCKY DUCK
French buckwheat crêpe, crispy duck leg, duck liver parfait, fried duck egg, and blueberry preserve ($24.50)

This was the dish that I had that time I was out with Marissa and her friend Karina. Duck is one of my favourite meats which is why I had no doubts when having to select another dish after not being able to have my way with what I wanted in the first place. I regret nothing. This dish was top notch for me, despite me having doubts about the liver parfait. It actually tasted good together with the blueberry preserve and the other elements to the dish. I could not fault this dish, and unlike most dishes, this definitely was a great value for money.

Devon on Danks: CRONUT
CRONUT
Green tea matcha cronut with red bean filling ($7.00)

This was by far the best cronut I’ve had to date (not that I’ve had many anyway), but the flavour combinations happening in this one tiny cronut was to die for. The amount of red bean filling in this cronut might I add was very generous! It just oozed out every time we sliced into it for a bite. Though I did feel that by the 5th or 6th bite, I could feel that the red bean filling was a bit too sweet for my liking.

Devon on Danks: SOFT SERVE SUNDAE
SOFT SERVE SUNDAE
Pandan soft serve, banana, rice and coconut krispies, kalamansi cream, palm seeds, and gula melaka ($11.00)

What I love about Devon is the Asian fusion that they bring into their cuisine. This ice cream, though Asian inspired based on ingredients and flavours, is nothing that I have seen at all in Asia. Pansan, kalamansi, palm seeds, and gula melaka, are all flavours that I am familiar with, but never did I think that they’d all work so well together as an ice cream sundae! Loved the flavour combinations in this sundae, better than the salted caramel soft serve. I only wished that it had been a very hot day instead of a gloomy ‘Straya Day the time I shared this with Tara because the cloddish weather and really cold ice cream did not feel right!

Devon on Danks: DD's SPECIAL SOFT SERVE SUNDAE
DD’s SPECIAL SOFT SERVE SUNDAE
with salted caramel ice cream, black salt, and hot chips ($10.00)

Ever since the opening of Devon on Danks, I have seen this pop up on my Instagram feed one too many times! It brought back a lot of memories of when I was a kid and how I’d use to dip my order of fries into my soft serve ice cream on a cone from McDonalds. I think it was everyone’s childhood memories for everyone had written about how they did that when they were kids when talking about this sundae. Though I thoroughly enjoyed this, there was too much salt going on for me. I was fine at first, but I struggled to finish the rest. Salted caramel ice cream, TOPPED with black salt, AND salted fries on the side. Salt overload!

I’d rate the food probably an 8 on a scale of 10, just cos of some minor issues I had with some of the dishes that were served. Service was on point and the waiters/waitresses were always smiling, friendly, and gave great recommendations when it came down to having to make a decision on what cronut we wanted to have for dessert. The ambiance was sort of like modern meets industrial which by the way is what I like most about cafés around Sydney who embrace this interior design style fusion. Value for money is variable – some dishes I feel were reasonably priced while others I felt that they were a bit overpriced for the amount of food that was on the plate. Then again this is my opinion, and I’m pretty sure others will have a different say to this. But overall, be it the original Devon Café or Devon on Danks, I will always pay a visit when I am in the mood for a pretty epic brunch date.

Devon on Danks
2 Danks Street
Waterloo, New South Wales
Australia, 2017

– Ally xx

Kueh Ketayap (Pandan Crêpes with Coconut filling)

Kueh Ketayap (Pandan Crêpes with Coconut filling)

Hello everyone! And sorry for a very late post (1:27am Sydney time). I basically just finished cleaning up after a late dinner hosted by 3 other people and myself. It was a Malaysian-Asian themed dinner (excluding the peri-peri chicken we had as our menu evolved though out the night). I really wanted to make a dessert for the night, and I remember watching Uel and Shannelle from My Kitchen Rules whipping up this dessert and so I decided to have a go. Mind you that this was my first time ever making it and I was so glad on what a success it has been! Everyone loved it! I call it beginner’s luck 😛

I actually looked at two different recipes to make this dish so please do check out the original recipes below:

So here’s today’s recipe: Kueh Ketayap (Pandan Crêpes with Coconut filling)

PREP TIME 10 MINS | COOKING TIME 45 MINS | SERVES 16 CRÊPES

INGREDIENTS

For the pandan extract:

  • 12 pandan leaves, cut into short pieces
  • 1/2 cup of water

For the crêpe batter:

  • 4 eggs
  • 2/3 cup pandan extract
  • 1 1/3 cup of water
  • 1 cup milk
  • 2 cups plain flour
  • 6 tbsp unsalted butter, melted

For the coconut filling:

  • 3 cups shredded coconut
  • 90g gula melaka (palm sugar), roughly chopped
  • 3 tbsp water
  • 1/3 tsp salt
  • 1 tsp cornflour, mixed with 1 tbsp of water for thickening

METHOD

  1. Place the pandan leaves and water into a blender. Blend until the leaves are chopped very finely. Pour contents through a fine sieve and press against it using a spoon to draw out any extra juice. Discard the leaves. Tip: if you keep the extract in a sealed bottle, you can keep it for up to one week in the fridge. Do not freeze though.
  2. Mix all the batter ingredients in a blender and blend until smooth. Transfer to a mixing bowl and cover with cling wrap. Let it rest for at least half an hour.
  3. Meanwhile, cook the gula melaka and water in a saucepan until syrupy. Add in the shredded coconut and salt, and mix thoroughly. Add the cornflour water mixture and cook until thick. Set aside and leave to cool.
  4. Warm up a crêpe skillet under low heat with 1/2 tsp of butter. Melt butter and swirl around the skillet to distribute it. Ladle the batter in the pan. Distribute the batter thinly by turning the skillet. Cook until set and remove from the pan. Repeat for the remaining batter (should make about 16 crêpes).
  5. Put 1 tbsp of filling on the crêpe and roll tightly.

Kueh Ketayap (Pandan Crêpes with Coconut filling)

BON APPÉTIT!

– Ally xx

myTaste.com