Easy Hummus (without Tahini)

Easy Hummus (without Tahini)

Hello Everyone! Tonight, I will be sharing the recipe for the last and third component of my lunchbox series from the National Pack Your Lunch Day (March 10) collaboration that I organised with my foodie friends over on IG. Here’s a quick and easy recipe for Hummus, without the tahini.

The debate over the origin of hummus dates back to the 13th century. The Greeks like to claim it as their own, but based on historical information, hummus likely originated from ancient Egypt. Regardless of where it’s originally from, hummus is enjoyed by all cultures, not just Greek and Middle Eastern. In the Middle East, hummus is usually eaten as a dip, with pita bread. In the West, it is now produced industrially, and is often served as a snack or an appetiser with crackers.

Easy Hummus (without Tahini)

But before we dive into the recipe, what exactly is tahini?

Tahini is a Middle Eastern paste or sauce made from toasted ground hulled sesame seeds, oil, and sometimes salt. The ground sesame seeds are emulsified with oil to create a smooth and creamy seed butter with a pourable consistency. It can be served by itself, as a dip or used as a major ingredient in hummus.

If tahini is a key ingredient in hummus, can we make hummus without tahini?

The answer is, yes!

Unlike all the other ingredients that go into making hummus, tahini is one where you’re likely to not always have on hand. It’s not cheap either if you manage to find them at your local supermarket, but it’s not commonly found here in the Philippines. You can also make your own at home, but if you’re on the same boat as me and want homemade hummus without the fuss of making your own tahini at home, then this recipe is just as good without it!

Because of the other ingredients that are mixed in the making of hummus, it tastes nothing like chickpeas. Instead, it tastes a little garlicky, smoky, and also tangy because of lemon juice. It’s a smooth, creamy paste that melts in your mouth, and the taste of cumin will linger on your tongue.

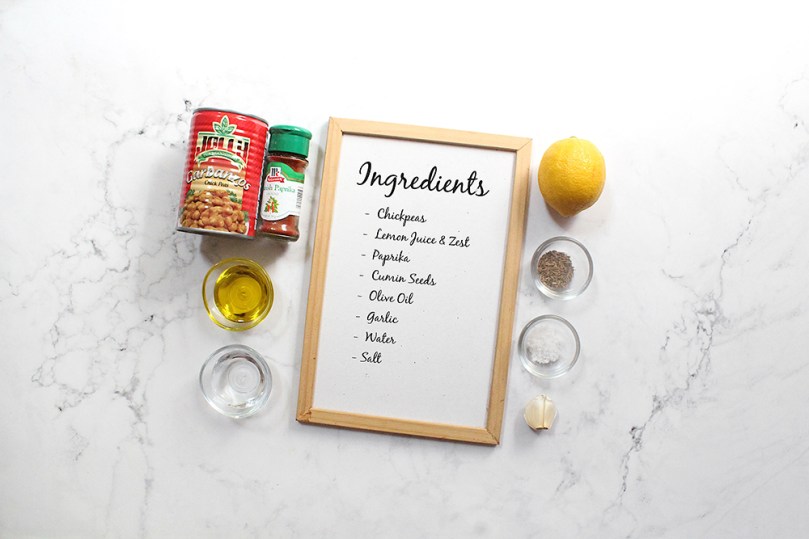
Easy Hummus (without Tahini) Ingredients

PREP TIME 5 MINS | COOKING TIME — MINS | SERVES 6-8

INGREDIENTS

  • 1 can (425g) garbanzo beans (chickpeas), drained and blanched
  • 1 garlic clove, minced
  • 2 to 4 tbsp water
  • 2 tbsp extra virgin olive oil
  • 1 tbsp lemon juice
  • 3/4 tsp toasted ground cumin
  • 1/2 tsp ground paprika
  • 1/4 tsp salt

METHOD

  1. Add all the ingredients into a food processor. Process until smooth and creamy; if needed, you may add additional water to get your desired consistency. You may also add additional spices, and/or seasoning to suit your taste preference.
  2. Transfer to a serving dish and top with more olive oil, toasted cumin seed, and ground paprika.
  3. Serve with your veggies and crackers of choice. I went with carrots and celery, and multi-seed rice crackers. Enjoy!

Easy Hummus (without Tahini)

BON APPÉTIT

– Ally xx

Follow me on my social media accounts:
Facebook: Amcarmen’s Kitchen
Instagram: @amcarmenskitchen
TikTok: @amcarmenskitchen

myTaste.com

Pastéis de Nata (Portuguese Egg Tarts)

Pastéis de Nata (Portuguese Egg Tarts)

Hello Everyone! As I mentioned in my post last week, East Timor was colonised by Portugal from the 16th century up until 1975, hence why East Timorese food even up to this day is heavily influenced by Portuguese cuisine. A favourite East Timor dessert snack that stuck around is Pastéis de Nata, or in English, Portuguese Egg Tarts. These egg tarts were originally created and made by Catholic nuns in Lisbon over 200 years ago. In East Timor, these tarts are a standard dessert found in fancy hotels, usually paired with a flavourful, aromatic, and organically grown East Timorese coffee.

If you’ve ever had one of these egg tarts, you’ll know that they are one of the greatest pastries to binge-eat! It has a crisp, flaky crust that holds a rich and creamy custard center that is blistered on top from the high heat of an oven. It tastes like home, even if you aren’t from Portugal. They’re just as enchanting as a trip to Lisbon.

Pastéis de Nata (Portuguese Egg Tarts)

Before we dive into tonight’s recipe, please take the time to check out the original where I drew my inspiration from over on the Tasting Table. Now in the original recipe, they make their own puff pastry dough, which you can also do. If you want to save time and energy (like me), you can always use store-bought puff pastry. The results are pretty much the same for a quick, easy, and hassle-free Portuguese Egg Tart.

Now you may notice that the tops may not brown quite as much as the authentic pastéis when baking at home. In fact my oven only goes to a maximum of 250C (482F or gas mark 9) and commercial pastry shops that sell these tarts have oven temperatures that blast up to 430C (800F)!

Pastéis de Nata (Portuguese Egg Tarts) Ingredients

PREP TIME 10 MINS | COOKING TIME 30 MINS | MAKES 32 TARTS

INGREDIENTS

  • 3/4 cup white granulated sugar
  • 2/3 cup water
  • 1 cinnamon stick
  • 1 cup & 6 tbsp whole milk
  • 1/2 cup all-purpose flour
  • 6 free-range egg yolks
  • Puff pastry sheets
  • Ground cinnamon, to garnish (optional)

Pastéis de Nata (Portuguese Egg Tarts)

METHOD

  1. Cinnamon Sugar Syrup: Combine the sugar, water, and cinnamon stick in a small saucepan. Over high heat, bring the mixture to a boil and cook for about a minute or until all the sugar granules have dissolved. Remove from the heat and let it sit aside until ready to use.
  2. Egg Filling: Add one cup plus one tablespoon of the whole milk into a separate saucepan over medium heat, until bubbles begin to form around the edges, about 4 to 5 minutes.
  3. While the milk is heating up, whisk the flour and remaining five tablespoons of milk in a large mixing bowl. Continue to whisk while adding the hot milk in a slow and steady stream.
  4. Discard the cinnamon stick from the sugar syrup and slowly whisk it into the milk mixture in a steady steam.
  5. Return the milk and sugar mixture to the saucepan and cook over low heat, whisking constantly until thickened, about 10 to 12 minutes.
  6. Turn the heat off and add in the yolks to the mixture. Whisk until well combined, and then strain through a fine-mesh sieve into a mixing bowl. Set aside to cool down slightly.
  7. Egg Tarts: Preheat oven to 260C (500F or gas mark 10).
  8. Prepare you muffin tins by lightly greasing them with a little butter.
  9. Roll out your store-bought puff pastry sheets and cut them depending on the size of your muffin tins. Ideally you’ll want them about 3/4 up the sides of each muffin mold. Evenly flatten the dough against the bottom and sides by pressing down on it.
  10. Pour about 1 & 1/2 tablespoons of the warm egg filling into each pastry shell.
  11. Bake for about 15 to 20 minutes, or until the shells are golden brown and crisp, the custards are set, and the tops are blackened in spots.
  12. Let cool in the pans on wire racks for 5 minutes, and then remove them from the tin and onto the wire rack. Sprinkle with cinnamon, serve warm, and enjoy!

Pastéis de Nata (Portuguese Egg Tarts)

BON APPÉTIT

– Ally xx

myTaste.com

Num Ansom Chek (Rolled Banana Rice Cake)

Num Ansom Chek (Rolled Banana Rice Cake)

Hello Everyone! February flew by in just the blink of an eye, and before we know it, in a couple of days it’ll be March already! This also means that this will be the last Cambodian recipe that I will be sharing on my blog, for now. There are still so many wonderful recipes that the country has to offer, and maybe one day I’ll revisit the cuisine and discover more dishes that’ll take a liking to my tastebuds.

For our last Cambodian cuisine, I’ll be sharing a popular street snack that is sold across the country, known as Num Ansom Chek, or in English, Rolled Banana Rice Cake. It is a traditional Cambodian snack that is low fat, healthy, and easy to make as it only requires a few ingredients to put together. In many Cambodian snacks, banana is used because of its abundance in the tropical region, and its ritual value. Of course, it is also delicious and sweet!

Num Ansom Chek (Rolled Banana Rice Cake)

Other than bananas, this snack also includes sticky rice and grated coconut. Sometimes, jackfruit is also added, but since I’m not a huge fan of jackfruit, I’ve replaced them with strips of mango instead. You may also add red mung beans or black beans and it can also be sweetened with palm sugar if desired. All of this is then carefully rolled and enclosed in a banana leaf. The resulting cylindrical-shaped snack is then steamed until tender and fragrant.

In Cambodia, this sweet delicacy is traditionally prepared for important celebrations such as Cambodian New Year and the religious festival Pchum Ben (Festival of Souls). With a culture that is heavily influenced by Hinduism and Buddhism, during a festival, it is common practice to offer food to the monks at the temple, and the ghosts of our ancestors, relatives, and friends. One of the foods that they offer is Num Ansom Chek because of their ability to be kept for days without being spoiled. This is due to them being wrapped and steamed in banana leaves.

Before we dive into tonight’s recipe, please take the time to check out the original where I drew my inspiration from over on Vanier Culinary by Thun-Carl Sieu.

Num Ansom Chek (Rolled Banana Rice Cake) Ingredients

PREP TIME 30 MINS* | COOKING TIME 1 HOUR | MAKES 6 ROLLS

*Allow for 6 hours to overnight to soak the glutinous rice.

INGREDIENTS

  • 3 ripe bananas
  • 1 ripe mango (optional)
  • 1 & 1/2 cups sweet glutinous rice, soaked for at least 6 hours or overnight
  • 3/4 cup freshly grated coconut
  • Salt, to taste
  • Banana leaves, 6 of about 15cm x 20cm pieces

METHOD

  1. Drain the water from the soaked rice and mix the grated coconut in with the rice.
  2. Peel and cut the bananas in half and sprinkle a touch of salt over them.
  3. Take a piece of banana leaf and place a small portion of the rice and coconut mixture in a horizontal line along the longer side of the banana leaf. Place a banana half in the centre of the rice and strips of ripe mango if you wish. Top the fruits with more rice, there should be enough to fully surround them.

Num Ansom Chek (Rolled Banana Rice Cake)

  1. Roll the banana leaf tightly around the rice to form a log and fold both edges in to seal. Make sure that the leaf is not loose so that the mixture can use it as a mold. Use string to secure the banana leaf wrapping if needed. Repeat until all of the bananas have been wrapped.
  2. Stack the rolls in a steamer and steam over boiling water for about 60 minutes.
  3. Once done, allow to cool slightly before unwrapping and serving. Enjoy!

Num Ansom Chek (Rolled Banana Rice Cake)

Num Ansom Chek (Rolled Banana Rice Cake)

BON APPÉTIT

– Ally xx

myTaste.com

Num Treap (Sticky Rice with Sesame Seeds)

Num Treap (Sticky Rice with Sesame Seeds)

Hello Everyone! Forget about brownie sundaes, forget about éclairs and chocolate cake; the real desserts, the sinfully sweet and decadent treats, can be found in one region: Southeast Asia. Ingredients in Southeast Asian treats are less traditional than the sweet flavours you typically see in Western desserts. Ingredients like cassava, mung beans, and lotus seeds paired with sticky sweet syrups like coconut cream, palm syrup, and condensed milk are common and no strangers to Cambodian treats. Beyond these ingredients you can also always expect to have at least one fresh fruit added to the mix. Look for favourites like mangoes, rambutan, durian and of course, bananas.

Just as Southeast Asian desserts, Cambodian treats are most frequently enjoyed mid-morning. Instead of being served to cap off a delicious meal, the treats are bought and enjoyed in markets as you are doing your shopping around town. Many of the most popular Khmer treats are sold from mobile street stands. Look out for the crowds of students outside universities and schools, flocked around a stand.

Traditional Cambodian treats, also known as Khmer sweets, also come in the form of custards and puddings; egg-based dishes that are spiced up with a variety of flavours (vanilla and cinnamon are typical favourites). Since rice remains a main staple in current day cuisine, being eaten as often as three times a day, rice-based cakes are also very popular.

Num Treap (Sticky Rice with Sesame Seeds)

Tonight, I will be sharing a Cambodian favoured treat that is simple and super easy to make at home. The best part? You’ll most likely have everything readily available to whip this up in your pantry. Num Treap, or in English, Sticky Rice with Sesame Seeds, is a treat that is basically as the name states, steamed sticky rice mixed in a warm coconut sauce. The mixture is then spread into a baking dish or pan, topped with sesame seeds, and then set aside to cool before cutting into squares and then served. You may serve it as it is, or with fruits on the side. Num in Cambodian means pastry, so it is essentially a sticky rice (bai damnaeb) pastry treat.

This dessert is very much similar to a sweet rice cake that we have here in the Philippines known as Biko. It is also made of coconut milk, brown sugar, and glutinous rice, that is topped with latik (coconut curds) instead of sesame seeds.

Num Treap (Sticky Rice with Sesame Seeds) Ingredients

PREP TIME 60 MINS* | COOKING TIME 45-60 MINS | MAKES 9 SLICES

*Allow for an additional 6 hours (or more) to soak the glutinous rice before cooking.

INGREDIENTS

  • 1 cup sweet glutinous rice, soaked for at least 6 hours or overnight
  • 2/3 cup coconut milk
  • 1/2 cup coconut sugar
  • 3 tbsp sesame seeds, toasted
  • 2 tsp vanilla extract
  • 1/2 tsp salt

METHOD

  1. Rice: Drain the water (no need to shake off the excess water), and evenly arrange the soaked sticky rice in a steamer lined with a greased banana leaf.
  2. Cover and steam for 30-45 minutes. You can check the rice and increase the steaming time if need be. Once done, keep the rice in the steamer or covered to prevent it from drying out until you need to use it.
  3. Coconut Sauce: While the rice is cooking, add the coconut milk, coconut sugar, salt, and vanilla extract in a large saucepan and cook over medium-high heat. Stir frequently until it thickens, about 5 minutes.
  4. Num Treap: Fluff the cooked rice with a fork to separate the grains. With the heat off, add the rice to the saucepan with the coconut sauce and mix well.
  5. Spread the rice mixture into a shallow dish or baking pan, pressing them down with a spatula. Sprinkle sesame seeds on top and cover with plastic wrap. Leave to set and cool for about an hour.
  6. Cut into squares, then serve and enjoy!

Num Treap (Sticky Rice with Sesame Seeds)

Num Treap (Sticky Rice with Sesame Seeds)

BON APPÉTIT

– Ally xx

myTaste.com

Kuih Koci Gula Kelapa (Glutinous Rice Cake with Coconut Filling)

Kuih Koci Gula Kelapa (Glutinous Rice Cake with Coconut Filling)

Hello Everyone! Tonight I will be sharing my last recipe from Brunei. As previously mentioned in a post I shared two weeks ago, I came across this Kuih Koci Gula Kelapa from the same website entitled ‘Brunei’s Traditional Sweet Treats You Must Try’.

To be honest, when I was still living in Brunei, this was a kuih that I barely saw sold in the night markets or road-side stalls – or maybe I was too focused on my favourite kuih-kuih that I failed to notice them amongst the pack. Nevertheless, as with most, if not all, kuih-kuih found in Brunei originate from a different country, and the Kuih Koci Gula Kelapa is no stranger to that. As it turns out, it is actually native to Indonesia.

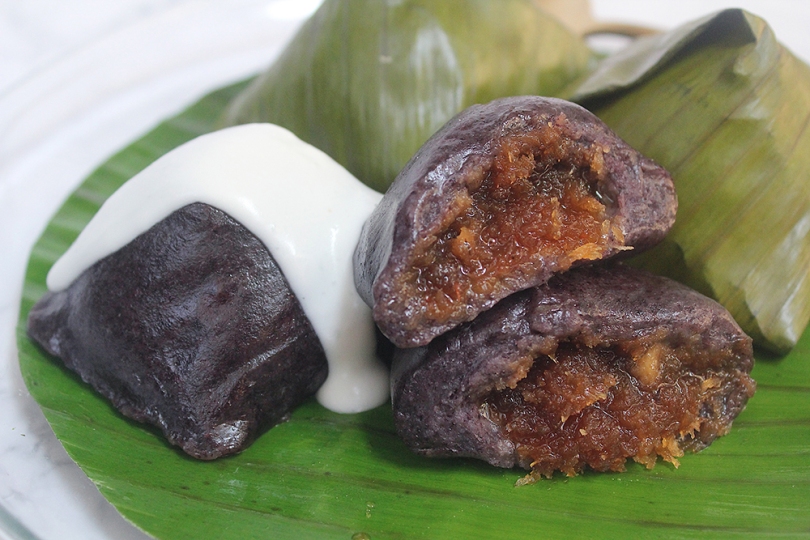
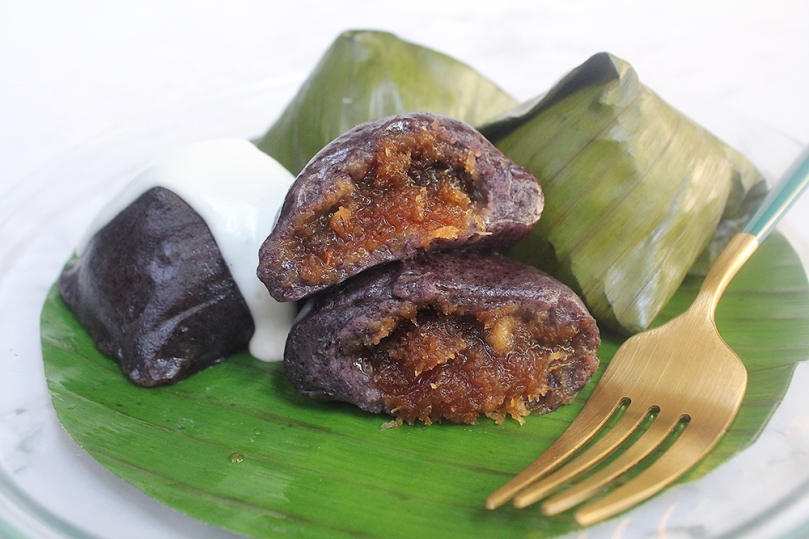
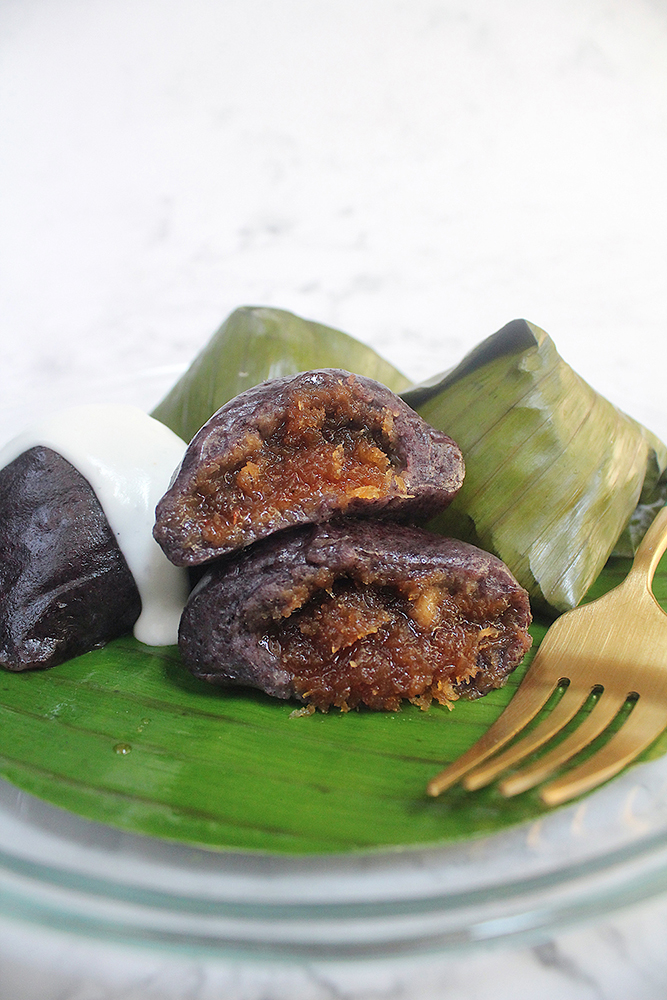
Pronounced koh-chee, this is a snack/dessert made with a mix of white and black glutinous rice flour, stuffed with sweetened coconut and palm sugar filling, wrapped in banana leaves, and then steamed. The deep purple hue of the kuih comes from the black glutinous rice flour. There are also varieties of this kuih that do not require black glutinous rice flour, in fact a majority of it is made with white glutinous rice flour. The black glutinous rice flour is mainly used to colour the kuih.

Kuih Koci Gula Kelapa (Glutinous Rice Cake with Coconut Filling)

In fact, black glutinous rice flour may be quite difficult to source (depending on where you live). You can actually make your own too by grinding black glutinous rice grains. Place them in a coffee grinder or blender and then grind until really fine. Sieve the flour and then grind again. You need to grind several times until you get a really fine flour, so technically it’s a lot of work too. I managed to source mine online from Indonesia.

The Kuih Koci has a mochi-like texture and is sweet in flavour from the coconut filling inside. Though optional, a slightly salty coconut sauce cuts through the sweetness nicely. Other than just adding a dollop of it atop after the kuih has been steamed, you can also spoon the coconut sauce into the banana leaf, place the dough in, and then steam it with the coconut sauce.

Before we dive into tonight’s recipe, please take the time to check out the original where I drew my inspiration from over on What To Cook Today by Marvellina.

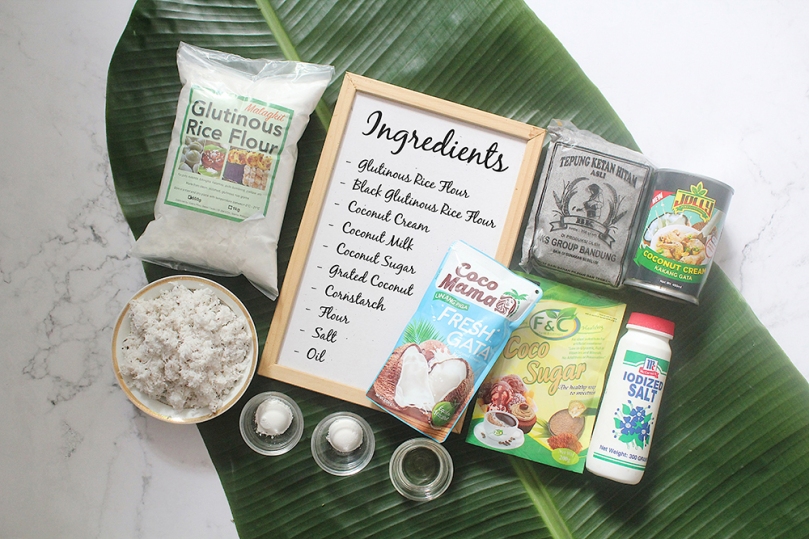
Kuih Koci Gula Kelapa (Glutinous Rice Cake with Coconut Filling) Ingredients

PREP TIME 30 MINS | COOKING TIME 30 MINS | MAKES 6 PCS

INGREDIENTS

For the dough

  • 1 & 1/2 cups white glutinous rice flour
  • 1/3 cup black glutinous rice flour
  • 2/3 cup coconut milk

For the coconut filling

  • 2 cups grated coconut
  • 1/2 cup coconut sugar*
  • 1/4 cup coconut cream
  • 1/4 cup white granulated sugar**
  • 1 tsp cornstarch
  • 1/4 tsp salt

*Gula Melaka (palm sugar) is the choice of sweetener used when it comes to traditional kuih like this, but if you can’t seem to source it, you can always substitute it for coconut sugar like I did.

**Also, I ran out of coconut sugar. It’s supposed to be 1 cup of coconut sugar but I only had half a cup left and therefore mixed it together with a quarter cup of white granulated sugar.

For the coconut sauce (optional)

  • 2/3 cup coconut cream
  • 1 tsp all-purpose flour
  • Pinch of salt, to taste

Wrapping

  • 6 pcs banana leaves (15cm x 20cm)
  • Coconut oil, for brushing

METHOD

  1. Prepare the Banana Leaves: Soak the banana leaves in warm water for 30 minutes. Wipe them dry and brush with coconut oil. Set aside.
  2. Coconut Filling: Meanwhile, add the coconut cream and sugars in a pan over medium heat. Mix until the sugars have melted, then stir in the grated coconut and salt. Mix until well incorporated and then sprinkle the cornstarch over the coconut-sugar mixture. Stir and cook until the mixture thickens. Once done, set aside and let it cool down completely.
  3. Coconut Sauce: Add the coconut cream and a pinch of salt to a small saucepan. Whisk in the all-purpose flour until smooth. Place on the stove and cook over medium heat, whisking continuously until the sauce thickens. Set aside.
  4. Dough: Heat the coconut milk in a small saucepan until it is hot, but not boiling. Add both flours to a large mixing bowl, together with the hot coconut milk. Stir to mix everything, until the dough comes together. It should be pliable and not sticky.
  5. Divide the dough into 6 equal pieces. Flatten the dough with the palm of your hands and place the cool coconut filling in the middle. Wrap around it and roll the dough into a smooth ball. Repeat with the remaining dough.
  6. Wrapping: Take a piece of banana leaf and shape into a cone. Place a dough ball in the cone and gently push it into the leaf. Fold one side over, and then the adjacent side. Then fold the other two sides to make your cone-shaped Kuih Koci.

You may also choose to wrap them into a parcel, or steam them with no wrapping at all! Just place the balls onto a small sheet of banana leaf.

  1. Steaming: Place the wrapped Kuih Koci into a steamer and steam for about 10 -15 minutes.
  2. Serve: Once done, unwrap and serve immediately while hot, topped with the coconut sauce. Enjoy as a light mid-morning or mid-afternoon snack!

Kuih Koci Gula Kelapa (Glutinous Rice Cake with Coconut Filling)

Note: Steamed Kuih Koci can be kept in the refrigerator for up to 3 days. Otherwise, you may freeze the uncooked kuih koci for later consumption. Steam, frozen for, 15-18 minutes.

BON APPÉTIT

– Ally xx

myTaste.com

Kuih Kosui (Rice Cakes with Grated Coconut)

Kuih Kosui (Rice Cakes with Grated Coconut)

Hello Everyone! The Bruneian traditional kuih (or kueh) is similar to many traditional cakes from around the region, such as in Singapore, Malaysia, and Indonesia. Nobody knows where the true origins of each traditional kuih came from in Brunei, but we know it all started from the water village – Kampong Ayer many decades ago. Back in the day, due to limited supply of resources, Bruneian cake makers would make use of natural elements and materials to prepare the cakes, such as wrapping with leaves, and making use of all parts of a coconut or palm tree.

Today, Bruneian kuih-kuih (plural for kuih) are still as popular as ever due to the nostalgia and historical heritage that it carries with every bite. Upon researching traditional kuih-kuih native to Brunei, I came across a website entitled ‘Brunei’s Traditional Sweet Treats You Must Try’. Kuih Kosui was amongst the list, but as it turns out, it is actually native to Malaysia, as most kuih-kuih are.

Kuih Kosui is a saucer-shaped rice cake that is flavoured with either pandan (screwpine leaves) juice or gula melaka (palm sugar). It is also known as Kue Lumpang in native Indonesian language, and is actually very similar to what we have closer to home here in the Philippines, known as kutsinta.

Kuih Kosui (Rice Cakes with Grated Coconut)

Kuih Kosui is very economical to make. The kuih is characterised by its ‘dimple’ in the middle of the cake, lightly sweet taste, soft, yet wobbly and slightly bouncy in texture. They are then topped with a slightly salted, grated coconut topping to give that extra layer of flavour with the classic sweet-salty combination.

Unlike with a traditional kutsinta recipe, the soft, wobbly, and bouncy texture of Kuih Kosui can be achieved without having to add any alkaline water. You just need the right combination of flours and you can still achieve its distinct chewy texture and dimples.

Before we dive into tonight’s recipe, please take the time to check out the original where I drew my inspiration from over on What To Cook Today by Marvellina.

Kuih Kosui (Rice Cakes with Grated Coconut) Ingredients

PREP TIME 15 MINS | COOKING TIME 15-20 MINS | MAKES 14 CAKES

INGREDIENTS

  • 1/2 cup + 1 tbsp + 1 & 3/4 tsp rice flour
  • 2 tsp wheat starch
  • 2 tsp cornstarch
  • 1/4 tsp salt

For pandan flavour

  • 2/3 & 1/4 cup boiling water (cooled for 15 minutes)*
  • 1/2 cup white granulated sugar
  • 1/3 cup pandan-infused water**

For coconut sugar flavour

  • 1 & 1/4 cup boiling water (cooled for 15 minutes)*
  • 1/4 cup coconut sugar
  • 1 tsp white granulated sugar

For the topping

  • Freshly grated coconut
  • Pinch of salt

Notes:

  • *Bring water to a boil and let it cool down for 15 minutes so it should feel lukewarm after that. The warm water will stabilize the starch/flour and they won’t separate when you steam. Make sure not to use boiling hot water as this will cook the starch/flour into a dough.
  • **Place the pandan leaves and water into a blender. Blend until the leaves are chopped very finely. Pour contents through a fine sieve and press against it using a spoon to draw out any extra juice. Discard the leaves.
  • Flour and starch measurements are for one recipe per flavour. If you want to make both flavours at the same time, make sure to measure out another set of flour and starch ingredients.

METHOD

  1. Topping: Add the pinch of salt together with the grated coconut and give it a good mix. Steam over high heat for 10 minutes and set aside once done.
  2. Kuih Kosui: Bring the water in the steamer to a boil and place the empty cups in the steamer. Allow them to heat up for about 5 minutes while you are preparing the batter This step is important to prevent the starch/flour from separating when steaming your rice cakes.
  3. Add the three different types of flour and starches, together with the salt, into a medium-sized mixing bowl. Depending on your chosen flavour, add the sugars, (then the pandan-infused water if making pandan flavour Kuih Kosui), and then the lukewarm water. Stir into a smooth batter until the sugars have dissolved.
  4. Pour the batter into the preheated cups, about 3/4 of the wall full and steam over high heat for 12-15 minutes (18 minutes if your cups are larger).

If your steamer cannot fit all the cups/batter in at the same time, work in batches. Do not pour the mixture into the remaining cups ahead of time and let them sit. The flour and starch mixture tends to settle at the bottom after a while. This is important otherwise your Kuih Kosui won’t turn out right.

  1. After steaming, remove the cups from the steamer and let them cool down for about 5 minutes. They can be easily removed by running a small rubber spatula around the edges to lift them up.
  2. Repeat with the next batch of batter. Make sure the steaming water is back to a rolling boil before steaming. Stir the batter first before pouring into the preheated cups.
  3. Once done, sprinkle with the prepared grated coconut topping. Serve and enjoy as an afternoon snack! Should make around 14 kuih-kuih.

Kuih Kosui (Rice Cakes with Grated Coconut)

If you ever happen to find yourself travelling through Brunei on your next travel adventure, drop by any day or night markets and you’re bound to come across this kuih and many others. If you’re lucky enough, you can even catch the vendor making them fresh on the spot for you.

The best time to find all the local snacks and kuih-kuih in one place is during the holy month of Ramadhan at various food markets. You can find a plethora of local and traditional goodies for you to try. Alternatively, you can also get these at the Gadong Night Market or Tamu Kianggeh throughout the year and more often the vendors would be more than happy to describe each one to you!

BON APPÉTIT

– Ally xx

myTaste.com

Ube Champorado

Ube Champorado

Hello Everyone! Everything is about ube these days; ube ice cream, cakes, and desserts and all that. ‘New’ recipes are being developed all the time – new meaning adding an ube twist to already classic favourites. The latest ube trend/craze to come out of this quarantine is of course none other than the overrated Ube Cheese Pandesal.

Ube Champorado

Like this Ube Champorado, it is as good as our favourite original chocolate version. Almost two years ago (just shy of a few days actually), I made the classic version of this champorado using tablea chocolate. In that post, I talked about pairing a sweet rice pudding with dried, salted fish. I remember getting messages from friends when I posted a photo of the dish on IG; all with the same “wow, that’s interesting!” reaction. There are a lot of desserts out there that embrace the salty-sweet combination; salted caramel and salted chocolate being the top two favourite bases to endless dessert options!

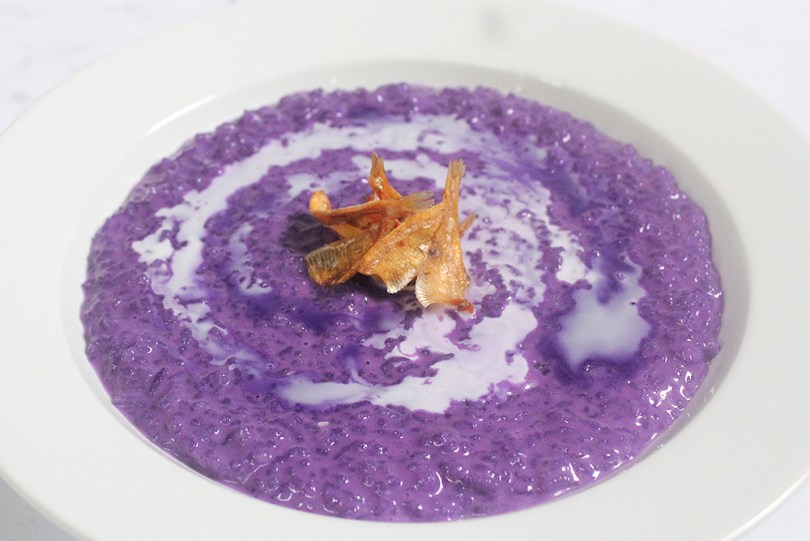
This Ube Champorado with dried salted fish is no exception. It adds pops of salty surprises to each spoonful of the sweet ube rice porridge that you take. If the combination is off putting for you, then you could get away with adding a pinch of rock salt into your champorado – but it won’t be the same. For all the ube lovers out there, this is an ideal breakfast, snack, or dessert for any occasion!

Ube Champorado Ingredients

PREP TIME 5 MINS | COOKING TIME 25 MINS | SERVES 6

INGREDIENTS

  • 4 cups filtered water
  • 1 cup (250g) white glutinous rice, rinsed
  • 1 cup ube jam/halaya
  • 1/2 cup coconut milk
  • 1 tsp ube extract
  • Pinch of salt

METHOD

  1. Add the rinsed glutinous rice together with the water in a medium-sized stockpot over medium heat. Bring to a boil and then lower the heat down to a simmer. Cook until the rice is almost tender, about 15 minutes. Stir regularly to avoid scorching and sticking. Add more water if necessary to achieve your desired consistency.
  2. Stir in the ube jam/halaya, ube extract, coconut milk, and season with a pinch of salt. Taste and adjust if needed. Cook, still continuously stirring, until tender and the ube is mixed in well with the rice, a further 10 minutes or so.
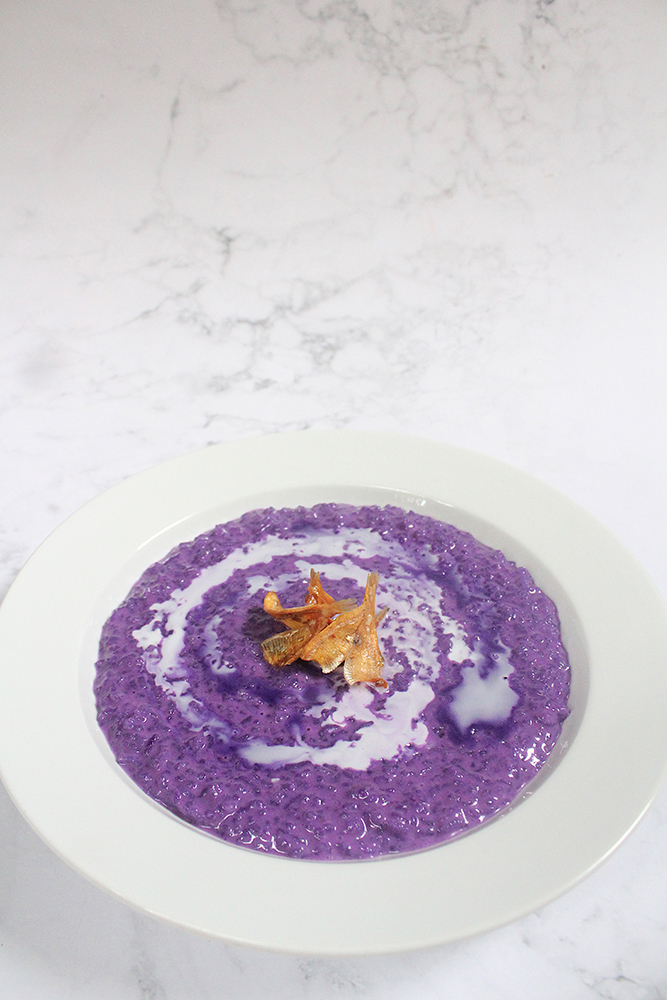
  3. Once done, ladle the champorado into individual serving bowls and top with a swirl each of the ube condensada and coconut milk. You may also top them with fried boneless dilis if you’re feeling adventurous.
  4. Enjoy immediately while steaming hot on a chilly and crisp morning!

Ube Champorado

You may use fresh/raw ube for this recipe, however, so using store-bought ube jam/halaya, ube extract, or ube powder is just as good; quick and hassle free as how champorado should be. Having to work with fresh Ube will totally ruin that aspect of a no-fuss champorado for me.

Ube Champorado

BON APPÉTIT

– Ally xx

myTaste.com

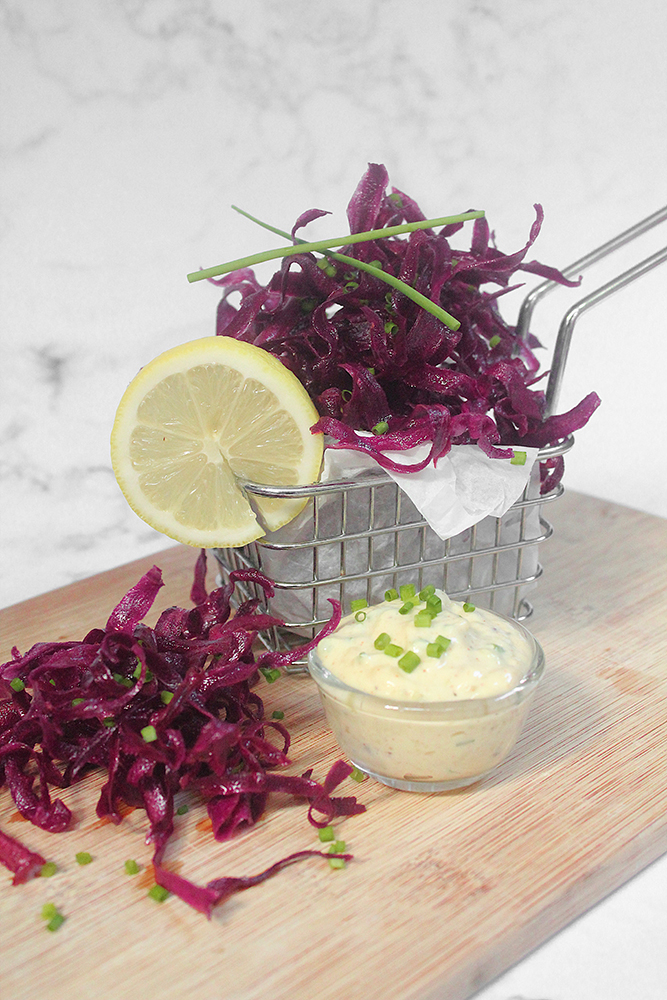
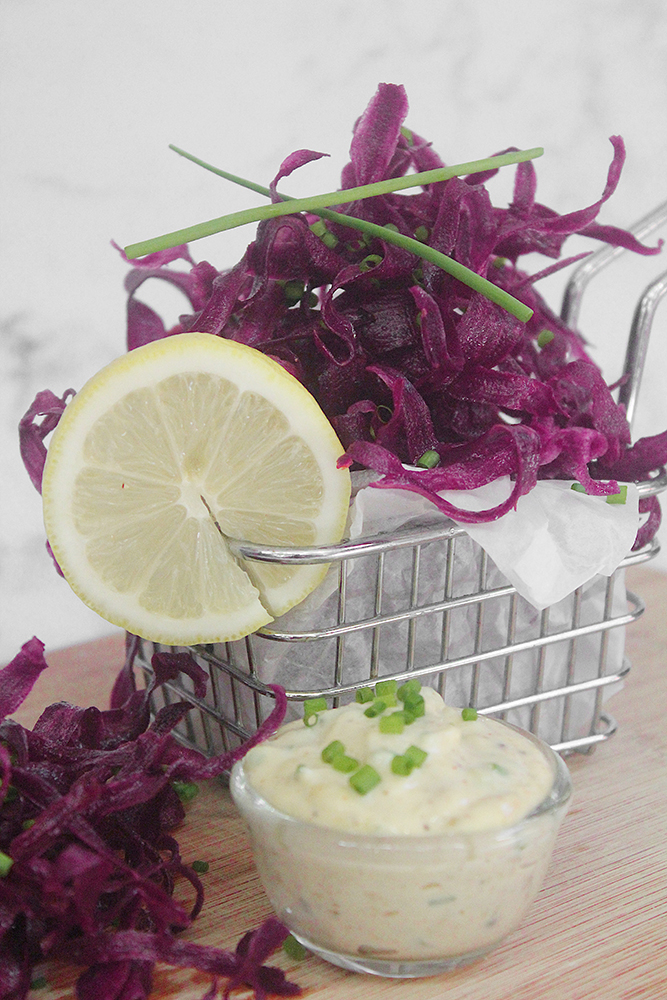
Purple Sweet Potato Crisps with Easy Roasted Garlic & Chive Aïoli

Purple Sweet Potato Crisps with Easy Roasted Garlic & Chive Aïoli

Hello Everyone! Now this is a recipe I’ve been so eager to make since forever. I first came across this dish from a café across the road from my campus when I was still studying in Australia for my design degree. The café is known as Ampersand Café & Bookstore. I did a review of the café back in 2015, so if you have some free time up your sleeves, go and have a read, or just a look at the lovely ambiance of the café and the delicious food served there.

Purple Sweet Potato Crisps with Easy Roasted Garlic & Chive Aïoli

The one thing I would never fail to order off their blackboard menu? That’s right, their sweet potato crisps with aïoli. I even remember going there several times and not being able to order this dish because their deep fryer had been broken for a couple of months. At times I would even ask them “is your deep fryer still broken?” and then make a sad face later when they would unfortunately say yes.

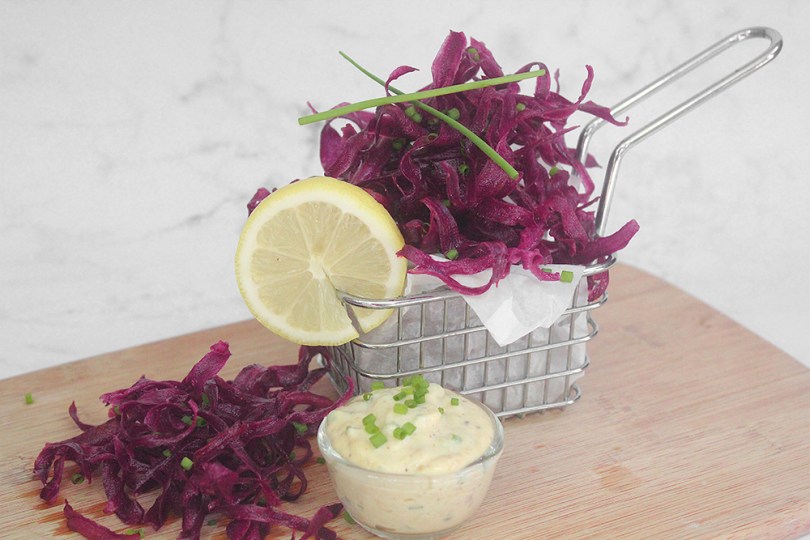
The crisps from the café are made using orange sweet potatoes, and since we’re sharing violet recipes for this month, I decided to use purple sweet potatoes that I sourced from PruTazan. The sweet, crispy, and caramelised sweet potatoes pair really well with the slightly tangy, spicy, and garlicky aïoli. It’s a perfect side dish to your main meal, or even just a light snack on its own. Either way, it’s a whole new experience of enjoying sweet potatoes!

Purple Sweet Potato Crisps with Easy Roasted Garlic & Chive Aïoli

PREP TIME 10 MINS | COOKING TIME 5 MINS* | SERVES 4

* Plus additional 40 minutes for the roasted garlic (if not made in advance).

INGREDIENTS

For the sweet potato crisps

  • 2 small (100-200g) purple sweet potatoes, washed
  • Salt and freshly ground pepper, to taste

For the roasted garlic

  • 1 bulb garlic
  • Dried thyme leaves
  • Ground paprika
  • Olive oil
  • Salt and freshly ground pepper, to taste

For the easy roasted garlic and chive aïoli

  • Roasted Garlic (see above)
  • 1 stalk chives, finely chopped
  • 1/2 cup Japanese mayonnaise
  • 1/4 tsp ground cayenne pepper powder, plus more if needed (optional)
  • Juice of 1/2 a lemon
  • Cooking oil, for deep frying

METHOD

  1. Roasted Garlic: Preheat oven to 200C (400F or gas mark 6).
  2. Use your fingers to peel away all the loose, papery, outer layers around the head of the garlic. Leave the head itself intact with all the cloves connected.
  3. Trim about 1/4 inch off the top of the head of garlic to expose the tops of the garlic cloves.
  4. Drizzle 1 to 2 teaspoons of olive oil over the exposed surface of the garlic, letting the oil sink down into the cloves. Season with salt and freshly ground pepper, and flavour with your favourite herbs and spices as well (optional).
  5. Wrap the garlic in aluminum foil and roast in the oven for 40 minutes. After 40 minutes, begin checking the garlic. The garlic is done when a center clove is completely soft when pierced with a knife.

Note: Even once soft, you can continue roasting until deeply golden for a more caramelised flavor — check the garlic every 10 minutes. Exact roasting time will depend on the size of your garlic, the variety, and its age.

  1. Let the garlic cool slightly, and then press on the bottom of a clove to push it out of its paper.

Tip: Roasting a single bulb of garlic in an oven for 40 minutes sounds a bit excessive doesn’t it? Well, what I usually like to do is whenever I use my oven for something, be it baking a delicious sweet treat or roasting away some beautiful salmon portions, I always throw a couple of garlic heads wrapped in foil into the oven as well. That way I’m killing two birds with one stone. I then keep the roasted garlic in a jar together with olive oil to preserve and use it when I need to. Roasted garlic can be refrigerated for up to 2 weeks or frozen for up to 3 months.

  1. Roasted Garlic and Chive Aïoli: Add all the ingredients into a small bowl and mix well. Add ground cayenne pepper if you want a bit of heat to your aïoli, otherwise you may omit. Taste and adjust the seasonings to your liking. Set aside to chill until ready to serve.
  2. Sweet Potato Crisps: Using a peeler, peel off the skins of the sweet potato. Continue peeling into the flesh of the sweet potato to make long and thin strips. Place on top of a kitchen towel and pat dry to remove any excess moisture from them.
  3. Pour cooking oil in a large, heavy pan to a depth of about 2 inches, and heat the oil to 165C/325F. Working in small batches, fry the sweet potatoes for about 45 seconds to a minute. Stir them a few times to keep them from sticking together. Using a metal slotted spoon, lift them out onto paper towels to remove excess oil.
  4. Season the crisps with a touch of salt and serve immediately while hot and crispy with the roasted garlic aïoli. Squeeze a touch of lemon juice onto the crisps before eating. Enjoy!

Purple Sweet Potato Crisps with Easy Roasted Garlic & Chive Aïoli

Purple Sweet Potato Crisps with Easy Roasted Garlic & Chive Aïoli

BON APPÉTIT

– Ally xx

myTaste.com

Pulut Tai Tai (Blue Glutinous Rice Cakes)

Pulut Tai Tai (Blue Glutinous Rice Cakes)

Hello Everyone! Pulut Tai Tai is a Nyonya kuih made of fluffy glutinous rice that is steamed in coconut milk, and tinted with a beautiful natural blue colour from butterfly pea flowers. You can leave it out if you can’t find butterfly pea flowers, as it’s mostly for the colour, but it wouldn’t be as elegant-looking without it.

It is typically served with a coconut-pandan spread where the contrasting colours of green together with the vibrant blue and white of the glutinous rice makes the kuih all the more delightful and pleasing to the eyes of the beholder. In addition to colour, the slight tinge of saltiness of the glutinous rice coupled with the sweetness of the kaya makes this kuih a delight to savour.

Pulut Tai Tai (Blue Glutinous Rice Cakes)

Tai Tai refers to a rich man’s wife who enjoys a life of leisure. It is said that this specific kuih was only served to the wives of rich men back then. This kuih is also known as Pulut Tekan which literally translates to ‘pressed glutinous rice.’

Before we dive into tonight’s recipe, please take the time to check out the original recipe for these Blue Glutinous Rice Cakes over on Bake with Paws by Yeanley.

Before I tackled this recipe, I read that soaking the glutinous rice with the addition of vinegar or lemon juice will reduce the phytic acid found in the grain. It also helps in breaking down the gluten and aids for better absorption of the blue colour from the butterfly pea flowers. Now, while I included lemon in the ingredients shot below, I in fact did not use the lemon at all for one main reason – the addition of acidity to the butterfly pea flower infused water would make it turn violet in colour. Since I am all about sharing blue recipes for this month, that’s definitely not what I want. I found that the glutinous rice absorbed the blue colour well anyway without the need for vinegar or lemon juice.

Pulut Tai Tai (Blue Glutinous Rice Cakes) Ingredients

PREP TIME 20 MINS* | COOKING TIME 30-45 MINS | SERVES 4-6

* Additional 4 hours min. overnight max. for soaking time

INGREDIENTS

  • 2 cups white glutinous rice
  • 1 cup coconut milk
  • 2/3 cups water
  • 3/4 tsp salt
  • 25 pcs dried butterfly pea flowers
  • Banana leaves
  • Pandan (screwpine) leaves
  • Lemon juice (optional)

METHOD

  1. Bring a small saucepan of water and the dried butterfly pea flowers to a boil, over high heat. Let it simmer for a few minutes and then remove from the heat. Cover and leave to steep for 10 minutes before straining. Press down on the flowers to extract the blue colour from the flowers. Set aside to cool.
  2. Wash the glutinous rice until the water is clear. Soak 1/3 of the glutinous rice with the blue-infused water and the remaining 2/3 in water. Soak for at least 4 hours or overnight. After 4 hours or the next day, drain them both separately.
  3. Prepare your steamer by lining with clean banana leaves. Light grease with a touch of coconut oil and top with pandan leaves followed by the glutinous rice; blue rice on one side and white on the other.
  4. Mix the coconut milk and salt together. Pour half of the coconut milk mixture over the rice and mix well. Steam over high heat for 20 minutes. After 20 minutes, remove from the steam and fluff the rice. Add the remaining coconut milk mixture and then return it to the steamer to cook for a further 10 to 15 minutes.
  5. Line a square pan with banana leaves and lightly grease with coconut oil. Transfer the cooked rice to the pan, alternating between the white and the blue rice. Level the surface and cover with more banana leaves. Place another pan on top of it and weigh it down with heavy objects to compress the rice. Set aside to cool.
  6. Cut into small rectangular pieces and serve with some homemade Nyonya-style kaya. Enjoy it as a mid-afternoon snack!

This kuih can be kept for a couple of days if stored in the refrigerator. Before consuming it again, steam or heat it in a preheated oven at 70C for 10 minutes to soften it.

Pulut Tai Tai (Blue Glutinous Rice Cakes)

PS: Before I end tonight’s post, let’s see if a particular someone actually reads my blog from start to finish *cheeky grin* I would like to take this opportunity to wish a special person in my life, a Happy Birthday! I hope you like the little gift I had sent to you earlier this afternoon. I wish you an abundance of happiness, good health, peace, and prosperity in life. To many more birthdays and hopefully I can spend them all with you by your side!

BON APPÉTIT

– Ally xx

myTaste.com

Chinese Blue Tea Eggs (茶叶蛋)

Chinese Blue Tea Eggs (茶叶蛋)

Hello Everyone! Before we jump into a new colour theme for the month, I would just like to take this opportunity to thank each and every one of my Auguesters for sharing, not only their deliciously enticing recipes, but for also sharing their story and passion for food. Thank you to the new faces, and of course to the recurring guests over the years since I started the series. Check them out on the ‘Auguest’ tab above!

Moving forward, I just wanted to say that I initially had a different recipe planned out to share with you guys tonight, but it just so happened that one of my Auguesters had the same idea. Luckily, they sent their recipe in towards the end of July so I still had time to research and come up with a different recipe to share with you guys.

The Chinese Tea Egg is commonly sold as a snack by street vendors or in night markets in most Chinese communities throughout the world, and also served in many Asian restaurants. It is a typical Chinese savory food in which a boiled egg is cracked slightly and then boiled again in tea, and sauce or spices. It is also known as marble egg because cracks in the egg shell create darkened lines with marble-like patterns.

Chinese Blue Tea Eggs (茶叶蛋)

Chinese Tea Eggs are traditionally cooked twice; cooked until hard boiled the first time, and then cooked in a savoury marinade for several hours the second time around. The reason they are cooked for such a long time is that, as a street food, they need to be preserved when refrigeration is not available. Unfortunately, as someone who likes all eggs with a set white and runny yolk, be it boiled, poached, or sunny side up, this is a living nightmare for me. The end result is that the eggs end up extremely overcooked, with a rubbery texture.

So here’s a recipe that I found on Omnivore’s Cookbook by Maggie that works with whatever doneness you like. Whether soft, medium, or hard boiled, this recipe creates the most flavourful marbled tea eggs with a perfectly cooked texture.

Instead of boiling these eggs twice as per tradition, they are marinated in a savoury liquid that has been simmered first to release and incorporate its flavours into the liquid, and then cooled. The marinating liquid consists of bay leaves, star anise, cinnamon sticks, black peppercorns, chillies, and instead of black tea, I’ve decided to put a little twist to these eggs and use butterfly pea flowers to give it that blue hue. This way your eggs will be cooked to the tenderness you like and still retain all the beautiful and rich flavours of a traditional Chinese Tea Egg. Also, because I want to achieve its blue hue, I’ve had to omit using soy sauce for this recipe. Instead, I’ve replaced the soy sauce for fish sauce to still achieve the saltiness for the eggs.

Chinese Blue Tea Eggs (茶叶蛋) Ingredients

PREP TIME 15 MINS | COOKING TIME 15 MINS | MAKES 12 EGGS

Additional of up to 24 hours for marinating the eggs.

INGREDIENTS

  • 12 large free-range eggs*

For the marinade

  • 2 & 1/2 cups water
  • 3 tbsp fish sauce
  • 3 whole cloves
  • 2 bay leaves
  • 2 red bird’s eye chillies
  • 2 star anise
  • 1 small cinnamon stick
  • 2 tbsp dried blue butterfly pea flowers
  • 2 tsp sugar
  • 1 tsp black peppercorns
  • 1 tsp salt

* If your eggs have been stored in the refrigerator, it is important to bring your eggs to room temperature before cooking them as they are much less likely to crack in the hot water. Let them sit at room temperature for about 20 to 30 minutes. In addition, yes I am aware that the photo above only shows 7 eggs. I initially wanted to make a dozen eggs for this recipe, but when I took the carton of eggs out of the fridge when making this recipe, there were only 7 eggs left. Nevertheless, the recipe below is good for a dozen eggs.

Chinese Blue Tea Eggs (茶叶蛋) Spices

METHOD

  1. Mix all the marinade ingredients in a small to medium-sized pot. Cook over medium heat and bring to a boil. Once boiling, turn the heat down to medium-low and simmer for about 10 minutes. Remove the pot from the stove and leave to completely cool down.
  2. To boil the eggs, heat a medium-sized pot of water (enough to cover all the eggs) over high heat until boiling. Once boiling, turn the heat down to low and carefully place the eggs in the pot using a ladle to prevent them from cracking.
  3. Depending on your preference, boil for 5 minutes for soft-boiled eggs, 7 minutes for medium eggs, or 10 minutes for hard-boiled eggs.
  4. While the eggs are cooking, prepare an ice bath** by combining ice and tap water in a large bowl. Once the eggs are cooked, immediately transfer them to the ice bath to cool for 2 to 3 minutes.
  5. Gently crack the eggs using the back of a spoon. You want to make sure the egg shells are cracked enough so the marinade will seep into the interior, without cracking the eggs apart (especially if you made soft-boiled eggs). If you’re in a hurry, you can also completely peel the eggs and marinate them.
  6. Transfer the eggs to a quart-size ziplock bag***, then carefully pour in the cooled marinade liquid together with the other spices (discarding the flowers). Marinate overnight for peeled eggs, or up to 24 hours for cracked “marble” eggs.
  7. When ready, peel the eggs and enjoy them cold or at room temperature, as it is or as an accompaniment to other dishes i.e. top it on a bowl of simple noodle soup or on some steamed rice. You will feel such happiness when you bite into the savoury creamy egg yolk.
  8. You can store leftover eggs in the marinade for 4 to 5 days in the fridge. The marinade will help with preserving the eggs. Note that the eggs will become more flavourful and saltier over time.

Chinese Blue Tea Eggs (茶叶蛋)

Notes:

  • ** The ice bath will cool the eggs quickly and stop the cooking process. The ice water will also cause the egg to contract and pull away from the shell, which will make it easier to peel.
  • *** This recipe uses a quart-size ziplock bag to marinate the eggs, so you won’t need as much marinating liquid. Double the amount of marinade if you’re planning to marinate the eggs in a container.
  • The tea egg marinating liquid, if stored properly, can be used more than once. If you plan to do so, make sure to use a clean spoon to remove the eggs from the liquid. Boil the liquid and let it cool again the next time you use it.
  • If you’re making soft boiled tea eggs, let them marinate a bit longer, for two to three days. The egg yolk will start to get thicker and turn a beautiful light brown colour. It’s so creamy and bursting with flavour.

Chinese Blue Tea Eggs (茶叶蛋)

BON APPÉTIT

– Ally xx

myTaste.com