Auguest 2019: Jialing Mew

Baked Brie with Rosemary, Honeyed Pear & Walnuts

Happy Auguest everyone! I’m Jialing and this is my 5th year as the grand finale for Amcarmen’s Kitchen’s Auguest series. I’ve learnt a lot in these past five years, but clearly not how to stop procrastinating.

Baked Brie with Rosemary, Honeyed Pear & Walnuts

I am at a friend’s wedding, typing away on my phone as quickly as I can while waiting for dinner to come out, moments before it is meant to go live (despite Allison having sent me daily reminders – sorry mate). If you, like me, frequently find yourself with many commitments, and little time, boy do I have a recipe for you! Having learnt from my previous Auguest blogs, this recipe uses just a few ingredients and equipment, and comes together in 15 minutes!

As a bonus, it is vegetarian friendly, and can be easily adapted to be gluten friendly, by swapping out the bread. But it’s not for vegans. Sorry. Please direct yourself to Auguest 2016 for my Poached Pears with Chocolate Chia Mousse if that’s what you’re after.

Baked Brie with Rosemary, Honeyed Pear & Walnuts Ingredients

PREP TIME 5 MINS | COOKING TIME 10-12 MINS | SERVES 4-6*

*Or one (1) very hungry Jialing.

INGREDIENTS

  • 200g Brie cheese
  • 3 pears
  • 2 sprigs rosemary
  • 1/4 cup walnuts
  • 2 tbsp honey

To serve

  • Strawberries
  • Crusty bread

METHOD

  1. Pre-heat oven to 180C (350F or gas mark 4) and line a tray with baking paper – this will help keep the honey from sticking to the surface when it caramelises!
  2. Cut pears into quarters, and lay onto the baking tray, leaving space for the brie cheese in centre.
  3. Place the unwrapped brie cheese in the centre of the tray and lay whole sprigs of rosemary on top.

Tip: Laying them on top rather than poking them into the cheese infuses the flavour without creating holes that the melting cheese will spill out of as it bakes!

  1. Pile walnuts gently on top of the rosemary sprigs, and drizzle the brie cheese and pears generously with honey.
  2. Bake for 10-12 minutes, until the brie cheese is soft and the honey just starts to bubble. As the honey cools it will caramelise the walnuts.
  3. Gently lift the brie cheese using spatula and place onto a cheese board. Arrange pears (careful, they’ll be hot too) and fresh strawberries around the brie cheese and serve immediately with fresh crusty bread. Enjoy!

Baked Brie with Rosemary, Honeyed Pear & Walnuts

Baked Brie with Rosemary, Honeyed Pear & Walnuts

And here we have a rather curious Winston.

Photo Courtesy & Recipe Copyright © 2019 | Jialing Mew

BON APPÉTIT

– Jialing Mew

myTaste.com

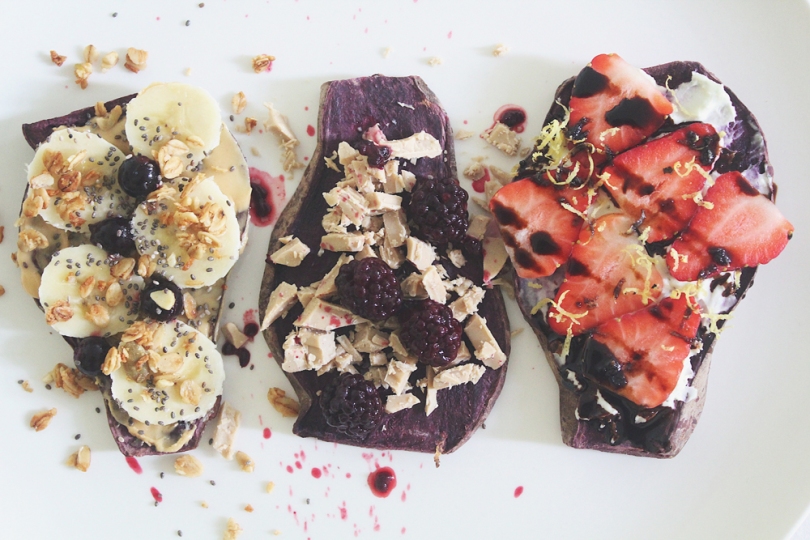
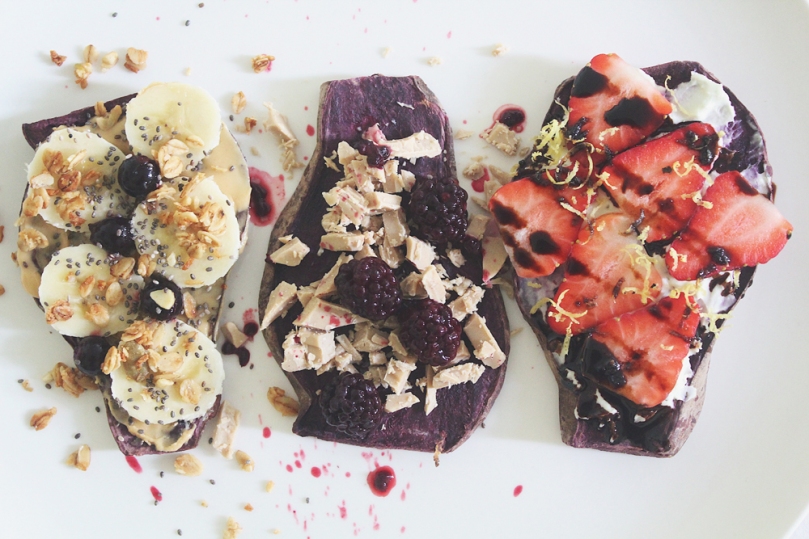
Sweet Purple Sweet Potato Toasts (3 ways)

Sweet Purple Sweet Potato Toasts (3 ways)

Hello everyone! Apologies for not getting this post up last week as it was supposed to – I feel like I’ve been repeating myself in every post so far but yes, things have been hectic. Amongst the hecticness I speak of, my sister also arrived back from Singapore last week. Other than that, nothing exciting has happened over the past week – the week ahead though will definitely be one to remember.

Anyway, I’ll keep tonight’s introduction short and just dive straight into the recipe. To recap, the theme for this month on Amcarmen’s Kitchen is to hero Sweet Potatoes for breakfast! At the beginning of he month, I shared Savoury Orange Sweet Potato Toasts 3 Ways for you, and tonight I’m going to share you a Sweet Purple Sweet Potato Toasts 3 Ways for those who prefer a sweet option rather than savoury to kick start their mornings!

Sweet Purple Sweet Potato Toasts (3 ways)

Preparing your Sweet Potato Toasts

PREP TIME 10 MINS | COOKING TIME 20 MINS* | MAKES 5 SLICES**

*Baking time time will vary depending on the size and thickness of your sweet potato slices.
**Or how-ever-so-many slices you can get from a single sweet potato

INGREDIENTS

  • 1 large purple sweet potato, wash and dried

METHOD

  1. Preheat oven to 180C (350F or gas mark 4). Place a wire rack on a large rimmed baking sheet.
  2. Trim both ends from the sweet potato using a knife and slice them lengthwise into 1/4-inch thick slabs using a knife or mandolin slicer.
  3. Arrange the slabs in a single layer on the wire rack and bake for about 15-20 minutes or until the potatoes are tender, but not fully cooked.
  4. Remove the potatoes from the oven and allow them to cool on wire rack completely before transferring to a storage container. They can be stored in the fridge for up to 4 days.

When it’s go-time simply add the desired number of slices to your toaster and toast away. Setting it on the highest setting takes only one toasting cycle to get them how I like them (warm, bubbly and crispy on the edges). Just be wary that yours may need more or less depending on the toaster that you are using. Adjust to your liking!

Notes/Tips:

    • Look for sweet potatoes that are relatively shaped like a tube so that they’re easier to slice.
    • Don’t remove the skin because fibre in it is good and it helps the slices hold up better during storage.
    • Using a mandolin slicer gives you uniform slices of sweet potatoes, and is easier and safer than using a big knife.
    • Allow them to cool completely after baking before stacking them in a container or they’ll get sweaty and will definitely take longer to toast when you’re ready to eat them.

Now the fun starts – you get to add toppings! The possibilities are pretty much endless but these three are my absolute favourite combinations for a yummy start to my day – the sweet edition!


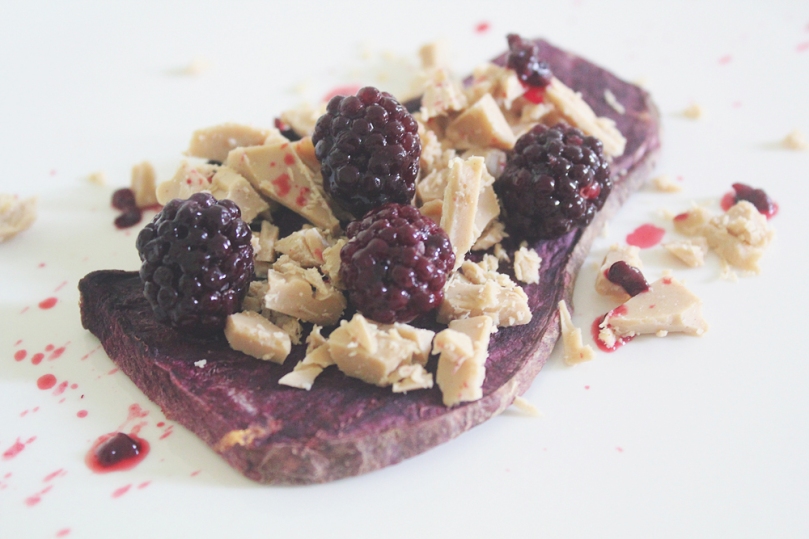
Blackberries & Buttermilk Caramelised White Chocolate

Sweet Purple Sweet Potato Toasts (3 ways): Blackberries & Buttermilk Caramelised White Chocolate

PREP TIME 5 MINS | COOKING TIME 5-10 MINS | SERVES 1

INGREDIENTS

  • Blackberries, fresh or frozen (thawed)
  • Sweet potato slice(s)
  • Whittaker’s West Coast Buttermilk Caramelised White Chocolate (Artisan Collection), roughly chopped

METHOD

  1. Place the sweet potato slices into a toaster and toast on the highest setting until warm, bubbly and crispy on the edges.
  2. Top with the above garnishes and enjoy!

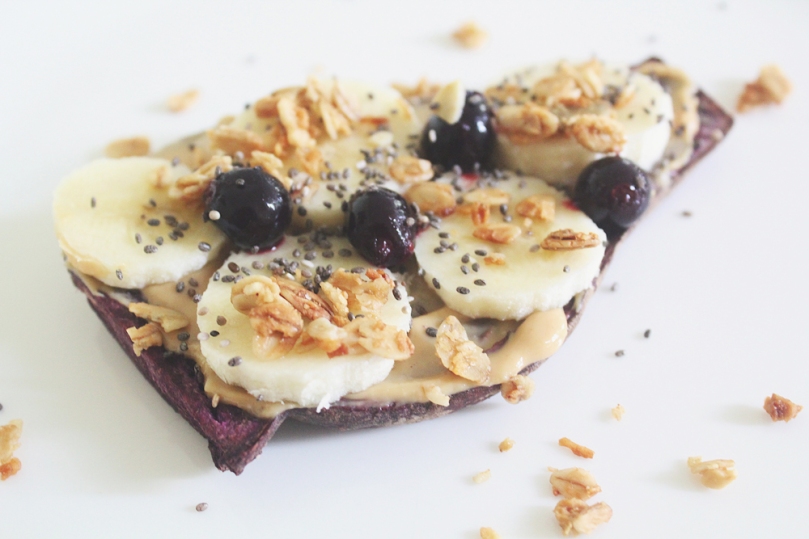
Banana, Blueberries & Peanut Butter

Sweet Purple Sweet Potato Toasts (3 ways): Banana, Blueberries & Peanut Butter

PREP TIME 5 MINS | COOKING TIME 5-10 MINS | SERVES 1

INGREDIENTS

  • Banana slices
  • Blueberries, fresh or frozen (thawed)
  • Chia seeds
  • Granola
  • Peanut butter
  • Sweet potato slice(s)

METHOD

  1. Place the sweet potato slices into a toaster and toast on the highest setting until warm, bubbly and crispy on the edges.
  2. Top with the above garnishes and enjoy!

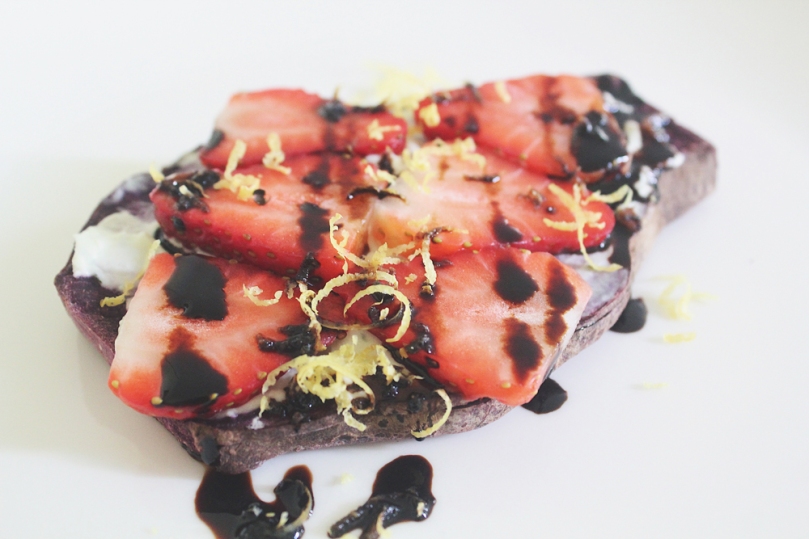
Strawberries & Goats Cheese with Balsamic Reduction

Sweet Purple Sweet Potato Toasts (3 ways):Strawberries & Goats Cheese with Balsamic Reduction

PREP TIME 5 MINS | COOKING TIME 5-10 MINS | SERVES 1

INGREDIENTS

  • Balsamic reduction
  • Goats Cheese
  • Lemon zest
  • Strawberry slices, fresh
  • Sweet potato slice(s)

METHOD

  1. Place the sweet potato slices into a toaster and toast on the highest setting until warm, bubbly and crispy on the edges.
  2. Top with the above garnishes and enjoy!

And there you have it – three simple ways you can make you mornings sweeter, brighter, full of colour, healthier, and energising altogether! I’ll TRY to get the last post for the month up, if not on Wednesday night, then on Thursday night hopefully – fingers crossed!

BON APPÉTIT

– Ally xx

myTaste.com

High Blood Pressure (Hypertension)

Health Tip: High Blood Pressure (Hypertension)

Hello Everyone! I am back on Amcarmen’s Kitchen for the year and I would just like to take this opportunity to wish everyone a belated Happy New Year and a Happy Chinese New Year to all my Chinese Family, Friends, and Followers! May the Year of the Golden Rooster bring you and your family your family Happiness that comes from within, the best of Luck to keep you pushing, and Peace in all days of this New Year. Gong Xi Fa Cai! 恭喜發財!

Now, before I move on to this evening’s post, I just want to clarify to those who haven’t read or been following my blog last month – I did mention that I would be taking a break from Amcarmen’s Kitchen due to the fact that I had a hectic schedule for the past few weeks, preventing me from having the energy to be in the kitchen on my only day off for the month of January. When the New Year kicked in, I had been staying a little later in the office every night to expedite the completion of the many design collaterals needed for the 19th Consumer Fair that happened just last week from the 18th to the 22nd of January 2017. Right after the Consumer Fair, we had family friends visiting us for 5 days, and then I had a Car Launching Event to manager alongside another colleague just 2 days ago. I haven’t had a good night’s sleep since the start of the year and I still haven’t been able to have a good rest as the inevitable post-Consumer Fair virus decided to kick in. I am currently, and slowly recovering from a blocked nose, an itchy throat, and a migraine as I am writing this post. Thank goodness for the long weekend ahead, otherwise I wouldn’t be seeing myself recovering for the next week or so.

Now, all that aside, let’s get onto tonight’s post! Tonight will be something different, but it will serve as the ultimate guideline for the year to come. As you can see from the title, the main focus of this post is to target High Blood Pressure, or also known as, Hypertension. In my recent trip to the Philippines, back in the middle of 2016, I underwent a health check as part of my requirement to process my employment permit to work in Brunei. It was then that I found that I suffer from high blood pressure. I admit that when I found out about this, I was feeling a little bit depressed; and whilst I was still in the Philippines back then awaiting for the approval of my employment visa, I sat down and started researching on hypertension and what foods to eat/avoid to help regulate blood pressure levels. Ever since I found out about my blood pressure levels being exceedingly high, I have also made changes to the food I eat, and have tried to become more active in my lifestyle habits.

High Blood Pressure, or Hypertension, is a serious health problem, where over time it causes blood vessel damage that can lead to heart disease, kidney disease, stroke, and other health problems. Hypertension is sometimes known as the silent killer because there are no real symptoms to detect whether or not you are prone High Blood Pressure. If you don’t get your blood pressure checked regularly, hypertension could go unnoticed, and untreated, for years.

Your diet plays a big role in whether you have high or normal blood pressure. Dietary recommendations for lowering blood pressure include reducing your intake of fat, sodium, and alcohol. It is also suggested that you eat more foods that are rich in potassium, calcium, and magnesium. In general, you should eat more high-fibre, low-sodium, low-fat protein sources, whole grains, and plenty of fruits and vegetables. Here are 20 foods & drinks that you should include in your daily diet to help prevent, lower, or control your high blood pressure naturally without the need for medication:

1. Avocado – All you need is about half a medium-sized avocado everyday as it provides 1% of the calcium, 5% of the magnesium, and 10% of the potassium that you need daily. The dark green flesh just under an avocado’s brittle skin contains large amounts of disease-fighting compounds.

High Blood Pressure (Hypertension): Avocados


2. Bananas – Slice a banana into your breakfast cereal or oatmeal, or take one to work everyday for a quick, easy, and inexpensive snack. One medium-sized banana provides 1% of the calcium, 8% of the magnesium, and 12% of the potassium you need daily.

High Blood Pressure (Hypertension): Bananas


3. Beets – People with High Blood Pressure saw significant improvements from drinking beetroot juice. The nitrates found in the juice brought down one’s high blood pressure within just 24 hours. If you’re not too keen on drinking beetroot juice, you can easily roast or steam the whole root and add it to a green-packed salad, stir-fry, or stews.

High Blood Pressure (Hypertension): Beets


4. Berries – Blueberries especially, are rich in natural compounds where when consumed, is known to prevent hypertension and reduce high blood pressure. Blueberries, raspberries, and strawberries are easy to add to your diet; put them in your cereal every morning or keep some in the freezer for a quick and healthy dessert.

High Blood Pressure (Hypertension): Berries


5. Broccoli – This cruciferous vegetable is a famous source of cancer-fighting nutrients. One cup of cooked broccoli provides 6% of the calcium, 8% of the magnesium, and 14% of the potassium you need everyday.

High Blood Pressure (Hypertension): Broccoli


6. Celery – To lower mild cases of high blood pressure, one would eat about a cup of chopped celery daily. You should begin to see results after only a week or two. Celery contains a chemical that smoothes the muscles lining blood vessels, which increases vessel diameter and allows for easier blood flow at lower pressures.

High Blood Pressure (Hypertension): Celery


7. Fat-free Plain Yogurt – Cool and creamy, yogurt is a star ingredient in mineral-rich breakfasts, sauces and salad dressings, and even in entrée dishes. You can control the fat and nutrient content by making your own yogurt at home for your high blood pressure diet. Here’s a recipe to making your own yogurt at home.

High Blood Pressure (Hypertension): Fat-free Plain Yoghurt


8. Hibiscus Tea – Hibiscus tea has been a traditional remedy for high blood pressure and one that must be used continuously to maintain its positive results. Look specifically for tea made from Hibiscus sabdariffa. It is generally made from the flowers and fruit of the plant.

High Blood Pressure (Hypertension): Hibiscus Tea


9. Kiwi – Kiwis contain more vitamin C than a same-size serving of orange slices. One kiwifruit provides 2% of the calcium, 7% of the magnesium, and 9% of the potassium you need every day.

High Blood Pressure (Hypertension): Kiwis


10. Leafy Greens – Leafy greens such as romaine lettuce, arugula (rocket), kale, turnip greens, collard greens, and spinach are high in potassium. This allows your kidneys to get rid of more sodium through your urine, which lowers your blood pressure. Stray away from canned vegetables though as they contain high amounts of sodium; instead, opt for frozen vegetables as they contain as many nutrients as fresh vegetables and are easy to store.

High Blood Pressure (Hypertension): Leafy Greens


11. Oatmeal – Oatmeal for your breakfast is a great way to charge up for the day. It is high-fibre, low-fat, and low-sodium, which is essentially just what you need to help lower your blood pressure. On its own, oatmeal can be bland; however, you should refrain from adding too much sugar. Instead, add fresh or frozen berries (see point 4) to sweeten it up, and maybe just a touch of honey.
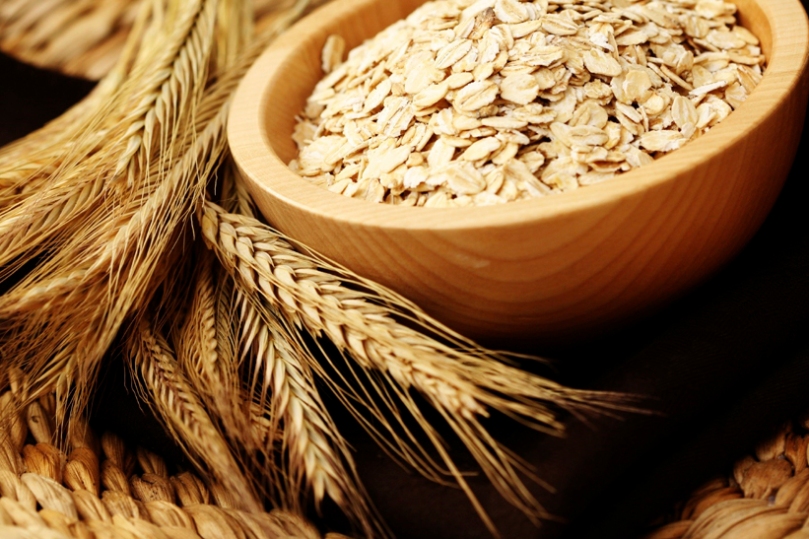
High Blood Pressure (Hypertension): Oatmeal


12. Peaches & Nectarines – Frozen unsweetened peach slices are a great alternative to fresh peaches and nectarines on a high blood pressure diet. Just defrost ahead of time or, for smoothies, simply toss in the blender. One medium peach or nectarine provides 1% of the calcium, 3% of the magnesium, and 8% of the potassium you need every day.

High Blood Pressure (Hypertension): Peaches & Nectarines


13. Pomegranate Juice – The pomegranate has been revered as the “fruit of life.” One of its remarkable powers is to improve cardiovascular health. If you drink pomegranate juice to naturally lower your blood pressure, be sure your juice has no added sugars.

High Blood Pressure (Hypertension): Pomegranate Juice


14. Pork Tenderloin – Meat lover’s can now rejoice! You’re probably wondering how pork even made it onto this list, well just 85 grams (3 oz) of pork tenderloin provide 6% of the magnesium and 15% of the potassium you need every day. This lean cut provides plenty of meaty flavour and satisfaction without the overload of saturated fat found in fattier types of beef and pork.

High Blood Pressure (Hypertension): Pork Tenderloin


15. Potatoes & Sweet Potatoes – Potatoes and sweet potatoes are high in potassium and magnesium, two minerals that can help to lower your blood pressure. One medium sweet potato with the skin provides 4% of the calcium, 8% of the magnesium (7% without the skin), and 15% of the potassium (10% without the skin) you need every day. Bake several sweet potatoes at one time so you’ll have a ready supply for quick smoothies and other recipes.

High Blood Pressure (Hypertension): Potatoes & Sweet Potatoes


16. Quinoa – This high-protein whole grain has a mild yet nutty flavour, contains a variety of health-protecting nutrients along with an impressive amount of magnesium, and cooks in less than half the time it takes to make brown rice. A half-cup of cooked quinoa provides 1.5% of the calcium, 15% of the magnesium, and 4.5% of the potassium you need every day. Quinoa is gluten free, making it a great option if you’re gluten intolerant or have celiac disease. The most widely available quinoa is a golden beige color, but red and black varieties are also available and worth a try for your high blood pressure diet.

High Blood Pressure (Hypertension): Quinoa


17. Red Capsicum – One cup of raw red capsicum provides 1% of the calcium, 4% of the magnesium, and 9% of the potassium you need every day.

High Blood Pressure (Hypertension): Red Capsicum


18. Skim Milk – Skim milk is an excellent source of calcium and is low in fat. These are both important elements of a diet for lowering blood pressure. Swap out your higher-fat milk for skim milk. If you’re not a fan of milk altogether, then eat more low-fat or nonfat yoghurt. Just make sure to avoid yoghurt that is high in sugar.

High Blood Pressure (Hypertension): Skim Milk


19. Tilapia – This mild white fish is available year-round in supermarkets and fish stores, fresh or as frozen fillets. You can roast it, bake it, and sauté it, flavor it with a variety of seasonings, and even top it with mineral-rich kiwi-avocado salsa (see points 1 and 9). Just 133 grams (4 oz) of tilapia provides 8% of the magnesium and 8% of the potassium you need every day.

High Blood Pressure (Hypertension): Tilapia


20. White Beans – And last but not least, you can use this comfort food in side dishes, soups, and entrées. As a meatless source of protein, it’s a great choice for vegetarians. One cup of white beans provides 13% of the calcium, 30% of the magnesium, and 24% of the potassium you need every day.

High Blood Pressure (Hypertension): White Beans

Of course there are other factors that help control, lower, or prevent high blood pressure such as exercising regularly and keeping an eye on your waistline, but I won’t be going into too much detail on those aspects. Just always remember that eating foods that are rich in minerals is better than taking supplements.

So yes, earlier above I made mention that this list will serve as the ultimate guideline to the monthly themes on Amcarmen’s Kitchen – each month I will pick a certain food to cook with from the list above and dish up meals highlighting the chosen ingredient. For example, I have chosen to focus on Bananas for the month of February. Stay tuned as Amcarmen’s Kitchen will be back with some exciting recipes starting this Wednesday!

Cheers!

*Note: All imagery used in this blog post do not belong to me, they have been sourced from Google Images and Freepik. Likewise, information gathered for this post has been sourced from Dr. David Williams, Eating Well, Health Line & Prevention.

– Ally xx

Strawberry & Banana Smoothie

Strawberry & Banana Smoothie

Hello Everyone! It’s Week 4 of Smoothie month and tonight I’ve got a very simple recipe yet packed with lots of flavour and nutrients. I don’t actually have much to share with you guys besides the fact that it has been a long week of work. I actually genuinely thought that today was Thursday, and then to my dismay, it’s only Wednesday – I was so looking forward to being one step closer to my 1-day weekend!

Besides my life being non-exciting for the past week, on Monday I started my Meat Free Week in preparation for Easter. So far, it’s going well and I can definitely say that I am in a much better place than where I was two years ago with this. Two years ago I was always hungry and depressed for being always hungry. I lasted the whole week but despised the rollercoaster of emotions that I experienced. Last year, I did not last 3 days I think – I needed my meat. This time around, I’ve completed 3 days without meat, but I have to say, yesterday I had such intense cravings for deep fried crispy chicken – and to my dear friend Pam, saying round 2 to Korean Fried Chicken did not help me get over my cravings that day! Haha.

Anyway, tomorrow will be a bit more exciting I guess. After work I’ll be having dinner with my Marketing colleagues and then heading off to do some ice-skating! Oh gosh, what have I gotten myself into. Firstly, I may have mentioned this in a previous blog post before, and I can’t skate to save my life! The last time I went ice-skating, I fell hard on my bum 7 times in a span of a 2-hour skating session. Secondly, I managed to slice my pinky finger on someone else’s skates as I was going down for my last fall of the day. It was a small cut, but the scar is still visible *sad face*

Moving on, if you’re not already a fan of strawberries, you should be. Not only are they juicy, summery and delicious, they’re a bona fide superfood, too. Nutrient-rich and packed with antioxidants (like vitamin C), strawberries offer a wide range of health benefits. Strawberries boost your immunity, promote eye health, help fight cancer and bad cholesterol, reduce inflammation, regulate blood pressure, boost fibre, aid in weight management, and result in healthier, younger-looking skin. To read each health benefit in more detail, head on over to Reader’s Digest Best Health. Likewise, bananas too contain many important nutrients and powerful antioxidants that help support heart health, improve digestive health, moderate blood sugar levels, and many more. You can read more on the health benefits of bananas here.

Strawberry & Banana Smoothie Ingredients

PREP TIME <5 MINS | COOKING TIME | SERVES 2

INGREDIENTS

  • 2 cups fresh or frozen strawberries
  • 1 fresh banana, peeled
  • 1 cup coconut water
  • 1 cup Ice
  • 1 tablespoon honey, if needed to sweeten

METHOD

  1. Add all ingredients to a blender, and pulse until combined. If the smoothie is too thick, add more milk. If it is too thin, add more fruit and/or ice.
  2. Serve immediately and enjoy!

Strawberry & Banana Smoothie

BON APPÉTIT

– Ally xx

myTaste.com

Pink Grapefruit Lemonade

Hello Everyone! It’s the last of Juicy January and I’ve got a nice, refreshing drink for you that you can also add a little twist if you want something naughty for all that healthy juicing you’ve (I’ve) been doing for the past month. It was just a normal Sunday morning when I went grocery shopping with my Mom and sister. I saw these lovely, plump, fresh grapefruits on the shelves and Schweppes’ Apple & Pink Grapefruit Mineral Water that I always, or well, most of the time, had in my fridge when I was still studying in Australia, came into mind. So I grabbed these fruits, some lemons, and mint, and decided that I was going to make a Pink Grapefruit Lemonade. When I got around to making them, I realised that I had some strawberries in the fridge that were on the verge of becoming overripe, and so I decided to slice them up and add them to the drink as well.

Grapefruits vary in hue from white or yellow to pink and red and can range in taste from very acidic and even bitter to sweet and sugary. Grapefruits are low in calories but are full of nutrients, and are an excellent source of vitamins A and C. These fruits support clear, healthy skin, can help to lower our risk for many diseases and conditions, and may even help with weight loss as part of an overall healthy and varied diet. To read into more details on how, for example, grapefruits can aid in weight loss, click here.

Pink Grapefruit Lemonade

Mix the juice of one grapefruit together with the juice of a lemon and you’ve got yourself and juice that’s rich in many nourishing elements like vitamin C, vitamin B6, vitamin A, vitamin E,  copper,  calcium, iron,  magnesium, potassium, zinc, phosphorus, protein, and the list goes on. The health benefits of lemons include the treatment of throat infections, indigestion, constipation, dental problems, and fever, internal bleeding, and high blood pressure, while it also benefits hair and skin care. They also help to strengthen your immune system, cleanse your stomach, and it is considered a blood purifier.

Throw in some roughly chopped mint leaves for a fresh, aromatic, sweet flavor with a cool aftertaste. If you happen to have strawberries in your fridge too, or if you actually bought them to try this out, throw them in too for an extra added nutrients and antioxidants, offering a wide range of health benefits that may surprise you – click here for more information.

PREP TIME 5 MINS | COOKING TIME | SERVES 3-4

INGREDIENTS

  • 650ml cold water
  • 1 punnet (125g) fresh strawberries, sliced thinly
  • 1 large grapefruit, peeled and cut into quarters
  • 1 large lemon, juice squeezed
  • 1/2 bunch of mint, roughly chopped
  • 1/4 cup boiling water
  • 1 tbsp white sugar

Optional:

  • 2-3 tbsp white rum

METHOD

  1. Add the white sugar and boiling water to a large pitcher. Stir until the sugar has full dissolved.
  2. Add the lemon juice together with the cold water, mint leaves, sliced strawberries.
  3. Juice the grapefruit using an electric juicer and then pour into the pitcher. Give it a good stir.

Pink Grapefruit Lemonade

If you’re feeling a little bit cheeky, throw in a few tablespoons of coconut rum (that was the only thing I had available at that time) or just plain white rum, tequila, or vodka – whatever tickles your fancy that is! 🙂 Enjoy and happy juicing!

BON APPÉTIT

– Ally xx

myTaste.com

Cornflake-crusted French Toast

Cornflake-crusted French Toast

Hello Everyone! I’ve got another french toast recipe with a twist for you again today, but this time there will be no added milo to it. Instead we’re gonna crust our classic french toast with some cornflakes to give it that extra added crunch to an already soggy bread. I came across this idea a couple of months ago back in July when Symmetry Breakfast went viral. They posted a photo of some cornflake-crusted french toast and when I planned for Breakfast/Brunch Month for October, I knew I had to tackle a recipe for that!

I absolutely love their work! If you have been following my Instagram during that month, you would’ve seen that Jialing and I (and Edison) hopped on the #symmetrybreakfast bandwagon for the last remaining week that I was in Sydney. Actually, I might just share the photographs here since I don’t know if I will be posting them on the blog anytime other than now I guess (click on the individual images to view a larger version of them):

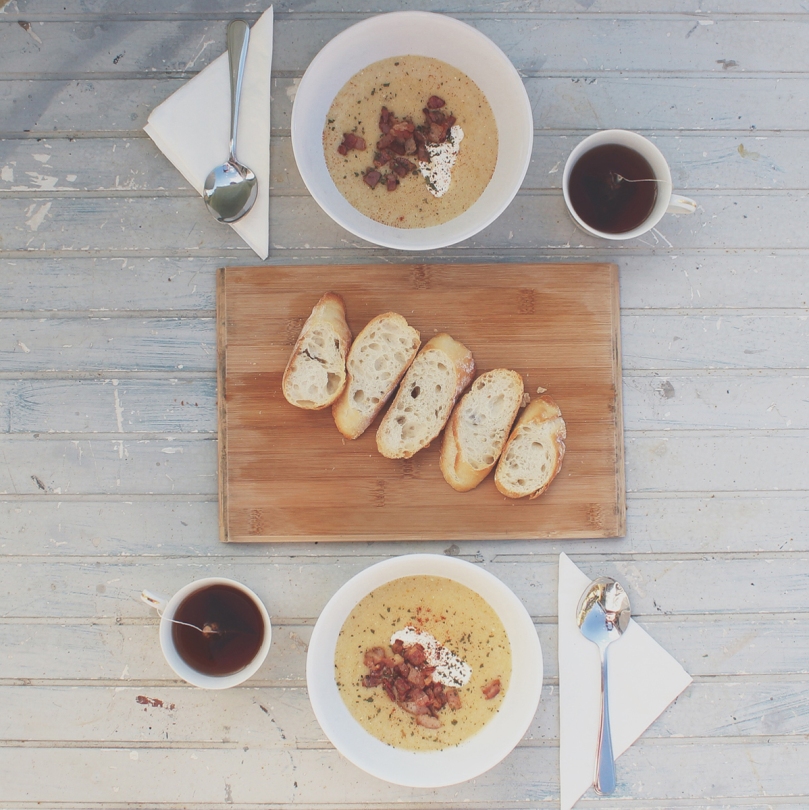
Homemade Charred Eggplant & Baby Octopus Shakshuka with Lebanese Bread; Blueberry & Passionfruit Cider French Crêpes with a Honeyed Citrus Creamcheese Filling topped with a Mixed Berry Compte; Orange Sunrise Cocktail Pea and Ham Soup with Stone-baked Pane di Casa and Strawberry & Lime Cider
Potato Hash Crusted Breakfast Quiche with Caramelised Onion, Chorizo, Spinach, and Sunnyside Up Egg with Mixed Leaf Salad and Garlic Butter Bread Beer, Bacon, and Tater Soup (aka “Man Soup”) with Pane di Casa; Russian Earl Grey Tea Fancy Filipino Hotsilog Brekky with Sweet Potato Hash Browns and Brekky Mocktails

L-R: Homemade Charred Eggplant & Baby Octopus Shakshuka with Lebanese Bread; Blueberry & Passionfruit Cider | French Crêpes with a Honeyed Citrus Creamcheese Filling topped with a Mixed Berry Compte; Orange Sunrise Cocktail | Pea and Ham Soup with Stone-baked Pane di Casa and Strawberry & Lime Cider Potato Hash Crusted Breakfast Quiche with Caramelised Onion, Chorizo, Spinach, and Sunnyside Up Egg with Mixed Leaf Salad and Garlic Butter Bread Beer, Bacon, and Tater Soup (aka “Man Soup”) with Pane di Casa; Russian Earl Grey Tea Fancy Filipino Hotsilog Brekky with Sweet Potato Hash Browns and Brekky Mocktails

I know, they’re not quite as symmetrical as the guys from Symmetry Breakfast (we tried to be creative with our symmetry/asymmetry lines), but it still gained a lot of views, likes (especially from Symmetry Breakfast), and new followers! Anyway, yes I realise that I have gone on a bit of a tangent, but I’m pretty sure you enjoyed those photographs (for those who have not seen them that is). So let’s get down to business shall we and get a move on to today’s recipe:

Cornflake-crusted French Toast Ingredients

PREP TIME <5 MINS | COOKING TIME 8-12 MINS | SERVES 2-4*

*Depending if you want one or two slices of french toast per person; recipe is for 4 slices of bread

INGREDIENTS

  • 1 & 1/2 cups of cornflakes, crushed
  • 4 thick slices of bread
  • 1/2 cup milk
  • 1 large free range egg
  • 1 tbsp white sugar
  • 1/2 tbsp vanilla extract
  • 1/4 tsp cinnamon
  • 1/8 tsp ground nutmeg

Optional:

  • Green Kiwi
  • Pineapple
  • Strawberries
  • Honey
  • Powdered sugar
  • Vanilla yoghurt

METHOD

  1. Whisk the eggs together with the milk, sugar, spices, and vanilla extract in a bowl.
  2. Dip both sides of a bread slice to soak up the wet mixture; do not soak it for too long. The dip the soaked sliced bread into the cornflake crumbs and coat.
  3. Place the bread slice into the frying pan and cook until done, 2-3 minutes per side.
  4. Once done, transfer to a plate lined with a paper towel to soak up any excess oils. Repeat for the remaining bread slices.
  5. Top with your favourite toppings, and/or serve with your choice of fruits for a fresh salad on the side. Enjoy!

Cornflake-crusted French Toast

Cornflake-crusted French Toast

BON APPÉTIT

– Ally xx

myTaste.com

Milo French Toast

Milo French Toast

Hello Everyone! Anyway, so it’s week 4 of Breakfast/Brunch month and this week I will be sharing with you my now-favourite french toast recipes. I say ‘now-favourite’ because this is the very first time I’ve attempted these recipes. I’ve had and made french toast before, but the recipes I’ll be sharing with you this week are beyond than that of the classic french toast – they got a certain twist to them that will make you fall in love with french toast all over again.

Today’s recipe is one that I came across on Facebook as I was scrolling through my newsfeed. BuzzFeed Australia posted a video recipe for Milo French Toast. If you love milo and fancy some french toast to go with that, then this recipe was made for you, only that, you get to combine milo together with your french toast – how cool is that? You can top them off simply with some butter and syrup, or you can make it a bit more interesting by topping them off with some of your favourite fruits – I topped mine with some strawberries, crushed pistachios, honey, and a bit of powdered sugar.

I remember growing up, even up until now, my mom would make a classic french toast for breakfast at least once a week. When I came across this recipe and talked to her about it, we decided to try it out. It was a great success in my opinion and I loved it, so did my Mom and sister Angela. Original video recipe can be found on BuzzFeed Australia‘s Facebook page.

Milo French Toast Ingredients

PREP TIME <5 MINS | COOKING TIME 8-12 MINS | SERVES 2-4*

*Depending if you want one or two slices of french toast per person; recipe is for 4 slices of bread

INGREDIENTS

  • 4 thick slices of bread
  • 1/2 cup milk
  • 1/2 cup milo
  • 1 large free range egg
  • 1/2 tbsp vanilla extract

Optional:

  • 1 punnet (250g) strawberries, hulled then halved
  • Handful of pistachios, shelled and lightly crushed
  • Honey
  • Powered sugar

METHOD

  1. Heat a bit of oil in a non-stick frying pan over medium.
  2. Combine the milo, milk, egg, and vanilla extract in a bowl. Mix until well combined.
  3. Dip both sides of a bread slice to soak up the wet mixture; do not soak it for too long.
  4. Place the soaked bread slice into the frying pan and cook until done, about 2-3 minutes per side.
  5. Once done, transfer to a plate lined with a paper towel to soak up any excess oils. Repeat for the remaining bread slices.
  6. Serve up this Aussie twist on a French favourite with some honey and butter if you like, or with some fresh fruits and crushed nuts and enjoy!

This slideshow requires JavaScript.

BON APPÉTIT

– Ally xx

myTaste.com

Nutella & Mixed Berries Pizza

Nutella & Mixed Berries Pizza

Hello Everyone! Before I begin, I would like to dedicate this post to my little sister April who would’ve been 17 years old today. She unfortunately showed no signs of life when she was born.

Nutella & Mixed Berries Pizza

Nutella & Mixed Berries Pizza

Today, I am finally ending this short pizza series on a high with this pizza recipe from SORTED Food. I’ve been wanting to give this recipe a go for a very long time and I’m glad that I’ve managed to cross this off my list of things to make, and will continue to make over and over again. So, during the process of making this dessert pizza, there is one step where you have to place the pizza in the oven with the Nutella spread and hazelnuts to bake before adding the berries on top. When I took the pizza out to do this, I saw that the Nutella started caramelising. I stupidly, without thinking, put my finger in the Nutella spread because I wanted to know whether it has hardened… And I burnt my finger. My first reaction (of course) was to quickly put it in my mouth… And thus I also burnt my tongue. Well done Allison. Well done indeed. Other than this little stupidity of mine, the pizza was a success. The flavours were on point and that mascarpone cheese to top it off was pretty amazing.

Nutella & Mixed Berries Pizza

Of course you may use other berries as well, those that are in season wherever you are in the world. Fresh or frozen, it doesn’t matter. I really wanted to try it with boysenberries since I absolutely LOVE them. I saw punnets of them on the shelves at Coles a few times during December-January time. But by the time I came around to making this pizza, the berries were off the shelf and they didn’t even have any frozen ones *sob*.

Nutella & Mixed Berries Pizza Ingredients

PREP TIME 15 MINS | COOKING TIME 8-10 MINS | SERVES 4-5

INGREDIENTS

  • Classic New York Style Pizza Dough Recipe
  • 1 punnet (125g) blackberries
  • 1 punnet (125g) blueberries
  • 1 punnet (125g) raspberries
  • 1 punnet (125g) strawberries, sliced
  • Fresh mint leaves
  • Roasted hazelnuts
  • Mascarpone Cheese
  • Nutella

METHOD

  1. Preheat oven to 220C. Place your pizza stone in the oven as well to heat it up.
  2. Roll out your dough to a circle the same size as your pizza stone on a lightly floured surface as thick or thin as you want.
  3. Brush around the edge with a little water, then create a wall of raspberries all the way around. Fold the edge over the raspberry wall and seal it in by pressing down on the damp dough to form a stuffed crust.
  4. Spread a thin (or if you are that type, a generous) layer of Nutella onto the dough and top with the roasted hazelnuts (place them in to oven for about 5-6 minutes if your hazelnuts are raw). Don’t forget to lick your spoon, or whatever utensil that you used to spread the Nutella with, clean!
  5. Carefully remove the stone from the oven and quickly slide the pizza over the top of the stone. Place it back in the oven and bake for about 3 minutes. Remove from the oven and top the pizza with the berries and bake in the oven for a further 3-4 minutes or until cooked all the way through. It should not take more than 10 minutes in total.
  6. Remove from the oven and top with mascarpone cheese and fresh mint leaves.

Nutella & Mixed Berries Pizza

Nutella & Mixed Berries Pizza

BON APPÉTIT

– Ally xx

myTaste.com

Layered Pistachio Cake with Honey Vanilla Buttercream

Layered Pistachio Cake with Honey Vanilla Buttercream

Hello Everyone! Today I have a special post for you as today is my not so little sister’s 19th birthday! Today is also the first time in 4 years that I have been home to celebrate with her and the rest of the family. If you have been following my blog since September last year, you would know that I started getting into baking cakes. I never really liked baking cakes to be honest, only because I find it very time consuming and my level of patience does have a limit. Since I started baking cakes, my Mom and sisters now prefer a homemade birthday cake instead of an expensive and cliché store-bought cake. So on Sunday, with the help of the birthday girl, we baked her birthday cake together. We baked it on Sunday even though her birthday is today. Why? Well only because tomorrow we’ll be off for a 1-month vacay to the Philippines, and if we had baked it today, leftovers would be sitting in the fridge until April.

Layered Pistachio Cake with Honey Vanilla Buttercream

Today’s cake recipe has been slightly adapted from, and can be found on Joanne Eats Well With Others. As you have already read from the title, it is a 3-layer pistachio cake with honey vanilla buttercream. I decided to add the strawberries and crushed pistachios on top to bring some life and colour to the presentation of the cake. I substituted some ingredients, such as instead of using cream of tartare, I used lemon juice instead. I barely use cream of tartare in my baking and buying a jar of it didn’t seem very economical as I know it’ll just sit in the pantry waiting for its expiry date. Also, instead of cake flour, also because I barely use it, I used plain flour combined with cornstarch instead. The easiest way to do this substitution is to put 2 tablespoons of cornstarch in the bottom of a 1-cup measuring cup, then fill the cup as usual with plain flour and level the top. In addition, I lessened the amount of sugar and butter in this recipe and it still turned out fine for me! I am not a huge fan of overly sweet desserts, and also I had to take into consideration my Mom who is a diabetic.

Layered Pistachio Cake with Honey Vanilla Buttercream

Before I move on to the recipe, I HIGHLY recommend that you buy shelled pistachios. We went to four different grocery stores and could not find any and so we decided to buy the shelled ones. It took forever to shell just over a cup of pistachios – thank goodness I had my Mom and my sisters to do the tedious job while I worked on the batter. Also, have a food processor handy, but if you’re like me and don’t own one, then all you need is a motor and pestle to bash it all up as well as grinding it. It takes time but it gets the job done. I think that’s why towards the end of this cake I was starting to lose a little bit of my patience because everything took longer to do! But hurray for a gas oven! I cannot stress how much I hated using the oven at the Doncaster Lodge. Everything took at least double or triple the normal time to cook!

Layered Pistachio Cake with Honey Vanilla Buttercream Ingredients

PREP TIME 30 MINS | COOKING TIME 1 HOUR | SERVES 8-10

INGREDIENTS

For the cake
  • 3 & 1/4 cups plain flour
  • 1 & 1/2 cups ice water
  • 1 cup caster sugar
  • 1 cup shelled pistachios, plus extra for decorating
  • 250g unsalted butter, softened
  • 3 large free range egg whites, at room temperature
  • 1 large free range egg
  • 5 tbsp cornflour
  • 1 tbsp baking powder
  • 1 tbsp vanilla extract
  • 1 tsp baking soda
  • 3/4 tsp salt
  • 1/4 tsp lemon juice
For the buttercream
  • 300g unsalted butter, soft, cut into small pieces
  • 1 & 1/2 cups milk
  • 1 cup caster sugar
  • 1/3 cup plain flour
  • 1/3 cup thickened cream
  • 3 tbsp honey
  • 1 tsp vanilla extract

METHOD

  1. Preheat the oven to 160C or gas mark 3. Grease three 8.5-inch cake pans with a little butter.
  2. For the Cake Batter: Using a food processor, pulse the pistachios until coarsely chopped. Remove half of the pistachios and transfer to a small bowl. Pulse the remaining pistachios until they are an almost powder-like consistency.
  3. Transfer to a large bowl and whisk together both the roughly chopped and fine pistachios with the plain flour, cornstarch, baking powder, baking soda, and salt. Set aside
  4. Cream the butter using an electrical mixer on high speed for about 3 minutes. Add in the sugar and vanilla and beat until fluffy for about another 3 minutes. Scrape down the sides of the bowl, and then add in the egg, mixing until just combined.
  5. Turn the mixer to low and add the flour+pistachio mix to the butter mixture in three additions, alternating with the ice water, mixing each time until just combined. Scrape down the bowl and mix on low speed for a few more seconds.
  6. In a medium, clean bowl whisk together the egg whites with the lemon juice until soft peaks form, about 3-5 minutes. Fold the egg whites into the batter.
  7. Divide the batter evenly among the cake pans and smooth the tops. Bake for 40-45 minutes, rotating the pans halfway through baking, until a toothpick inserted in the centre comes out clean.
  8. Transfer to a cooling rack and let them completely cool.
  9. For the Buttercream: Meanwhile, as the cakes are cooling down, whisk together the flour and sugar in a medium-sized saucepan. Then, add in the milk and cream, and cook over medium heat, whisking frequently, until the mixture comes to a boil and then thickens, about 10 to 15 minutes.
  10. Transfer the hot milk mixture to a large bowl and mix on high speed until cool, about 9 minutes. Reduce the speed to low and add the butter, a few pieces at a time, until it is full incorporated. Increase the speed to medium-high and beat until light and fluffy for a further few minutes. Then add in the vanilla and honey, and continue mixing until combined. If the frosting is too soft, chill it in the freezer for a while and then mix again.
  11. Assembly: Place one cake layer top side up on a serving platter. Use a long serrated knife to cut the top so that it is flat and even. Spread a little over a cup of frosting on top. Add the next later and, again, trim so that it is flat. Top with another cup of frosting. Add the remaining cake layer and trim the top again. Spread cake with a very thin layer of frosting for the crumb coating. Put in the freezer for 5 to 10 minutes. Spread the sides and top of the cake with the remaining frosting and decorate as desired.

Layered Pistachio Cake with Honey Vanilla Buttercream

Happy Birthday Alyssa!

BON APPÉTIT

– Ally xx

myTaste.com

Meat District Co. - Sydney - Roasted bone marrow

Meat District Co. – Sydney

Hello Everyone! And a happy first day of Autumn to all my dear Aussie friends. Welcome back to an all new Review Sunday. Today, I have a selection of cocktails, entrées, mains, and a dessert to share with you from Meat District Co. Sydney. If I am not mistaken, Meat District Co. started in the United States? And branched out to Sydney in late 2014. How I came to know about this place was through my internship – Meat District Co. Sydney is a client of Hello Social and I worked on a few graphics for them, one of which included their #mdcburgerselfie competition that ran earlier on this year.

The first time I came here my boss Max treated lunch for everyone in the office. I had the lamb loin then. The second time I came here, I came with a bunch of close friends for my farewell dinner. We went on a Friday night and even Darling Harbour had fireworks on later that evening. Normally fireworks only happen every Saturday, so Edison cheekily said that he had arranged for fireworks that night for my farewell (obviously he didn’t). Nevertheless, the fireworks were a great touch to a wonderful evening sharing food and exchanging laughters with close friends.

Inspired by the paddock to the plate, Meat District Co. aims to bring a NEW kind of dining to Sydney. Meat District Co. works in partnership with some of Australia’s most sustainable producers delivering an experience & dishes that tick all the boxes when it comes to quality & taste, leaving you wanting more each & every time: an ADDICTION waiting to be savoured. We remember a time when beef came from a farm & not a factory – when ‘100% beef’ was actually from a cow. Meat District Co. has decided it is time to bring the farm to your doorstep.

ASSORTED HOUSE COCKTAILS

Meat District Co. - Sydney - ASSORTED HOUSE COCKTAILS

CUCUMBER MULE: Traditional Moscow Mule with Smirnoff Vodka, lime juice, ginger beer & cucumber slices; served tall over ice ($10.00)

MANGO TANGO: A sweet & fruity mix of Zubrowka Bison Grass Vodka & Mohala Mango Liqueur, cloudy apple juice & mango purée ($10.00)

PIMMS ‘N’ PONY: Fortified ‘any occasion’ classic; Pimm’s No. 1, tuned with Gordon’s Gin, served tall with lemonade, strawberries & mint ($10.00)

HAVAIANA: Pleasant flavour of the tropics; a blend of Malibu, Midori, banana liqueur, pineapple juice & coconut cream ($10.00)

FRUIT NINJA COMBO: Sweet with subtle fruity hints of mixed Passoa & Malibu strengthened up with Smirnoff Vodka, finished with pineapple juice, passionfruit & dash of raspberry cordial; served tall & garnished with fresh fruits ($10.00)

I only had sips of the other cocktail drinks that my friends ordered, but from what they all had to say, their drinks were all refreshingly tasty. The alcohol flavour did not dominate which I quite like. I had the Fruit Ninja Combo cocktail, and obviously I’m going to be biased, but it was probably the best cocktail drink from the others that we ordered that night. It was absolutely yum. Tough I couldn’t really taste much of the other fruits that were incorporated into the drink, the passionfruit taste really stood out from the rest.

Like most reviews I do, I mentioned that I could not comment on some (most) of the dishes because I wasn’t able to have a bite of it. But overall, my friends were really impressed by the flavours of the dishes that they ordered, which were mainly the burgers and the fries. They also commented that the prices were well worth money.

STARTERS & SIDES

Meat District Co. - Sydney - Fries with rosemary & thyme salt
Fries with rosemary & thyme salt ($5.00)

Meat District Co. - Sydney - Truffle fries, truffle salt, truffle parmesan & truffle aioli
Truffle fries, truffle salt, truffle parmesan & truffle aioli ($7.50)

Meat District Co. - Sydney - Crispy battered onion rings with truffle aioli
Crispy battered onion rings with truffle aioli ($7.50)

Quite possibly the BEST onion rings I’ve ever tasted ANYWHERE in the world. Nothing can top this. The crispy, light batter that wrapped around a generous thick slice of onion was simply to die for! And that truffle aioli! I really wished I hadn’t shared this dish with others.

Meat District Co. - Sydney - Roasted bone marrow
Roasted bone marrow with garlic, parsley, mustard seeds, chilli, served with bread ($8.50)

Unfortunately this dish was more bone than marrow. A little disappointing to find half a slice of bone with little marrow on it. I felt that there were more mustard seeds than the marrow itself, and I’m not a fan of mustard myself! Would’ve been a great dish if the marrow spoke for itself because that’s how I like it.

Meat District Co. - Sydney -  Grilled watermelon salad
Compressed, grilled watermelon salad, sumac, goat cheese, and hazelnut ($8.50)

BURGERS

Meat District Co. - Sydney - OLD FAITHFUL BURGER
OLD FAITHFUL BURGER: MDC beef patty with mixed greens, tomato, caramelised onions, pickles & house sauce ($12.00)

Meat District Co. - Sydney - TRUFFLE BURGER
TRUFFLE BURGER: MDC beef patty with truffle parmesan, rocket, roasted peppers, tomato & truffle aioli ($14.00)

Meat District Co. - Sydney - CHICKEN BURGER
CHICKEN BURGER: Crumbed chicken breast with sesame seeds, almond flakes, tomato, coleslaw & horseradish mayo ($14.00)

Meat District Co. - Sydney - SPIDER CRAB BURGER
SPIDER CRAB BURGER: Battered soft shell crab, coleslaw & lemon caper aioli ($16.00)

Meat District Co. - Sydney - SLIDERS FLIGHT
SLIDERS FLIGHT: 3 mini burgers, an Old Faithful, Crumbed Chicken & Lamb Pull ($15.00)

THE DOGS

Meat District Co. - Sydney - CLASSIC DOG
CLASSIC DOG: Pure beef hot dog with caramelised onions, mustard, pickles & ketchup on a baked roll ($11.00)

THE PULLS

Meat District Co. - Sydney - SLOW ROASTED PORK
SLOW ROASTED PORK: Spiced & roasted pork shoulder, coleslaw & apple jam on a bun ($12.00)

Meat District Co. - Sydney - SLOW ROASTED LAMB
SLOW ROASTED LAMB: Spiced & roasted lamb shoulder, cucumber, rocket, BBQ mint dressing on a bun ($13.00)

FROM THE GRILL

Served with your choice of chips or salad

Meat District Co. - Sydney - 220G LAMB LOIN
220G LAMB LOIN: Sous vide lamb loin with an olive & pistachio crust, truffle mash, and lamb jus ($33.00)

This was overall an okay dish to be honest. I know a lot of people have certain preferences of how they like their mash; I like mine smooth, creamy, and rich, which unfortunately was not what I got on my plate. I got chunky mashed potatoes, which I don’t mind, but would’ve preferred it the way I like my mash to be. The lamb loin looked a bit small on the plate, but nonetheless was quite flavourful. Was it worth the $33.00? Probably not.

RIBS & COMBOS

Served in two sizes with your choice of fries or a side salad

Meat District Co. - Sydney - HALF PORK RIBS
HALF PORK RIBS with a side of rosemary & thyme salt fries ($31.00)

This was my highlight of the night for this main dish was the absolute bomb dot com. Way much better than the ribs you find at Hurricane’s Grill in my opinion. Tender pork ribs with a lovely barbecue flavour. I only wished they had given a truffle aioli dip for the fries on the side because the dip that I got seemed like it was barbecue sauce if I’m not mistaken? Yes that’s right, only real women order fries with their ribs… I mean, a salad? Really? Anyway, barbecue on barbecue was a bit much to handle. Nevertheless, this dish is seriously melt in the mouth, and the TRUE definition of finger licking good. I mean honestly, who eats ribs with a knife and fork? Not me that’s for sure!

DESSERTS

Meat District Co. - Sydney - COOKIE & CREAM CHEESECAKE
COOKIE & CREAM CHEESECAKE: with white chocolate ganache, chocolate soil, and white chocolate gelato ($12.00)

This wasn’t my first choice at dessert actually for I had my eyes (or more like my friend Simon who wanted to share dessert with me) on the Caramel Tart, but they had unfortunately just run out of it when we placed our order – so it was either the cheesecake or gelato. It didn’t disappoint though for it was a nice, light, and airy dessert, which was perfect to top off the half rack of ribs I had that night. My gelato on the side unfortunately melted quite quickly, but MDC aren’t to blame here for I got caught up saying goodbye to a few friends who were ready to go home that night. Overall, I lovely dessert to end the night on.

Overall, the food is about a 7 to 7.5 out of 10 for me. There are a few dishes that I had minor issues with, and some that were top notch for me. Then again, I haven’t had the range of dishes that they have to offer so I can’t give an honest score. Service was good, and the ambience, I’m not too sure because both times I dined outdoors and haven’t had the chance to see the indoor seating area yet. Value for money is variable, I don’t know about spending $33.00 for a small piece of lamb loin, but the ribs was definitely worth it. For a total of 14 people that night at my farewell, the total bill came to almost $450.00!!!

Meat District Co. – Sydney
R3/11 Lime Street
Sydney, New South Wales
Australia, 2000