Upside-down Banana Cake

Upside-down Banana Cake

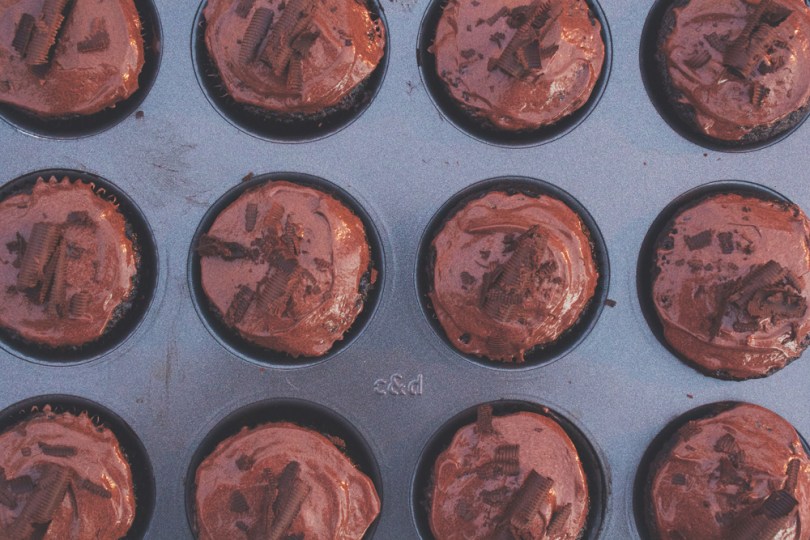
Hello Everyone! So I don’t think I’ve shared this little piece of information on the blog before – I’m going on holiday starting this coming Friday! I’ll be in Singapore for a 10-hour layover (yay me) before finally setting off to my final destination. I won’t share where I’ll be going as I’ve been trying so hard to keep this a secret from a few people – but you’ll definitely know in next week’s post. I’ve got everything planned out and prepared for the blog for this month so you guys don’t have to worry about me being gone from Amcarmen’s Kitchen for another 3 weeks (yeap, that’s how long I’ll be on holiday for) seeing as I just returned for 2017.

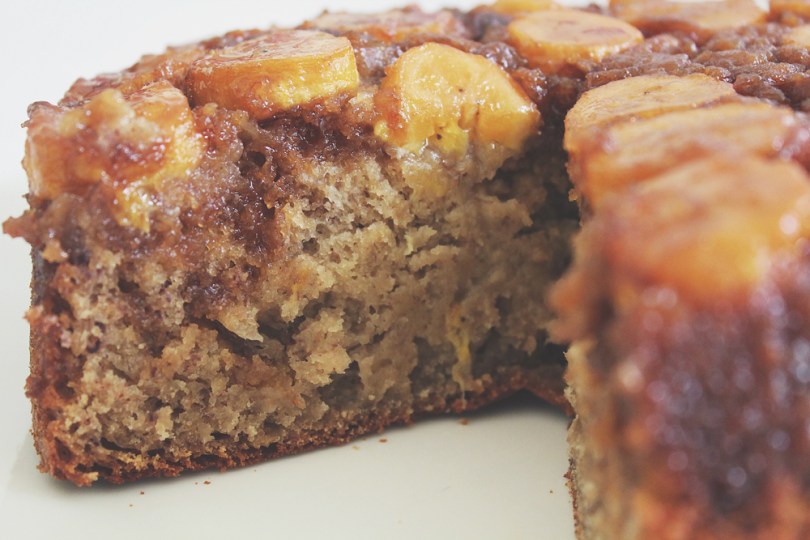
Anyway, that aside, today’s recipe has been made multiple times before back when I was still studying in Sydney. My then housemate and I would whip this cake up whenever we’d see our fruit bowl of bananas start to get all spotty and soft. This is definitely a recipe you should consider when you find yourself in a similar situation – instead of throwing those bruised bananas, which are actually still pretty mint, mash them up and make an upside-down banana cake! You definitely won’t regret it.

This is an incredibly moist and flavourful dessert, but it could be great for breakfast or as a morning/afternoon snack too. You can take it a step further as well by topping it all off with some toasted pecans, a generous amount of caramel sauce, and topped with a scoop or two of creamy vanilla ice cream. I decided to keep mine simple without all the extra and unnecessary sugars on top since I’m not a big fan of too much sugar, and the fact that my Mom is a diabetic is an enough reason to hold back on the sugar since she’ll definitely be having a slice or two… Or even the whole cake to herself.

Upside-down Banana Cake Ingredients

PREP TIME 15 MINS | COOKING TIME 55-65 MINS | SERVES 10-12

INGREDIENTS

  • 65g unsalted butter, cut into cubes
  • 2/3 cup brown sugar
  • 2-3 large bananas, 1/3″ rounds
For the cake batter
  • 70g unsalted butter, softened
  • 2 large free range eggs
  • 1 & 3/4 cups plain flour
  • 1 cup overripe bananas, mashed
  • 3/4 cup granulated sugar
  • 1/3 cup plain yoghurt
  • 1 & 1/2 tsp baking powder
  • 1 & 1/2 tsp vanilla extract
  • 1 tsp baking soda
  • 1/2 tsp ground cinnamon
  • 1/4 tsp salt

METHOD

  1. Preheat the oven to 180C (350F or gas mark 4). Grease a 9″ x 2″ round cake pan, or an 8″ x 8″ x 2″ square cake pan. Spread the 2/3 cup of brown sugar on the bottom of the pan and scatter the pieces of cubed butter on top.
  2. Place the pan in the oven for about 5 to 7 minutes until the butter has completely melted. Remove the cake pan from the oven and give the butter and brown sugar a stir, spreading evenly on the bottom. Arrange the sliced bananas to cover the caramel bottom then set aside.
  3. For the batter, add the dry ingredients – plain flour, baking powder, baking soda, baking powder, ground cinnamon, and salt – to a medium sized bowl and stir together until combined. Set aside.
  4. In a large bowl using a handheld electric mixer on medium speed, cream the softened butter granulated sugar together until pale in colour. Add the eggs and vanilla extract, mixing well to combine. Then add in the plain yoghurt and mashed bananas, again mixing well to combine.
  5. Turn the speed of your mixer on low and slowly add the dry ingredients to the wet. Mix just enough to combine.
  6. Pour the batter over bananas, smoothing the top and then place in the oven to bake for 30 minutes at 180C. After half an hour, reduce the heat to 170C (325F or gas mark 3) and bake for additional 25-35 minutes until a toothpick inserted in the centre comes out completely clean.
  7. Once down, remove form the oven and let it cool in the pan completely, or at least until the bottom is barely warm before inverting onto a plate. Use a knife to loosen the edges from the pan then place a plate upside-down on top of the pan, then invert cake.
  8. At this point you can make a caramel sauce to top off the cake and add a handful of toasted, roughly chopped pecans to your dessert/breakfast/snack. Otherwise, enjoy the cake as it is!

Upside-down Banana Cake

Upside-down Banana Cake

BON APPÉTIT

– Ally xx

myTaste.com

White Chocolate Snickerdoodle Blondies

White Chocolate Snickerdoodle Blondies

Hello Everyone! Wow! I can’t believe that it’s the last day of November today! Once again, another month managed to slip right under our noses! Christmas is nearing, and in the blink of an eye, it will be 2017! Anyway, I’m not going to give a brief recap of my year just yet – I’ll probably save that for sometime in December – I’ll just give you a recap of my week as it was indeed a busy one! Firstly, I have been home alone for the past 5 nights as my Mom and my sister flew off on Friday to visit the other sibling over in Singapore. Secondly, I had two back-to-back events that I helped with the event decorations for, one was Phantom of the Opera themed (but very minimal/close to none on the decorations that actually resembled anything from Phantom of the Opera), and the other was an Alice and Wonderland/Enchanted Forest themed Staff Appreciation Night. I had loads of fun designing the initial proposal for the decorations, and of course helping with execution of the decorations onsite.

My next task, in terms of event decoration is to propose and present to the client, the theme ‘The Chronicles of Narnia; The Lion, The Witch, and The Wardrobe’ for a corporate 25th Anniversary Dinner coming up in mid-January. The presentation will be on Friday and I’m both excited and nervous at the same time; fingers-crossed that they will like my idea and that they see the underlying meaning of the chosen theme. Other than work, I scored VIP tickets from my Boss to watch Coreyah and JinJo Crew perform at The Rhythm of Korea on Saturday night. It was a free event hosted by the Korean Embassy here in Brunei as a sort of launching of their moving in to their new Embassy which will happen sometime in December if I’m not mistaken – so yes, this was an early celebration for the general public.

White Chocolate Snickerdoodle Blondies

A cross between a chewy blondie and moist butter cake, these blondies are studded with white chocolate chips and ribboned with sweet cinnamon sugar! — Sally’s Baking Addiction

But enough of the long-winded, personal life stories and let’s move on to tonight’s recipe shall we? So, I think you guys can probably tell that this is another recipe followed and adapted from none other than Sally’s Baking Addiction. I honestly think that the theme for this November shouldn’t have been ‘Cooking with Chocolate’ but rather Sally-themed instead haha! Anyway, I don’t actually have much to say for this recipe as it was kind of just a I-need-to-bake-something-for-my-blog-but-what-should-I-bake kind of moment early on the Sunday morning before I went grocery shopping to make sure I had all the ingredients. I came across this recipe while browsing and I thought that it’d be interesting to make.

White Chocolate Snickerdoodle Blondies Ingredients

PREP TIME 15 MINS | COOKING TIME 30-35 MINS | SERVES 12-15 BARS

INGREDIENTS

For the blondies

  • 2 & 1/3 cups plain flour
  • 1 cup white chocolate chips
  • 3/4 cup granulated sugar
  • 3/4 cup packed light brown sugar
  • 3/4 cup unsalted butter, softened to room temperature
  • 2 large free range eggs, room temperature
  • 2 tsp vanilla extract
  • 1 & 1/4 tsp baking powder
  • 1/2 tsp salt

For the cinnamon-sugar filling

  • 1/3 cup granulated sugar
  • 2 tsp ground cinnamon

METHOD

  1. Preheat oven to 180C (350F or gas mark 4). Line a 9×9, 11×7, or 9×13 inch baking pan with parchment paper, leaving enough overhang on the sides to easily pull the blondies out of the pan and cut once done.
  2. Combine the plain flour, baking powder, and salt in a small bowl, then set aside. Beat the unsalted butter on high speed using a hand or stand mixer fitted with a paddle attachment, in a large bowl. Beat for at least 1 minute until creamy, and then add in the granulated and brown sugars, beating for 2 full minutes on high speed until light and fluffy. Scrape down the sides and bottom of bowl when needed.
  3. Beat in the eggs and vanilla on high speed, scraping down the sides and bottom of the bowl as needed. On low speed, beat in dry ingredients until just combined. With a large wooden spoon or rubber spatula, fold in the white chocolate chips.
  4. Spoon half the batter into pan. It will be a relatively thin layer, but try to spread it across the pan evenly. Combine the cinnamon and sugar and sprinkle on top of them bottom layer, reserving 1 tbsp for the top. Spread the remaining batter over top. Some of the cinnamon-sugar will mix into the top layer as you spread it, which is fine. Sprinkle the top with remaining cinnamon-sugar.
  5. For a 9×9 or 11×7 baking pan, bake for 30-35 minutes or until golden brown and a toothpick inserted in the centre comes out clean. For a 9×13, bake 22-26 minutes or until golden brown and toothpick inserted in centre comes out clean. Cool completely for about 1 hour.

White Chocolate Snickerdoodle Blondies

These bars can be made 3 days in advance and kept in an airtight container at room temperature until ready to serve. Bars freeze well, up to 3 months. Simply thaw overnight in the refrigerator and bring to room temperature before serving. Leftover bars can be stored in an airtight container in the refrigerator or at room temperature for up to 1 week.

BON APPÉTIT

– Ally xx

myTaste.com

White Chocolate & Macadamia Red Velvet Cookies

White Chocolate & Macadamia Red Velvet Cookies

Hello Everyone! I don’t think I ever mentioned it in the past 3 posts for the month of November, but I’m pretty sure that most of you who follow my blog are smart little ducklings and have already probably figured out that the theme for Amcarmen’s Kitchen this month is all about Procrastibaking – well, really, not really. The theme isn’t just centred around baking, but it is most definitely about baking with… CHOCOLATE! How did I come up with this month’s theme you ask (well if you didn’t ask then read ahead hehe), I wanted to bake a Chocolate cake for my birthday this month, and I had two chocolate-linked recipes sitting in my archives waiting to be post up on my blog, and so… Baking with Chocolate came into play!

Or you could probably just say that I’ve been lazy and haven’t been in the mood to cook on Sundays for the past few weeks – which is partially true. It’s not that I was being lazy – it was more like I wanted to have a Sunday to myself doing whatever I want, meaning doing nothing actually *cheeky grin* instead of slaving away in the hot kitchen the whole afternoon. I’ve probably mentioned this in a post before, but for those of you who don’t know, I work 6 days a week from 8am to 5pm. By Sunday, all I want to do is just sit back and do nothing, however, if I did do that, I wouldn’t be able to keep up with Amcarmen’s Kitchen any longer.

White Chocolate & Macadamia Red Velvet Cookies

Anyway, enough of my rants, let’s move on to tonight’s recipe – an adaptation from none other than my favourite baker out there, Sally’s Baking Addiction. You can find the original recipe for these cookies over on her blog. If you went over to visit her blog, you’d notice that they are actually Red Velvet Chocolate Chip Cookies, but I decided to do a little twist and use white chocolate chips instead and pair them with macadamia nuts! The perfect combination in my opinion! I’d like to take this opportunity to share a recipe by a friend of mine, also known as Brendon The Smiling Chef, for his “I Love You This Much” Giant Red Velvet Cookie. I remember the time we met up and cooked together for my Auguest series last year, Brendon baked a Giant Chocolate Chip Cookie from the left over cookie dough he had from his “Cookies & Cream” inspired dessert. I think I might bake a Giant Cookie for next week actually!

White Chocolate & Macadamia Red Velvet Cookies Ingredients

White Chocolate & Macadamia Red Velvet Cookies

PREP TIME 1 HOUR 10 MINS* | COOKING TIME 10 MINS | SERVES 18 COOKIES

*Includes chilling time

INGREDIENTS

  • 1 & 1/2 cups + 1 tbsp plain flour, spooned and leveled
  • 1 cup semi-sweet white chocolate chips (plus a few extra for after baking)
  • 3/4 cup packed light (or dark) brown sugar
  • 1/2 cup raw macadamia nuts, roughly chopped
  • 1/4 cup granulated sugar
  • 1/4 cup unsweetened natural cocoa powder
  • 115g unsalted butter, softened to room temperature
  • 1 large free range egg, room temperature
  • 1 & 1/2 tbsp red food colouring
  • 1 tbsp milk
  • 2 tsp vanilla extract
  • 1 tsp baking soda
  • 1/4 tsp salt

METHOD

  1. In a medium-sized bowl, whisk together the flour, cocoa powder, baking soda, and salt together until incorporated well. Set aside.
  2. In a large bowl, beat the softened butter using a handheld or stand mixer with a paddle attachment on high speed until creamy, about 1 minute. When necessary, scrape down the sides and the bottom of the bowl. Add in the brown and granulated sugar, beating until combined and creamy, about another minute. Then, beat in the egg, milk, and vanilla extract, scraping down the sides and bottom of the bowl as needed. Once mixed, add the food colouring and beat until combined.
  3. Turn the mixer off and pour the dry ingredients into the wet ingredients. Turn the mixer on and slow beat on low speed until a very soft dough is formed. Beat in more food colouring if you’d like the dough to be a brighter red.
  4. Add in the white chocolate chips, and roughly chopped macadamia nuts and use a spatula to combine with the dough mixture. At this point, the dough will be sticky.
  5. Cover the dough tightly with aluminum foil or plastic wrap and chill for at least 1 hour (and up to 3 days). Chilling is mandatory.
  6. Preheat the oven to 180C (350F or gas mark 4) (177°C). Line two large baking trays with parchment paper or silicone baking mats and set aside.
  7. Scoop about 1 and 1/2 tablespoons of dough and roll into a ball, as pictured above. Place 9 balls onto each baking sheet and bake each batch for about10-11 minutes. The cookies may have only spread slightly and that’s ok. Simply press down on the warm cookies to slightly flatten and form crinkles. Stick a few chocolate chips into the tops of the warm cookies (optional and only for looks).
  8. Allow the cookies to cool on the cookie sheet for 5 minutes before transferring to a wire rack to cool down completely. Enjoy and share with family and friends!

White Chocolate & Macadamia Red Velvet Cookies

White Chocolate & Macadamia Red Velvet Cookies

BON APPÉTIT

– Ally xx

myTaste.com

Double Chocolate Crinkle Cookies

Double Chocolate Crinkle Cookies

Hello Everyone! For those who follow me on my personal social media pages will most definitely know that I’ve probably celebrated my turning of a quarter of a century one too many times that I guess an average person would celebrate their birthday. To quote a friend “[I] only turn 25 once” I think she meant that in a way that I probably had too many celebrations – but of course I’m going to take that as yes, I only turn 25 once so I’m going to go all out and use my birthday as an excuse to eat all the cake and food without feeling guilty *cheeky grin* Okay, so it’s been exactly a week now since I turned 25 so I guess it’s only fair to put a cease to the celebrations and start hitting the gym to burn off all the cake (3 cakes in total to be honest).

That aside, tonight’s recipe that I will be sharing is one that I whipped up last year for Christmas. I baked a batch of soft, chewy Double Chocolate Crinkle Cookies long with some traditional Sugar Cookies to take to the office with me on Boxing Day, to share with my colleagues – I know right. I’m so nice. Anyway, you might realise  in the photos that the cookies may look like they have a hint of red to them – well, I tried adding a little bit of red food colouring (what I had left of it anyway) to make it look like a red velvet crinkle cookie, but I guess I didn’t have enough coloring for it to really shine through.

Double Chocolate Crinkle Cookies IngredientsOh you know – just my little owly friend that also happens to be one of my measuring spoons basking in a bowl of flour mixture.

Anyway! Before I head onto the recipe, please take the time to check out the original over on Sally’s Baking Addiction. I think I have said this before, but nonetheless, I will say it again. Sally’s recipes are definitely spot on and easy to follow. I don’t think that I’ve ever screwed up a recipe of hers when in the kitchen myself. Somewhere in the past, I attempted to bake crinkle cookies after seeing my Aunt post her cookies on her Facebook page. I followed a recipe, not Sally’s of course and they ended being a total FAIL. I was so sad because I had baked them to share with friends – which I did anyway, and I think they were just being nice and said that the cookies were ‘still’ good haha.

Double Chocolate Crinkle Cookies Ingredients

PREP TIME 3 HOURS 30 MINS* | COOKING TIME 10 MINS | SERVES 20 COOKIES

*Includes chilling time – it is highly recommended that you chill the cookie dough for at least 3 hours. The longer, the better! Chilling helps the flavors to develop, prevents spreading, and makes the otherwise sticky cookie dough easy to handle.

INGREDIENTS

  • 1 cup all-purpose flour, levelled
  • 1 cup confectioners’ sugar, for rolling
  • 1/2 cup & 2 tbsp unsweetened cocoa powder
  • 1/2 cup granulated sugar
  • 1/2 cup packed light or dark brown sugar
  • 180g Belgian dark chocolate, roughly chopped
  • 115g unsalted butter, softened to room temperature
  • 1 large free range egg, at room temperature
  • 1 tsp baking soda
  • 1 tsp pure vanilla extract
  • 1/8 teaspoon salt

METHOD

  1. Using a hand-held electric mixer, beat the butter in a large mixing bowl for about 1 minute on medium speed until completely smooth and creamy. Then, add in the granulated sugar and brown sugar, continuing to beat on medium-high speed until fluffy and light in colour. Beat in the egg and vanilla extract on high speed. Scrape down the sides and bottom of the bowl as needed. Set aside.
  2. In a separate medium-sized bowl, whisk the flour, cocoa powder, baking soda, and salt together until combined. On low speed, slowly mix into the wet ingredients until combined. The cookie dough will be quite thick. Switch to high speed and beat in the roughly chopped Belgian chocolate. At this point, the cookie dough will be sticky. Cover dough tightly with aluminum foil or plastic wrap and chill for at least 3 hours and up to 3 days. Chilling is mandatory for this cookie dough.
  3. Remove the cookie dough from the refrigerator and allow it to sit at room temperature for about 20 minutes; if the cookie dough was chilled longer than 3 hours, then let it sit at room temperature for about 30 minutes. This makes the cookie dough easier to scoop and roll.
  4. Preheat oven to 180C (350F or gas mark 4). Line two large baking sheets with parchment paper or silicone baking mats, and then set aside.
  5. Scoop and roll the dough, about 1.5 tbsp of dough each, into balls. Roll each ball generously in the confectioners’ sugar and place them on the prepared baking sheets.
  6. Bake the cookies for about 8-9 minutes. The baked cookies will look extremely soft in the centers when you remove them from the oven. Allow them to cool for 5 minutes on the cookie sheet; they will slightly deflate as you let them cool. Transfer to a cooling rack to cool completely. Once cooled, enjoy and share with family and friends!

Double Chocolate Crinkle Cookies

Double Chocolate Crinkle Cookies

Cookies stay fresh covered at room temperature for up to 1 week. Baked cookies freeze well – up to three months. Unbaked cookie dough balls (that are not coated in confectioners’ sugar) freeze well – up to three months. Coat the frozen cookie dough balls in confectioners’ sugar, then bake for about 10 minutes. No need to thaw them.

BON APPÉTIT

– Ally xx

myTaste.com

Chilli Chocolate & Cinnamon Cake

Chilli Chocolate & Cinnamon Cake

Hello Everyone! Well… Today has been quite an eventful day! For my followers who do not know, today marks my quarter of a century years young! 25 years of achievements and failures has brought me to where I am today.

Round 1 of Birthday Celebrations

My colleagues surprised me with a cake earlier this afternoon – quite funny as the whole morning they kept telling me not to expect anything because they didn’t have a surprise for me, nor did they have cake. By afternoon, my Manager called me to their department, asking me to help her with a design that I had helped her with earlier in the afternoon. Being the gullible person that I am, I went up to her, and that’s when the rest started singing Happy Birthday and brought out the cake (mini tower of cream puffs). So I’d like to take this opportunity to thank everyone in the office who greeted me today – and for the surprise!

Round 2 of Birthday Celebrations

Round 2 of celebrations began earlier tonight as well, with my Mom, Sister, and my Godmother. We had Japanese for dinner and of course, the restaurant staff sang Happy Birthday to me as they brought out the cake that I had baked for myself for my birthday – which is tonight’s recipe! Original recipe can be found over on Dish.

Dense, rich and moist with a little hint of chilli and cinnamon – everything a great chocolate cake should be, and even more delicious when served with candid pepitas. — Claire Aldous.

Chilli Chocolate & Cinnamon Cake Ingredients

PREP TIME 15 MINS | COOKING TIME 20-25 MINS | SERVES 10-12

INGREDIENTS

For the cake:

  • 200g Lindt Chilli Chocolate, roughly chopped
  • 200g unsalted butter, cubed
  • 2 large free range eggs, lightly beaten
  • 1/2 cup caster sugar
  • 2 tbsp plain flour
  • 1 tsp ground cinnamon
  • 1 tsp vanilla extract
  • 1/2 tsp salt
  • 1/4 tsp ground cayenne pepper (optional if you’d like a little more kick to your chilli chocolate cake)

For the glaze:

  • 100g dark chocolate
  • 100ml thickened cream

METHOD

  1. Preheat the oven to 170C (325F or gas mark 3).
  2. Melt the butter and chocolate in a heat-proof bowl in the microwave at 30-second intervals and stirring until the butter and chocolate has melted. Once melted, stir in the sugar and vanilla extract, setting aside to cool for 10 minutes.
  3. Once cooled, gradually stir in the eggs and then fold in the flour, salt, cinnamon, and cayenne pepper. Pour into a buttered cake tin and smoothen the top.
  4. Bake for 20-25 minutes until the centre of the cake is set but not too firm. Once done, transfer to a rack and leave to cool completely in the tin.
  5. While the cake is cooling down, get started on the glaze by melting the dark chocolate in a heat-proof bowl set over a pan of simmering water, stirring occasionally. Do not let the base of the bowl touch the water. Once the chocolate has melted, slowly add in the cream, stirring gently. Remove from the heat.
  6. Transfer the cake to a dish and pour the glass over. Finish with a light dust of confectioners’ sugar and enjoy with family and friends!

Chilli Chocolate & Cinnamon Cake

Chilli Chocolate & Cinnamon Cake

BON APPÉTIT

– Ally xx

myTaste.com

Death by Chocolate Cupcakes

Death by Chocolate Cupcakes

Hello Everyone! It’f finally November which means, other than a new theme on the blog as usual, it is also my birthday month! I’ll be 25 in exactly a week and I’ve got a few get-togethers planned with family, friends, and colleagues. I actually baked these cupcakes last year for my Manager’s birthday. The week before her birthday I shared the leftover red velvet cupcakes that I had baked for halloween with my colleagues. When I offered her the cupcakes, she told me that she didn’t like red velvet, and that chocolate was more her thing. So, my colleagues told me that I should bake her some chocolate cupcakes for her birthday. I’m not sure if she liked them, but my colleagues and I definitely did!

Death by Chocolate Cupcakes

These cupcakes  are not overly sweet, but rather deep and intense in pure chocolate flavour. They are dark chocolate cupcakes with a thick dark chocolate frosting on top and sprinkled with dark chocolate shavings. The mixture of melted chocolate and cocoa powder to make these cupcakes ultra fudgey, rich, and moist. Are you salivating yet? Well, if you aren’t then please go away – if you can’t salivate over fudgey dark chocolate cupcakes then we cannot be friends *cheeky grin*

Today is actually her birthday, and we tried to surprise her today which ended up being a massive fail. Well, it’s hard to surprise someone who already expects a surprise – my colleague was right, we should’ve just not surprised her as that would’ve been the ultimate surprise. She’ll probably get mad at us for forgetting, but then again she’ll definitely know that we didn’t forget and still expect a surprise in some way or another. Maybe that will be the plan for next year?

Anyway, Please take the time to check out the original recipe over on Sally’s Baking Addiction. Anyway, I don’t want to take you guys on a massive tangent so let’s move on to the recipe for tonight!

Death by Chocolate Cupcakes Ingredients

PREP TIME 12 MINS | COOKING TIME 18 MINS | SERVES 12 CUPCAKES

INGREDIENTS

For the dark chocolate cupcakes

  • 3/4 cup (95g) all-purpose flour
  • 1/2 cup buttermilk*
  • 1/2 cup granulated sugar
  • 1/2 cup unsweetened cocoa powder
  • 1/4 cup light brown sugar
  • 115g unsalted butter
  • 60g semi-sweet baking chocolate
  • 2 large eggs, at room temperature**
  • 1 tsp vanilla extract
  • 3/4 tsp baking powder
  • 1/2 tsp baking soda
  • 1/4 tsp salt

For the dark chocolate frosting

  • 2 & 3/4 cup confectioners’ sugar
  • 2/3 cup unsweetened cocoa powder
  • 95ml heavy cream
  • 90g unsalted butter, softened to room temperature
  • 1 tsp vanilla extract

Optional

  • Semi-sweet chocolate chips or shaved dark chocolate for decoration

*Room temperature eggs are required for this recipe. To bring eggs to room temperature quickly, put them in a glass of warm water for 5-10 minutes.

**Buttermilk is required for this recipe. If you do not have buttermilk, make your own by mixing 2 teaspoons white vinegar or lemon juice with 1/2 cup milk. Stir and let sit for 5 minutes.

METHOD

  1. Preheat the oven to 180C (350F or gas mark 4). Line a 12-cup cupcake/muffin pan with cupcake liners and set aside.
  2. For the cupcakes: Melt the butter and chocolate together in the microwave at 30-second intervals, stirring between each time until smooth. Once smooth, set aside to slightly cool. You may also melt the butter and chocolate over low heat on the stovetop.
  3. In a medium-sized bowl, combine the cocoa powder, flour, baking soda, baking powder, and salt together, and then set aside.
  4. In a large bowl, whisk the eggs, sugar, brown sugar, and vanilla together until smooth. Then, add in the cooled butter and chocolate mixture, whisking until smooth. Add half of the flour mixture, then half of the buttermilk. Repeat until everything is added, stirring until just combined; be careful to not over mix otherwise the batter will be very thick like pudding. Fill the cupcake liners about 2/3 of the way full with batter.
  5. Bake for 18 minutes, or until a toothpick inserted into the centre of the cupcake comes out clean. Allow to cool completely before frosting.
  6. For the frosting: Sift the confectioners’ sugar and cocoa powder together to assure there are no lumps, and then set aside.
  7. With a handheld or stand mixer fitted with a paddle attachment, beat the butter on medium speed until creamy – about 2 minutes. Gradually add the sifted sugar and cocoa powder mixture alternately with the heavy cream and vanilla extract. Beat on low speed after each addition. Once all added, beat on high speed until creamy and combined for at least 2 minutes. Add a pinch of salt if frosting is too sweet.
  8. Frost the cooled cupcakes and top with chocolate chips or shaved dark chocolate as desired. Cupcakes stay fresh at room temperature in an airtight container for up to 4 days. Store covered in the refrigerator is desired for up to 1 week.
  9. Share and enjoy amongst family and friends!

Death by Chocolate Cupcakes

Death by Chocolate Cupcakes

BON APPÉTIT

– Ally xx

myTaste.com

Poached Pears with Chocolate Chia Mousse

Hello! I’m Jialing and I will be taking over Amcarmen’s Kitchen for today. I will confess that today’s blog was very close to being a two-step tutorial on how to boil a cup of water and make tea – the only semi-regular dietary part of my life that does not involve any animal by-products.

As someone who has clearly only ever eaten vegan food a handful of times (I genuinely thought that the vegan theme was intended as a joke when I first agreed to do a recipe), I found this year’s Auguest theme to be a punishment. I mean challenge. I ended up ransacking my own pantry and refrigerator for inspiration, confirming with Allison and Google about what ingredients could and couldn’t be used by vegans. What seems like day later, I emerged triumphant – pears, wine, cocoa powder, and a questionable bag of chia seeds (waste not, want not…) sat atop my counter, ready for the arduous vegan road ahead.

Now, onto the recipe, poetically inspired by the very essential act of boiling water.

Poached Pears with Chocolate Chia Mousse Ingredients

PREP TIME min. 24 HOURS* | COOKING TIME 40 MINS | SERVES 4

*The chocolate chia mousse will need to be prepared the day before to allow chia seeds time to soak

INGREDIENTS

For the chocolate chia mousse

  • 1 & 1/2 cups almond milk
  • 1/3 cup chia seeds
  • 1/4 cup cocoa powder
  • 4 tbsp 100% pure maple syrup**
  • 1/2 tsp vanilla extract
  • Strawberries for garnish

For the poached pears

  • 4 buerre bosc pears, peeled
  • 1/2 bottle moscato or other sweet dessert wine***
  • 3 tbsp 100% pure maple syrup**
  • 3 star anise
  • 2 cinnamon sticks
  • 2 tsp cloves
  • Pinch of nutmeg
  • Water

**Maple-flavoured syrup isn’t vegan, so be sure to check the label!
***Find your fave vegan wines here http://www.barnivore.com/wine

METHOD

  1. Chocolate Chia Mousse: Prepare the chocolate chia mousse the day before, to allow chia seeds time to soak. Combine the cocoa powder, vanilla, and maple syrup, stirring until well mixed.
  2. Slowly pour in almond milk, stirring until mixture is smooth. Add chia seeds and stir until well-incoporated. Leave in fridge to soak overnight, stirring mixture once in between.
  3. Once the chia seeds have fully absorbed the liquid, they will increase significantly in size and have a gelatinous texture. Transfer to a blender or food processor and blitz until smooth and creamy. Tip: leave the chia mixture unblended and top with fresh fruit and desiccated coconut as a healthy and envy-worthy breakfast.
  4. Poached Pears: In a sauce pot large and deep enough to hold pears, combine wine, maple syrup, cinnamon sticks, star anise, cloves, nutmeg, and just enough water to cover pears.
  5. Bring the wine and spices to the boil over high heat.
  6. Add the pears, positioning them so that they are completely submerged, and continue to boil for another 25 minutes, until pears are cooked through and tender. Be sure to turn pears for even cooking, particularly when liquid gets low, keeping in mind that the bottoms of the pears will take longer to cook than the tops.
  7. Once pears are cooked, remove from the pot, reserving the syrup, and set aside to cool.
  8. Carefully simmer remaining syrup until reduced to about 1/2 cup.
  9. To serve, divide mousse into small bowls or stemless glasses and garnish with sliced strawberries. Place a pear on each plate, next to the mousse. Drizzle the pear with syrup. Enjoy!

Poached Pears with Chocolate Chia Mousse

Recipe Copyright © 2016 | jialingmew

ENJOY YOUR MEAL!

Jialing.

myTaste.com

Auguest 2016: Wong Miao Hui

Raw Nutty Orange & Blueberry Vegan ‘Cheesecake’

The perfect vegan dessert for your next dinner party.

Hey there! My name is Miao, pronounced “Meow” and I am currently located in Singapore. I’ve known the lovely Allison for a good 12 years now, perhaps for even longer! We attended the same high school back in Brunei. A few years went by before we recently got in contact again, and this time we had more in common than ever before­ – the both of us had branched from loving food, to loving to cook food during our years of studying abroad. Our enthusiasm was shared over social media and it was agreed that we had to, had to, collaborate in hosting a dinner party the very next time we stood on common soil.

Dinner parties are great! They indulge our senses through so many different factors; from the atmospheric music playing in the background, the vibrant and dramatic display of what’s being served, to the tantalising aroma of something sizzling, something roasted, something seasoned in the air. In every way, a dinner party is an experience of art, as a guest you are inclined to explore the texture of your dish and savour the flavours, forming an opinion that’ll later be added to the table’s conversation. For people who love to cook, a dinner party is an exciting show to curate.

I’ve hosted a few dinner parties since the start of my time in Singapore, and every time it’s been the perfect way to rekindle old friendships, create new memories, and to sprout conversations between acquaintances. Well what’s a dinner party without its guests? Allison and I rounded up a few other pals from our high-school days along with a few foodies I’ve grown to love in Singapore.

One seat at the table was reserved for our vegan friend, adding a little variety to the collective diet. Accommodating to a vegan was completely new to me, the savoury vegan recipes weren’t all that hard to comprehend, but because I specialise in baking cakes, deciding what to create for dessert took a little more time for consideration. We made an array of dishes for the mains, including both vegan approved recipes and recipes with meat, while trying as much as possible to have everyone enjoy similar flavours. The dessert was to mark the finale of the show, and it only seemed appropriate to have everyone leave with the same experience and same lingering flavour in their mouth.

Well, after some time browsing through recipes online, I realised just how darn easy vegan desserts are to make! And they can still be just as rich and indulgent as desserts with animal products – like the vegan ‘cheesecake’ I’m about to introduce. Now I sit here still thinking how I wasn’t introduced to vegan desserts any earlier; they’re healthier, somewhat more refreshing and require less cleaning up. So without further ado, here is the perfect dessert recipe for your next dinner party with or without your vegan buddies.

Raw Nutty Orange & Blueberry Vegan 'Cheesecake'

PREP TIME 15-20 MINS | FREEZE TIME min. 12 HOURS | SERVES 8

INGREDIENTS

For the nutty crust 

  • 2 cups raw nuts
  • 1/2 cup medjool dates
  • 1/2 cup dried cranberries
  • Pinch of salt

For the orange ‘cheesecake’

  • 3 cups cashews
  • 3/4 cup fresh orange juice
  • Juice of one lemon
  • 1/2 cup melted coconut oil
  • 1/2 cup agave or maple syrup
  • Orange zest from all the juiced oranges
  • Pinch of salt

For the blueberry layer

  • 2 cups frozen blueberries
  • 1/4 cup of the orange ‘cheesecake’ mixture

METHOD

  1. To make the crust: Process all ingredients for the crust in a food processor, until the nuts become crumbs and the mixture sticks together when you press it. Press into the bottom of an 8 inch spring-form pan to form the first layer of your cake. Leave in the fridge to chill.
  2. To make the orange cheesecake layer: Excluding the orange zest, blend all other ingredients in your blender at high-speed until very smooth, then with a spoon add in the orange zest to taste. Take out 1/4 cup of the mixture for the blueberry layer, pour the remaining mixture onto the chilled crust and then leave it in the freezer.
  3. To make the blueberry layer: Simply blend the blueberries and the 1/4 cup of cheesecake mixture with your food processor. Spread this evenly over your cheesecake and keep it in the freezer or fridge overnight. I prefer keeping it in the freezer as I live in a tropical climate and it only takes 15 minutes for the cake to soften for serving.
  4. You can serve the cake with blueberries or sliced oranges for that additional wow factor.

Raw Nutty Orange & Blueberry Vegan 'Cheesecake'

Raw Nutty Orange & Blueberry Vegan 'Cheesecake'

Recipe Copyright © 2016 | misohui

Enjoy!

Miao.

myTaste.com

Salted Caramel Popcorn Layered Cake

Salted Caramel Popcorn Layered Cake

Hello Everyone! Today is a special day, and that special day is my birthday! For those who want to know, I am 24 years young today, and another year wider, I mean, wiser, but not another year taller unfortunately. It’s been 4 years since I last celebrated my birthday in Brunei with my family, and friends I grew up and went to high school with. It’s been that long because for the past 4 years I’ve spent my birthday’s in Australia, with my friends from uni. I didn’t really plan anything special, I just organised a dinner party at Villa Mauri last Friday night with some friends; exchanging conversations, laughter, and of course, no gathering is complete without some dirty talk! We’ve all not changed one bit 🙂 I’d just like to take this opportunity to thank those who came that night, and also thank everyone else who has greeted me so far. I am so blessed to have family and friends from all over sending love my way. I know, that sounded a bit cheesy.

24th Birthday Celebrations
Birthday with my high school friends at Villa Mauri (November 6th, 2015)

24th Birthday Celebrations
Birthday with my work friends at 
Patisserie (November 9th, 2015)

I baked this cake yesterday afternoon for my birthday dinner tonight with my mom and my sister. Seriously, I cannot stress out how much I hate frosting – it take so bloody long for me to get it perfect. Well, not so much perfect, but for me to get it to cover the cake. I don’t know if I’m doing it wrong or I should blame the climate, but the buttercream is runny to begin with, so I put it in the freezer to stiffen up a bit before I frost. Then when I start frosting, it quickly becomes runny again to the point that I have to keep placing the cake in and out of the freezer multiple times before I can get the frosting to somewhat cover the cake. But anyway, after much frustration on the eve of my birthday, I managed to get a decent looking cake up I guess (so over it right now – so over baking cakes altogether).

Actually, I think I know the reason (maybe not really) why my frosting was runny. I had a look at the ingredients photo that I took and saw that I had icing sugar in it. At first, I thought that that might’ve been the reason, but when I looked at the original recipe, there was no sign of icing sugar. So why did my frosting go wrong?! 😦 Not enough butter?

24th Birthday Celebrations
Birthday with my family at home (November 9th 2015)

Anyway, I’ve been wanting to make a cake like this for a while; as in the whole salted caramel with caramel popcorn on top kind of cake. I was blown away when I came across it over on La Pêche Fraîche – so beautiful and well photographed. So don’t forget to check out the original recipe over on her blog; she has adapted the different components to making this cake from various recipes (all links have been acknowledged below). Plus, her’s looks much more beautiful, and somehow taller than my cake *cries*.

Salted Caramel Popcorn Layered Cake Ingredients

PREP TIME 20 MINS | COOKING TIME 50-55 MINS | SERVES 8-10

INGREDIENTS

For the yellow butter cake (adapted from Joy of Baking)

  • 120g unsalted butter
  • 4 large free range egg yolks
  • 2 & 1/4 cups plain flour
  • 1 cup sugar
  • 3/4 cup milk
  • 2 & 1/4 tsp baking powder
  • 1 & 1/2 tsp vanilla
  • 1/4 tsp salt

For the salted caramel (adapted from FoodSwoon)

  • 30g unsalted butter
  • 1/2 cup sugar
  • 1/4 cup + 2 tbsp heavy cream
  • 2 tbsp water
  • 1 tbsp corn syrup
  • 1/4 tsp salt

For the salted caramel Italian meringue buttercream (adapted from FoodSwoon)

  • 350g unsalted butter, cut into small chunks
  • 4 egg whites
  • 1 cup sugar
  • 1/4 cup water
  • 1 tsp corn syrup
  • Pinch of salt
  • Half of a batch of salted caramel, cooled, the rest reserved for drizzling (see recipe below)

For the salted caramel popcorn (adapted from the Kitchn)

  • Popped popcorn from about 1 & 1/2 bags of popcorn
  • 130 grams unsalted butter
  • 3/4 cup brown sugar
  • 1/4 tsp baking soda
  • Big pinch salt, plus a little for sprinkling

METHOD

  1. Yellow Butter Cake:
    • Preheat oven to 180C (350F or gas mark 4). Grease 2 x 8.5-inch pans with a little bit of butter.
    • In a medium-sized bowl, whisk together the plain flour, baking powder, and salt together. Set aside.
    • In a large bowl, beat the butter and sugar together until light and fluffy, about 4 minutes altogether. Scrape the sides of the bowl, then add the egg yolks in and beat for a further 2 minutes. Add in the milk and vanilla, stirring gently to combine.
    • Add in the dry ingredients all at once, and stir gently until the batter comes together. Divide the batter evenly between your prepared pans and bake in the oven for 20-25 minutes or until a tooth pick inserted into the centre of the cake comes out clean.
    • Set the cakes aside to cool down completely before frosting.
  2. Salted Caramel:
    • Heat the sugar, water, corn syrup and salt together over medium-low in a small saucepan . Whisk at the beginning until they dissolve. Once dissolved, leave the mixture to caramelise into an amber colour.
    • Once amber, remove from the heat and quickly whisk in the butter and cream. Be careful of any splattering that may occur. Whisk until completely smooth.
    • Set aside to cool down before using it.
  3. Salted Caramel Italian Meringue Buttercream:
    • Place the water, sugar, corn syrup, and salt in a small saucepan. Heat on low until it reaches to about 115C/240F.
    • Meanwhile, as your sugar+water mixture is slowly heating up, place the egg whites in a large bowl and start to beat using a handheld electric mixer. Beat the eggs until soft peaks start to form. Then, slowly stream the water+sugar syrup into the egg whites with the mixer still going.
    • Beat the meringue until cooled to about body temperature, and then beat in the butter about 2 tablespoons (30g) at a time. Continue whipping the buttercream until it is silky before adding half of the caramel mixture in.
    • Set aside in the fridge until it is time to frost your cake.
  4. Salted Caramel Popcorn:
    • Preheat oven to 130C (250F or gas mark 1/2) and line a baking tray with parchment paper.
    • Place the popcorn in a big bowl and make sure not to include any unpinned kernels.
    • In a small saucepan, heat the butter, brown sugar, and salt until they begin to caramelise. Whisk well to combine, and then add in the baking soda. Quickly pour the caramel over the popcorn and toss well to coat.
    • Scrape the popcorn  out onto the baking tray and lightly sprinkle with a touch of salt. Bake in the oven for 30 minutes or until the caramel is completely dry and crunchy. Once done, set aside.
  5. Assembly:
    • Stack your cake on a cake stand and frost it with the buttercream. Drizzle the remaining caramel on the edges of the cake and then top the cake with a mountain of caramel popcorn!
    • Serve, share, and enjoy!

Salted Caramel Popcorn Layered Cake

BON APPÉTIT

– Ally xx

myTaste.com