Greek-inspired Barley Salad

Greek-inspired Barley Salad

Hello Everyone! I can’t believe that it’s already February, which means sad times ahead as I only have less than two week in this beautiful city I have been calling home for the past 4 years. I’m finding it difficult to wrap my head around the fact that once I leave, the possibility of coming back is unlikely. Yes I will be back for graduation, but after that it’s quite possible that it’s sayōnara for good.

So why am I starting off my blog post on this matter? Well it’s because leaving and knowing you won’t be back in a long time has me in this cleaning-up-the-pantry phase. I discovered that I have a tin of pearl barley in my pantry and so I wanted to make use of this. I came across a recipe on the Food Network for a Barley Greek Salad and decided to give this a try. I didn’t change much of the recipe besides the fact that I used balsamic vinegar instead of red wine vinegar only because I had about a quarter of a bottle left of balsamic. I didn’t want to buy a whole new bottle of red wine vinegar seeing as I didn’t have any (since my whole point is to clear the pantry)! I also decided to throw in some avocado chunks instead of cucumber because for those who know me, cucumber isn’t my thing.

Greek-inspired Barley Salad

Easy, simple, and packed with lots of flavour. Good for a light and healthy (I presume) lunch or as a side to a classic Aussie summer BBQ. The flavours worked really well together; you’ve got the saltiness from the olives, counterbalanced with the acidity of the balsamic vinegar. You’ve got the freshness of the added vegetables as well as the crunch from the diced capsicum, chewiness from the pearl barley, and creaminess of the avocado. Like fireworks in your mouth I tell you; an absolute burst of flavours to the palette!

Greek-inspired Barley Salad Ingredients

PREP TIME 15 MINS | COOKING TIME 45 MINS | SERVES 4

INGREDIENTS

  • 1 cup pearl barley
  • 1/2 cup danish feta cheese, crumbled
  • 1/2 cup kalamata olives, pitted
  • 1 avocado, pitted and cut into chunks
  • 1 punnet (250g) cherry tomato medley, quartered
  • 1 small red capsicum, seeded, ribs removed, and diced
  • 1 small red spanish onion, minced
  • 3 tbsp balsamic (or red wine) vinegar
  • 3 tbsp fresh mint leaves, torn
  • 2 tbsp extra-virgin olive oil
  • Freshly ground black pepper
  • Pinch of salt

METHOD

  1. Combine the barley, 3 cups water, and a pinch salt in a medium-sized saucepan and bring to a boil. Once boiling, reduce the heat to low and simmer until the barley is tender, approximately 45 minutes. Strain* and set aside to cool.
  2. Combine the tomatoes, feta, olives, mint, capsicum and shallots in a large bowl. Once the barley has cooled down, add it to the bowl. Set aside.
  3. Whisk together the balsamic vinegar and olive oil in a separate small bowl. Season with salt and pepper, and dress the salad and toss to combine. Cover with plastic wrap and place in the refrigerator until ready to serve. It’s best to make the barley salad at least 3 hours ahead of time so the flavours have time to incorporate and mingle into each other.

*Optional: when straining the barley, reserve the water for drinking. There are numerous health benefits associated to drinking barley water such as lowering cholesterol levels in the body because of its high fibre content. Barley water also helps reduce the risk of developing type-2 diabetes. It is a good source of magnesium, which reacts with various enzymes involving glucose levels in the body. To find out more about the health benefits of barley water, check out the Diet Health Club.

Greek-inspired Barley Salad

BON APPÉTIT

– Ally xx

myTaste.com

Devon on Danks: BREAKFAST WITH THE SAKUMA'S

Devon on Danks

Hello Everyone and welcome back to yet another Review Sunday on the blog! Devon Café is one of those that I’d never fail to go back to for a nice Sunday brunch, well besides the Potting Shed at the Grounds though – I can’t pick between the two! So recently, I think somewhere in mid-November, Devon Café expanded their brand and opened up a new venue over on Danks Street in Waterloo. I quite honestly did not get into the hype of it until late December, after Christmas, before New Years – not that I wasn’t into it, but I just wanted to wait until the hype died down a bit. Knowing that this is Sydney, the hype never dies down! The first time I went here wasn’t that bad though, we managed to get a seat straight away but even so, the place was pretty packed. If we had arrived any later we could’ve easily been standing outside waiting for at least 10 minutes or so for a table for 3. Don’t even get me started on how packed it was on ‘Straya Day, but lucky again we managed to get a table for 2 with ease, but I did feel sorry for the others who had to wait out in the rain for a table.
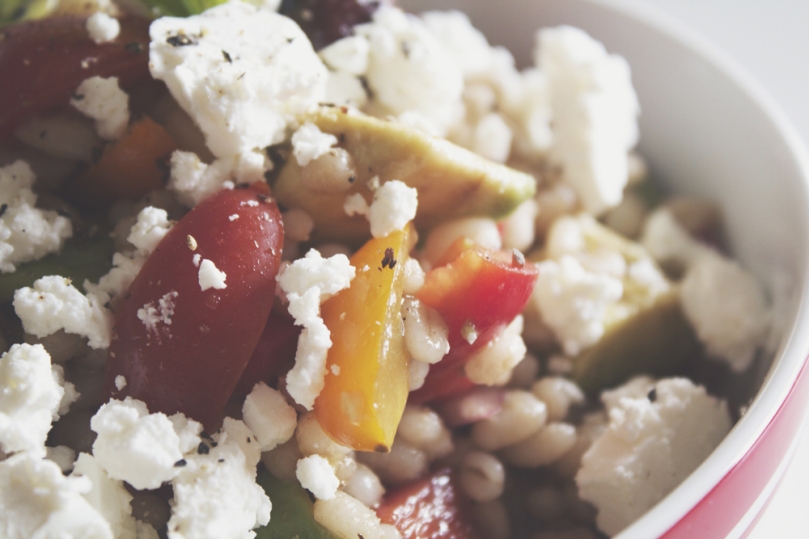
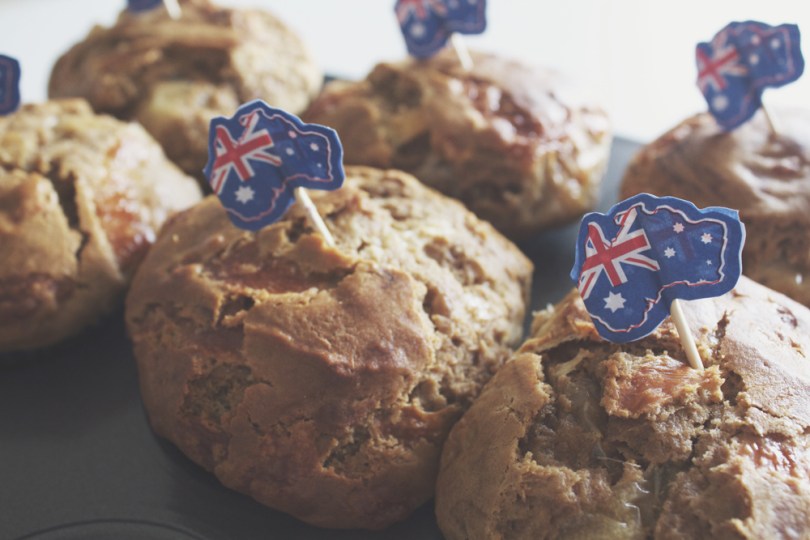
Devon on Danks: 'STRAYA DAY SPECIAL
‘STRAYA DAY SPECIAL
Medley of tomatoes, avocado, olive oil, and soft-boiled egg, on toast ($16.50)

As mentioned above, this dish was only available during Australia Day. I ordered it because it’s one of their specials and it won’t be on their menu ever again (maybe)! It was a difficult decision because I was eying their ‘Naked’ Bruschetta at that time as well. I actually have no regrets going for this dish because it blew my mind. Yes I know, some tomatoes and avocado on toast – really? The dish was just so flavoursome and fresh at the same time. The crusty white bread added that crunch texture to the palette and was excellent for soaking up the olive oil. The disappointment in this dish though was that my egg was not at all soft nor runny liked I’d expect it to be. Would’ve loved a runny yolk to compliment the crusty bread to soak it all up. Also, $16.50 for this dish? A bit too much in my opinion.

Devon on Danks: BREAKFAST WITH THE SAKUMA'S
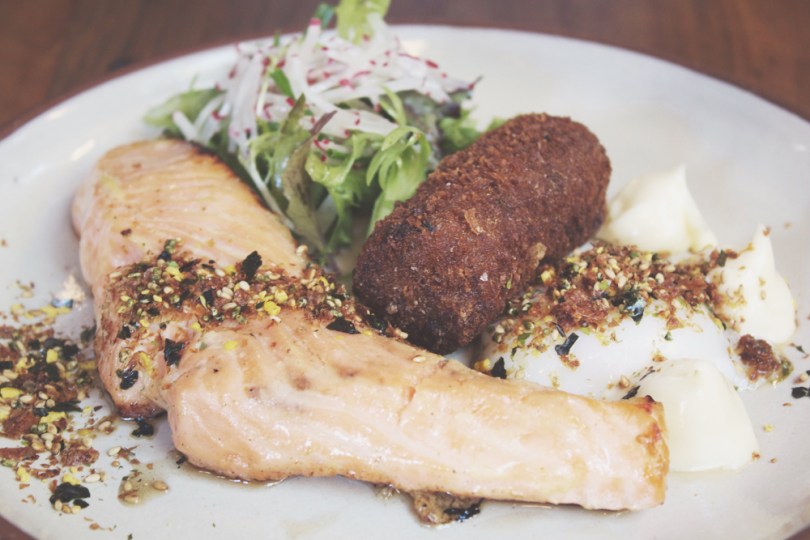
BREAKFAST WITH THE SAKUMA’S
Miso grilled king salmon, smoked eel croquette, 63˚ egg, radish petit salad, and kewpi mayonnaise ($24.50)

This dish is probably Devon’s signature as it appears in both menus at the original Devon and Devon on Danks. My Instagram newsfeed always features this dish from other people’s brunches. I never really had this dish for myself to consume, but I did manage to have a bite from my friend’s plate. According to her, the salmon was cooked to perfection and I can definitely vouch for that statement. The egg was perfectly cooked, and flavour combinations worked well together. She overall liked the dish.

Devon on Danks: LITTLE LOST BREAD
LITTLE LOST BREAD
Brioche French toast, fresh and freeze dried strawberries, balsamic and strawberry gastrique, strawberry cheesecake ice cream, and Arnott’s biscuit crumble ($16.50)

Again, I did not have this dish to myself, but I did manage to have a small bite. My friends, who at that time share this dish as a dessert, really loved this dish, but it was a bit sour for my liking, which I think mainly came from the balsamic. But otherwise, the brioche French toast was amazing, and so was the ice cream that topped it. What I found interesting was that at the end of the description for this dish it said “add bacon $4.00”. BACON? I was so confused and intrigued at the same time, but my friends didn’t want to get the bacon with it.

Devon on Danks: DR SEUSS's GREEN EGGS AND HAM
DR SEUSS’s GREEN EGGS AND HAM
Thick cut bacon, crispy potato, 63˚ egg, green tomato ketchup, pea purée, soybeans, pea tendrils, and jus ($19.00)

This again was a dish that was predominately popping up on my Instagram newsfeed. I think what is attractive about this dish is its name. It brought back many childhood memories and this was a dish that I really wanted to indulge in, but unfortunately lost the battle with Marissa. She told me to order the same thing but I was like NO that’s not point! Because I write a blog, I actually hate it when people order the same thing, because then that means that I have one (sometimes two) less dishes to write about. Which also means that I have to again visit the café/restaurant so that I am not just reviewing two or three dishes. Anyway, tangent aside, the bacon was delish, cooked to perfection, and paired well with the other components in the dish. Marissa seemed to love it too!

Devon on Danks: SOFT SHELL CRAB SALAD ala JAPANOIS
SOFT SHELL CRAB SALAD ala JAPANOIS
Crispy soft shell crab with sichimi pepper, wasabi mayo, tobiko, nori, pickled cucumber, daikon, carrot, and shiso ($19.90)

Originally, this dish was meant to be a soft shell crab roll. I don’t know what happened, like whether they ran out of rolls or whatever other reason, this time when I came back with Tara, they had blacked out the ‘roll’ on their menu and changed it to a salad. Despite it not being a roll anymore, the dish was beautifully presented and was very flavoursome. The soft shell crab was crunchy and was packed with a lot of spice, quite possibly from the wasabi. That was on point for me. The salad was flavourful, but in the end I kept thinking that the dish looked really small, and for roughly $20.00, it almost seemed that you didn’t a good value for your money. I’ve had soft shell crab salad elsewhere before at a Japanese restaurant and it was about $11.00 for more than just ONE crab.
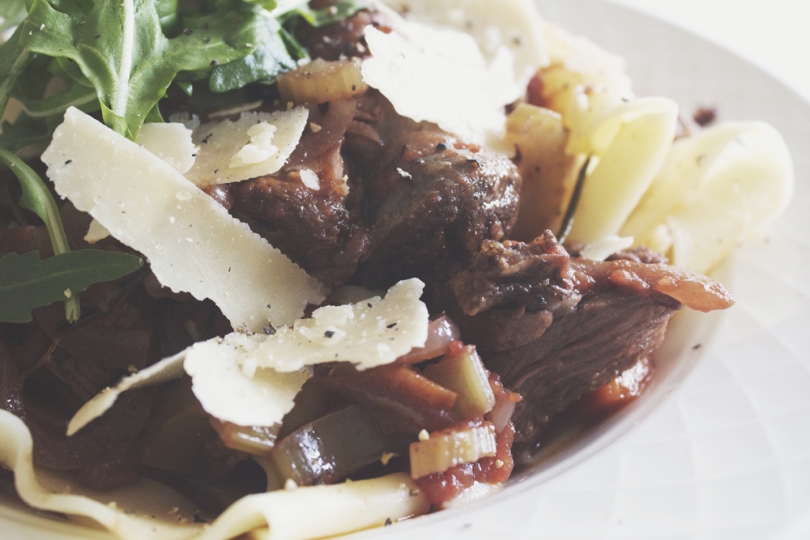
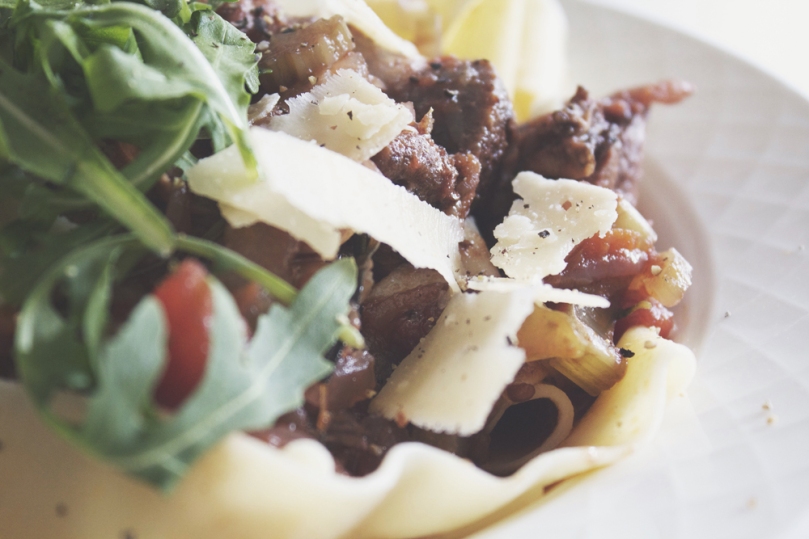
Devon on Danks: LUCKY DUCK
LUCKY DUCK
French buckwheat crêpe, crispy duck leg, duck liver parfait, fried duck egg, and blueberry preserve ($24.50)

This was the dish that I had that time I was out with Marissa and her friend Karina. Duck is one of my favourite meats which is why I had no doubts when having to select another dish after not being able to have my way with what I wanted in the first place. I regret nothing. This dish was top notch for me, despite me having doubts about the liver parfait. It actually tasted good together with the blueberry preserve and the other elements to the dish. I could not fault this dish, and unlike most dishes, this definitely was a great value for money.

Devon on Danks: CRONUT
CRONUT
Green tea matcha cronut with red bean filling ($7.00)

This was by far the best cronut I’ve had to date (not that I’ve had many anyway), but the flavour combinations happening in this one tiny cronut was to die for. The amount of red bean filling in this cronut might I add was very generous! It just oozed out every time we sliced into it for a bite. Though I did feel that by the 5th or 6th bite, I could feel that the red bean filling was a bit too sweet for my liking.

Devon on Danks: SOFT SERVE SUNDAE
SOFT SERVE SUNDAE
Pandan soft serve, banana, rice and coconut krispies, kalamansi cream, palm seeds, and gula melaka ($11.00)

What I love about Devon is the Asian fusion that they bring into their cuisine. This ice cream, though Asian inspired based on ingredients and flavours, is nothing that I have seen at all in Asia. Pansan, kalamansi, palm seeds, and gula melaka, are all flavours that I am familiar with, but never did I think that they’d all work so well together as an ice cream sundae! Loved the flavour combinations in this sundae, better than the salted caramel soft serve. I only wished that it had been a very hot day instead of a gloomy ‘Straya Day the time I shared this with Tara because the cloddish weather and really cold ice cream did not feel right!

Devon on Danks: DD's SPECIAL SOFT SERVE SUNDAE
DD’s SPECIAL SOFT SERVE SUNDAE
with salted caramel ice cream, black salt, and hot chips ($10.00)

Ever since the opening of Devon on Danks, I have seen this pop up on my Instagram feed one too many times! It brought back a lot of memories of when I was a kid and how I’d use to dip my order of fries into my soft serve ice cream on a cone from McDonalds. I think it was everyone’s childhood memories for everyone had written about how they did that when they were kids when talking about this sundae. Though I thoroughly enjoyed this, there was too much salt going on for me. I was fine at first, but I struggled to finish the rest. Salted caramel ice cream, TOPPED with black salt, AND salted fries on the side. Salt overload!

I’d rate the food probably an 8 on a scale of 10, just cos of some minor issues I had with some of the dishes that were served. Service was on point and the waiters/waitresses were always smiling, friendly, and gave great recommendations when it came down to having to make a decision on what cronut we wanted to have for dessert. The ambiance was sort of like modern meets industrial which by the way is what I like most about cafés around Sydney who embrace this interior design style fusion. Value for money is variable – some dishes I feel were reasonably priced while others I felt that they were a bit overpriced for the amount of food that was on the plate. Then again this is my opinion, and I’m pretty sure others will have a different say to this. But overall, be it the original Devon Café or Devon on Danks, I will always pay a visit when I am in the mood for a pretty epic brunch date.

Devon on Danks
2 Danks Street
Waterloo, New South Wales
Australia, 2017

– Ally xx

Pappardelle al Ragù

Pappardelle al Ragù

Hello Everyone! So today’s recipe is sort of a carry on from Monday’s special. If you’re like me, living by yourself, having a whole roast leg of lamb to yourself, you’re bound to have leftovers. What do you do? Lamb Ragù! Well, I’m pretty sure you can come up with other dishes to use your leftovers, if you have any that is, or you could always go out and buy lamb shanks or any other cuts that work for this dish.

I decided to go for a lamb ragù because not too long ago, exactly two weeks ago actually now that I think of it, a friend of mine planned for a little celebration for completing our degrees! We had dinner at the Westfield in Pitt Street, at a place called Janus Italian, and apparently she tried to book Jamie’s Italian but they are all booked out for groups until April! But nonetheless, Janus Italian was a nice dining place too – not to mention spacious as we had the whole back area to ourselves, well illuminated, and we could basically hear each other talk without having to shout across the table – all of which we probably wouldn’t have had/been able to do at Jamie’s. Seriously, though the food at Jamie’s is superb, it’s cramped, dark, and loud. Anyway, where I am getting at with this is that I had the Pappardelle al Ragù with slow cooked lamb. It was the best thing I’ve ever had! I even had the entrée sized dish and I was full about three quarters of the way into my dish. It was so good that when I knew I’d be making a roast leg of lamb, I would be able to make this too! Original recipe for slow-cooked lamb ragù can be found on Taste.

Pappardelle al Ragù Ingredients

PREP TIME 210 MINS | COOKING TIME 3 HOURS | SERVES 4-6

INGREDIENTS

  • 1kg roast leg of lamb meat
  • 500g pappardelle pasta
  • 1 can (400g) diced tomatoes
  • 3 celery sticks, sliced
  • 2 garlic cloves, crushed and then minced
  • 2 red bird’s eye chillies, sliced
  • 1 large carrot, peeled and cut into small chunks
  • 1 large spanish onion, finely chopped
  • 1/2 cup red wine
  • 1/4 cup fresh herbs such as rosemary and thyme, chopped
  • 2 tbsp extra virgin olive oil
  • 2 tbsp tomato paste
  • 1 chicken stock cube
  • Shaved parmesan cheese, to serve
  • Salt and pepper to taste

METHOD

  1. Preheat  oven to 220C.
  2. Heat olive oil in a large, frying pan over medium-high heat. Add in the garlic, chillies, and fresh herbs. Sauté until fragrant and then add the onions in. Cook until the onions are soft before adding the carrots and celery in. Season with salt and pepper, and cook for a further 10 to 12 minutes, stirring continuously.
  3. While the vegetables are cooking, add the lamb meat as well as the bones to a casserole dish (in my case I just used my rectangle pyrex dish).
  4. Add the red wine and leave to cook for about a minute or two before adding the the diced tomatoes, stock cubes, tomato paste, and about 2 cups of cold water. Stir to combine and then bring to a boil.
  5. Once boiled, remove from the heat are carefully scoop out the vegetables transfer them to the pyrex dish with the lamb meat. Then pour the liquid into the dish. Cover using aluminium foil, or with the lid if using a casserole dish with a lid, and place in oven to cook for about 3 hours or until tender.
  6. Once the lamb is done, get started on your pappardelle pasta. Bring a medium-sized saucepan of salted water to a boil. Cook the pasta according to the packet instructions, until al dente. Drain and transfer to a serving plate. Top with the lamb ragù and shaved parmesan. Serve!

Pappardelle al Ragù

Pappardelle al Ragù

BON APPÉTIT

– Ally xx

myTaste.com

Breakfast Muffins: Vegemite & Cheese

Breakfast Muffins: Vegemite & Cheese

Hello Everyone! Knowing that Muffin Making Monday would fall on ‘Straya Day, I just knew I had to make these muffins. All I can say is that when I was out doing groceries over the weekend, I had so many doubts about this, and I could not even comprehend WHY I decided to do this. I even struggled to place the tiny jar of vegemite into my trolley of groceries. I just could not bring myself to, but in my head I kept saying, “just do it. Do it for ‘Straya Day” and I did (what am I doing to myself).

Besides lamb, vegemite is another ‘Australian thing’. Vegemite has appeared on my blog once before, but for those of you who don’t know, vegemite is like the Australian version of marmite, a popular spread for sandwiches, toast, crumpets, crackers, and as well as a filling for various pastries. It is salty, slightly bitter, and apparently is similar to beef bouillon. You’ll either love it or hate it, and I did mention before that I am on the hateful side. The smell for me is a bit off-putting, and I know Vidhya hates it too, so I kept shoving the jar of vegemite up her nose whenever I had the chance to *cheeky grin*.

Breakfast Muffins: Vegemite & Cheese

I was too scared to bake a whole dozen muffins because I wasn’t too sure on how the taste would go down with me, so I only baked half a dozen, however, please note that the recipe below is for a full dozen – if you’re like me and don’t want to end up having to throw away the whole batch after eating one, then just half the measurements from the recipe below! Also, a little side note, I followed Sally’s master muffin mix recipe for these, and then added the vegemite and cheese. I only added about a tablespoon of vegemite as I was again afraid that the saltiness of it would overpower the taste of the muffin. But I can tell you that the batter smelled amazingly good!

But to be completely honest, these muffins did NOT taste as bad as I thought they would. It’s sort of like a taste that I cannot really describe. The only issue I had with them this morning was that because knowing that there was vegemite in them, I gagged a couple of times before even putting them in my mouth, so it kind of threw me off just a little bit. Nevertheless, the muffins were beautifully moist though, and I think that all the other ingredients mixed together with the vegemite sort of diluted its taste a bit. They weren’t at all overly salty like I thought they’d perhaps turn out to be. Having said that though, I would probably still never indulge in vegemite just as it is, like on toast or something as they have it here down under.

Breakfast Muffins: Vegemite & Cheese Ingredients

PREP TIME 25 MINS | COOKING TIME 25 MINS | MAKES 6 MUFFINS

INGREDIENTS

  • 3 cups plain flour
  • 1/2 cup granulated sugar
  • 1 cup milk, at room temperature
  • 1/2 cup light brown sugar
  • 1/2 cup vegetable oil
  • 2 handfuls of grated mozzarella cheese
  • 2 large free range eggs, at room temperature
  • 1-2 tbsp vegemite
  • 4 tsp baking powder
  • 1 tsp vanilla extract

METHOD

  1. Preheat oven to 220C. Line a 12 hole muffin pan with paper cases.
  2. Add the baking powder and flour in a large bowl, gently whizzing together until well combined. Set aside.
  3. In a medium-sized bowl, whisk together the eggs, granulated sugar, and brown sugar until combined. Then add in the milk, oil, and vanilla extract. Whisk together until the mixture is pale and yellow in colour.
  4. Using a spatula, fold the wet ingredients into dry ingredients and lightly mix everything together until all the flour is off the bottom of the bowl and no big pockets of flour remain. Then add in the cheese and vegemite, and continue to mix. Be careful as to not over mix the batter; it will result in tough, dense muffins. The batter will be extremely thick and somewhat lumpy.
  5. Spoon the batter into prepared muffin cups, filling them all the way to the top.
  6. Bake at 220C degrees for 5 minutes. Then reduce oven temperature to 190C and continue to bake for a further 25-26 minutes until tops are lightly golden. A toothpick inserted in the centre should come out clean. Allow to cool for 10 minutes before transferring to a wire rack to cool down completely.

Muffins taste best fresh the same day. Store muffins at room temperature in an airtight container for up to 5 days. Muffins freeze well, up to 3 months.

Breakfast Muffins: Vegemite & Cheese

Breakfast Muffins: Vegemite & Cheese

BON APPÉTIT

– Ally xx

myTaste.com

Roast Leg of Lamb

Roast Leg of Lamb

Hello Everyone and Happy Australia Day! Or as they say it here in the land down under, Happy ‘Straya Day! It is the official national day of Australia that is celebrated on the 26th of January. It marks the anniversary of the 1788 arrival of the First Fleet of British Ships at Port Jackson, NSW, and raising of the Flag of Great Britain at that site by Governor Arthur Phillip. If there’s anything that I’ve learnt about Australia from living here for the past 4 years is that they really love their lamb. So for this special Monday post, I am bringing to you a classic leg of lamb roast. All you really need are garlic, olive oil, rosemary, and a little salt and pepper – you need not do anything fancy with this leg! These make for a flavourful and tasty leg of lamb.

Roast Leg of Lamb

So this is probably the fourth leg of lamb roast that I’ve made over the years of being in Australia. I was never in the country for Australia Day, except this year of course, so I remember that my previous flatmate and I would always serve one up during our annual Easter dinner. A simple roast with simple and humble ingredients to flavour it up; all you really need is some patience with it as it does require some time in the oven. But you can always do something else with your time rather than sit and watch it cook. Just remember to check on it every hour incase it starts to tan a bit too much.

Roast Leg of Lamb Ingredients

PREP TIME 10 MINS | COOKING TIME 2 HOURS 30 MINS | SERVES 8-10

INGREDIENTS

  • 2.5kg leg of lamb, washed and pat dried
  • 5 garlic cloves, crushed
  • 1 large sprig of rosemary
  • Garlic infused olive oil
  • Salt and pepper

METHOD

  1. Preheat oven to 200C. Line a deep baking tray with foil and place a wire rack above it.
  2. Place the leg on the rack and rub with salt, pepper, and olive oil. Make small incisions throughout the leg and insert garlic pieces and rosemary in each. Chop up any remaining garlic pieces and sprinkle over the top of the leg.
  3. Place in the oven and let it roast for about 2 to 2 and a half hours. Once done, transfer the leg to a deep dish (I used my rectangular pyrex) cover the leg with foil and let it rest for about 10 to 15 minutes. While the lamb is resting, pour the pan juices into a small saucepan and let it simmer away. This is totally optional by the way! Once simmering, add about half a cup of white wine and bring back to a simmer. Then add in about a teaspoon of flour and mixture until the juices start to thicken. Serve with the leg of lamb!

Roast Leg of Lamb

Roast Leg of Lamb

The rest is up to you! You can have it with some steamed rice or mashed potatoes. Whatever tickles your fancy. If you have any leftovers, get creative and whip up another stellar dish – like perhaps my lamb ragù which will be up on the blog on Thursday!

Once again, happy Australia Day to all my fellow Aussie friends!

Roast Leg of Lamb

BON APPÉTIT

– Ally xx

myTaste.com

Pastabella - PRIMI (PASTA): CARBONARA

Pastabella

Hello Everyone and hello to an all new Review Sunday! I’ve visited Pastabella twice now; the first time was for Marissa’s birthday dinner at the beginning of this month, and the second time was two nights ago when I caught up with my friend Rowena from back home. Both times did not disappoint; the food was absolutely amazing and the dining experience was taken to the next level with great company.

Pastabella is an Italian restaurant that is all about fresh house-made pasta and wood fired pizza. Now it may not have the best looking ambience in comparison to the other cafés and restaurants on the same street, but it had a homely feel to it. The inside space was like sitting down in your own dining room, while the outside space felt like your backyard or patio area.

There is this man, a cheerful guy he is, who I believe may quite possibly be the owner of Pastabella, greeted us with a smile, a cheeky joke and a laugh, which I thought was quite pleasant because it set the mood for us. I absolutely hate it when you’re greeted with snotty and unpleasant waiters/waitresses, but no, none at Pastabella! You could easily joke around with this man as well and he even returned the favour. When he served us, he asked “who ordered the spachatella?” I raised my hand and he placed the dish in front of me. He then asked “and who ordered the gamberi?” I mean, I was with one other person at that time so it was obviously Rowena’s dish. Nonetheless I responded by saying “I think someone inside ordered this” while I tried to point through the glass windows at a table inside. He the responded by saying “oh okay” and took about two steps away from our table, then quickly turned around, laughed, placed the dish in front of Rowena, and said “she’s a cheeky one isn’t she?” Golden. There were many other funny encounters but I’ll end up writing a whole paragraph or two more about that!

Pastabella - PRIMI (PASTA): BOSCAIOLA
PRIMI (PASTA): BOSCAIOLA
House-made fettuccine pasta with mushroom, bacon, and shallots in a fresh creamy sauce ($18.00)

This dish was quite similar to their carbonara, minus the mushrooms of course and add the egg. I had a little taste of this from my friend’s plate and I quite enjoyed how the cream sauce was nice and relatively thin, but still very flavoursome.

Pastabella - PRIMI (PASTA): CARBONARA
PRIMI (PASTA): CARBONARA
Famous Italian dish of house-made spaghetti pasta with bacon, shallots, egg, and cream ($18.00)

Carbonara is like a classic favourite of mine, but I always try to stray away from ordering it for two reasons mainly. The first is because I can make my own carbonara and secondly, for me I find that carbonara anywhere is the same. When this came to our table though, I have never seen anything like it! When I say that, I am actually referring to it’s presentation. I’ve had my fair share of carbonara’s and never have I seen it being served with a raw egg yolk sitting on a bed of pasta. It tasted amazing! The sauce was rich and absolutely divine, but I probably would struggle to eat a whole plate of it just because the richness and creaminess gets to you at a certain point.

Pastabella - PRIMI (PASTA): CHILLI CON GAMBERI
PRIMI (PASTA): CHILLI CON GAMBERI
House-made fettuccine pasta with tiger prawns, rocket, garlic, and olive oil, cooked in a white wine sauce with a dash of chilli ($22.00)

I had a little taste of this off Rowena’s plate – the tiger prawns were cooked to perfection. Plump, juicy, and soft; nothing of that rubbery texture that I’ve had at a fair share of other places. This dish here was perfection. The pasta was cooked well and I remember Rowena saying that she gets skeptical when dishes say ‘chilli’ but they don’t live up to that level of spice that she expects. This dish did not disappoint her tough! To quote her, “they used legit chillies”. I felt though that those who cannot take the heat will complain about the ‘dash’ of chilli – did not feel like dash! But I’m not complaining; I love the spicy kick!

Pastabella - PASTABELLA SPECIALS: RISOTTO MARINARA
PASTABELLA SPECIALS: RISOTTO MARINARA
Traditionally cooked risotto with mixed seafood in our traditional napolitana sauce garnished with fresh parsley ($26.00)

This for me tasted really good; the seafood was cooked to perfection and flavours were on point. But like other marinara dishes that I’ve had, I feel like they all taste the same.

Pastabella - PASTABELLA SPECIALS: SPACHATELLA, PISTACHIO E PANA
PASTABELLA SPECIALS: SPACHATELLA, PISTACHIO E PANA
A traditional Sicilian style pasta cooked with fresh cream, sprinkled with roasted pistachio nuts, and topped with pecorino cheese ($25.00)

I was intrigued by this one because never have I ever had a pasta-pistachio combination before. I love pistachios, and I know they have a very distinct taste to them as well. This pasta tasted so great! The pistachios really enhanced the flavour of the dish and was finished off nicely with pecorino on top. It was something that I’ve never tasted before, and I couldn’t even compare it to any other dish in terms of flavour.

In my opinion, the pizzas that we ordered were nothing really special that would make me want to go all the way back here for more. Don’t get me wrong, the pizzas were good, but it’s more like there are other pizza places that are nearer to where I live that are just as good.

Pastabella - PIZZA: ITALIANA
PIZZA: ITALIANA
Napolitana & mozzarella cheese base with eggplant, zucchini, mushrooms, artichokes, olives, and garlic ($23.00)

Pastabella - PIZZA: PASTABELLA
PIZZA: PASTABELLA
Signature Pastabella sauce, grilled chicken, mushrooms, and olives ($20.00)

Pastabella - DOLCI (DESSERTS): PIZZA ALLA BANANA
DOLCI (DESSERTS): PIZZA ALLA BANANA
Banana and custard pizza, drizzled with a delicious caramel sauce and lightly sprinkled with icing sugar ($14.00)

After a filling feast, we just had to have dessert, and we definitely made the right choice. Wood fired dessert pizza with a custard-base sauce, fresh bananas, and caramel sauce – what a combination! Though I love the taste of fresh bananas, I probably would’ve loved them to be fired in the pizza oven for a few minutes to caramelise. I bet that would be AMAZING.

Pastabella - DOLCI (DESSERTS): PASSIONE DI FRUTTI
DOLCI (DESSERTS): PASSIONE DI FRUTTI
Banana, passionfruit and custard pizza, sprinkled with icing sugar ($15.00)

I know, you’re probably thinking that this is exactly the same as above but with passionfruit instead of a caramel sauce. Well you are totally right! But this was supposed to be a dessert pizza with peaches and passionfruit instead of banana. To my dismay, they had run out of peaches that night, and they asked if banana was okay. Well, I couldn’t do anything about it, so I just agreed to it. Not disappointed on the taste though because it was just as good as the last time I had their pizza alla banana dessert!

I definitely recommend this place if you want to spend a quiet date night with friends or even your special someone. There’s just something about ambience that makes you feel right at home, and eating great traditional pasta and pizza with good company that makes Pastabella a great dining place.

So based on all that, I’d say that this place is a definite 9.5 for food (just a slight disappointment that they didn’t have peaches for the passione di frutti dessert pizza we ordered), ambience probably 8, and service an easy 10. Value? I’d probably give it an 8.5? The portions were decent for the price in my opinion!

Pastabella
89 Glebe Point Road,
Glebe, NSW
Australia, 2037

– Ally xx

Celery & Green Apple Slaw

Celery & Green Apple Slaw

Hello Everyone! The story behind me attempting this recipe is that I always seem to struggle with celery. There are times where I’d buy a whole bunch for a dollar (on special) when the halves weren’t available or if they didn’t have the bags of pre-cut celery sticks. The thing with me and celery is that I only use it when I’m making a bolognese or minestrone soup. I rarely use it for any of my dishes. So half the time it sits in the fridge waiting to be use, and then eventually thrown out because it’s been sitting there for weeks, possibly months. I know, most of you are probably thinking that I could’ve just eat them like that with some sort of dip, but in all honesty, raw celery isn’t quite my thing. Again, another rabbit food moment here.

Celery & Green Apple Slaw

So, I bought a bag of celery sticks last week for a dish that will be posted next week, and before going out to do my weekly groceries, I jumped online and search for a recipe that I could make that included celery – yes, I was determined to not waste my bag of celery! I came across this recipe from Taste and I thought that I’d give this one a go. I know, when I thought about it and how I mentioned that “raw celery isn’t quite my thing”, and here I am attempting a raw celery slaw. Well, I thought it was about time that I gave raw celery a chance and it did not disappoint. Well to be honest I could’t distinctly pick out its taste, maybe because from the crème fraîche dressing, but the crispiness and freshness from both the celery and apple paired with the creamy sweet yet tangy dressing really made the dish exciting to my palette. Why did I not think of this sooner! All those celery sticks that went to waste…

Celery & Green Apple Slaw Ingredients

PREP TIME 20 MINS | COOKING TIME | SERVES 2-3

INGREDIENTS

  • 4 celery sticks, cut into matchsticks
  • 1 large green apple, cut into matchsticks
  • 100g Danish feta cheese, crumbled
  • 1/3 cup walnuts, toasted and coarsely chopped
  • 2 tbsp crème fraîche
  • 2 tbsp freshly squeezed lemon juice
  • 1 & 1/2 tbsp chopped fresh chives
  • Pinch of caster sugar
  • Salt and pepper to taste

METHOD

  1. In a small bowl, whisk the crème fraîche, lemon juice, sugar and chives in a small bowl. Season with a bit of salt and pepper.
  2. Plate up the celery and apple matchsticks in a deep dish. Pour the crème fraîche mixture over the celery and apples, and top with crumbled danish feta and walnuts. Serve!

Celery & Green Apple Slaw

If you want to add some protein or omega-3 to this fresh, light slaw, you can have some chicken on the side, or as what I’ve done is grill some salmon to go with this dish. Season with salt, pepper, and lemon juice, pop in the grill oven for about 5 to 7 minutes (for a thin portion as what I had), and serve!

Celery & Green Apple Slaw with Salmon

Celery & Green Apple Slaw with Salmon

BON APPÉTIT

– Ally xx

myTaste.com

Caesar Salad with Lemon & Thyme Roast Chicken

Caesar Salad with Lemon & Thyme Roast Chicken

Hello Everyone! As mentioned at the end of my last recipe post on Lemon & Thyme Roast Chicken, I made a Caesar Salad to go with the roast. A quick and healthy dish (excluding the mayonnaise), to easily pack and take to work with you, which is exactly what I did last week.

Caesar Salad with Lemon & Thyme Roast Chicken

I have a funny, but quite saddening story on my part about this. So as usual, I always pre-pack my lunches the day I make them, which is usually on Monday afternoon, and I made the decision to add the caesar dressing in the morning before going to work because I didn’t want the lettuce leaves to soak in the dressing overnight. Tuesday was fine, but I completely forgot to add the dressing on the salad for Wednesday. I specifically remembered to do it when I woke up in the morning, and even had it running in my mind throughout my morning shower. But for some mystical reason, it slipped my mind and it only hit my that I completely forgot to add the dressing was when I was halfway through the journey to work by bus. I was so devastated when I came to that realisation. I was too devastated that I didn’t even look forward to having my lunch that day. I now know what it’s like to eat rabbit food. Rabbits must have such a hard life to have to go through this every single meal of every single day.

All that aside, even though I had bottled caesar dressing sitting in the fridge, I decided to make my own (sort of) caesar dressing. I say ‘sort of’ because I used bottled mayonnaise; if you really want to go all out, then be my guest and whip up your own healthier version of mayo! Anyway, I wanted to give making my own caesar dressing a go since I had all the ingredients to make it possible already in the pantry. Maybe my next challenge will be to make my own mayo too! Also, I accidentally left the croutons in the oven for a little bit too long that they were overly tanned, but thankfully not burnt. Oops! I made the mistake of not setting a timer to remind me that they were in the oven; I think at that time I was busy carving the chicken. (I picked the least tanned ones for the photographs)!

Caesar Salad Ingredients

Croutons Ingredients

Caesar Salad Dressing Ingredients

PREP TIME 20 MINS | COOKING TIME 10 MINS | SERVES 4

INGREDIENTS

  • Baby cos lettuce, washed and sliced
  • Garlic infused olive oil
  • Mini stone-baked pane di casa, cut into small chunks
  • Roast chicken slices

For the caesar dressing

  • 1/3 cup free range egg mayonnaise
  • 4 anchovy fillets, minced
  • 1 garlic clove, crushed then minced
  • 1 tbsp white wine vinegar
  • Handful of grated parmesan
  • Salt and pepper to taste

METHOD

  1. Preheat oven to 180C. Spread the small chunks of bread over a large baking tray lined with parchment paper and sprinkle the garlic infused olive oil over them. Rub the oil into the bread and season with a little salt if you like. Bake for about 8 to 10 minutes, turning the croutons a few times during cooking so they brown evenly on all sides. Once done, remove from the oven and set aside.
  2. Combine all the ingredients for the caesar dressing into and small bowl and whisk together to combine.
  3. Plate up the baby cos lettuce and the roast chicken. Drizzle a generous amount of the dressing, and top with the croutons, shaved parmesan, and a bit of cracked black pepper.

Caesar Salad with Lemon & Thyme Roast Chicken

You can skip the chicken if you wish for a great light salad for lunch, and for those who want to bulk it up so that it’s not just leaves, have it with the chicken of course! For this salad, I carved up the breast parts from the whole roast chicken that I posted the recipe to last week. Check it out here on the blog for those of you who missed it!

BON APPÉTIT

– Ally xx

myTaste.com

Ampersand Café & Bookstore

Ampersand Café & Bookstore

Hello Everyone and welcome back to an all new Review Sunday! Ampersand Café & Bookstore is one that I am very fond of mainly because of the memories and conversations shared over food. I have been going to Ampersand on a frequent basis over the past 4 years; it was the go-to brunch/lunch spot before or after classes at the then-COFA (now known as UNSW Art & Design). I remember popping by the café with Bec many times before our 9am classes; I would always get a regular latte, and she would always get a regular flat white. Then there are many times we’d visit for a quick brunch/lunch in between classes. Most recently, it was an after photography class lunch date for Anastasia, Jess, Jialing, and myself. We would sit and talk about the most random things for 2 hours, and even quote from White Chicks all throughout lunch.

Ampersand Café & Bookstore

What I also love about this café is that it is also a bookstore! It has a rustic, or as one would use the term, ‘hipster’ feel to it which makes it even that more inviting for the suburb that it is in. The café and bookstore has three amazing floors of dining areas surrounded with an adjoining library and bookstore with many books to choose from. A great place for those who just want to sit and immerse themselves in a book over a cup of coffee, or with friends over food.

Ampersand Café & Bookstore

Besides all the fond memories I have of this café, and the cozy ambience, the coffee and food are also quite excellent! The menu that you are about to see in this post is some of the dishes that my friends and I have indulged in. I have had many more dishes from this café but I think that during first two years of visiting this café I wasn’t taking any photos or I just can’t seem to find where the photographs are if I did take any. I have indulged in the Ampersandian, the Morning After Breakfast, and their Club Sandwich from their counter items. Nonetheless, I feel like the dishes on this post are quite a good range of the food that Ampersand has to offer. Also, I should make mention that they also have another café known as Ampersand on Crown | Café, Bar & Bookstore. I actually didn’t know that this existed until I went and had brunch with some friends at  Rustic Pearl. Ampersand on Crown was just right next to it! 413 Crown Street, Surry Hills for those who want to know where!

Ampersand Café & Bookstore - HOT DRINKS: CAPPUCCINO
HOT DRINKS: CAPPUCCINO
brewed using Allpress Beans (Regular $3.30, Large $3.80)

Their coffee art amazes me every time. I have yet to come across an ampersand on the drink as I have seen in many Facebook/Instagram posts by others.

Ampersand Café & Bookstore - HOT DRINKS: LULLABY NIGHTCAP
HOT DRINKS: LULLABY NIGHTCAP
Nutmeg, malt, cinnamon, and honey served with hot milk ($4.80)

What really struck me about this drink was that, on their blackboard menu, it said ‘seahorse eggs’. Being naive and gullible at that time, I legitimately thought that the drink actually had seahorse eggs it in. Only then did I come to a realisation that the seahorse eggs referred to the frothy, fizzing bubbles in the drink. I was not disappointed though; the drink was absolutely amazing! However, probably not a great idea to have before a boring lecture (which was what I did at the time). It’s all in the name of the drink!

Ampersand Café & Bookstore - LUNCH BLACKBOARD MENU: RISOTTO
LUNCH BLACKBOARD MENU: RISOTTO
Arborio & barley risotto, confit cherry tomatoes, garlic, halloumi, and pesto ($15.90)

What attracted me to this dish was the fact that it was originally ‘arborio & barley risotto, tiger prawns, lemon butter, and crumbed pancetta’ on their blackboard menu. The combination sounded so great in my head that I had no second thoughts of wanting to order it. However, for a reason that I cannot remember, the lady at the cashier told me that their risotto for that day was confit cherry tomatoes, garlic, halloumi, and pesto. At first I was hesitating whether or not I should have that or order something else off their menu, but at that time there wasn’t anything else that tickled my fancy. So I decided to go for this, and absolutely no regrets. It tasted amazing! But I secretly think that the tiger prawns, lemon butter, and crumbed pancetta would’ve been amazing-er!

Ampersand Café & Bookstore - LUNCH BLACKBOARD MENU: THE HASH
LUNCH BLACKBOARD MENU: THE HASH
Braised beef cheeks (slow-cooked), seasonal veggies, potato rösti, and poached egg ($16.90)

This dish, that Jialing ordered and we shared with Annie, was again to die for! The only criticism I have with this dish that it said ‘poached egg’ and the egg we for that day was what you would get between a soft boiled egg and a hard boiled egg. No runny yolk! Disappointed. Other than that, the beef cheeks where tender and full of flavour; verging on the dry side which is why it was important that we had that runny yolk!

Ampersand Café & Bookstore

I mean, if these empty plates of the first two dishes mentioned above does not convince you of their deliciousness, then you sir are not my friend (the other empty plate is of the stuffed red capsicum which is the very last photograph on this post).

Ampersand Café & Bookstore - LUNCH BLACKBOARD MENU: SWEET POTATO CRISPS
LUNCH BLACKBOARD MENU: SWEET POTATO CRISPS
served with aïoli ($6.00)

This is a winner side dish for me. I never fail to order these babies each time I visit Ampersand. But sadly over the past month in late October, early November last year, I did not get to have any. Why? Because their deep fryer had been broken during those times. But for a month? Pure torture. I have not been back since our last photography class which was in early November. Maybe it’s time I paid another visit – hopefully their deep fryer is fixed by now! I just love the thin crispy sweet potato sliced paired with garlic-y and tangy aïoli.

Besides their blackboard menu, they also have a selection of pre-cooked counter items. Possibly an easier and quick option for those who have their breakfast/lunch/brunch to go, but that never stopped us from trying them ourselves over a two hour lunch session. You can probably tell that we have a thing for their arancini as it appears in almost every counter item on this post, but are paired with a different salad each time. This is because no salad is ever the same whenever we visit the café. One thing that I do love about their salads is that they aren’t your regular Joe that you see in almost every café; they are pretty exotic to your taste buds! Black sticky rice? Miso chic pea? Cracked wheat? I mean, who would’ve thought these combinations would work so well?! Yum! So what you can do is order an arancini, sandwich, wrap, or whatever hot dish they have at the counter, and then add $5.00 on top for a salad on the side.

Ampersand Café & Bookstore - COUNTER ITEMS: ARANCINI & CHIC PEA SALAD
COUNTER ITEMS: ARANCINI & CHIC PEA SALAD
Arancini with tomato & mozzarella ($5.90) & Chic pea salad with miso and red wine dressing, enoki, kale, and raw zucchini (+$5.00)

Ampersand Café & Bookstore - COUNTER ITEMS: ARANCINI & CRACKED WHEAT SALAD
COUNTER ITEMS: ARANCINI & CRACKED WHEAT SALAD
Arancini with tomato & mozzarella ($5.90) & Cracked wheat salad with mixed beans, feta, grilled sweet potato, asparagus, and sweet & sour paprika dressing (+$5.00)

Ampersand Café & Bookstore - COUNTER ITEMS: ARANCINI & ROASTED EGGPLANT AND WHEAT SALAD
COUNTER ITEMS: ARANCINI & ROASTED EGGPLANT AND WHEAT SALAD
Arancini with tomato & mozzarella ($5.90) & Roasted eggplant and cracked wheat salad with green peas, red pepper, and balsamic reduction (+$5.00)

Ampersand Café & Bookstore - COUNTER ITEMS: BREAKFAST WRAP & BLACK STICKY RICE SALAD
COUNTER ITEMS: BREAKFAST WRAP & BLACK STICKY RICE SALAD
Poached egg, crispy bacon, spinach, tomato, cheese, and hollandaise ($9.50) & Black sticky rice salad with cherry tomatoes, bocconcini, rocket, and balsamic reduction (+$5.00)

Ampersand Café & Bookstore - COUNTER ITEMS: STUFFED RED CAPSICUM
COUNTER ITEMS: STUFFED RED CAPSICUM
with pearl barley, pumpkin, feta, and spinach purée ($5.90)

Ampersand Café & Bookstore
78 Oxford Street
Paddington, New South Wales
Australia, 2021

– Ally xx

Lemon & Thyme Roast Chicken

Lemon & Thyme Roast Chicken

Hello Everyone! Today’s recipe is pretty much what the title says, a classic whole roast chicken. I know some of you guys out there, myself included, would’ve probably rubbed some herds onto the skin and then pop it in the oven to roast away. I kid you not, I have had my fair share of roast chicken, homemade or from the grocers and almost every time the chicken is quite dry, especially the breast parts (which is why I hated eating chicken breast while growing up as a kid). It wasn’t only until recently I learnt about a cooking technique known as brining (submerging in salted water at the very basic) when we roasted a whole turkey for last year’s Noche Buena. It feels weird saying last year when it was technically less than a month ago. Anyway, the turkey was super moist and flavoursome! So I decided to try out brining again with a whole chicken.

Lemon & Thyme Roast Chicken

Keeping your bird juicy isn’t that hard – all you need is the right seasoning, and a little bit of patience and motivation to add that extra step before having your lunch or dinner. It does pay off though! Brining chicken not only adds moisture to the chicken, making it nice and plump, it also helps prevent it from drying out when you cook it. The result is a delicious, moist, and juicy chicken. In addition, not only does it affect the texture and juiciness of your chicken, it also affects the taste. A few hours, or even better if overnight, in brine will let the salt penetrate deep into the chicken meat, enhancing its natural flavour. Of course, there is one disadvantage. All the extra water that ends up in the chicken can make it harder to get a crispy skin. Luckily, that’s easy to fix. If you’re going for crispy skin, just let the chicken air dry in the refrigerator for an hour or so. Yes, it does take the extra effort, but it’s so easy to do!

Lemon & Thyme Roast Chicken Brine

So what actually happens during the brining process? A little bit of high school science for you!

  • Diffusion: This occurs when particles move from a region of higher concentration to an area of lower concentration. So, as we have established above, the brine has a lot more salt in it than the chicken. Therefore, to balance things out, the salt gets absorbed by the chicken – not just on the surface, but all through the meat.
  • Osmosis: This is when water (or another liquid) moves through a membrane from one region that has more water to another region that has less water. This is exactly what happens when you brine chicken. The brine has a lot more water than the chicken, so the water moves through the chicken cells, from the brine to the chicken.

Lemon & Thyme Roast Chicken Brining Process

Lemon & Thyme Roast Chicken Brining Process

Salt is the most important ingredient when brining chicken. It actually doesn’t make the chicken salty in the end, but as explained above, really enhances the chicken’ natural flavour. You can also add some other seasonings to your chicken brine, and they’ll work the same way and diffuse into the chicken. If you’re planning on using extra seasonings in your chicken brine, you’re going to need to boil it. Otherwise, the flavors just won’t penetrate the chicken. Think of it as if you were making tea – if you try making it with cold water, nothing happens. You need the heat to leech the flavour out of your seasonings. But remember to cool your brine down first before submerging your chicken into it. Not only does it end up cooking the chicken just a little bit, it also creates a bacteria farm that could potentially make you sick.

Lemon & Thyme Roast Chicken Ingredients

PREP TIME 24 HOURS* | COOKING TIME 2 HOURS | SERVES 6-8

*This includes the brining process.

INGREDIENTS

  • 2kg whole free range chicken, washed and cleaned
  • 3L water
  • 3/4 cup salt
  • 1/2 cup white wine
  • 4 garlic cloves, crushed and peeled
  • 1 medium-sized spanish onion, halved and sliced thinly
  • 1/2 lemon, sliced
  • 2 tsp chicken stock powder
  • Few sprigs of fresh thyme
  • Handful of whole black peppercorns
  • 50g butter, chilled

The basic ratio of salt to water for a brine is 4 tablespoons of salt per litre of water.

METHOD

  1. Start by clearing out a space big enough to fit a bowl large enough to hold your chicken in the fridge. Line two plastic bags over your bowl, or if you don’t have one large enough, a cooking pot will do. Place your chicken into the bag, and set aside.
  2. Combine half of the water and all the ingredients, except the butter, chicken, and wine, in a large cooking pot and bring to a slight boil to allow all the flavours and seasoning to incorporate into the liquid. Once boiling, let it boil for a further 5 minutes before removing from the heat.
  3. Add the remaining water and the wine. Set aside to cool down completely. There are other ways of cooling down the brine faster if you are short on time, or a little bit impatient. You can submerge the pot in cold water, or even add ice to the brine.
  4. Once the brine has cooled down completely, slowly and carefully pour it over the prepared bowl/pot of chicken. If there is too much liquid, do not panic! Simply lift the plastic bags up and then pour the remaining brine in.
  5. Tie the bags ups nice and tightly and refrigerate for a few hours, or overnight. If you’re going for crispy skin, just let the chicken air dry in the refrigerator for an hour or so before roasting in the oven.
  6. Preheat oven to 190C. Line a deep baking tray with foil and place a wire rack above it.
  7. Using cooking twine, tie the drumsticks together as well as the wings to hold them in place while roasting. I don’t actually know how to tie the wings properly, so that’s how I tied mine! I don’t even know if tying it the way I did is how it’s done either!
  8. In a small bowl, combine the butter with a few thyme leave, mashing it together just by using your fingertips, and then rubbing it all over the chicken.
  9. Add the garlic and onions from the brining liquid to the drop tray, as well as a little bit of the brine. This will later add flavour to the gravy that you can make combined with the drippings from the chicken. Just combine the pan drippings into a small sauce pan and add flour to thicken it up.
  10. Place the chicken on the wire rack, and into the oven for about 2 hours.
  11. Once done, remove from the oven and tent it for about 10 to 15 minutes before serving. Serve with steamed rice or mashed potatoes and veggies. Alternatively, you can serve with is a nice Caesar Salad which is what I did – stay tuned for the recipe on Tuesday!

Lemon & Thyme Roast Chicken

BON APPÉTIT

– Ally xx

myTaste.com