Hello Everyone! It’s Sunday which means another review on the blog tonight for you! Today’s post is one of my favourite cafés to date. I’ve been here a total of 3 times now and this place always finds a way to impress me. That’s right, I am talking about The Potting Shed at the Grounds of Alexandria! The ambiance, the feels, the food, the service, and of course the ever so friendly, drop-dead gorgeous waiters there – spot on. I came to know about this place through Instagram photos from friends and various food bloggers that I follow.
My first trip here was when my high school friend Andrew came to visit, which was somewhere in mid-August. We, and three of my other friends went along for a lovely Sunday brunch. I remember that day clearly – it started off wet and gloomy, but ain’t no rain gonna stop me from getting FOOD, especially from the Potting Shed. By the time we finished catching up over food (which was a very long time indeed – basically the table next to us seated 3 different customers before we got up and left), the sun came out and it ended being such a beautiful day. My second trip here was for dinner; a complete different feel to the ambiance as it was dark, but food was the same – spot on delicious. The third time, we were a group of about 12 people, gathered together to celebrate my 23rd birthday over a delicious brunch. And finally, I popped by the Grounds for their Christmas markets. I got a photo with Santa and instead had food from the Garden Café – it was a festive day and again the food didn’t disappoint.

The Grounds of Alexandria is located in an old pie factory from the early 1900s. The exterior and interior design maintains the integrity of the former warehouse, embracing its rustic and industrial aesthetic. Besides the cafés, the site opens onto a luscious garden of heirloom vegetables and fragrant herbs, in which the kitchen uses sustainable practices. This includes picking fresh herbs every morning and working with full time horticulturalist to grow seasonal produce for the menu; offering a wholesome and rustic menu. The site is also home to a coffee research and testing facility as it is known to be the flagship venue for its specialty coffee. If you want to know more about their sustainable practices and research facility, head on over to their website at GroudRoasters.
The Potting Shed is one of the eateries that can be found at the Grounds. It is located towards the back of the site, if you’re entering from Huntley street, right next to the florist. When you walk in, you are immediately greeted by one of the locals at the café Fluffy the Blue and Gold Macaw. The café is surrounded by lush greenery and really defines its name throughout – from how they presented their menu right down to the cutlery used; terracotta pots everywhere! This is also one of the reasons why I love this place so much.

SHARE WITH FRIENDS: PUMPKIN FATTEH
Roasted pumpkin, za’atar, pine nuts, labne, black sesame seeds and flatbread ($16.00)
This roast pumpkin fatteh was melt-in-the-mouth perfection; a wholesome burst of Middle Eastern flavours that is sure to tingle your tastebuds. If you’re looking for a great entrée, this is definitely one to try and share with friends. The pumpkin was so tender that you could easily spread it onto your flatbread. Top it off with a bit of labne, pine nuts, za’atar, and chives and you’ve got every element of this dish in one bite. My only criticism for this is that the flatbread-pumpkin ratio isn’t quite balanced – would love more flatbread to wipe up the rest of the labne and pumpkin!
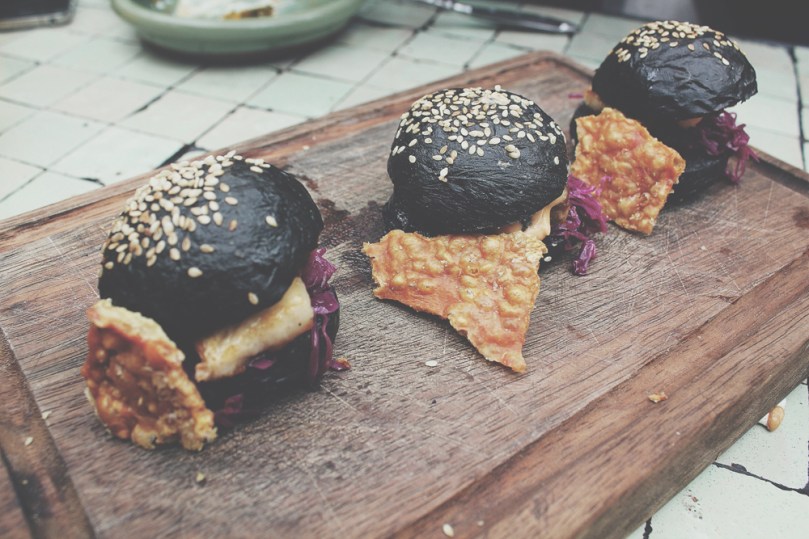
SHARE WITH FRIENDS: KUROBUTA PORK BELLY SLIDERS
with kimchi and rye-eye mayo on a charcoal brioche ($16.00)
Taking a shift in culture, these pork sliders are a fusion of French (brioche), Japanese (kurobuta), and Korean (kimchi) cuisines. I am not a complete fan of kimchi, but these flavour combinations worked to my liking. The pork belly sandwiched between the charcoal brioche buns were flavourful and melt-in-thee-mouth tender. The pork crackling on the side of each slider? Crispy. They are offered as a set of three per order on their menu, but you can always ask your friendly waiter/waitress to add an extra or two at additional costs.

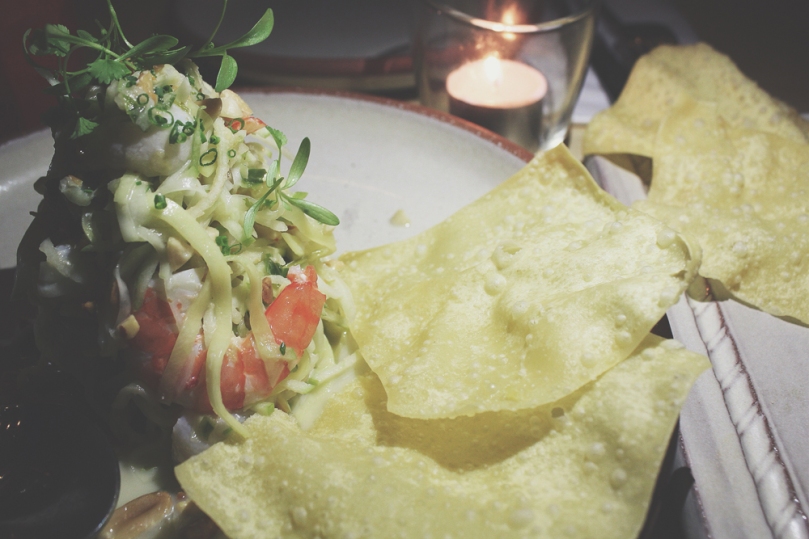
SHARE WITH FRIENDS: MINI DOGS
Shed-made Kurobuta pork & fennel sausages with caraway seed, cabbage and apple slaw, plus white onion, dill and mustard ($16.00)
This was probably one of the most enjoyable entrées on their menu as it was served as a sort of DIY plate. It was quite entreating in a way because not realising that they had already cut a slit into the buns, Jialing further made a horizontal cut along the sides of the buns. When she cut through halfway and the top fell right off, she realised that incisions had already been made. But other than that little mishap, the dogs tasted amazing. Like the pork sliders, you can ask for an additional serving or two at additional costs.
You’d imagine having these 3 hefty entrées would already be ever so filling for 5 people, but no, we were just getting ready and pumped up for our mains!

SHED MAINS: BATTERED MARKET-FRESH FISH OF THE DAY (WHITE FISH)
served up with hand-cut potato chunks and rosemary salt, lemon, watercress, radish and tartare ($23.00)

SHED MAINS: GRILLED MARKET-FRESH FISH OF THE DAY (WHITE FISH)
served up with hand-cut potato chunks and rosemary salt, lemon, watercress, radish and tartare ($23.00)
You have a choice of battered, crumbed, or grilled for their market-fresh fish of the day. As you can see, we went for the classic battered and grilled. The fish was cooked to perfection and again just melt-in-the-mouth, especially the grilled fish. It’s like a fancy take on fish and chips, but instead of the chips, you have baked potato chunks seasoned with rosemary salt. The salad on the side added an extra texture to the palette and a burst of freshness to the tastebuds.

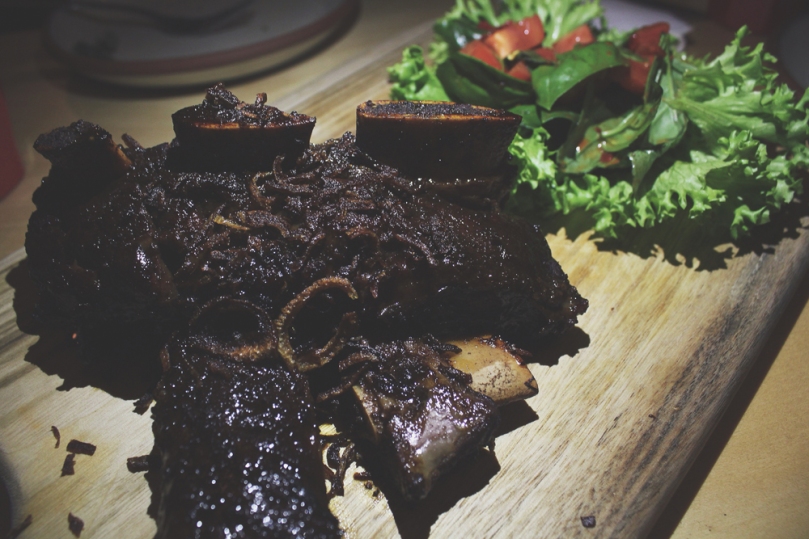
SHED MAINS: SLOW COOKED GRAIN-FED ANGUS SHORT RIB
with sweet & sour glaze, spiced eggplant ($23.00)
This was amongst the best mains that I’ve had from the Potting Shed. Beef and eggplant are a match made in heaven, both absolutely tender and packed with flavour. We were unsure though whether it was actually beef ribs as according to Jialing, they didn’t taste like ribs. For me, they didn’t look like the classic ribs for they weren’t served on the bone, but nonetheless, delicious!

SHED MAINS: CHARCOAL-GRILLED HOLMBRAE 1/2 CHICKEN
amongst fenugreek, coriander, walnuts, pomegranate, cucumber, radish and grains ($28.00)
This charcoal-grilled chicken was another favourite amongst us. I actually can’t remember if the skin was crispy, but that golden tan on it though! Tender, juicy chicken on a bed of yummy grains. The broth (sauce?) that came on the side to bathe your chicken in was also very flavoursome, and the fresh greens on the side balanced the dish as a whole.
The next two mains I unfortunately cannot comment on because I did not get to have a bite of! This was during my birthday and everyone basically had their own mains. I am assuming that they all taste very good anyway as my friends ate every single thing on their plate and left nothing behind.
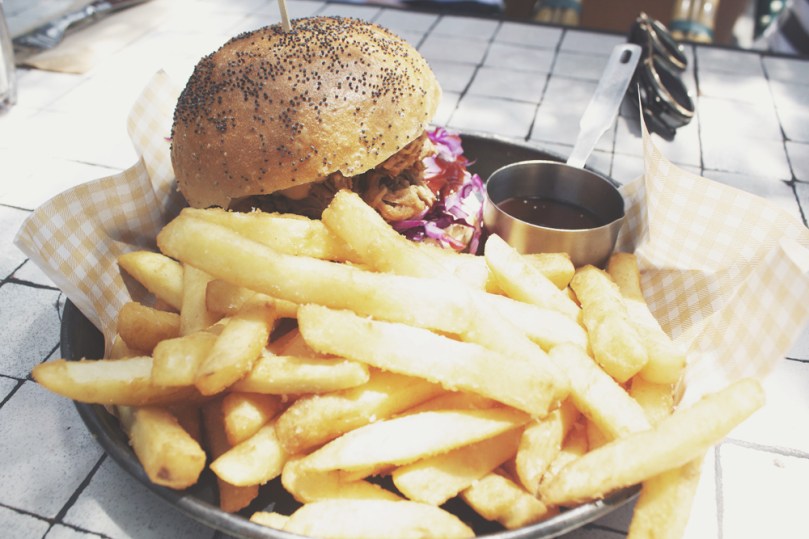
SHED MAINS: DAVID BLACKMORE FULL-BLOODED WAGYU CHEESEBURGER
with shed-made dill pickles, mustard seed onions, tomato chilli jam and lettuce, all on a poppyseed bun with chips ($21.00)

SHED MAINS: LAMB SHANK POT PIE
with piped buttered mash and green leaf salad ($24.00)
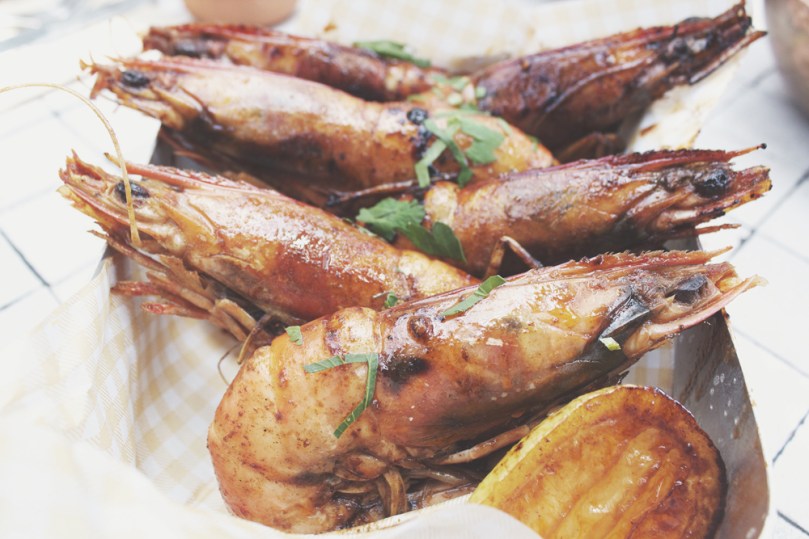
SHED MAINS: BBQ CHILLI & GARLIC QLD JUMBO PRAWNS
(6) covered in burnt lemon dressing, served whole ($32.00)
I actually got to try one of these plump jumbo prawns – they were cooked to perfection and packed with flavour. I actually have a funny story to tell about these. But first, flashback to entrées. So amongst the friends who came to my birthday brunch was Daniel. When digging into our pumpkin entrée, we realised that he was putting the pumpkin skins to the side. We told him that you could in fact eat them. Then came along this main of his – I didn’t actually notice it at first, but towards the end of his meal I realised how clean his plate looked. He had eaten the shells of the prawns. After that we all made fun of how when he could actually eat the skins, he’d put them aside; and when he’s not meant to eat the skin (shells), he ate them anyway!

SHED MAINS: CHAR GRILLED MARINATED LAMB CUTLETS
(6) infused with oregano, mint and grilled lemon, with beetroot, potato & feta salad ($34.00)
When i visited the Potting Shed for the second time for dinner, my eyes were all over this dish as I was deciding on what I wanted to have. I went for something else though only because I thought it was a bit expensive for a casual weekend dinner. We settled the bill and just before I walked out of the café, a waited walked by carrying two plates of these babies and I had an instant food regret. They looked so good even though it was relatively dark and I could barely see a thing. I knew then that this was definitely a dish that I needed to order for the next visit despite how expensive it was. And voilà! I went all out and ordered it for my birthday and definitely no regrets. My only criticism? It was probably a little bit too pink on the inside for me, but otherwise, flavour combination was on point!
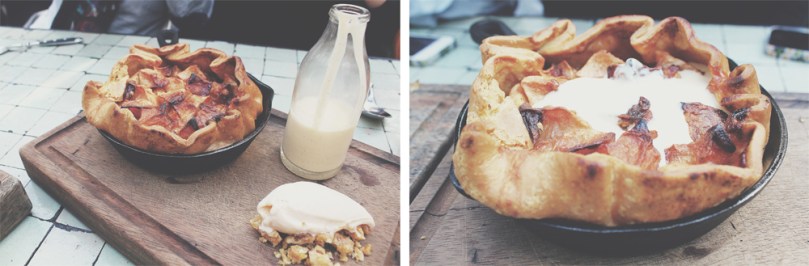
DESSERTS: BAKED APPLE PIE (for 2 people)
amongst home style vanilla custard ($16.00)
I actually cannot remember what my mouth felt like after having this dessert which means that it probably wasn’t as memorable as the last dessert you’ll see in this post. Nonetheless, it was a great tasting apple pie. I really liked how they served the vanilla custard in an old-school milk bottle, it made us fight over who wanted to pour it onto the pie!
Again, I was not able to have a bite of the next two desserts, so I won’t be able to comment on them. But judging by the orgasmic sounds that my friends made while consuming the dessert, I’m guessing they were pretty top notch as well!

DESSERTS: BANANA TART TATIN
alongside coconut ice cream and hazelnut praline ($14.00)

DESSERTS: BANANA BANOFFEE PIE
short crust pastry with caramel topping, flavoured cream, grilled banana and coconut ice cream ($12.00)

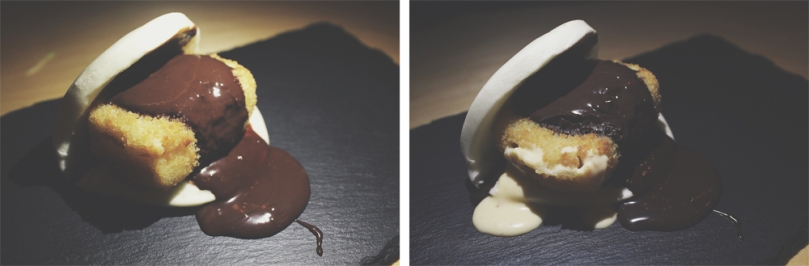
DESSERTS: SELF SAUCING CHOCOLATE PUDDING
with vanilla bean or salted caramel ice cream ($14.00)
Ever heard of the saying that there’s always room for dessert? THERE WILL ALWAYS BE ROOM FOR THIS DESSERT HANDS DOWN! You can obviously tell that this is probably the most mouthgasmic dessert I’ve had EVER! The first time I had this dessert I unfortunately had to share with 4 other people – it was definitely not enough! I had about 2 mouthfuls and that was it! Much rage. But for my birthday, I ordered one just for myself! This warm and chocolate-rich pudding is to die for, and the salted caramel ice cream on the side was the perfect match. I mean, if this photograph of the dessert doesn’t entice you into making that wise decision to order it, then I have no words for your insane mind.
What I have shown in this post is just a number of dishes that you can find at one of the cafés at the Ground of Alexandria. The site is filled with various food stalls and I definitely recommend spending a sunny weekend at the Grounds with friends for some delectable eats. Explore the gardens, the markets, and of course say hi to the various farm animals!
The Potting Shed at the Grounds
Building 7A
No. 2 Huntley Street
Alexandria, New South Wales
Australia, 2015
– Ally xx


