Auguest 2016: An Introduction

Hello Everyone! I can’t believe the months are creeping up so fast; in 4 months time it’ll be Christmas and then 2017! Before I dive into today’s post, I would just like to apologise to my followers and readers for not updating my blog last month. If I hadn’t already mentioned in my previous post from June, I’m currently and still in the Philippines and for the first part of my trip, Internet connection hasn’t been great – and well, kind of non-existent to be honest, and hence why I haven’t been able to update my blog for the month of July. I did however promise you guys content for August, and here it is!

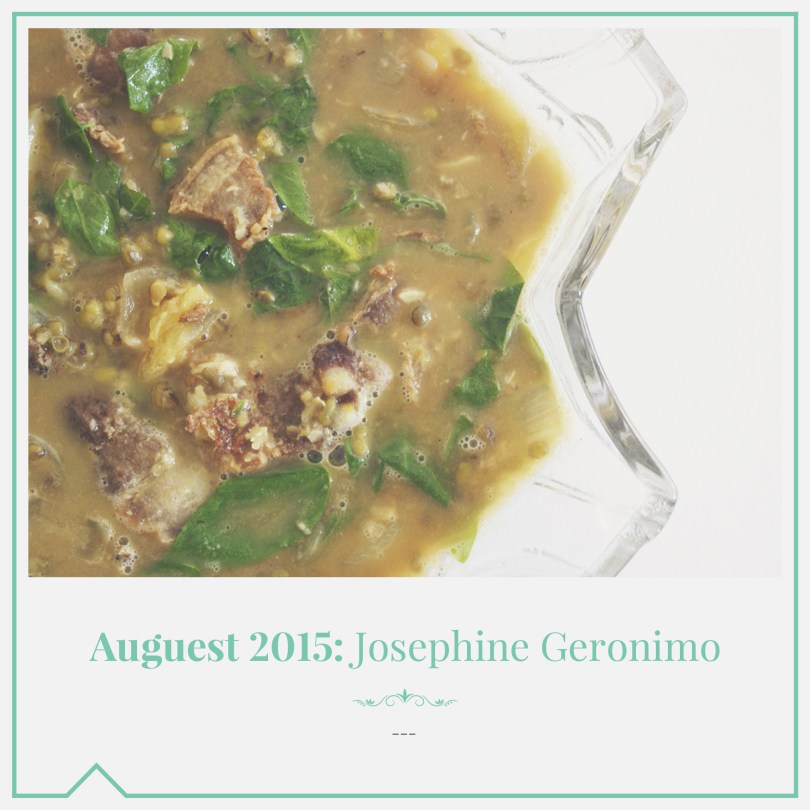
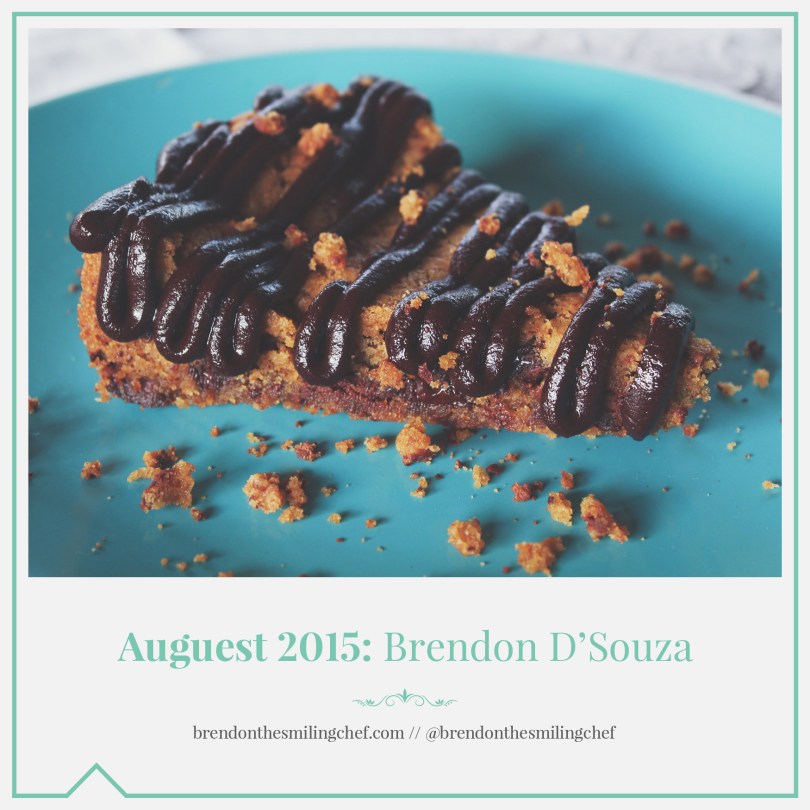
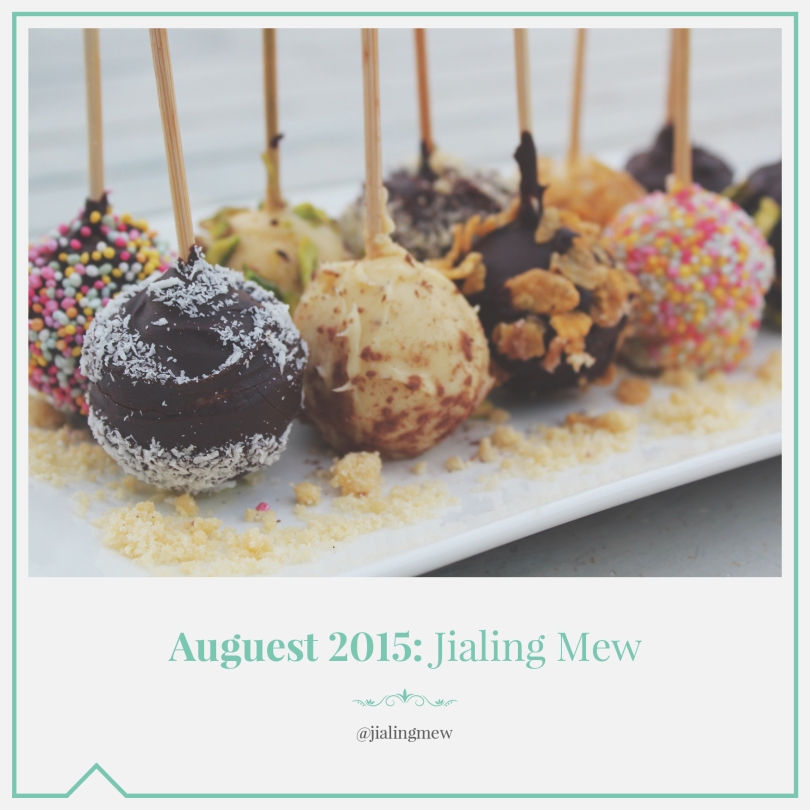
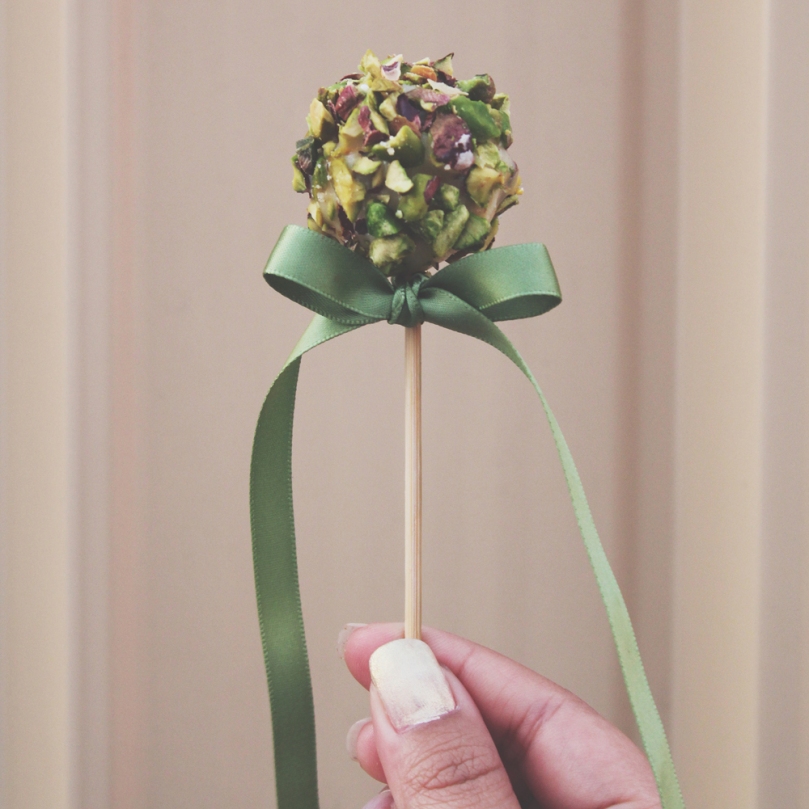
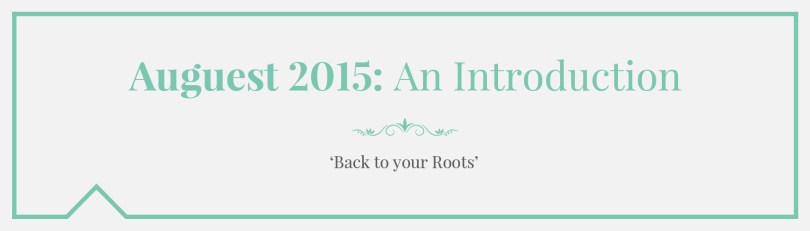
August is now here and for those of you who don’t know, August is guest bloggers/foodies month on Amcarmen’s Kitchen, hence also known as Auguest. For those of you who are just tuning into my blog, last year I started this as a way to get in touch with other food bloggers/foodies as well as a great opportunity to network and produce some really cool content for our blogs/websites. Last year’s theme was based on preparing dishes from your roots. A few of my guests took traditional recipes and put their own twist to them while others took street food to another level. Also, if you want to read up on how this annual series of mine started, click here.

This year’s theme for Auguest is Yes Ve Gan! I thought of this theme back in March when I visited Singapore for about a week. I contacted a friend of mine from high school and asked if she wanted to cook together and host a small dinner party after our kitchen adventures. We invited a friend over who is a vegan and so our menu that night revolved around cooking food that was vegan. We made a spiced cauliflower soup for entrée, wholewheat spaghetti with a sage and butternut squash sauce, and finally, my friend made a blueberry and citrus no-bake vegan cheesecake which will be featured on Amcarmen’s Kitchen. It was a delicious was to end a vegan feast and I’m sure everyone will enjoy it as much as we all did that night.

Of course that’s not the entire reason why I decided to revolve the theme around vegan eats, but is also an effective way to educated those that by going vegan, it protects animals, the environment, and your health. I hope that I do not get bashed on my blog for saying this but not actually be a vegan or vegetarian myself – and I will say this now and openly admit that I do not see myself going vegetarian or vegan anytime soon. For now, I’ll just have to see where my food journey will take me. Next week we’ll be welcoming Diandra on Amcarmen’s Kitchen so stay tuned and make her feel welcome 🙂

Cheers!

– Ally xx

Auguest 2015: Josephine Geronimo

Ginataang Munggo (Roasted Mung Beans & Sticky Rice in Coconut Milk)

Hello Everyone! Alas, we’ve come to the end of my mini collaboration series for this month! My last post for this Auguest that my Mom has kindly shared with us is another mung bean recipe that she grew up eating during her childhood years.

Ginataang Munggo (Roasted Mung Beans & Sticky Rice in Coconut Milk)

If you haven’t read Wednesday’s post, my Mom mentioned there that once a year when her whole family went to visit the province that they were from, they would always bring back one 50kg sack of munggo (mung beans) to the city, where they lived, from their farm. Everyday, Munggo Guisado (Sautéed Mung Bean Soup) was what they had for lunch and dinner, and for merienda, they’d have mung beans as well – there was no escaping the wrath of the mung beans – whether savoury or sweet! After lunch, everyone would take a 2-hour break before they’d be back in the kitchen, preparing and cooking Ginataang Munggo for merienda at 3pm.

Ginataang Munggo (Roasted Mung Beans & Sticky Rice in Coconut Milk) Process

Ginataang Munggo is basically roasted or toasted mung beans cooked in coconut milk together with some glutinous rice. It is a simple Filipino dish that can be eaten for either merienda (light afternoon meal or an afternoon snack) or dessert that is best served warm. toasted Mung beans and sticky rice are cooked in coconut milk. Though this dish has been a part of my Mom’s family tradition way back when she was still in her younger years back in the Philippines, today is the first time my Mom cooked this dish and served it to my sister Angela and I. Now that my Mom has passed on her two favourite mung bean recipes from her childhood, she said to me that it is but right that I pass them on to my children to be and keep tradition going – hopefully my children won’t be as fussy as I was before when I used to hate munggo!

Ginataang Munggo (Roasted Mung Beans & Sticky Rice in Coconut Milk) Ingredients

PREP TIME 15 MINS | COOKING TIME 30 MINS SERVES 6-8

INGREDIENTS

  • 1.5L boiling water water
  • 1 can (400ml) coconut milk
  • 1 cup glutinous rice
  • 1/2 cup mung beans
  • 1/2 cup white sugar

METHOD

  1. First, heat up a medium-sized frying pan over medium-high and add the mung beans. Toast until browned, about 8-10 minutes. Be careful as to not over toast them otherwise they will become bitter. Likewise, you can roast the mung beans in the oven for about 10 minutes at 200C.
  2. Turn the heat off and set the mung beans aside to cool down.
  3. Once the mung beans have cooled down slightly, crack the toasted mung beans using a mortar and pestle, or as my Mom prefers, by using a rolling pin. Set aside.
  4. Add the boiling water and sugar to a large pot over medium-high heat and dissolve the sugar. Once dissolved, add the coconut milk and bring to a boil.
  5. Once boiling, add the glutinous rice and mung beans, then give it a good stir. Turn the heat down to low and cook for 15 to 20 minutes or until the coconut milk is almost absorbed, stirring once a while to make sure that the rice doesn’t stick to the bottom of the pot.
  6. Once done, turn the heat off and let it sit in the post for a further 5-10 minutes. Then,transfer to individual serving plates.
  7. Share and enjoy! You may serve this either hot or cold. I prefer having this hot with a pinch of salt on top to further enhance the flavours.

Ginataang Munggo (Roasted Mung Beans & Sticky Rice in Coconut Milk)

Ginataang Munggo (Roasted Mung Beans & Sticky Rice in Coconut Milk)

And that about wraps up guest blogging month for this year! Many thanks to Jialing, Brendon, Marissa, and my Mom for participating in my very first Auguest series. I’m actually pretty happy with how this all came together in the end. It was hectic at first trying to find the how ever so many bloggers I had in mind for this collaboration series, but then narrowing it down made it much more simpler and much easier to communicate with my friends and fellow bloggers. If you enjoyed this mini collaboration of mine, let me know in the comments section below and I’ll see to organising this into a yearly series 🙂

My Mom and I at Bondi Beach, Australia 2015
my Mom and I at Bondi Beach, July 2015

PS: Back in the day in the 70s, canned coconut milk was not a thing yet and so my Mom had to buy a whole matured coconut and manually grate it. From the grated coconut, she then had to squeeze the milk out of it for this dish. This dish was a lot of hard work for her back in the day, which is why she was so confused as to why this dish took no effort at all for her to make, and then she realised it was because we already had coconut milk readily available.

BON APPÉTIT

– Ally xx

myTaste.com

Auguest 2015: Josephine Geronimo

Munggo Guisado (Sautéed Mung Bean Soup)

Hello Everyone and welcome to the final week of Auguest! If you’ve read all the way to the end of my post yesterday, you’ll know that I’ve said that week 4 of Auguest would commence today seeing as I had a special post that went up live yesterday. Today’s guest won’t be communicating with you through the write up only because she’s not that confident with her English writing skills; so instead I will be the one taking you through her story of this dish. But first, who’s my guest for this week? Of course it is none other than the woman who cooked for me throughout my years of growing up and the woman who taught me how cook. Without her, my passion for cooking would’ve probably never existed, and neither would this blog. Today’s guest blogger is none other than my Mother, Josephine, known to many as Mama G!

This dish is a delicacy from one of the Ilocanos provinces, my Mom’s hometown in the Northern part of the Philippines, Pangasinan, but her family grew in Quezon City. Once a year the whole family would travel the province to visit their farm and bring back some of their produce, one of them included one 50kg sack of munggo (mung beans). Munggo Guisado is a common lunch and dinner dish found on their table as it is a healthy and nutritious dish. Her father (my grandfather) would always remind his children that munggo contains the same amount of proteins that can be found in beef, chicken, pork, and other meats. Her father was a little bit on the stingy side, so their Munggo Guisado contain no meat at all, just pure mung beans and other vegetables such as ampalaya (bitter gourd) leaves or malunggay leaves. Her father even planted a malunngay tree so that they could pick their own leaves instead of having to go to the markets to buy it. The dish would then be flavoured with bagoong isda (anchovy sauce). It was a dish that they had for both lunch and dinner, everyday.

Munggo Guisado (Sautéed Mung Bean Soup)

This dish was introduced to my Mom since she started to eat solid foods, and has been a part of her daily meal until she came to Brunei. She stopped eating it because she wasn’t in a cooking mood since she moved out of the Philippines to work in Brunei. She started cooking it again when she had a family of her own. My Mom did the same thing by introducing this dish to me when I started to eat solid foods. To her surprise, I hated this dish and she didn’t know why. Even my two younger sisters hated it. She tried everything to make it more appetising for us by adding meat and/or prawns, but still she could not get us to eat it. So, she had no choice but to stop cooking it.

But now, after 20 years, she was able to introduce it back to us again (mainly because for this Auguest post as it has a story to tell of her roots), and apparently we love it! I kept asking my Mom why I didn’t like it in the first place, and she kept answering, “I don’t know with you!” Now Munggo Guisado has found it’s way back into our table as a regular, weekly, meal. The dish is best served with steamed rice and fried fish, as they would say “magkakambal sila” – twins, or meaning a well paired dish.

Munggo Guisado (Sautéed Mung Bean Soup) Ingredients

PREP TIME 1 HOUR | COOKING TIME 30 MINS | SERVES 6

INGREDIENTS

  • 1 cup mung beans
  • 1 cup malunggay (or ampalaya) leaves
  • 250g pork belly, sliced
  • 2-3 garlic cloves, minced
  • 1 large onion, diced
  • 1 large tomato, diced
  • 1 tbsp salted ziganid fish (bagoong padas, or anchovies)
  • Ground black pepper

METHOD

  1. Soak the beans in water for about an hour or two, this will help soften the beans and lessen the time required to boil and tenderise the beans when it comes to cooking them.
  2. Add the beans to a medium-sized pot together with about 1L of water and bring to a boil. Once boiling, let the beans simmer for about half an hour until soft (or about 50 minutes if you didn’t pre-soak them).
  3. In a medium-sized deep fry pan, add the sliced pork belly and fry until browned, about 3-4 minutes. Move them to one side of the frying pan and add the garlic. You shouldn’t need to add any oil and the natural oils from the pork fat should be enough to sauté the garlic. Once the garlic is golden brown in colour and is fragrant, add in the onions and cook until soft. At this point, you can mix them together with the pork. Add in the tomatoes, season with a bit of ground black pepper, and cook until softened, about 5 minutes.
  4. Pour the cooked mung beans, together with the water that it was simmered in into the pork and tomato mixture. Give it a good mix and if it’s looking a bit dry, add more water to make it more into a soup. Bring to light simmer.
  5. Add the tablespoon of anchovies to a small bowl with about a few heaped tablespoons of the munggo soup. Press on the anchovies to get the flavours out and strain the sauce/paste back into the soup. Discard the anchovies.
  6. Simmer for another 10 minutes or so and then add in the malunggay leaves. Turn the heat off and give it a good mix, until the malunggay leaves have wilted into the soup.
  7. Serve with a nice bowl of steamed rice and fried fish. Enjoy!

Munggo Guisado (Sautéed Mung Bean Soup)

Munggo Guisado (Sautéed Mung Bean Soup)

Of course this dish can be an all vegetarian dish just as how my Mom ate it when she was growing up; just remove the pork belly!

While my Mom was telling me the story of this dish, she teared up a little as it brought back many childhood memories. I hope that one day I’ll have kids of my own and share with them the many favourite dishes I grew up with and the stories that come with them 🙂

BON APPÉTIT

– Ally xx

myTaste.com

Auguest 2015: Marissa Mai

Cơm Gà (Vietnamese Chicken Rice)

Hi Everyone! Its Marissa from Maiyummy back again on Amcarmen’s Kitchen and it’s a pleasure for me to introduce the second and last dish for my week. Tonight’s dish is one that is known to finally endeavour the Vietnamese community through hardship and war, but 25 years ago, it was a dish invented with the idea to save locals through famine.

Cơm Gà (Vietnamese Chicken Rice)

From generation to generation, we cannot forget this dish as it commonly appears in Vietnamese gatherings and memorial days. The dish is called Cơm Gà (Vietnamese Chicken Rice), originally based in the Quang Nam province where I grew up. Chicken is the cheapest and most available food resource in Vietnam, and therefore it is widely popular and used in many typical Vietnamese dishes.

Cơm Gà (Vietnamese Chicken Rice) Ingredients

PREP TIME 20 MINS | COOKING TIME 45 MINS | SERVES 4

INGREDIENTS

For the chicken rice

  • 2 cups jasmine rice, uncooked
  • 2 pcs chicken whole legs (or a whole chicken)
  • 2-3 red bird’s eye chillies, sliced
  • 2 medium brown onions, halved and then sliced
  • 1 lemon, halved
  • 1 medium tomato, sliced
  • 1 stalk spring onion, sliced thinly
  • 1 thumb-sized ginger, peeled and julienned (reserve the peels)
  • 3 tbsp chicken powder
  • 2 tbsp fish sauce
  • 2 tbsp white vinegar
  • Ground sea salt and black pepper

For the heart/liver sauce

  • 100g chicken heart, washed and cleaned
  • 100g chicken liver, washed and cleaned
  • 2-3 garlic cloves garlic, crushed
  • 3 tbsp chicken stock (from the broth)
  • 1 & 1/2 tbsp white sugar
  • 1 tbsp chicken powder
  • Ground sea salt

METHOD

  1. Prepare the chicken: Add the chicken whole legs to a large pot of water together with about 2 tablespoons of chicken powder and the reserved peeled ginger skins. Boil the chicken for about 40 minutes or until it is cooked all the way through. Remove the chicken from the broth and set aside to cool down. Once cool, shred the chicken into small pieces. Return the bones to the broth and add about half of the onions. Keep it at a low simmer.
  2. Prepare the rice: Wash and rinse 2 cups of uncooked jasmine rice and then add to a rice cooker together with a tablespoon of chicken powder, julienned ginger, and about 2 & 1/2 cups of the chicken broth. Let it cook in the rice cooker until done (about 20 minutes).
  3. Prepare the chicken salad mixture: In a small bowl, add the white vinegar together with a few ice cubes and the remaining onions. Mix around and set aside for about 15-20 minutes for it to pickle.
  4. In a medium-sized bowl, add 2-3 tablespoons of chicken broth, about a tablespoon of ground black pepper, half a tablespoon of chicken powder, one red bird’s eye chilli, and juice of half a lemon. Mix around to combine. Then add the shredded chicken, pickled onions, and spring onions and combine all the ingredients together. Add some fish sauce if the chicken salad tastes a bit bland.
  5. Prepare the liver sauce: Heat about a tablespoon of peanut oil in a small saucepan over medium-high. Sauté the garlic for about 2 minutes or until fragrant and golden brown. Then add in the chicken heart and liver and cook for about 5 minutes. Add the chicken broth, chicken powder, and sugar, and let it cook for a further 5 minutes. Season with salt when it’s ready.
  6. Plate up: Place the chicken salad on top of the rice with the chicken heart and liver to the side. Then pour the heart/liver sauce on top of chicken salad, and serve with a side of the chicken soup and chilli sauce of your choice.

Cơm Gà (Vietnamese Chicken Rice)

Cơm Gà (Vietnamese Chicken Rice)

Hopefully this brought back a most authentic Vietnamese experience from where I am from, both culturally and through the experience of food. Thank you and have a lovely week 🙂

~ OH MAI YUMMYYYYY

Recipe Copyright © 2015 | Maiyummy

myTaste.com

Auguest 2015: Marissa Mai

Sò Lông Nướng Mỡ Hành (Grilled Mussels with Buttered Green Onions)

Hello Everyone! Hope you have a fabulous weekend so far 🙂 If you haven’t heard from me, my name is Marissa and I am a Sydney-based food blogger over at Maiyummy, where my primary focus is on Asian Street Food. This week I am extremely glad to be given such a wonderful opportunity to guest blog on Amcarmen’s Kitchen for the first time for a mini collaboration series known as Auguest. Allison first launched the idea of Auguest last month, and I am really honoured to be part of her series, reinventing our local street food cuisines into casual dining dishes. While she was staying at my place, we have cooked up multiple storms in the kitchen together where we both showed each other how to make some delicious Filipino and Vietnamese dishes. Later on today you can head on over to Maiyummy for Allison’s featured blog post.

Before I lead you guys into my secret Asian adventure, I should probably give a bit of an introduction to myself. I was born and raised in Vietnam and came to Australia in 2008 and have been living in Sydney ever since. At first I was really amazed by how diverse and multicultural Australia is, especially in food, language, and music, ranging from a variety of Korean, Japanese, Thai, Vietnamese, Greek, Italian, and many more. Back in Vietnam, I could only find authentic local Vietnamese food and some of the popular Asian flavours like Korean and Japanese; but to be honestly the taste is entirely different to what I have been experiencing here in Australia.

Sò Lông Nướng Mỡ Hành (Grilled Mussels with Buttered Green Onions)

I launched Maiyummy and made my first post in June 2015, exactly 2 months ago. A very special thanks Amcarmen’s Kitchen for being such a great supporter and influencer as she continuously motivated me to start up my blog while she was living at my place. We cooked, brunched, and shared our food together, creating memories that will last forever. Even though I am still new to blogging, I cannot thank her enough, and if you have the chance to, please follow her blog, Facebook, and Instagram page for great tips on cooking European food where I learned so much from her. While you’re there feel free to check out all my food adventures over on Instagram.

The recipe that I am going to share with my lovely audience today is a common seafood street food known as Sò Lông Nướng Mỡ Hành, or Grilled Mussels with Buttered Green Onions. Seafood is probably the most common ingredient in Da Nang, a place famous for its coastline, beautiful beaches, and of course a variety of fresh seafood. The idea of this dish originated from this city, and it simple, quick, and easy to cook; it is quite delicate and rich in texture. Not everyone can eat spicy or sour food, but this dish can accommodate the tastebuds of anyone who loves the freshness and the real taste of Vietnamese seafood.

Sò Lông Nướng Mỡ Hành (Grilled Mussels with Buttered Green Onions) Ingredients

PREP TIME 10 MINS | COOKING TIME 15 MINS | SERVES 3-4

INGREDIENTS

  • 1 kg fresh green mussels (or scallops), washed and cleaned thoroughly
  • 100g peanuts, roasted and crushed
  • 4 tbsp olive oil
  • 1 tbsp fish sauce
  • 2-3 red bird’s eye chillies, sliced
  • 1 stalk spring onion, sliced
  • Cilantro or coriander leaves
  • Ground sea salt and black pepper
  • Unsalted butter (optional)

METHOD

  1. Preheat oven to 180C (350F or gas mark 4). Line a baking tray with aluminium foil and set aside.
  2. Bring a medium-sized pot of salted water to a boil. Once boiling, turn the heat down to low and place the mussels into the pot for about 2-3 minutes or until their shells open up. Remove from the pot and rinse under cold water to stop the cooking process. Break one side of the shell open and place the mussel onto the prepared baking tray.
  3. In a small saucepan, heat up the olive oil over medium-high and add the sliced spring onions in. Toss them around using a spoon for about 5 minutes. Turn the heat off and add the fish sauce and half of the sliced chillies to the spring onion mixture. Stir to combine and then equally spoon the mixture over each mussel.
  4. Place them in the oven for about 7-8 minutes, then reduce the temperature down to 150C (300F or gas mark 2) in order for the mussels to cook slowly. Keep checking the oven and check till the mussels are sizzling, then immediately turn off the heat (for a creamier texture, I personally add a little bit of butter on the top of the mussels during the last few minutes of its cooking time before taking them out of the oven).
  5. Remove the mussels from the oven and arrange them onto a wooden board. Garnish with some crushed peanuts and remaining chillies. Serve them with salt, pepper and coriander leaves. Enjoy!

Sò Lông Nướng Mỡ Hành (Grilled Mussels with Buttered Green Onions)

Sò Lông Nướng Mỡ Hành (Grilled Mussels with Buttered Green Onions)

HAVE A LOVELY WEEK 🙂

~ OH MAI YUMMYYYYY

Recipe Copyright © 2015 | maiyummy

PS: This is Allison here writing a quick note to apologise for the late upload – I was busy all day yesterday and didn’t have time to proof read Marissa’s post, do some editing (both photographs and writing) to be able to get this recipe up yesterday. Nonetheless I hope you enjoyed her recipe today and stay tuned for another Vietnamese dish by her tomorrow! xx

myTaste.com

Auguest 2015: Brendon D'Souza

Brendon’s Giant Chocolate Chip Cookie

Hi Everyone! It’s Brendon from Brendon The Smiling Chef again with my second delicious dessert post as part of Amcarmen’s Kitchen’s Auguest series. It’s been a pleasure to be able to share my recipes with you, and next week you can visit my website to check out Ally’s mouthwatering recipes for Adobo and Sinigang.

Brendon's Giant Chocolate Chip Cookie

Here in Australia we often take for granted just how lucky we are to have an abundance of fresh, delicious food whenever we want it. On my travels to developing parts of India or Peru I saw firsthand the immense poverty and malnutrition that many people experience in their daily life. With populations on the rise, food is becoming an increasingly scarce and precious commodity. Back home in Sydney I’ve volunteered for a number of years with St. Vincent De Paul Society in their Vinnies Van appeal, providing fresh meals to people less fortunate. I’ve seen their struggle and this is why find it extremely difficult to hear that in the state of New South Wales alone (where I live) we throw away over 1.1 million tonnes of food each year! It’s a ridiculous amount and we really need to be more careful with our food consumption habits if we are to create a sustainable future for the generations to come.

The recipe I’d like to share with you today is part of a collection of recipes I like to call “Up-cycled Food”. The idea is simple – take your leftovers or parts of ingredients you would commonly throw away (such as parsley stalks or vegetable stems to name a few) and turn them into a delicious meal. At the end of my Cookies and Cream recipe from Tuesday’s post, I promised to show you what you can do with your leftover chocolate chip cookie dough. Sometimes I genuinely cannot be bothered to roll out a million tiny balls for individual cookies. Instead I press the dough into a cake tin or slice pan and bake it as one giant choice chip cookie. It still tastes absolutely delicious and much faster to make. You can either use your leftover cookie dough from Tuesday’s recipe (and simply skip straight to step 3) or make some more dough using the recipe below.

Brendon's Giant Chocolate Chip Cookie

PREP TIME 10 MINS | COOKING TIME 20-30 MINS | MAKES 2 GIANT COOKIES

INGREDIENTS

  • 250g unsalted butter, softened
  • 200g dark chocolate, chopped
  • 200g milk chocolate, chopped
  • 1 cup brown sugar
  • 1 cup plain flour
  • 1/4 cup baking powder
  • 1 free range egg
  • 1 tbsp vanilla bean paste (or extract)

METHOD

  1. Pre-heat the oven to 170C (325F or gas mark 3). Grease two 20cm spring form cake tins with butter and line with a disc of baking paper. Place each onto a baking tray and set aside.
  2. Place the butter and sugar and vanilla into the bowl of an electric mixer and beat until fluffy. Alternatively use electric hand beaters. Add the egg and beat until combined. Add the flour, baking powder and salt and stir to form a smooth dough. Add the chopped chocolate stir to combine.
  3. Divide the dough in half and press into each cake tin using your fingertips.
  4. Place the baking tray on the middle shelf of the oven and bake for 20-25 minutes until for a soft, fudgy cookie. Increase cooking time to between 25-30 minutes for a firmer, biscuit-y texture. Remove from the oven and allow to cool.
  5. Cut into wedges and serve. Any leftover ganache from Tuesday’s recipe tastes delicious with these gooey cookies. Simply warm it up then drizzle for a full-on chocolate hit!

That wraps up things for me here at Amcarmen’s Kitchen. It’s been a pleasure to be a part of this Auguest series. You can check out all my cooking and food blogging adventures at Brendon The Smiling Chef. While you’re there check out my Instagram page @brendonthesmilingchef.

Brendon's Giant Chocolate Chip Cookie

Recipe Copyright © 2015 | brendonthesmilingchef

Happy cooking and keep smiling,

Brendon D’Souza 🙂

myTaste.com

Auguest 2015: Brendon D'Souza

Brendon’s Cookies & Cream

Hi Everyone! Hope you’re all having a lovely day wherever you are. My name is Brendon D’Souza and I am a writer and food blogger from Sydney. I’m very honoured to be a part of this Auguest series and have some exciting dessert creations to share with you over the next two posts.

I launched my website Brendon The Smiling Chef in 2012, posting simple recipes that I had cooked for dinner. I developed skills in food styling and photography through internships and writing and editing roles at Green Lifestyle, Grapeshot, Australian Catholics and Youth Food Movement Australia and started to apply these skills to my recipe posts. This year I plan to make a few exciting changes with the website and include a restaurant review section called “Smiling & Dining @” which features reviews that I publish at Zomato While you’re there feel free to check out all my foodie adventures in Instagram at @brendonthesmilingchef.

Brendon's Cookies & Cream

I met Ally a few months ago at a food blogging seminar held in Sydney and she told me all about her passion for exploring cultures through food, which is something that I too love! We caught up a few weeks ago for a fabulous cooking day where she showed me how to make some delicious Filipino recipes (Which you can check out at Brendon The Smiling Chef next week). The recipe that I’m going to share with you today is a bit of an invention that I have drawn from my experiences of growing up here in Australia. Like Ally, I too am a bit of a third-culture foodie. My family are Indian and are originally from the state of Goa which sits on the West Coast of India. Goa is largely influenced by the Portuguese, who colonised the region in around the 16th Century, so our culture, customs and cuisine are surprisingly similar to Europe. I was born in Bahrain and lived there for two years before we migrated to Australia in the mid-nineties.

Growing up in Western Sydney, I was surrounded by a wealth of multicultural diversity and from a young age I was introduced to the cultures and cuisines of the Philippines, Southern America, Malta and Vietnam to name a few. Despite all this I have to admit that as a child I was very embarrassed about being Indian. It’s one of side-effects of growing up in Anglo-Saxon society. I saw myself as different from all the other kids at school. I had black hair, brown skin and brown eyes rather than blonde hair and blue eyes. Now that we’ve all grown up, a lot of my friends have said that they experienced these feelings too! I would cringe when I opened my lunchbox to find the beautiful Goan prawn curry and rice that mum had packed for me. What would the other kids think? We never really ate much Indian food at home when we were younger because my sister and I, being True Blue Aussies, didn’t like the pungent spices used in most of our cooking. They were too hot for our tiny tastebuds to handle. In these instances, six-year-old Brendon would drag a chair to the kitchen and reach for a jar of tomato paste sauce to put together my version of Spaghetti Bolognese; 1 kilogram of beef mince with 1 jar of tomato paste, yes paste (#IcantbelieveIdidthat), stirred through.

Brendon's Cookies & Cream

The 2000’s came along we noticed a number of American food products appearing on the supermarket shelves including Pop Tarts, Oreos, and Krispy Kreme Donuts. My favourite was Hershey’s Cookies ’n’ Creme bar, (or the Mars® counterpart Dove), a dreamy combination of white chocolate with tiny chocolate cookie pieces. It was ever popular among my Filipino friends. They had experienced this delight for years because it was sold in all the Filipino grocery stores. We saw it as a luxury because it was so new! It became one of my favourite flavour combos and, to nine-year-old Brendon’s delight, even started appearing in ice creams and cheesecakes!

I was playing around with the idea of reinventing Cookies and Cream and turning it into a sophisticated dessert. Chocolate chip cookies would definitely feature because who doesn’t love a good chocolate chip cookie? A white chocolate and vanilla bean ganache could represent the Cream and a 70% dark chocolate ganache would balance the sweetness. It had been a while since I’d tried to make macarons from scratch but I thought it would be nice to have some chocolate almond cigars to add another texture and flavour to the dessert. We made up the recipe for these while referring to the Master Adriano Zumbo’s for rough measurements. They weren’t as smooth on top but they made delicious chewy cookies.

Brendon's Cookies & Cream Ingredients

PREP TIME 30 MINS | COOKING TIME 15 MINS | SERVES 2-3

INGREDIENTS

For the white chocolate and vanilla bean ganache

  • 100ml pure cream
  • 200g white chooclate, chopped
  • 1 tbsp vanilla bean paste
  • 1 tsp glucose syrup

For the bitter dark chocolate ganache

  • 100ml pure cream
  • 150g dark chocolate (min. 70% cocoa solids)
  • 1 tsp glucose syrup

For the chocolate almond cigars

  • 1 free range egg white
  • 250g caster sugar
  • 150g almond meal
  • 2 tbsp Dutch process cocoa powder

For the chocolate chip cookies

  • 250g unsalted butter, softened
  • 200g dark chocolate, chopped
  • 200g milk chocolate, chopped
  • 1 cup brown sugar
  • 1 cup plain flour
  • 1/4 cup baking powder
  • 1 free range egg
  • 1 tbsp vanilla bean paste (or extract)

METHOD

Preparation

  1. White chocolate and vanilla bean ganache: Place the cream and white chocolate into a microwave-safe bowl and stir to combine. Heat for 30 seconds on medium then give the bowl a stir with a spatula. Continue to heat and stir the ganache in this way until smooth. Alternatively you can place the chocolate and cream into a heatproof glass bowl set over a pan of simmering water and stir until melted. When smooth, add the vanilla bean paste and the glucose syrup and stir until smooth. Allow to cool completely. Transfer the ganache to a disposable piping bag, seal the end with a rubber band and place in the fridge until cold but pliable.
  2. Bitter chocolate ganache. Place the cream and dark chocolate into a microwave-safe bowl and stir to combine. Heat for 30 seconds on medium then give the bowl a stir with a spatula. Continue to heat and stir the ganache in this way until smooth. Alternatively you can place the chocolate and cream into a heatproof glass bowl set over a pan of simmering water and stir until melted. When smooth, add the glucose syrup and stir until smooth. Allow to cool completely. Transfer the ganache to a disposable piping bag, seal the end with a rubber band and place in the fridge until cold but pliable.

Chocolate Almond Cigars

  1. Pre-heat the oven to 150C (300F or gas mark 2). Line a baking tray with baking paper and set aside.
  2. Place the egg white into a clean stainless steel or glass bowl free from grease or dirt. Whip to soft peaks using clean electric beaters. Add 1 tbsp of castor sugar to the egg whites and beat for 20-30 seconds or until the sugar has dissolved. Continue to add the sugar in this way until you have a glossy meringue. Sprinkle the almond meal and cocoa powder over and fold using a spatula to form a smooth batter.
  3. Transfer the batter to a disposable piping bag, twist the opening to enclose the filling and carefully cut off the tip of the bag to create a hole 2cm in diameter.
  4. Pipe 5cm cigars onto the baking sheet. You will need about 8 for this recipe. Allow them to rest for 10 minutes.
  5. Place the tray on the middle shelf of the oven and bake for 10-15 minutes or until the cigars have risen. Remove the tray from the oven and allow them to cool. When cool, take your piping bag with the white chocolate ganache and pipe a line down half the cigars. Sandwich with another cigar on top.

Brendon's Cookies & Cream

Chocolate Chip Cookies

  1. Place the butter and sugar and vanilla into the bowl of an electric mixer and beat until fluffy. Alternatively use electric hand beaters. Add the egg and beat until combined. Add the flour, baking powder and salt and stir to form a smooth dough. Add the chopped chocolate stir to combine.
  2. Roll out 12 cookies using 2 tsp cookie dough for each. Place them onto the prepared baking tray leaving about 3cm between each cookie for spreading. You will only need a small amount of the dough for the recipe but I’ll show you what you can do with your leftovers in my next recipe. Wrap the leftover dough tightly with cling wrap and place in the fridge.
  3. Place the baking tray on the middle shelf of the oven and bake for 10-15 minutes until the cookies have spread. Remove from the oven and allow to cool.
  4. Crumble 4 of the cookies to form cookie crumbs.

Plate up the dessert

  1. This is where the fun begins. Feel free to let your imagination run wild. Sprinkle the cookie crumbs across 4 serving plates. Pipe some white chocolate ganache onto each of the serving plates. Then rest a cigar along the ganache. Divide the chocolate chip cookies among the plates. Make a 1cm hole in the piping bag with the biter chocolate ganache and pipe them around the plate. Serve.

Ally and I had lots of fun with the plating. Check out our attempts.

Brendon's Cookies & Cream

Brendon's Cookies & Cream

Recipe Copyright © 2015 | brendonthesmilingchef

Happy cooking and keep smiling,

Brendon D’Souza 🙂

myTaste.com

Auguest 2015: Jialng Mew

Polvorón Pops (Popvoróns)™

Hello everyone, it’s Jialing again, with my second/final recipe for this week. It’s been a pleasure sharing my recipes with you, and I hope to do it again in the future, but in the meantime, feel free to add me on Instagram – @jialingmew. Also, check out Tuesday’s Chicken Pastel Mini Pot Pies if you haven’t already 🙂 Today’s recipe is another one of my Filipino favourites, but this time based on a sweet treat called Polvorón, which is made with powdered milk and toasted flour and wrapped in colourful cellophane.

Polvorón Pops (Popvoróns)™

I’d previously tried to bring packs of polvoron back to Sydney with me after a trip back to Manila so that my Australian friends could try it, but was told at Sydney Airport Customs that it was on the permanent confiscation list, because of the powdered milk. But fortunately, Australia is not doomed to a polvorón-less fate! The ingredients are actually all very easy to find, and had I realised at the time that they were so simple to make, I wouldn’t have had to go through all that trouble with Customs.

Polvorón Pops (Popvoróns)™

To be quite honest, although I had made polvorón before, a very long time ago, I sort of had to make up this recipe as I went along, adjusting the proportions using some educated guesswork. Traditionally, polvoron is shaped with a special metal tool – that I did not have access to. So I was stuck with the option of cookie cutters, which of course, were nowhere to be found (and probably would not work out at all, looking back in retrospect), and finally, shaping them by hand. I then had one of my pressure and stress-induced moments of genius, and polvorón cake pops happened! Luckily it worked out (better than expected, actually), so I didn’t have to come up with a different recipe, and I can quietly sit down to calmly write about this experience. The recipe can easily be adjusted to make more (or less), which is a bonus! So we all lived happily ever after ❤

Polvorón Pops (Popvoróns)™ Ingredients

PREP TIME 20 MINS | COOKING TIME 15 MINS | MAKES 16-20 POPS

INGREDIENTS

  • 1 cup chocolate chips or melts (I used 1 cup each of dark and white chocolate)
  • 1 cup plain flour, sifted
  • 1/2 cup unsalted butter, melted
  • 1/2 cup powdered milk
  • 1/2 cup white sugar
  • Additional toppings (i.e. crushed nuts or cereal, desiccated coconut, sprinkles, cocoa powder, etc)

METHOD

  1. Using a frying pan or wok, toast the all purpose flour gently on low-medium heat, stirring the flour constantly until it is very lightly browned throughout, about 10-15 minutes. You should notice a change in the aroma of the flour, though the colour change will be very slight, so keep a watchful eye on the pan! Do not overheat, as the resulting taste will be bitter (a helpful tip is to keep a small bowl of all-purpose flour nearby so you can keep checking the colour difference). Once flour is toasted, remove from heat and pour into a large heat-safe mixing bowl.
  2. Make the polvorón mixture by adding the powdered milk and white sugar to flour, stirring until well combined. Add the melted butter and continue to stir (or use hands) until the mixture resembles wet sand, and holds when pinched. At this stage, you can eat some of the polvorón mixture (highly recommended – it’s divine) and add more sugar or powdered milk to your liking. If the polvorón mixture is too dry, add a teaspoon of melted butter.
  3. Using your hands, firmly pack a small amount of the mixture into a 1-inch ball, rolling in between palms to shape. Set completed ball aside on a baking paper-lined plate or small tray, and repeat until the rest of the mixture is used up (should make around 16-20 balls).
  4. Using toothpicks or BBQ skewers (I used BBQ skewers, and cut them in half), very slowly and carefully insert pointed end about 2/3 of the way through each ball. If the ball cracks, gently press around cracked areas and reshape around the inserted skewer. Place the polvorón pops in the fridge to harden while preparing the next step.
  5. Melt chocolate using a double boiler method, being careful not to allow any steam into the chocolate. Alternatively, place into a microwave-safe bowl and heat in the microwave on high for 15 seconds at a time, stirring between intervals, until chocolate is fully melted (please note that you may need to adjust intervals according to your microwave).
  6. Place bowl of melted chocolate on a clean surface, and pour selected toppings separately into small bowls or dishes arranging work surface so that all the bowls and dishes are all adjacent to each other.
  7. Remove polvorón pops from the fridge, and dip one at a time into the melted chocolate mixture (the chocolate will start to set once removed), then immediately into the toppings. Transfer back to the tray and continue dipping and coating the remaining pops.
  8. Serve immediately, or store in a container and keep refrigerated until needed. I’m not exactly sure what the shelf-life of these is, but I’d recommend eating them within 2 weeks – if you can even resist eating them for that long #polvoronparty #theend

Polvorón Pops (Popvoróns)™

Polvorón Pops (Popvoróns)™

Recipe Copyright © 2015 | jialingmew

ENJOY YOUR MEAL!

Jialing.

myTaste.com

Auguest 2015: Jialng Mew

Chicken Pastel Mini Pot Pies

Hello Everyone, I’m Jialing, and I’ll be taking over Amcarmen’s Kitchen for this week, so watch this space for my experimental Filipino fusion recipes! Like Allison, I come from a Filipino background, but didn’t really start doing a lot of cooking until my university years. My cooking style is… hazardous… I may set off the occasional fire alarm, or forget a key ingredient or two, but don’t worry! My recipes for this week have been Amcarmen-approved. Today’s recipe features one of my favourites, Chicken Pastel, which is a cream-based chicken and vegetable dish, typically eaten with rice, as typical with most Filipino cuisine.

Chicken Pastel Mini Pot Pies

Today’s recipe came into existence after I made a batch of chicken pastel using 1kg of meat, then realising too late that I only had 2 cups of rice left in the pantry, and wasn’t due for a Coles-run for another week 😦 I decided to make use of recently purchased ramekin sets by turning the pastel into pot pies, which proved to be a big success with my boyfriend (or so I surmised, after returning to a mountain of empty ramekins). The pastel is adapted from my mother’s recipe, using chicken thighs, which she claims is tastier (and she’s right, of course), but be warned that this recipe makes several servings of pastel, simply because there are a lot of components, but feel free to play around with the ratios.

So apparently, after doing a bit of research, Filipinos adapted this dish from the Spanish Pastel de Pollo – essentially the same thing – which is actually eaten with a pastry crust. Not rice. So… this recipe isn’t so much fusion food as accidentally recreating the recipe in its original state… But… anyway.

Chicken Pastel Mini Pot Pies Ingredients

PREP TIME 2 HOURS | COOKING TIME 1 HOUR 35 MINS | MAKES 6 MINI POT PIES

INGREDIENTS

For the marinated chicken

  • 500g chicken thigh fillets, cubed
  • 3 tbsp light soy sauce
  • 1 & 1/2 tbsp flour
  • Juice of 1/2 a lemon

For the pastry

  • 2 & 1/2 cups plain flour
  • 2/3 cup ice water
  • 250g unsalted butter, chilled and cut into 1 cm cubes
  • 1/2 tsp salt
  • 1/2 tsp white sugar

For the chicken pastel filling

  • Prepared marinated chicken
  • 1 can (420g) cream of mushroom soup
  • 1 can (230g) vienna sausage*, cut into 1/2cm pieces, reserve the liquid
  • 1/2 cup grated tasty cheese
  • 6 large cup mushrooms, diced
  • 3 garlic cloves, minced
  • 2 medium-sized carrots, peeled and cubed
  • 1 large potato, peeled and cubed
  • 1 large red Spanish onion, diced
  • 1 medium-sized capsicum, diced
  • 1 chicken bouillon cube

*Alternatively you can use cocktail sausages or pre-cooked chorizo sausages

METHOD

Preparation

  1. Marinate the chicken: Toss the chicken thigh fillet with lemon juice and soy sauce, and marinate in a large covered bowl for at least an hour (or refrigerate overnight for juicer chicken).
  2. Once you are ready to prepare the chicken pastel (after you have made the pastry), add the flour to the chicken marinade, making sure to mix evenly.
  3. Prepare the pastry dough: Combine the flour, white sugar, and salt in a large mixing bowl. Using a pastry cutter (or a blunt knife, in my case), cut the butter into the flour until it resembles a coarse, pebbly mixture. Be careful not to overwork the mixture as this will cause the butter to melt before baking and reduce the pastry’s flakiness!
  4. Slowly add the iced water, one tablespoon at a time, gently stirring it into the flour until the mixture just holds when pinched (it should still look crumbly, but not doughy).
  5. Carefully shape mixture into two round disks (if the dough does not hold, add another tablespoon of iced water), then cover each with plastic wrap and refrigerate them for at least one hour. While the pastry is chilling, prepare the filling.

Chicken Pastel Filling

  1. Heat a large frying pan over medium-high. When the oil is hot, add the garlic stirring until fragrant and golden brown, followed by the onions. While onion is cooking, add the chicken bouillon cube.
  2. Once the onions are soft and translucent, add the chicken together with the marinade liquids. Stir continuously until the marinade thickens slightly and the chicken is almost cooked through.
  3. Add the carrots and potato, cooking them until softened for about 3-5 minutes. Then add in the capsicum and mushroom, cooking them further for another 3-5 minutes.
  4. Once all vegetables are cooked through, add cream of mushroom soup, plus half the can of water or milk if you prefer, stirring well (if you are using cocktail sausages or chorizo, use one full can of water/milk). Reduce the heat to low and allow the mixture to simmer on the stove for about 15 minutes.
  5. Add the vienna sausage pieces and the reserved liquid to the chicken mixture, and stir, allowing to simmer for another 5-10 minutes until the sauce is thickened.
  6. Remove from stove, and allow the chicken pastel to cool down a bit while preparing the pastry.

Chicken Pastel Mini Pot Pies

Prepare the pastry for the pies

  1. Preheat oven to 200C (200F or gas mark 6). Spray 12 ceramic ramekins with cooking oil (or grease with butter) and set aside.
  2. Sprinkle some flour onto a clean tabletop or surface. Remove one disk of pastry dough from fridge (leave the other in the fridge while you work, to make sure the butter in the mixture remains chilled), and gently work into a ball. Cut into 6 equal portions.
  3. Working with one portion at a time, divide into two pieces – one piece should be approximately 1/3 of the portion (this will be the top) and the remaining 2/3 of the portion will be used to line the inside of the ramekin.
  4. Roll out the larger portion into a circle large enough to fit inside the ramekin. Gently drape the pastry into the ramekin, pressing it onto the bottom and sides. Smooth out the folds of pastry so that the entire interior of the ramekin is covered, with a slight border of pastry going over the lip of the ramekin.
  5. Spoon enough chicken pastel filling into the pastry-lined ramekin, ensuring that it does not spill over the edge.
  6. Roll out the remaining 1/3 portion of pastry into a circle, and gently place on top of the filled ramekin. Join edges to pastry lining the lip of the ramekin, pinching the pastry securely.
  7. Using a small paring knife, cut slits into the top (this will allow the heat to escape, so the pie tops do not explode in your oven).
  8. Repeat with remaining 5 portions (to make process quicker, first divide all the portions into 1/3 and 2/3 pieces, and then roll them out and line the six ramekins. Fill the ramekins, then pinch the tops into place and cut slits).
  9. Arrange the ramekins on a baking tray, lined with baking paper (this will catch any drips from the filling). Bake in preheated oven for 45-60 minutes (may or may not take longer depending on your oven), or until tops are golden and pastry is flaky.
  10. Once the first batch of pot pies are in the oven, repeat steps 13-19 with the remaining pastry dough from the fridge.
  11. Once cool, the pies should come out of the ramekins quite easily, with gentle help from a breakfast knife.
  12. Serve hot and enjoy with a side of a green leafy salad of your choice.

Chicken Pastel Mini Pot Pies Process

Chicken Pastel Mini Pot Pies

Baked pies can be refrigerated for up to one week, or frozen for up to 3 months. Place frozen pies in refrigerator overnight to thaw. To heat refrigerated pies, place in an oven preheated to 200 C for 15-20 minutes.

Unfortunately, the recipe for the chicken pastel filling and pastry don’t quite match up in terms of quantity, so there WILL be leftover chicken pastel. But never fear! It is quite delicious eaten with a bowl of steaming white rice, in true Filipino fashion #pastelfordays

Chicken Pastel Mini Pot Pies

Recipe Copyright © 2015 | jialingmew

ENJOY YOUR MEAL!

Jialing.

myTaste.com

Auguest 2015: An Introduction

Auguest 2015: An Introduction

Hello Everyone! Yes, I am aware that I said today I would get right back into Review Sundays since I did a post on the Sisterhood of the World Bloggers Award last week. However, since it’s August and I’ve got some exciting content for you guys this month, I thought I’d take this opportunity to explain what will happen on Amcarmen’s Kitchen for the upcoming month!

I came up with this idea about a month ago or so while I was in the shower – well actually, the idea already existed, but I used that as a base and put a food blogger twist to it.  Before I get into it, I should probably make mention that I did not misspell August in the title of this post – and yes you read it right as ‘Auguest’ and here is why:

The idea is based on a famous YouTube celebrity known as Tyler Oakley. If you don’t already know him, you can look him up on YouTube, especially his ‘Auguest’ collaboration videos. In a nutshell, two years ago he started something known as ‘Auguest’ where for everyday (maybe just weekdays I can’t remember) in August, he uploads collaborations with other well-known YouTubers. So therefore, my idea for content this month will be based on the concept of collaborating with other foodie friends and/or food bloggers and have them guest blog on Amcarmen’s Kitchen for the month of August.

How this will work is that for example, today’s content on my blog would feature a post/recipe written by another blogger, while their post/recipe on their blog will be written by me. Then next week, another blogger will be featured on my blog, and so on. I thought that this would be a great way to get in touch with other food bloggers as well as a great opportunity to network and produce some really cool content for our blogs/websites. It didn’t quite work out as I hoped it would as I initially wanted to feature at least 12 different bloggers on my blog. It was actually quite difficult to find bloggers who were interested in taking part, and also it was a bit difficult for me to organise with so little time on my hands. I do hope to make this a yearly thing, so I hope that it will actually work out the way I had initially envisioned it!

I still have 4 foodies/bloggers that will be guest blogging on Amcarmen’s Kitchen for the rest of August. The theme of this year’s collaboration will be ‘Back to your Roots’ – cooking up dishes from your own cultural background and basically food that you love eating. In addition, I will still be writing reviews on Sunday’s from next week onwards – so don’t miss me too much! And I will still be writing, on the other blogger’s page so you can still head on over to their blog, when the post goes live to have a read 🙂

Cheers!

– Ally xx


I wanted to keep this to last because I didn’t want the beginning of the post to start of with a whole chunk of rant that has nothing to do with the actual post. Just think of this a bonus material on the life of Amcarmen’s Kitchen when not actually in the kitchen.

So, I just wanted to let you all know that I am back in Singapore (arrived just a few hours ago) and boy was it hectic! First off all, the baggage belts in the Sydney Airport this morning were all down for some reason – like actually across the WHOLE airport, which meant that baggages had to be manually transported from the check-in counters to the aircraft. I thought, okay maybe the flight might be delayed for a bit since they needed to do this. When I boarded the plane and was waiting for take off, they made an announcement that not ALL baggages were loaded into the aircraft that I was on because of that whole system being down and they didn’t want the flight to be delayed. They said that the baggages would be loaded onto the next flight out of Sydney to Singapore which was 3 hours behind the flight I was on.

When I got off the plane, I waited for about 10 minutes at the baggage belt after passing immigration, HOPING that my bags travelled with me. Ground staff then started approaching people saying that what was already on the belt were the bags that the aircraft was able to carry and that no new bags were being placed on the belt for collection. I could’ve sworn that I saw less than 50 bags on the belt. Terrible! And they were all priority bags for suites, first, and business class people. So after that I had to queue up at the lost and found with practically half of the other passengers who didn’t get their bags as well. Good thing I was able to beat a few people and was kind of sort of at least in the first quarter of the line, but I swear the line did not even move for like 20 minutes. Anyway, I got out of the airport 2 HOURS after my flight landed – I blame Sydney Airport for such unnecessary hassles.

Good thing I have extra clothes and underwear packed in my hand carry, and an extra $120 to compensate for the troubles. I overheard a lady saying that she had no clothes at all because they were all packed in her check-in baggages – and she leaves the next morning to another destination. I feel sorry for those who are in that situation and hope that they get their bags soon! And I hope I get mine tomorrow morning as well!