Auguest 2020: Jialing Mew

Roasted Purple Winter Vegetable Salad

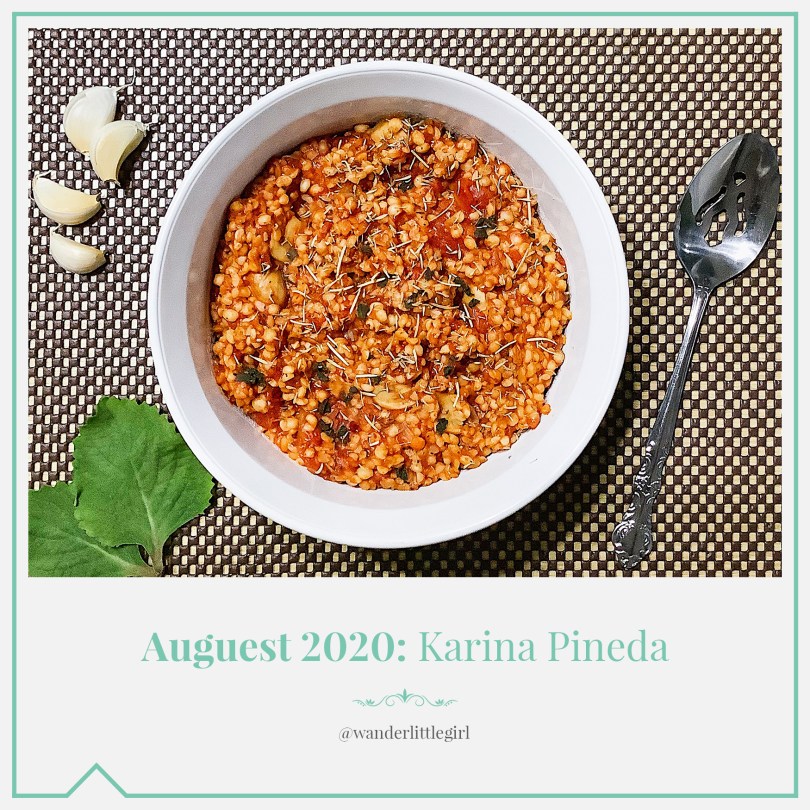
“Waste not, want not.” — Jialing Mew

Short of blackened and burnt, I’ve learned from my many Auguest disasters that you can almost always save a dish on the brink of catastrophe! Just get creative, do a quick Google search, or go with your gut. I’m also a big believer of using up what you have, even if it means not quite following the recipe to a T (shoutout to anyone with random vegetable halves rotting away in their fridge!). In the same vein, ingredients can always go further than you think. Simmer bones for a flavoursome broth, that, when combined with your salvaged refrigerator produce, equals soup for supper! It’s kinder on your wallet and better for the environment.

Auguest 2020: Jialing Mew


So before we get started, I would like to explain that were it not for a HIGHLY misleading label at my local supermarket, this dish would have been much more on-theme (surely I can’t be the only one who didn’t know that ‘Purple Sweet Potato’ is in fact WHITE once peeled??). Also. Having never actually cooked with beetroot before, I was woefully unaware of how shockingly long it takes to roast in the oven, thereby obliterating whatever small amount of purple pigmentation my poor adjacent sweet potato had to begin with.

Anyway. Just your standard Auguest post featuring Food Fiascos by Jialing.

Roasted Purple Winter Vegetable Salad

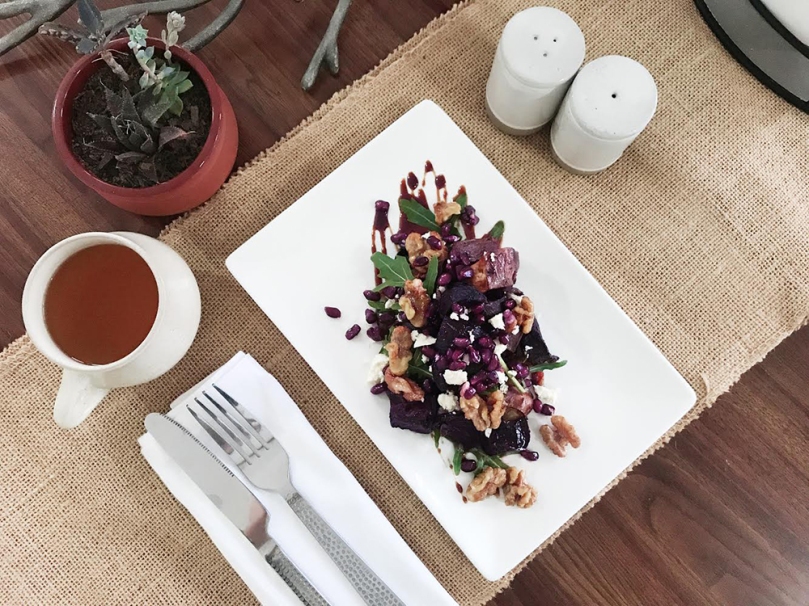
Actually, though, apart from the frustrating lack of purple, I consider this to be one of my standout Auguest recipes, as it makes for a pretty fab morning meal. Feel free to skip the pomegranate if unavailable (if we’re being completely honest, that was mainly brought onboard in an effort to edge our way closer to the violet spectrum, though it did turn out to be a nice addition). I do highly recommend the candied walnuts and feta, though!

This dish comes together with fairly minimal effort, despite the lengthy roast-time. Plus, it’s warm and carb-y – the good kind of carbs, I’m told! – making it the perfect cure for your winter morning blues. P.S. keep reading until the end of the recipe for a sneaky vegan plot-twist #Auguest2016

Roasted Purple Winter Vegetable Salad Ingredients

PREP TIME 15 MINS | COOKING TIME 2 HRS 30 MINS | SERVES 4-6

INGREDIENTS

For the roasted vegetables

  • 2 tbsp balsamic vinegar
  • 2 tbsp maple syrup
  • 2 tbsp olive oil
  • 1 tsp thyme
  • 3 beetroots, cut into 2cm cubes
  • 3 red onions, cut into wedges
  • 1 purple sweet potato, cut into 2cm cubes
  • 1 tsp flaky sea salt (or 1/2 tsp regular salt)
  • Pepper

For the candied walnuts

  • 1 cup walnut halves
  • 2 tbsp maple syrup

For the balsamic glaze

  • 2 tbsp balsamic vinegar
  • 2 tbsp maple syrup

To assemble

  • 50g baby rocket leaves
  • 1 cup feta, crumbled
  • 1 pomegranate (arils only)

Roasted Purple Winter Vegetable Salad Ingredients

METHOD

  1. Preheat your oven to 180C (160C fan-forced), and line a baking tray with parchment (this is for the walnuts) plus a large roasting tray with parchment paper or aluminium foil (this is for the vegetables).
  2. First prepare the candied walnuts. Toss the walnuts with the 2 tbsp maple syrup until evenly coated. Spread out over your lined baking tray and place in the oven for 10 minutes (in the meantime you can begin to prepare your vegetables), then take out and turn pieces over to ensure even cooking. Return to the oven for a further 10 minutes, then transfer from parchment onto a plate for cooling.
  3. To prepare the roasted vegetables, first combine the 2 tbsp balsamic vinegar, 2 tbsp maple syrup, 2 tbsp olive oil, 1 tsp thyme in a bowl and lightly whisk with a fork until emulsified.
  4. In a large bowl, toss the beetroot, red onion, and sweet potato with the balsamic mixture until evenly coated. Transfer to a roasting tray and season generously with pepper and 1 tsp flaky sea salt. Roast in the oven for 1 hour, then turn the vegetables to make sure they cook evenly, and return to the oven for another 1 hour.
  5. In the last 15 minutes or so of roasting, you can start to arrange your rocket leaves on a serving dish, and prepare the balsamic glaze by heating the 2 tbsp of balsamic vinegar and maple syrup over low heat until it begins to bubble (about 2-5 minutes). Remove from heat after 10 seconds and let cool slightly (it will thicken as it cools).
  6. Arrange roasted vegetables on top of the rocket leaves, and top with crumbled feta and pomegranate arils. Drizzle with balsamic vinegar, serve, and enjoy!

Roasted Purple Winter Vegetable Salad

Tips:

  • To make it vegan, simply omit the feta (or use a plant-based substitute).
  • To make this dish even better (but less vegan) serve on toasted sourdough bread topped with poached eggs for the ultimate Instagram-worthy brunch!

Photo Courtesy & Recipe Copyright © 2020 | Jialing Mew (@jialingmew)

BON APPÉTIT

– Jialing Mew

myTaste.com

Advertisement
Auguest 2020: Olive

Ube-glazed Doughnuts

“I’m a homecook and food photography enthusiast.
For me, it’s not just food, it’s my love language for family. I also believe that even if life isn’t perfect, having great food brings magic and creates good memories that makes life colorful.” — Olive

Auguest 2020: Olive

As I crave having sweet and indulgent doughnuts with my favorite flavor Ube, I thought, why not make them at home instead? Making homemade glazed doughnuts is easier than you think – with practice that is. I’m taking a deep dive into homemade doughnuts that taste like the ones you get from your favorite bakery – incredibly delicious and comforting.

Ube-glazed Doughnuts

Being able to make them from scratch without leaving the comforts of home is so much more fun. For my first attempt ever at making homemade doughnuts, they definitely aren’t the prettiest, but definitely delicious! Fried, sugary, old-fashioned, and comforting!

Ube-glazed Doughnuts Ingredients

PREP TIME 45-50 MINS | COOKING TIME 15 MINS | MAKES approx. 15 DOUGHNUTS

INGREDIENTS

For the doughnut batter

  • 2 cups all-purpose flour, plus more for dusting
  • 1 cup full-fat greek yoghurt
  • 1/2 cup granulated sugar
  • 2 large free-range eggs
  • 2 tbsp unsalted butter, melted
  • 2 & 1/2 tsp baking powder
  • 1 tsp salt
  • 1 tsp vanilla extract

For the ube-glaze

  • 1 cup powdered sugar
  • Pinch of salt
  • Ube flavouring
  • Water
  • Vegetable oil, for frying

METHOD

  1. Doughnuts: Combine all the ingredients for the doughnut batter in a large mixing bowl. Turn it out onto a lightly floured surface and knead it by hand for about 2 minutes.
  2. Lightly grease a large bowl with oil and place the dough in the bowl, turning it to coat all sides in the oil. Cover the bowl with a clean kitchen towel and set aside in a relatively warm environment to let the dough rise/rest for about 45 minutes or until doubled in size.
  3. When the dough is ready, punch it down to release the air.Remove dough from the bowl and turn it out onto a lightly floured surface. Roll the dough out and using a doughnut cutter, cut out about 15 doughnuts. If you can’t quite fit 15, re-roll the scraps and cut more out.
  4. Place the doughnuts and doughnut holes on a baking sheet lined with parchment paper. Loosely cover and allow to rest as you heat the oil. They will rise a bit as they rest.
  5. Prepare and heat the vegetable oil for frying in a large heavy-duty pot set over medium heat.
  6. Fry the doughnuts for 1 minute each side. Once done, carefully place the fried doughnuts over a cooling rack.
  7. Ube-glaze: Combine all the ingredients needed for the glaze in a medium-sized mixing bowl. Whisk together thoroughly.
  8. Dip each warm doughnut into the glaze. After 15 minutes the glaze will set and you can add any topping of your choice. A few examples to get you started are lemon zest, cocoa powder, choice of nuts, sprinkles, and so much more!
  9. Serve and enjoy!

Ube-glazed Doughnuts

Photo Courtesy & Recipe Copyright © 2020 | Olive (@whatoliveloves)

BON APPÉTIT

– Olive

myTaste.com

Auguest 2020: Mhyre Virtudazo

Celestial Ice Buko

“If I can make it from scratch, I will make it from scratch. I also try to cook with whole foods as much as possible and eat more vegetables/plant-based meals at least once a week.” — Mhyre Virtudazo

Auguest 2020: Mhyre Virtudazo

When Allison told me her plans for Auguest 2020 and asked if I wanted to be one of her guest contributors, I was immediately onboard! I didn’t hesitate and said yes in a heartbeat! I was very thrilled to hear about this month’s theme which is RAINBOW COLORS!! 🌈 How could I say no to that? I was just so excited that I volunteered to share a recipe for a blue-colored dish.

Fast forward to a couple of months before August, I realized that there’s a challenge to the color I chose. I wanted my dish to represent me. I wanted it to be completely plant-based. I’m trying to incorporate more vegetables and other plant-based products to my meals. I love meat and will not go vegan but this is my way of lessening my carbon footprint. I’ve also been trying to make more Filipino dishes so that’s another thing. The trickiest part is I don’t typically find blue-colored food attractive. I mean I won’t eat blue soup but I can eat a blue dessert.

Celestial Ice Buko

So… I had to come up with a Filipino dish that’s plant-based and visually appealing for my taste. Most importantly, I wanted to consider Allison’s readers and IG followers. I wasn’t only creating this for myself but also I’d like for you guys to try and enjoy what I’ll be sharing.

One afternoon, I was brainstorming by myself (LOL) when I heard an ice cream vendor pass by my house. So I thought, why not dessert? What about ice cream? I can make it blue by using butterfly pea flowers! But then I couldn’t imagine eating blue ice cream cone. I kept on making a list of possible ingredients then I wrote coconut milk on my notebook. That’s when the idea hit me—ice buko! Why not? I mean it brings me happy childhood memories and it meets my complicated requirements! Oh, and I just found out that there’s a Wikipedia entry for it! Haha! Most of all, I could eat it even if it’s colored blue!

I hope you try the recipe. I like how smooth and creamy the texture is even without condensed milk! You’ll also be amazed with how it turns out visually from making it to the final result! It freezes into a soft blue just like the color of the sky while the swirls of white are coconut milk and macapuno strings that look like clouds.

Celestial Ice Buko Ingredients

PREP TIME 10 MINS | COOKING TIME 10 MINS | MAKES 4 ICE LOLLIES

Freezing time: 4 hours

INGREDIENTS

  • 2 cups coconut milk
  • 2 cups of water
  • 2/3 cup white sugar (two 1/3 cups)
  • 1/2 cup macapuno strings (syrup must be drained)
  • 1/4 cup dried butterfly pea flowers
  • 1 tbsp cornstarch (two 1/2 tbsp)

METHOD

  1. In a pot, heat coconut milk and sugar in low heat.
  2. Make slurry using the coconut milk from the pot and some cornstarch. Combine it with the rest of the liquid in the pot.
  3. Stir the liquid gently until sugar has been fully dissolved. Be careful not to bring it to a boil.
  4. Add the dried blue pea flowers. Mix until all the flowers are soaked in coconut milk.
  5. Turn off heat and cover the pot. Steep for 8-10 minutes. Remove the flowers.
  6. Wait for the liquid to cool.
  7. Put a few spoons of macapuno strings in each mold. Pour the liquid, put the lolly holder on top and freeze for about 4 hours.
  8. Admire your beautiful Celestial Ice Buko before devouring them! Enjoy!

Celestial Ice Buko

Here are some conclusions/tips/notes for making this Celestial Ice Buko:

  • Traditional ice buko has red beans. I didn’t include them because it might not go well with the butterfly pea tea. But feel free to experiment!
  • Instead of red beans, I tried rice crispies and loved it! Wanna try it, too? It pretty much follows step 6 but you freeze a teaspoon of rice crispies and a tablespoon of blue liquid first for 30 minutes. The rice crispies will float if you put a large amount of liquid. They will also stick to the lolly holder if you quickly fill the mold up.
  • I wanted to dip my ice buko in melted white chocolate first and then sprinkle it with rice crispies. However, I read on the package that it had dairy in it so I scrapped my plan. If you’re okay with a not so 100% vegan dessert then go ahead and enjoy your ice buko with white chocolate casing. I bet it’s going to be yummy!
  • Another thing you can try is freezing 3/4 coconut milk-blue pea flower mixture in the mold for 2 hours. Fill up the rest of the mold with butterfly pea tea and freeze for another 2 hours. When it freezes, it will have different layers of sky blue and indigo. Just like the galaxy!
  • For another galaxy-looking option, sprinkle blue, pink and purple colored sugar on your ice buko.
  • No ice lolly molds? No worries! You may use paper cups and popsicle sticks. I also made a batch with them. I doubled the quantity and was able to make 11 pieces!
  • Freezing time may vary depending on your freezer. It took overnight for my ice buko to fully solidify in one of the refrigerators I used. (Back story: I made this recipe 8 times in 4 different houses. Therefore, I’ve tried 4 different refrigerators. 😅)

Celestial Ice Buko

Photo Courtesy & Recipe Copyright © 2020 | Mhyre Virtudazo (@acupofjasminerice)

BON APPÉTIT

– Mhyre Virtudazo

myTaste.com

Auguest 2020: Azrina Hidup

Thai Green Curry Mussels

“Cooking feeds the soul, both the cook and the people who are eating. For me, cooking is an act of love, a gift, and a way of sharing. It puts a smile in my heart when I put a lot of thought and care into preparing a dish. At home, cooking symbolizes love and family.” — Azrina Hidup

Auguest 2020: Azrina Hidup

Hello everyone! My name is Azrina Hidup and I am half Filipina and half Bruneian. I would like to thank my beautiful friend, Allison, for the opportunity to be featured on her blog along with other amazing foodies and chefs.

I am always the happiest girl when I get to put my apron on. It was my dream to enter ‘Le Cordon Bleu’ Culinary School, but somehow I ended up doing Political Science. My passion for cooking though, doesn’t stop. Every weekend I will be on my #apronmodeon doing recipe testing and feeding my family with my cooking.

I love creating different dishes. I love travelling for food and what I usually love doing when I travel is to explore and try the local cuisine. I will always try to remember the taste and look of the food so I can recreate them back home for my loved ones to try.

Thai Green Curry Mussels

Most of all, I strongly believe that cooking is more than just an act to fill the empty stomach. Cooking for me is an act of love, a gift, and a way of sharing. It puts a smile in my heart when I put a lot of thought and care into preparing a dish. I grew up with home cooked food, and growing up with my mom’s cooking inspires me a lot to develop my passion for cooking. For me, cooking and home cooked meals symbolize family and love.

For Allison’s Auguest series, I will be sharing my favourite Thai dish which is green curry. Tonight I have made Thai Green Curry Mussels with Homemade Green Curry Paste. Thai green curry is absolutely delicious when served with steamed rice. Nyums!

Thai Green Curry Mussels Ingredients

PREP TIME 30 MINS | COOKING TIME 20-25 MINS | SERVES 4-5

INGREDIENTS

For the green curry paste

  • 15-20 Thai basil leaves
  • 6 Thai green chillies (remove the seeds if you prefer it to be less spicy)
  • 3-4 cloves of garlic
  • 3 long green chillies
  • 2 stalks lemongrass, bottom part only, thinly sliced
  • 1-2 shallots
  • 1 & 1/2 inch size piece of galangal
  • 1 & 1/2 inch size piece of ginger
  • 1 lime
  • 1 tbsp of coconut milk
  • 1-2 tsp of kaffir lime zest
  • 1-2 tsp of shrimp paste (belacan)
  • 1/2 tsp white peppercorns
  • Cilantro leaves and roots
  • Coriander seeds
  • Cumin powder
  • Salt, to taste

Homemade Thai Green Curry Paste

For the Green Curry Mussels

  • Mussels
  • 1 cup fresh coconut water
  • 1 cup seafood stock*
  • 1 can (approx. 440g) coconut milk
  • 3 pieces kaffir lime leaves (torn to smaller pieces)
  • Basil leaves (5-6)
  • Fish sauce, to taste
  • Palm sugar, to taste
  • Squeeze 1-2 fresh limes
  • Thai eggplants
  • Cilantro and basil leaves for garnish (cut/torn to smaller pieces)

* For this recipe, I used homemade prawn stock. You may use any kind of stock as a substitute.

Thai Green Curry Mussels Ingredients

METHOD

  1. Thai Green Curry Paste: Toast coriander seeds simply by heating them in a skillet over medium-high heat. Then, finely grind using a mortar and pestle.
  2. In the same skillet, toast the shrimp paste/belacan and set aside.
  3. Slowly add the rest of the ingredients for the green curry paste to the mortar and pound until fine, adding liquid so that the mixture will become paste-like in texture. For this recipe, I used coconut milk as the liquid.
  4. Taste the curry paste and add season with salt to your preference and add a squeeze of lime juice.

Tip: You may also use an electric blender to speed up the process (and really make your life a little easier), if you prefer. For the coriander seeds, grind them first into a powder with the mortar and pestle. Then use the electric blender to grind all the remaining ingredients together. Similarly, add liquid to get the blender going. Since this will be used for a green curry dish, I highly suggest to use coconut milk as your liquid base.

  1. Thai Green Curry Mussels: Over medium heat, reduce half the can of the coconut milk in a heavy-bottomed pot until it becomes thick.
  2. Add the homemade green curry paste and sauté. Make sure to stir constantly for 2-3 minutes until fragrant/aromatic.
  3. Add the seafood stock, remaining half can of the coconut milk, kaffir lime leaves, and basil leaves. Leave to simmer gently for about 5-10 minutes, keeping the heat on medium.

Tip: You may also blend the basil leaves and some coconut milk into an electric blender to get nice green color soup.

  1. Add palm sugar and fish sauce to taste.
  2. Add coconut water and eggplants. Cover the pot until the eggplants are cooked through, about 3-4 minutes.
  3. Add in the mussels and cover until mussels are cooked, about 5 minutes.
  4. Garnish with chopped basil and cilantro. Add lime juice just before serving. Best to enjoy with steamed rice!

Thai Green Curry Mussels

Thai Green Curry Mussels

Photo Courtesy & Recipe Copyright © 2020 | Azrina Hidup (@azrinoh501)

BON APPÉTIT

– Azrina Hidup

myTaste.com

Auguest 2020: JM de Guzman

Pinais na Hipon at Niyog na may Palapa (Shrimp wrapped in Banana Leaves with Coconut and Green Palapa)

“Food isn’t just something to eat to satisfy an empty stomach or a craving palate. One must know the story about every dish, and celebrate it as a work of art, culture, tradition, custom and beliefs of its creator, and by doing that, we don’t just let them know how we appreciate their food but also honour the people and the nation behind it.” — JM de Guzman

Auguest 2020: JM de Guzman

I’d like to thank Miss Allison, for inviting me once again to do an Auguest post on her blog. I’m also thrilled to share this recipe, which I personally developed for this year’s theme – Colours of Rainbow. The dish I’m about to share was inspired by a traditional Filipino dish ‘Pinais’ and pinais-like dishes (such as Bicol’s pinangat and kinagang). Therefore should I say that this is my take on pinais.

Pinais is a traditional dish from the Southern Tagalog region. While the name refers to the dish itself – it’s actually a cooking process wherein the ingredients (most commonly coconut meat and seafood) are wrapped in banana leaves before steaming. The method of pagpapais effectively seals in the juices and imparts a fresh aroma to the food.

What inspired me to make this take on pinais is my forever obsession about everything coconut and my interest to explore more regional Filipino foods, particularly the foods of the South (Mindanao or Moro Foods). So this dish is inspired by a multitude of cultures, from the flavours of Luzon and Mindanao.

Pinais na Hipon at Niyog na may Palapa

The usual components of pinais are seafood (fish or shellfish), coconut, and aromatics. For my recipe’s seafood component, I used prawns/shrimps. For the coconut, try to look for a matured one (we call it ‘ngalutin’ or chewey here in Bataan). It’s the stage between buko and niyog. However, since I cannot find the specific type of coconut, I just used matured niyog. For the aromatics or flavouring, I used my adaptation of Maranao Palapa, a spice paste mixture of pounded sakurab, ginger/turmeric, and chilies that stands as Maranao all-purpose seasoning. It can be used as a dip, condiment, marinade, or even an appetizer. However for my version, I used siling panigang to produce a greener palapa which is commonly reddish or yellowish from the red chilies and turmeric. I also used the whole sakurab including its green part, dahon ng kabuyaw (kaffir lime leaves), and langkawas (galangal) for a more herbal and aromatic flavour profile. It’s not traditional per se, but this is just my take which I’d like to call “Green Palapa”.

Langkawas and Kabuyaw rather are alien to many Filipinos, and most would have encountered these only with Thai or other Southeast Asian foods, but these are actually native to the Philippines, and in fact Filipino ingredients as well.

Pinais na Hipon at Niyog na may Palapa Ingredients

PREP TIME 30 MINS | COOKING TIME 45-60 MINS | SERVES 5

INGREDIENTS

  • 500g grated coconut meat
  • 500g prawns or large shrimp, peeled and deveined*
  • Banana leaves for wrapping

For the ‘green palapa’

  • 2 & 1/2 cups sakurab, chopped**
  • 1/4 + 1/8 cup cooking oil, divided
  • 8 sprigs of kabuyaw (kaffir lime) leaves, torn***
  • 4 pcs long green chilies, chopped****
  • 1 thumb-sized ginger, chopped
  • 4 tbsp fish sauce
  • 2 & 1/2 tbsp sugar
  • 4 tsp galangal powder or 2 tbsp fresh galangal, chopped*****
  • Salt & pepper, to taste

Ingredient Notes:

* Don’t throw the prawn heads and shells. The flavour is there. Pound it to extract the juice.

** Substitute green onion or scallion if sakurab isn’t available. Sakurab is an allium native to Mindanao and while this is almost synonymous to scallion or green onions it actually isn’t. You can substitute it though but it won’t taste the same. Sakurab is more pungent and for me it has a taste of something in between shallots and garlic.

*** It might be hard to find the kaffir lime leaves, but it is essential for this recipe. I suggest using grated dayap rinds if you can’t find it.

**** Add more chilies if you want a spicier palapa, likewise, deseed the green chilies if you want the palapa less spicy, but I personally don’t mind it getting overly hot.

***** Omit galangal if not available and double the amount of ginger instead.

Not only can you use the “Green Palapa” for this pinais, but also as base for “Ginataans”

Pinais na Hipon at Niyog na may Palapa - Step-by-Step

METHOD

  1. Green Palapa: Add a quarter cup of the oil and all the chopped ingredients for the green palapa into a food processor or blender. Blend until you get a smooth consistency, kind of like pesto.
  2. Over very low heat, add the remaining oil to a pan together with the blended paste and stir continuously. Season with fish sauce, sugar, and black pepper to taste. You’ll know it’s cooked when the colour turns deep green, and the oil seeps out of the mixture. Set aside to cool down. You can remove some of the oil as it cools down.
  3. Pinais: In a large mixing bowl, combine the grated coconut meat, the green palapa, and the extracted prawn juice. You now have a green-coloured coconut meat mixture.
  4. Place a cup of coconut and palapa mixture in the center of a prepared sheet of banana leaf. Place as much prawns as you want on the top. Fold all sides to form a tight wrap.
  5. Line the bottom of a large wok or pan with banana leaf. Place all the wrapped pinais and add two cups of water. Cover and cook over medium heat for 45-60 minutes.
  6. Transfer to individual serving plates, unfold the banana leaf and serve immediately while hot. Enjoy!

Pinais na Hipon at Niyog na may Palapa

Photo Courtesy & Recipe Copyright © 2020 | JM de Guzman (@thecoconutdude)

BON APPÉTIT

– JM de Guzman

myTaste.com

Auguest 2020: Simon Swadling

Salted Coconut & Rum Pineapple Upside-down Cake

“I love making food that makes people smile, or brings them joy, whether it’s a fancy beautiful patisserie creation, or a simple but delicious cake.” — Simon Swadling

Auguest 2020: Simon Swadling

This easy Salted Coconut & Rum Pineapple Upside-down Cake is loaded down with the flavours of the Caribbean islands and the tropics. Sweet caramelised pineapple slices lay perfectly on top of this light and fluffy coconut-infused yellow cake for a summer treat like no other. It is a play on a piña colada, which is a sweet cocktail made with rum, cream of coconut or coconut milk, and pineapple juice, usually served either blended or shaken with ice.

Salted Coconut & Rum Pineapple Upside-down Cake Ingredients

PREP TIME 20 MINS | COOKING TIME 1 HOUR 20 MINS | SERVES 8-10

INGREDIENTS

For the caramelised pineapple

  • 1/2 a pineapple
  • 20g butter
  • 3/4 cup sugar
  • 1/4 cup cream

For the cake batter

  • 150g butter
  • 100g almond meal
  • 100g all-purpose flour
  • 50g desiccated coconut
  • 3 large free-range eggs
  • 3/4 cup sugar
  • 1 tbsp golden syrup
  • 1 tbsp rum
  • 1 tbsp sour cream
  • 1 & 1/2 tsp baking powder
  • 1 tsp salt
  • 1 tsp vanilla extract

METHOD

  1. Preheat the oven to 160C (325F or gas mark 3). Grease and line an 8” (20.5 cm) round cake tin with parchment paper.
  2. Caramelised Pineapple: Peel and core the pineapple. Cut into 1cm thick slices and then thirds.
  3. In a heavy-based frying pan (do not use a non-stick pan!), add the sugar and cook on medium heat until it melts and begins to caramelise. Stir to avoid burning ‘hot spots’.
  4. When the caramel is golden brown, mix in the butter and then cream, being careful not to burn the caramel.
  5. Add in the pineapple sliced and cook until soft and semi transparent, about 10 to 15 minutes.
  6. Cake Batter: Add all the dry ingredients into a food processor and blitz to combine. Next, add in the butter and pulse until it is blended into the flour mixture.
  7. In a separate bowl, combine all the wet ingredients together and whisk. Slowly pour into the processor and pulse until combined and smooth.
  8. Layer the petals of pineapple at the bottom of your cake tin in an aesthetic pattern, adding a little bit of the caramel. Top with the cake batter.
  9. Bake for 55 minutes, or until done. You can tell when it’s done by piercing the middle of the cake with a skewer and it comes out clean. If not, bake further.
  10. Remove the cake from the oven and cool on a wire rack for about 20 minutes.
  11. Serve: Invert the slightly cooled cake onto a cake stand or serving plate. Some of the juices from the topping will seep over the sides – that’s okay.
  12. You can slice and serve the cake warm, or cool the cake down completely at room temperature before slicing and serving. Enjoy!

Salted Coconut & Rum Pineapple Upside-down Cake

Salted Coconut & Rum Pineapple Upside-down Cake

Photo Courtesy & Recipe Copyright © 2020 | Simon Swadling (@thebeardedpatissier)

BON APPÉTIT

– Simon Swadling

myTaste.com

Auguest 2020: Jenel Laureta

Deconstructed Spicy Seafood Jambalaya

“Learn as much as you can through reading cookbooks, watching cooking shows, attending short cooking classes, and from other people. Then try to incorporate all these in your daily cooking.” — Jenel Laureta

Auguest 2020: Jenel Laureta

I was greatly influenced by my paternal grandfather to love food and cooking! Hands down, he was a great cook because there was not a dish I didn’t like. All his dishes were simply delicious. His cooking was not by-the-book and he had no recipes to follow. He cooked by taste and with utmost passion.

In my Lolo Pepe’s kitchen, I began with peeling garlic and onions for homemade atchara. We were busiest in the kitchen during town fiestas. Lolo Pepe would whip up his specialties: Asadong Manok, Mechadong Baka, and Adobong Hito to name a few. I would linger in the kitchen to smell the bubbling sauces and of course to get a taste of each cooked dish.

From him, I also learned how to appreciate good food. We weren’t rich but he wouldn’t settle for less than the best. I remember that he would always buy our butter from a PX store and we would always travel to a nearby city to eat good food.

A great part of my childhood memory is about food and cooking, and this may be the reason why until now I love to eat and cook! In my kitchen now, I try to replicate Lolo Pepe’s cooking. Although I do not have any recipes to follow, I just try to remember the smell, the taste, and the look of a certain dish!

Deconstructed Spicy Seafood Jambalaya

Jambalaya is a popular dish of West African, French (especially in Provençal cuisine), Spanish and Native American influence; similar to, but distinct from, other rice-and-meat dishes known in Louisiana cuisine.

An easy Jambalaya recipe is pure comfort food filled to the brim with flavor. A soffritto-like trinity of onion, bell peppers and celery are also included, along with rice, chilies, cajun spice, other seasonings, and broth. Jambalaya is a quintessential one pot recipe, usually cooked together until the rice is done, but since this is a recipe for a deconstructed Jambalaya, we’re going to need a pot/pan more or two.

Deconstructed Spicy Seafood Jambalaya Ingredients

PREP TIME 10 MINS | COOKING TIME 45 MINS | SERVES 1-2

INGREDIENTS

  • 1 pc river prawn
  • 1 pc blue swimmer crab
  • 1 pc crab claw
  • 3 pcs large prawns
  • 4 pcs mussels
  • 2 stalks celery, sliced
  • 1 whole green bell pepper, cubed
  • 1 medium-sized white onion, minced
  • 5 cloves garlic, minced
  • 1-2 pcs red chili, diced (optional)
  • 1 & 1/2 to 2 cups seafood broth or water
  • 1 to 1 & 1/2 tbsp cajun spice
  • 1 can (approx. 400g) diced tomatoes
  • Olive oil
  • Salt, to taste
  • 2 cups cooked rice
  • Cherry tomatoes, lightly fried, for garnish

METHOD

  1. Jambalaya Stew: Add olive oil in a shallow pan and start sautéing in this order: green bell pepper, celery, white onion, and then garlic. Add cajun spice and continue cooking for a further 2 minutes.
  2. Pour the can of diced tomatoes and let it cook until softened before adding a cup of seafood broth or water. Bring to a boil.
  3. Add assorted seafood and cover until cooked. Add more seafood broth or water as needed and leave to simmer, seasoning with salt according to your taste.
  4. Once the assorted seafood is cooked through, fish out into a bowl and set aside.
  5. Jambalaya Rice: In a separate pan, sauté the garlic until golden and fragrant.
  6. Ladle about a cup of the jambalaya stew and add it to the pan with sautéed garlic. Leave to simmer to allow the flavors to concentrate.
  7. Add the cooked rice and mix well. Season with salt and pepper to taste, and allow the rice to absorb all the stew.
  8. Jambalaya Soup: Add half a cup of seafood broth to the remaining jambalaya stew and simmer.
  9. Season with salt and pepper, to taste. Optional, if you want an intense jambalaya flavor, you can add a half teaspoon more of cajun spice.
  10. Purée the stew in a blender and pass it through a fine sieve.
  11. Pour soup in a bottle and keep warm.
  12. Assembly: Arrange the assorted seafood in a large shallow plate and garnish with lightly fried cherry tomatoes.
  13. Pour the warm jambalaya soup over the assorted seafood and serve with jambalaya rice. Enjoy!

Deconstructed Spicy Seafood Jambalaya

Deconstructed Spicy Seafood Jambalaya

Photo Courtesy & Recipe Copyright © 2020 | Jenel Laureta (@jenel.laureta)

BON APPÉTIT

– Jenel Laureta

myTaste.com

Auguest 2020: Melissa Delos Reyes

Crispy Orange Tofu with Broccoli

“Creating food is a therapeutic process. It’s a way for me to unwind and slow down in this fast-paced world. To see my family & friends enjoy what I create is worth all the effort.” — Melissa Delos Reyes

Auguest 2020: Melissa Delos Reyes

Ola! I’m Melissa or Mel, the smol lady behind Eats Meru on Facebook and Instagram. I am a social media associate by profession and I freelance in photography and graphic design. Ever since I was young, I’ve always enjoyed cooking, experimenting with food, and following recipes!

I created Eats Meru pre-pandemic to share my food adventures at first. Everything changed when the Covid-19 virus struck. No one was prepared. Businesses were greatly affected, especially the small/start-up local brands. Since then, I’ve converted my goal for Eats Meru as a platform where I can help local MSMEs to share their products especially now that everyone is doing their best to make a living.

For this post in the Auguest series, I chose the color orange. I’ll be sharing a healthy and plant-based version of the famous Orange Chicken that uses tofu as the protein of the dish; it’s sticky, orange-y, tangy, crispy, and tasty too! You can easily make this dish as most of the ingredients can be found in your fridge and pantry. It is also perfect for those busy weeknights as it comes together in 20 minutes.

Crispy Orange Tofu with Broccoli Ingredients

PREP TIME 10 MINS | COOKING TIME 10 MINS | SERVES 4

INGREDIENTS

For the crispy tofu

  • 2 packs firm tofu, drained and cut into 1-inch size cubes
  • 2 tbsp cornstarch
  • 1 tsp rice flour
  • 1/4 tsp garlic powder
  • 1/4 tsp freshly ground black pepper
  • 1/4 tsp salt
  • Vegetable oil, for frying

For the orange sauce

  • 1 cup fresh orange juice (about 3 medium-sized oranges)
  • 1/4 cup water
  • 3 tbsp sugar
  • 2 tbsp soy sauce
  • 2 tbsp white or rice vinegar
  • 1 & 1/2 tbsp cornstarch (2 tbsp for a thicker sauce)
  • 1 tsp chilli, minced
  • 1/8 tsp salt
  • 4 garlic cloves, finely chopped
  • 1 inch ginger, minced (or 1 tbsp grated)
  • Spring onion (for garnishing)
  • Blanched broccoli

METHOD

  1. Crispy Tofu: In a large bowl, combine the cornstarch, rice flour, garlic powder, salt, and pepper. Mix well and coat the tofu in the cornstarch mixture.
  2. In a deep, heavy-bottomed pot, heat the vegetable oil (enough to cover the tofu) over medium-high. Carefully drop the coated cubed tofu in the oil and fry until slightly golden brown. Do not overcrowd the pot; work in batches if needed.
  3. Once done, use a slotted spoon to remove the tofu and transfer to a wire rack or strainer to cool down.
  4. Orange Sauce: Combine all the ingredients for the orange sauce, except water and cornstarch in a saucepan over medium heat. Cook and bring to a boil.
  5. Mix the cornstarch in the water together to create a slurry and gradually stir it into the simmering sauce. Cook until the sauce thickens, stirring well for even thickening. Taste for salt, sweetness, flavour, etc. and adjust as you go.
  6. Turn the heat off and add the crispy tofu. Toss to evenly coat them with the sauce. Transfer to a serving bowl and garnish with the spring onions. Serve immediately while hot, with rice and blanched broccoli (or any of your favorite greens for that matter). Enjoy!

This Crispy Orange Tofu can be modified for an even healthier option. For this recipe, the tofu is deep-fried in oil, but if you prefer, and have a bit more time on your hands, you can bake the tofu instead. Additionally, you can consider serving it with some cauliflower rice and other greens of your choice.

Crispy Orange Tofu with Broccoli

Crispy Orange Tofu with Broccoli

Photo Courtesy & Recipe Copyright © 2020 | Melissa Delos Reyes (@eatsmeru)

BON APPÉTIT

– Melissa Delos Reyes

myTaste.com

Auguest 2020: Karina Pineda

Adlai Tomato Risotto

“Take off on a food journey that is both healthy and happy” — Karina Pineda

Auguest 2020: Karina Pineda

Hello! My name is Karina, the girl behind wander little girl on Instagram. Two years ago, I initially started my food blog to document my #foodjourney—basically a marriage between transitioning to a healthy lifestyle (which was then a strictly plant-based diet) and learning my way around the kitchen. Fast forward to the present, a few things have changed, from my perspective on health and wellness to the direction of my blog. I decided to see wander little girl as a serious brand and grow it (especially now that we’re in the midst of a global pandemic).

At one point within that two-year timeline, Allison and I followed each other. Though we hardly interacted with one another, it was when she opened slots for this year’s Auguest series that we began to communicate.

When Allison told me the chosen theme and the recipe guidelines, I was thankful for having seen and grabbed the opportunity to guest in this series. Titled Colors of the Rainbow, participating guests (or should I say, Auguests) were tasked to come up with a vegan, vegetarian, or pescatarian recipe in line with their assigned color. For me, this served as a walk down memory lane, back to wander little girl’s roots.

Adlai Tomato Risotto

Having picked the color red, I challenged myself to cooking beyond my comfort zone, hence Adlai Tomato Risotto. I had never made risotto prior and I wanted to add a few twists to the beloved dish. First, the risottos that I’ve tried are usually creamy, and so I whipped up a tomato-based version; that way, it would scream bloody RED! Next, I veganized it by using vegetable broth made from scratch and vegan margarine. Last (but definitely not the least), I swapped rice (specifically arborio rice) with adlai. Before anything, please hear me out! Since I live in the Philippines, I wanted to promote a grain that was both locally produced and a healthier alternative. Since adlai absorbs more than the regular white rice here, this Adlai Tomato Risotto is just as creamy and thick as its traditional counterpart! The entire process from preparing to cooking may be tedious and time-consuming, but I promise that the hard work is worth it; it’s like a dish straight out of an Italian restaurant!

Adlai Tomato Risotto Ingredients

PREP TIME 45 MINS* | COOKING TIME 30 MINS | SERVES 4-5

* Includes making of the vegetable broth

INGREDIENTS

For the adlai tomato risotto

  • 1 cup uncooked adlai
  • 1 & 1/2 cup of canned diced tomatoes
  • 2 tbsp tomato paste
  • 1 & 1/2 tsp olive oil
  • 1 & 1/2 tsp vegan margarine or spreadable
  • 1 tsp rosemary (+ more for topping)
  • 1 tsp thyme (+ more for topping)
  • 3-4 cloves of garlic
  • Half a white onion (or less, depending on your taste)
  • Sliced mushrooms
  • Ground pepper
  • Spanish paprika
  • Brown sugar (optional)

For the vegetable broth

  • 6 cups water
  • Chosen vegetables (in picture: carrots, stems of sweet potato leaves, garlic, and ginger)
  • Ground pepper
  • Salt

METHOD

  1. Vegetable Broth: Gather the vegetables to be used for the broth and place them in a pot. Add ground pepper and salt to taste. Pour 6 cups of water into the pot. Allow it to boil on a stove top for 30 minutes. Set it aside afterwards.
  2. Adlai Tomato Risotto: Mince garlic cloves and half a white onion. Heat a pan on the stove top. Add olive oil. Sauté the minced garlic and onions. Add margarine to enhance the flavor.
  3. Pour the cup of uncooked adlai, and cook it until slightly toasted. Start with a bit of the vegetable broth from earlier (I used a ladle and poured two servings) and stir it. Once the broth has been absorbed, pour another portion again. Repeat the process until all of the vegetable broth has been used and the adlai is cooked.
  4. Add sliced mushrooms. Pour diced tomatoes and tomato paste. Mix well until everything is incorporated and evenly colored.
  5. Sprinkle the herbs (i.e. rosemary and thyme) as well as the spices (i.e. ground pepper and Spanish paprika). Add brown sugar to taste, but this step is optional. Continue to mix everything.
  6. Once cooked, allow the risotto to cool. Transfer it into a large plate or bowl. Top it with more rosemary and thyme. Eat the risotto on its own or pair it with corn. Enjoy!

Adlai Tomato Risotto

Adlai Tomato Risotto

Photo Courtesy & Recipe Copyright © 2020 | Karina Pineda (@wanderlittlegirl)

BON APPÉTIT

– Karina Pineda

myTaste.com

Auguest 2020: Shazrinah Shazali

Roasted Garlic & Onion Tomato Tagliatelle with Butter Beans,Tuna, and a Chilli Balsamic Drizzle

“Cooking is an exploration of our own creativity. Always try out new flavour combinations, different cooking techniques, build on textbook recipes, and have fun!” — Shazrinah Shazali

Auguest 2020: Shazrinah Shazali

Hello Everyone! I am a neuroscientist and home-grown chef best known as ShefShaz. I started my entrepreneurial journey from home, supplying healthy lunch meal plans to offices and homes. I then ventured into collaboration with The Healthy Habit in January 2018 to develop menus and co-founded FUEL’D. Just this year I’ve also recently co-opened a cafe in the gardens to work with the garden’s nursery to develop menus and create delicious food from their produce.

Tonight I will be sharing a delicious and healthy dish that is packed with the flavours of roasted garlic, chilli, and balsamic vinegar. You can easily whip up for a quick weeknight dinner if you’re pressed for time!

Roasted Garlic & Onion Tomato Tagliatelle with Butter Beans,Tuna, and a Chilli Balsamic Drizzle Ingredients

PREP TIME 10 MINS | COOKING TIME 20 MINS | SERVES 4

INGREDIENTS

For the tagliatelle

  • 200g dried tagliatelle pasta
  • 1 can (approx 400g) butter beans, drained
  • 1 can (approx. 185g) tuna in olive oil
  • 1 can (approx. 400g) roasted garlic and onion tomato pasta sauce
  • 4 garlic cloves, minced
  • 4 shallots, minced
  • 2 red bird’s eye chillies, minced
  • 1 tsp sweet ground paprika
  • Salt and freshly cracked black pepper, to taste
  • Parmesan cheese (optional)

For the chilli balsamic drizzle

  • 1/4 cup olive oil
  • 2 garlic cloves, minced
  • 1 red bird’s eye chilli, minced
  • 2 tbsp balsamic vinegar
  • 1 tsp fresh parsley, minced
  • Salt and freshly cracked black pepper, to taste

METHOD

  1. Chilli Balsamic Drizzle: In a mortar and pestle, grind the garlic, chilli, and parsley together. Add the olive oil, balsamic vinegar, and season with salt and pepper to taste. Adjust to your liking and set aside.
  2. Roasted Garlic & Onion Tomato Tagliatelle: In a large pot with boiling salted water, cook the tagliatelle pasta according to packet directions or until al dente. Drain and set aside, reserving about half a cup of the pasta water.
  3. In a separate pan over medium-high heat, sauté the minced garlic, shallots, and chilli until golden, fragrant, and translucent, about a minute or two.
  4. Add in the drained butter beans together with the tuna in olive oil and cooked until warmed through. Add the ground paprika and season with salt and pepper to taste.
  5. Stir in the canned tomato pasta sauce plus the half cup of reserved pasta water. Bring to a rapid simmer before adding the cooked pasta. Once done, transfer to individual serving plates.
  6. Top with parmesan cheese if desired, fresh arugula or any other leafy greens you prefer, and drizzle with the chilli balsamic mixture. Serve and enjoy!

Roasted Garlic & Onion Tomato Tagliatelle with Butter Beans,Tuna, and a Chilli Balsamic Drizzle

Roasted Garlic & Onion Tomato Tagliatelle with Butter Beans,Tuna, and a Chilli Balsamic Drizzle

Photo Courtesy & Recipe Copyright © 2020 | Shazrinah Shazali (@shefshaz // @fueld.bn // @glowcafebn)

BON APPÉTIT

– Shazrinah Shazali

myTaste.com