Lemon Molten Cakes with Raspberry & Cream

Lemon Molten Cakes with Raspberry & Cream

Hello Everyone and Happy Mother’s Day to all mothers out there, and most especially to my mother. You are braver than you believe, stronger than you seem, smarter than you think, and loved more than you know. Happy Mother’s Day to you Mumu; love you forever and always, even if we sometimes don’t see eye to eye.

Happy Mother's Day
There is nothing more sincere than a mother’s love for her children, and this picture clearly portrays your love for me while I care more about putting my hairband on for the picture (but really I’ve got my eye on the food).

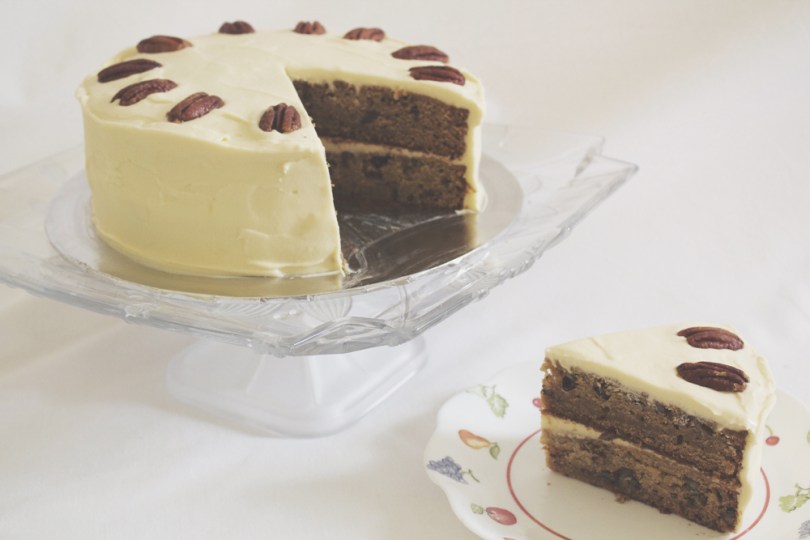
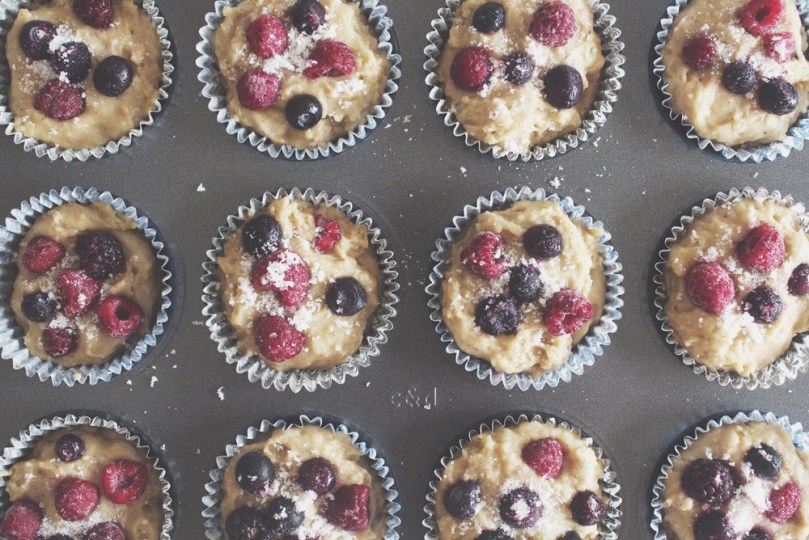
Last week after my Mom’s birthday celebration (and that whole fiasco that I had with baking her cake), I asked her what she wanted me to bake for her for Mother’s Day, and I’m not gonna lie, but said aloud to her, “please not another cake” – the troubles of my mother being born a week before Mother’s Day. We both started thinking for a while, and then I remembered that I wanted to make this cake back when I was still in Sydney. Now I know I said no cakes, but this technically isn’t a massive layered cake, but instead, mini molten lava cakes.

Lemon Molten Cakes with Raspberry & Cream

Somewhere back in July last year, I hosted a tea and scones party for some of my favourite ladies, and one male housemate. We had an assortment of tea of course, homemade scones, homemade strawberry jam, and homemade lemon curd. I had a lot of strawberry jam left over, but I had a way of finishing it by having it with toast in the mornings with a cup of tea. Lemon curd on the other hand I had no clue on how to consume it. I then searched for other recipes that used lemon curd, except for the obvious lemon meringue pie/tart since I am not a huge fan of meringue. I then came across this recipe and I instantly knew that this was the recipe that I was going attempt – but never got around to doing so. Reasons? I actually don’t remember. I think it was because the lemon curd had been sitting in the fridge for weeks and probably already off at the time I decided that I want to make these molten cakes. After that, I wasn’t bothered to make a whole new batch of lemon curd just for this dessert to happen. But now for Mother’s Day – I don’t see any better chance to have a go at these!

The original recipe can be found on The Gallery Gourmet and this recipe makes about 8 cakes but I guess differs on the size of your moulds/ramekins.

Lemon Molten Cakes with Raspberry & Cream Ingredients

PREP TIME 15 MINS | COOKING TIME 13-15 MINS | MAKES 4 CAKES

INGREDIENTS

  • 120g white baking chocolate, roughly chopped
  • 100g unsalted butter
  • 3/4 cup Homemade Lemon Curd
  • 2/3 cup plain flour
  • 1/2 cup confectioners’ sugar
  • 4 large free range eggs, lightly beaten
  • 4 large free range egg yolks, lightly beaten
  • 2 tsp freshly grated lemon zest
  • 1/2 tsp vanilla extract
  • Pinch of salt
Accompaniments
  • Confectioners’ sugar for dusting
  • Whipped cream
  • Fresh raspberries

METHOD

  1. Preheat the oven to 220C (425F or gas mark 7). Grease 8 ramekins with softened butter or non-stick baking spray.  Place them onto a baking tray and set aside.
  2. Melt the butter and white chocolate in a large microwave-safe bowl, stirring every 15 seconds (for a total of 60-90 seconds) until melted and smooth. Remove from the microwave and whisk until smooth.
  3. Add the flour, sugar and salt; mix well. Then add in the eggs, egg yolks, lemon curd, lemon zest, and vanilla extract and whisk until well blended. Divide the batter evenly into the prepared ramekins.
  4. Bake for about 13-15 minutes or until the edges are just starting to to turn golden brown, and the centre is puffy and just beginning to set. Transfer the ramekins to a wire rack and let cool for 5 minutes.
  5. Run the tip of a paring knife around the edges of the cakes to loosen them and then invert the cakes onto small dessert plates or dishes.
  6. Dust the top with confectioners’ sugar, garnish with fresh raspberries, and serve with whipped cream.
  7. Share with the family (or friends) and enjoy!

Lemon Molten Cakes with Raspberry & Cream Process

Lemon Molten Cakes with Raspberry & Cream

PS: I completely forgot about the whipped cream when I was photographing the cakes, and by the time I had the cream ready and whipped, I found out that my Mom and my sister had already dug into the perfect molten cake that I specifically set aside for my photograph (the other cakes weren’t as runny as the one I had opened for the photo). The whipped cream nicely balances out the sweetness and tartness of the cakes.

BON APPÉTIT

– Ally xx

myTaste.com

Ube Cake with Mango Cream Cheese Frosting

Ube Cake with Mango Cream Cheese Frosting

Hello Everyone! As I already mentioned in yesterday’s post, I have a very special recipe for all of you today as today is my Mother’s 55th Birthday! Not only that, it is also my Cousin’s 35th Birthday! A very Happy Birthday to the both of them! Not only do they share the same birthday, but they also share the same-ish name. My mom’s name is Josephine, while my cousin’s name is Joseph; and my mother is also his godmother in both his baptismal and wedding. So yes, these two people are very important to me.

Happy Birthday Mom Josephine & Kuya JR
Happy Birthday to my mom Josephine & my cousin Joseph Russell! This is the latest photo that I could find of the two of them. This photograph dates back to December 2012 when my cousin JR got married. Kuya J, payat mo oh! Anyare? Hehehe.

To be completely honest, this cake has given me a lot of headaches to the point where I just had to redo everything again. The plan was to bake it the day before so that it would be in the fridge overnight; that obviously didn’t happened. Something went wrong in the batter; it was very pale and it looked like the batter and the eggs whites separated because when I took them out of the oven, the top half was very airy white the bottom half was cake-y. Since I had quite a tiring day yesterday, I gave up on baking the cake and decided to bake it early the next morning (today). The cake this time went well, I just mixed the batter very well and added some food colouring to bring out the purple a bit more.

Ube Cake with Mango Cream Cheese Frosting

However, today my frosting decided that it wanted to wreck havoc. The frosting was actually an experiment, because I wanted to incorporate mango into the cream cheese frosting somehow. The big mistake that I did was that I mixed the mango purée together with the cream cheese and and butter instead of smoothening out the cream cheese and butter first. I ended up with a mess of what looked like really bad scrambled eggs. I tried so hard to save it, but in the end I started all over again. At one point I kind of just had about enough with this cake… But I told myself to carry on because it’s a special cake for my Mom’s Birthday! The flavours were all there, form the cake in the beginning, and even the frosting, but it would’ve ended up looking like a shit cake if I hadn’t redone the whole thing.

Anyway, all mishaps aside, the cake turned out to be pretty good! But what decided to ruin everything yet once again was the weather. It was pitch black and raining when I was about to do the final touches on the cake and I have no natural light to photograph my cake. I am so devastated. It was as if everything was trying to ruin this cake for me… Thank goodness that it was still a little bit bright outside, but I really had to put my ISO up and decrease my shutter speed to get some light!

Ube Cake with Mango Cream Cheese Frosting Ingredients

PREP TIME 30 MINS | COOKING TIME 30-35 MINS | SERVES 8-10

INGREDIENTS

For the cake batter

  • 2 & 1/2 cups cake flour*
  • 1 cup ube (purple yam), cooked and finely grated**
  • 1 cup white sugar
  • 7 egg yolks, lightly beaten
  • 7 egg whites
  • 3/4 cup milk
  • 1/2 cup corn syrup***
  • 1/2 cup vegetable oil
  • 3 tsp baking powder
  • 1 tsp salt
  • 1 tsp vanilla extract
  • Blue & red food colouring (optional)

For the frosting

  • 1 very ripe mangoes, puréed
  • 1 package (250g) cream cheese, softened
  • 100g unsalted butter, softened
  • 1 cup confectioners’ sugar

*I barely use cake flour, and if you so happen as to not have cake flour in your pantry, you can substitute 1 cup of cake flour with 2 tablespoons of corn flour place into a measuring cup and then filling it with plain flour all the way to the 1 cup mark.

**Place the ube (leaving its skin on) in a pot of boiling water and boil for about 45 minutes to an hour, depending on how big it is, or until tender. Peel off its skin and then grate.

***If you’re like me and you don’t have corn syrup sitting in your pantry because you barely use it anyway, you can substitute corn syrup by dissolving 3/4 cup of granulated sugar in 1/4 cup of boiling water.

METHOD

  1. Preheat oven to 165C (325F or gas mark 3). Grease three 8.5-inch cake pans with a little butter and set aside.
  2. Ube Cake: In a medium-sized bowl, mix together the flour, baking powder, and salt. Set aside.
  3. Place the grated ube into a large bowl and mix together with the milk and vanilla extract; gradually mix into the ube until it is smooth. Then add in the corn syrup, egg yolks, and oil. Mix together and then add in the flour mixture and mix until smooth. Set aside.
  4. In another large bowl, beat the egg whites until foamy. Gradually add in the sugar, then red and blue food colouring (optional), while continuing to beat until stiff peaks form.
  5. Fold in a third of the egg white mixture into the batter, then quickly fold in remaining whites until no streaks remain. Pour batter into prepared pans.
  6. Bake in the preheated oven for 30 to 35 minutes, or until a toothpick inserted near the centre comes out clean. Cool for 10 minutes before removing the cakes from the pans to wire racks to cool down completely.
  7. Mango Cream Cheese Frosting: Using an electric handheld mixer, beat the cream cheese, butter, and maple syrup in a small bowl until smooth. Then beat in the confectioners’ sugar, and then fold in the mango purée.
  8. Assembly: Place one cake layer on a serving plate and trim the tops so that they are level. spread with about 1/4 cup of frosting. Top with the second layer of cake and spread another 1/4 cup of and frosting. Finally, top with the last layer of cake and frost the top and sides of the cake. Decorate with the cake trimmings and store in the fridge before serving. Enjoy!

Happy Birthday Mom Josephine

Ube Cake with Mango Cream Cheese Frosting

BON APPÉTIT

– Ally xx

myTaste.com

Vermont Maple-Pecan Cake

Vermont Maple-Pecan Cake

Hello Everyone and welcome to a very special post as today officially marks the 1-year anniversary of my food blog! I started up this food blog exactly a year ago during spring break, and instead of slaving away on the many assignments/projects I had at that time, I decided to spontaneously start up a blog, out of pure procrastination really. Since it was quite spontaneous, I didn’t quite put much effort into it in the beginning, as in I wasn’t bothered to purchase my own domain name, and buy a theme and customise it. I wasn’t sure of how long I’d be able to keep up with this blog (because I have tried many times and failed). I am happy that I am able to finally keep one up and running, posting 3 times a week, almost.

Vermont Maple-Pecan Cake

For the next few months or so, I will work on developing an aesthetic and a colour scheme for my blog that reflects who I am as a person – not just one who loves to cook and is passionate about all things food, but also my personality and my design style. The pink and brown was sort of a “yeah that will do for now” because it fit the default theme that I picked (which was more like “I prefer this theme that the others I’ve seen”). Anyway, so to celebrate my blog turning 1 today, I decided to bake a cake for this occasion. I wanted to bake a citrus poppyseed cake at first but for some reason, lemons were nowhere to be found in every supermarket and market that I went to. Instead, I found another recipe that stood out to me – Vermont Maple-Pecan Cake. Why I chose to attempt this cake was because I already had maple syrup in the fridge and CREAM CHEESE; like who could say no to cream cheese?!

The quantities from the original recipe that can be found on Taste of Home, makes two 6-inch round cake layers, but since my baking pans were about 8.5-inches, I decided to double the recipe until I realised that I should’ve tripled it when I poured the batter into the pans; they barely filled halfway. So I made another batch to top them off. Therefore, the quantities below have been tripled from the original to make two 8.5-inch round cake layers. Once again, Happy Anniversary to Amcarmen’s Kitchen!

Vermont Maple-Pecan Cake Ingredients

PREP TIME 20 MINS | COOKING TIME 20-25 MINS | SERVES 8-10

INGREDIENTS

For the cake batter

  • 2 & 1/2 cups plain flour
  • 1 & 1/2 cup buttermilk*
  • 1 cup toasted pecans, roughly chopped
  • 3/4 cup sugar
  • 3/4 cup packed brown sugar
  • 1/2 cup maple syrup
  • 170g unsalted butter, melted
  • 1 & 1/2 tsp baking soda
  • 3/4 tsp salt
  • 3/4 tsp vanilla extract
  • 1/3 cup finely chopped pecans, toasted

For the frosting

  • 1 package (250g) cream cheese, softened
  • 100g unsalted butter, softened
  • 1 & 1/2 cups confectioners’ sugar
  • 4 tbsp maple syrup
  • Toasted pecan halves, to decorate

*I could not find any buttermilk at the supermarket, so I made my own by using a tablespoon of white vinegar for every cup of milk. Set it aside for about 5 minutes for the milk to react to the vinegar. You can also substitute the vinegar for lemon juice.

METHOD

  1. Preheat the oven to 180C (350F or gas mark 4).
  2. Grease two 8.5-inch cake pans with a little butter and set aside
  3. For the cake batter: Combine the plain flour, sugars, baking soda, and salt in a large bowl. In a separate bowl, combine the buttermilk, butter, syrup, and vanilla, and stir into dry ingredients until just combined. Fold in chopped pecans.
  4. Pour into the prepared pans and bake for 20-25 minutes or until a toothpick inserted near the centre comes out clean. Cool for 10 minutes before removing the cakes from the pans to wire racks to cool down completely.
  5. For the frosting: Using an electric handheld mixer, beat the cream cheese, butter, and maple syrup in a small bowl until smooth. Then beat in the confectioners’ sugar.
  6. Assembly: Place one cake layer on a serving plate and spread with about 1/2 cup of frosting. Top with the second layer of cake and frost the top and sides of the cake. Decorate with toasted pecan halves and store in the fridge before serving. Enjoy!

Vermont Maple-Pecan Cake

BON APPÉTIT

– Ally xx

myTaste.com

Easter Hot Cross Buns

Easter Hot Cross Buns

Hello Everyone! It’s been a while hasn’t it? Bare with me as I get back on track with my posting schedule, but I must warn you once again that I may or may not be travelling back to the Philippines, and as you already know, Internet connection will once again be disrupted, but hopefully for only a week or so. I am aware that it is a Sunday, and on amcarmenskitchen it should in fact be a Review Sunday! But not today for I have a special post for you guys tonight as it is Easter Sunday! I will sort out my reviews from various places that I visited during my month-long trip to the Philippines and get working on them to have one up for next week.

I remember how every bakery in Sydney, be in along the streets, inside a shopping centre, or supermarket, smelled of freshly baked hot cross buns. I definitely miss those chocolate chip flavoured ones from Baker’s Delight! A hot cross bun is a spiced sweet bun made with currants or raisins and marked with a cross on the top, traditionally eaten on Good Friday in most parts of Europe, the United States, and Australia/New Zealand. Apparently, hot cross buns may go on sale in Australia and New Zealand as early as New Year’s Day or even right after Christmas.

Easter Hot Cross Buns

To be honest, I was quite reluctant on whether or not I should post this up because a few things went wrong even though I followed the recipe from Taste very carefully. My buns did not at all look like the photograph and I think it because I under baked the buns (even though I followed the recipe). Okay, I technically didn’t quite follow it because the dough was very wet and quite sticky so I added probably the equivalent of about 1/2 or 3/4 more cups of flour. Maybe this is where it went wrong? I don’t know. Half of the buns deflated when I removed them from the oven (this is why I mentioned that I may have quite possibly under baked them), and they were still pretty pale when they had an extra 15 minutes in the oven. The crosses ended up appearing the same in terms of colour as the bun and didn’t look as evident. Oh the many mishaps; and now you see why I was hesitant to show my fail buns. Anyway, I deserve an A for effort as this is my first time making bread ever! And even still I am showing you my result!

When I reheated the buns again our small electric oven for about 6-8 minutes (for our afternoon snack), the tops browned nicely; and it was only then did I decide that maybe I should post it on my blog even if they don’t look that appetising. However, by this time, having been in the oven for quite some time since the initial baking, the bottoms and even the outside became quite crusty, however, the inside remained soft and dense. The 6 that are missing from the photograph were the deflated ones that we ate, and so I only managed to photograph the remaining 6. I will definitely give this recipe another go some other time.

Easter Hot Cross Buns Ingredients

PREP TIME 2 HOURS 20 MINS | COOKING TIME 20-25 MINS | MAKES 12 BUNS

INGREDIENTS

For the dough

  • 4 cups plain flour
  • 1 & 1/2 cups of raisins (or currents/sultanas)
  • 1 cup milk
  • 1/4 cup caster sugar
  • 40g butter
  • 2 eggs, lightly beaten
  • 2 sachets (7g each) dried yeast
  • 1 & 1/2 tsp mixed spices (I used cinnamon, cloves, & nutmeg)
  • Pinch of salt

For the flour paste

  • 1/4 cup plain flour
  • 3 tbsp water

For the glaze

  • 1/3 cup water
  • 2 tbsp caster sugar
  • Butter to serve

METHOD

  1. Bread Dough: Combine flour, yeast, sugar, mixed spices, and salt in a large bowl.
  2. Melt butter in a small saucepan over medium heat and then add in the milk. Heat for about a minute, or until the mixture is lukewarm. Add warm milk mixture and eggs to flour mixture. Then, using a flat-bladed knife, mix until the dough almost comes together. Use clean hands to finish mixing to form a soft dough.
  3. Turn the dough out onto a floured surface and knead for 10 minutes, or until the dough is smooth. Place the dough into a lightly oiled bowl and cover with plastic wrap. Set aside in a warm, draught-free place for 1 to 1 & 1/2 hours, or until the dough doubles in size.
  4. Punch the dough down to its original size and add the raisins to the dough. Knead with the raisins for about a minute on a lightly floured surface until smooth. Divide into 12 even portions. Shape each portion into a ball. Place balls onto a large tray lined with baking paper, about 1cm apart, and cover with plastic wrap. Set aside in a warm, draught-free place for 30 minutes, or until buns double in size. Meanwhile, preheat the oven to 190C.
  5. Flour Paste: Mix flour and water together in a small bowl until smooth, adding a little more water if paste is too thick. Spoon into a small snap-lock bag and snip off a corner of the bag. Pipe flour paste over tops of buns to form crosses.
  6. Bake for 20 to 25 minutes, or until buns are cooked through.
  7. Glaze: Place water and sugar into a small saucepan over low heat, and stir until the sugar dissolves. Bring to the boil and let it boil for about 3-4 minutes. Then, brush the warm glaze over the hot cross buns. Serve warm or at room temperature.

Easter Hot Cross Buns

Easter Hot Cross Buns

BON APPÉTIT

– Ally xx

myTaste.com

Red Velvet Cheesecake Brownies

Red Velvet Cheesecake Brownies

Hello Everyone! First off, I’d like to apologise for not posting a recipe over the weekend – reason being just that I haven’t had the time to sit down and write one, and even better, my laptop charger decided that it was time for it to die. Also, another heads up, I will be leaving Lucena tomorrow and back to Bulacan where I will once again have no connection, so this will be the last post for March! I will see you again in April when I come back from my vacation!

Red Velvet Cheesecake Brownies

Moving on, today’s recipe is a belated one as it was meant to go up on Valentine’s Day. But for those who have been following for a while, you would’ve known that that was a busy week for me. I spent late morning/early afternoon of Valentine’s Day with a few of my very close friends over brunch at Cuckoo Callay for their Bacon Festival. I spent the rest of the day finalising my packing, moving all my things to a friends house, and having dinner with Vidhya that night. I left Sydney the next day.

I’ve made these a total of 3 times now. The first two were a complete fail and the third time was ALMOST a fail but worked out in the end. The first time I filled my square pan right to the top. I forgot how deep that pan was but nevertheless the brownies were too thick. The top started to brown a lot and it was nowhere close to being halfway done. The second time I tried it, I made the same mistake, but it wasn’t that I didn’t learn from my first mishap, it was another miscalculation on my side. I used a bigger dish this time, but one recipe wasn’t enough to fill it, do I doubled the quantities. It didn’t fill up all the way to the top, but it was still too thick. The brownie cooked about 3/4 of the way and the bottom was still batter. The second time I made it, I had planned on bringing it to office as a treat for my boss and managers, but because I didn’t want to bring in underdone brownies, I waited until my next day off to make the brownies again and finally bring them in on my last day of work.

Red Velvet Cheesecake Brownies

Now for the third batch, I used 1 and a half recipes this time and it was just the right thickness, FINALLY. When I said that it was an almost fail, it was because it was taking three times as long as it should to bake in the oven. The reason is because firstly, the oven at the lodge in Sydney is just unreliable. Secondly, I noticed that the top was starting to brown and the brownies aren’t all the way cooked yet, so I resulted to having to cover the top with foil so that it’d stop browning any further. Anyway, it got there in the end and it was a huge hit in the office! And Vidhya loved it as well, even though the had some from the first batch.

The original recipe can be found on Sally’s Baking Addiction. As stated before, I used 1 and a half recipes (just for the red velvet batter, I stuck to the same quantities for the cheesecake mix) from Sally’s so that my brownies were of the right thickness for my baking dish (about 8″ x 13″). Also, since at that time I was in midst of clearing out my pantry, I only had about a half cup of plain flour left, and quite a bit of self rising. I didn’t want to use self rising because I didn’t want it to rise, and Vidhya wasn’t home so I couldn’t borrow her plain flour. So I ended up using what’s left of Jialing’s wholemeal flour that she left at my place. I don’t exactly know if using wholemeal changes the texture or the taste, but it worked out in the end.

Red Velvet Cheesecake Brownies Ingredients

PREP TIME 15 MINS | COOKING TIME 45 MINS | SERVES 6-8

INGREDIENTS

For the red velvet brownies

  • 1 & 1/2 cups sugar
  • 1 cup wholemeal flour
  • 170g unsalted butter
  • 3 large free range eggs
  • 6 tbsp unsweetened cocoa powder
  • 1 tbsp vanilla extract
  • 1 & 1/2 tbsp liquid or gel red food colouring
  • 1 tsp white vinegar
  • 1/4 teaspoon salt

For the cheesecake mix

  • 8 ounces cream cheese, softened
  • 1 large free range egg, yolk only
  • 1/4 cup sugar
  • 1/2 tsp vanilla extract

METHOD

  1. Preheat oven to 180C. Grease an 8×13 baking dish with a little butter. Set aside.
  2. Red Velvet Brownie Mix: Beat the eggs together in a small bowl and set side. Then melt the butter in a large microwave safe bowl in 30-second increments until fully melted.
  3. Stir in the sugar, vanilla extract, cocoa powder, salt, food coloring, and vinegar, mixing each of the ingredients into the batter in that order.
  4. Whisk in the eggs, then fold in the flour until completely incorporated. Do not overmix.
  5. Pour the brownie batter into prepared baking pan. Leave about 3 or 4 tablespoons to top the mixture later for the top.
  6. Cheesecake Mix: Beat the softened cream cheese, sugar, egg yolk, and vanilla extract in a medium-sized bowl using a hand-held electrical mixer on medium speed. Make sure that the mixture is completely smooth (about a minute or so).
  7. Dollop spoonfuls of the cream cheese mixture on top of the prepared brownie batter and top with the remaining tablespoons of brownie batter. Glide a knife through the layers, creating a swirl pattern.
  8. Bake the brownies for 45 minutes or until a toothpick inserted in the middle comes out clean. Once down, allow the brownies to cool completely before cutting into squares.
  9. Cover the brownies and store at room temperature for 3 days or in the refrigerator for up to 6 days.

Red Velvet Cheesecake Brownies

Red Velvet Cheesecake Brownies

BON APPÉTIT

– Ally xx

myTaste.com

Layered Pistachio Cake with Honey Vanilla Buttercream

Layered Pistachio Cake with Honey Vanilla Buttercream

Hello Everyone! Today I have a special post for you as today is my not so little sister’s 19th birthday! Today is also the first time in 4 years that I have been home to celebrate with her and the rest of the family. If you have been following my blog since September last year, you would know that I started getting into baking cakes. I never really liked baking cakes to be honest, only because I find it very time consuming and my level of patience does have a limit. Since I started baking cakes, my Mom and sisters now prefer a homemade birthday cake instead of an expensive and cliché store-bought cake. So on Sunday, with the help of the birthday girl, we baked her birthday cake together. We baked it on Sunday even though her birthday is today. Why? Well only because tomorrow we’ll be off for a 1-month vacay to the Philippines, and if we had baked it today, leftovers would be sitting in the fridge until April.

Layered Pistachio Cake with Honey Vanilla Buttercream

Today’s cake recipe has been slightly adapted from, and can be found on Joanne Eats Well With Others. As you have already read from the title, it is a 3-layer pistachio cake with honey vanilla buttercream. I decided to add the strawberries and crushed pistachios on top to bring some life and colour to the presentation of the cake. I substituted some ingredients, such as instead of using cream of tartare, I used lemon juice instead. I barely use cream of tartare in my baking and buying a jar of it didn’t seem very economical as I know it’ll just sit in the pantry waiting for its expiry date. Also, instead of cake flour, also because I barely use it, I used plain flour combined with cornstarch instead. The easiest way to do this substitution is to put 2 tablespoons of cornstarch in the bottom of a 1-cup measuring cup, then fill the cup as usual with plain flour and level the top. In addition, I lessened the amount of sugar and butter in this recipe and it still turned out fine for me! I am not a huge fan of overly sweet desserts, and also I had to take into consideration my Mom who is a diabetic.

Layered Pistachio Cake with Honey Vanilla Buttercream

Before I move on to the recipe, I HIGHLY recommend that you buy shelled pistachios. We went to four different grocery stores and could not find any and so we decided to buy the shelled ones. It took forever to shell just over a cup of pistachios – thank goodness I had my Mom and my sisters to do the tedious job while I worked on the batter. Also, have a food processor handy, but if you’re like me and don’t own one, then all you need is a motor and pestle to bash it all up as well as grinding it. It takes time but it gets the job done. I think that’s why towards the end of this cake I was starting to lose a little bit of my patience because everything took longer to do! But hurray for a gas oven! I cannot stress how much I hated using the oven at the Doncaster Lodge. Everything took at least double or triple the normal time to cook!

Layered Pistachio Cake with Honey Vanilla Buttercream Ingredients

PREP TIME 30 MINS | COOKING TIME 1 HOUR | SERVES 8-10

INGREDIENTS

For the cake
  • 3 & 1/4 cups plain flour
  • 1 & 1/2 cups ice water
  • 1 cup caster sugar
  • 1 cup shelled pistachios, plus extra for decorating
  • 250g unsalted butter, softened
  • 3 large free range egg whites, at room temperature
  • 1 large free range egg
  • 5 tbsp cornflour
  • 1 tbsp baking powder
  • 1 tbsp vanilla extract
  • 1 tsp baking soda
  • 3/4 tsp salt
  • 1/4 tsp lemon juice
For the buttercream
  • 300g unsalted butter, soft, cut into small pieces
  • 1 & 1/2 cups milk
  • 1 cup caster sugar
  • 1/3 cup plain flour
  • 1/3 cup thickened cream
  • 3 tbsp honey
  • 1 tsp vanilla extract

METHOD

  1. Preheat the oven to 160C or gas mark 3. Grease three 8.5-inch cake pans with a little butter.
  2. For the Cake Batter: Using a food processor, pulse the pistachios until coarsely chopped. Remove half of the pistachios and transfer to a small bowl. Pulse the remaining pistachios until they are an almost powder-like consistency.
  3. Transfer to a large bowl and whisk together both the roughly chopped and fine pistachios with the plain flour, cornstarch, baking powder, baking soda, and salt. Set aside
  4. Cream the butter using an electrical mixer on high speed for about 3 minutes. Add in the sugar and vanilla and beat until fluffy for about another 3 minutes. Scrape down the sides of the bowl, and then add in the egg, mixing until just combined.
  5. Turn the mixer to low and add the flour+pistachio mix to the butter mixture in three additions, alternating with the ice water, mixing each time until just combined. Scrape down the bowl and mix on low speed for a few more seconds.
  6. In a medium, clean bowl whisk together the egg whites with the lemon juice until soft peaks form, about 3-5 minutes. Fold the egg whites into the batter.
  7. Divide the batter evenly among the cake pans and smooth the tops. Bake for 40-45 minutes, rotating the pans halfway through baking, until a toothpick inserted in the centre comes out clean.
  8. Transfer to a cooling rack and let them completely cool.
  9. For the Buttercream: Meanwhile, as the cakes are cooling down, whisk together the flour and sugar in a medium-sized saucepan. Then, add in the milk and cream, and cook over medium heat, whisking frequently, until the mixture comes to a boil and then thickens, about 10 to 15 minutes.
  10. Transfer the hot milk mixture to a large bowl and mix on high speed until cool, about 9 minutes. Reduce the speed to low and add the butter, a few pieces at a time, until it is full incorporated. Increase the speed to medium-high and beat until light and fluffy for a further few minutes. Then add in the vanilla and honey, and continue mixing until combined. If the frosting is too soft, chill it in the freezer for a while and then mix again.
  11. Assembly: Place one cake layer top side up on a serving platter. Use a long serrated knife to cut the top so that it is flat and even. Spread a little over a cup of frosting on top. Add the next later and, again, trim so that it is flat. Top with another cup of frosting. Add the remaining cake layer and trim the top again. Spread cake with a very thin layer of frosting for the crumb coating. Put in the freezer for 5 to 10 minutes. Spread the sides and top of the cake with the remaining frosting and decorate as desired.

Layered Pistachio Cake with Honey Vanilla Buttercream

Happy Birthday Alyssa!

BON APPÉTIT

– Ally xx

myTaste.com

Breakfast Muffins: Vegemite & Cheese

Breakfast Muffins: Vegemite & Cheese

Hello Everyone! Knowing that Muffin Making Monday would fall on ‘Straya Day, I just knew I had to make these muffins. All I can say is that when I was out doing groceries over the weekend, I had so many doubts about this, and I could not even comprehend WHY I decided to do this. I even struggled to place the tiny jar of vegemite into my trolley of groceries. I just could not bring myself to, but in my head I kept saying, “just do it. Do it for ‘Straya Day” and I did (what am I doing to myself).

Besides lamb, vegemite is another ‘Australian thing’. Vegemite has appeared on my blog once before, but for those of you who don’t know, vegemite is like the Australian version of marmite, a popular spread for sandwiches, toast, crumpets, crackers, and as well as a filling for various pastries. It is salty, slightly bitter, and apparently is similar to beef bouillon. You’ll either love it or hate it, and I did mention before that I am on the hateful side. The smell for me is a bit off-putting, and I know Vidhya hates it too, so I kept shoving the jar of vegemite up her nose whenever I had the chance to *cheeky grin*.

Breakfast Muffins: Vegemite & Cheese

I was too scared to bake a whole dozen muffins because I wasn’t too sure on how the taste would go down with me, so I only baked half a dozen, however, please note that the recipe below is for a full dozen – if you’re like me and don’t want to end up having to throw away the whole batch after eating one, then just half the measurements from the recipe below! Also, a little side note, I followed Sally’s master muffin mix recipe for these, and then added the vegemite and cheese. I only added about a tablespoon of vegemite as I was again afraid that the saltiness of it would overpower the taste of the muffin. But I can tell you that the batter smelled amazingly good!

But to be completely honest, these muffins did NOT taste as bad as I thought they would. It’s sort of like a taste that I cannot really describe. The only issue I had with them this morning was that because knowing that there was vegemite in them, I gagged a couple of times before even putting them in my mouth, so it kind of threw me off just a little bit. Nevertheless, the muffins were beautifully moist though, and I think that all the other ingredients mixed together with the vegemite sort of diluted its taste a bit. They weren’t at all overly salty like I thought they’d perhaps turn out to be. Having said that though, I would probably still never indulge in vegemite just as it is, like on toast or something as they have it here down under.

Breakfast Muffins: Vegemite & Cheese Ingredients

PREP TIME 25 MINS | COOKING TIME 25 MINS | MAKES 6 MUFFINS

INGREDIENTS

  • 3 cups plain flour
  • 1/2 cup granulated sugar
  • 1 cup milk, at room temperature
  • 1/2 cup light brown sugar
  • 1/2 cup vegetable oil
  • 2 handfuls of grated mozzarella cheese
  • 2 large free range eggs, at room temperature
  • 1-2 tbsp vegemite
  • 4 tsp baking powder
  • 1 tsp vanilla extract

METHOD

  1. Preheat oven to 220C. Line a 12 hole muffin pan with paper cases.
  2. Add the baking powder and flour in a large bowl, gently whizzing together until well combined. Set aside.
  3. In a medium-sized bowl, whisk together the eggs, granulated sugar, and brown sugar until combined. Then add in the milk, oil, and vanilla extract. Whisk together until the mixture is pale and yellow in colour.
  4. Using a spatula, fold the wet ingredients into dry ingredients and lightly mix everything together until all the flour is off the bottom of the bowl and no big pockets of flour remain. Then add in the cheese and vegemite, and continue to mix. Be careful as to not over mix the batter; it will result in tough, dense muffins. The batter will be extremely thick and somewhat lumpy.
  5. Spoon the batter into prepared muffin cups, filling them all the way to the top.
  6. Bake at 220C degrees for 5 minutes. Then reduce oven temperature to 190C and continue to bake for a further 25-26 minutes until tops are lightly golden. A toothpick inserted in the centre should come out clean. Allow to cool for 10 minutes before transferring to a wire rack to cool down completely.

Muffins taste best fresh the same day. Store muffins at room temperature in an airtight container for up to 5 days. Muffins freeze well, up to 3 months.

Breakfast Muffins: Vegemite & Cheese

Breakfast Muffins: Vegemite & Cheese

BON APPÉTIT

– Ally xx

myTaste.com

Breakfast Muffins: Mixed Berries

Breakfast Muffins: Mixed Berries

Hello Everyone and three cheers for the return of Muffin Making Mondays! I hate to start off on a bad note, but this is sadly my second last muffin making session with Jialing as I will be leaving this beautify country that I have called my second home for the past 4 years. I now truly understand the concept of time flying past.

Anyway, all that mushy stuff aside, yesterday we were joined by Yvonne, who spectated our Muffin Making Monday session, and was going on about how she should’ve started coming over when we first started our muffin baking sessions. It wasn’t so that she could bake with us too, but so that she could have a muffin from each of us to eat on the spot, and another to takeaway!

Breakfast Muffins: Mixed Berries

I whipped up a dozen very berry muffins while Jialing made a muffin. Yes you read that right, just ONE muffin. One BIG muffin. She had no muffin cups left and said that it was too far to go out and buy new ones; so she brought her pie tin over instead and made the decision to make ‘muffin slices’. She made an eggless and flourless chocolate muffin (cake) topped with chocolate bits, a chocolate streusel and mixed berries. Unfortunately for her, the streusel burnt, but nonetheless, beneath that was a very chocolatey and moist muffin (cake). It tasted delicious even though the little mishap!

Mine tasted really good as well! If you want to check out the original recipe, please head on over to Sally’s Baking Addiction. Also, while you are there, read up on how she came up with the Master Muffin Mix; basically kitchen tested bakery-style muffin batter with endless possibilities! Never have flat and/or deflated muffins ever again with her master mix!

Breakfast Muffins: Mixed Berries Ingredients

PREP TIME 10 MINS | COOKING TIME 25 MINS | MAKES 12 MUFFINS

INGREDIENTS

  • 3 cups plain flour
  • 2 cups mixed berries, fresh or frozen (not thawed)
  • 1/2 cup granulated sugar
  • 1 cup milk, at room temperature
  • 1/2 cup light brown sugar
  • 1/2 cup vegetable oil
  • 2 large free range eggs, at room temperature
  • 4 tsp baking powder
  • 1 tsp ground cinnamon
  • 1 tsp vanilla extract
  • 1/2 tsp salt
  • Coarse sugar for sprinkling on top

METHOD

  1. Preheat oven to 220C. Line a 12 hole muffin pan with paper cases.
  2. Add the baking powder, cinnamon, flour, ad salt in a large bowl, gently whizzing together until well combined. Set aside.
  3. In a medium-sized bowl, whisk together the eggs, granulated sugar, and brown sugar until combined. Then add in the milk, oil, and vanilla extract. Whisk together until the mixture is pale and yellow in colour.
  4. Using a spatula, fold the wet ingredients into dry ingredients and mix everything together until all the flour is off the bottom of the bowl and no big pockets of flour remain. Be careful as to not over mix the batter; it will result in tough, dense muffins. The batter will be extremely thick and somewhat lumpy.
  5. Spoon the batter into prepared muffin cups, about halfway. Then press a few berries into the batter of each muffin cup. Spoon the rest of the batter into each cup, filling them all the way to the top. Press a few more berries into the tops of each muffin and sprinkle with coarse sugar.
  6. Bake at 220C degrees for 5 minutes. Then reduce oven temperature to 190C and continue to bake for a further 25-26 minutes until tops are lightly golden. A toothpick inserted in the centre should come out clean. Allow to cool for 10 minutes before transferring to a wire rack to cool down completely.

Muffins taste best fresh the same day. Store muffins at room temperature in an airtight container for up to 5 days. Muffins freeze well, up to 3 months.

Breakfast Muffins: Mixed Berries

Breakfast Muffins: Mixed Berries

BON APPÉTIT

– Ally xx

myTaste.com

Cherry Ripple Black Forest Cake

Cherry Ripple Black Forest Cake

Hello Everyone! Yes, I know it is a Sunday which for those of you who are new to my blog, I don’t normally post on a Sunday – but I wanted to get all the Noche Buena recipes up before the New Year because I’ll probably have another batch of recipes to post from a New Years Day Lunch (maybe dinner depending on how energised I am to cook after a long day/night out the previous night) that I am planning to host – a small one though with probably 2-3 dishes maximum. Noche Buena was hectic and I don’t want to have a repeat that’s a week apart from each other. I won’t be doing Media Noche because I will most likely be camping out the whole day/night for a good spot by the harbour to view the Harbour Bridge Fireworks at midnight.

Cherry Ripple Black Forest Cake

Anyway, tonight’s recipe is from our Noche Buena dinner that Jialing and I hosted on the Eve of Christmas. This Cherry Ripple Black Forest Cake is one of the many desserts we had on the menu for the night. When deciding on a cake to make for the festive dinner, we found it difficult to decide on a cake that felt festive – besides a Yule Log. Even though I wasn’t too fond of a Black Forest cake, that is what we decided on. The reason why I am not fond of it is because every time I indulged in a store bought Black Forest cake, they ALWAYS use those horrible canned/tinned/jarred Maraschino Cherries that I absolutely hate. Not for our Black Forest cake NO! I was determined to use fresh cherries and if I had to use cherries from a can, at least not the maraschino ones!

Before Jialing and I went to do our groceries for the dinner, we talked about how we haven’t been seeing any fresh cherries at the local supermarkets. But when we got to Coles, we saw that cherries were on special and looking very fresh! I was so happy! Also, please do check out the original recipe over on Taste. Like how I’ve probably been describing over and over again in my previous posts, the recipe says to use a little more than 1/4 cup of Jim Beam Black Cherry Bourbon, but I didn’t want to buy a 700ml bottle for $30 for that amount. So from the leftover vodka I had from the East Orange Frosting I made for my Gingerbread Men, Jialing had the idea of infusing that into the cherry syrup for that boozy touch. Also, our sponge didn’t rise that much to be able to cut it into three layers, so we ended up having a two layer cake.

Cherry Ripple Black Forest Cake Ingredients

PREP TIME 10 MINS | COOKING TIME 1 HOUR 20 MINS | SERVES 8-10

INGREDIENTS

For the chocolate sponge

  • 1 & 1/4 cup self-raising flour
  • 1 cup brown sugar, firmly packed
  • 1/2 cup almond meal
  • 1/2 cup buttermilk
  • 1/4 cocoa powder
  • 200g dark cooking chocolate, melted and cooled
  • 200g unsalted butter, at room temperature
  • 2 large free range eggs

For the cream-jam filling

  • 1 can (425g) pitted black cherries in syrup, drain and reserve syrup
  • 300ml double cream
  • 250ml thickened cream
  • 1/2 cup black cherry jam

For the choc-cherry ganache

  • 100g dark cooking chocolate, chopped
  • 60ml thickened cream
  • Vodka-infused cherry syrup*
  • Fresh cherries
  • Chocolate curls

*Add the reserved syrup to a small sauce pan together with about a tablespoon of vodka to the reserved syrup and bring to a simmer to infuse the flavours. Use this to brush onto the sponge cake layers and in the chocolate ganache.

METHOD

  1. Preheat oven to 160C. Grease the sides of a 20cm round springform cake pan with melted butter and line the base with baking paper.
  2. Chocolate Sponge Cake: Sift the flour, almond meal, and cocoa powder into a medium sized bowl. Whisk until combined and set aside.
  3. In a large bowl, beat the butter and sugar using an electric handheld mixer until pale and creamy. Beat in the melted chocolate and eggs, and fold in the dry ingredients and buttermilk until well combined. Spoon the batter into the prepared pan.
  4. Bake for 1 hour and 20 minutes or until a skewer inserted into the centre comes out clean. Set aside to cool slightly before transferring the cake to a wire rack to cool completely.
  5. Choc-cherry Ganache: While the cake is baking in the oven, stir all the ingredients (leaving about 1/4 cup of the vodka-infused syrup for brushing) for the choc-cherry ganache in a small saucepan over low heat for 5 minutes or until the chocolate has melted and is smooth. Set aside cool slightly.
  6. Cream-jam Filling: Using an electric mixer, beat the double and thickened cream in a large bowl until firm peaks form. Then fold in the jam to create a swirled effect.
  7. Assembly: Cut the cake horizontally into 2 (or 3 if you can) even layers. Place the cake base on a round cake board and brush the cut surface with half of the vodka-infused syrup and spoon over the cream-jam mixture. Dip each pitted black cherry into the ganache and place on top of the cream filling. Brush the vodka-infused syrup on the cut surface with the other half of the cake layer and top over the base. Pour the choc-cherry ganache over the cake and decorate with fresh cherries and chocolate curls. Sprinkle with a bit a icing sugar for a Christmasy finish.

Cherry Ripple Black Forest Cake

Cherry Ripple Black Forest Cake

Cherry Ripple Black Forest Cake

BON APPÉTIT

– Ally xx

myTaste.com

Gingerbread Stained Glass Cookies

Gingerbread Stained Glass Cookies

Hello Everyone! So today’s recipe was inspired by a video I watched on YouTube from one of my favourite channels SORTED Food. This recipe is by far one of my new Christmas favourites and spot on because this year for Christmas planned on decorating our Christmas Tree with food items! We strung some popcorn and wrapping them around our tree. We have candy canes, Ferrero Rochers, Lindt chocolate, and sugar cookie wreaths lined up as our ornaments:

Edible Christmas Tree

I actually completely forgot about this recipe for Stained Glass Cookies until the night before Jialing and I had planned to make the cookies. It’s a good thing that we picked up the Turkey I preordered yesterday which meant that I could also pick up some boiled candy for this recipe! But I mean, does Australia have something against boiled sweets? Or did they just sell out or something? I swear I could not find any form of boiled sweets at the local supermarkets other than soothers or lozenges. Lucky for me that Woolies stocked their own home brand fruity sweets. But even so, the bag of candy only had 4 green sweets and half of the bag was filled with yellow sweets. So I ended up crushing some of the yellow with the green and added a few drops of green food colouring to it.

Initially I had planned to make my gingerbread cookies again for the tree, and since I have all the ingredients ready for some gingerbread making, I decided to do a little twist on their recipe and make Gingerbread Stained Glass Cookies. Do check out the original recipe on their main channel: Stained Glass Cookie Decorations, or if you want to see a step-by-step write-up version of the recipe, check it out on their website: SORTED Food.

Gingerbread Stained Glass Cookies

The first batch of cookies turned out to be a massive fail that they only deserved a before picture. Can’t even bare the look of the result after. Lesson learned? Don’t bake these stained glass cookies with raising agents in them – just don’t. I think you may have a picture in your head how these first batch of cookies turned out:

Gingerbread Stained Glass Cookies Ingredients

PREP TIME 30 MINS | COOKING TIME 12 MINS | MAKES 2 DOZEN

INGREDIENTS

  • 2 cups plain flour (plus 1/2 cup additional for rolling, if needed)
  • 85g unsalted butter, softened
  • 1 large free range egg
  • 1/2 lemon, juiced
  • 1 cup caster sugar
  • 1/4 cup dark molasses (or honey in my case)
  • 2 tbsp milk
  • 2 tsp ground dry ginger
  • 1 tsp ground cinnamon
  • 3/4 tsp baking powder
  • 1/4 tsp baking soda
  • 1/4 tsp ground allspice
  • 1/4 teaspoon ground cloves
  • 1/4 tsp ground nutmeg
  • 1/4 teaspoon salt
  • Boiled Sweets (Hard Candy)

METHOD

  1. Preheat oven to 200C. Add the unsalted butter and sugar in a large bowl and beat using an electric mixer fitted with a paddle at medium-high speed until smooth; about 5 to 8 minutes.
  2. Meanwhile, in another bowl, sift together the flour, baking powder, baking soda, dry ginger, nutmeg, allspice, cinnamon, cloves, and salt. Whisk to blend and then set aside. In another bowl, whisk together the eggs, milk, molasses (or honey), and lemon juice.
  3. When the butter and sugar mixture is smooth, lower the speed of the mixer and add the wet ingredients. Then gently fold the dry ingredients until a dough starts to form.
  4. Divide the cookie dough in half. Wrap each half with cling wrap and chill in the fridge for about 15 minutes. This step will make it easier to finish rolling out the dough when it has chilled. It will also mean you only have half of the dough getting warm as you roll it.
  5. Lightly flour a flat surface. Use a floured rolling pin to gently roll the first half of the dough about 1/2-inch thick. Lightly flour the cookie cutter(s) and cut out your desired cookie shapes. Cut another shape out of the centre of each cookie and transfer the cookies to a lined baking tray.
  6. Chop up some boiled fruit sweets with a knife or by bashing them with a rolling pin whilst still in their wrappers, keeping the different colours separate. Sprinkle the chopped sweets into the hole in the centre of the cookies and bake them for 12 minutes.
  7. Leave to cool until completely cold before removing them from the lined baking tray. Ice them however you wish and thread a ribbon through the hole to hang your decorations. For these cookies, I made a simple vanilla icing to decorate with and edible silver balls.

Gingerbread Stained Glass Cookies

Gingerbread Stained Glass Cookies

Hope everyone had a merry festive Christmas!

BON APPÉTIT

– Ally xx

myTaste.com