
Hello Everyone! And a very Happy New Year to all! I trust everyone enjoyed celebrating in one way or another. I spent the whole day sitting out in the sun with friends as we waited for midnight to strike. Watching the fireworks display by the Harbour Bridge was an amazing experience, and also such a tiring day of waiting really.
Anyway, hopefully I can keep this going as long as I have visited enough places and have the time to write up my dining experience. I feel like it’s been a while since I did a review – well that’s because it has been a while indeed! So, starting this New Years, I will be uploading a review every Sunday on top of 2 recipes a week on Tuesdays and Thursdays.
So I’ve been to Devon Café a total of 3 times now this year; twice for brunch and once for their dinner service. The both times that I went for brunch I ordered the same dish, and so did the one other person I went with, so I thought doing a review just on the one dish from their brunch menu was a bit meh. I had the Eggs Blini by the way which you can probably already tell because I had it twice (within two weeks) was so good and also apparently was the most Instagrammed dish from their menu at the time.
Anyway, the last time I visited Devon Café was actually in August of this year. Yes, that means that the food that you see in this review may not even be on their menu anymore as I am aware that menus here in Australia tend to change depending on the season. Therefore, the food that you see here are from their winter menu, and I have not been back to know whether their menu is different for the now summer season.
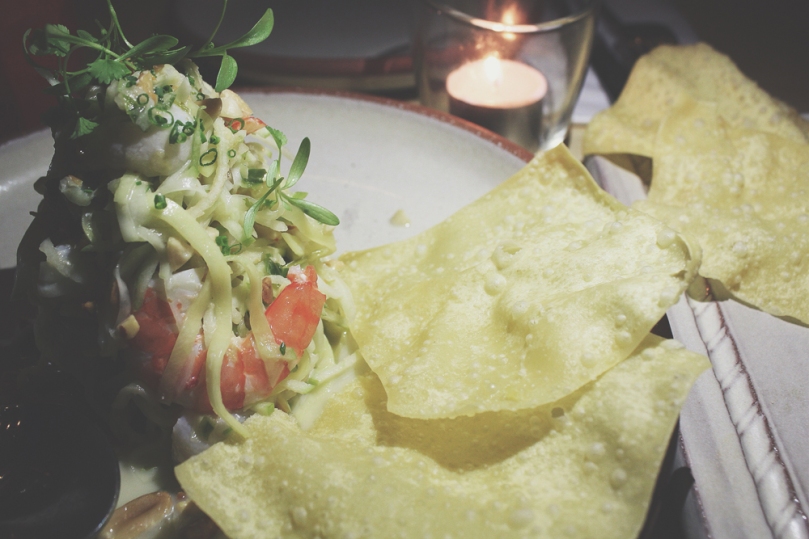
ENTRÉE: Prawn and Scallop Wontons
Scallop and Prawn Ceviche, Crispy Wontons, Green Mango, Peanuts, Nahm Jim ($18.00)
When the waiter first came to our table with these, I actually thought he got our order mixed up. In my head I was like “these aren’t wontons are they?” I was actually hesitant to have him place the dish on our table and I think he could tell that I was confused. I asked “are these the wontons?” He assured me that they were, AND then I saw him carrying the other plate that had the wonton wrappers. Yes I know, not quite how I’ve known wontons to be served, but nonetheless these tasted amazing! I really loved the freshness of the prawn and scallop ceviche paired with the kick of spice from the nahm jim sauce. Not to mention the crispy wontons that added that extra crunch to the dish!

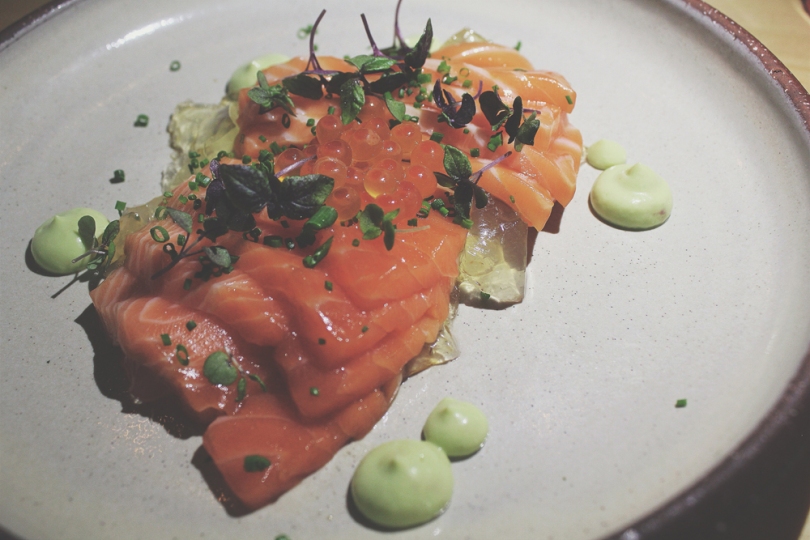
ENTRÉE: King Salmon Sashimi, Avocado, Jelly, Ikura, Chives ($15.00)
Enticingly fresh salmon. What more can I say? This dish was spot on for me!

MAIN: Chinese Egg Custard, Shiitake, Fungus, Yellow Needle Flower, Chinese Fried Bread and Perigord Black Truffle ($29.00)
This dish gave me some mixed feelings – well, now that I think of it, the flavour didn’t quite sit well with me even though I think my other friends enjoyed it. I found the mushroom taste to be a bit too overpowering for me, which was probably the main reason why I didn’t not enjoy this dish. Also, the Chinese Fried Bread was not at all crispy, at least not as crispy as the ones I’d get back home. Their bread also didn’t look that fresh.
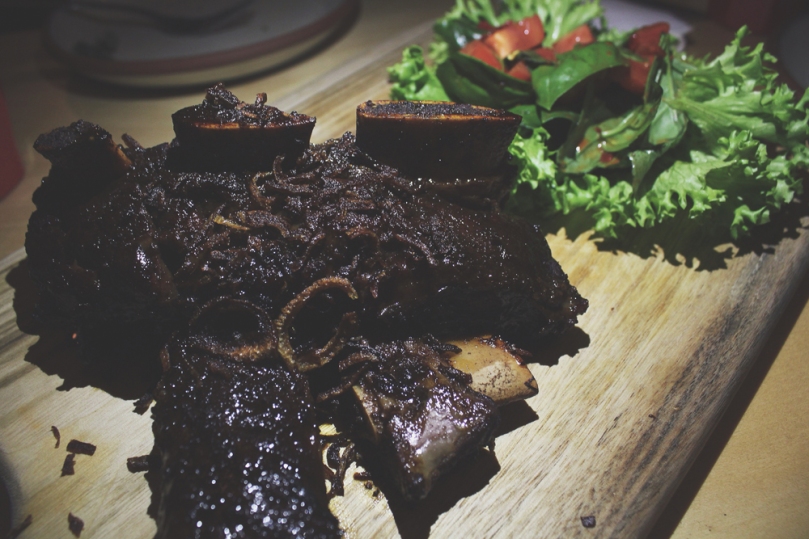
MAIN: Aunty Yulia’s Short Ribs
Slow Cooked in Indonesian Sweet Soy with Spicy Tomato and Basil Relish ($28.00)
This was probably the highlight of all dishes. The short ribs were cooked to perfection; falling off the bone tender and packed with that delicious kecap manis flavour. The relish was a nice refreshing touch to the palette and that him tot spice really gave it that kick it needed. I highly recommend this dish if it’s still on their menu!

DESSERT: Matcha Fondant (Green Tea Molten Lava Cake)
with Vanilla-bean Ice Cream, Honey Dew Balls and Pistachio Crumb ($13.00)
This dessert I believe is actually one of the main reasons why I wanted to go to Devon by Night. I saw it all over Instagram and I said to myself that I NEEDED to go here just to be able to get my hands on this dessert. The last time I had a green tea molten lava cake was 2 or 3 years ago at Tokkuri. That I loved, but I think now THIS I love more! The perfect consistency and paired with other flavours and textures that really enhanced the dish. The lava was thick and rich – just absolute yum! A definite must try!
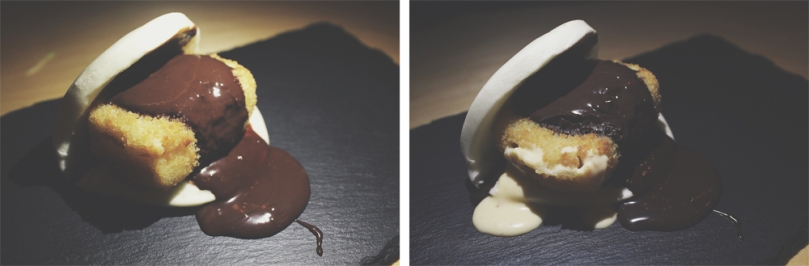
DESSERT: Fried Ice Cream Bao with Dark Chocolate Sauce ($7.00)
This was the day that I broke my fried ice cream virginity as well – and I am glad that I lost it to Devon’s Fried Ice Cream Bao! Such a clever and innovative way of fusion cooking; serving fried ice cream in a bao. The only let down with this was that they served it with a dark chocolate sauce – don’t get me wrong, the sauce was perfection, but I was expecting a kaya (coconut jam) sauce instead, as from what I’ve seen all over Instagram. I seriously believe that it would’ve tasted a hundred times better! I’m probably being biased here since I’m not a huge fan of chocolate, but KAYA?! My fellow kaya-loving friends/followers will be able to imagine magic happening in their mouth just thinking about this flavour combination.
Devon Café is quite a popular breakfast, brunch, lunch, and dinner spot to both the locals and the tourists. So if and when you get the chance to Sydney, or are currently residing in Sydney, this should be in your places to eat in Sydney list. A MUST! They’ve recently opened a new branch in Waterloo on Danks St. which I was able to visit with two other friends for a nice brunch just this week actually. Unless their menu has changed at the original Devon Café, their menu is quite different so I will be doing a review on them too! Soon I hope!
Devon Café
76 Devonshire Street
Surry Hills, New South Wales
Australia, 2043
– Ally xx


