Purple Sweet Potato Gnocchi with Creamy Parmesan Sauce, Danablu & Pistachios

Purple Sweet Potato Gnocchi with Creamy Parmesan Sauce, Danablu & Pistachios

Hello Everyone and a Happy November to all! I honestly didn’t think that I would be spending my birth month still under general community quarantine, but at least it means that we’re still taking safety precautions… Or are we really? I went grocery shopping over the weekend, and it seemed like people weren’t keeping their distances. I was queuing up at the pharmacy and though there were evident markings on the floors on where you should stand, this one lady behind me kept standing right behind me. The security guard had to tell her to follow the markings.

Mini introductory tangent aside, gnocchi (pronounced ni-yok-ee; singular gnocco) are a variety of pasta consisting of various thick, small, and pillow soft dough dumplings that are primarily made by combining potatoes, flour, and egg, but may also be made from semolina, ordinary wheat flour, breadcrumbs, cornmeal, or similar ingredients. The dough for gnocchi is most often rolled out before it is cut into small pieces about the size of a wine cork. The little dumplings are then pressed with a fork or a cheese grater to make ridges that can hold sauce. Alternatively, they are simply cut into little pillows.

Purple Sweet Potato Gnocchi with Creamy Parmesan Sauce, Danablu & Pistachios

Gnocchi are generally homemade in Italian and Italian-immigrant households. They may also be bought fresh from specialty stores. Packaged gnocchi are widely available either refrigerated, dried, or frozen, if industrially produced. Like many Italian dishes, gnocchi have considerable variation in recipes and names across different regions. Gnocchi are commonly cooked on their own in salted boiling water and then dressed with various sauces depending on the type of gnocchi and recipe used. Common accompaniments of gnocchi include melted butter with sage, and pesto.

For tonight’s recipe, I decided to put a little spin to it by using sweet potatoes instead or regular potatoes. In addition, since it’s a new month and therefore a new colour theme on Amcarmen’s Kitchen, I specifically used Japanese purple sweet potatoes that I sourced from PruTazan, for my last colours of the rainbow theme for the year! That’s right, for the month of November and December, I will be sharing violet recipes with you guys.

Also known as Murasaki Imo, which means “purple potato” in Japanese, contains dietary fiber, vitamins A and C, and minerals like calcium, magnesium, potassium, and zinc. The flesh also contains anthocyanin, a naturally occurring antioxidant that gives the tuber its purple hue. They are used in a variety of culinary applications including desserts and snack foods and are valued for their sweet flavour and high antioxidant content. They are also commonly dried and turned into powder for use as a natural food colouring.

Purple Sweet Potato Gnocchi with Creamy Parmesan Sauce, Danablu & Pistachios Ingredients

PREP TIME 20 MINS | COOKING TIME 1 HOUR | SERVES 4

INGREDIENTS

For the sweet potato gnocchi

  • 1 kg purple sweet potatoes
  • 3/4 cup all purpose flour, plus more if needed as well as for dusting
  • 1 large free-range egg
  • Salt and freshly ground pepper, to taste

For the creamy parmesan sauce

  • 250ml all purpose cream
  • 3 garlic cloves, finely minced
  • 1 small red onion, finely minced
  • 1/4 cup parmesan cheese, grated
  • Salt and freshly ground pepper, to taste
  • Chives, finely chopped
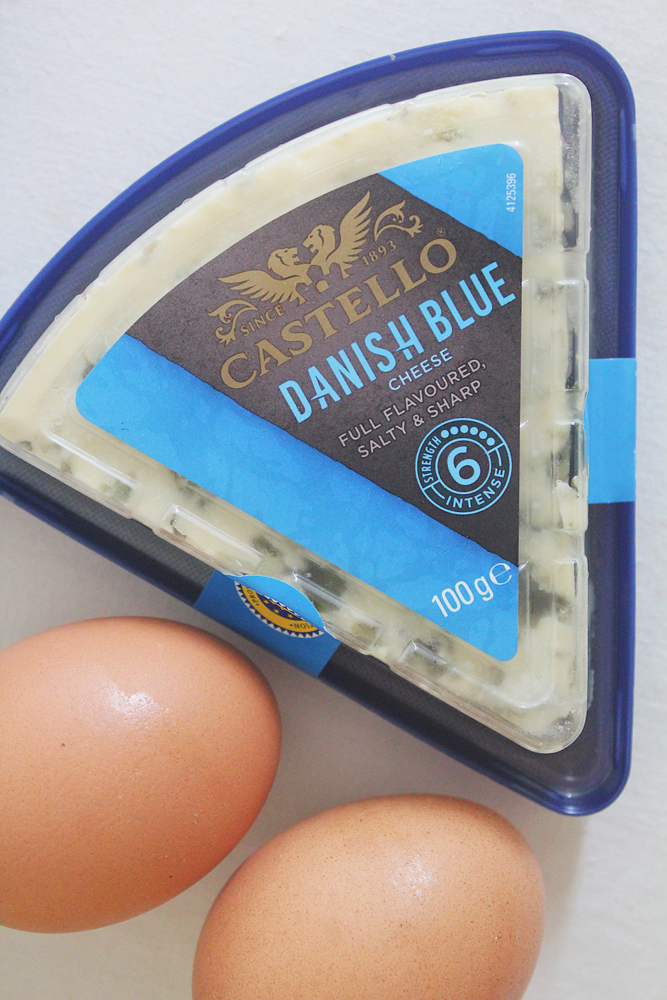
  • Danablu Cheese, crumbled
  • Pistachios, roughly chopped

METHOD

  1. Sweet Potato Gnocchi: Bake the sweet potatoes in a preheated oven at 230C (450F or gas mark 8), for 45 minutes or until completely tender when pierce with a fork. Once done, set aside to cool.

Note: Japanese purple sweet potatoes are best steamed or roasted. When boiled, they will lose their purple hue. So to retain their vibrant colour, they should be roasted or steamed.

  1. Once cool enough to handle, peel the skins off the sweet potatoes and in a large mixing bowl, roughly mash them using a fork. Add the flour, egg and season with a touch of salt and freshly ground black pepper. Bring the mixture together to form a dough.
  2. Gently fold and press the dough a couple of times, adding flour as necessary if the dough feels sticky. Turn the dough out onto a work surface lightly dusted with flour. Cut the dough into four equal parts and form each quarter into a ½-inch diameter log using the palm of your hands.
  3. Cut each log into 1-inch pieces and then press over the tine of a fork to create ridges. Transfer to a baking sheet dusted with flour and repeat with the remaining dough. I managed to make about 76 pieces of gnocchi with this recipe, more or less depending on how you roll them out/cut them.

Purple Sweet Potato Gnocchi

  1. Bring a large pot of generously salted water to a boil. Working in batches, add the gnocchi to the pot, gently stirring once or twice to prevent them from sticking. Cook until the gnocchi floats to the surface, about 3-5 minutes, and then cook for an additional 30 seconds. Remove using a slotted spoon and transfer to a tray lightly drizzled with oil. Set aside.
  2. Creamy Parmesan Sauce: Heat about a tablespoon of cooking oil over medium-high, in a medium-sized pan. Add garlic and sauté until fragrant, about 30 seconds. Immediately add in the onions and continue to sauté until fragrant and slightly golden in colour and onions have softened and begin to go translucent, a further 45 seconds.
  3. Add the cream and season with a touch of salt and freshly ground pepper. Mix and bring to a gentle simmer. Once simmering, add in the parmesan cheese. Mix until the cheese has melted and then remove from the heat.
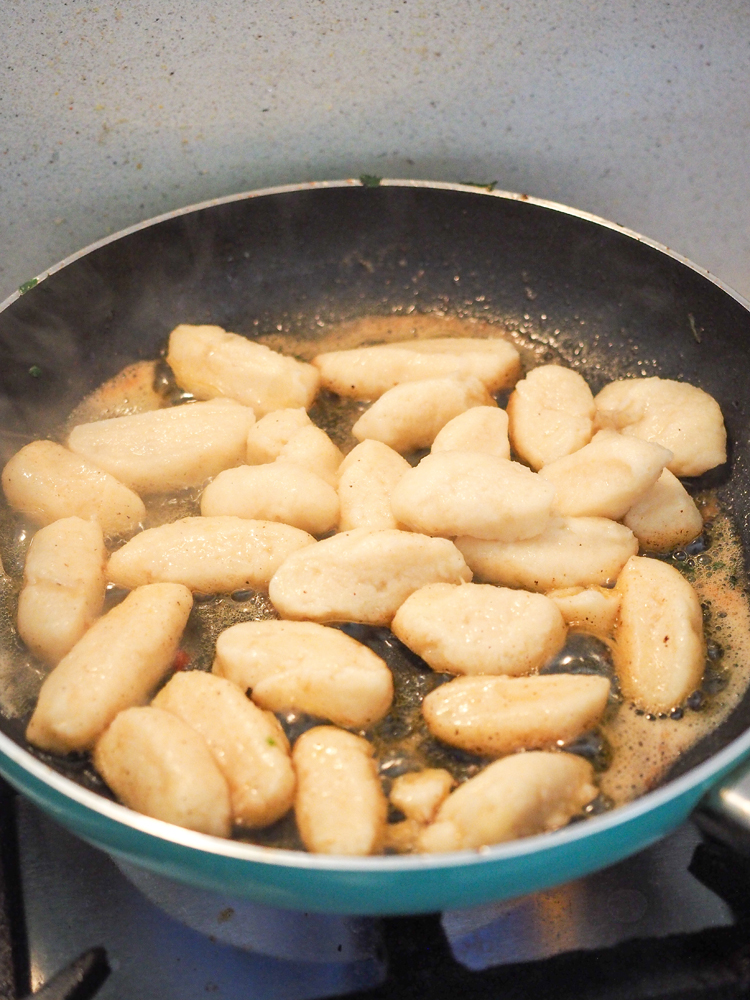
  4. Assemble: Heat 2 tablespoons of cooking oil in a large frying pan over medium-high. Working in batches again, add the gnocchi to the pan and lightly fry until golden brown in colour.
  5. Spread the creamy parmesan sauce on a serving dish, and place the pieces of fried gnocchi on top. Add crumbles of Danablu cheese* (or any other type of blue cheese) and top with roughly chopped pistachios, and chives.
  6. Serve immediately and enjoy!

Purple Sweet Potato Gnocchi with Creamy Parmesan Sauce, Danablu & Pistachios

This recipe for Purple Sweet Potato Gnocchi creates a vibrant and eye-catching dish that is as visually pleasing as it is delicious. You get the best of both worlds with the light, soft-pillowy interior and golden-crispy exterior in every mouthful. These gnocchi are a touch sweeter than those made from regular potatoes, and therefore are best complimented by salty and savoury flavours, like a Creamy Parmesan Sauce. Sharp, rich, and bold especially with the danablu cheese. Balance it out with a fresh squeeze of lemon juice to cut through the creaminess, and you’ve got yourself a killer dish!

Purple Sweet Potato Gnocchi with Creamy Parmesan Sauce, Danablu & Pistachios

BON APPÉTIT

– Ally xx

myTaste.com

Advertisement
Auguest 2019: Jialing Mew

Baked Brie with Rosemary, Honeyed Pear & Walnuts

Happy Auguest everyone! I’m Jialing and this is my 5th year as the grand finale for Amcarmen’s Kitchen’s Auguest series. I’ve learnt a lot in these past five years, but clearly not how to stop procrastinating.

Baked Brie with Rosemary, Honeyed Pear & Walnuts

I am at a friend’s wedding, typing away on my phone as quickly as I can while waiting for dinner to come out, moments before it is meant to go live (despite Allison having sent me daily reminders – sorry mate). If you, like me, frequently find yourself with many commitments, and little time, boy do I have a recipe for you! Having learnt from my previous Auguest blogs, this recipe uses just a few ingredients and equipment, and comes together in 15 minutes!

As a bonus, it is vegetarian friendly, and can be easily adapted to be gluten friendly, by swapping out the bread. But it’s not for vegans. Sorry. Please direct yourself to Auguest 2016 for my Poached Pears with Chocolate Chia Mousse if that’s what you’re after.

Baked Brie with Rosemary, Honeyed Pear & Walnuts Ingredients

PREP TIME 5 MINS | COOKING TIME 10-12 MINS | SERVES 4-6*

*Or one (1) very hungry Jialing.

INGREDIENTS

  • 200g Brie cheese
  • 3 pears
  • 2 sprigs rosemary
  • 1/4 cup walnuts
  • 2 tbsp honey

To serve

  • Strawberries
  • Crusty bread

METHOD

  1. Pre-heat oven to 180C (350F or gas mark 4) and line a tray with baking paper – this will help keep the honey from sticking to the surface when it caramelises!
  2. Cut pears into quarters, and lay onto the baking tray, leaving space for the brie cheese in centre.
  3. Place the unwrapped brie cheese in the centre of the tray and lay whole sprigs of rosemary on top.

Tip: Laying them on top rather than poking them into the cheese infuses the flavour without creating holes that the melting cheese will spill out of as it bakes!

  1. Pile walnuts gently on top of the rosemary sprigs, and drizzle the brie cheese and pears generously with honey.
  2. Bake for 10-12 minutes, until the brie cheese is soft and the honey just starts to bubble. As the honey cools it will caramelise the walnuts.
  3. Gently lift the brie cheese using spatula and place onto a cheese board. Arrange pears (careful, they’ll be hot too) and fresh strawberries around the brie cheese and serve immediately with fresh crusty bread. Enjoy!

Baked Brie with Rosemary, Honeyed Pear & Walnuts

Baked Brie with Rosemary, Honeyed Pear & Walnuts

And here we have a rather curious Winston.

Photo Courtesy & Recipe Copyright © 2019 | Jialing Mew

BON APPÉTIT

– Jialing Mew

myTaste.com

Auguest 2019: Brendon D'Souza

Potato Gnocchi with Red & Yellow Peppers

Hi Foodies, it’s Brendon D’Souza from @brendonthesmilingchef here.

It’s an honour to take part in Auguest once again this year at AMCarmen’s Kitchen. Allison and I met in Sydney a few years ago through Instagram, and then in-person at a food blogging event I hosted. Since then we’ve had countless foodie adventures together.

I started a food blog called Brendon The Smiling Chef around 2012, following the success of a recipe column of the same name. I wrote, styled, and photographed the recipes of my favourite dishes and reviewed some of my favourite restaurants and cafes. The blog continued to run until around 2016. I then focused on photography and a few other passions, worked for tech startups like Deliveroo and Tix and eventually landed a role at a global workspace provider. Earlier this year I launched my photography business Sydney Food Photography. I’ve been lucky to collaborate with some amazing brands like Samsung, OzHarvest and more.

Potato Gnocchi with Red & Yellow Peppers

When I received the theme for this year, I knew I wanted to take a playful twist on the definition of fruit. Potatoes are called pomme de terre in French which could literally translate to ‘apple of the earth’ and peppers (or capsicums as we call them in Australia), are also technically a fruit of the nightshade family (Solanaceae).

Gnocchi are delightful potato dumplings made with a few simple ingredients. They are one of my favourite comfort food this winter and pair very well with a tangy roasted pepper sauce.

Potato Gnocchi with Red & Yellow Peppers

PREP TIME 25 MINS | COOKING TIME 1 HOUR 30 MINS | SERVES 6

INGREDIENTS

For the gnocchi

  • 500g potatoes, skin on
  • 200g plain flour + extra
  • 1 free-range egg yolk, lightly beaten
  • Salt and pepper, to taste

For the peppers

  • 1 large red pepper, sliced
  • 1 large yellow pepper, sliced
  • 1-2 cloves garlic, sliced
  • 1-2 tbsp olive oil + extra

To serve

  • 250g cherry tomatoes, halved
  • Handful chopped parsley
  • Grated Grana Padano or other hard Italian cheese, to serve

Potato Gnocchi with Red & Yellow Peppers

METHOD

  1. Preparing the Potatoes: Place the potatoes in a large pot and cover with cold water. Place over high heat and bring to a boil. Continue to boil until cooked through. A knife should glide through the potato when it’s cooked. Remove from the heat and drain. Cover the potatoes with cold water and set aside to cool.
  2. Roasted Peppers: Pre-heat the oven to 180ºC/160ºC fan forced. Toss the peppers with a little olive oil and garlic slices. Spread in a single layer in a roasting pan and roast for 20-25 minutes until the peppers have softened and start to caramelise around the edges. You may need to stir the peppers in the pan while roasting. Remove from the oven and set aside.
  3. Potato Gnocchi: Once the potatoes have cooled, peel and then mash. Add the 200g of flour, egg yolk, salt and pepper and mix with a wooden spoon to form a pliable dough. If the mixture looks a little sticky, add more flour until it forms a ball. It will look and feel like play dough.
  4. Bring a large pan of salted water to a boil. Sprinkle a chopping board with some extra flour. Divide the dough into quarters and roll to form a 1.5cm thick sausage. Cut the sausage into 1cm thick slices with a sharp knife dipped in some cold water. This helps to prevent the dough from sticking. I like to make my gnocchi a little rough and leave them as discs.
  5. Cook the gnocchi in small batches for 2-3 minutes. They will float to the surface when they have cooked through. Remove to large heatproof bowl and toss with a little olive oil to prevent sticking.
  6. Add the roasted peppers, cherry tomatoes, and parsley to the gnocchi and toss to combine. Drizzle with olive oil and grated Grana Padano to serve and enjoy!

Potato Gnocchi with Red & Yellow Peppers

Optional extra: I love the taste and texture of pan-fried gnocchi. To do so, heat a frying pan over a medium-high heat. Add 1 tsp butter and a drizzle of olive oil. When hot, add the gnocchi in batches and sauté until golden brown.

Potato Gnocchi with Red & Yellow Peppers

Check out my foodie adventures on Instagram at @brendonthesmilingchef

Photo Courtesy & Recipe Copyright © 2019 | Brendon D’Souza

BON APPÉTIT

– Brendon D’Souza

myTaste.com

Spicy Garlic Prawn & Avocado Fettuccine

Spicy Garlic Prawn & Avocado Fettuccine

Hello Everyone! So once again, I’ve been feeling a little under the weather since towards the end of last week. I think it’s because I got rained (drizzled) on and just been feeling cold ever since. Started with an itchy throat, then a runny nose. I had a mild fever just two days ago but thank goodness I’m starting to feel a little better! Apologies in advance if this post contains a lot of typos or obvious grammatical errors – my brain is not fully functional at the moment.

But that aside, a new month can only mean one thing right? It’s time to experiment and play around with a new fruit on the blog! For the month of July, I’ll be featuring one of my favourite (well to be honest, almost everything is a favourite of mine *cheeky grin*) fruits of all time – Avocado! The last time I featured a month of avocado recipes was back in 2017 if not mistaken. You can click here to see what I got up to with avocados back then.

Avocados can be such an unpredictable b*tch at times – you can never win with them! If I knew I was going to cook/use the avocados on the same day I bought them, I would ask the lady who sells them if the ones I’ve picked are ripe and ready for that day. I still pick those that are slightly firm when gently squeezed. I never ever pick the soft ones! If I knew I was going to only use them the next day, she’d pick the ones that are a little less ripe for me – those that are still green, slightly browned. Here are some tips from Love One Today on how to check for the ripeness of avocados.

How to Differentiate the Ripeness of an Avocado

Besides being super unpredictable, avocados are known for several proven health benefits:

Avocados are Incredibly Nutritious

They contain a wide variety of nutrients, including 20 different vitamins and minerals. Here is a list of some of the most abundant nutrients found in a single 100-gram serving:

  • Vitamin K: 26% of the daily value
  • Folate: 20% of the daily value
  • Vitamin C: 17% of the daily value
  • Potassium: 14% of the daily value
  • Vitamin B5: 14% of the daily value
  • Vitamin B6: 13% of the daily value
  • Vitamin E: 10% of the daily value
  • Avocados also contain small amounts of magnesium, manganese, copper, iron, zinc, phosphorous, and vitamins A, B1 (thiamine), B2 (riboflavin), and B3 (niacin).
  • Although avocados contain carbs, 78% of those are fibre. So basically only 22% are actually carbs, making this a low-carb friendly plant food.
  • Avocados do not contain any cholesterol or sodium and are low in saturated fat.

Fat Content in Avocados may help you Absorb Nutrients from Plant Foods

When it comes to nutrients, your intake is not the only thing that matters. What’s also important is that you need to be able to absorb these nutrients into your body, where they can be used. Some nutrients are fat-soluble, meaning that they need to be combined with fat in order to be utilised.

So, not only are avocados highly nutritious, they can dramatically increase the nutrient value of other plant foods that you eat. This is all the more a very good reason to always include a healthy fat source, such as the avocado (or avocado oil), when you eat your veggies. Without it, a lot of the beneficial plant nutrients will go to waste.

Avocados are Loaded with Powerful Antioxidants that can Protect your Eyes

Not only do avocados increase antioxidant absorption from other foods, they are also high in antioxidants themselves, two of which, namely carotenoids lutein and zeaxanthin, as incredibly important for our long term eye health.

Spicy Garlic Prawn & Avocado Fettuccine

Eating Avocados may help you Lose Weight

Avocados are weight-loss friendly. They keep you full longer and may help you naturally eat fewer calories, making it easier for you to stick to healthy eating habits. As stated before, avocados are also high in fibre and very low in carbs, two attributes that should help promote healthy weight loss – if considering the context of a healthy, real-food-based diet.

And lastly for the #avocadohaters *cheeky grin*

Avocados are Delicious and Easy to Incorporate into your Diet!

Not only are they beneficial to our health, they’re also super delicious and go with many types of food. They have a creamy, rich, and fatty texture. You can easily add them to salads or pasta, spread them on toast, use as a dip for chips, or simply scoop them out with a spoon and eat them plain!

If you want to read up more on the many health benefits that avocados have to offer, you can head on over to Healthline.

But before you head on over to the recipe below, please check out the original recipe for Shrimp & Avocado Pasta by Kevin & Amanda.

Spicy Garlic Prawn & Avocado Fettuccine Ingredients

PREP TIME 10 MINS | COOKING TIME 10-12 MINS | SERVES 4

INGREDIENTS

For the avocado and Parmesan ‘sauce’

  • 1 medium-sized ripe avocado
  • 2 tbsp extra-virgin olive oil
  • 2 tbsp grated Parmesan cheese
  • 1 tbsp freshly squeezed lemon juice
  • Sea salt and freshly ground black pepper, to taste

For the spicy garlic prawns

  • 250g large tiger prawns, heads removed, deshelled, and deveined*
  • 30g unsalted butter
  • 5 garlic cloves, minced
  • 2 stalks scallions, chopped
  • 1 tbsp extra-virgin olive oil
  • 1 tsp ground chilli, or more if you want it spicier
  • Sea salt and freshly ground black pepper, to taste
  • 250g fettuccine pasta, uncooked**
  • 1/4 cup sun-dried tomatoes, sliced
  • 1 small ripe avocado, diced
  • Parmesan cheese, for serving (optional)

*A quarter kilo gave us 4 large tiger prawns, plus 1 extra because the lady who sells them was nice enough to add one in when my Mom asked for it *cheeky grin*. Save the heads and shells to use as a base for soups, broths, or sauces. If not using immediately, place in a zip-lock bag and pop it into the freezer. Keeps frozen for up to 3 months.

**Or you can use any type of pasta – whatever you have readily available in your pantry!

METHOD

  1. Avocado ‘Sauce’: Cut the medium-sized avocado in half, lengthwise. Remove the pit and discard – or if you have a green thumb, you’ll know what to do with it. Using a spoon, scoop out the flesh from both halves of the avocado from its skin, and place in a medium-sized mixing bowl.
  2. Add the Parmesan cheese, lemon juice, and olive oil. Smash and mix together until well combined. Season with sea salt and freshly ground black pepper, to taste. Set aside.
  3. Meanwhile, bring a large pot of water with a teaspoon of sea salt to a boil. Add the fettuccine pasta and cook according to package directions until al dente.

Tip: In cases like these, I like to undercook my pasta by 2 to 3 minutes. The reason being is that I will then add the cooked pasta to the frying pan of garlic prawns, which will continue to cook the pasta. If I had pushed it to the max when boiling, I’ll end up with super soft pasta.

  1. Spicy Garlic Prawns: While the pasta is cooking away, add the butter and olive oil to a medium-sized frying pan over medium heat. Add the minced garlic and sauté for about 30 seconds until golden brown and fragrant.
  2. Add the prawns and cook until they turn pink, about 2 minutes per side, then add the chopped scallions and ground chilli. Mix to combine.
  3. Quickly add the pasta from the pot of boiling water, to the garlic prawns, followed by the avocado sauce. Give it a good mix and then throw in the sliced sun-dried tomatoes.
  4. Turn the heat off and let it cook for a further minute before plating up.
  5. Sprinkle more Parmesan cheese on top and garnish with the diced avocados. Serve hot and enjoy!

Spicy Garlic Prawn & Avocado Fettuccine

Tip: The nutrients in avocado can oxidise and turn brown soon after cutting into it and exposing its flesh. The trick to slowing down the oxidation process and preventing them from browning quickly is to add a squeeze of lemon or lime juice.

Now, this may not be one of the prettiest dishes I’ve plated up for the year – I don’t know, I just don’t like how the colour of the diced avocados blended in with the colour of the pasta. The green didn’t quite pop out as much as I would’ve liked it to. Besides the prawns, everything else looked a bit monotonous in my opinion. Nonetheless, despite its look, it was a great tasting dish! I mean, you honestly can’t go wrong with the classic taste of garlicky and lemony prawns can you? What more when it’s paired with pasta and a creamy avocado and parmesan sauce? And that added kick of spice? BOOM!

Spicy Garlic Prawn & Avocado Fettuccine

BON APPÉTIT

– Ally xx

myTaste.com

Breakfast Muffins: Blue Cheese & Mushroom

Breakfast Muffins: Blue Cheese & Mushroom

Hello Everyone! I hope everyone had a great weekend and are all pumped for another week ahead! I may have been a little unmotivated today though seeing as it is a Monday after a long weekend. Friday was the first day of Hari Raya (Eid al-Fitr) here in Brunei and we got that Friday and Saturday off from work. To my surprise, the long weekend has been quite uneventful and quiet for Hari Raya.

On the eve of Raya, my mom, sister, and I went to watch the premier of The Incredibles 2! My inner 12-year-old was screaming for joy as the long wait for a sequel finally came into fruition. I remember when I was at the snacks counter, they had these character cups for the drinks. I was asked by the guy at the counter which character would I like, and with probably too much amusement for a 26-year-old in my tone, I squealed, Jack Jack! Thank God the guy did not ask me who Jack Jack was, I would’ve shamed him *shame shame shame* After I got the popcorn and drinks, I stood aside to wait for my hotdog (don’t judge, we were watching the film during our normal dinner time), and the next lady came up to the counter. I wasn’t even listening to the exchange of words between her and the snacks counter guy, but I was in such disbelief when I heard her utter the words “I want the baby.” My eyes widened and in my head I said, how dare you, you uncultured swine. You don’t deserve to watch the movie if you don’t even know the character’s name! Anyway, the film was WORTH THE WAIT. I was laughing non-stop throughout the film, and the people seated beside us were probably thinking, what is this girl on – LET ME HAVE MY MOMENT. My favourite line from the movie? “Num Num Cookie!”

Breakfast Muffins: Blue Cheese & Mushroom

Anyway, that aside for some more side-tracking – if you want to skip ahead to the recipe, just continuing scrolling. I basically spent the rest of my long weekend at home sorting out stuff that I want to get rid of – we’re having a garage sale at home this coming Sunday – and spent the remaining of the long weekend in the kitchen cooking up a storm both good and bad *cheeky grin* I had a bit a failed attempt at a recipe I was so eager to tackle, which made me feel a little deflated after, but I did also have a successful cook the following day for a different recipe though, so all is well. I also went over to a friend’s, had lots of food, dirty talks that involved Urban Dictionary, and of course insanely MASSIVE laughs that turned into silent and out of breath laughs with tears involved for a good 5 minutes. Those are the best kind of laughters, especially between people who get the joke, or get what it is that needs to be laughed at without having to explain further.

Okay, I guess with the long-winded introduction to this post, my long weekend doesn’t seem to be THAT uneventful at all. But moving on, the adventures of Muffin Making Monday continues for its third week and I’ve got, let’s see… Blue Cheese? AND Mushies?! YAAASSS! These delightfully savoury blue cheese and mushroom muffins are delicious for ANY time of day with a hot bevvy (no, not alcohol). I know, I know, some are not very fond of the pungent taste and smell of blue cheese, but trust me when I say that these muffins smell nothing but amazing when freshly baked and the taste and the taste of the blue cheese only just subtly shines through. Check out the original recipe over on All Recipes.

Breakfast Muffins: Blue Cheese & Mushroom Ingredients

Breakfast Muffins: Blue Cheese & Mushroom Ingredients

PREP TIME 10 MINS | COOKING TIME 30-35 MINS | SERVES 16 MUFFINS

INGREDIENTS

  • 1 punnet (125g) brown mushrooms, roughly chopped*
  • 125g unsalted butter
  • 2 large free range eggs
  • 3 & 1/3 cups plain flour
  • 1 cup milk
  • 2 tsp baking powder
  • 1 tsp dried oregano
  • 1 tsp dried thyme**
  • Freshly ground black pepper, to taste

*Reserved a few mushies to slice thinly, to decorate on top of the muffins (optional).
**Or you may use 2 tsp of herbes de Provence if available which is basically a combination of savory, marjoram, rosemary, thyme, and oregano.

METHOD

  1. Preheat oven to 200C (400F or gas mark 6). Line one 12 hole and one 6 hole muffin pan with paper cases. Set aside.
  2. Add the butter in a heatproof bowl and melt in the microwave, about 30 seconds. Set aside to cool down a bit.
  3. Melt a knob of butter in a medium-size pan over medium-high heat. Add the sliced mushrooms and cook until half done, about 30 seconds per side. Remove from the pan. Add the roughly chopped mushrooms to the pan and cook until soft, about 5 minutes. Season with the herbs and freshly ground black pepper. Remove from the heat and set aside to cool.
  4. In a small mixing bowl, whisk the eggs with the milk, and then stir in the melted butter.
  5. Sift the flour and baking powder into a large mixing bowl. Gradually stir in the egg mixture until well combined.
  6. Add the sautéd mushrooms and crumbled blue cheese into the flour mixture and gently mix. Spoon the mixture into the prepared pan and no more than up to 3/4 full (this allows room for the muffins to rise). Top each muffin with a sliced mushie.
  7. Bake for 20 to 25 minutes until golden brown. Remove from the oven and serve immediately with a nice cup of coffee. Enjoy!

You can store the muffins in an airtight container in the refrigerator for up to 3 days. Heat them back up in a steamer before serving.

Breakfast Muffins: Blue Cheese & Mushroom

Breakfast Muffins: Blue Cheese & Mushroom

Before I wrap things up here, I just thought I’d share this weird little fascination of mine with these muffins. While I was having them for an afternoon snack, I was fascinated by the speckles of mold present in the muffins in such a way that I really sat there and observed the muffin for a good five minutes before biting into it. I even raised it up to my Mom saying, “look at all the mold in these muffins!” with an obvious hint of excitement in my tone. To which my Mom replied, “if I didn’t know you bought blue cheese for this recipe, I would’ve thrown it out because I thought it went bad since it was moldy and smelled like feet!” *cheeky grin*

Breakfast Muffins: Blue Cheese & Mushroom

BON APPÉTIT

– Ally xx

myTaste.com

Breakfast Muffins: Feta Cheese, Onion & Rosemary

Breakfast Muffins: Feta Cheese, Onion & Rosemary

Hello Everyone and a happy first Monday for the month of June! Hope the Monday blues didn’t hit you guys hard, especially to my friends/followers in Brunei – unlike me, I know some of you guys have had a super long weekend with all the public holidays we’ve been having. We, as in my office, didn’t get to have one of the public holiday off so it was a normal working day for us on Thursday while most likely 80% of the working population was off. Thank goodness Saturday was public holiday that applied to us so yay for the long weekend (normal weekend anyway for some)! If you guys don’t already know from my constant mentions on several posts, and on the ‘about’ section of my blog, I work SIX full days a week. So getting to have a Saturday off (which is quite rare) because of a public holiday is pure bliss.

Moving on from that… mini rant? I mentioned in one of my posts last week that I’ll be switching up my post schedule just for this month – and yes it does have something to do with the theme for June. The title of this post may have already given it away for some of my loyal and consistent followers. Drumroll please! So I may have taken it to Google and searched ‘how to type out a drumroll sound’ – gives up 30 minutes later.

Breakfast Muffins: Feta Cheese, Onion & Rosemary

MUFFIN MAKING MONDAY IS BACK ON AMCARMEN’S KITCHEN! Muffin Making Mondays started about 4 years ago now I think, where Jialing would come back to my place after our Monday morning lecture together on main campus. We’d bake muffins together for our on-the-go work brekkie for that week. Well, we’d bake together but we’d both have our own recipes, i.e. she’d make sweet muffins for herself while I’d make savoury ones – we still share 1 or 2 though after we’ve baked them. I also remember how we’d both have a 1-on-1 Cards Against Humanity game where we’d both just unanimously vote which was the best (dirtiest) answer while our muffins were baking in the oven. Those were the days.

Anyway, it’s probably going to get lonely in the kitchen as it’ll just be me, myself, and I without Jialing, but I’m bringing back Muffin Making Mondays for the month of June! And to kick things off, I’ve got a delicious Feta, Onion, and Rosemary Savoury Muffin to start your mornings with a bang! Check out the original recipe over on Genius Kitchen.

Breakfast Muffins: Feta Cheese, Onion & Rosemary Ingredients

PREP TIME 15 MINS | COOKING TIME 30 MINS | SERVES 12 MUFFINS

INGREDIENTS

For the muffin batter

  • 1 & 3/4 cups plain flour
  • 1 cup milk
  • 1 large free range egg
  • 1 tbsp baking powder
  • 1 tsp salt

For the onion and cheese mixture

  • 100g feta cheese, crumbed
  • 1 medium-sized brown onion, finely chopped
  • 1 tbsp fresh rosemary, finely chopped
  • Freshly ground black peppercorns
  • Knob of unsalted butter

METHOD

  1. Preheat oven to 200C (400F or gas mark 6). Line a 12 hole muffin pan with paper cases.
  2. Melt the butter in a small frying pan over medium heat. Add in the chopped onions and cook for about 5 minutes until soft and slightly caramelised. Remove from heat and set aside to cool.
  3. Once the onions have cooled down, add in the crumbed feta cheese and chopped rosemary. Season with freshly ground black pepper and give it a good mix. There is no need for salt since the feta is quite salty by itself. Set aside.
  4. For the muffin batter, sift the plain flour, baking powder, and salt into a large mixing bowl.
    In another medium-sized bowl, beat the egg, followed by the milk and give it a good whisk to combine.
  5. Pour the egg and milk mixture into the flour, until well incorporated, using minimum number of folding movements. Ignore the lumps in the mixture and do not over-mix.
  6. Gently add the onion and cheese mixture into the batter mixture, folding in, as before, with as few strokes as possible. Spoon the mixture into the prepared muffin pan.
  7. Bake for about 20 minutes, or until well risen and golden. Remove the muffins from the tins and serve immediately. Enjoy!

Breakfast Muffins: Feta Cheese, Onion & Rosemary

Breakfast Muffins: Feta Cheese, Onion & Rosemary

These muffins are perfect for sahur with a hot cup of teh tarik for my Muslim friends and followers. Well to be honest, it’s perfect for any time of the day with a nice hot cup of anything like coffee, tea, or hot chocolate!

BON APPÉTIT

– Ally xx

myTaste.com

Plokkfiskur (Icelandic Fish Stew)

Plokkfiskur (Icelandic Fish Stew)

Hello Everyone! Can you believe it?! It’s already the middle of the year! How did time fly by so quickly when I felt like it was only just yesterday that 2017 kicked in?! The next thing you know, it’ll be December and I hope that the next half of the month will be exciting for me in terms of personal and career growth.

So let’s just get right into it shall we? I promise that this won’t be a long-winded post as have the previous ones been so far. I’ve got nothing much to share anyway as things at work have been progressively slow, but I’m not complaining though!

The theme for the month of June on Amcarmen’s Kitchen is hero-ing Tilapia! For those of you who are just tuning into the blog, I made a post at the beginning of the year about Hypertension, or known commonly as High Blood Pressure. Last year, I did a medical check up and found out that I had High Blood Pressure – now I don’t know if this was due to the amount of stress I had been experiencing from work prior to my medical check up, or that it is already a part of my health. Nonetheless, after knowing about my high blood pressure, I’ve been rather careful with my diet and making sure that I eat foods that help lower and maintain a stable blood pressure. In the post, I listed out 20 foods and drinks that help to prevent, lower, or control your high blood pressure naturally without the need for medication. Tilapia is one of the foods that I listed out in that post, and just to recap: just 133 grams (4 oz) of tilapia provides 8% of the magnesium and 8% of the potassium you need every day. I promised that this wouldn’t be a long-winded post but it seems like it is turning out to be one, and I do apologise for misleading everyone!

Plokkfiskur (Icelandic Fish Stew)

So, maybe you’ve read this in a previous post, or you know me personally to know where I’d like to travel to next; it’s an absolute dream of mine to travel Iceland. I talked to an Icelandic acquaintance not too long and asked him what Icelandic dish he would recommend I try if I were to visit Iceland in the near future. A dish that he pointed out was Plokkfiskur. Plokkfiskur, or roughly translating to ‘mashed fish’ is an Icelandic Fish Stew that isn’t quite like the stews that you’re traditionally used too. It’s not soup based, but instead it is a combination of fish, potatoes, onions and béchamel sauce is a firm favourite in Icelandic kitchens. It’s a traditional dish and a true comfort food. For my dish, I completely left the béchamel sauce out for no particular reason – okay I lied, there is a reason and that reason is because the recipe that I looked up did not have béchamel sauce in it. It was only after when I was trying to describe what Plokkfiskur was for this post that I saw “béchamel sauce” in the description and had a little oh shit reaction. So any Icelanders out there reading this post, please do not butcher me for this – I’ve simply adapted the recipe to what is available here in Brunei and also paired it with other side dishes… Without the rye bread *gasps*.

Plokkfiskur (Icelandic Fish Stew) Ingredients

PREP TIME 10 MINS | COOKING TIME 30-40 MINS | SERVES 3-4

INGREDIENTS

For the plokkfiskur

  • 1kg fresh or frozen tilapia fillets, skins removed and cubed
  • 200g gouda cheese, grated
  • 2 medium brown onions, diced
  • Ground sea salt and black pepper, to taste
  • Spring onion, chopped
  • Butter, for greasing

For the garlic rosemary potatoes

  • 500g small to medium-sized potatoes, skin on
  • 2-3 garlic cloves, minced
  • 1 sprig of fresh rosemary
  • 2-3 tbsp olive oil
  • Asparagus stalks

METHOD

  1. Preheat oven to 190C (375F or gas mark 5).
  2. Add the diced onions and cubed tilapia into a greased baking dish, and season with salt and pepper. Top with the grated gouda cheese and pop into the oven for about 15-20 minutes or until golden brown and bubbly on top.
  3. Once done remove from the oven and sprinkle some chopped spring onions on top.
  4. Meanwhile, boil the potatoes in a large pot of salted water until tender, about 15-20 minutes. Once done, drain and set aside to cool down a bit. Then take a flat surfaced object (I used a small plate), to press down on the potatoes so that they are slightly smashed but not completely broke into pieces.
  5. Heat the olive oil in a medium-sized non-stick frying pan and sauté the minced garlic and rosemary spring until slightly fragrant. Add the potatoes in, working in batches if needed, and panfry each side until golden in colour, about 2-3 minutes per side. Once done transfer to individual dishes.
  6. Bring a small pot of salted water to a boil and blanch the asparagus stalks for about a minute or two until tender but still crunchy. Drain and submerge in an ice bath immediately to stop the cooking process. Divide evenly between the individual dishes.
  7. Divide the Plokkfiskur into the individual dishes and enjoy with your family and/or friends!

Plokkfiskur (Icelandic Fish Stew)

BON APPÉTIT

– Ally xx

myTaste.com

Smashed Avo Toast (9 ways)

Hello Everyone! Finally I am back on track with my posts and the theme for the month of April is Avocado! All you need is about half a medium-sized avocado everyday as it provides 1% of the calcium, 5% of the magnesium, and 10% of the potassium that you need daily. Avocados are a good source of potassium, which can help lower blood pressure, and in addition, the dark green flesh just under an avocado’s brittle skin contains large amounts of disease-fighting compounds. Though avocados are proven to help lower blood pressure and an abundance of health benefits, we have to be weary of how much we intake daily as they are also high in calories.

Tonight, I will be sharing 9 different ways you can start your mornings with a smile on your face with 9 different smashed avocado toasts! Of course, don’t limit yourselves to just these 9 recipes; I encourage you to get creative with your smashed avo toasts and share your creations with me on Instagram using the hashtag #amcarmenskitchen

1. Five Pepper Smoked Salmon with Red Onions, Capers & Chilli Flakes

Five Pepper Smoked Salmon with Red Onions, Capers & Chilli Flakes

PREP TIME <5 MINS | COOKING TIME  | SERVES 2

INGREDIENTS

  • 2 slices multigrain brown bread
  • 1/2 avocado, smashed
  • 1 small red onion, cut into rings
  • 2 tsp capers
  • Smoked salmon slices with five peppers

METHOD

  1. Lightly toast bread in a toaster for about 1-2 minutes.
  2. Spread a generous amount of the smashed avocado onto the toast and top with smoked salmon, red onion rings, and capers. Sprinkle with a touch of chilli flakes for an added kick (optional).
  3. Enjoy!

2. Medley of Grape Tomato Caprese Salad with Balsamic Reduction

Medley of Grape Tomato Caprese Salad with Balsamic Reduction

PREP TIME <5 MINS | COOKING TIME 5 MINS | SERVES 2

INGREDIENTS

  • 2 slices multigrain brown bread
  • 1/2 avocado, smashed
  • 1 punnet (250g) grape tomato medley, halved
  • 4 cherry bocconcini cheese, sliced
  • 4 tbsp balsamic vinegar
  • Ground sea salt and black pepper, to taste
  • Olive Oil
  • Sweet basil leaves

METHOD

  1. Combine the grape tomatoes, bocconcini slices, and sweet basil leaves in a small bowl. Drizzle with olive oil and season with a touch of ground sea salt and black pepper to taste. Set aside and leave to macerate.
  2. Meanwhile, heat the balsamic vinegar in a small non-stick saucepan over medium-high heat. Simmer, continuously stirring to check on the consistency of the glaze, until the vinegar reduces to a thick sauce, about 5 minutes. Remove from the heat and leave to cool down for a bit.
  3. Lightly toast bread in a toaster for about 1-2 minutes.
  4. Spread a generous amount of the smashed avocado onto the toast, top with the tomato cappers salad, and drizzle the balsamic reduction over the salad.
  5. Enjoy!

3. Sliced Banana & Pumpkin Seeds drizzled with Honey

Sliced Banana & Pumpkin Seeds drizzled with Honey

PREP TIME <5 MINS | COOKING TIME  | SERVES 2

INGREDIENTS

  • 2 slices multigrain brown bread
  • 1/2 avocado, smashed
  • 1 large banana, sliced
  • Honey
  • Pumpkin seeds

METHOD

  1. Lightly toast bread in a toaster for about 1-2 minutes.
  2. Spread a generous amount of the smashed avocado onto the toast, top with banana slices and pumpkin seeds, and drizzle with honey.
  3. Enjoy!

4. Soft-boiled Egg with Chilli Flakes & Parsley

Soft-boiled Egg with Chilli Flakes & Parsley

PREP TIME <5 MINS | COOKING TIME 6 MINS | SERVES 2

INGREDIENTS

  • 2 slices multigrain brown bread
  • 1/2 avocado, smashed
  • 2 large free range eggs
  • Chilli Flakes
  • Parsley, roughly chopped

METHOD

  1. Bring a small pot of water to a rolling boil. Once boiling, reduce the water to a rapid simmer before gently lowering the eggs one by one into the pot. Cook for 5 minutes for a runny yolk, or 7 minutes for a barely set yolk. Once done, remove from the heat and place in an ice bath to stop the cooking process. Once cool, peel the shell off and slice.
  2. Lightly toast bread in a toaster for about 1-2 minutes.
  3. Spread a generous amount of the smashed avocado onto the toast, top with the sliced eggs, and sprinkle with a touch of chilli flakes, and parsley.
  4. Enjoy!

5. Sliced Strawberries & Crumbled Goat’s Cheese with Balsamic Reduction and Peppermint Leaves

Sliced Strawberries & Crumbled Goat's Cheese with Balsamic Reduction and Peppermint Leaves

PREP TIME <5 MINS | COOKING TIME 5 MINS | SERVES 2

INGREDIENTS

  • 2 slices multigrain brown bread
  • 1/2 avocado, smashed
  • 4 large strawberries, sliced
  • 4 tbsp balsamic vinegar
  • Goat’s cheese, crumbled

METHOD

  1. Heat the balsamic vinegar in a small non-stick saucepan over medium-high heat. Simmer, continuously stirring to check on the consistency of the glaze, until the vinegar reduces to a thick sauce, about 5 minutes. Remove from the heat and leave to cool down for a bit.
  2. Lightly toast bread in a toaster for about 1-2 minutes.
  3. Spread a generous amount of the smashed avocado onto the toast, top with the sliced strawberries, crumbled goat’s cheese, and drizzle the balsamic reduction over the strawberries.
  4. Enjoy!

6. Sautéd Brown & Shimeji Mushrooms topped with Fried Enoki & Parsley

Sautéd Brown & Shimeji Mushrooms topped with Fried Enoki & Parsley

PREP TIME <5 MINS | COOKING TIME 8 MINS | SERVES 2

INGREDIENTS

  • 2 slices multigrain brown bread
  • 1/2 avocado, smashed
  • 4 large brown mushrooms, sliced
  • 1/2 bunch (100g) shimeji mushrooms
  • 1/2 bunch (50g) enoki mushrooms
  • 2-3 garlic cloves, minced
  • Ground sea salt and black pepper, to taste
  • Knob of unsalted butter
  • Olive oil
  • Parsley, roughly chopped

METHOD

  1. Melt the unsalted butter in a small frying pan over medium-high heat and add about a teaspoon of olive oil.
  2. Sauté the minced garlic until golden brown and fragrant, about 30 to 45 seconds. Add in the sliced brown mushrooms and shimeji mushrooms and cook until tender, about 3-4 minutes.  Season with pinch of ground sea salt and black pepper. Once tender, remove from the pan and set aside.
  3. In the same pan, heat about 3 tbsp of olive oil over high heat until slightly smoking. Add the enoki mushrooms in and fry until golden brown in colour, about 2-3 minutes. Once done, transfer to a small plate lined with a paper towel. Set aside.
  4. Lightly toast bread in a toaster for about 1-2 minutes.
  5. Spread a generous amount of the smashed avocado onto the toast and top with the sautéd garlic mushrooms and the fried enoki mushrooms. Garnish with a touch of ground black pepper and parsley.
  6. Enjoy!

7. Diced Mango with Chilli Powder & Peppermint

Diced Mango with Chilli Powder & Peppermint

PREP TIME <5 MINS | COOKING TIME  | SERVES 2

INGREDIENTS

  • 2 slices multigrain brown bread
  • 1/2 avocado, smashed
  • 1 small mango, diced
  • Chilli powder
  • Peppermint leaves

METHOD

  1. Lightly toast bread in a toaster for about 1-2 minutes.
  2. Spread a generous amount of the smashed avocado onto the toast and top with the diced mangoes, chilli powder, and peppermint leaves.
  3. Enjoy!

8. Roasted Chickpeas & Parsley

Roasted Chickpeas & Parsley

PREP TIME <5 MINS | COOKING TIME 10 MINS | SERVES 2

INGREDIENTS

  • 2 slices multigrain brown bread
  • 1/2 avocado, smashed
  • 1 can (200g) chickpeas, drained
  • 2 tsp ground smoked paprika
  • Ground sea salt and black pepper, to taste
  • Olive oil
  • Parsley, roughly chopped

METHOD

  1. Preheat oven to 200C (400F or gas mark 6). Line a baking tray with aluminium foil. Set aside.
  2. Add the drained chickpeas in a small bowl together with the ground smoked paprika, sea salt, black pepper, and a drizzle of olive oil. Toss to coat.
  3. Spread the chickpeas onto the prepared baking tray and roast in the oven for about 10 minutes. Once done, remove from the oven.
  4. Lightly toast bread in a toaster for about 1-2 minutes.
  5. Spread a generous amount of the smashed avocado onto the toast and top with the roasted chickpeas and parsley.
  6. Enjoy!

9. Chorizo Sausage & Sweet Corn

Chorizo Sausage & Sweet Corn

PREP TIME <5 MINS | COOKING TIME 4-6 MINS | SERVES 2

INGREDIENTS

  • 2 slices multigrain brown bread
  • 1/2 avocado, smashed
  • 1 chorizo sausage, sliced
  • 1 can (200g) sweet corn kernels, drained
  • Olive oil

METHOD

  1. Heat olive oil in a small frying pan over medium-high. Pan-fry the chorizo slices until browned, about 2-3 minutes per side. Once done, transfer to a plate lined with a paper towel. Set aside.
  2. Bring a small pot of water to a rolling boil and blanch the sweet corn kernels for about a minute or two. Drain and set aside to cool down for a bit.
  3. Lightly toast bread in a toaster for about 1-2 minutes.
  4. Spread a generous amount of the smashed avocado onto the toast, top with the pan-fried chorizo sausages and sweet corn kernels, and drizzle with a bit of the chorizo oil (optional).
  5. Enjoy!

Just a little side note before I end tonight’s post, I spent the whole day amending quite possibly the same artwork because their comments/amendments were all on an installation basis. Such completely waste of time which then prevented me from actually completing the work I had set to do today because I had to keep going back and forth to the same bloody artwork.

​BON APPÉTIT

– Ally xx

myTaste.com

Risoni al Ratatouille

Risoni al Ratatouille

Risoni al Ratatouille

Hello Everyone! Today is the last day of Pasta Month; sad to be ending as I actually have a whole lot more pasta dishes that I want to try out, but also happy to move onto a new theme for next month! Just a heads up though – the likelihood of a theme not happening is quite possible. I did have a theme in mind, and I’ve already prepared and cooked two dishes for it in advanced, the only problem is getting two more made for next month’s theme is quite unlikely. I say this because I am heading off to the Philippines on Saturday for about a month! Because of that, I probably won’t have time to cook. I also will not be sure if I will have Internet connection during my stay there so the likelihood of me uploading content for the month of July might not happen as well. So I guess I’ll just see how it goes – if posting on my blog is a problem, then you can follow me over on Instagram @amcarmenskitchen to follow my food journey while I am in the Philippines – I’ll make sure to keep that up to speed 🙂

Anyway, so okay, the dish is not quite a Ratatouille (I just thought naming it for this post would make it sounds fancier than it looks, hehe) – more like it’s inspired by some of the vegetables used to make a ratatouille *cheeky grin* but nonetheless, it still tastes pretty good for something that I just “whipped up” with the ingredients lying in the fridge and the pantry. You can bulk this dish up by adding meat or seafood if you wish, but I decided to keep this dish vegetarian.

Risoni al Ratatouille Ingredients

PREP TIME 10 MINS | COOKING TIME 15 MINS | SERVES 6

INGREDIENTS

  • 500g risoni, or other shaped pasta
  • 3-4 garlic cloves, minced
  • 2-3 red bird’s eye chilies, sliced
  • 2 medium-szied Lebanese eggplants, sliced into 1-inch thick chunks and then quartered
  • 1 medium-sized zucchini, sliced into 1-inch thick chunks and then quartered
  • 1 onion, diced
  • 1 punnet (125g) cherry tomato medley, sliced
  • 1/2 bunch asparagus, woody ends snapped off and cut into thirds
  • 1 tbsp baby capers, washed and drained
  • Freshly squeezed lemon juice from 1 lemon
  • Ground sea salt and black pepper, to taste
  • Handful of grated parmesan cheese
  • Olive oil

METHOD

  1. Bring a large pot of salted water to a boil. Once boiling, add in the risoni pasta and cook according to packet instructions or until al dente (mine was about 11 minutes).
  2. While your pasta is cooking away, heat some olive oil in a large frying pan. Sauté the garlic and chilies until golden brown and fragrant, about a minute, and then add in the onions, cooking until soft for another minute or two.
  3. Add in the asparagus, together with the zucchini and eggplant, cooking until soft for about 6-7 minutes. Season with a bit of ground salt and black pepper. Add in the cherry tomatoes and leave to cook for a further 4-5 minutes. Lastly, add in the capers and then turn the heat off.
  4. Once the risoni is done, drain, and then return to the pot. Add in the stir-fried veggies to the pot with the risoni and then give it a good mix.
  5. Divide the risoni equally into 6 portions and then top with a generous handful of  grate parmesan cheese and some ground black pepper. Serve immediately and enjoy!

Risoni al Ratatouille

BON APPÉTIT

– Ally xx

myTaste.com

Trine Boscaiola

Trine Boscaiola

Trine Boscaiola

Hello Everyone! It’s week 3 of Pasta Month and I’ve got a few things to say before we dive into the recipe. I apologise in advance that what I am about to say has nothing to do with the upcoming recipe – it’s more me telling you about my day/week and upcoming week. So if you don’t want to read this part, you can skip onto the recipe 🙂 Anyway, so last week Friday I had a nice dinner with my colleagues and then we ended the night escaping from a hostage-themed escape room and we did pretty well I must say! We escaped within an hour and one minute – which from what I remember is 14 minutes earlier than the set time limit hooray! Hostage is one of their new rooms, and the other is The Ring-themed *OMG* which I really want to try out with my friends, but I know I will probably regret it later on.

On Sunday, I also spent the afternoon with different colleagues and we watched The Conjuring 2 – which I don’t know whether it was a huge mistake or not haha. I didn’t think I was that scared from the movie, but I only knew that I was definitely scared when I could barely sleep that night. The image of Valak kept appearing in my head in the dark room – but I was definitely fine the next day/night. We then had dinner and said our goodbyes. Today, a few colleagues of mine headed over to the KFM studio to do a voice recording – basically just getting us to wish everyone “Selamat Hari Raya” for the upcoming festivities next month. It was actually quite fun in the end even though I had to convince just one colleague that I did not want to do the script in Malay because they’d all probably laugh at my pronunciation and intonation.

And that’s all I have for you – OH I almost forgot! Tomorrow morning I’ll be flying of to Singapore again for a couple of days. Taking a small break from work to do some shopping, eating, and meeting up with friends – it going to be a great weekend ahead!

Trine Boscaiola Ingredients

PREP TIME 5 MINS | COOKING TIME 10-15 MINS | SERVES 5

INGREDIENTS

  • 500g trine (curly fettuccine) pasta, or any other pasta shape
  • 250g rindless bacon rashers, thinly sliced
  • 1 punnet (250g) brown mushrooms, thinly sliced
  • 40g unsalted butter
  • 300ml thickened cream
  • 1/3 cup parmesan cheese
  • 5 spring onion stalks, chopped
  • Ground salt and black pepper, to taste
  • Olive oil

METHOD

  1. Bring a large pot of salted water to a boil. Cook the trine pasta according to packet instructions or until al dente.
  2. While the pasta is cooking away, heat about 1 tablespoon of olive oil in a large frying pan over medium-high. Cook the bacon until slightly browned and then remove from the pan. Add in the unsalted butter and then the mushrooms and cook for about 3-4 minutes or until soft. Then add in the pale parts of the chipped spring onion.
  3. Add in the cream together with about a cup of the pasta water and parmesan cheese. Turn the heat down to low and bring the mixture to a low simmer.
  4. Once the pasta is done, drain and then transfer the pasta to the cream mixture together with the fried bacon bits. Turn the heat back up to medium-high and then give it a good mix. Top with the remaining spring onions and then turn the heat off.
  5. Season with salt and pepper and toss until well combined. Divide the pasta among serving dishes and top with extra parmesan. Serve and enjoy!

Trine Boscaiola

Trine Boscaiola

BON APPÉTIT

– Ally xx

myTaste.com