Pininyahang Manok (Pineapple Chicken)

Pininyahang Manok (Pineapple Chicken)

Hello Everyone! If you’re looking for a fast and easy dinner meal that will have you out of the kitchen in no time, then I have some great news for you!

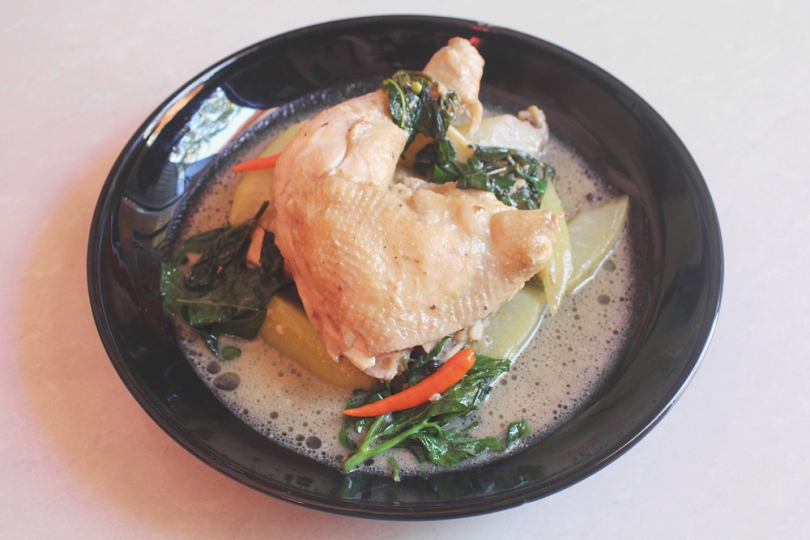
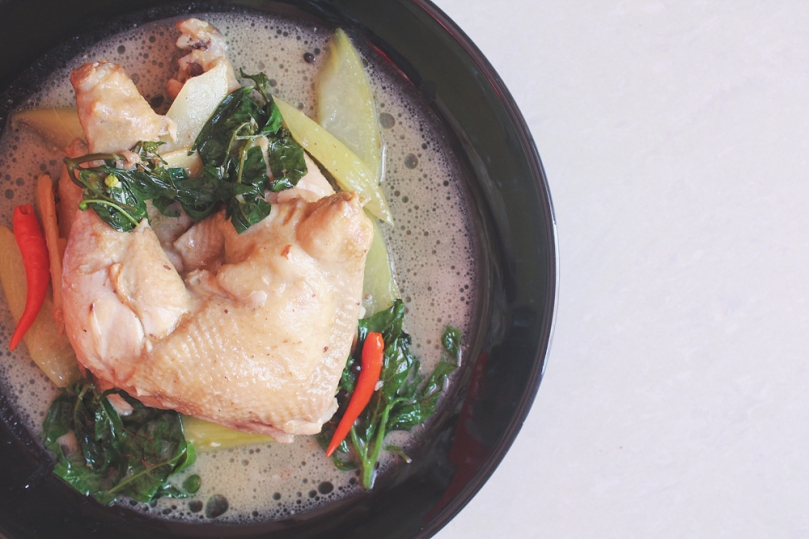
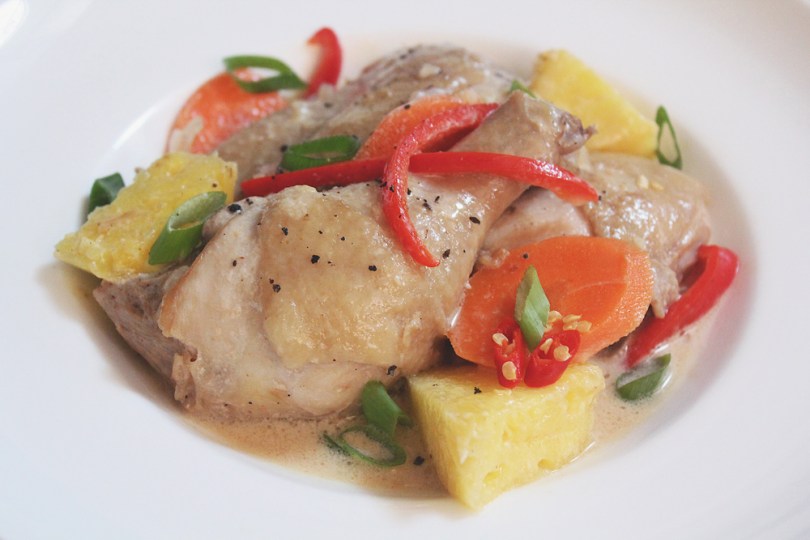
Tonight’s recipe is one very close to my heart. Besides the famous Chicken Adobo and Sinigang for days, Pininyahang Manok, or in English, Pineapple Chicken is one of those Filipino dishes that radiates the true meaning of Filipino comfort food. It is delicately flavoured with milk or cream, and pineapples, pulled together with simple pantry staples, finishing in less than 30 minutes cook time. Pair it with steamed rice and you have a chicken dish that the whole family is sure to love.

Pininyahang Manok (Pineapple Chicken)

There are different variations on how the dish is prepared by individuals, mainly in using either fresh or canned pineapples. I like to use fresh pineapples for not only does it add a balanced flavour profile of sweetness and tartness, it also does not have that lasang lata* taste to the dish. Another variation would be the choice of milk used – fresh, evaporated, or coconut milk. Those who prefer a creamier texture use whipping or all-purpose cream. All produce the same results tweaked to their liking, so there is no right or wrong way in choosing your ingredient variations.

*For my non-Filipino followers, lasang lata means “canned” flavour. Some canned products for me have this weird taste that I can’t shake off, that it tastes like the can in which it was preserved.

Pininyahang Manok (Pineapple Chicken) Ingredients

PREP TIME 10 MINS | COOKING TIME 20 MINS | SERVES 3
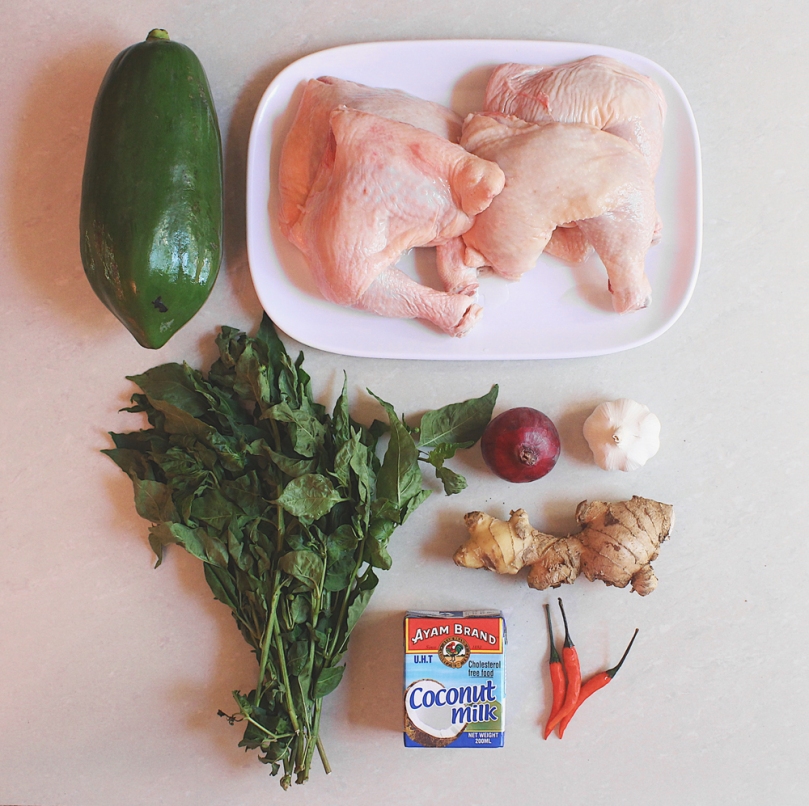
INGREDIENTS

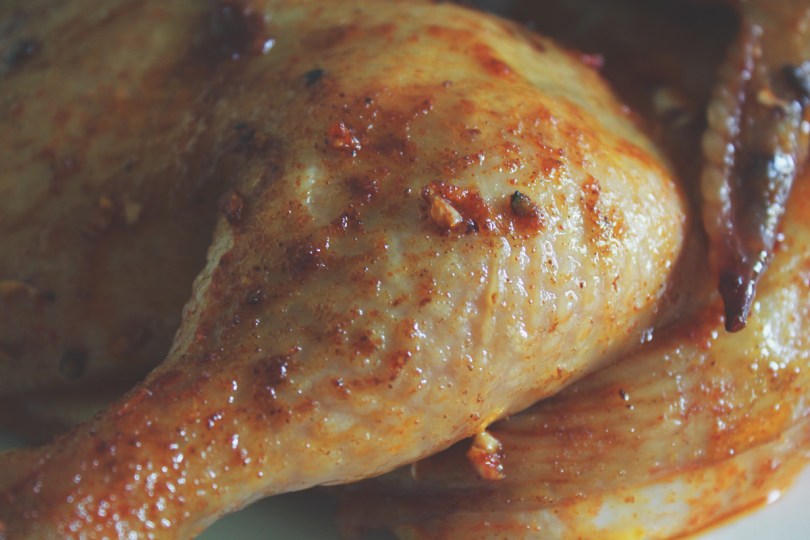
  • 3 pcs chicken whole legs, cut into 3
  • 3 garlic cloves, minced
  • 1 medium-sized carrot, peeled and sliced diagonally
  • 1 red bird’s eye chilli (optional)
  • 1 small red bell pepper, cut into thin strips
  • 1 small red onion, halved then sliced
  • 2 cups fresh (or canned) pineapple, cut into chunks**
  • 1 cup fresh (or evaporated) milk
  • 1/2 cup water
  • Handful of chopped spring onions
  • Salt and ground black pepper, to taste

**If using canned pineapples, drain and discard the syrup if you don’t want your dish to be on the sweeter side. The fresh pineapples that I used for this recipe were a bit tart which I personally loved.

METHOD

  1. Add about 2 tablespoons of cooking oil to a medium-sized pan and heat over medium-high. Sauté the minced garlic until golden brown in colour and fragrant, about 30 seconds. Then add in the onions, cooking until soft, about a further minute.
  2. Add the chicken pieces and season with salt and ground black pepper. Stir occasionally and cook until the chicken pieces are lightly browned.
  3. Lower down the heat and add the pineapple chunks and bird’s eye chilli for an extra kick of heat to the dish (optional). Stir then cover until the chicken is tender and has released its own juices, about 10 minutes. Add about half a cup of water if it gets too dry.
  4. Add the sliced carrots and bell pepper strips. Taste and adjust the flavour to your liking. If it is too sweet, add a bit more water or balance it by adding a bit of fish sauce (if it isn’t already too salty for your taste buds). Cook for a further 5 minutes.
  5. Make sure that you turn the heat down as low as you can so that your pineapple chicken is down to a very slow simmer before you add the milk in. Adding the milk when it is rapidly boiling will heat the milk too quickly and cause it to curdle and we don’t want that to happen!
  6. Leave to simmer slowly, but not bring to a boil, for a further 5 minutes before taking it off the heat. Sprinkle with spring onions and serve immediately with steamed rice. Enjoy!

Pininyahang Manok (Pineapple Chicken)

BON APPÉTIT

– Ally xx

myTaste.com

Advertisement
Apple Chicken Bake

Apple Chicken Bake

Hello Everyone! March is here which can only mean one thing for Amcarmen’s Kitchen. That’s right! A new month means a new fruit to play with and we’re all about Apples this March! More specifically we’re going to be playing around with Red Washington Apples only because they were on sale at Rustan’s Supermarket for only P28 apiece! I think they were originally priced at like P35 or something. I know it’s not much of a difference but other supermarkets have them priced at P230 or something per kilo, which is crazy!

Apple Chicken Bake

I’ll keep my introduction short tonight, as I am not feeling well today – the creative writing juices aren’t flowing at the moment, apologies for that. I didn’t want to start off my post in saying what happened, but you can read more about it at the end of the post.

Before we dive right into the recipe, please head on over to Taste of Home for the original recipe where I drew my inspiration.

Apple Chicken Bake Ingredients

PREP TIME 5 MINS* | COOKING TIME 30 MINS | SERVES 3

*Allow for up to 4-6 hours to marinate the chicken, or even better, overnight in the fridge. Remove from the fridge about an hour before baking to bring the meat back to room temperature.

INGREDIENTS

  • 3 whole chicken legs (about 1/2 kg)
  • 1 large brown onion, peeled and wedged
  • 1 large Red Washington Apple, washed and wedged
  • Freshly cracked black pepper

For the marinade

  • 5 whole cloves
  • 2-3 garlic cloves, peeled and crushed
  • 1 cinnamon bark
  • 1/3 cup Hickory BBQ sauce
  • 1/4 cup apple juice
  • 1 tbsp honey
  • 1/4 tsp ground nutmeg
  • 1/4 tsp salt
  • 1/4 tsp whole black peppercorns

Apple Chicken Bake Process

METHOD

  1. Combine the marinade ingredients in a small bowl. Dip the chicken whole legs into the marinade and then place skin side down into an oven-safe Pyrex dish.
  2. Pour the remaining marinade into the Pyrex dish, cover with cling wrap and then set aside in the fridge to marinate for about 4-6 hours or overnight.
  3. When ready to bake, remove from the fridge and turn the chicken legs over skin side up. Leave aside to bring to room temperature, about an hour.
  4. Preheat oven to 200C (400F or gas mark 6). Scatter the wedged apples and onions onto the Pyrex dish, and season with a touch of freshly cracked black pepper. Bake in the oven for 30 minutes.
  5. Once done, turn the heat off. Drain the sauce into a small saucepan and place the chicken back into the oven to keep warm.
  6. Bring the sauce to a boil over medium-high heat. Once boiling, add slurry of cornstarch to the sauce to thicken it. Once thickened, turn the heat off.
  7. Serve with any sides of your choice. I served mine with a side of salad with cherry tomatoes and French beans, and corn on a cob.

Apple Chicken Bake Process

Apple Chicken Bake

Before I end tonight’s post, I would just like to say that it’s been one heck of a crazy week! So busy that I haven’t even had the time to plan and cook my dishes for this month ahead of time, which is what I usually do to stay on top of things. This is one of the reasons why tonight’s post isn’t as informative as my previous posts. The reason for that being is that I’m also suffering from piercing stomach pains and an irritable bowel syndrome, quite possibly due to food poisoning. I’m confined at home and hydrating lots. Hopefully I’ll be all good in the coming days and I can get back on track with my cooking and writing by the weekend or early next week!

BON APPÉTIT

– Ally xx

myTaste.com

Ginataang Manok (Chicken Stewed in Coconut Milk)

Ginataang Manok (Chicken Stewed in Coconut Milk)

Hello Everyone and a very Happy New Year to all! It just came to my attention as I was about to write this post that I should probably prepared a much more distinctive dish to welcome for the first post of the Year – but oh well.

Before I dive into the recipe, let me take up this paragraph to reveal the theme for Amcarmen’s Kitchen for this 2019 – it’s gonna be a FRUITFUL Year! That’s right! This year will be all about cooking with fruits or their… Derivatives? I’m not sure if that is the correct word I am looking for, but what I’m trying to say is for example milk from a coconut or juice from an orange and not the actual fruit itself. Let me know in the comments below what the word for this is!

So to kick start the year, I’ll be featuring Coconut and their… derivatives *insert crying laughing emoji* in all the dishes that I will be sharing for the month of January – both the sweet and the savoury!

Ginataan is one of the most basic cooking processes in the Philippines where ingredients are cooked/stewed in coconut milk. Dishes can vary from savoury dishes such as tonight’s recipe of Ginataang Manok to dessert and snacks such as Ginataang Halo-Halo.

Ginataang Manok (Chicken Stewed in Coconut Milk)

Ginataang Manok, or in English, Chicken Stewed in Coconut Milk, is basically the process of cooking Tinolang Manok (Chicken & Green Papaya Soup) with the addition of coconut milk.

Short tangent, I went back an had a quick read of my Tinolang Manok post that I shared back in 2015 and I would just like to address a few things that may confuse some of you – heck it confused me a little bit so I’m sure it’s bound to raise questions, especially if you aren’t a regular follower of Amcarmen’s Kitchen.

First things first, I had cooked up the dish when I was in Australia. I had already completed my Bachelor’s Degree in Design, and had graduated just a month before I posted it. Anyway, so on my post I mentioned that I tried to look for malunggay leaves and/or chilli leaves, and to be told by the farmers that no one at the market sells them in Australia. On the other hand here in the Philippines, malunggay and chilli leaves are abundantly sold in markets and supermarkets nationwide. You can even pluck some malunggay leaves from your neighbour’s tree! Just thought I had to clear this up as I am currently back in the Philippines and may confuse some of my new followers from the Philippines in regards to this statement.

Secondly, and lastly I guess – I wrote about my apparent hate for green papaya in Tinolang Manok and my preference for using chayote instead. I did state that maybe there was something off in the particular green papaya that I had picked out – and 3 years later, after having Tinolang Manok with green papaya on a weekly basis ever since being back here in the Philippines, I can finally confirm that there was definitely something off with the one I had picked out from the markets back in Australia. For me, now, green papaya definitely overthrows chayote!

Okay apologies, 3 paragraphs isn’t exactly a short tangent, but now that that’s cleared up and out of the way, on with the recipe!

Ginataang Manok (Chicken Stewed in Coconut Milk) Ingredients

PREP TIME 10 MINS | COOKING TIME 20-25 MINS | SERVES 4

INGREDIENTS

  • 1kg chicken whole legs, chop each into 3
  • 200ml coconut milk (fresh, canned, or frozen)
  • 1 small green papaya, peeled, seeds removed and cut into wedges
  • 3 red bird’s eye chillies*
  • 2-3 garlic cloves, minced
  • 1 small red onion, diced
  • 1 bunch chilli leaves
  • Thumb-sized ginger, peeled and sliced thinly
  • 1 tsp whole black peppercorns
  • Salt, to taste

*Optional – only if you want your ginataang to have a spicy kick to it or not

METHOD

  1. Heat about a tablespoon of oil in a large pot over medium-high. Add the sliced ginger and sauté until fragrant. Add in the garlic and continue sautéing until golden brown, followed by the onions, cooking until they are soft and translucent.
  2. Add the chopped chicken in the chicken and season with a touch of salt. Give it a good mix, then cover the pot and let it cook for about 5-8 minutes.
  3. Add in about 1.5 litres of water together with the whole black peppercorns. Bring to a boil. Once boiling, add in the coconut milk, papaya wedges, and red chillies (optional). Cover and leave to cook on low heat for about 15 minutes or until the papayas are tender. Taste and if needed, season with a bit more salt; adjust to your liking.
  4. Add in the chilli leaves and give it a good mix. Turn the heat off and serve immediately with steamed rice. Enjoy!

Ginataang Manok (Chicken Stewed in Coconut Milk)

Now that I think about it, I wonder if this should’ve been a Papaya dish rather than a Coconut dish? Thoughts?

BON APPÉTIT

– Ally xx

myTaste.com

Fried Chicken with Salted Egg Sauce 'Eggs Benedict'

Fried Chicken with Salted Egg Sauce ‘Eggs Benedict’

Hello Everyone! I hope everyone has had a good week, and yes I am aware it is only a Sunday night, but I want to be able to share with you guys all the delicious dishes that I’ve whipped up in for the month of May. I do plan out all my recipes so that I know whether to cook 4 or 5 dishes depending how many Wednesdays there are in a month. Because I missed a post last month which is why everything got pushed forward by a week. So I plan to wrap up Eggs Benny month by posting on an extra day so that you’ll get to see everything I prepared for you guys!

Fried Chicken with Salted Egg Sauce 'Eggs Benedict'

Tonight I’ll be tackling a classic combination of fried chicken and waffles with a hit of a Bruneian favourite twist to it. Over the recent year there has been a craze to add salted egg sauce to pretty much every dish possible – salted egg sauce carbonara, salted egg sauce fried chicken, salted egg sauce nasi lemak, salted egg sauce kolo mee, and the list goes on as imaginable! Oh, and let’s not forget those highly overrated and overpriced Salted Egg Potato Chips from Irvins! At the hype of its time, I caved into these overpriced potato chips because they were indeed, as marketed, dangerously addictive. Thank goodness I’ve fallen out of the craze of it all – or have I really? I’m sure when the craving kicks in, I’ll be in trouble *cheeky grin*

The recipe I’ll be sharing with you guys is not something new, in Brunei that is – I guess? Please do share in the comments below if you’ve seen this dish, or something similar, outside of Brunei. Basically, the waffles substitute the classic English muffin while a salted duck egg sauce is made instead of a traditional hollandaise sauce that makes an Eggs Benny. The sweetness of the Belgian waffles pair perfectly with a savoury spicy crispy fried chicken and salty egg sauce – definitely an explosion of taste and texture in your mouth, exciting your palette. Sweet. Spice. Salty. Boom!

Fried Chicken with Salted Egg Sauce 'Eggs Benedict' Ingredients

PREP TIME 1 HOUR* | COOKING TIME 30 MINS | SERVES 3

*Includes the 1 hour marinating time for the chicken

INGREDIENTS

For the tom yum fried chicken

  • 3 pcs boneless whole leg chicken
  • 8 tbsp water
  • 6 tbsp cornflour
  • 6 tbsp plain flour
  • 3 tsp sesame oil
  • 1 & 1/2 tsp salt
  • 1-2 tsp homemade tom yum paste
  • Dash of ground black pepper

For the salted duck egg sauce

  • 3 salted duck egg yolks, steamed and smashed
  • 2 sprigs fresh curry leaves (dried leaves can be used as well if not available)
  • 3-4 red bird’s eye chillies, chopped
  • 1 can (350ml) evaporated milk
  • 6 belgian waffles**
  • 3 large free range eggs
  • Micro-herbs, to garnish

**You can either make your own waffles or buy them in the store – I opted for the latter just because I don’t have a waffle maker to be able to make them myself.

METHOD

  1. Tom Yum Fried Chicken: Combine all the marinade ingredients in a medium-sided bowl and mix the chicken around until well coated. Cover the bowl with cling wrap and leave to marinate for at least an hour to let all the tom yum flavours infuse into the chicken.
  2. Preheat oven to 180C. Heat up oil in a large frying pan and shallow fry the chicken until skin is crispy and golden (about 5-6 minutes per side).
  3. Remove from the heat and place on a baking tray lined with aluminium foil. Place the wings in the oven for a further 8-10 minutes to finish off in the oven.
  4. Salted Duck Egg Sauce: While your chicken is on the go, sauté the egg yolks, curry leaves and half of bird’s eye chillies until fragrant. Reserve some of the fried curry leaves to garnish your dish later. Add the evaporated milk and bring to a boil until the sauce has thickened.
  5. Poached Eggs: Bring small saucepan of water to the boil over medium-high heat, then reduce the heat to low-medium – the water should be just simmering. Add in the vinegar and stir. Crack one egg into a small bowl and quickly, but gently pour it into the water. Repeat with the other egg. A really soft poached egg should take around 2 minutes, but if you want it a bit more firm, it will take about 4 minutes. To check if they’re cooked right, carefully remove the egg from the pan with a slotted spoon and give the yolk a gentle push (you can tell just by your instincts if it is under or over – or perfect)!
  6. Assembly: Top the waffles with the tom yum fried chicken followed by the poached egg. Drizzle a generous amount of salted duck egg sauce and garnish with the remaining chopped chillies, fried curry leaves, and micro-herbs. Serve and enjoy!

Fried Chicken with Salted Egg Sauce 'Eggs Benedict'

BON APPÉTIT

– Ally xx

myTaste.com

Angel Hair with Beetroot Pesto & Roast Lemon Rosemary Chicken

Angel Hair with Beetroot Pesto & Roast Lemon Rosemary Chicken

Hello Everyone! I know that one of my Mom’s family friends had been asking for this recipe from way back when she showed a picture of this dish to her at the time I put it together (probably back in July); well I’m glad to say that’s it’s finally here and I do apologise for getting it up really late.

I mentioned in my last post that I have a lot of personal and work stuff going on, and things have still been a bit rough – actually to be honest, I don’t think it is as rough as I say it is, but let’s just say my mind has the tendency to drift into a dangerous place which turns my usual cheerful mood to the complete opposite from time to time and I haven’t been able to get out of it since last week. I guess my mood has been making me think that it’s been rough; maybe I should stop listening to Sam Smith’s “Too Good at Goodbyes” on repeat … I can’t get enough of it though because it’s a really good song, but on the other hand, it’s putting a lot of unnecessary thoughts into my head. Well on top of that I guess it doesn’t help that work is getting crazy busy that I can barely keep up with it. Anyway I’m not here to talk about this, so onward with tonight’s recipe!

Angel Hair with Beetroot Pesto & Roast Lemon Rosemary Chicken

As you know, or maybe not depending on if you’ve read my post from the beginning of the year back in January, or if you already know this from your own research and reading, there are nitrates in the juice of beetroots that have been found to bring down one’s high blood pressure within just 24 hours. If you’re not a keen beetroot juice drinker, you can easily add this vegetable to your diet by roasting or steaming the whole root and then add it to a green-packed salad, stir-fry, stew, or in this case, make a nutty and creamy beetroot pesto that’s far from tasting beet-y the way beets do for those who don’t sit well with its taste.

Tonight’s recipe is so much more versatile than just adding it to your favourite pasta. It is a delicious sauce for your salads, pizza, and appetizers to spread on to toast with eggs or dip crudites in for the ultimate seasonal flavour fix! You can pair your Angel Hair Pasta with a delicious and juicy road chicken breast or keep it completely vegetarian. I’m sure there’s a vegan recipe for beetroot pesto as well, just don’t forget to replace your pasta with a vegan-friendly one.

You can find the original recipe that I referred to for this Beetroot Pesto over on Akis Petretzikis.

Beetroot Pesto Ingredients

PREP TIME 15 MINS | COOKING TIME 30 MINS | SERVES 6

INGREDIENTS

For the beetroot pesto sauce

  • 400g whole raw beetroot, washed
  • 3/4 cup walnuts, roughly chopped
  • 1/4 grated parmesan
  • 2-3 garlic cloves, minced
  • 3 tbsp olive oil
  • Ground sea salt and black pepper, to taste
  • Zest from 1 lemon
  • 500g angel hair pasta

For the roast lemon rosemary chicken*

*I’ve linked my recipe for Lemon & Thyme Roast Chicken which is essentially they same except that I replace the thyme with rosemary just because when I went grocery shopping that weekend, they didn’t have fresh thyme on the shelves but had rosemary instead. You can top your pasta with some chicken or keep it meat-free; it’s completely up to you!

METHOD

  1. In a pan of boiling salted water, boil the beetroot for about 15-20 mins or until tender. Drain and leave to cool before peeling (wear clean rubber gloves to peel if you want to avoid beet-stained hands). Reserve about a quarter cup of small cubed beets to garnish on top of your pasta dish.
  2. Roughly chop the beetroots in to small chunks and purée them in a blender for about 30 to 45 seconds.
  3. Add the olive oil, garlic, and season with ground sea salt and black pepper to taste. Continue to blend for another 30 seconds before adding the chopped walnuts and grated parmesan. Blend until smooth and creamy. Set aside.
  4. Cook the angel hair pasta according to packet instructions in a pot of boiling salted water. It should take no longer than two minutes, but I like to slightly undercook my pasta since I will be further cooking it again.
  5. When the pasta is ready, reserve some of the pasta water and drain. Add the pasta back to the pot and stir the beetroot pesto in. Add the pasta water if necessary to make the sauce as creamy as you like. Once coated, turn the heat off and divide equally to individual dishes.
  6. Top the pasta with the grated zest from 1 lemon, extra grated parmesan, more chopped walnuts, and the beetroot cubes. Optional to serve with juicy slices of Roast Lemon Rosemary Chicken. Enjoy!

Angel Hair with Beetroot Pesto & Roast Lemon Rosemary Chicken

BON APPÉTIT

– Ally xx

myTaste.com

Chicken & Broccoli Alfredo Stuffed Conchiglie

Chicken & Broccoli Alfredo Stuffed Conchiglie

Hello Everyone! I’ve got one last Broccoli recipe to share with you guys before I power through with the theme for April. I’ll be back to my usual Wednesday posts as I have finally caught up with all the recipes I had planned for the past two months. It wasn’t easy playing catch up seeing as I had to balance both writing the recipes and work over the past few weeks when I posted more than a recipe or two for the week. Anyway, I’ll keep tonight’s post short and sweet as I don’t really have much to talk about in terms of how my week went. I spent pretty much a whole two hours in the kitchen this afternoon whipping up multiple ways for you to add some colour and enjoyment to your breakfast mornings, all of which will be revealed on Wednesday!

Chicken & Broccoli Alfredo Stuffed Conchiglie

Tonight’s recipe is one that I have been wanting to try out for a while now – well not this specific recipe, but rather to work with jumbo pasta shells ever since I brought them back from my recent travels to Singapore. I was at the grocers looking for some products to bring back to Brunei, more specifically products that you don’t find in Brunei, and I came across these jumbo pasta shells (also known as ‘Conchiglie’). You’d think that you’d be able to find Conchiglie pasta in Brunei, and you can actually but just not the jumbo-sized ones. With this recipe, you can choose to make your own Alfredo sauce, or you can just buy the ready made ones at your local grocers; I guess it depends on whether you have time up your sleeve or not! The recipe may be a little bit time consuming like shredding the chicken, stuffing the shells, but trust me when I say that it all pays off in the end and it is actually a very easy and fool-proof recipe! It tastes so good straight out of the oven, and even better the day after if you have any leftovers. Be sure to check out the original recipe over on Life in the Lofthouse by Holly.

Chicken & Broccoli Alfredo Stuffed Conchiglie Ingredients

PREP TIME 30 MINS | COOKING TIME 25 MINS | SERVES 4-6

INGREDIENTS

For the pasta

  • 500g jumbo Conchiglie pasta
  • 500g chicken breast
  • 1 head broccoli, cut into florets
  • 1 cup shredded mozzarella cheese
  • 1/2 cup shredded parmesan cheese
  • Ground sea salt and black pepper, to taste

For the Alfredo sauce

  • 300ml thickened cream
  • 1 cup full cream milk
  • 3/4 cup freshly shredded mozzarella cheese
  • 2/3 cup freshly shredded Parmesan
  • 2-3 garlic cloves, minced
  • 1 small red onion, finely diced
  • 3 tbsp unsalted butter
  • Ground sea salt and black pepper, to taste
  • Olive oil

METHOD

  1. Add the chicken breast together with 2-3 dried bay leaves, a pinch of whole black peppercorns, and about a teaspoon of salt in a pot of water. Bring to a boil and leave to simmer for about 20 minutes. Once done, remove the chicken breast from the stock and set aside to cool down. *Do not discard the stock as it can be kept as a base for soups. I used mine on the same day and made a delicious pumpkin soup while I had these shells on the go too.
  2. Once the chicken as cooled down, shred and place in a medium-sized mixing bowl. Set aside.
  3. Bring a small pot of salted water to a boil and add the broccoli florets in. Poach for about a minute or two so that it still has a crispy bite to it. Immediately transfer to an ice bath to stop the cooking process. Roughly chop the broccoli florets and add to the bowl with the shredded chicken.
  4. Preheat oven to 180C (350F or gas mark 4).
  5. Bring a pot of salted water to a boil and cook the Conchiglie pasta to the package instructions, 18 minutes until al dente. Once done, drain and lay the shells out on a baking tray lined with parchment paper. Let shells cool down completely.
  6. While waiting for the shells to cool, heat the olive oil in a medium-sized saucepan over medium-high. Melt the unsalted butter and then sauté the minced garlic until golden brown and fragrant, about 30 to 45 seconds. Add in the finely diced onions and cook until soft, about 1-2 minutes.
  7. Add the thickened cream and milk to the saucepan and reduce the heat down to medium. Bring to a simmer. Once simmering, remove from heat and stir in the parmesan and mozzarella cheese. Season with ground sea salt and black pepper to taste. Set aside to cool down a bit.
  8. Pour about a cup of the Alfredo sauce to the shredded chicken and chopped broccoli and stir together until well combined.
  9. Add a spoonful of Alfredo sauce to the bottom of a greased baking pan, about 9″ x 13″ will do.
  10. Fill the shells with a large spoonful of the chicken, broccoli, and Alfredo sauce mixture, and place each shell into the prepared pan.
  11. Pour the remaining Alfredo sauce evenly over the shells and sprinkle the tops with more mozzarella and parmesan cheese.
  12. Bake in the oven, uncovered, for about 25 minutes or until warm and bubbly.
  13. Serve and enjoy!
Chicken & Broccoli Alfredo Stuffed Conchiglie

Chicken & Broccoli Alfredo Stuffed Conchiglie

BON APPÉTIT

– Ally xx

myTaste.com

Bourbon & Maple Glazed Chicken

Bourbon & Maple Glazed Chicken

Hello Everyone! I really want to start of with a Green Day classic, but I realised just how lame it is and how overdone the joke is in the past years. For the non-Green Day fans or just those that have been living under a rock, Green Day released a song on their 2004 American Idiot album, a song titled Wake Me Up When September Ends – and I was going to go on this tangent about how it’s already October and that I wasn’t woken up when September ended. I told you it was lame *cheeky grin*

Anyway, mini tangent aside; as per usual, a new month calls for a new theme on the blog! This month, I will be sharing recipes that incorporate the use of alcohol into the dishes. Okay, how I came up with this theme was because I have a full bottle of Jack that has been sitting in the living room collecting dust for almost 3 years now, and I also brought back a bottle of red wine from my recent trip to the Philippines. For those of you who know me personally, you’ll know that I am not a drinker – so why do I have these beverages lying around the house if I don’t drink? Well, I mean the fact that my bottle of whisky has been sitting around for years speaks for itself. I don’t even know why I bought it in the first place; the only reason I could think of was so that I could use it in my cooking – and here we are now! I guess, with these two alcoholic beverages, you can tell when the month is going to predominantly feature *cheeky grin*

Bourbon & Maple Glazed Chicken

Tonight’s recipe was one that I whipped up a while back, during the long weekend in the middle of September. I brought it for lunch in the office the next day back, and my colleague asked me what I had brought in for lunch today. I replied “Bourbon and Maple-glazed Chicken with Chunky Mash and Pan-fried Asparagus.” She then laughed and continued to say “it sounds so Masterchef – like usually if you ask any locals what they had for lunch, they will just say ‘Buttermilk Chicken’.” I too laughed when she said that, referring to the fact that one would normally have a simply-named dish for lunch, but not me apparently. My lunch’s name was Masterchef worthy hahaha – yes, just the name, the overall dish is still maybe a bit too simple for Masterchef level. Maybe if I cooked it in liquid nitrogen to give it the Heston Blumenthal touch then I could be in it to win it… As if hahaha! Anyway, the original recipe for tonight can be found over on Simply Recipes.

Bourbon & Maple Glazed Chicken Ingredients

PREP TIME 5 MINS | COOKING TIME 1 HOUR | SERVES 6

INGREDIENTS

  • 6 pcs chicken whole legs, cleaned thoroughly
  • 3-4 garlic cloves, minced
  • 2-3 sprigs of fresh rosemary (or about 2-3 tsp of dried rosemary)
  • 1 small red onion, finely diced
  • 3/4 cup maple syrup
  • 1/2 cup bourbon whisky
  • 2 tbsp tomato paste
  • 1 tbsp unsalted butter
  • 1/4 tsp ground black pepper
  • 1/4 tsp salt

METHOD

  1. Preheat oven to 180C (350F or gas mark 4). Prepare the chicken by placing them skin side up in a oven-proof dish. Set aside.
  2. Bourbon Maple Glaze: Heat a medium-sized saucepan over medium-high and melt the butter until melted. Add in the minced garlic and cook until fragrant, about 1 minute, and then add the diced onions, cooking for about 2 to 3 minutes further.
  3. Add the bourbon whisky together with the maple syrup, tomato paste, rosemary, and season with salt and pepper. Whisk to combine and bring the glaze to a low simmer.
  4. Coat chicken with glaze and roast: Pour half of the glaze mixture over the pre-prepared chicken and toss to coat well. Place in the oven, and then roast the for about 30 minutes, then turn the chicken over and roast for a further 12-15 minutes, or until nicely browned. Lower the heat or remove from the oven if the chicken whole legs start getting too dark.
  5. Simmer remaining glaze until thickened: Meanwhile, as the chicken roasts away, simmer the remaining sauce in the medium-sized saucepan until it thickens slightly and can coat the back of a spoon. Once done, remove from the heat and then set aside. Tip: if it is taking too long for the sauce to reduce, pour it into a wide shallow pan and bring to a boil. The wider pan will make sauce evaporate more easily.
  6. Coat cooked chicken in glaze: When the whole legs are done, remove from oven and dip them into the saucepan with the reduced glaze.
  7. Serve on a bed of chunky roasted garlic mashed potatoes and some pan-fried baby asparagus stalks – of course, whatever you fancy with your chicken will do the trick. Enjoy!

Bourbon & Maple Glazed Chicken

BON APPÉTIT

– Ally xx

myTaste.com

Roast Barbecued Chicken

Roast Barbecued Chicken

Roast Barbecued Chicken

Hello Everyone! As of today I have been working 24 days straight – 3 Sundays of work, and another to look forward to this weekend. I cannot wait for a public holiday coming up next week, and then two Sundays off before I head back into another 2 Sundays of work towards the end of May. I know, I shouldn’t be complaining since I only work for about 2-3 hours on Sundays, but I guess it’s the fact that I have to get up early and do work in humid and ventilation-challenged areas makes it a depressing start to the ONLY weekend I have. Yeap, this is my life now. Anyway! Sorry to start off all moody and what nots; I have been feeling a little burnt out and just not in the mood these past couple of days – I’m hoping that I can change that with a little bit of rest… Hopefully.

Tonight’s recipe is one that I have been hesitant of sharing on my blog because it’s my Mom’s special barbecue marinade recipe. We finally came around to a decision to share it on the blog, and so I will be sharing her ever so deliciously finger-licking good marinade for a whole roast chicken. We usually fire up the barbecue for this recipe, but recently we have been roasting the meat in the oven for a healthier option to charcoal-barbecued chicken. You can also use this marinade for pork or lamb. I once brought some yummy pork bellies to a barbecue party that my colleague hosted a few months back. It was a great hit amongst my other colleagues and so I believe that they’ll be overly happy to know that I am posting the recipe for my Mom’s special barbecue marinade on the blog.

Roast Barbecued Chicken Ingredients

PREP TIME 20* MINS | COOKING TIME 1 HOUR 35 MINS | SERVES 6

*plus 4-6 hours of marination, or preferably overnight

INGREDIENTS

  • 2kg whole chicken, washed and cleaned thoroughly
  • 1 bulb garlic, peeled and crushed
  • 1 tbsp brown sugar
  • 1 heaped tbsp hot & spicy UFC Banana Catsup
  • 1 heaped tbsp light soy sauce
  • 1 heaped tbsp oyster sauce
  • Ground salt and black pepper, to taste
  • Juice of 5 calamansi
  • Cooking twine

METHOD

  1. Combine all the ingredients in a large mixing bowl. Mix well until combined. Coat your chicken in the marinade and then leave in the fridge to marinate for about 4-6 hours (or preferably overnight). Remove chicken from the fridge 45-60 minutes before roasting to bring it back to room temperature.
  2. Preheat oven to 230C (450F or gas mark 8). Line a baking tray with aluminium foil and place a rack above it.
  3. Start by making a loop with the twine and fastening it around the stub of the neck. Bring it around the sides and tie a knot at the cavity, then pull it tight around the breast. Now, loop the twine around the drumsticks and tie another knot, tightening it until the legs cross.
  4. Place the chicken on the rack and into the preheated oven for 10-15 minutes. The lower the heat down to 175C (350F or gas mark 4) and continue roasting for an hour and 20 minutes more until cooked all the way through.
  5. Once done, remove the oven and set aside to rest for about 10 minutes before serving. Enjoy!

Roast Barbecued Chicken

Roast Barbecued Chicken

BON APPÉTIT

– Ally xx

myTaste.com

Butterflied Buffalo Roast Chicken

Butterflied Buffalo Roast Chicken

Butterflied Buffalo Roast Chicken

Hello Everyone! Wow, I cannot even begin to tell you guys how mentally and physically drained I am right now – well, if I am to talk about today in particular, it’s probably not from having worked for 17 days straight already with Sunday breaks, but because I probably had (not even) too much to drink. I said not even because I know that what I had a few hours ago was not my maximum capacity, but I’m feeling tipsy and sleepy already. My boss called for a “brainstorming” session after work hours which actually turned out to be a chill session with dumplings and beers (red wine for me because I’m sophisticated and classy af) haha!

Anyway, all that aside that the fact that I have to work this coming Sunday again, tonight’s recipe is a favourite of mine – I mean, who doesn’t like buffalo chicken?! We can’t be friends if you don’t like it; I’m serious. I served mine with a simple kale and roasted chickpea salad with crumbled blue cheese on top. Buffalo chicken goes well with anything blue cheese! Be sure to check out the original recipe over on Food.com; the original recipe calls to actually brush the sauce mixture onto the chicken, but I marinated the chicken in the sauce mixture instead to absorb all the yummy flavours into the flesh.

Butterflied Buffalo Roast Chicken

PREP TIME 20 MINS* | COOKING TIME 1 HOUR 35 MINS | SERVES 6

*plus 4-6 hours of marination, or preferably overnight

INGREDIENTS

  • 2kg butterflied whole chicken, washed and cleaned thoroughly
  • 2 tbsp unsalted butter, melted and cooled
  • 1 – 1 & 1/2 tbsp tabasco sauce (or more if you like a good punch)
  • 1 tbsp red wine vinegar
  • 1/2 bulb garlic, minced
  • 2 tsp ground smoked paprika
  • Ground salt and black pepper, to taste

METHOD

  1. Combine all the ingredients, except for the butter, in a large mixing bowl. Mix well until combined. Coat your chicken in the marinade and then leave in the fridge to marinate for about 4-6 hours (or preferably overnight). Remove chicken from the fridge 45-60 minutes before roasting to bring it back to room temperature.
  2. Preheat oven to 230C (450F or gas mark 8). Line a baking tray with aluminium foil and place a rack above it.
  3. Place the chicken on the rack and into the preheated oven for 10-15 minutes. The lower the heat down to 175C (350F or gas mark 4) and continue roasting for an hour and 20 minutes more. Baste the chicken with a little bit of butter at every 20 minute intervals.
  4. Once done, remove the oven and set aside to rest for about 10 minutes before serving. Enjoy!

Butterflied Buffalo Roast Chicke

Butterflied Buffalo Roast Chicken with Salad

Butterflied Buffalo Roast Chicken with Salad

BON APPÉTIT

– Ally xx

myTaste.com

Honey-Roasted Chicken

Honey-Roasted Chicken

Honey-Roasted Chicken

Hello Everyone! Before I begin with this post, I just want to say that I just realised that two Sunday’s ago was quite possibly the last Sunday that I had off and I probably won’t see another relaxed Sunday at home until the beginning of June. Yes, you read that right! Last Sunday I got up at the wee hours of 3:55am to get ready for work. WORK! Last Sunday we kicked off our month-long sporting event with a 2km and 10km Run that started at around 7am. Our team had to be there by 5am to help set up, prepare, and do a lot more things in order to ensure a smooth event. I was also event photographer that morning so I was constantly moving here and there for a good 5 hours. Though it wasn’t a whole day/night event, it was still tiring – I mean, getting up at 4 in the morning is tiring enough especially when I couldn’t sleep well the few hours before. Anyway, so this Friday will be another opening ceremony, this time for Badminton, and then on Sunday again for Basketball.

Besides my 7-day working months from now until June, I’m thrilled to say that my blog will be turning 2 years old on Saturday! I’ll be posting a recipe up on that day to celebrate 2 years of not giving up on this blog – which I believe is a first! I’ve started up many blogs before (but mainly diary-style) and so far I’ve been able to keep up with this one! I won’t say anymore and save the rest of my tangents for Saturday’s post. Anyway, it’s week 2 of delicious yummy roast chicken and I’ve got a classic recipe to share with you. To be honest, whenI first came across this recipe, I found it weird how it had a hint of ground cinnamon and turmeric in it which in my opinion dominated the honey flavour just a bit. I’ll admit that I much preferred the taste of last week’s roast, but this one is alright too. You can eat it with a whole load of roast veggies and fresh greens, or steamed rice. Don’t forget to check out the original recipe over on SBS.

Honey-Roasted Chicken Ingredients

PREP TIME 10 MINS* | COOKING TIME 1 HOUR 35 MINS | SERVES 6

*plus 4-6 hours of marination, or preferably overnight

INGREDIENTS

  • 2kg whole chicken, washed and cleaned thoroughly
  • 8 tbsp honey
  • 3 tbsp light soy sauce
  • 3 tbsp olive oil
  • 2 tbsp freshly squeezed lime juice
  • 1 & 1/2 tsp ground cinnamon
  • 1 & 1/2 tsp ground tumeric
  • Thumb-sized ginger, minced
  • Butter, for basting
  • Ground salt and black pepper, to taste
  • Assorted veggies, for roasting
  • Cooking twine

METHOD

  1. Combine all the ingredients, except for the butter, in a large mixing bowl. Mix well until combined. Coat your chicken in the marinade and then leave in the fridge to marinate for about 4-6 hours (or preferably overnight). Remove chicken from the fridge 45-60 minutes before roasting to bring it back to room temperature.
  2. Preheat oven to 230C (450F or gas mark 8). Line a baking tray with aluminium foil and place a rack above it.
  3. Start by making a loop with the twine and fastening it around the stub of the neck. Bring it around the sides and tie a knot at the cavity, then pull it tight around the breast. Now, loop the twine around the drumsticks and tie another knot, tightening it until the legs cross.
  4. Place the chicken on the rack and into the preheated oven for 10-15 minutes. The lover the heat down to 175C (350F or gas mark 4) and continue roasting for an hour and 20 minutes more. Baste the chicken with a little bit of butter at every 20 minute intervals.
  5. Once done, remove the oven and set aside to rest for about 10 minutes before serving with seasonal roast veggies, or steamed rice. Enjoy!

Honey-Roasted Chicken

BON APPÉTIT

– Ally xx

myTaste.com