Auguest 2015: Josephine Geronimo

Ginataang Munggo (Roasted Mung Beans & Sticky Rice in Coconut Milk)

Hello Everyone! Alas, we’ve come to the end of my mini collaboration series for this month! My last post for this Auguest that my Mom has kindly shared with us is another mung bean recipe that she grew up eating during her childhood years.

Ginataang Munggo (Roasted Mung Beans & Sticky Rice in Coconut Milk)

If you haven’t read Wednesday’s post, my Mom mentioned there that once a year when her whole family went to visit the province that they were from, they would always bring back one 50kg sack of munggo (mung beans) to the city, where they lived, from their farm. Everyday, Munggo Guisado (Sautéed Mung Bean Soup) was what they had for lunch and dinner, and for merienda, they’d have mung beans as well – there was no escaping the wrath of the mung beans – whether savoury or sweet! After lunch, everyone would take a 2-hour break before they’d be back in the kitchen, preparing and cooking Ginataang Munggo for merienda at 3pm.

Ginataang Munggo (Roasted Mung Beans & Sticky Rice in Coconut Milk) Process

Ginataang Munggo is basically roasted or toasted mung beans cooked in coconut milk together with some glutinous rice. It is a simple Filipino dish that can be eaten for either merienda (light afternoon meal or an afternoon snack) or dessert that is best served warm. toasted Mung beans and sticky rice are cooked in coconut milk. Though this dish has been a part of my Mom’s family tradition way back when she was still in her younger years back in the Philippines, today is the first time my Mom cooked this dish and served it to my sister Angela and I. Now that my Mom has passed on her two favourite mung bean recipes from her childhood, she said to me that it is but right that I pass them on to my children to be and keep tradition going – hopefully my children won’t be as fussy as I was before when I used to hate munggo!

Ginataang Munggo (Roasted Mung Beans & Sticky Rice in Coconut Milk) Ingredients

PREP TIME 15 MINS | COOKING TIME 30 MINS SERVES 6-8

INGREDIENTS

  • 1.5L boiling water water
  • 1 can (400ml) coconut milk
  • 1 cup glutinous rice
  • 1/2 cup mung beans
  • 1/2 cup white sugar

METHOD

  1. First, heat up a medium-sized frying pan over medium-high and add the mung beans. Toast until browned, about 8-10 minutes. Be careful as to not over toast them otherwise they will become bitter. Likewise, you can roast the mung beans in the oven for about 10 minutes at 200C.
  2. Turn the heat off and set the mung beans aside to cool down.
  3. Once the mung beans have cooled down slightly, crack the toasted mung beans using a mortar and pestle, or as my Mom prefers, by using a rolling pin. Set aside.
  4. Add the boiling water and sugar to a large pot over medium-high heat and dissolve the sugar. Once dissolved, add the coconut milk and bring to a boil.
  5. Once boiling, add the glutinous rice and mung beans, then give it a good stir. Turn the heat down to low and cook for 15 to 20 minutes or until the coconut milk is almost absorbed, stirring once a while to make sure that the rice doesn’t stick to the bottom of the pot.
  6. Once done, turn the heat off and let it sit in the post for a further 5-10 minutes. Then,transfer to individual serving plates.
  7. Share and enjoy! You may serve this either hot or cold. I prefer having this hot with a pinch of salt on top to further enhance the flavours.

Ginataang Munggo (Roasted Mung Beans & Sticky Rice in Coconut Milk)

Ginataang Munggo (Roasted Mung Beans & Sticky Rice in Coconut Milk)

And that about wraps up guest blogging month for this year! Many thanks to Jialing, Brendon, Marissa, and my Mom for participating in my very first Auguest series. I’m actually pretty happy with how this all came together in the end. It was hectic at first trying to find the how ever so many bloggers I had in mind for this collaboration series, but then narrowing it down made it much more simpler and much easier to communicate with my friends and fellow bloggers. If you enjoyed this mini collaboration of mine, let me know in the comments section below and I’ll see to organising this into a yearly series 🙂

My Mom and I at Bondi Beach, Australia 2015
my Mom and I at Bondi Beach, July 2015

PS: Back in the day in the 70s, canned coconut milk was not a thing yet and so my Mom had to buy a whole matured coconut and manually grate it. From the grated coconut, she then had to squeeze the milk out of it for this dish. This dish was a lot of hard work for her back in the day, which is why she was so confused as to why this dish took no effort at all for her to make, and then she realised it was because we already had coconut milk readily available.

BON APPÉTIT

– Ally xx

myTaste.com

Advertisement
Auguest 2015: Marissa Mai

Cơm Gà (Vietnamese Chicken Rice)

Hi Everyone! Its Marissa from Maiyummy back again on Amcarmen’s Kitchen and it’s a pleasure for me to introduce the second and last dish for my week. Tonight’s dish is one that is known to finally endeavour the Vietnamese community through hardship and war, but 25 years ago, it was a dish invented with the idea to save locals through famine.

Cơm Gà (Vietnamese Chicken Rice)

From generation to generation, we cannot forget this dish as it commonly appears in Vietnamese gatherings and memorial days. The dish is called Cơm Gà (Vietnamese Chicken Rice), originally based in the Quang Nam province where I grew up. Chicken is the cheapest and most available food resource in Vietnam, and therefore it is widely popular and used in many typical Vietnamese dishes.

Cơm Gà (Vietnamese Chicken Rice) Ingredients

PREP TIME 20 MINS | COOKING TIME 45 MINS | SERVES 4

INGREDIENTS

For the chicken rice

  • 2 cups jasmine rice, uncooked
  • 2 pcs chicken whole legs (or a whole chicken)
  • 2-3 red bird’s eye chillies, sliced
  • 2 medium brown onions, halved and then sliced
  • 1 lemon, halved
  • 1 medium tomato, sliced
  • 1 stalk spring onion, sliced thinly
  • 1 thumb-sized ginger, peeled and julienned (reserve the peels)
  • 3 tbsp chicken powder
  • 2 tbsp fish sauce
  • 2 tbsp white vinegar
  • Ground sea salt and black pepper

For the heart/liver sauce

  • 100g chicken heart, washed and cleaned
  • 100g chicken liver, washed and cleaned
  • 2-3 garlic cloves garlic, crushed
  • 3 tbsp chicken stock (from the broth)
  • 1 & 1/2 tbsp white sugar
  • 1 tbsp chicken powder
  • Ground sea salt

METHOD

  1. Prepare the chicken: Add the chicken whole legs to a large pot of water together with about 2 tablespoons of chicken powder and the reserved peeled ginger skins. Boil the chicken for about 40 minutes or until it is cooked all the way through. Remove the chicken from the broth and set aside to cool down. Once cool, shred the chicken into small pieces. Return the bones to the broth and add about half of the onions. Keep it at a low simmer.
  2. Prepare the rice: Wash and rinse 2 cups of uncooked jasmine rice and then add to a rice cooker together with a tablespoon of chicken powder, julienned ginger, and about 2 & 1/2 cups of the chicken broth. Let it cook in the rice cooker until done (about 20 minutes).
  3. Prepare the chicken salad mixture: In a small bowl, add the white vinegar together with a few ice cubes and the remaining onions. Mix around and set aside for about 15-20 minutes for it to pickle.
  4. In a medium-sized bowl, add 2-3 tablespoons of chicken broth, about a tablespoon of ground black pepper, half a tablespoon of chicken powder, one red bird’s eye chilli, and juice of half a lemon. Mix around to combine. Then add the shredded chicken, pickled onions, and spring onions and combine all the ingredients together. Add some fish sauce if the chicken salad tastes a bit bland.
  5. Prepare the liver sauce: Heat about a tablespoon of peanut oil in a small saucepan over medium-high. Sauté the garlic for about 2 minutes or until fragrant and golden brown. Then add in the chicken heart and liver and cook for about 5 minutes. Add the chicken broth, chicken powder, and sugar, and let it cook for a further 5 minutes. Season with salt when it’s ready.
  6. Plate up: Place the chicken salad on top of the rice with the chicken heart and liver to the side. Then pour the heart/liver sauce on top of chicken salad, and serve with a side of the chicken soup and chilli sauce of your choice.

Cơm Gà (Vietnamese Chicken Rice)

Cơm Gà (Vietnamese Chicken Rice)

Hopefully this brought back a most authentic Vietnamese experience from where I am from, both culturally and through the experience of food. Thank you and have a lovely week 🙂

~ OH MAI YUMMYYYYY

Recipe Copyright © 2015 | Maiyummy

myTaste.com

Auguest 2015: Marissa Mai

Sò Lông Nướng Mỡ Hành (Grilled Mussels with Buttered Green Onions)

Hello Everyone! Hope you have a fabulous weekend so far 🙂 If you haven’t heard from me, my name is Marissa and I am a Sydney-based food blogger over at Maiyummy, where my primary focus is on Asian Street Food. This week I am extremely glad to be given such a wonderful opportunity to guest blog on Amcarmen’s Kitchen for the first time for a mini collaboration series known as Auguest. Allison first launched the idea of Auguest last month, and I am really honoured to be part of her series, reinventing our local street food cuisines into casual dining dishes. While she was staying at my place, we have cooked up multiple storms in the kitchen together where we both showed each other how to make some delicious Filipino and Vietnamese dishes. Later on today you can head on over to Maiyummy for Allison’s featured blog post.

Before I lead you guys into my secret Asian adventure, I should probably give a bit of an introduction to myself. I was born and raised in Vietnam and came to Australia in 2008 and have been living in Sydney ever since. At first I was really amazed by how diverse and multicultural Australia is, especially in food, language, and music, ranging from a variety of Korean, Japanese, Thai, Vietnamese, Greek, Italian, and many more. Back in Vietnam, I could only find authentic local Vietnamese food and some of the popular Asian flavours like Korean and Japanese; but to be honestly the taste is entirely different to what I have been experiencing here in Australia.

Sò Lông Nướng Mỡ Hành (Grilled Mussels with Buttered Green Onions)

I launched Maiyummy and made my first post in June 2015, exactly 2 months ago. A very special thanks Amcarmen’s Kitchen for being such a great supporter and influencer as she continuously motivated me to start up my blog while she was living at my place. We cooked, brunched, and shared our food together, creating memories that will last forever. Even though I am still new to blogging, I cannot thank her enough, and if you have the chance to, please follow her blog, Facebook, and Instagram page for great tips on cooking European food where I learned so much from her. While you’re there feel free to check out all my food adventures over on Instagram.

The recipe that I am going to share with my lovely audience today is a common seafood street food known as Sò Lông Nướng Mỡ Hành, or Grilled Mussels with Buttered Green Onions. Seafood is probably the most common ingredient in Da Nang, a place famous for its coastline, beautiful beaches, and of course a variety of fresh seafood. The idea of this dish originated from this city, and it simple, quick, and easy to cook; it is quite delicate and rich in texture. Not everyone can eat spicy or sour food, but this dish can accommodate the tastebuds of anyone who loves the freshness and the real taste of Vietnamese seafood.

Sò Lông Nướng Mỡ Hành (Grilled Mussels with Buttered Green Onions) Ingredients

PREP TIME 10 MINS | COOKING TIME 15 MINS | SERVES 3-4

INGREDIENTS

  • 1 kg fresh green mussels (or scallops), washed and cleaned thoroughly
  • 100g peanuts, roasted and crushed
  • 4 tbsp olive oil
  • 1 tbsp fish sauce
  • 2-3 red bird’s eye chillies, sliced
  • 1 stalk spring onion, sliced
  • Cilantro or coriander leaves
  • Ground sea salt and black pepper
  • Unsalted butter (optional)

METHOD

  1. Preheat oven to 180C (350F or gas mark 4). Line a baking tray with aluminium foil and set aside.
  2. Bring a medium-sized pot of salted water to a boil. Once boiling, turn the heat down to low and place the mussels into the pot for about 2-3 minutes or until their shells open up. Remove from the pot and rinse under cold water to stop the cooking process. Break one side of the shell open and place the mussel onto the prepared baking tray.
  3. In a small saucepan, heat up the olive oil over medium-high and add the sliced spring onions in. Toss them around using a spoon for about 5 minutes. Turn the heat off and add the fish sauce and half of the sliced chillies to the spring onion mixture. Stir to combine and then equally spoon the mixture over each mussel.
  4. Place them in the oven for about 7-8 minutes, then reduce the temperature down to 150C (300F or gas mark 2) in order for the mussels to cook slowly. Keep checking the oven and check till the mussels are sizzling, then immediately turn off the heat (for a creamier texture, I personally add a little bit of butter on the top of the mussels during the last few minutes of its cooking time before taking them out of the oven).
  5. Remove the mussels from the oven and arrange them onto a wooden board. Garnish with some crushed peanuts and remaining chillies. Serve them with salt, pepper and coriander leaves. Enjoy!

Sò Lông Nướng Mỡ Hành (Grilled Mussels with Buttered Green Onions)

Sò Lông Nướng Mỡ Hành (Grilled Mussels with Buttered Green Onions)

HAVE A LOVELY WEEK 🙂

~ OH MAI YUMMYYYYY

Recipe Copyright © 2015 | maiyummy

PS: This is Allison here writing a quick note to apologise for the late upload – I was busy all day yesterday and didn’t have time to proof read Marissa’s post, do some editing (both photographs and writing) to be able to get this recipe up yesterday. Nonetheless I hope you enjoyed her recipe today and stay tuned for another Vietnamese dish by her tomorrow! xx

myTaste.com

Auguest 2015: Brendon D'Souza

Brendon’s Giant Chocolate Chip Cookie

Hi Everyone! It’s Brendon from Brendon The Smiling Chef again with my second delicious dessert post as part of Amcarmen’s Kitchen’s Auguest series. It’s been a pleasure to be able to share my recipes with you, and next week you can visit my website to check out Ally’s mouthwatering recipes for Adobo and Sinigang.

Brendon's Giant Chocolate Chip Cookie

Here in Australia we often take for granted just how lucky we are to have an abundance of fresh, delicious food whenever we want it. On my travels to developing parts of India or Peru I saw firsthand the immense poverty and malnutrition that many people experience in their daily life. With populations on the rise, food is becoming an increasingly scarce and precious commodity. Back home in Sydney I’ve volunteered for a number of years with St. Vincent De Paul Society in their Vinnies Van appeal, providing fresh meals to people less fortunate. I’ve seen their struggle and this is why find it extremely difficult to hear that in the state of New South Wales alone (where I live) we throw away over 1.1 million tonnes of food each year! It’s a ridiculous amount and we really need to be more careful with our food consumption habits if we are to create a sustainable future for the generations to come.

The recipe I’d like to share with you today is part of a collection of recipes I like to call “Up-cycled Food”. The idea is simple – take your leftovers or parts of ingredients you would commonly throw away (such as parsley stalks or vegetable stems to name a few) and turn them into a delicious meal. At the end of my Cookies and Cream recipe from Tuesday’s post, I promised to show you what you can do with your leftover chocolate chip cookie dough. Sometimes I genuinely cannot be bothered to roll out a million tiny balls for individual cookies. Instead I press the dough into a cake tin or slice pan and bake it as one giant choice chip cookie. It still tastes absolutely delicious and much faster to make. You can either use your leftover cookie dough from Tuesday’s recipe (and simply skip straight to step 3) or make some more dough using the recipe below.

Brendon's Giant Chocolate Chip Cookie

PREP TIME 10 MINS | COOKING TIME 20-30 MINS | MAKES 2 GIANT COOKIES

INGREDIENTS

  • 250g unsalted butter, softened
  • 200g dark chocolate, chopped
  • 200g milk chocolate, chopped
  • 1 cup brown sugar
  • 1 cup plain flour
  • 1/4 cup baking powder
  • 1 free range egg
  • 1 tbsp vanilla bean paste (or extract)

METHOD

  1. Pre-heat the oven to 170C (325F or gas mark 3). Grease two 20cm spring form cake tins with butter and line with a disc of baking paper. Place each onto a baking tray and set aside.
  2. Place the butter and sugar and vanilla into the bowl of an electric mixer and beat until fluffy. Alternatively use electric hand beaters. Add the egg and beat until combined. Add the flour, baking powder and salt and stir to form a smooth dough. Add the chopped chocolate stir to combine.
  3. Divide the dough in half and press into each cake tin using your fingertips.
  4. Place the baking tray on the middle shelf of the oven and bake for 20-25 minutes until for a soft, fudgy cookie. Increase cooking time to between 25-30 minutes for a firmer, biscuit-y texture. Remove from the oven and allow to cool.
  5. Cut into wedges and serve. Any leftover ganache from Tuesday’s recipe tastes delicious with these gooey cookies. Simply warm it up then drizzle for a full-on chocolate hit!

That wraps up things for me here at Amcarmen’s Kitchen. It’s been a pleasure to be a part of this Auguest series. You can check out all my cooking and food blogging adventures at Brendon The Smiling Chef. While you’re there check out my Instagram page @brendonthesmilingchef.

Brendon's Giant Chocolate Chip Cookie

Recipe Copyright © 2015 | brendonthesmilingchef

Happy cooking and keep smiling,

Brendon D’Souza 🙂

myTaste.com

Auguest 2015: Brendon D'Souza

Brendon’s Cookies & Cream

Hi Everyone! Hope you’re all having a lovely day wherever you are. My name is Brendon D’Souza and I am a writer and food blogger from Sydney. I’m very honoured to be a part of this Auguest series and have some exciting dessert creations to share with you over the next two posts.

I launched my website Brendon The Smiling Chef in 2012, posting simple recipes that I had cooked for dinner. I developed skills in food styling and photography through internships and writing and editing roles at Green Lifestyle, Grapeshot, Australian Catholics and Youth Food Movement Australia and started to apply these skills to my recipe posts. This year I plan to make a few exciting changes with the website and include a restaurant review section called “Smiling & Dining @” which features reviews that I publish at Zomato While you’re there feel free to check out all my foodie adventures in Instagram at @brendonthesmilingchef.

Brendon's Cookies & Cream

I met Ally a few months ago at a food blogging seminar held in Sydney and she told me all about her passion for exploring cultures through food, which is something that I too love! We caught up a few weeks ago for a fabulous cooking day where she showed me how to make some delicious Filipino recipes (Which you can check out at Brendon The Smiling Chef next week). The recipe that I’m going to share with you today is a bit of an invention that I have drawn from my experiences of growing up here in Australia. Like Ally, I too am a bit of a third-culture foodie. My family are Indian and are originally from the state of Goa which sits on the West Coast of India. Goa is largely influenced by the Portuguese, who colonised the region in around the 16th Century, so our culture, customs and cuisine are surprisingly similar to Europe. I was born in Bahrain and lived there for two years before we migrated to Australia in the mid-nineties.

Growing up in Western Sydney, I was surrounded by a wealth of multicultural diversity and from a young age I was introduced to the cultures and cuisines of the Philippines, Southern America, Malta and Vietnam to name a few. Despite all this I have to admit that as a child I was very embarrassed about being Indian. It’s one of side-effects of growing up in Anglo-Saxon society. I saw myself as different from all the other kids at school. I had black hair, brown skin and brown eyes rather than blonde hair and blue eyes. Now that we’ve all grown up, a lot of my friends have said that they experienced these feelings too! I would cringe when I opened my lunchbox to find the beautiful Goan prawn curry and rice that mum had packed for me. What would the other kids think? We never really ate much Indian food at home when we were younger because my sister and I, being True Blue Aussies, didn’t like the pungent spices used in most of our cooking. They were too hot for our tiny tastebuds to handle. In these instances, six-year-old Brendon would drag a chair to the kitchen and reach for a jar of tomato paste sauce to put together my version of Spaghetti Bolognese; 1 kilogram of beef mince with 1 jar of tomato paste, yes paste (#IcantbelieveIdidthat), stirred through.

Brendon's Cookies & Cream

The 2000’s came along we noticed a number of American food products appearing on the supermarket shelves including Pop Tarts, Oreos, and Krispy Kreme Donuts. My favourite was Hershey’s Cookies ’n’ Creme bar, (or the Mars® counterpart Dove), a dreamy combination of white chocolate with tiny chocolate cookie pieces. It was ever popular among my Filipino friends. They had experienced this delight for years because it was sold in all the Filipino grocery stores. We saw it as a luxury because it was so new! It became one of my favourite flavour combos and, to nine-year-old Brendon’s delight, even started appearing in ice creams and cheesecakes!

I was playing around with the idea of reinventing Cookies and Cream and turning it into a sophisticated dessert. Chocolate chip cookies would definitely feature because who doesn’t love a good chocolate chip cookie? A white chocolate and vanilla bean ganache could represent the Cream and a 70% dark chocolate ganache would balance the sweetness. It had been a while since I’d tried to make macarons from scratch but I thought it would be nice to have some chocolate almond cigars to add another texture and flavour to the dessert. We made up the recipe for these while referring to the Master Adriano Zumbo’s for rough measurements. They weren’t as smooth on top but they made delicious chewy cookies.

Brendon's Cookies & Cream Ingredients

PREP TIME 30 MINS | COOKING TIME 15 MINS | SERVES 2-3

INGREDIENTS

For the white chocolate and vanilla bean ganache

  • 100ml pure cream
  • 200g white chooclate, chopped
  • 1 tbsp vanilla bean paste
  • 1 tsp glucose syrup

For the bitter dark chocolate ganache

  • 100ml pure cream
  • 150g dark chocolate (min. 70% cocoa solids)
  • 1 tsp glucose syrup

For the chocolate almond cigars

  • 1 free range egg white
  • 250g caster sugar
  • 150g almond meal
  • 2 tbsp Dutch process cocoa powder

For the chocolate chip cookies

  • 250g unsalted butter, softened
  • 200g dark chocolate, chopped
  • 200g milk chocolate, chopped
  • 1 cup brown sugar
  • 1 cup plain flour
  • 1/4 cup baking powder
  • 1 free range egg
  • 1 tbsp vanilla bean paste (or extract)

METHOD

Preparation

  1. White chocolate and vanilla bean ganache: Place the cream and white chocolate into a microwave-safe bowl and stir to combine. Heat for 30 seconds on medium then give the bowl a stir with a spatula. Continue to heat and stir the ganache in this way until smooth. Alternatively you can place the chocolate and cream into a heatproof glass bowl set over a pan of simmering water and stir until melted. When smooth, add the vanilla bean paste and the glucose syrup and stir until smooth. Allow to cool completely. Transfer the ganache to a disposable piping bag, seal the end with a rubber band and place in the fridge until cold but pliable.
  2. Bitter chocolate ganache. Place the cream and dark chocolate into a microwave-safe bowl and stir to combine. Heat for 30 seconds on medium then give the bowl a stir with a spatula. Continue to heat and stir the ganache in this way until smooth. Alternatively you can place the chocolate and cream into a heatproof glass bowl set over a pan of simmering water and stir until melted. When smooth, add the glucose syrup and stir until smooth. Allow to cool completely. Transfer the ganache to a disposable piping bag, seal the end with a rubber band and place in the fridge until cold but pliable.

Chocolate Almond Cigars

  1. Pre-heat the oven to 150C (300F or gas mark 2). Line a baking tray with baking paper and set aside.
  2. Place the egg white into a clean stainless steel or glass bowl free from grease or dirt. Whip to soft peaks using clean electric beaters. Add 1 tbsp of castor sugar to the egg whites and beat for 20-30 seconds or until the sugar has dissolved. Continue to add the sugar in this way until you have a glossy meringue. Sprinkle the almond meal and cocoa powder over and fold using a spatula to form a smooth batter.
  3. Transfer the batter to a disposable piping bag, twist the opening to enclose the filling and carefully cut off the tip of the bag to create a hole 2cm in diameter.
  4. Pipe 5cm cigars onto the baking sheet. You will need about 8 for this recipe. Allow them to rest for 10 minutes.
  5. Place the tray on the middle shelf of the oven and bake for 10-15 minutes or until the cigars have risen. Remove the tray from the oven and allow them to cool. When cool, take your piping bag with the white chocolate ganache and pipe a line down half the cigars. Sandwich with another cigar on top.

Brendon's Cookies & Cream

Chocolate Chip Cookies

  1. Place the butter and sugar and vanilla into the bowl of an electric mixer and beat until fluffy. Alternatively use electric hand beaters. Add the egg and beat until combined. Add the flour, baking powder and salt and stir to form a smooth dough. Add the chopped chocolate stir to combine.
  2. Roll out 12 cookies using 2 tsp cookie dough for each. Place them onto the prepared baking tray leaving about 3cm between each cookie for spreading. You will only need a small amount of the dough for the recipe but I’ll show you what you can do with your leftovers in my next recipe. Wrap the leftover dough tightly with cling wrap and place in the fridge.
  3. Place the baking tray on the middle shelf of the oven and bake for 10-15 minutes until the cookies have spread. Remove from the oven and allow to cool.
  4. Crumble 4 of the cookies to form cookie crumbs.

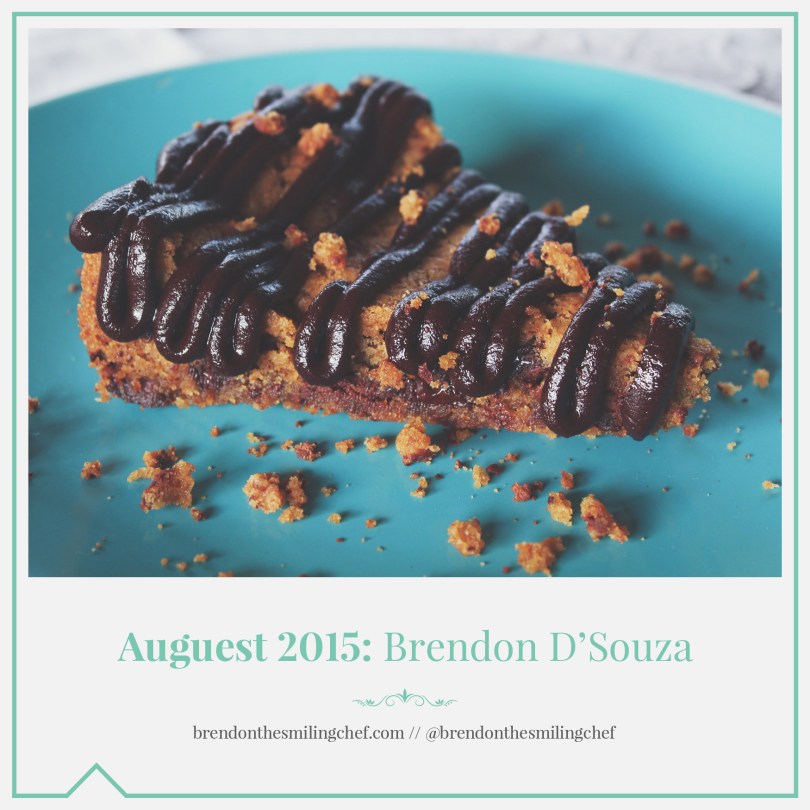
Plate up the dessert

  1. This is where the fun begins. Feel free to let your imagination run wild. Sprinkle the cookie crumbs across 4 serving plates. Pipe some white chocolate ganache onto each of the serving plates. Then rest a cigar along the ganache. Divide the chocolate chip cookies among the plates. Make a 1cm hole in the piping bag with the biter chocolate ganache and pipe them around the plate. Serve.

Ally and I had lots of fun with the plating. Check out our attempts.

Brendon's Cookies & Cream

Brendon's Cookies & Cream

Recipe Copyright © 2015 | brendonthesmilingchef

Happy cooking and keep smiling,

Brendon D’Souza 🙂

myTaste.com