Tahu Telur (Indonesian Tofu Omelette)

Hello Everyone! So if you saw my recipe yesterday for Homemade Egg Tofu, you’ll know that I’m back with a recipe that uses them in the dish that I will be sharing tonight.

Back in my very first post in May when we first landed in Indonesia for our Flavours of Southeast journey, I mentioned that there was this Indonesian restaurant in Brunei that my family and I would always go to on a weekly basis. One of the dishes that we would always order is Tahu Telur, or in English, Indonesian Tofu Omelette. It is an inexpensive and humble dish that originated from East Java, and although meatless, it is packed with protein from the eggs and tofu, making it perfect for those on a ovo-vegetarian diet. The dish may seem intimidating in terms of its preparation, but trust me, it doesn’t require much skill and is actually easy to put together. It’s also worth it!

Tahu Telur (Indonesian Tofu Omelette)

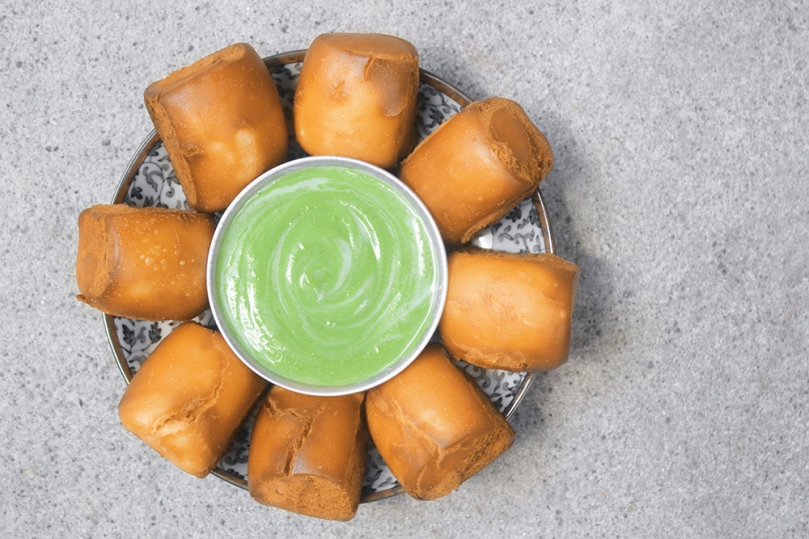
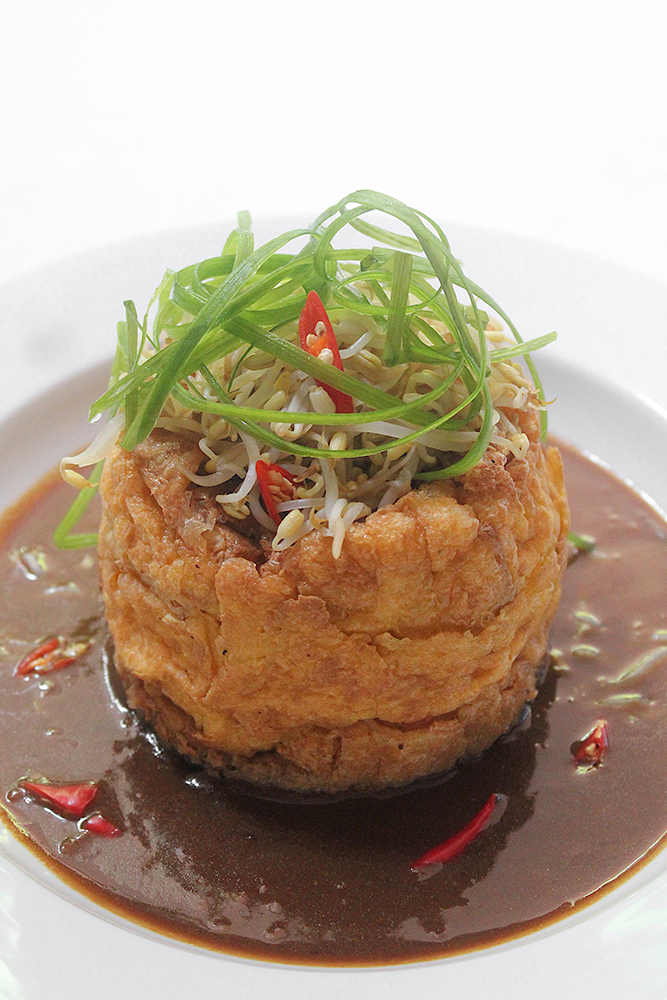
What makes this tahu telur dish stand out from other omelettes out there is its tower-like structure. You can also find flat versions of this dish, but it’s not as exciting and dynamic as a vertical omelette in my opinion. To achieve this tower, you’ll need a ring mold to cook the eggs and tofu in. If you do not have a ring mold, you can DIY one from a tin can that is at least 4 inches in diameter and 5 inches high. This is what I did when I could not seem to find ring molds in stores; and it worked just as good!

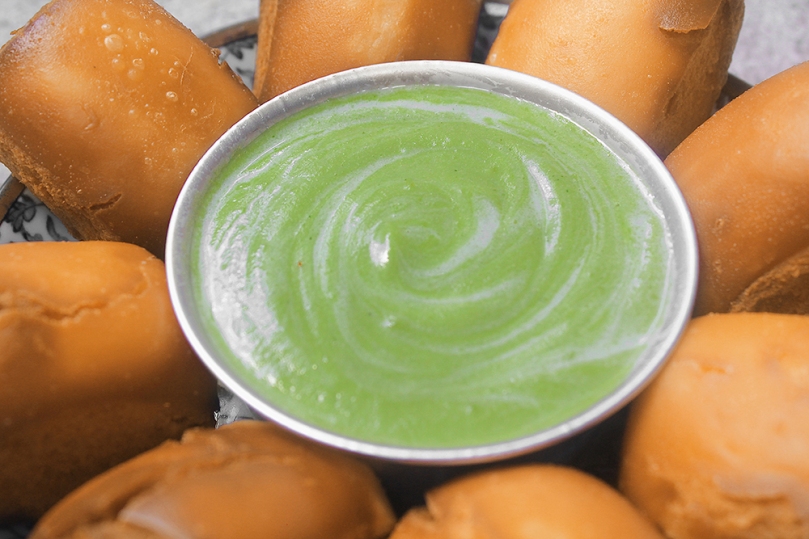
When fried the eggs are fluffy and crispy on the outside, but soft and moist on the inside when you cut through it due to the tofu that’s mixed in it. You can top it with various fresh vegetables of your choice to add a different crunch that’s refreshing to the palette. The dish is then brought together with a sweet and spicy peanut sauce that you can easily adjust to suit your liking.

1907

PREP TIME 15 MINS | COOKING TIME 20 MINS | SERVES 4

INGREDIENTS

For the tauhu telur

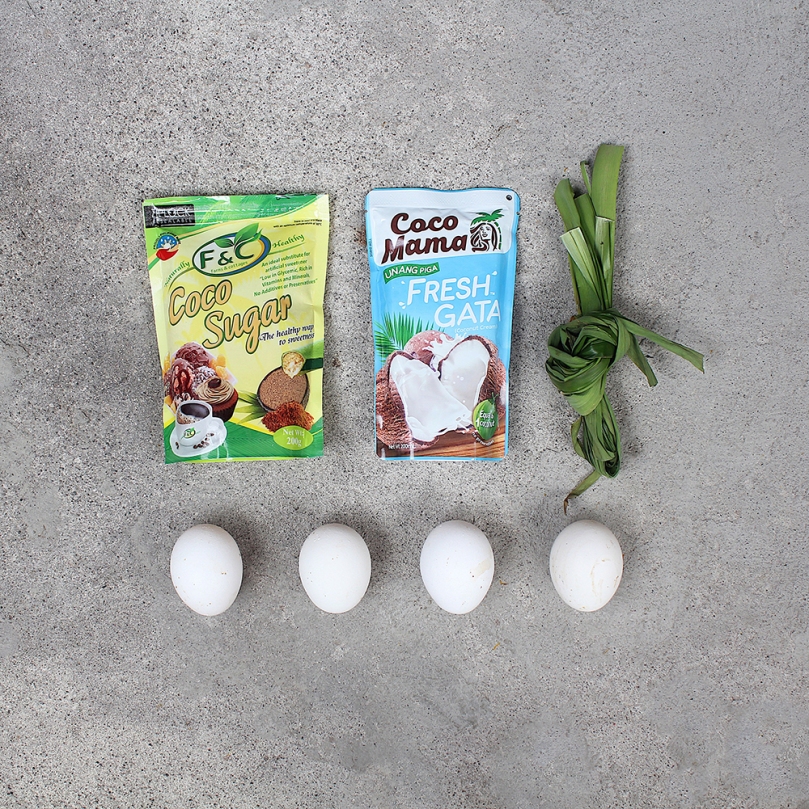
  • 5 large free-range eggs
  • 2 tbsp tapioca flour
  • 1 tsp salt
  • Homemade egg tofu*, deep fried
  • Cooking oil

*I used a quarter serving of this recipe, and cut them into 8 rectangular pieces.

For the peanut sauce

  • 5 garlic cloves, peeled
  • 3 red chillies
  • 1 cup hot water
  • 3 tbsp kicap manis
  • 2 tbsp coconut sugar
  • 1 & 1/2 tbsp peanut butter

To garnish

  • Blanched bean sprouts
  • Fresh red chillies, chopped
  • Spring onion

METHOD

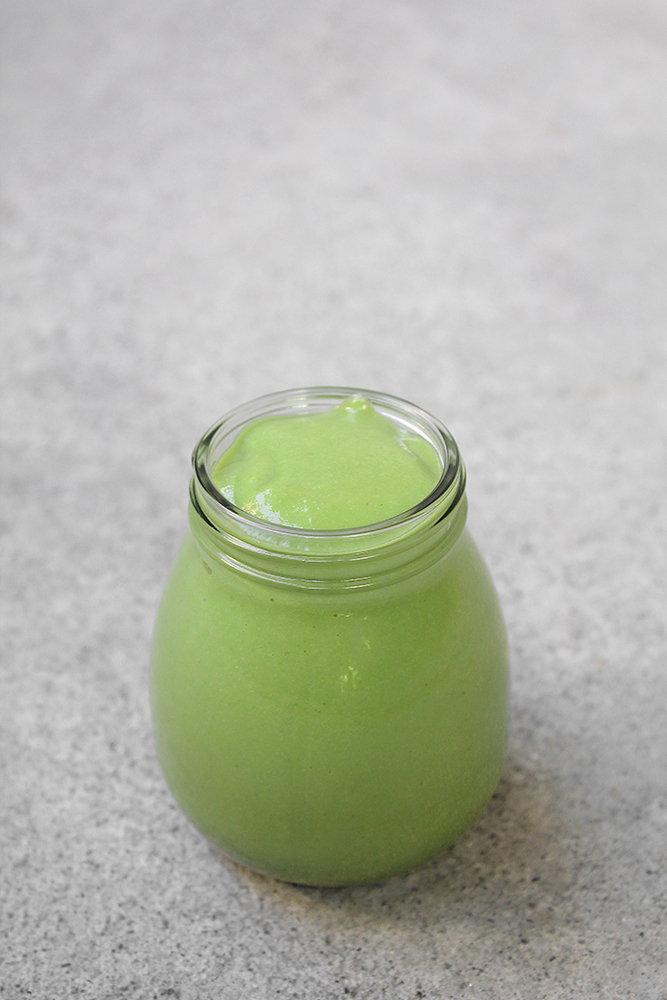
  1. Peanut Sauce: In a small pan, fry the garlic cloves and chillies until soft and browned. Add all the ingredients into a blender and blend until combined.
  2. Transfer the mixture to a small saucepan and cook over medium heat until reduced and slightly thickened. You may want to add more kicap manis at this point to darken the colour of the sauce. Once done, remove from the heat and set aside. Reheat later if needed.
  3. Tauhu Telur: Beat the eggs, tapioca flour, and salt together until well combined. Dissolve as much of the flour as possible.
  4. In a large frying pan, heat over medium-high, enough oil so that you are able to scoop up using a ladle, I used about 6 to 8 cups. Place the ring mold in the center of the pan and ladle the hot oil over the mold to prevent sticking while cooking.
  5. Pour about a third of the egg mixture into the ring mold and let it cook for about 30 to 45 seconds. Add half of the deep fried egg tofu to the eggs and cook for a further 30 seconds, ladling hot oil into the mold.
  6. Add another third of the egg mixture and top with the remaining egg tofu. Ladle more hot oil into the mold, and then add the remaining egg mixture on top.
  7. Reduce the heat down to medium and cook by continuously ladling hot oil on top of the mixture. Remove the oil if it stops sizzling and pour hot oil on top, repeating until golden brown in colour, about 4 to 5 minutes, or until the egg is cooked enough that it can hold its shape upright.
  8. Using a knife, gently scrape the inner side of the mold to loosen the egg. Use tongs to slowly and gently pull the mold away from the egg. Continue to cook until the sides are golden brown in colour.
  9. Once done, remove from the pan and shake off any excess oil. Transfer to a plate lined with paper towels to soak up any more excess grease.
  10. Transfer to a serving plate with the peanut sauce, and top with the blanched bean sprouts, fresh chillies, and spring onion. Enjoy!

Tahu Telur (Indonesian Tofu Omelette)

1909

BON APPÉTIT

– Ally xx

myTaste.com

Advertisement
Homemade Egg Tofu

Homemade Egg Tofu

Hello Everyone! Apologies for being MIA for the past few weeks; I’ve been having some issues with accessing the photos for my recipes, along with other things that have kept me busy in the past weeks. Anyway, a new month usually means we’ll be travelling to another country on our Flavours of Southeast Asia journey, but since I was away for half of May, I already had Indonesian dishes cooked up and planned for then. I’ll continue to share them first before we fly off to another country.

Tonight’s recipe isn’t particularly Indonesian; in fact it is of Chinese origin, commonly consumed in Hong Kong and Taiwanese cuisine. Egg tofu is made from eggs and soy milk, which means it is much sturdier than silken tofu. The main difference between the two is that egg tofu is not vegan because it has eggs whereas silken tofu is typically vegan since it’s made by coagulating soy milk without curdling it. Egg tofu is vegetarian if you consume eggs as part of your vegetarian diet. You can usually find egg tofu in a tube-like shape sold in many Asian groceries, but since I could not find any at my local grocer/supermarket, I decided to do some research and found out that it’s actually super simple to make at home! All you need are eggs, soy milk, salt, and voilà!

Homemade Egg Tofu

But wait! Before I dive any further, why am I sharing a recipe for Chinese-style egg tofu when we’re supposed to be venturing in Indonesia? Well, I will be sharing a recipe that uses egg tofu in an Indonesian dish; I just decided that I want to share this recipe for egg tofu separately. It’s so versatile; you can pan/deep fry it, boil it, and braise it. Use this recipe as a base for other delicious recipes, like what I’ll be sharing tomorrow night.

Normally I would opt to make my own homemade soy milk, but because I could not source soy beans at my local grocer or supermarkets, I used store-bought soy milk instead. Now, it’s important to use unsweetened soy milk. The first time I tried this recipe out, I used slightly sweetened soy milk because that’s what I had sitting in my pantry at that moment. The result is very different, especially if you’re going to fry the egg tofu.

The result I got when I used sweetened soy milk was that the exterior of the egg tofu turned dark brown in patches, almost like it caramalised instead of fried. It wasn’t crispy at all. When I made a second batch using unsweetened soy milk, the exterior of the egg tofu was perfectly golden brown in colour when fried, and was also extra crispy. So please use unsweetened soy milk!

Homemade Egg Tofu Ingredients

PREP TIME 10 MINS | COOKING TIME 30 MINS | SERVES 4

INGREDIENTS

  • 7 large free-range eggs
  • 2 cups unsweetened soy milk, homemade or store-bought
  • 1/2 tsp salt

METHOD

  1. Whisk the eggs and salt together in a large mixing bowl until well combined. While continuing to whisk, slowly pour the soy milk into the eggs.
  2. Line a square baking dish (8-in x 8-in) with parchment paper, and sieve the egg mixture into the prepared pan. Get rid of any bubbles on the surface. Cover with aluminium foil and steam for 30 minutes or until a toothpick inserted into the center of the egg tofu comes out clean.
  3. Once done, remove from the steamer and transfer the egg tofu to a plate lined with paper towels to soak up all the excess moisture. This step is really important if you’re going to pan/deep fry these later to prevent oil splatters.
  4. Set aside to cool down completely before cutting into desired shapes and sizes. Enjoy as it is, fried, or include it in various dishes.

1903

Stay tuned to see what I’ve used this egg tofu for!

How to store egg tofu?

  • Store raw egg tofu in a container with water and use it within 2 days. Make sure to drain the water and pat dry before cooking with them, especially if you’re going to fry them.
  • Cooked egg tofu can last up to 3 days if refrigerated, however, it’s best to eat it freshly pan fried.

Homemade Egg Tofu

BON APPÉTIT

– Ally xx

myTaste.com

Kaya (Malaysian Pandan Coconut Egg Jam) with Fried Mantou

Nyonya-style Kaya (Malaysian Pandan Coconut Egg Jam)

Hello Everyone! Try something new on your morning toast! If you’re looking to change up your breakfast condiment selection from the everyday jams and jellies, try this Pandan Coconut Egg Jam. It will transport you to the tropics with its flavourful, rich, and sweet taste!

Kaya (Malaysian Pandan Coconut Egg Jam) with Fried Mantou

Kaya in the Malay language means “rich”, with reference to the texture of this jam. It is a sweet coconut egg jam that is rich, thick and custard-like in texture, and flavoured with pandan, giving it a fun green colour.

There are two well-known varieties of kaya:

  • Nyonya, which is green in colour
  • Hainanese, which is darker brown in colour and often sweetened with honey

The colour variation depends on the number of eggs, the caramelisation of the sugar, and the amount of pandan leaves used. In the Philippines, a variation of this jam is known as matamís sa báo, but it does not contain eggs and is less thick in texture. In Thailand, it is known as sangkhaya.

Kaya (Malaysian Pandan Coconut Egg Jam) with Fried Mantou

This version of kaya that I will be sharing with you guys tonight is the Nyonya-style one, which gets its aromatic fragrance and natural green colour from the pandan leaf. The idea of treating it as a dip rather than a spread or a filling was inspired from my trip to Thailand a couple years back, in 2013. We (my family and I) were at a roadside stall for dinner and on their menu they had steamed thick-sliced bread with a kaya and condensed milk dip. I decided to recreate this dish to share with you guys tonight, but instead of serving it with steamed bread, I fried some mantou buns for that extra-added crunch on the outer layer while still keeping the inside of the buns soft.

Before we dive into tonight’s recipe, please take the time to check out the original where I drew my inspiration from over on Curious Cuisiniere by Michelle Wong.

Kaya (Malaysian Pandan Coconut Egg Jam) Ingredients

PREP TIME 5 MINS | COOKING TIME 15 MINS | MAKES 1 SMALL JAR

INGREDIENTS

  • 4-5 pandan (screwpine) leaves
  • 200ml coconut milk
  • 4 large free range eggs
  • 1/2 cup coconut sugar

Optional (to serve with)

  • Condensed milk
  • Fried mantou buns

METHOD

  1. Place the pandan leaves together with the coconut milk in a food processor or heavy-duty blender, and blitz/blend for a few minutes until the pandan leaves have been finely puréed.
  2. Pour the blended pandan-infused coconut milk over a fine sieve and into a large bowl. Strain the coconut milk from the pandan leaf pulp, pressing down firmly with the back of a spoon to extract all of the coconut milk from the pulp. Discard the pandan leaf pulp.
  3. In a separate heat-proof bowl, beat together the eggs and sugar, until frothy. Then, add the pandan-infused coconut milk to the egg and sugar mixture.
  4. Create a bain-marie (double-boiler) by pouring some water into a pot that is slightly larger than your heat-proof bowl. Very important, check to see if your bowl can sit on top of the pot without any water touching the bottom of the bowl.
  5. Heat your pot of water over low-medium and bring to a slight simmer. Once slightly simmering, place the bowl with the coconut milk and eggs over it and gently whisk for 10-15 minutes, ensuring no water escapes from the bottom pot. It’s important to keep a low simmer or else the eggs can curdle quickly (refer to notes).
  6. Once done, transfer the kaya to a small serving dish and add just a touch of condensed milk (just enough that it doesn’t become overly sweet) and serve with your choice of steamed or fried bread. Whatever tickles your fancy! Enjoy!

Kaya (Malaysian Pandan Coconut Egg Jam) with Fried Mantou

Transfer the remaining kaya into a sterilised and clean jar. Let it cool before storing in the refrigerator for up to two weeks. Kaya is eaten as a condiment spread on bread or toast, usually as breakfast.

Kaya (Malaysian Pandan Coconut Egg Jam)

Notes:

  • If you don’t have access to fresh pandan leaves, you may be able to find pandan extract which comes in a small bottle or pandan leaf powder, which will work perfectly fine with the recipe.
  • If your eggs curdle during the cooking process, not to fret! Continue to cook for the full 15 minutes, and then transfer the mixture to a blender. Blend until the kaya is smooth.

Growing up in Brunei, Nyonya-style kaya was my go-to choice of spread (together with peanut butter or just butter) on the waffles that you’d get at the local supermarket (Hua Ho) in the snack corner. Their freshly made kaya-filled pancakes, or even the kaya buns on their shelves were also my go-to choice. Also not forgetting the Hainanese kaya-filled cakoi (Chinese youtiao fried dough) from a nearby roadside stall from my workplace that my then workmates and I used to drive to our lunch breaks, and the kaya-buttered toast from a popular Chinese kopitiam known as Chop Jing Chew. These are, if not all, then some of my fondest memories of kaya.

BON APPÉTIT

– Ally xx

myTaste.com

Full Pinoy Breakfast

Full Pinoy Breakfast

Hello Everyone! I can’t believe that we’re nearing the end of November! The month went by so quickly and before we know it, the year will be over too. I’m not going to say that tonight will be the last of my Filipino breakfast series because expect more for the month of December. The only twist is that I will be sharing Filipino Christmas Breakfast treats, so stay tuned for that! I will also be sharing with you a Noche Buena Special next month be sure to so look out for that too!

Tonight’s recipe is a dish that draws inspiration from a Full English Breakfast – but with a Filipino twist to it. I’m not sure if this has been done before (I’m sure it has), but nevertheless, I’ve swapped out traditional English Breakfast ingredients with its Filipino counterpart i.e. sausages for longganisa, toast for pandesal, and so on. I came across this idea while researching the top favourite Filipino Breakfast dishes and it clicked into mind: “what if I substitute the ingredients from a Full English Breakfast and make a Filipino version of it?”

The end result definitely put a smile on my face, and I’m sure it will do the same for you.

Full Pinoy Breakfast Ingredients

PREP TIME 10 MINS | COOKING TIME 20 MINS | SERVES 4

INGREDIENTS

  • 250g fresh corned beef
  • 250g oyster mushrooms*
  • 12 Vigan longganisa**
  • 8 freshly baked malunggay pandesal***
  • 4 large free range eggs
  • 4 slices of pineapple-marinated holiday ham****
  • 4-5 garlic cloves, minced
  • 1 small potato, diced
  • 1 small red onion, halved and sliced
  • Knob of unsalted butter
  • Salt and freshly ground black pepper, to taste

To garnish

  • Lettuce leaves
  • Tomatoes, sliced

*Or any other type such as button, cup, or Portobello, whichever is readily available and fresh at your local market or grocers. In my case, the oyster mushrooms were the freshest from the rest.

**Quantity depends on the size and type, more if you get the smaller ones.

***You can bake your own pandesal or you can pop over to your nearest pandesal stall (ours is just a 2 minute walk from our house) and buy at 3 pesos a piece of freshly baked malunggay pandesal.

Malunggay Pandesal

****Since Christmas is nearing, Hamon de Bola (Ham Ball or Holiday Ham) can now be found in every grocery store nationwide! Since this is our first time being back in the Philippines for good, we’ve been scouting around for the best tasting Holiday Ham by just buying slices of the various brands out there before buying the whole ball to serve for our upcoming Noche Buena Feast next month.

METHOD

Get ready for some one-pan action!

  1. Preheat oven to 90C (190F) just hot enough to keep each element of the dish warm as we work through each one of them individually. Place your store-bought pandesal into the oven.
  2. Fried Egg: Heat a large frying pan over medium-high heat with about a tablespoon of oil. Crack the eggs gently into the pan to keep the yolks intact. Don’t overcrowd the pan, so if needed, fry the eggs in batches.
  3. Cook until the tops of the whites are set, but the yolk is still runny. Browned and crispy on the edges with a golden liquidy yolk is how I like my fried eggs! Transfer to a heat-proof plate and set aside in the oven.
  4. Garlic Sautéed Mushies: In the same pan, add half of the minced garlic and sauté until fragrant and golden brown, about 30 seconds. Add in the mushrooms and cook until softened, about 3 minutes.
  5. Add a knob of unsalted butter, and season with a touch of salt and freshly ground black pepper. Give it one good stir to combine and transfer to a small heat-proof bowl. Set aside in the oven.
  6. Corned Beef: Add about a tablespoon of oil to the pan and sauté the remaining minced garlic until fragrant and golden brown, about 30 seconds. Add in the onions and cook until soft for about 1 minute before adding in the corned beef.
  7. Continue to cook for 5 to 6 minutes, seasoning with a touch of fragrant and golden brown, about 30 seconds. Add in the diced potatoes and cook further until the potatoes are soft, about 2-3 minutes. Once done, set aside in a small heat-proof bowl and set aside in the oven.
  8. Longganisa: Wipe down the pan with a kitchen towel tissue and add about a quarter cup of water to the pan together with the longganisa. Bring the water to a boil. Roll the longganisa occasionally and continue to boil until the water in the pan evaporates.
  9. When the water has fully evaporated, let the longganisa fry in its own oil. Continue to fry the longganisa for about 5 minutes while constantly rolling them around to cook evenly on all sides. When the longganisa is slightly crisp on the outside, it’s done! Set aside on a heat-proof plate lined with a paper towel to absorb any excess oil. Set aside in the oven to keep warm.
  10. Holiday Ham: Again, wipe down the pan with a kitchen towel tissue and add about a tablespoon of oil. Add the ham slices to the pan and fry until golden brown both sides. Set aside on a single plate lined with a paper towel to absorb any excess oil.
  11. Plate Up: Remove all the cooked elements from the oven and plate up accordingly into four individual serving plates. Garnish with fresh lettuce leaves and fresh sliced tomatoes. Serve with coffee or any hot beverage of your choice and here you have it! Enjoy a Full Filipino Breakfast for the upcoming weekend!

Full Pinoy Breakfast

Full Pinoy Breakfast

BON APPÉTIT

– Ally xx

myTaste.com

Level Up Instant Noodles

Level Up Instant Noodles

Hello Everyone! When you think of breakfast, it should be quick to prepare and warm up your empty stomach – if you’re in a rush that is. It should also be filling. You can find all those characteristics in instant noodles!

Comfort food for some, a staple for the rest – instant noodles in the Philippines is favoured by many, either dry or with a soup base. A hot bowl of soup with noodles in the morning gets us going through the day. You simply put a block of noodles in briskly boiling water for about 3 minutes, stir in the seasonings and pour it into a bowl. Tada! Breakfast is solved! Just remember, eating instant noodles is not commendable, but we can still eat them in moderation.

Level Up Instant Noodles

This is how I normally like to have my instant noodles for breakfast once a week – boiled and tossed in its packet seasonings and topped with fried egg with a runny yolk. I also add in more chilli powder just because I love a good hard kick of spice, and a squeeze of fresh calamansi juice for a bit of tang. But of course, I’m not going to just write up a recipe for instant noodles with fried egg for you…

There’s only one type of instant noodles you’ll see me eating, and that’s Indofood Mi Goreng, which if not mistaken, can be found in Indonesia and is only distributed in Brunei. I’m sure most of my follow Bruneians have seen lots and lots of boxes of these being checked-in by almost every single Filipino passenger (myself included), so it’s no doubt that this particular brand of instant noodles is a big hit with our community.

Level Up Instant Noodles

I recently saw a hashtag thread on Instagram for #JazzedUpInstantNoodles and that’s where the inspiration came from. Since instant noodles is a heavy favourite, not only amongst Filipinos, but also across the Asian (and most likely Western) community, I’ll be sharing with you tonight my version of Level Up Instant Noodles, the Filipino way of course. When I say Filipino way, I mean by using Filipino favourites like Lechon to mash up with my favourite pack of instant noodles for a super filling breakfast!

Level Up Instant Noodles

PREP TIME 5 MINS | COOKING TIME 5 MINS | SERVES 1

INGREDIENTS

  • 1 packet (80g) Indofood Mi Goreng, or any other instant noodles
  • 150g of spit-roasted lechon, cooked
  • 1 bird’s eye chilli, chopped
  • 1 calamansi, halved
  • 1 large free range egg
  • Chilli powder, to taste
  • Lechon sauce
  • Spring Onions, chopped

METHOD

  1. Heat a large frying pan over medium-high heat with about a tablespoon of oil. Crack the egg gently into the pan to keep the yolks intact. Cook until the tops of the whites are set, but the yolk is still runny. Browned and crispy on the edges with a golden liquidy yolk is how I like my fried eggs! Transfer to a small plate and set aside.
  2. Bring a small pot of water to a boil over high heat. Add the block of instant noodles and cook until al dente, about 3 minutes.
  3. Once the noodles are done, drain and return them to the pot with a little bit of the cooking water. Mix in thoroughly the packet seasonings and extra chilli powder.
  4. Transfer to a serving plate together with the lechon and fried egg. Top with extra chilli powder and spring onions. Enjoy!

Level Up Instant Noodles

You can buy small portions of lechon at your local market if they sell it there rather than the whole pig. I got mine from our local weekend market that sells for P700 a kilo. I usually go for the liempo (belly) part because there are less bones and is juicier that other parts. However, it is also the fattiest part of the pig. What I usually do it throw out the fat, but is also such a waste in terms of paying for the fat included. Dilemma.

Of course, there are many other ways in which you can level up your instant noodles at home. A growing popular trend in Brunei and across certain parts of Asia as well is to add salted egg to everything. You can now have Mi Goreng coated with salted egg sauce, or even Mi Goreng with Ayam Penyet (fried chicken) that’s drenched in salted egg sauce! The possibilities are endless and it’s up to you to pair your favourites and get creative in the kitchen!

Level Up Instant Noodles

BON APPÉTIT

– Ally xx

myTaste.com

Beef Tapsilog

Beef Tapsilog

Hello Everyone! First and foremost, I would like apologise for my absence last month. I had a theme all planned out, and even had the dishes ready to post – but life got in the way and disrupted my writing and posting schedule for two weeks. At the beginning of September, I was on a family trip to Singapore and Malaysia for my youngest sister’s graduation – it was a jam-packed week filled with much activities and therefore gifted me with a fever, cough, and flu from over fatigue after the trip.

Alyssa’s Graduation Ceremony – Diploma in Contemporary Music from LASALLE College of the Arts, Singapore

Day Trip to Legoland, Nusajaya, Malaysia

And because of that, I decide to take a small break for September and just start fresh with the theme I had planned out for the month of October! (Details in a bit).

Secondly, before I dive into the theme for this month, I would like to take this opportunity to thank all my friends and fellow foodies who have contributed a recipe or two for my Auguest series on Amcarmen’s Kitchen. I hope that you guys enjoyed both the sweet and savoury breakfast fixes that they have shared with you! If you’d like to participate in next year’s Auguest series, drop me an email and let’s see what we can do!

Thirdly, I just want to put it out there that have some news to share with everyone so stick around until the end of this post (or you can skip ahead and scroll down to read it now).

Moving on, a new month means a new theme and for the month of October, where I will be sharing with you some of my favourite Filipino Breakfast staples! I’m kicking off the theme with few ways you can enjoy a traditional Filipino “silog” breakfast. Silog is a suffix in which the si is short for sinangag (garlic fried rice) while the log is short for itlog (fried egg). For example, Tapsilog is an abbreviation for Beef Tapa, Sinangag, and Itlog. The popular Filipino breakfast dish is a harmonious combination of sweet, sour, salty and umami flavours that sing in every mouthful you take.

Beef Tapsilog

Traditionally, tapa was a means of extending the shelf life of meats and other proteins such as chicken and fish. Beef Tapa is similar to that of Beef Jerky where it is prepared by curing the meat with sea salt and then left to dry directly under the sun for the purpose of preserving the meat.

Nowadays, Beef Tapa is simply marinated and cooked (either grilled, sautéed, or fried). The marinade mixture consists of, but is not limited to: soy sauce for saltiness, calamansi juice for a punch of tang, sugar for sweetness, and garlic for warmth. You can even buy Beef Tapa from grocery stores across the Philippines that have already been marinated for you, either fresh or frozen. Of course, the best way is to do it yourself so that you can adjust the levels of salt, sweet, and tang to your liking, and also know what actually goes into the marinade.

Beef Tapsilog

PREP TIME 15 MINS* | COOKING TIME 20 MINS | SERVES 4

*For ready marinated, store-bought Beef Tapa. If marinating yourself, allow for a minimum of 4-6 hours of marinade time, or 12 hours overnight in the fridge for the flavours to really soak into the meat (maximum 24 hours).

INGREDIENTS

For the Beef Tapa marinade

  • 500g beef sirloin (New York Strip or boneless rib eye), sliced thin against the grain**
  • 1/4 cup freshly squeezed calamansi juice
  • 1/4 cup reduced-sodium soy sauce
  • 6 garlic cloves, finely minced
  • 3 tbsp brown sugar
  • 1/4 tsp freshly ground black pepper

To serve with

  • Garlicky fried rice
  • Fried sunny-side up egg
  • Fresh tomatoes, roughly chopped (optional)
  • Spicy vinegar

**When using beef, it is best to slice against the grain (grain referring to the muscle fibres), as this will result in easier to chew, more tender pieces of beef.

METHOD

  1. Add all the marinade ingredients together in a medium-sized bowl and mix until the brown sugar has dissolved.
  2. Toss in the sliced beef and make sure that it is well coated in the marinade. Cover and leave to marinate in the fridge for at least 4 hours (up to 24 hours).
  3. Strain the beef from the marinade and arrange on a grill pan (you may have to do this in batches depending on the size of your grill pan). Turn the heat up to medium-high and cook the beef until well browned on each side, about 2-4 minutes per side once they start to sizzle aggressively.
  4. Serve hot with garlicky fried rice, fresh tomatoes, a spicy vinegar dip, and fried egg – browned and crispy on the edges with a golden liquidy yolk is how I like my fried eggs.

This dish is all about balance. The contrasting flavours and textures all work together to keep your palate salivating for more. While Tapsilog is most popular for breakfast, it can also be enjoyed at any time of the day, even as an occasional midnight snack after a night of drinking!

Beef Tapsilog

Okay, now down to business – the news. If you have been a frequent follower of my blog for the past few months or so, I’ve vaguely mentioned multiple times of what has been going on in my life that I couldn’t exactly say back then. The time has finally come…

I quit my job back in Brunei.

Or more like, I had finished my two-year contract with them and I decided not to be tied down for another two years (which I had been looking forward to since the beginning of the year). The working environment just became toxic to my mental health. I also felt that I had lost myself – I didn’t know who I was anymore, as a designer. I was either designing for a client who knows nothing about design, or for my supervisor who thinks she’s better than the designer. She would push for her ideas to be realised, but when everyone criticises it, she puts the blame on the designer. When I push for what I want and then praised for a job well done, she would steal the spotlight. There were just so many things wrong with the system, and I decided to put my foot down and just leave altogether.

I grew tired of fighting and standing up for myself amongst vipers with childish and petty attitudes, and to be honest, my mental wellness is so much more important than dealing with these kind of people 6 full days a week for the past 3 years – and I am not going to allow myself to endure another 2 years if I had decided to renew my contract with them.

With that being said – no job in Brunei for me means no valid visa to work there. No valid visa means I can’t stay in Brunei anymore, and so after more or less 26 years, I finally left my home away from home, my birthplace, and have settled for just over two months now back to the motherland – the Philippines.

This is also why for the month of October on Amcarmen’s Kitchen, I have decided to share popular Filipino breakfast staples – something that I have been enjoying and indulging in for the past two months so I hope you enjoy my Filipino Breakfast series for the upcoming month!

To end, apologies for the super long post!

BON APPÉTIT

– Ally xx

myTaste.com

Salmon Sashimi Eggs Blini

Salmon Sashimi Eggs Blini

Hello Everyone! I hope it’s been a good week for y’all so far. So the original inspiration for this dish was actually drawn from a dish that I had back when I was still studying in Australia – a simple dish that is packed with beautiful flavours that sing in our mouth upon every bite. The pop of citrus that you get from the fresh king salmon, the explosion of salt from the caviar, the crunch from the broccolini, and the fluffiness of the blini to just soak up all the creaminess from the maltaise sauce combined with that liquid gold – pure heaven.

Devon Café's Eggs Blini
Devon Café’s Eggs Blini • buckwheat blini • poached eggs • citrus cured king salmon • salmon caviar • broccolini • maltaise sauce

If I remember clearly, the first time I had this dish was also the first time I had stepped into Devon Café – one fine Sunday(?) morning I believe. I was waiting outside with Jialing for – of course – Yvonne to show up for our ‘brunch’ meet up. While waiting, I saw one of my high school friend’s brother inside the café with a group of his friends. We both displayed shocked expressions on our faces as we made eye contact and realised each other’s familiar faces. Why? Well because firstly, I hadn’t seen him since I graduated highschool, which at that time would’ve been 3-4 years ago, and secondly, he doesn’t live Sydney, he was just travelling through at that time – what a small world amirite? Anyway we talked for a bit, but I let him enjoy his Eggs Blini (yes he was having that dish) while Jialing and I continued to wait for Yvonne. If not mistaken, we had planned to meet up at 10am, but Yvonne didn’t show up until quarter to one, or even at one maybe. I can’t actually remember, but I know she was super late which is typical. Not hating on her though because Jialing and I know her so well for this to be her thing *cheeky grin* We still waited for her, though I also don’t know what Jialing and I did for 3 hours of waiting. Another one of a brunch-turned-late-lunch sessions! The wait was all worth it though for that spectacular Eggs Blini dish!

The second time I had this dish wasn’t planned at all. The initial plan was to take, my then housemate’s friend to have the BEST sandwiches ever in Sydney, but I had totally forgotten that they were closed on Sundays! So I told him that I’d take him to the next best place on my list for our brunch date – which was of course, Devon Café! I had convinced him to order the Eggs Blini because he was being very indecisive. I told him that he would not regret it – and he didn’t! I could see it in his face as he savoured and devoured each bite he took.

Floris & his Eggs Blini
Remember guys, the camera ALWAYS eats first!

Alright, I apologise for the long-winded introduction, but nowadays it’s very rare that I have something to share with you guys, since I do nothing now but eat, sleep, work, repeat 6 times a week. My social life has gone down the drain, which is also my fault because I can’t be bothered to make the effort to go out. I’d much rather sit in front of the TV after work or just lay in bed waiting to fall asleep. Nevertheless! Here’s my take on Devon Café’s Eggs Blini:

Salmon Sashimi Eggs Blini Ingredients

PREP TIME 1 HOUR 30 MINS* | COOKING TIME 20 MINS | SERVES 3

*Includes time for the buckwheat blini batter to rise and rest.

INGREDIENTS

For the buckwheat blini (original recipe from The Spruce Eats)**

  • 1 cup milk warm
  • 2/3 cup plain flour
  • 1/2 cup buckwheat flour
  • 1 large free range egg, at room temperature, yolk and white separated
  • 2 tbsp unsalted butter, melted and cooled
  • 1 tsp instant yeast
  • 1/2 tsp salt

For the hollandaise sauce

  • 3 large free range eggs, yolks separated
  • 175g unsalted butter, cut into cubes, at room temperature
  • 2 tbsp water
  • 2 tbsp fresh lemon juice
  • Fresh Thyme Leaves
  • Ground salt and black pepper, to taste
  • 3 large free range eggs
  • 1/2 bunch purple kale, stemmed
  • Fresh salmon, cut into 15 equal sashimi slices***
  • Fresh salmon roe
  • Lemon wedges, to garnish
  • Micro-herbs, to garnish

**I recommend that you follow the link to learn more about what a blini is especially if this word is foreign to you.

***If you don’t possess the knife skills to do so, you can always pop by your local fish market to get lovely and readily fresh cuts of sashimi.

METHOD

  1. Buckwheat Blini: Mix all of the dry ingredients in a large bowl – the plain flour, buckwheat flour, salt, and instant yeast.
  2. Make a well in the centre and pour in the warmed milk, mixing until smooth. Cover and let rise until the mixture has doubled in size, about 1 hour. Then, stir in the cooled melted butter and the egg yolk into the batter.
  3. In a separate bowl, whisk the egg white until stiff but not dry. Fold into batter and cover to stand 20 minutes.
  4. Heat a nonstick skillet over medium heat. Drop quarter-size dollops of dough into pan without crowding. Cook for about 1 minute or until bubbles form and break. Turn and cook for about 30 seconds more. Cover blini and keep warm. Repeat with remaining batter.
  5. Hollandaise Sauce: While the buckwheat blini batter is underway and left to stand, start on the Hollandaise sauce. Place a heatproof bowl over a medium saucepan that is quarter-filled with water. Make sure that the bowl should fit snugly into the pan without touching the water (lift the bowl to check and remove some water if it does). Bring the water to a boil over high heat, then reduce heat to very low so the water is barely simmering (there should be almost no movement at all). It is important that the water is barely simmering while making the sauce – if it is too hot, the egg yolks will cook too much and the sauce will curdle.
  6. Place the egg yolks and the 2 tablespoons of water in the heatproof bowl and place over the pan. Whisk the mixture constantly for 3 minutes or until it is thick and pale, has doubled in volume and a ribbon trail forms when the whisk is lifted.
  7. Add the butter a cube at a time, whisking constantly and adding another cube when the previous one is incorporated completely (about 10 minutes to add it all in). If butter is added too quickly, it won’t mix easily with the egg yolks or the sauce may lose volume. At the same time, it is important that the butter is at room temperature and added a cube at a time, so that it doesn’t take too long to be incorporated – if the sauce cooks for too long, it can curdle.
  8. Remove the bowl from the pan and place on a heatproof surface. The cooked sauce should have the consistency of very lightly whisked thickened cream. Whisk in the lemon juice, tom yum paste, fresh thyme leaves, and season with salt and pepper.
  9. Poached Eggs: Bring small saucepan of water to the boil over medium-high heat, then reduce the heat to low-medium – the water should be just simmering. Add in the vinegar and stir. Crack one egg into a small bowl and quickly, but gently pour it into the water. Repeat with the other egg. A really soft poached egg should take around 2 minutes, but if you want it a bit more firm, it will take about 4 minutes. To check if they’re cooked right, carefully remove the egg from the pan with a slotted spoon and give the yolk a gentle push (you can tell just by your instincts if it is under or over – or perfect)!
  10. Kale: Bring a large pot of water to a rolling boil, add salt to taste and the kale. Blanch for 3 minutes, then transfer to a bowl of cold water to stop the cooking, and drain. Take the blanched kale up by the handful and squeeze hard to expel excess water.
  11. Assembly: Lay the blini on the plate, and place the blanched kale leaves on top. Build up with the salmon sashimi slices, 5 per serving, and top with the poached egg. Drizzle a generous amount of hollandaise sauce and garnish with the salmon roe, about a teaspoon or two per serving, and micro-herbs. Squeeze with a bit of lemon juice before indulging. Enjoy!

Salmon Sashimi Eggs Blini

Salmon Sashimi Eggs Blini

Before I sign off, I just want to let you guys know that next week will be a little different as the recipe that I will be sharing will be in three parts. I will be posting part 1 of the recipe on Tuesday night, the main Eggs Benny recipe on Wednesday night, and another dish on what you can do with the leftovers! So get your mouths watering for three new recipes next week!

BON APPÉTIT

– Ally xx

myTaste.com

Asian-inspired Vegetarian Eggs Benedict

Asian-inspired Vegetarian Eggs Benedict

Hello Everyone! I hope everyone has had a good start to the week so far, and of course had a great weekend celebrating Mother’s Day! We celebrated by having a delicious brunch at Le Keris (again), as it is our new favourite go-to restaurant for fine dining quality food that’s super affordable. Other than that, the week hasn’t been all that exciting but at least I have the day off to look forward to tomorrow! It’s a public holiday for the first day of Ramadhan here in Brunei and I’m probably going to spend the day updating and planning Amcarmen’s Kitchen, and also whip up a storm in the kitchen – this is, if I don’t procrastinate or fall lazy by midday *cheeky grin*

Last week I mentioned how versatile one can get with a classic Eggs Benedict dish, and I also said that I will be covering the as many options as I can for this month of May. Tonight, I will be sharing an Asian-inspired Vegetarian Eggs Benny with everyone. I drew inspiration from Jenessa over on Jenessa’s Dinners so be sure to drop a visit to her site before continuing on with the recipe below!

Crispy firm tofu, topped with deliciously soft sautéed shimeji mushies in ginger, lemongrass, and garlic, accompanied with some Asian greens and pan-fried marinated eggplant in a sesame oil mixture, tied together with liquid gold and a tom yum hollandaise sauce – if this didn’t make your mouth water, then don’t talk to me. Of course, if you’re going to try this recipe out, you don’t have to restrict yourself to the ingredients I’ve chosen, or the type of cuisine that inspired this dish, pick your favourite veggies and cuisine to fuse together and I’m almost certain that you’ll come up with something just as (guilt-free) indulgent.

Asian-inspired Vegetarian Eggs Benedict Ingredients

PREP TIME 15 MINS | COOKING TIME 30 MINS | SERVES 3

INGREDIENTS

For the eggs benedict

  • 3 large free range eggs
  • 3 medium-size eggplant, sliced thinly lenghtwise
  • 3 pcs firm tofu
  • 2-3 garlic cloves, finely minced
  • 2 stalks lemongras, finely sliced
  • 1 bunch bok choy
  • 1 pack (250g) fresh shimeji mushrooms
  • Sesame oil
  • Thumb-sized fresh ginger, peeled and grates

For the tom yum hollandaise sauce

  • 3 large free range eggs, yolks separated
  • 175g unsalted butter, cut into cubes, at room temperature
  • 2 tbsp water
  • 2 tbsp fresh lemon juice
  • 1-2 tsp tom yum paste*
  • Fresh Thyme Leaves
  • Ground salt and black pepper, to taste
  • Toasted sesame seeds, to garnish

*Adjust to your level of spice likeness

METHOD

  1. Crispy Tofu: Line a plate with a paper towel and set the tofu on top. Set a small plate on top of the tofu and weigh it down with something heavy, pressing to absorb the liquid – about 15 minutes. Remove the weight and drain off the excess liquid. Pat the tofu dry with more paper towels.
  2. Heat about a quarter cup of oil in a large frying pan over medium-high until the oil shimmers. It should not smoke. If you see a wisp of smoke, lower the heat slightly and immediately proceed with adding the tofu. Fry until all sides are golden and crispy, about 4-5 minutes. Once done, place on a cooling rack. Set aside.
  3. Vegetables: In the same frying pan, discard excess oil, leaving about a tablespoon. Sauté the garlic, ginger, and lemongrass until fragrant. Transfer half of the sautéed mixture to a small bowl with sesame oil.
  4. Add the shimeji mushrooms to the frying pan and sauté until soft, about 5 minutes. Season with a touch of salt and ground black pepper to taste. Once done, set aside.
  5. Brush the sesame oil mixture on each side of the eggplant slices and place in the frying pan to cook until soft, about 3-4 minutes per side.
  6. While the mushies and eggplants are going, bring a small pot of salted water to a boil and cook the bok choy for about 2 minutes. Once done, transfer to an iced water bath to stop the cooking process. Drain and set aside.
  7. Hollandaise Sauce: While the balsamic reduction is underway and slowly simmering, start on the Hollandaise sauce. Place a heatproof bowl over a medium saucepan that is quarter-filled with water. Make sure that the bowl should fit snugly into the pan without touching the water (lift the bowl to check and remove some water if it does). Bring the water to a boil over high heat, then reduce heat to very low so the water is barely simmering (there should be almost no movement at all). It is important that the water is barely simmering while making the sauce – if it is too hot, the egg yolks will cook too much and the sauce will curdle.
  8. Place the egg yolks and the 2 tablespoons of water in the heatproof bowl and place over the pan. Whisk the mixture constantly for 3 minutes or until it is thick and pale, has doubled in volume and a ribbon trail forms when the whisk is lifted.
  9. Add the butter a cube at a time, whisking constantly and adding another cube when the previous one is incorporated completely (about 10 minutes to add it all in). If butter is added too quickly, it won’t mix easily with the egg yolks or the sauce may lose volume. At the same time, it is important that the butter is at room temperature and added a cube at a time, so that it doesn’t take too long to be incorporated – if the sauce cooks for too long, it can curdle.
  10. Remove the bowl from the pan and place on a heatproof surface. The cooked sauce should have the consistency of very lightly whisked thickened cream. Whisk in the lemon juice, tom yum paste, fresh thyme leaves, and season with salt and pepper.
  11. Poached Eggs: Bring small saucepan of water to the boil over medium-high heat, then reduce the heat to low-medium – the water should be just simmering. Add in the vinegar and stir. Crack one egg into a small bowl and quickly, but gently pour it into the water. Repeat with the other egg. A really soft poached egg should take around 2 minutes, but if you want it a bit more firm, it will take about 4 minutes. To check if they’re cooked right, carefully remove the egg from the pan with a slotted spoon and give the yolk a gentle push (you can tell just by your instincts if it is under or over – or perfect)!
  12. Assembly: Top the crispy tofu with the sautéed mushies, followed by the poached egg. Place the bok choy to the side together with rolled slices of the eggplant. Drizzle the poached egg with a generous spoonful of the tom yum hollandaise sauce, with a bit of extra tom yum paste a top. Garnish with a pinch of toasted sesame seed. Serve and enjoy!

Asian-inspired Vegetarian Eggs Benedict

Asian-inspired Vegetarian Eggs Benedict

Of course you can plate it up any way you want, like incorporating the bok choy and eggplant slices into the stack. It’s up to you on where you creative plating skills will take you!

BON APPÉTIT

– Ally xx

myTaste.com

Sweet Gourd Noodles with Tilapia & Egg White Soup

Sweet Gourd Noodles with Tilapia & Egg White Soup

Hello Everyone! I hope that this time around I say that I will keep a post short, that I will actually keep it short *fingers crossed (yet no promises will be made)*. Continuing on with the theme of hero-ing tilapia in all recipes for the month of June, tonight I will be sharing a recipe that I came across last year during a corporate dinner with Ambassadors from a few Southeast Asian countries as we celebrated the Ambassador of Cambodia’s farewell from Brunei. How did a score an invite to a dinner with high-ranking officials? Well, it’s not hard to when your Boss has the connections.

Tangent aside, it was during this dinner that I came across this particular dish that I will be sharing with you guys tonight. I honestly have no clue what the dish is called, as in if there is a special name for it so I do apologise for the blunt name – just calling it as I see it! Anyway, as I recall, the dish didn’t have slices of tilapia in it, I just added it on for extra flavour and protein to the overall dish. I know that the dish doesn’t sound like it packs a lot of flavour to it, well I think it isn’t supposed to anyway. From what I remember, the broth was subtle in taste, and what really shined through was the sweetness of the sponge gourd and a little pop of sour from the goji berries. Honestly, I’m not exactly sure what the egg white does to help the dish as I know it’s rather bland in flavour – maybe to give the broth some texture?

Sweet Gourd Noodles with Tilapia & Egg White Soup

Anyway, I remember really enjoying the dish that night and last weekend I decided to give the dish a go based from the ingredients that I recognised, playing around with flavoring the broth, and of course incorporating tilapia into the overall dish. I’ll be honest and say that I was a bit nervous going blindly into this recipe with having only tried the dish once just shy of a year ago, but it turned out to be a delicious hit!

Sweet Gourd Noodles with Tilapia & Egg White Soup Ingredients

PREP TIME 10 MINS | COOKING TIME 1 HOUR | SERVES 4

INGREDIENTS

  • 750g tilapia, filleted and sliced, heads and bones reserved
  • 1 large sweet gourd, peeled and cut into long thin strips (like noodles)
  • 2 large free range egg whites
  • Handful of dried goji berries

For the fish broth

  • 1L water
  • 3-4 garlic cloves
  • 2-3 dried bay leaves
  • 2 tsp salt
  • 2 tsp whole black peppercorns
  • Reserved tilapia heads and bones
  • 1 tbsp cornstarch + 1 tbsp water

METHOD

  1. Add all the ingredients for the fish broth into a large pot and bring to a boil. Once boiling, bring the heat down to low and allow the broth to slowly simmer for about 30-45 minutes. Once done, strain out the tilapia heads, bones, garlic cloves, peppercorns, bay leaves, and discard.
  2. Meanwhile, soak the goji berries in hot water for about 5 minutes. Drain and then set aside.
  3. Bring the heat back up to high and the broth to a rapid boil. Add the sweet gourd noodles to the broth and cook until tender but still has a slight crunch to it, about 2-3 minutes altogether, or longer if you prefer it soft. Once done, strain and then divide evenly into each single serving deep dish.
  4. Add the fish slices into the broth and quickly blanch until cooked through, about 1-2 minutes. Strain and then divide evenly.
  5. Drizzle the egg whites into the broth a little at a time using a fork to continuously stir into the broth as the egg whites are dropped in. Eggs whites would cook immediately.
  6. Once the eggs whites have been dropped, gradually stir in the cornstarch and water mixture into the broth until the soup is thickened to your desired consistency. Turn the heat off and divide the soup evenly between the individual serving dishes.
  7. Top the dish with the goji berries and a touch of ground black pepper. Serve immediately and enjoy!

Sweet Gourd Noodles with Tilapia & Egg White Soup

BON APPÉTIT

– Ally xx

myTaste.com

Smashed Avo Toast (9 ways)

Hello Everyone! Finally I am back on track with my posts and the theme for the month of April is Avocado! All you need is about half a medium-sized avocado everyday as it provides 1% of the calcium, 5% of the magnesium, and 10% of the potassium that you need daily. Avocados are a good source of potassium, which can help lower blood pressure, and in addition, the dark green flesh just under an avocado’s brittle skin contains large amounts of disease-fighting compounds. Though avocados are proven to help lower blood pressure and an abundance of health benefits, we have to be weary of how much we intake daily as they are also high in calories.

Tonight, I will be sharing 9 different ways you can start your mornings with a smile on your face with 9 different smashed avocado toasts! Of course, don’t limit yourselves to just these 9 recipes; I encourage you to get creative with your smashed avo toasts and share your creations with me on Instagram using the hashtag #amcarmenskitchen

1. Five Pepper Smoked Salmon with Red Onions, Capers & Chilli Flakes

Five Pepper Smoked Salmon with Red Onions, Capers & Chilli Flakes

PREP TIME <5 MINS | COOKING TIME  | SERVES 2

INGREDIENTS

  • 2 slices multigrain brown bread
  • 1/2 avocado, smashed
  • 1 small red onion, cut into rings
  • 2 tsp capers
  • Smoked salmon slices with five peppers

METHOD

  1. Lightly toast bread in a toaster for about 1-2 minutes.
  2. Spread a generous amount of the smashed avocado onto the toast and top with smoked salmon, red onion rings, and capers. Sprinkle with a touch of chilli flakes for an added kick (optional).
  3. Enjoy!

2. Medley of Grape Tomato Caprese Salad with Balsamic Reduction

Medley of Grape Tomato Caprese Salad with Balsamic Reduction

PREP TIME <5 MINS | COOKING TIME 5 MINS | SERVES 2

INGREDIENTS

  • 2 slices multigrain brown bread
  • 1/2 avocado, smashed
  • 1 punnet (250g) grape tomato medley, halved
  • 4 cherry bocconcini cheese, sliced
  • 4 tbsp balsamic vinegar
  • Ground sea salt and black pepper, to taste
  • Olive Oil
  • Sweet basil leaves

METHOD

  1. Combine the grape tomatoes, bocconcini slices, and sweet basil leaves in a small bowl. Drizzle with olive oil and season with a touch of ground sea salt and black pepper to taste. Set aside and leave to macerate.
  2. Meanwhile, heat the balsamic vinegar in a small non-stick saucepan over medium-high heat. Simmer, continuously stirring to check on the consistency of the glaze, until the vinegar reduces to a thick sauce, about 5 minutes. Remove from the heat and leave to cool down for a bit.
  3. Lightly toast bread in a toaster for about 1-2 minutes.
  4. Spread a generous amount of the smashed avocado onto the toast, top with the tomato cappers salad, and drizzle the balsamic reduction over the salad.
  5. Enjoy!

3. Sliced Banana & Pumpkin Seeds drizzled with Honey

Sliced Banana & Pumpkin Seeds drizzled with Honey

PREP TIME <5 MINS | COOKING TIME  | SERVES 2

INGREDIENTS

  • 2 slices multigrain brown bread
  • 1/2 avocado, smashed
  • 1 large banana, sliced
  • Honey
  • Pumpkin seeds

METHOD

  1. Lightly toast bread in a toaster for about 1-2 minutes.
  2. Spread a generous amount of the smashed avocado onto the toast, top with banana slices and pumpkin seeds, and drizzle with honey.
  3. Enjoy!

4. Soft-boiled Egg with Chilli Flakes & Parsley

Soft-boiled Egg with Chilli Flakes & Parsley

PREP TIME <5 MINS | COOKING TIME 6 MINS | SERVES 2

INGREDIENTS

  • 2 slices multigrain brown bread
  • 1/2 avocado, smashed
  • 2 large free range eggs
  • Chilli Flakes
  • Parsley, roughly chopped

METHOD

  1. Bring a small pot of water to a rolling boil. Once boiling, reduce the water to a rapid simmer before gently lowering the eggs one by one into the pot. Cook for 5 minutes for a runny yolk, or 7 minutes for a barely set yolk. Once done, remove from the heat and place in an ice bath to stop the cooking process. Once cool, peel the shell off and slice.
  2. Lightly toast bread in a toaster for about 1-2 minutes.
  3. Spread a generous amount of the smashed avocado onto the toast, top with the sliced eggs, and sprinkle with a touch of chilli flakes, and parsley.
  4. Enjoy!

5. Sliced Strawberries & Crumbled Goat’s Cheese with Balsamic Reduction and Peppermint Leaves

Sliced Strawberries & Crumbled Goat's Cheese with Balsamic Reduction and Peppermint Leaves

PREP TIME <5 MINS | COOKING TIME 5 MINS | SERVES 2

INGREDIENTS

  • 2 slices multigrain brown bread
  • 1/2 avocado, smashed
  • 4 large strawberries, sliced
  • 4 tbsp balsamic vinegar
  • Goat’s cheese, crumbled

METHOD

  1. Heat the balsamic vinegar in a small non-stick saucepan over medium-high heat. Simmer, continuously stirring to check on the consistency of the glaze, until the vinegar reduces to a thick sauce, about 5 minutes. Remove from the heat and leave to cool down for a bit.
  2. Lightly toast bread in a toaster for about 1-2 minutes.
  3. Spread a generous amount of the smashed avocado onto the toast, top with the sliced strawberries, crumbled goat’s cheese, and drizzle the balsamic reduction over the strawberries.
  4. Enjoy!

6. Sautéd Brown & Shimeji Mushrooms topped with Fried Enoki & Parsley

Sautéd Brown & Shimeji Mushrooms topped with Fried Enoki & Parsley

PREP TIME <5 MINS | COOKING TIME 8 MINS | SERVES 2

INGREDIENTS

  • 2 slices multigrain brown bread
  • 1/2 avocado, smashed
  • 4 large brown mushrooms, sliced
  • 1/2 bunch (100g) shimeji mushrooms
  • 1/2 bunch (50g) enoki mushrooms
  • 2-3 garlic cloves, minced
  • Ground sea salt and black pepper, to taste
  • Knob of unsalted butter
  • Olive oil
  • Parsley, roughly chopped

METHOD

  1. Melt the unsalted butter in a small frying pan over medium-high heat and add about a teaspoon of olive oil.
  2. Sauté the minced garlic until golden brown and fragrant, about 30 to 45 seconds. Add in the sliced brown mushrooms and shimeji mushrooms and cook until tender, about 3-4 minutes.  Season with pinch of ground sea salt and black pepper. Once tender, remove from the pan and set aside.
  3. In the same pan, heat about 3 tbsp of olive oil over high heat until slightly smoking. Add the enoki mushrooms in and fry until golden brown in colour, about 2-3 minutes. Once done, transfer to a small plate lined with a paper towel. Set aside.
  4. Lightly toast bread in a toaster for about 1-2 minutes.
  5. Spread a generous amount of the smashed avocado onto the toast and top with the sautéd garlic mushrooms and the fried enoki mushrooms. Garnish with a touch of ground black pepper and parsley.
  6. Enjoy!

7. Diced Mango with Chilli Powder & Peppermint

Diced Mango with Chilli Powder & Peppermint

PREP TIME <5 MINS | COOKING TIME  | SERVES 2

INGREDIENTS

  • 2 slices multigrain brown bread
  • 1/2 avocado, smashed
  • 1 small mango, diced
  • Chilli powder
  • Peppermint leaves

METHOD

  1. Lightly toast bread in a toaster for about 1-2 minutes.
  2. Spread a generous amount of the smashed avocado onto the toast and top with the diced mangoes, chilli powder, and peppermint leaves.
  3. Enjoy!

8. Roasted Chickpeas & Parsley

Roasted Chickpeas & Parsley

PREP TIME <5 MINS | COOKING TIME 10 MINS | SERVES 2

INGREDIENTS

  • 2 slices multigrain brown bread
  • 1/2 avocado, smashed
  • 1 can (200g) chickpeas, drained
  • 2 tsp ground smoked paprika
  • Ground sea salt and black pepper, to taste
  • Olive oil
  • Parsley, roughly chopped

METHOD

  1. Preheat oven to 200C (400F or gas mark 6). Line a baking tray with aluminium foil. Set aside.
  2. Add the drained chickpeas in a small bowl together with the ground smoked paprika, sea salt, black pepper, and a drizzle of olive oil. Toss to coat.
  3. Spread the chickpeas onto the prepared baking tray and roast in the oven for about 10 minutes. Once done, remove from the oven.
  4. Lightly toast bread in a toaster for about 1-2 minutes.
  5. Spread a generous amount of the smashed avocado onto the toast and top with the roasted chickpeas and parsley.
  6. Enjoy!

9. Chorizo Sausage & Sweet Corn

Chorizo Sausage & Sweet Corn

PREP TIME <5 MINS | COOKING TIME 4-6 MINS | SERVES 2

INGREDIENTS

  • 2 slices multigrain brown bread
  • 1/2 avocado, smashed
  • 1 chorizo sausage, sliced
  • 1 can (200g) sweet corn kernels, drained
  • Olive oil

METHOD

  1. Heat olive oil in a small frying pan over medium-high. Pan-fry the chorizo slices until browned, about 2-3 minutes per side. Once done, transfer to a plate lined with a paper towel. Set aside.
  2. Bring a small pot of water to a rolling boil and blanch the sweet corn kernels for about a minute or two. Drain and set aside to cool down for a bit.
  3. Lightly toast bread in a toaster for about 1-2 minutes.
  4. Spread a generous amount of the smashed avocado onto the toast, top with the pan-fried chorizo sausages and sweet corn kernels, and drizzle with a bit of the chorizo oil (optional).
  5. Enjoy!

Just a little side note before I end tonight’s post, I spent the whole day amending quite possibly the same artwork because their comments/amendments were all on an installation basis. Such completely waste of time which then prevented me from actually completing the work I had set to do today because I had to keep going back and forth to the same bloody artwork.

​BON APPÉTIT

– Ally xx

myTaste.com