Homemade Strawberry Jam

Homemade Strawberry Jam

What do you do when you have a punnet or two of strawberries in the fridge that are on the verge of becoming overripe? – Make jam of course! I’m pretty sure you can do many other things with them, but today, I made jam.

I’ve actually had the strawberries in the fridge for almost 2 weeks before I decided to do something of them. I got them from my friend Pam; she was leaving to go back to Singapore that day. I wasn’t going to eat them only because I’m a bit sceptical of any fruit lasting beyond a week. The strawberries were actually still quite firm. They were very dark red in colour and the outside looked like it was starting to dry up. They were nonetheless still quite juicy when I cut them open.

Homemade Strawberry Jam Ingredients

PREP TIME 5 MINS | COOKING TIME 20 MINS MAKES 2 JARS

INGREDIENTS

  • 2 x 125g punnets of strawberries, hulled and halved
  • 2/3 cups caster sugar
  • 1/2 tsp vanilla extract
  • Zest and juice of one lemon

METHOD

  1. Combine all the ingredients in a medium-sized saucepan and cook over very low heat for 20 minutes, until the strawberries release some of their juices and the mixture boils slowly. Cook until thickened.
  2. Pour carefully into sterilised canning jars and either seal or keep refrigerated (see below on sterilising jars).

Sterilising Jars:

Jars should be made from glass with a metal lid that has a rubber seal. To sterilise the jars and lids, wash with hot, soapy water. Rinse well and arrange jars and lids open sides up, without touching, on a tray. Leave in a preheated 80C oven for 25 minutes, or boil the jars and lids in a large saucepan, covered with water, for 15 minutes.

Remember as a rule:

Hot preserves go into hot jars and cold preserves go into cold jars.

Homemade Strawberry Jam

BON APPÉTIT

– Ally xx

myTaste.com

Peach Crumble

Peach Crumble

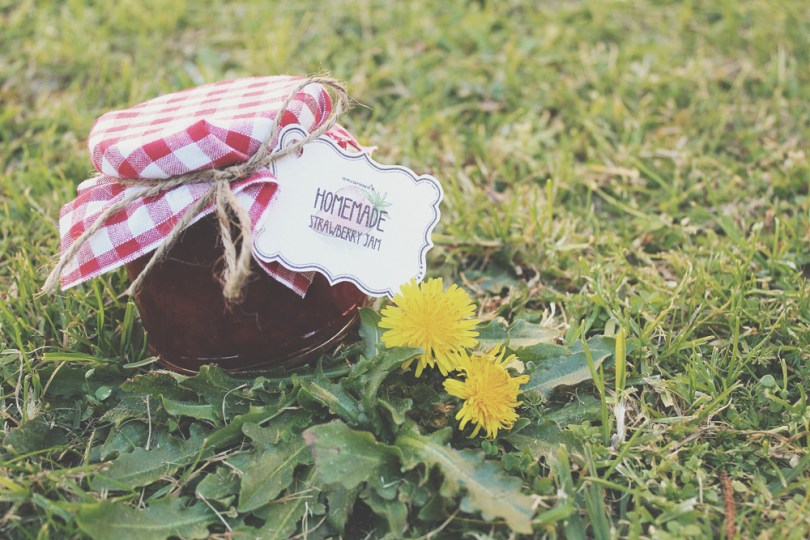
For my 21st Birthday (which was like a year and a half ago), one of my friend’s from church, Tom, got me a set of 4 mini-cocottes with an accompanying cookbook. It was probably one of the best gifts I’ve ever received – a lot of people back then knew that I am a foodie and that I love to cook. The mistake they always make is that they get me food, such as chocolates and even gingerbread cookies (since my birthday was towards the end of the year, they thought they’d give me a birthday and Christmas gift too). I never really liked receiving food as gifts as I always say “I’m just gonna poop it out later anyway”, but cookware or even tableware? Best.

Note, I’m actually not a very big fan of chocolate. Moist, warm, oozy, chocolate cake: Yes. Chocolate bars, candies: No.

Peach Crumble

From this cookbook, I’ve only actually made two recipes, Shepard’s Pie and of course today’s post, Peach Crumble – which I have made numerous times because I just love it! Even my friends love it! It’s also simple and requires no more than 10 ingredients. I’ve tweaked the recipe a bit in terms of lessening the amount of sugar (I don’t really like my desserts too sweet and sometimes when I see ‘1 cup of sugar’ it scares me a bit). I also used less peaches than what the recipe calls for, and discarded the juice of lemon – in the past I have found the lemon too overpowering, making the dessert very sour. I think the zest adds enough lemony flavour to the crumble.

This is usually a dessert I pull out during the summer as peaches are in season then here in Australia. To my surprise, when I went shopping a few days ago at Coles, I found peaches! At first I was a bit skeptical knowing that they weren’t in season, and then I realised they had been imported from the US. I bought them anyway despite it being a tad bit more expensive than the local peaches during the summertime, because I needed peach crumble in my life right now and I couldn’t sit around and wait for summer to come along. But a warm peach crumble dessert fits perfectly with the cold weather don’t you think?

Peach Crumble Ingredients

PREP TIME 15 MINS | COOKING TIME 20 MINS SERVES 4

INGREDIENTS

  • 3 large ripe peaches
  • 100g cold unsalted butter, cut into little cubes
  • 1 cup plain flour
  • 2/3 cup caster sugar
  • 1/3 cup crumbed walnuts
  • 1/3 tsp ground cinnamon
  • Zest of one lemon

Peach Crumble

METHOD

  1. Preheat oven to 190C. Lightly butter 4 mini-cocottes.
  2. Bring a saucepan on water to a boil and plunge the peaches in one by one for 2 minutes. Remove using a slotted spoon and transfer to a deep dish to cool. Once cool, the skin should easily peel off. Cut into generous chunks or slices and mix with the lemon zest, cinnamon, and half of the sugar. Set aside.
  3. Mix the remaining sugar together with the butter, flour, and walnuts in a bowl. With your fingertips, quickly mix the ingredients together until looks like rough bread crumbs. If your mixture is too warm, put the bowl into the refrigerator for 15 minutes and start again when it has chilled.
  4. Fill each mini-cocottes with the peaches and top with the crumble mixture. Place any remain peach slices on the top.
  5. Place the cocottes on a baking tray lined with aluminium foil. This is to catch any juices that may overflow from the cocottes; saves having to clean the tray later. Place in the oven and bake for 20 minutes, uncovered.
  6. Serve hot out of the oven or at room temperature with vanilla ice cream (optional).

Peach Crumble

Peach Crumble

Additionally, you can use any stone fruit besides peaches, such as apricots and plums – anything that is ripe, available locally, and in season. Reserve and leftover crumble by freezing it in a small ziplock bag.

BON APPÉTIT

– Ally xx

myTaste.com

Stir-fried Pipis in XO Sauce

Stir-fried Pipis in XO Sauce

I remember the first time having this, not too long ago actually, about 1 and a half weeks ago, instant love. I was having dinner with Pam (ex-housemate, fellow foodie, and now long-distance twinnie) and her family who had just arrived that morning from Singapore. We were meant to have a homemade pizza night but we were all feeling a bit tired to cook. Still happy anyway because I got to meet Pam after 4 months since we last saw each other, and I got to meet her family. We had dinner in Chinatown (forgive me, I don’t actually remember the name of the restaurant), and amongst the many dishes we ordered, the stir-fried pipis in XO sauce caught my attention.

It was so yummy, well cooked, and had a good amount of spice to it. It was that good that I had to recreate it for myself, and I did – with larger pipis as well (the ones at the restaurant were baby-sized)! They were only $16.00/kg at the seafood market in Market City. The pipis were already cleaned and had no sand and grit in them. They were also alive which amused me quite a bit to be honest. I stood there over the bucket and started playing with them – tapping their shells, and picking them up and squeezing their shells shut, until the lady approached me and asked me if I wanted to buy them. I bought roughly about 800g for about $13.00 and I was able to get two meals out of it – with steamed jasmine rice and pan-fried eggplant. So delish!

XO sauce is a spicy seafood sauce commonly used in southern Chinese cooking. It’s made of roughly chopped dried seafoods, including scallops, dried fish and shrimp, and subsequently cooked with chilli peppers, onions, and garlic. XO sauce can be used as a condiment on the side of main dishes or used in cooking to enhance the flavour of fish, meats, vegetables, and otherwise bland foods such as tofu or noodles. The named is derived from fine XO (extra-old) cognac, which is a popular Western liquor in Hong Kong which denotes high quality, prestige, and luxury.

Check out the original recipe from Yahoo!7 Lifestyle.

Stir-fried Pipis in XO Sauce Ingredients

PREP TIME 5 MINS | COOKING TIME 10-12 MINS SERVES 4

INGREDIENTS

  • 800g live pipis
  • 1/2 cup fish stock (or clam juice)
  • 1/4 cup XO sauce
  • 1/4 cup Chinese Shaoxing rice wine
  • 2 tbsp oyster sauce
  • 2 tbsp olive oil
  • 3 red birds-eye chillies, sliced
  • 2 stalks green onion, sliced
  • Juice of 1 lime

METHOD

  1. Heat olive oil in a large frying pan (or preferably a wok if you have one) over high heat. Sauté the green onions and red chillies (reserve a few for garnishing later) for 2 minutes or until softened.
  2. Add the pipis and cook for a further 3 minutes or until most of the shells have opened.
  3. Add in the XO sauce, fish stock, Shaoxing wine, and oyster sauce. Simmer for about 3 minutes or until all shells have opened (cook for no more than 5-6 minutes, discard any unopened shells). Transfer to a serving plate.
  4. Top with reserved green onions and red chillies. Drizzle with lime juice and serve with steamed rice.

Stir-fried Pipis in XO Sauce

BON APPÉTIT

– Ally xx

myTaste.com

Hainanese Chicken Rice

Hainanese Chicken Rice

Guess who’s back? Back again? That’s right, I’m back from the dead (as some may say) and here with another post! I do apologise for not posting over the past few weeks. I just finished my first semester of my 4th year and it feels so good to have completed everything! I finished on Tuesday morning and practically celebrated the whole day – from a barbecue, to 22 Jump Street, and finally ending the night/early the next morning at a bar/club. I didn’t really get back into my cooking until this morning after having gone grocery shopping to fill up my empty fridge. It felt so good to see a shelf full of fresh fruit and vegetables, and meat.

Today’s recipe is something close to my heart, or should I say tummy? I remember growing up with Thien Thien Chicken Rice just a couple of blocks away from where I spent my early 7 years of life, and still continued to go back and forth there up until today. $3.20 chicken rice? Don’t mind if I do! Hainanese Chicken Rice here in Sydney is almost 3x (sometimes even 4x) more expensive and honestly not as delicious as chicken rice back home – but I can’t do anything about it. When I crave it, I just have to have it. I recently had some at Kreta Ayer in Kingsford with some friends and we were a bit disappointed. The chicken was well cooked, rice was mediocre, and the sauces, disappointed. Chilli sauce from a bottle? No spring onion and ginger oil? No soup to go with the dish? This must be a joke.

Hainanese Chicken Rice

After that disappointment, my friend and fellow housemate, Marissa, and I decided that when we were both free from assignments and exams, that we would make our very own Hainanese Chicken Rice, and that’s exactly what we did for today. I was in charge of cooking the chicken and rice, while Marissa took care of the sauces and carving of the chicken.

Check out the original recipes that we followed:

Hainanese Chicken Rice

PREP TIME 10 MINS | COOKING TIME 1 HOUR SERVES 6-8

INGREDIENTS

For the chicken

  • 1 whole chicken (ours was 1.6kg)
  • 5-6 thick slices of ginger
  • 3 stalks of spring onion, cut into 1″ sections (both green and white parts)
  • 1 pandan leaf, washed and halved
  • 2 tsp chicken stock powder
  • 1 tsp sesame oil
  • Salt for cleaning and seasoning the chicken

For the rice

  • 3 cups uncooked long-grain rice, washed and drained
  • 3 cups reserved chicken poaching broth
  • 2 tbsp olive oil
  • 3 cloves garlic, finely minced
  • 1 pandan leaf, washed and halved
  • 2 tsp grated ginger
  • 1/2 tsp sesame oil

For the chilli sauce

  • 6 red birds-eye chillies
  • 2 cloves garlic, finely minced
  • 2 tbsp reserved chicken poaching broth
  • 2 tbsp grated ginger
  • 1 tsp white sugar
  • 1/4 tsp salt
  • 1 tsp lemon juice

For the spring onion and ginger oil

  • 4 stalks spring onion, sliced thinly
  • 3 tbsp peanut oil
  • 2 tbsp grated ginger
  • 1/2 tsp salt

For the dressing and garnishes

  • 1 tomato, sliced
  • 1 lebanese cucumber, peeled and sliced
  • Sliced spring onions
  • 2 tbsp light soy sauce
  • 1 tbsp chicken poaching broth
  • 1 tbsp sesame oil

Hainanese Chicken Rice: Chilli Sauce

Hainanese Chicken Rice: Spring Onion and Ginger Oil

METHOD

  1. Rub a small handful of salt all over the chicken, getting rid of any loose skin and dirt. Rinse chicken well, inside and outside, and season with a generous amount of salt. Stuff the chicken with the ginger slices, green onions and pandas leaves. Place the chicken in a large stockpot and fill with cold water to cover the chicken. Bring the pot to a boil over high heat, then immediately turn the heat to low to keep it to a simmer. Cook for about 30 minutes more (less if you’re using a smaller chicken).
  2. When the chicken is cooked through, turn the heat off and remove the pot from the burner. Immediately lift and transfer the chicken into a bath of ice water to cool. Discard the stuffing. The quick cooling will stop the cooking process, keeping the meat soft and tender, and giving the skin a lovely firm texture. The quality of the chicken skin is important in this dish! It’s all about the skin texture. DO NOT DISCARD THE CHICKEN POACHING BROTH.
  3. While the chicken is cooking, prepare the sauces and dressing. For the chilli sauce, combine chillies, ginger, garlic, sugar and salt in a mortar and pound to a paste. Add the lemon juice and chicken poaching broth, and pound again. Set aside.
  4. For the spring onion and ginger oil, add the spring onions, ginger and salt to a heatproof mortar and pound lightly with the pestle. Heat the oil in a small frying pan until smoking and pour onto the mixture. Once the sizzling stops, combine lightly with the pestle and leave to infuse for a few minutes.
  5. For the dressing, mix the sesame oil and soy sauce with the chicken poaching broth.
  6. For the rice, heat cooking oil in a saucepan over medium-high heat. When hot, add the ginger and the garlic and fry until your kitchen smells like heaven. Be careful not to burn the aromatics! Add in your drained rice and pandan leaves, and stir to coat, cook for 2 minutes. Add the sesame oil, mix well. Add the reserved poaching broth and bring to a boil. Immediately turn the heat down to low, cover the pot and cook for 15 minutes. Remove from heat and let sit (with lid still on) for 5-10 minutes more.
  7. While the rice is cooking, remove the chicken from the ice bath and carve to serve.
  8. If you have any remaining chicken stock after that, you can season it and add a few onion slices. This can be served as a light soup to accompany the meal. We added some slices of hairy melon to our soup.

Hainanese Chicken Rice

BON APPÉTIT

– Ally xx

myTaste.com

Spicy Carrot, Chickpea & Almond Soup with Roasted Croutons

Spicy Carrot, Chickpea & Almond Soup with Roasted Croutons

Hello Everyone! Sorry for the lack of posts once again. I’ve been a bit busy with University, preparing for the last 2 weeks to go! It’s been hectic! Also, the weather hasn’t been very cheerful for the past couple of days. Winter is definitely kicking in! It’s cold, damp and miserable. On occasions there’d be rays of sunshine, but Sydney weather being deceptive and all, the sunshine never lasts long. So what better way to warm up that a nice bowl of spicy soup with crunchy croutons? Soup has never tasted so good.

Today I cooked from the UNSW Student Cookbook, a recipe by Serena Coady. This dish was served at the Cookbook Launch last week and I fell in love with it. It tasted so good that I really wanted to make a whole bowl for myself after a measly taste test without the croutons. Today was definitely the perfect time to whip it up. I tweaked the recipe just a bit in terms of using different bread, herbs and beans, and leaving the sour cream as is, but otherwise I pretty much followed the recipe.

To be honest, the title of this recipe doesn’t quite live up to it – the spicy part that was. I was a bit disappointed that my soup was not spicy at all, like I wouldn’t even say it was mildly spicy. So I may have added a bit too much of dried chilli flakes to give it that kick that I was after. Now that really grasped the word ‘spicy’! It may just be cultural thing, I know a lot of my Western friends who can’t take anything spicy at all, or even calling a dish that had a dash of paprika in it ‘really spicy’. I seriously have no comment for that.

Spicy Carrot, Chickpea & Almond Soup with Roasted Croutons Ingredients

PREP TIME 5 MINS | COOKING TIME 25 MINS SERVES 4

INGREDIENTS

  • 500g carrots, peeled and sliced
  • 1 medium brown onion, diced
  • 5 cups vegetable stock
  • 1 can (400g) chickpeas, drained
  • 1/2 cup flaked almonds
  • 1 tbsp smoked paprika
  • 2 tsp dried chilli flakes
  • 1/2 tsp dried oregano leaves
  • 3-4 slices of Pane di Casa bread from Bakers Delight
  • 1/4 cup + 2 tbsp extra virgin olive oil
  • Dollop of sour cream
  • Ground salt and pepper to taste

METHOD

  1. Preheat oven to 250C.
  2. Heat 2 tbsp of olive oil in a large pot over medium to high heat and sauté onions until soft, about 2 minutes. Add in the carrots with the chillies, paprika and oregano and sauté until combined. Season with a touch of salt and pepper. Increase the heat to high and stir intermittently for 15 minutes until carrots are tender and browned. Add the vegetable stock and chickpeas and bring to a boil. Simmer for another 10 minutes. Add the almond flakes into the soup, saving some for garnish later.
  3. Meanwhile, spread the flaked almonds on a lined baking tray and place in the oven for about 5 minutes or until the flakes are golden brown. Remove and set aside.
  4. Rip the slices of bread into bite size pieces and toss with 1/4 cup of olive oil in a small bowl. Spread onto the same lined baking tray and roast in the oven for about 8-10 minutes or until golden brown. Set aside.
  5. Pour the soup over into a blender (working in batches if I does not all fit) and blend on low speed for about a minute until well combined and smooth. Pour into a bowl and add a dollop of sour cream. Sprinkle with almonds, croutons, and paprika. Serve.

Spicy Carrot, Chickpea & Almond Soup with Roasted Croutons

A definite favourite winter warmer.

BON APPÉTIT

– Ally xx

myTaste.com

Prawn & Mango Vermicelli Salad

Prawn & Mango Vermicelli Salad

UNSW Student Cookbook 2014: Photoshoot
Getting my dish styled and photographed for the cookbook

Hello Everyone! So about a month ago or so I entered a recipe into this year’s UNSW Student Cookbook 2014. The theme for this year was “Simple Recipes to Impress” or as it is aptly referred as “Simprecipes”. I originally submitted a recipe for fried chicken wings with a prawn and mango vermicelli salad, but since there was another chicken wing entry that already made the cookbook, I was asked to tweak my recipe and just submit the salad. Though it wasn’t quite what I submitted originally, I was still very happy that it was chosen – they loved it for the bright and fresh colours! I also realised though that mangoes are out of season in Australia right now so I doubt anyone will be trying out my recipe until the summer. Sucks. That’s why I love the tropics, all year round mangoes!

Today was the official launch of the cookbook and it was a great turnout! Good food, good drinks, good music. I helped with setting up in the morning, preparing the platters to go out, serving, and a little bit of packing up at the end. Oh and I also got to meet Kumar Pereira, Masterchef Australia’s Season 3 and Allstars contestant. Such a sweet and loving guy! Here’s my entry for the cookbook (I will also post the recipe down below if it’s a bit hard to read from the photo):

Prawn & Mango Vermicelli Salad


PREP TIME 10 MINS | COOKING TIME 10 MINS SERVES 4

INGREDIENTS

For the salad:

  • 200g rice vermicelli noodles
  • 500g cooked prawns, shelled and deveined
  • 2 ripe mangoes, cut into chunks
  • 1/2 bunch fresh mint leaves, loosely torn
  • 1 red bird’s eye chilli, sliced
  • 1/4 cup unsalted peanuts plus extra to serve, finely chopped
  • 1/4 head red cabbage, finely sliced

For the chilli-lime sauce:

  • 4 tbsp fresh lime juice
  • 4 tbsp rice vinegar
  • 4 tbsp water
  • 2 tbsp white sugar
  • 1 tsp sesame oil
  • 1 red bird’s eye chilli, finely chopped
  • 1 spring onion, finely chopped

METHOD

  1. In a medium-szied bowl, soak the rice vermicelli noodles in lukewarm water until tender, about 8-10 minutes. Drain and set aside.
  2. Combine sauce ingredients in a bowl and mix well (yields about 1/2 cup of sauce).
  3. Add the salad ingredients to a large bowl and mix through. Dress with the chilli-lime sauce and toss to combine. I’m a huge fan of all things spicy so don’t be afraid to add more chillies for those spicy-lovers out there!
  4. Garnish with extra peanuts and a few mint leaves. Serve.

This recipe is all about the intense variety of flavours, so invest in quality ingredients to really give it the best punch. It’s easy and super tasty! The bold flavours definitely won’t disappoint!

BON APPÉTIT

– Ally xx

myTaste.com

South American Style Eggs with Fresh Tomato Salsa & Turkish Bread Roll

South American Style Eggs with Fresh Tomato Salsa & Turkish Bread Roll

For brunch yesterday I had planned to make a sandwich with my Turkish bread roll. I had bought some Hungarian salami, tomatoes, rocket leaves, and a spicy capsicum spread to go with it. When I actually started to gather the ingredients for my sandwich I realised I had an untouched carton of a dozen eggs, I then decided to poach an egg or two to go with my sandwich. I then also spotted chorizo sausages at the back of the refrigerator and I instantly wanted to fry those up too with some caramelised onions.

I then ended up completely changing what I had in mind as I started to chop up the ingredients. I slowly craved for scrambled eggs with chorizo on the side… And then I thought of those South American Style Eggs that I had at Café con Leche about a month ago. I stopped there – I scrapped the salami and decided scrambled eggs with chorizo it was! I didn’t want the bread to go stale as well so I ended up toasting those in the oven and having them with my lunch. I also wanted to use the tomato and rocket leaves I bought so I ended up making a fresh salsa with it. My simple sandwich turned into something so epically large that it left me 5-months pregnant with a food baby (an expression that I always use to describe a very good, but gluttonous, meal).

PREP TIME 10 MINS | COOKING TIME 10-15 MINS SERVES 1

INGREDIENTS

For the eggs:

  • 2 large free range eggs
  • 1 Mexican chorizo sausage, sliced
  • 2 tbsp milk
  • 1/2 spanish red onion, diced
  • 2 tbsp extra virgin olive oil
  • Ground salt and pepper

For the tomato salsa:

  • 1/2 large tomato, diced
  • 1/2 spanish red onion, diced
  • 1 lime, juiced
  • 2 tsp extra virgin olive oil
  • Handful rocket leaves
  • Ground salt and pepper
  • Turkish bread roll

METHOD

  1. For the tomato salsa, combine all of the ingredients in a small bowl and toss to mix. Let it sit for an hour for the flavours to infuse (this is entirely optional, I let mine to sit for about 10-15 minutes and it still tasted amazing).
  2. Preheat oven to 180C. Slice the bread roll in half and drizzle with olive oil. Place in the oven and toast for about 10 minutes or until golden brown (mine were a bit overdone only because I completely forgot about them in the oven).
  3. In a small bowl, whisk together the eggs and milk, and season with salt and pepper. Heat the oil in a medium-sized frying pan over medium heat. and sauté onions until soft, about 2 minutes. Add the chorizo and cook, stirring, until just beginning to brown, about 5 minutes. Bring the heat down to medium-low and add he egg mixture and cook, stirring, about 3 minutes (or more depending on the desired firmness of the eggs). Transfer to serving plate with bread roll and tomato salsa.

South American Style Eggs with Fresh Tomato Salsa & Turkish Bread Roll

On a side note, while attempting to give this recipe a fancier name than just Scrambled Eggs with Chorizo, I came across a Spanish recipe called Migas con Chorizo. Migas meaning a dish of eggs scrambled with torn-up corn tortillas, with Chorizo sausages. I am definitely keeping this in mind the next time I want to make eggs with chorizo.

BON APPÉTIT

– Ally xx

myTaste.com

Banana & Peanut Butter Popsicles

Banana & Peanut Butter Popsicles

Happy June everyone! There is no doubt that my Dutch housemates Kevin and Sam, as well as myself, share an unconditional love for peanut butter. I also know that Kevin loves bananas and Sam loves popsicles. All these into account, I was almost certain that there is something out there that incorporates the three together.

I did some research and I found a recipe by Megan via Detoxinista, for Peanut Butter Banana Ice Pops. I shared the recipe with my housemates and we all agreed that we should make this – well, more like I make it and then they eat it. So that’s what I did yesterday, made the popsicles and let them to set in the freezer overnight for a happy Sunday afternoon snack 🙂

The recipe makes 8 popsicles, but I only had a mould that is good for 6, also it depends on the side of your moulds. I just kept the rest of the mixture in a container in the refrigerator to later pour into the mould as we consume them.

Banana & Peanut Butter Popsicles: Procedure

PREP TIME 10 MINS | COOKING TIME  SERVES 6 POPSICLES

INGREDIENTS

  • 3 large bananas (or 4 if small)
  • 1/2 cup smooth peanut butter
  • 1/2 cup full cream milk
  • 1 tbsp honey and maple syrup blend
  • 1/2 tsp vanilla extract
  • 1/4 tsp salt (optional only if you are using unsalted peanut butter)

METHOD

  1. Combine all of the ingredients in a blender, and blend until very smooth and creamy. If necessary, adjust the sweetness to taste keeping in mind that the frozen version will taste less sweet than the mixture.
  2. Pour the batter into the popsicle moulds and freeze for at least 6 hours, or until solid. When removing the frozen popsicles from their moulds, submerge them in hot water for about 20 seconds to allow them to loosen.

Banana & Peanut Butter Popsicles

BON APPÉTIT

– Ally xx

myTaste.com

Pan-fried Salmon with Mashed Potatoes & Wilted Spinach

Pan-fried Salmon with Mashed Potatoes & Wilted Spinach

Yesterday I whipped up a simple lunch. I don’t really have a back story for this, or some long winded explanation of a foreign ingredient, so today’s post will be short and straight to the point.

PREP TIME 10 MINS | COOKING TIME 25-30 MINS SERVES 2

INGREDIENTS

  • 2 salmon portions, skin on
  • 3 large golden potatoes, wash, peeled and cut into small chunks
  • 1 cup loose leaf baby spinach
  • 1/2 cup milk
  • Ground sea salt and pepper
  • Knob of unsalted butter
  • 1 tbsp Red Rock Deli-Style Dip, Sundried Tomato, Chargrilled Eggplant & Pinenuts (optional)

METHOD

  1. Place the potatoes in a medium-sized pot filled with salted water. Boil the potatoes for 15-20 minutes or until potatoes are tender. During the last 5 minutes, add the milk to a small saucepan and warm, do not boil.
  2. Meanwhile, press salmon filets between paper towels to dry surfaces thoroughly. Season on all sides with salt and pepper. Heat a knob of butter in a frying pan over medium-high heat. Add salmon filets skin side-down. Immediately reduce heat to medium-low. Cook, pressing gently on the back of the fillets to ensure good contact with skin, until skin is rendered and crisp, about 6 minutes. If skin shows resistance when attempting to lift with a spatula, allow it to continue to cook until it lifts easily. Flip salmon and cook on second side, about 1 to 1 and a half minutes longer, for medium-rare to medium. Transfer salmon to a plate lined with a paper towel to soak up any excess oils, and allow to rest. In the same pan, wilt spinach leaves.
  3. Remove the potatoes from the heat and drain. Working quickly, push the potatoes through a sieve using a rubber spatula, back into the pot. Add the milk and butter and fold. Season with salt and pepper to taste. Transfer to a serving plate together with the wilted spinach, salmon and deli dip.

Pan-fried Salmon with Mashed Potatoes & Wilted Spinach

BON APPÉTIT

– Ally xx

myTaste.com

Paksiw na Lechon Kawali

Paksiw na Lechon Kawali

Hello everyone! This is another Filipino dish that I really love. I have a lot of favourite Filipino dishes actually, but there are some that I cannot bring myself to eat – I’m pretty sure they taste good, but a little bit off putting for me, and yes, I am talking about the infamous dinuguan (a savoury stew of meat and/or offal, simmered in a rich, spicy dark gravy of pig blood, garlic, chilli, and vinegar). I get the shivers every time I think about this dish. Anyway, enough about this dish for it’s thankfully not what today’s post will be about.

Lechon Kawali is basically a pan-roasted pork dish popular in the Philippines. It is usually accompanied by sarsa ni mang tomas (basically a sauce blend of liver, vinegar and spices that give that distinct sweet and spicy taste it is famous for), ketchup, or soy sauce with calamansi (Philippine lime). Lechon kawali is cooked by boiling then later deep frying a portion of the pig.

Lechon Paksiw is essentially a term associated to a dish that is cooked with vinegar, garlic, onion, and sarsa ni mang tomas sauce. It is a pork dish made from leftover roast pig which is known as Lechon. However, fresh pork can also be used to make lechon kawali. Traditionally, as mentioned above, the pork is deep fried. Because I don’t like deep frying stuff, I roasted the pork in the oven like I would do for pork crackling – the result I find is better, not oily and the meat remains tender and juicy on the inside where as deep frying has a tendency to make the meat tough and dry.

Paksiw na Lechon Kawali

PREP TIME (see below)* | COOKING TIME 1 HOUR 20 MINS |
SERVES
4-6

*If you plan on making dish, plan for about 1-3 days ahead for resting time in the refrigerator.

INGREDIENTS

  • 1kg fresh pork belly or shoulder
  • 1 bottle (330g) mang tomas all purpose sauce
  • 6 cloves garlic, peeled and crushed
  • 3 bird’s eye chillies
  • 3/4 cup white vinegar
  • 1 cup pork stock
  • 1 tbsp white sugar
  • 6 dried bay leaves
  • 2 tsp whole black peppercorns
  • Ground salt
  • Oil for rubbing

METHOD

  1. Score the skin with a very sharp knife. Place the meat in a large pot with water, 1 tsp of the whole peppercorns and half of the bay leaves. Boil for 20 minutes. Remove from the heat and drain, placing in a large bowl and let to cool to room temperature. Reserve the pork stock for cooking later. Once the meat has cooled down, refrigerate uncovered for at least 24 hours or for up to 3 days for a better result. Refrigerating the meat will help to draw out any remaining moisture. Remove from the refrigerator and bring back to room temperature prior to roasting in the oven
  2. Preheat oven between 220-240C. Rub oil and plenty of salt into the scored skin, really getting it into the slits of the score marks. The fat under the skin will react to the salt and that is what makes the skin puff up and crisp up. Roast in the oven for 20 minutes and then bring the temperature down to 160C and roast for another 10 minutes. Remove from the oven and let the meat rest for 20 minutes. Then cut the pork into chunks.
  3. Add all the remaining ingredients into a large pot together with the pork belly chunks. Simmer for 20 minutes and then serve with steamed rice.

Paksiw na Lechon Kawali

BON APPÉTIT

– Ally xx

myTaste.com