Breakfast Muffins: Feta Cheese, Onion & Rosemary

Breakfast Muffins: Feta Cheese, Onion & Rosemary

Hello Everyone and a happy first Monday for the month of June! Hope the Monday blues didn’t hit you guys hard, especially to my friends/followers in Brunei – unlike me, I know some of you guys have had a super long weekend with all the public holidays we’ve been having. We, as in my office, didn’t get to have one of the public holiday off so it was a normal working day for us on Thursday while most likely 80% of the working population was off. Thank goodness Saturday was public holiday that applied to us so yay for the long weekend (normal weekend anyway for some)! If you guys don’t already know from my constant mentions on several posts, and on the ‘about’ section of my blog, I work SIX full days a week. So getting to have a Saturday off (which is quite rare) because of a public holiday is pure bliss.

Moving on from that… mini rant? I mentioned in one of my posts last week that I’ll be switching up my post schedule just for this month – and yes it does have something to do with the theme for June. The title of this post may have already given it away for some of my loyal and consistent followers. Drumroll please! So I may have taken it to Google and searched ‘how to type out a drumroll sound’ – gives up 30 minutes later.

Breakfast Muffins: Feta Cheese, Onion & Rosemary

MUFFIN MAKING MONDAY IS BACK ON AMCARMEN’S KITCHEN! Muffin Making Mondays started about 4 years ago now I think, where Jialing would come back to my place after our Monday morning lecture together on main campus. We’d bake muffins together for our on-the-go work brekkie for that week. Well, we’d bake together but we’d both have our own recipes, i.e. she’d make sweet muffins for herself while I’d make savoury ones – we still share 1 or 2 though after we’ve baked them. I also remember how we’d both have a 1-on-1 Cards Against Humanity game where we’d both just unanimously vote which was the best (dirtiest) answer while our muffins were baking in the oven. Those were the days.

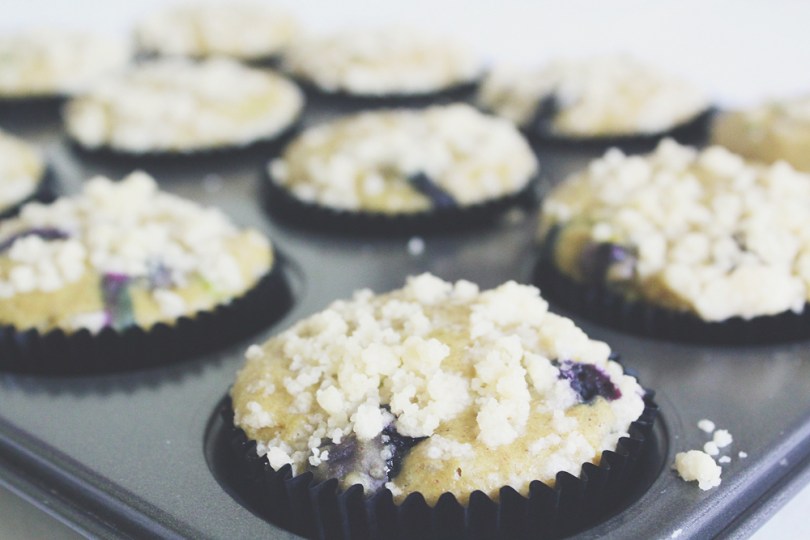
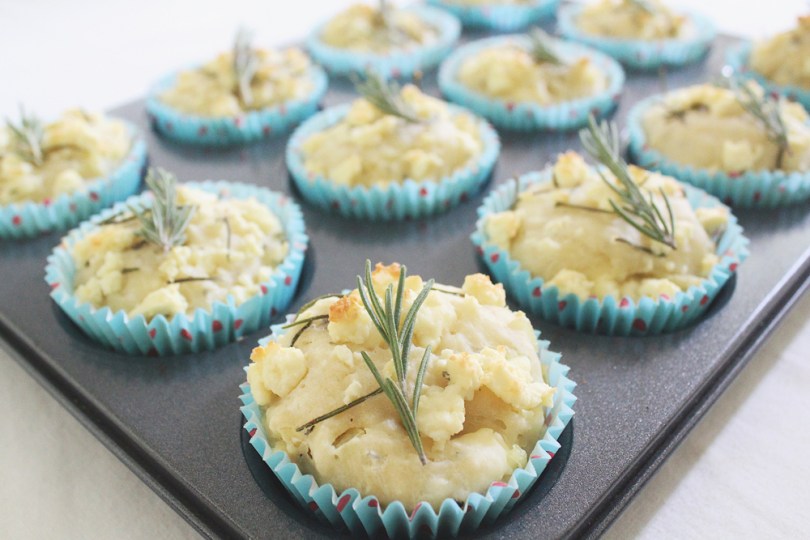
Anyway, it’s probably going to get lonely in the kitchen as it’ll just be me, myself, and I without Jialing, but I’m bringing back Muffin Making Mondays for the month of June! And to kick things off, I’ve got a delicious Feta, Onion, and Rosemary Savoury Muffin to start your mornings with a bang! Check out the original recipe over on Genius Kitchen.

Breakfast Muffins: Feta Cheese, Onion & Rosemary Ingredients

PREP TIME 15 MINS | COOKING TIME 30 MINS | SERVES 12 MUFFINS

INGREDIENTS

For the muffin batter

  • 1 & 3/4 cups plain flour
  • 1 cup milk
  • 1 large free range egg
  • 1 tbsp baking powder
  • 1 tsp salt

For the onion and cheese mixture

  • 100g feta cheese, crumbed
  • 1 medium-sized brown onion, finely chopped
  • 1 tbsp fresh rosemary, finely chopped
  • Freshly ground black peppercorns
  • Knob of unsalted butter

METHOD

  1. Preheat oven to 200C (400F or gas mark 6). Line a 12 hole muffin pan with paper cases.
  2. Melt the butter in a small frying pan over medium heat. Add in the chopped onions and cook for about 5 minutes until soft and slightly caramelised. Remove from heat and set aside to cool.
  3. Once the onions have cooled down, add in the crumbed feta cheese and chopped rosemary. Season with freshly ground black pepper and give it a good mix. There is no need for salt since the feta is quite salty by itself. Set aside.
  4. For the muffin batter, sift the plain flour, baking powder, and salt into a large mixing bowl.
    In another medium-sized bowl, beat the egg, followed by the milk and give it a good whisk to combine.
  5. Pour the egg and milk mixture into the flour, until well incorporated, using minimum number of folding movements. Ignore the lumps in the mixture and do not over-mix.
  6. Gently add the onion and cheese mixture into the batter mixture, folding in, as before, with as few strokes as possible. Spoon the mixture into the prepared muffin pan.
  7. Bake for about 20 minutes, or until well risen and golden. Remove the muffins from the tins and serve immediately. Enjoy!

Breakfast Muffins: Feta Cheese, Onion & Rosemary

Breakfast Muffins: Feta Cheese, Onion & Rosemary

These muffins are perfect for sahur with a hot cup of teh tarik for my Muslim friends and followers. Well to be honest, it’s perfect for any time of the day with a nice hot cup of anything like coffee, tea, or hot chocolate!

BON APPÉTIT

– Ally xx

myTaste.com

Pear & Walnut Cake with Spiced Red Wine Pears

Pear & Walnut Cake with Spiced Red Wine Pears

Hello Everyone! I’ve got a special post for you this evening as today marks 4 years of Amcarmen’s Kitchen! Don’t worry, I’ll still post a Breakfast Smoothie Bowl up for you guys most probably towards the end of the week since I already had the post and pictures prepared for it.

Anyway, technically I started this blog on April 16th, but it wasn’t until 2 days after on the 18th that I posted my very first recipe! You can check it out here: Cheesy Mushroom Omelette with Avocado Mint Greek Yoghurt & Wilted Spinach. Yes, you could say I was less talkative (wordy) for my first few posts, mainly because I had no clue on what else I could write about. When I started this blog out of pure procrastination way back in 2014 during my uni mid-semester break, I didn’t think I would be able to make it this far to be honest! I did slack behind a bit (a lot) towards the end of last year as it wasn’t easy juggling both a very demanding job, this blog, time for family and friends, and wanting some free time to myself as well. I have been doing a better job at keeping up so far, but it’s too early to tell to be honest, since I only just started getting back into this last month.

Pear & Walnut Cake with Spiced Red Wine Pears

I want to say that I promise that I will try to do better this year, but even I know that that’s a promise that I won’t be able to keep, so bear with me my dear followers! I know it is not in any way an obligation for me to share with you guys every single week, but I feel a sense of accomplishment for when I do so, and I don’t ever want this blog to drift away. It’s the only passion that I have going on for me right now because of my busy work schedule, and I don’t want all the hard work I’ve put into this blog for the past now coming 4 years to just become all for nothing.

With that being said, tonight I will be sharing a recipe that I tackled last November actually… For my 26th birthday! I never got around to posting it, and since I literally just got back from Hong Kong last night and had to report straight to work this morning, I’ve had no time to bake a new cake to celebrate Amcarmen’s Kitchen turning 4. So here’s my Pear & Walnut Cake that I drew inspiration from Olivia over on Liv for Cake. The cake itself was moist, not too sweet and had a lovely texture from the soft pear chunks and crunchy toasted walnuts. The honey buttercream was light and fluffy, beautifully contrasted by the deep red pears sitting atop a white-frosted cake.

(Apologies for not having an ingredient shot like how I normally do for almost all my recipe posts, but the photo didn’t turn out so great so I just decided not to post it)

PREP TIME 20 MINS | COOKING TIME 30 MINS | SERVES 8-10

INGREDIENTS

For the pear and walnut cake

  • 2 & 1/4 cups plain flour
  • 1 cup buttermilk, at room temperature
  • 1 cup toasted walnuts, roughly chopped (plus extra to top)
  • 180g unsalted butter, at room temperature
  • 3/4 cup brown sugar
  • 3/4 cup granulated sugar
  • 3 large free range eggs, at room temperature
  • 2 large pears, peeled, cored, and coarsely shredded
  • 2 tsp baking powder
  • 1 & 1/2 tsp vanilla extract
  • 3/4 tsp salt
  • 1/2 tsp ground cinnamon

For the honey Swiss meringue buttercream

  • 4 large free range eggs, whites only
  • 360g unsalted butter, at room temperature
  • 1 cup granulated sugar
  • 1/4 cup honey

Optional: for the spiced red wine poached pears to top

METHOD

  1. Spiced Red Wine Poached Pears: Follow the recipe method provided in the link above.
  2. Pear and Walnut Cake: Preheat oven to 180C (350F or gas mark 4). Grease and flour two 8-inch cake rounds and line with parchment paper.
  3. In a medium-sized bowl, whisk the plain flour, baking powder, ground cinnamon, and salt until well combined. Set aside.
  4. Next, using a stand mixer fitted with a paddle attachment, cream the butter and sugar on medium-high speed until the mixture becomes pale and fluffy (approximately 3 minutes). Reduce the speed and add the eggs in one at a time to allow to fully incorporate after each addition. Add the vanilla extract.
  5. Alternate adding the flour mixture and buttermilk, beginning and ending with flour (3 additions of flour and 2 of milk altogether). Make sure to fully incorporate after each addition. Then, gently fold in the toasted walnuts and shredded pears, and divide the mixture evenly between the two pans.
  6. Bake for 50 to 55 minutes or until a toothpick inserted into the centre of both cakes come out mostly clean. Place the cakes on wire rack to cool for about 10 minutes and then turn out onto the wire rack to cool further.
  7. Honey Swiss Meringue Buttercream: Place the egg whites and sugar into the bowl of a stand mixer, and whisk until combined.* Place the bowl over a double boiler on the stove and whisk constantly until the mixture is hot and no longer grainy to the touch (approximately 3 minutes), or until it registers 70C/160F on a candy thermometre.
  8. Place the bowl back on your stand mixer and whisk on medium-high speed until the meringue is stiff and has cooled (the bowl is no longer warm to the touch (approximately 5 to 10 minutes).
  9. Switch to a paddle attachment and slowly add in the butter (cubed). Mix until smooth.** Add the honey and whip until smooth. Set aside.
  10. Assembly: Place one layer of cake on a cake stand or serving plate. Top with approximately 1 cup of the buttercream and repeat with the remaining layer. Crumb coat the cake and place in the fridge to chill for about 20 minutes.
  11. Continue to frost the top and sides of the cake in a rustic manner. If desired, add toasted walnuts along the bottom and top, and place the poached pears on top. Secure pears in place with toothpicks and drizzle with the poaching syrup.
  12. Serve and enjoy!

* Ensure that there are NO traces of egg yolks in your whites and that your mixer bowl and whisk is completely grease free or your meringue won’t stiffen.

** The buttercream may look like it’s curdled at some point. Keep mixing until it is completely smooth.

Pear & Walnut Cake with Spiced Red Wine Pears

BON APPÉTIT

– Ally xx

myTaste.com

Strawberry Kiwi Lime Yoghurt Cake

Strawberry Kiwi Lime Yoghurt Cake

Hello Everyone! I know the last two posts have been a bit of a downer; let’s just say I’m starting to feel a little bit better and more of myself this week so I hope that I will be back to my chirpy self soon. That aside, tonight’s recipe is actually one that I made just almost 2 months ago for a very special occasion; my sister’s 23rd birthday last August 23rd! We celebrated her birthday with a yummy all-you-can-eat Korean BBQ dinner at Seoul Garden followed by a surprise visit from a family friend which at that time we had offered to look after their two little boys for a week since their helper had to go back to the Philippines and they couldn’t find anyone else under short notice. Overall it was a fun evening spent with lots of food, cake, and little, but great company!

Happy 23rd Birthday Angela!

The cake that I decided to make for my sister was inspired by a recipe that I found online when I was researching ways that I could incorporate some of the ingredients from my blood pressure friendly list that I compiled at the beginning of the year. This recipe, from that list, features kiwis, strawberries, bananas, and fat-free yoghurt, all of which help lower your blood pressure. This cake is simple and easy to put together, yet is still delicious and guilt-free for when you reach out for a second heap of serving or three (or four)… Or you know the whole cake *cheeky grin* Not that I have done this myself before, you know, have a whole cake for no one else but just me, myself, and I. Anyway, onward with the recipe shall we? But before that, just a quick mention that the original recipe can be found over on SkinnyMs.

Strawberry Kiwi Lime Yoghurt Cake Ingredients

PREP TIME 10 MINS | FREEZING TIME 3 HOURS | SERVES 10-12

INGREDIENTS

For the base

  • 1/4 cup hazelnuts, finely ground
  • 1/4 cup walnuts, finely ground
  • 1 tbsp coconut oil, melted
  • 1 tbsp honey
  • 1 tbsp unsalted butter, melted
  • 1/4 tsp salt
  • Honey graham crackers (enough to make about 1 cup of crumbs)

For the filling

  • 2 punnets (2 x 250g) fresh strawberries, sliced thinly
  • 1 tub (500g) fat free all natural yoghurt
  • 1 large banana, mashed
  • 3 tbsp lime juice
  • 2 tbsp honey

For the topping

  • 2 kiwis, peeled and sliced into thin circles
  • Sliced strawberries (about 2-3 from the punnet)
  • Extra honey graham cracker crumbs (optional)

PS: Please ignore the egg in the ingredient shot, I actually didn’t use it at all even though it was in the original recipe. I decided to go with a no-bake base and therefore omitted the egg from my recipe.

METHOD

  1. Prepare an 8.5-inch springform pan by lining the bases with baking paper and greasing the edges with a little bit of butter. Add all of the base ingredients into a medium-sized mixing bowl and mix until well combined. Press half of the mixture over the base of the prepared pan and set aside in the refrigerator for about 10-15 minutes or until firm.
  2. In a separate medium-sized mixing bowl, combine the mashed banana, yoghurt, honey, and lime juice, whisking well until smooth. Set aside.
  3. Arrange half of the strawberry slices on top of the cooled crust then pour over half of the yoghurt mixture on top of the strawberries in an even layer.
  4. Repeat by adding the remaining half of the base over the top of the yoghurt mixture, arranging the strawberries slices, and the pouring the remaining half of the yoghurt mixture.
  5. Top the cake with the kiwi slices and strawberries slices before placing in freezer for about 3 hours or until completely frozen.
  6. Serve and enjoy! Tip: to cut, hold a knife under hot water for 10 seconds, dry and cut the frozen cake wile the knife is still warm!

Strawberry Kiwi Lime Yoghurt Cake

Strawberry Kiwi Lime Yoghurt Cake

BON APPÉTIT

– Ally xx

myTaste.com

Beetroot Brownies with Chocolate Chunk Beet Ice Cream

Beetroot Brownies with Chocolate Chunk Beet Ice Cream

Hello Everyone! Firstly, I’d like to apologise to the moon and back to all my friends and followers for not posting in what seems like (or quite frankly has been) forever! A lot of things have been going on for the past few months, both in my personal and work life that I found it difficult to balance alongside with keeping up with Amcarmen’s Kitchen. The truth is, I haven’t had the time to write, or let’s just say that I did have the time, but I was either using my time unproductively or for something else instead of sitting down and getting back on track with posting. So yes, I am very sorry for the lack of consistency of posting on the blog in the recent months, but I’m planning on getting back on board with this for the remaining 3 months of 2017 (hopefully). It will however be a little scattered in a sense that you won’t see a set theme for the month just because I still have an archive of recipes that never got posted from the previous months.

Beetroot Brownies with Chocolate Chunk Beet Ice Cream

Back in July I started to hero beetroot in my cooking, and I shall continue that for the next two weeks (I think) before I share other recipes that still stick with the theme for 2017 which is Blood Pressure Friendly foods. Before I jump onto the recipe, I’d like to thank my friends Simon Swadling and Jialing Mew for contributing their recipes for this year’s Auguest – and yes, another thing that I did not plan properly for with everything going on so I apologise that I could only round up these amazing two friends for you!

Anyway, so somewhere down the path of whipping up this batch of beetroot brownies, which by the way includes Whittaker’s (New Zealand) Kaitaia Fire Chili Pepper Spice Dark Chocolate, I made the realisation that I basically just made red velvet brownies *cheeky grin* but of course, what makes a nice warm slice of heaven without ice cream? Specifically Chocolate Chunk Beet Ice Cream? Even MORE specifically, chunks of chocolate from Whittaker’s (New Zealand) Hawke’s Bay Black Doris Plum and Roasted Almonds Dark Chocolate? I think I just drooled. Cold ice cream with a kick of spice in it to really heighten the flavours atop a chocolatey, chewy, and moist brownie drizzled with a vibrant beetroot icing glaze? I’ll have the whole batch please thank you very much.

The original recipe to the brownies can be found over on BBC Good Food, and the original recipe to the beetroot ice cream can be found on Vegan Heaven.

PREP TIME 25 MINS | COOKING TIME 45 MINS | SERVES 12 SLICES

Note: Make the ice cream either the day before or a few hours (4-5 hours) to allow for freezing time before baking your brownies.

INGREDIENTS

Beetroot Brownies Ingredients

For the brownies

  • 500g whole raw beetroot, washed
  • 250g dark chocolate (70% cocoa), chopped*
  • 100ml olive oil
  • 3 large free range eggs
  • 1 & 1/4 cup plain flour
  • 3/4 cup granulated sugar
  • 2/3 cup cocoa powder
  • 1/3 cup macadamia nuts, roughly chopped
  • 2 tsp vanilla extract
  • 1 tsp baking powder

For the beetroot icing glaze

  • 1 cup icing sugar
  • 1 tbsp beetroot juice

Chocolate Chunk Beet Ice Cream Ingredients

For the ice cream

  • 500g whole raw beetroot, washed
  • 1 cup thick full fat coconut milk
  • 1/4 cup honey
  • 3 tablespoons chopped dark chocolate (Whittaker’s (New Zealand) Hawke’s Bay Black Doris Plum and Roasted Almonds)
  • 1 piece thumb-sized ginger, grated

*As mentioned earlier, I used Whittaker’s (New Zealand) Kaitaia Fire Chili Pepper Spice Dark Chocolate. But since I only had 100g of this, I used regular dark chocolate for the brownies and added half of the Whittaker’s chocolate to the mix, while the other half sprinkled on top of the baked brownies.

METHOD

  1. Boil the beetroots for both for the brownies and ice cream, in a pan of boiling salted water for 15-20 mins or until tender. Drain and leave to cool before peeling (wear clean rubber gloves to peel if you want to avoid beet-stained hands).
  2. Chocolate Chunk Beet Ice Cream: Roughly chop the cooked beets into small chunks and place them together with the coconut milk, honey, and the grated ginger in a food processor and blend until smooth.
  3. Transfer the beetroot-coconut mixture in a freezer-safe container, stir in the chococalte chunks and freeze for about 4-5 hours, whisking slightly every 20-30 minutes to avoid it getting too icy.
  4. Beetroot Brownies: Preheat oven to 180C (350F or gas mark 4) and grease a 10cm x 25cm baking dish. Chop a third of the cooked beetroots into small cubes and blitz the remainder in a blender or food processor to a paste. Sit the paste in a sieve over a bowl – just until you have collected 1-2 tbsp juice. Save the juice for the icing, and mix the olive oil into the beetroot paste. Set both aside.
  5. Bring a pan of water to a bare simmer and place a heatproof bowl with the chopped chocolate. Lightly stir until the chocolate had melted then set aside to cool slightly.
  6. Use an electric whisk to beat the eggs, sugar, and vanilla together in a large mixing bowl until light, fluffy, and tripled in size. Carefully fold the eggs into the beetroot and olive oil mixture, followed by the melted chocolate. Fold in the flour, cocoa powder, and baking powder, then add macadamia nuts and the chopped beetroot.
  7. Pour the mixture into your prepared baking dish and bake for 20-25 mins. The brownies should still be slightly gooey in the middle. Set aside to allow to cool slightly. While cooling, you can thaw your beetroot ice cream for 5-10 minutes before scooping and serving
  8. Mix enough reserved beetroot juice with the icing sugar to get a runny icing – dilute with water if you need. Remove brownies from the tin, drizzle with the icing and cut into squares.
  9. Enjoy a sinful slice or two, or more (who’s gonna stop you?) with family and/or friends, or you know, just by yourself *cheeky grin*.

Beetroot Brownies with Chocolate Chunk Beet Ice Cream

Beetroot Brownies with Chocolate Chunk Beet Ice Cream

BON APPÉTIT

– Ally xx

myTaste.com

Plokkfiskur (Icelandic Fish Stew)

Plokkfiskur (Icelandic Fish Stew)

Hello Everyone! Can you believe it?! It’s already the middle of the year! How did time fly by so quickly when I felt like it was only just yesterday that 2017 kicked in?! The next thing you know, it’ll be December and I hope that the next half of the month will be exciting for me in terms of personal and career growth.

So let’s just get right into it shall we? I promise that this won’t be a long-winded post as have the previous ones been so far. I’ve got nothing much to share anyway as things at work have been progressively slow, but I’m not complaining though!

The theme for the month of June on Amcarmen’s Kitchen is hero-ing Tilapia! For those of you who are just tuning into the blog, I made a post at the beginning of the year about Hypertension, or known commonly as High Blood Pressure. Last year, I did a medical check up and found out that I had High Blood Pressure – now I don’t know if this was due to the amount of stress I had been experiencing from work prior to my medical check up, or that it is already a part of my health. Nonetheless, after knowing about my high blood pressure, I’ve been rather careful with my diet and making sure that I eat foods that help lower and maintain a stable blood pressure. In the post, I listed out 20 foods and drinks that help to prevent, lower, or control your high blood pressure naturally without the need for medication. Tilapia is one of the foods that I listed out in that post, and just to recap: just 133 grams (4 oz) of tilapia provides 8% of the magnesium and 8% of the potassium you need every day. I promised that this wouldn’t be a long-winded post but it seems like it is turning out to be one, and I do apologise for misleading everyone!

Plokkfiskur (Icelandic Fish Stew)

So, maybe you’ve read this in a previous post, or you know me personally to know where I’d like to travel to next; it’s an absolute dream of mine to travel Iceland. I talked to an Icelandic acquaintance not too long and asked him what Icelandic dish he would recommend I try if I were to visit Iceland in the near future. A dish that he pointed out was Plokkfiskur. Plokkfiskur, or roughly translating to ‘mashed fish’ is an Icelandic Fish Stew that isn’t quite like the stews that you’re traditionally used too. It’s not soup based, but instead it is a combination of fish, potatoes, onions and béchamel sauce is a firm favourite in Icelandic kitchens. It’s a traditional dish and a true comfort food. For my dish, I completely left the béchamel sauce out for no particular reason – okay I lied, there is a reason and that reason is because the recipe that I looked up did not have béchamel sauce in it. It was only after when I was trying to describe what Plokkfiskur was for this post that I saw “béchamel sauce” in the description and had a little oh shit reaction. So any Icelanders out there reading this post, please do not butcher me for this – I’ve simply adapted the recipe to what is available here in Brunei and also paired it with other side dishes… Without the rye bread *gasps*.

Plokkfiskur (Icelandic Fish Stew) Ingredients

PREP TIME 10 MINS | COOKING TIME 30-40 MINS | SERVES 3-4

INGREDIENTS

For the plokkfiskur

  • 1kg fresh or frozen tilapia fillets, skins removed and cubed
  • 200g gouda cheese, grated
  • 2 medium brown onions, diced
  • Ground sea salt and black pepper, to taste
  • Spring onion, chopped
  • Butter, for greasing

For the garlic rosemary potatoes

  • 500g small to medium-sized potatoes, skin on
  • 2-3 garlic cloves, minced
  • 1 sprig of fresh rosemary
  • 2-3 tbsp olive oil
  • Asparagus stalks

METHOD

  1. Preheat oven to 190C (375F or gas mark 5).
  2. Add the diced onions and cubed tilapia into a greased baking dish, and season with salt and pepper. Top with the grated gouda cheese and pop into the oven for about 15-20 minutes or until golden brown and bubbly on top.
  3. Once done remove from the oven and sprinkle some chopped spring onions on top.
  4. Meanwhile, boil the potatoes in a large pot of salted water until tender, about 15-20 minutes. Once done, drain and set aside to cool down a bit. Then take a flat surfaced object (I used a small plate), to press down on the potatoes so that they are slightly smashed but not completely broke into pieces.
  5. Heat the olive oil in a medium-sized non-stick frying pan and sauté the minced garlic and rosemary spring until slightly fragrant. Add the potatoes in, working in batches if needed, and panfry each side until golden in colour, about 2-3 minutes per side. Once done transfer to individual dishes.
  6. Bring a small pot of salted water to a boil and blanch the asparagus stalks for about a minute or two until tender but still crunchy. Drain and submerge in an ice bath immediately to stop the cooking process. Divide evenly between the individual dishes.
  7. Divide the Plokkfiskur into the individual dishes and enjoy with your family and/or friends!

Plokkfiskur (Icelandic Fish Stew)

BON APPÉTIT

– Ally xx

myTaste.com

Blueberry Goat Cheese Empanadas

Blueberry Goat Cheese Empanadas

Hello Everyone! I hope everyone in Brunei had a great long weekend, and enjoyed yesterday’s public holiday as well while I unfortunately had to work yesterday. Don’t worry, I was 80% rebellious today to compensate for the fact that we had work yesterday and decided to take the whole day to work on a small task haha. Anyway, for anyone not in Brunei, I still hope that you had a great weekend nonetheless.

Before I dive into tonight’s recipe, I just want to apologise for the post going up a day late and also for not getting this post up last week like it was scheduled to be. I had a ladies night out with two of my friends whom I’ve not seen since forever and I ended up getting home past my bed time, not having prepared this post beforehand. I had initially started off the post with some distressing news, but because I didn’t want to start off with a downer, I’ve saved what I have to say for last. So if you want to know what’s been happening, read until the end.

Blueberry Goat Cheese Empanadas

Blueberry Goat Cheese Empanadas

So let’s get cracking then shall we? I came across tonight’s recipe while I was browsing through Pinterest one night, searching up new and unique recipes to try out for myself, and I was particularly drawn to this recipe by Joanna from JoCooks of her Blueberry Goat Cheese Empanadas. I never thought about sweet empanadas before so I thought that this was a pretty unique recipe, and definitely something new to me and quite possibly to many others I know. I have no idea why but all my empanadas decided that they wanted to spew out their innards! Okay that sounded a bit gross, but I’m not going to lie, I laughed way too much at that sentence!

Blueberry Goat Cheese Empanadas Ingredients

PREP TIME 40 MINS* | COOKING TIME 15-18 MINS | SERVES 9-12 EMPANADAS

*includes chilling time in the fridge

INGREDIENTS

For the empanada dough

  • 1 cup plain flour
  • 1/3 cup plain whole wheat flour
  • 1/3 cup cold water
  • 20g unsalted butter, chilled
  • 1 large free range egg, yolk only
  • 1 tsp granulated sugar
  • 1/4 tsp salt

For the filling

  • 1 punnet (125g) fresh blueberries
  • 1/2 cup crumbled goat cheese
  • 2 tsp granulated sugar
  • 2 tsp plain flour
  • 1/2 tsp vanilla extract
  • 1 large free range egg, lightly beaten, for egg wash

METHOD

  1. In a small food processor, combine the plain flour, plain whole wheat flour, sugar, and salt. Pulse a few times until combined, then add in the butter and pulse for about 5 seconds. Add the egg yolk in together with the cold water and process until a soft dough is formed, a couple of minutes in total.
  2. Turn the dough onto a lightly floured surface and knead until smooth. Cover with plastic wrap and let it rest in the fridge for about 30 minutes.
  3. Preheat oven to 200C (400F or gas mark 6). Line a baking tray with parchment paper.
  4. In a small bowl, add the fresh blueberries, vanilla extract, plain flour, and sugar. Toss to combine. Set aside.
  5. Roll out the empanada dough so that it is about 1/8 of an inch in thickness. Cut the dough into 4-inch rounds, using a cutter if you have one or a bowl/big mug to measure out the rounds, should make about 9-12 rounds depending on the size of each round.
  6. Spoon about half a tablespoon of goat cheese onto each round, and then about a tablespoon of the prepared blueberries onto the centre of each round. Fold the dough over in half to enclose the filling. Press the edges together to seal and crimp with either your fingers or a fork.
  7. Transfer the empanadas to the prepared baking tray and brush each empanada with the egg wash. Poke a few holes into each using a fork before baking for about 15 – 18 minutes or until the empanadas are golden brown in colour. Set aside to cool for a while then serve and enjoy with a nice cup of tea!

Blueberry Goat Cheese Empanadas

Blueberry Goat Cheese Empanadas

Blueberry Goat Cheese Empanadas

BON APPÉTIT

For those of you who are just tuning into Amcarmen’s Kitchen, I sometimes like to treat my blog a like a journal where you get to read small snippets of my life from time to time – I feel that’s what makes this blog more human and that way you get to know who I am a little at a time.

Okay, for those of you who have managed to reach this point of tonight’s post, here we go… How do I begin to say this. If you could see me right now, I just spent a whole 10 minutes sighing heavily whilst fighting back the tears just thinking about how I am going to write this next sentence.

My Blacky, my bundle of joy who has been in the family since he was a little pup for just short of 7 years, passed away on Sunday afternoon. My Mom, sister, and I were out for not even 2 hours doing our usual Sunday groceries, and when we got back home, there we saw him, lifeless, on a bed of green grass under the lovely sun. I cried instantly, wanting to believe that what I was seeing was just a dream… But it wasn’t. He was gone. I immediately called up a colleague of mine, to ask if he had a shovel and a hoe so that we could dig a resting place for Blacky, and within less than half an hour, he was at my house, with his team members from work, there to help me dig and lay Blacky into the ground. I wasn’t expecting this at all – all I asked for was the tools so that I could do it myself, so I am thankful to have him as my colleague and my friend. Sorry to end the post on a downer, but like I said before, I didn’t want to start the post off with this. Goodbye Blacky. You will be missed oh so dearly.

– Ally xx

myTaste.com

Blueberry Bread Pudding

Blueberry Bread Pudding

Hello Everyone! I apologise for posting a day late – I got home quite late last night. Actually that’s a lie, I got home at a decent hour but because I was super full from the Korean BBQ Buffet Dinner that I had with two of my colleagues, I just wanted to take a shower and then go to sleep. Even though we work together and basically see each other 6 days a week for 8 hours, we don’t really get to just chill and catch up with each other, be it talking about our personal life or just random office gossip. All in all a great night with great company over great food.

In other news, I hope everyone had a great weekend, celebrating with their Mom’s on Mother’s Day. Ours didn’t quite go as planned, or well it did but we all ended up disappointment so to say. We, or my Mom actually, wanted to try out a restaurant that she had been eyeing for a while now for their breakfast buffet. We got there all excited and everything only to be disappointed with the buffet itself – or should I even call it a buffet really? To me, there wasn’t a substantial amount of food to call it a buffet, and hello?! What breakfast buffet doesn’t have an egg station?! I was immensely frustrated that I could not have sunny side up eggs, or scrambled eggs to go with my… Soggy hash browns and non-existent beef rashers, but instead had to suffice to cold pancakes and waffles. Outrageous. They had fried noodles though, which at first I thought was probably the only thing that could save me from further dissatisfaction – but I most definitely regretted taking a plate full of it. The noodles were subpar but paired with the most bitter vegetables ever which was enough for me to just push the plate away. A waste I know, but I couldn’t risk an upset tummy at that point. So what did I actually eat? Their assortment of breads and under-seasoned prawn noodle soup – a lot of it just to get my money’s worth. My Brunei friends/followers, if you’re wondering what restaurant I’m talking about, it’s Anjung Saujana at the International Airport. Their al a cart menu looked comparatively better, but meh, still not enticing enough for me to ever step foot in there again to be brutally honest. Sorry!

Blueberry Bread Pudding

Blueberry Bread Pudding

That aside, I was able to save Mother’s Day by putting together a lovely Blueberry Bread Pudding, filling it up with basically anything and everything I had left lying around from the previous blueberry recipes I have whipped up for Amcarmen’s Kitchen. I had some leftover white chocolate chips from my Blueberry Lemon & White Chocolate Scones, leftover ricotta cheese from last week’s recipe of Blueberry & Ricotta French Toast Roll Ups, and the most important leftover ever – the bread crusts from last week’s recipe as well (remember I said not to discard the bread crusts in that post? This is why).

So back when I was still living in Sydney, I think at that time I was just starting my final year of university, I hosted a little flowery tea party for 4 lovely friends of mine one fine weekend afternoon. One of the eats on the menu was finger sandwiches, and to be completely honest, I forgot what we actually put in them. I have a feeling it was tuna or egg sandwiches, but I really cannot remember. Anyway, that’s not the point, the point is that finger sandwiches usually have the crusts cut off and I distinctly remember that time saying that I was going to keep the crusts and make something out of them. If I remember correctly, I did make an all-crust bread pudding out of them, and this was the caption to the end result when I posted a photo of it on Instagram:

Any normal person would’ve either thrown them away or fed them to the pigeons – I am not a normal person. So instead of throwing leftover bread crusts from the tea party, I went on and made a bread pudding with almond flakes and dates out of it #freshfromtheoven #someonecomeoverandeatitwithme #foodporn #foodgasms — click here to see the full image of my Date & Almond Flakes Bread Pudding from way back in 2014.

Blueberry Bread Pudding Ingredients

PREP TIME 1 HOUR | COOKING TIME 1 HOUR | SERVES 12

INGREDIENTS

  • 200g ricotta cheese
  • 1 punnet (125g) fresh blueberries
  • 3 large free range eggs
  • 2 cups milk
  • 1/4 cup white chocolate chips
  • 2 tbsp maple syrup
  • 2 tsp vanilla extract
  • 1 tsp ground cinnamon
  • 1/4 tsp ground nutmeg
  • Handful of flaked almonds
  • Granulated sugar (optional)
  • Leftover bread crusts + half a loaf of white bread
  • Unsalted butter, for greasing

METHOD

  1. Grease a rectangular baking dish, mine was about 7.5″ x 11″ in size, with the unsalted butter.
  2. Cut the crusts off the remaining half loaf and lay the bottom of the baking dish with the crusts, making sure to cover as much of the bottom as you can.
  3. Spread all of the ricotta cheese on top of the bread crusts and top with half of the blueberries and half of the white chocolate chips.
  4. Cut the crustless slices of bread diagonally in half and arrange to cover the layer of ricotta cheese, blueberries, and white chocolate chips. Set aside.
  5. Whisk together the eggs, milk, maple syrup, ground cinnamon, and ground nutmeg until well combined. Pour over the bread, making sure to press the bread down to absorb the egg mixture.
  6. Top with the remaining blueberries, white chocolate chips, and flaked almonds. Sprinkle about a tablespoon of granulated sugar on top if you wish. Cover with aluminium foil and let it sit for about an hour before baking.
  7. Preheat oven to 180C (350F or gas mark 4) about 45 minutes into its sitting time. Baked, covered for 30 minutes, and then uncovered for another 30 minutes or until lightly browned and set.
  8. Let it stand for 5 minutes before serving. Enjoy!

Blueberry Bread Pudding

Blueberry Bread Pudding

BON APPÉTIT

– Ally xx

myTaste.com

Blueberry Lemon & White Chocolate Scones

Blueberry Lemon & White Chocolate Scones

Hello Everyone! I’ll make tonight’s post quick only because I am mentally and physically exhausted from both being sick and basically juggling so many projects simultaneously today. I managed to tick at least 70% of my list of things to do for work so I’m pretty happy about that, but it’s going to be a busy weekend!

Blueberry Lemon & White Chocolate Scones

Anyway, tonight’s recipe is one of my favourite go-to-brekkie when I was still living in Sydney for my university studies. When I lived up in the lower North Shore, I’d always walk about 15 minutes from home to catch the train to the city, and then a bus to campus. Along the way, I’d stop at Baker’s Delight and pick up a freshly baked Blueberry Lemon & White Chocolate Scone before hopping onto the train. I’d then have my scone on campus in the lecture hall, or tutorial rooms while waiting for class/lecture to start. It would alway make my mornings a little bit better especially when I’d have to be on campus by 8 or 9 in the morning.

So since the theme for the month of May on Amcarmen’s Kitchen is Blueberries, I decided to whip up my own batch of Blueberry Lemon & White Chocolate Scones to get into the nostalgic zone. I followed my own recipe for Basic Scones which I posted way back in mid-2014, and added blueberries, lemon juice and zest, and white chocolate chips into the mix.

Blueberry Lemon & White Chocolate Scones Ingredients

PREP TIME 20 MINS | COOKING TIME 20-25 MINS | SERVES 12 SCONES

INGREDIENTS

  • 3 cups self-raising flour, plus extra for dusting
  • 1 punnet (125g) fresh or frozen blueberries
  • 80g chilled unsalted butter, cubed
  • 1 cup milk
  • 1/2 cup white chocolate chips
  • Juice of half a lemon
  • Zest of 1 lemon

METHOD

  1. Preheat oven to 200C.
  2. Sift the self-raising flour into a large bowl and add the cubed butter together with the lemon zest. Rub the butter into flour using your fingertips until the mixture resembles a breadcrumb texture.
  3. Make a well in the centre and add the milk, lemon juice, and blueberries in. Mix with a flat-bladed knife until the mixture forms a soft dough. If the mixture is a bit dry and crumbly, add more milk if required. Turn onto a lightly floured surface and knead gently until smooth (don’t knead the dough too much though or your scones will be quite tough).
  4. Pat the dough into a 2cm-thick round, and cut into 12 equal logs.
  5. Place scones onto a tray lined with baking paper, 1cm apart from each other. Lightly sprinkle the tops with a little flour and bake for 20 to 25 minutes or until golden and well risen. Serve warm with a nice cup of tea!

Blueberry Lemon & White Chocolate Scones

Blueberry Lemon & White Chocolate Scones

Blueberry Lemon & White Chocolate Scones

BON APPÉTIT

– Ally xx

myTaste.com

Breakfast Muffins: Avocado & Blueberry

Breakfast Muffins: Avocado & Blueberry

Hello Everyone! I hope you guys had a good Easter weekend! Even though we don’t get a long Easter weekend here in Brunei, I did still manage to enjoy my Easter Sunday day off. I can’t believe that there’s only less than 2 weeks of April left and that May is just around the corner! Time sure flies by when you’re (not) having fun at work. Haha! I know I’ve mentioned this in previous posts about how everything is just becoming routinely for me and it’s actually becoming quite depressing. I’m in need for a little excitement in my life. I think my thoughts have been heard because I’m flying off tomorrow night for a little staycation in the Philippines! The company I’m working at is sending me and three other colleagues to the Philippines for a little work/play adventure, attending events and meetings on behalf of the company, and of course what’s a trip to the Philippines without a little summer fun in the sun? I mean, it’s pretty much our tagline – It’s More Fun In The Philippines!

Breakfast Muffins: Avocado & Blueberry

On this note, I definitely won’t be uploading a post next week because I’ll be away from Thursday to Monday night. Since my Sunday, and the public holiday on Monday is taken up for this trip, I won’t have my dish prepared for a post. So this will be my last Avocado recipe for the month of April that I will be sharing with you guys! In fact, after I’ve posted this, I’ve got to get a head start on my packing because I still have to be at the office tomorrow up until 2 hours before my flight – what the heck right? Also, I was only told on Monday that I’d be flying off, and everything was only firmly confirmed yesterday afternoon. As usual, before we dive into tonight’s recipe, please check the original recipe out by Ali from Gimme Some Oven.

Breakfast Muffins: Avocado & Blueberry Ingredients

PREP TIME 15 MINS | COOKING TIME 25-30 MINS | SERVES 16 MUFFINS

INGREDIENTS

For the avocado and blueberry muffins

  • 2 cups plain flour
  • 1 cup plain fat-free yoghurt
  • 1/2 cup white granulated sugar
  • 1 large free range egg
  • 1 punnet (125g) fresh blueberries
  • 1 ripe avocado, halved, peeled, deseeded and roughly chopped
  • 2 tsp baking powder
  • 1 tsp pure vanilla extract
  • 1/2 tsp baking soda
  • 1/2 tsp ground cinnamon (optional)
  • 1/2 tsp salt

For the streusel topping

  • 30g unsalted butter, melted
  • 2 tbsp plain flour
  • 2 tbsp raw sugar
  • 2 tbsp white granulated sugar

METHOD

  1. Preheat oven to 190C (375F or gas mark 5). Line a 12-hole muffin pan with paper cases and set aside. Now since this recipes makes about 16 muffins, you can line another 6-hole muffin pan (if available), or if you only have one muffin pan, then bake in batches if needed.
  2. For the streusel topping, add all the ingredients in a small bowl until combined and crumbly. Set aside.
  3. In a medium-sized bowl, add the plain flour, baking powder, baking soda, salt, and cinnamon (optional) and stir together to combine. Set aside.
  4. In a separate large mixing bowl, add the roughly chopped avocado and using an electric mixer, beat on medium speed until smooth. Add the sugar in and beat until well blended. Follow with the yoghurt and pure vanilla extract, beating again until just combined.
  5. Add half of the flour mixture into the wet ingredients and beat until just combined. Add in the other half of the flour mixture and beat until well combined.
  6. Gently fold the blueberries in using a rubber spatula, then spoon the batter into the muffin cups, filling them about 2/3 of the way. Sprinkle with the streusel topping and place in the oven to bake for 25-30 minutes or until a tooth pick inserted to the centre of a muffin comes out clean.
  7. Set aside to cool in the muffin pan for about 5 minutes before transferring them to a wire rack to cool down completely. Serve for breakfast or afternoon tea and enjoy!

Breakfast Muffins: Avocado & Blueberry

Muffins taste best on the same day, though they may be stored covered tightly at room temperature for 3 days or in the refrigerator for 5 days.

Now, I know I have a couple of friends and colleagues who don’t particularly like the taste of avocado; don’t ask me why because I think that they’re just plain weird for not liking avocado (hehe!), but give them one of these beautiful green muffins and they’ll probably be hooked on it. The avocado flavour in these muffins are not overpowering or predominant, but there is a slight hint of it in each bite you take. These muffins are a classic twist to a classic blueberry muffin and are light, moist, and al the more healthy for you because of the avocado in place of all the other oils you’d otherwise use when making muffins. Top them off with a crumbly streusel to give it an “extra muffin-y sweetness” as Ali says.

Breakfast Muffins: Avocado & Blueberry

BON APPÉTIT

– Ally xx

myTaste.com

No-bake Avocado Lime Cheesecake

No-bake Avocado Lime Cheesecake

Hello Everyone! Today is a very special day, and for two reasons too! Today is special because God so loved the world that he gave his one and only Son, that whoever believes in him shall not perish but have eternal live (John 3:16 ESV). A very Happy Easter to all who celebrate the resurrection of Jesus Christ.

Besides today being Easter Sunday, today is also special because Amcarmen’s Kitchen turns 3! On this day 3 years ago I was sitting in my room, quite possibly still in my pyjamas at that time, blankly starting at my list of assignments to complete before the end of the Easter mid-semester break on my second-last semester of my degree. Knowing that I had so much to do in so little given time, I thought the only right thing to do at that moment was to take a nap and hopefully, magically, all my assignments would have been completed by the time I woke up from my nap… Well, that wasn’t what happened, but instead I decided to spontaneously delve into the world of WordPress, and *poof!* Kitchen Headquarters was born. Yes, Amcarmen’s Kitchen was previously known as Kitchen Headquarters in 2014 for a good year and a half before I did a whole rebranding in mid-2015.

As it has been for the past 2 years, I decided to make, not bake, a cake for Amcarmen’s Kitchen, and basically for my family and I to enjoy on behalf of my blog haha. I decided to try something new, while of course still sticking to the theme of using avocado in all my recipes for the month of April. Before we dive into today’s recipe, please do check the original by Sheilla on Chef Sheilla.

No-bake Avocado Lime Cheesecake Ingredients

PREP TIME 15 MINS | SETTING TIME 2 HOURS | SERVES 8-10

INGREDIENTS

For the avocado lime cheesecake mixture

  • 250g cream cheese, softened
  • 50g unsalted butter, melted
  • 300ml crème fraîche
  • 1 large avocado, mashed
  • 1 sachet (7g) clear gelatin or agar-agar powder
  • 1 cup granulated sugar
  • Juice and zest of 2 limes
  • 1 cup ground digestive cookies
  • 1 lime, for garnishing

METHOD

  1. Combine the ground digestive cookies and melted butter in a medium-sized bowl and mix until moist crumbs form. Press the crumb mixture onto the bottom of a 10″ springform pan that has been lined with parchment paper. Chill in the freezer for about 10 minutes to set.
  2. Take 100ml of the crème fraîche and combine it with the gelatin or agar-agar powder in a small saucepan. Stir for about 2 minutes until all the gelatin granules has dissolved. Turn the heat to medium and bring to a boil, stirring for a few minutes until the gelatin has completely melted. Remove from the heat and strain through a fine sieve. Set aside.
  3. Add the mashed avocado, cream cheese, sugar, the remaining 200ml of crème fraîche, lime juice, and lime zest to a large mixing bowl and using an electric mixer with a paddle attachment, mix everything together until smooth and well-combined. Pour in the gelatin-cream mixture and continue to mix until creamy and smooth in texture.
  4. Pour the avocado lime cheesecake mixture into the prepared springform pan and smoothen the top. Chill in the freezer for at least two hours for it to set.
  5. Release the cheesecake from the springform pan and serve right away! Garnish the top with some lime slices and zest. Enjoy!

No-bake Avocado Lime Cheesecake

The taste: amazing! The flavour of the avocado definitely shone through, and the hint of tangy flavour from the lime made the whole dessert refreshing in taste. The texture… Well let’s just say that it is supposed to be creamy and smooth, mine wasn’t as smooth as it could be. It has nothing to do with the original recipe; I think that I may have slipped up somewhere along the way. The obvious was probably that I was on the verge of over whipping the cheesecake mixture that the fresh cream started forming little clumps – I stopped before it severely over whipped. Also, I probably didn’t add enough gelatin to the cheesecake mixture so it didn’t quite set right. I only added half of the sachet in even though the original said ‘1 sachet’ – in my defense I didn’t know if Sheilla’s 1 sachet was the same quantity-wise as my 1 sachet. Oh well, I’ve adjusted the quantity of the gelatin in this recipe so hopefully the one listed above works!

Before I end tonight’s post, I’d just like to take this opportunity to thank first and foremost, my Mom who taught me how to cook. I also thank my other family members and friends who encouraged me to start up my blog because if it weren’t for them, Amcarmen’s Kitchen wouldn’t be here today, and I probably wouldn’t have continued pursuing my passion for cooking at home. Let’s face it, when I cook, I cook for my blog, and my family just so happens to be around to eat it after haha! Finally, to those who think I am just wasting my time on this, or assume that I work in a restaurant as a waitress because I didn’t actually go to culinary school to be able to work in a commercial/professional kitchen, take your negativity elsewhere. I have a degree in Design and I am working in the country’s leading Advertising Agency as a Creative Design and Events Management Executive, as well as a Copywriter. Thank you very much.

No-bake Avocado Lime Cheesecake

No-bake Avocado Lime Cheesecake

BON APPÉTIT

– Ally xx

myTaste.com