Auguest 2019: Jialing Mew

Baked Brie with Rosemary, Honeyed Pear & Walnuts

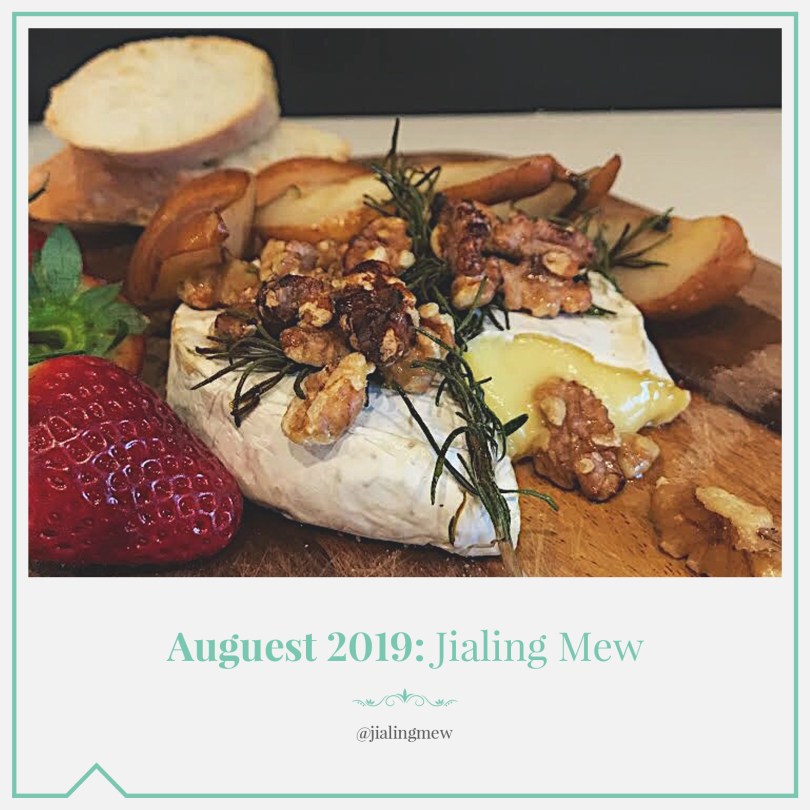
Happy Auguest everyone! I’m Jialing and this is my 5th year as the grand finale for Amcarmen’s Kitchen’s Auguest series. I’ve learnt a lot in these past five years, but clearly not how to stop procrastinating.

Baked Brie with Rosemary, Honeyed Pear & Walnuts

I am at a friend’s wedding, typing away on my phone as quickly as I can while waiting for dinner to come out, moments before it is meant to go live (despite Allison having sent me daily reminders – sorry mate). If you, like me, frequently find yourself with many commitments, and little time, boy do I have a recipe for you! Having learnt from my previous Auguest blogs, this recipe uses just a few ingredients and equipment, and comes together in 15 minutes!

As a bonus, it is vegetarian friendly, and can be easily adapted to be gluten friendly, by swapping out the bread. But it’s not for vegans. Sorry. Please direct yourself to Auguest 2016 for my Poached Pears with Chocolate Chia Mousse if that’s what you’re after.

Baked Brie with Rosemary, Honeyed Pear & Walnuts Ingredients

PREP TIME 5 MINS | COOKING TIME 10-12 MINS | SERVES 4-6*

*Or one (1) very hungry Jialing.

INGREDIENTS

  • 200g Brie cheese
  • 3 pears
  • 2 sprigs rosemary
  • 1/4 cup walnuts
  • 2 tbsp honey

To serve

  • Strawberries
  • Crusty bread

METHOD

  1. Pre-heat oven to 180C (350F or gas mark 4) and line a tray with baking paper – this will help keep the honey from sticking to the surface when it caramelises!
  2. Cut pears into quarters, and lay onto the baking tray, leaving space for the brie cheese in centre.
  3. Place the unwrapped brie cheese in the centre of the tray and lay whole sprigs of rosemary on top.

Tip: Laying them on top rather than poking them into the cheese infuses the flavour without creating holes that the melting cheese will spill out of as it bakes!

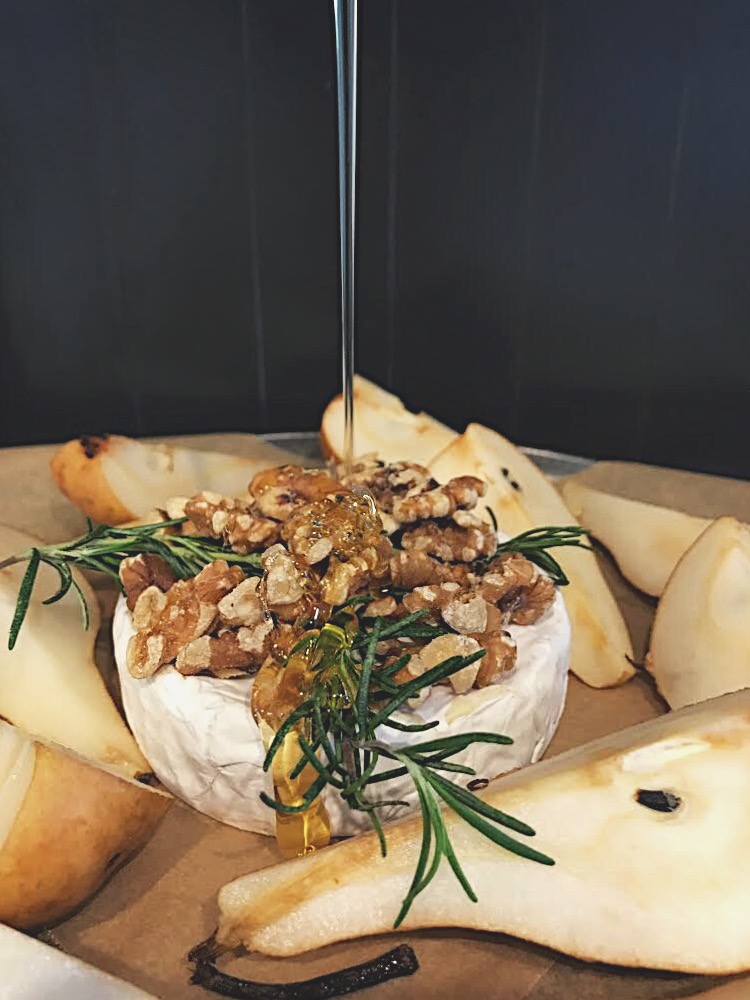
  1. Pile walnuts gently on top of the rosemary sprigs, and drizzle the brie cheese and pears generously with honey.
  2. Bake for 10-12 minutes, until the brie cheese is soft and the honey just starts to bubble. As the honey cools it will caramelise the walnuts.
  3. Gently lift the brie cheese using spatula and place onto a cheese board. Arrange pears (careful, they’ll be hot too) and fresh strawberries around the brie cheese and serve immediately with fresh crusty bread. Enjoy!

Baked Brie with Rosemary, Honeyed Pear & Walnuts

Baked Brie with Rosemary, Honeyed Pear & Walnuts

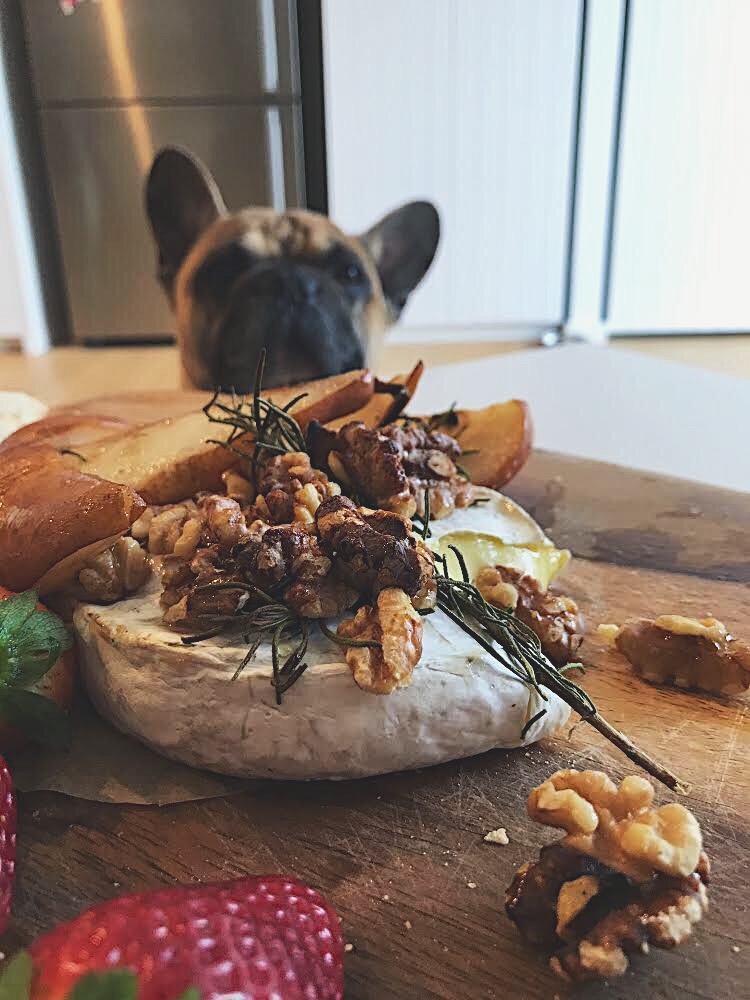
And here we have a rather curious Winston.

Photo Courtesy & Recipe Copyright © 2019 | Jialing Mew

BON APPÉTIT

– Jialing Mew

myTaste.com

Advertisement
Breakfast Muffins: Feta Cheese, Onion & Rosemary

Breakfast Muffins: Feta Cheese, Onion & Rosemary

Hello Everyone and a happy first Monday for the month of June! Hope the Monday blues didn’t hit you guys hard, especially to my friends/followers in Brunei – unlike me, I know some of you guys have had a super long weekend with all the public holidays we’ve been having. We, as in my office, didn’t get to have one of the public holiday off so it was a normal working day for us on Thursday while most likely 80% of the working population was off. Thank goodness Saturday was public holiday that applied to us so yay for the long weekend (normal weekend anyway for some)! If you guys don’t already know from my constant mentions on several posts, and on the ‘about’ section of my blog, I work SIX full days a week. So getting to have a Saturday off (which is quite rare) because of a public holiday is pure bliss.

Moving on from that… mini rant? I mentioned in one of my posts last week that I’ll be switching up my post schedule just for this month – and yes it does have something to do with the theme for June. The title of this post may have already given it away for some of my loyal and consistent followers. Drumroll please! So I may have taken it to Google and searched ‘how to type out a drumroll sound’ – gives up 30 minutes later.

Breakfast Muffins: Feta Cheese, Onion & Rosemary

MUFFIN MAKING MONDAY IS BACK ON AMCARMEN’S KITCHEN! Muffin Making Mondays started about 4 years ago now I think, where Jialing would come back to my place after our Monday morning lecture together on main campus. We’d bake muffins together for our on-the-go work brekkie for that week. Well, we’d bake together but we’d both have our own recipes, i.e. she’d make sweet muffins for herself while I’d make savoury ones – we still share 1 or 2 though after we’ve baked them. I also remember how we’d both have a 1-on-1 Cards Against Humanity game where we’d both just unanimously vote which was the best (dirtiest) answer while our muffins were baking in the oven. Those were the days.

Anyway, it’s probably going to get lonely in the kitchen as it’ll just be me, myself, and I without Jialing, but I’m bringing back Muffin Making Mondays for the month of June! And to kick things off, I’ve got a delicious Feta, Onion, and Rosemary Savoury Muffin to start your mornings with a bang! Check out the original recipe over on Genius Kitchen.

Breakfast Muffins: Feta Cheese, Onion & Rosemary Ingredients

PREP TIME 15 MINS | COOKING TIME 30 MINS | SERVES 12 MUFFINS

INGREDIENTS

For the muffin batter

  • 1 & 3/4 cups plain flour
  • 1 cup milk
  • 1 large free range egg
  • 1 tbsp baking powder
  • 1 tsp salt

For the onion and cheese mixture

  • 100g feta cheese, crumbed
  • 1 medium-sized brown onion, finely chopped
  • 1 tbsp fresh rosemary, finely chopped
  • Freshly ground black peppercorns
  • Knob of unsalted butter

METHOD

  1. Preheat oven to 200C (400F or gas mark 6). Line a 12 hole muffin pan with paper cases.
  2. Melt the butter in a small frying pan over medium heat. Add in the chopped onions and cook for about 5 minutes until soft and slightly caramelised. Remove from heat and set aside to cool.
  3. Once the onions have cooled down, add in the crumbed feta cheese and chopped rosemary. Season with freshly ground black pepper and give it a good mix. There is no need for salt since the feta is quite salty by itself. Set aside.
  4. For the muffin batter, sift the plain flour, baking powder, and salt into a large mixing bowl.
    In another medium-sized bowl, beat the egg, followed by the milk and give it a good whisk to combine.
  5. Pour the egg and milk mixture into the flour, until well incorporated, using minimum number of folding movements. Ignore the lumps in the mixture and do not over-mix.
  6. Gently add the onion and cheese mixture into the batter mixture, folding in, as before, with as few strokes as possible. Spoon the mixture into the prepared muffin pan.
  7. Bake for about 20 minutes, or until well risen and golden. Remove the muffins from the tins and serve immediately. Enjoy!

Breakfast Muffins: Feta Cheese, Onion & Rosemary

Breakfast Muffins: Feta Cheese, Onion & Rosemary

These muffins are perfect for sahur with a hot cup of teh tarik for my Muslim friends and followers. Well to be honest, it’s perfect for any time of the day with a nice hot cup of anything like coffee, tea, or hot chocolate!

BON APPÉTIT

– Ally xx

myTaste.com

Angel Hair with Beetroot Pesto & Roast Lemon Rosemary Chicken

Angel Hair with Beetroot Pesto & Roast Lemon Rosemary Chicken

Hello Everyone! I know that one of my Mom’s family friends had been asking for this recipe from way back when she showed a picture of this dish to her at the time I put it together (probably back in July); well I’m glad to say that’s it’s finally here and I do apologise for getting it up really late.

I mentioned in my last post that I have a lot of personal and work stuff going on, and things have still been a bit rough – actually to be honest, I don’t think it is as rough as I say it is, but let’s just say my mind has the tendency to drift into a dangerous place which turns my usual cheerful mood to the complete opposite from time to time and I haven’t been able to get out of it since last week. I guess my mood has been making me think that it’s been rough; maybe I should stop listening to Sam Smith’s “Too Good at Goodbyes” on repeat … I can’t get enough of it though because it’s a really good song, but on the other hand, it’s putting a lot of unnecessary thoughts into my head. Well on top of that I guess it doesn’t help that work is getting crazy busy that I can barely keep up with it. Anyway I’m not here to talk about this, so onward with tonight’s recipe!

Angel Hair with Beetroot Pesto & Roast Lemon Rosemary Chicken

As you know, or maybe not depending on if you’ve read my post from the beginning of the year back in January, or if you already know this from your own research and reading, there are nitrates in the juice of beetroots that have been found to bring down one’s high blood pressure within just 24 hours. If you’re not a keen beetroot juice drinker, you can easily add this vegetable to your diet by roasting or steaming the whole root and then add it to a green-packed salad, stir-fry, stew, or in this case, make a nutty and creamy beetroot pesto that’s far from tasting beet-y the way beets do for those who don’t sit well with its taste.

Tonight’s recipe is so much more versatile than just adding it to your favourite pasta. It is a delicious sauce for your salads, pizza, and appetizers to spread on to toast with eggs or dip crudites in for the ultimate seasonal flavour fix! You can pair your Angel Hair Pasta with a delicious and juicy road chicken breast or keep it completely vegetarian. I’m sure there’s a vegan recipe for beetroot pesto as well, just don’t forget to replace your pasta with a vegan-friendly one.

You can find the original recipe that I referred to for this Beetroot Pesto over on Akis Petretzikis.

Beetroot Pesto Ingredients

PREP TIME 15 MINS | COOKING TIME 30 MINS | SERVES 6

INGREDIENTS

For the beetroot pesto sauce

  • 400g whole raw beetroot, washed
  • 3/4 cup walnuts, roughly chopped
  • 1/4 grated parmesan
  • 2-3 garlic cloves, minced
  • 3 tbsp olive oil
  • Ground sea salt and black pepper, to taste
  • Zest from 1 lemon
  • 500g angel hair pasta

For the roast lemon rosemary chicken*

*I’ve linked my recipe for Lemon & Thyme Roast Chicken which is essentially they same except that I replace the thyme with rosemary just because when I went grocery shopping that weekend, they didn’t have fresh thyme on the shelves but had rosemary instead. You can top your pasta with some chicken or keep it meat-free; it’s completely up to you!

METHOD

  1. In a pan of boiling salted water, boil the beetroot for about 15-20 mins or until tender. Drain and leave to cool before peeling (wear clean rubber gloves to peel if you want to avoid beet-stained hands). Reserve about a quarter cup of small cubed beets to garnish on top of your pasta dish.
  2. Roughly chop the beetroots in to small chunks and purée them in a blender for about 30 to 45 seconds.
  3. Add the olive oil, garlic, and season with ground sea salt and black pepper to taste. Continue to blend for another 30 seconds before adding the chopped walnuts and grated parmesan. Blend until smooth and creamy. Set aside.
  4. Cook the angel hair pasta according to packet instructions in a pot of boiling salted water. It should take no longer than two minutes, but I like to slightly undercook my pasta since I will be further cooking it again.
  5. When the pasta is ready, reserve some of the pasta water and drain. Add the pasta back to the pot and stir the beetroot pesto in. Add the pasta water if necessary to make the sauce as creamy as you like. Once coated, turn the heat off and divide equally to individual dishes.
  6. Top the pasta with the grated zest from 1 lemon, extra grated parmesan, more chopped walnuts, and the beetroot cubes. Optional to serve with juicy slices of Roast Lemon Rosemary Chicken. Enjoy!

Angel Hair with Beetroot Pesto & Roast Lemon Rosemary Chicken

BON APPÉTIT

– Ally xx

myTaste.com

Plokkfiskur (Icelandic Fish Stew)

Plokkfiskur (Icelandic Fish Stew)

Hello Everyone! Can you believe it?! It’s already the middle of the year! How did time fly by so quickly when I felt like it was only just yesterday that 2017 kicked in?! The next thing you know, it’ll be December and I hope that the next half of the month will be exciting for me in terms of personal and career growth.

So let’s just get right into it shall we? I promise that this won’t be a long-winded post as have the previous ones been so far. I’ve got nothing much to share anyway as things at work have been progressively slow, but I’m not complaining though!

The theme for the month of June on Amcarmen’s Kitchen is hero-ing Tilapia! For those of you who are just tuning into the blog, I made a post at the beginning of the year about Hypertension, or known commonly as High Blood Pressure. Last year, I did a medical check up and found out that I had High Blood Pressure – now I don’t know if this was due to the amount of stress I had been experiencing from work prior to my medical check up, or that it is already a part of my health. Nonetheless, after knowing about my high blood pressure, I’ve been rather careful with my diet and making sure that I eat foods that help lower and maintain a stable blood pressure. In the post, I listed out 20 foods and drinks that help to prevent, lower, or control your high blood pressure naturally without the need for medication. Tilapia is one of the foods that I listed out in that post, and just to recap: just 133 grams (4 oz) of tilapia provides 8% of the magnesium and 8% of the potassium you need every day. I promised that this wouldn’t be a long-winded post but it seems like it is turning out to be one, and I do apologise for misleading everyone!

Plokkfiskur (Icelandic Fish Stew)

So, maybe you’ve read this in a previous post, or you know me personally to know where I’d like to travel to next; it’s an absolute dream of mine to travel Iceland. I talked to an Icelandic acquaintance not too long and asked him what Icelandic dish he would recommend I try if I were to visit Iceland in the near future. A dish that he pointed out was Plokkfiskur. Plokkfiskur, or roughly translating to ‘mashed fish’ is an Icelandic Fish Stew that isn’t quite like the stews that you’re traditionally used too. It’s not soup based, but instead it is a combination of fish, potatoes, onions and béchamel sauce is a firm favourite in Icelandic kitchens. It’s a traditional dish and a true comfort food. For my dish, I completely left the béchamel sauce out for no particular reason – okay I lied, there is a reason and that reason is because the recipe that I looked up did not have béchamel sauce in it. It was only after when I was trying to describe what Plokkfiskur was for this post that I saw “béchamel sauce” in the description and had a little oh shit reaction. So any Icelanders out there reading this post, please do not butcher me for this – I’ve simply adapted the recipe to what is available here in Brunei and also paired it with other side dishes… Without the rye bread *gasps*.

Plokkfiskur (Icelandic Fish Stew) Ingredients

PREP TIME 10 MINS | COOKING TIME 30-40 MINS | SERVES 3-4

INGREDIENTS

For the plokkfiskur

  • 1kg fresh or frozen tilapia fillets, skins removed and cubed
  • 200g gouda cheese, grated
  • 2 medium brown onions, diced
  • Ground sea salt and black pepper, to taste
  • Spring onion, chopped
  • Butter, for greasing

For the garlic rosemary potatoes

  • 500g small to medium-sized potatoes, skin on
  • 2-3 garlic cloves, minced
  • 1 sprig of fresh rosemary
  • 2-3 tbsp olive oil
  • Asparagus stalks

METHOD

  1. Preheat oven to 190C (375F or gas mark 5).
  2. Add the diced onions and cubed tilapia into a greased baking dish, and season with salt and pepper. Top with the grated gouda cheese and pop into the oven for about 15-20 minutes or until golden brown and bubbly on top.
  3. Once done remove from the oven and sprinkle some chopped spring onions on top.
  4. Meanwhile, boil the potatoes in a large pot of salted water until tender, about 15-20 minutes. Once done, drain and set aside to cool down a bit. Then take a flat surfaced object (I used a small plate), to press down on the potatoes so that they are slightly smashed but not completely broke into pieces.
  5. Heat the olive oil in a medium-sized non-stick frying pan and sauté the minced garlic and rosemary spring until slightly fragrant. Add the potatoes in, working in batches if needed, and panfry each side until golden in colour, about 2-3 minutes per side. Once done transfer to individual dishes.
  6. Bring a small pot of salted water to a boil and blanch the asparagus stalks for about a minute or two until tender but still crunchy. Drain and submerge in an ice bath immediately to stop the cooking process. Divide evenly between the individual dishes.
  7. Divide the Plokkfiskur into the individual dishes and enjoy with your family and/or friends!

Plokkfiskur (Icelandic Fish Stew)

BON APPÉTIT

– Ally xx

myTaste.com

Red Wine & Rosemary Braised Lamb Shanks

Red Wine & Rosemary Braised Lamb Shanks

Hello Everyone! I know, I say this every time we come to an end of a blog series – but sometimes it actually does come to quite a bit of a shock when the realisation hits you that another month has passed by and we are that much closer to Christmas and the New Year! It really does at times make me wonder, where did the year go? How was it that it felt like only a few months ago that I was complaining about it being a long way to go before the end of the year, and suddenly in the blink of an eye it will be November soon. I also have that same feeling when it comes to the day after my birthday – where I think about how I have to wait another 364 days until I have a reason to celebrate another year of life – and now look! I’ll be 25 in exactly two weeks!

Anyway, tangent aside, tonight’s recipe has been one that I have been wanting to make for a very long time. I can’t stress enough how much it saddens me when I have such high expectations for a lamb shank dish whenever I order it off a menu. Don’t get me wrong, flavours were nice, and definitely fall-off-the-bone tender, but, my expectations dissipate when a tiny piece of lamb shank hits the table, knowing that it’s definitely not worth the price. So how do I fix this? Well, why not I buy a worthy enough size of a lamb shank that will only cost me $8.00 max. and cook it myself? Not to mention, I can throw in a whole bottle of red wine too to really bring out the flavour *cheeky grin* For my readers who aren’t from Brunei, or aren’t Muslim, you can’t find lamb shanks that have been braised in red wine here in Brunei as if not all, but most Western Restaurants here are Halal. Actually – don’t pour in the whole bottle of wine for your shanks, reserve some for a glass or two to drink while devouring the lamb!

Before I move on to the recipe, please check out the original over on Taste Australia.

Red Wine & Rosemary Braised Lamb Shanks Ingredients

PREP TIME 10 MINS | COOKING TIME 1 HOUR 30 MINS | SERVES 3

INGREDIENTS

  • 4 cups chicken stock
  • 2 cups red wine
  • 2 x 400g cans Italian diced tomatoes
  • 3 lamb shanks, french trimmed
  • 3-4 garlic cloves, minced
  • 3-4 rosemary sprigs
  • 2 brown onions, roughly chopped
  • 1 tbsp olive oil
  • Ground salt and black pepper, to taste.

METHOD

  1. Preheat oven to 170C (325F or gas mark 3). Heat the olive oil in a large flame-proof casserole dish over medium-high. Season your shanks with salt and pepper. Depending on how big your casserole dish is, cook your lamb shanks if batches if needed, for 5 minutes or until browned all over. Transfer to a plate and repeat with the remaining shanks. Set aside.
  2. Add the garlic and sauté until golden and fragrant, about 30 seconds, and then add in the onions. Cook, stirring, for 5 minutes or until the onions soften. Return the lamb shanks to the dish and pour over the red wine, deglazing the brown residue at the bottom of the pan for extra flavour. Bring to a boil, cooking for 4-5 minutes, or until wine reduces by half.
  3. Remove from heat and add the canned tomatoes and rosemary sprigs to the dish, seasoning with salt and pepper. Transfer to the oven and bake, covered, for 1 & 1/2 hours or until lamb is almost falling off the bone.
  4. Serve the lamb shanks on a generous bed of rosemary & roasted garlic chunky mashed potatoes and some pan-fried baby asparagus. Enjoy!

Red Wine & Rosemary Braised Lamb Shanks

Red Wine & Rosemary Braised Lamb Shanks

BON APPÉTIT

– Ally xx

myTaste.com

Garlic & Rosemary Pizza

Garlic & Rosemary Pizza

Hello Everyone! Sorry for the lack of updates on the blog! I did say in the last post or so perhaps that I’d be travelling during this time and that I was unsure of whether I’d have, not so much the time, but more the internet connection to be able to post updates for you guys – and that’s exactly what happened! The first week of my trip I was staying in Sta. Maria Bulacan where my grandmother is currently residing has no wi-fi connection. I am now in Lucena at my cousin’s place with internet!

Garlic & Rosemary Pizza Ingredients

3 pizzas down and just 1 more to go after this recipe. I prepared this post and the next even before I left for holidays, but as I said, I didn’t have the connection. Today I have a very simple pizza recipe for you. The first time I had this pizza was back home in Brunei at a restaurant called Fratini’s. I was with my Mom and two younger sisters at that time for a 50% off dinner promotion during the month of fasting for Muslims known as Ramadhan. If I’m not mistaken (since I am talking about several years ago), we ordered their winning dish Linguine Fratini which was quite a hefty dish, but sharing that between 4 people was not enough; just. So we decided that we wanted to order a pizza too, to share, but nothing to hefty as the pasta dish. So the waiter/waitress at the time recommended the garlic and rosemary pizza, which we ended up ordering at the end. When it came to the table, I was actually quite shocked. “Where’s the sauce?” I asked myself. Everything that I knew about what pizza was meant to be, stuffed crust, tomato sauce, and cheesy goodness, all gone. But when I had a slice of that pizza, I was in heaven. It was like garlic bread, but in pizza form. It was delicious that I didn’t even want to share the pizza with anyone else!

My pizza came out a little too tan for my liking, and didn’t really have the same flavour I experienced back then. It was nonetheless still tasty, however I think I overdid the salt a wee-bit too much.

Garlic & Rosemary Pizza Ingredients

PREP TIME 10 MINS | COOKING TIME 8-10 MINS | SERVES 3-4

INGREDIENTS

METHOD

  1. Combine all the ingredients to a small bowl and let it sit for about 30 minutes to an hour for the fresh garlic and rosemary leaves to macerate in the olive oil.
  2. Preheat oven to 220C. Place your pizza stone in the oven as well to heat it up.
  3. Roll out your dough to a circle the same size as your pizza stone on a lightly floured surface as thick or thin as you want. Then drizzle the olive oil mixture over the top of the dough.
  4. Carefully remove the stone from the oven and quickly slide the pizza over the top of the stone. Place it back in the oven and bake for about 8-10 minutes or until cooked all the way through. It should not take more than 15 minutes in total.
  5. Remove from the oven and serve with any sort of pasta dish as a side!

Garlic & Rosemary Pizza

Garlic & Rosemary Pizza

BON APPÉTIT

– Ally xx

myTaste.com

Roast Leg of Lamb

Roast Leg of Lamb

Hello Everyone and Happy Australia Day! Or as they say it here in the land down under, Happy ‘Straya Day! It is the official national day of Australia that is celebrated on the 26th of January. It marks the anniversary of the 1788 arrival of the First Fleet of British Ships at Port Jackson, NSW, and raising of the Flag of Great Britain at that site by Governor Arthur Phillip. If there’s anything that I’ve learnt about Australia from living here for the past 4 years is that they really love their lamb. So for this special Monday post, I am bringing to you a classic leg of lamb roast. All you really need are garlic, olive oil, rosemary, and a little salt and pepper – you need not do anything fancy with this leg! These make for a flavourful and tasty leg of lamb.

Roast Leg of Lamb

So this is probably the fourth leg of lamb roast that I’ve made over the years of being in Australia. I was never in the country for Australia Day, except this year of course, so I remember that my previous flatmate and I would always serve one up during our annual Easter dinner. A simple roast with simple and humble ingredients to flavour it up; all you really need is some patience with it as it does require some time in the oven. But you can always do something else with your time rather than sit and watch it cook. Just remember to check on it every hour incase it starts to tan a bit too much.

Roast Leg of Lamb Ingredients

PREP TIME 10 MINS | COOKING TIME 2 HOURS 30 MINS | SERVES 8-10

INGREDIENTS

  • 2.5kg leg of lamb, washed and pat dried
  • 5 garlic cloves, crushed
  • 1 large sprig of rosemary
  • Garlic infused olive oil
  • Salt and pepper

METHOD

  1. Preheat oven to 200C. Line a deep baking tray with foil and place a wire rack above it.
  2. Place the leg on the rack and rub with salt, pepper, and olive oil. Make small incisions throughout the leg and insert garlic pieces and rosemary in each. Chop up any remaining garlic pieces and sprinkle over the top of the leg.
  3. Place in the oven and let it roast for about 2 to 2 and a half hours. Once done, transfer the leg to a deep dish (I used my rectangular pyrex) cover the leg with foil and let it rest for about 10 to 15 minutes. While the lamb is resting, pour the pan juices into a small saucepan and let it simmer away. This is totally optional by the way! Once simmering, add about half a cup of white wine and bring back to a simmer. Then add in about a teaspoon of flour and mixture until the juices start to thicken. Serve with the leg of lamb!

Roast Leg of Lamb

Roast Leg of Lamb

The rest is up to you! You can have it with some steamed rice or mashed potatoes. Whatever tickles your fancy. If you have any leftovers, get creative and whip up another stellar dish – like perhaps my lamb ragù which will be up on the blog on Thursday!

Once again, happy Australia Day to all my fellow Aussie friends!

Roast Leg of Lamb

BON APPÉTIT

– Ally xx

myTaste.com

Eggciting Herb Garden

Eggciting Herb Garden

“I was wondering why you have a carton of eggs on the ground!” said a fellow housemate while I was out back in the yard with a camera around my neck ready to photograph the above. I shall explain in detail below:

Hello everyone! Today I want to share with you a project (or part of a project I might say) that I have been working on as part of my Introduction to Ceramics course at uni. I said ‘part of a project’ only because it is actually one of the processes that my tutor demonstrated and talked about in one of our tutorials – and that process is called Slipcasting.

Slipcasting is basically a mass-production technique used in pottery especially for shapes that are not easily made on the wheel. Liquid clay (known as slip) is poured into a plaster mould and then removed one the clay is set solid. For a hollow piece, the liquid is poured out of the mould once the plaster has absorbed most of the liquid from the outer layer of the clay.

Our tutor also showed us how we can dip porous objects into slip. She demonstrated by dipping a sponge into the slip, had it fired and the result was just amazing. Basically what happens is that when the slipped object goes into the kiln at mid-fire glaze, the object burns out from the high temperatures and leaves the outer shell of the object. So you can imagine how a sponge turned out, it was so fragile and aesthetically beautiful as well.

So that’s what I did here, I completely submerged an egg carton in slip and let it to dry. I then did another coat of slip because the first layer started to crack while it was drying. I had the carton fired and it came out looking really great! I then applied layers and layers of oxide glazes (cobalt, chrome and china blue) and dipped the whole carton in a clear glaze. It was then fired again and this was the result:

Eggciting Herb Garden

I got the initial idea of slipcasting an egg carton through images I saw online while searching for inspiration for the first project for my ceramics course (which is ‘botanica’, basically nature-inspired). I saw images of egg cartons being used as planters, as well as pot holders for eggshell pots. So decided, why not make a permanent egg carton holder?

Eggciting Herb Garden

As you can see from the image above, the eggs don’t quite nicely sit in the hole. This is because when objects get fired in the kiln they tend to shrink a bit (and I’m guessing the two layers of slip ate a bit of space too). So my extra large eggs that I originally had saved could not fit at all, I had to buy new eggs that were smaller in size just so they could kind-of fit.

Eggciting Herb Garden

Hope you enjoyed reading and viewing this post. Please stayed tuned as well for when I actually finish making what I am supposed to make for my Botanica project. I will be making a set of plates inspired by water lilies and lily pads! The second project for this course is to make a vessel and I was thinking of stemming from project 1 and creating a centrepiece to tie the whole project together. So yes, look out for that in the next month and a half!

– Ally xx

Beetroot Gnocchi

Beetroot Gnocchi

Yesterday (30th April) was the 10-year anniversary of the iconic and always quotable click flick Mean Girls. I cannot even begin my obsession over this movie (okay, I’m not that obsessed, I just love it so much that I can quote it all day long). Leading up to this day, I planned a Mean Girls themed party and since its anniversary fell on a Wednesday, we had to bring in a pink dish to share, and of course wear pink as to quote Karen Smith, “On Wednesdays we wear pink”. If you want to skip ahead to the recipe, scroll down, otherwise enjoy reading about my DIY Mean Girls shirt:

Mean Girls Day: DIY Shirts

I was initially going to buy a shirt off eBay but it was a bit too expensive – well that was one of the reasons, the other reasons were the font not being right, not the right shade of pink, etc. Yes, the designer in me kicked in. And then I thought, yeah I’m a designer, why not I just make my own t-shirt? And so I did! I bought a pink tank top from Esprit and can I just say what a snatch! Originally priced at $14.95 and was down to $7.95 – and then a further 50% off from that price! With the help of my lovely friend Tara who does textiles as one of her majors for her degree, she taught me how to screen print using the photo-emulsion technique. Yeap, making my own screen printed shirt was the way to go, literally costed me less than $5 but a bit of time and effort. At least it was something that I am happy with and it turned out so great! “YOU CAN’T SIT WITH US!”

Mean Girls Day: DIY Shirts


So for the pink dish that I made to share with everyone, I made Beetroot Gnocchi. I’ve never made gnocchi before so I was a bit nervous as I didn’t want to screw up and have nothing for my guests to eat, but as always, beginner’s luck was on my side once again. They turned out really well and I would like to say that they taste really good (and I’m sure they do), I’m just not a very big fan of beetroot. It’s just something about the taste of it that I can’t really put my finger on. But as I said, I’m sure they would be so fetch for beetroot lovers.

Beetroot Gnocchi

PREP TIME 30 MINS | COOKING TIME 30 MINS SERVES 5-6

INGREDIENTS

For the beetroot purée

  • 1 bunch beetroot, cleaned and scrubbed (if the greens are still attached, cut them off, wash them, and reserve them for another use such as for salads)
  • Extra virgin olive oil
  • 2 sprigs rosemary

For the beetroot gnocchi dough

  • 3/4 cup roasted beetroot purée
  • 2 cups plain flour, divided
  • 1 cup ricotta cheese
  • 3/4 cup grated parmesan cheese
  • 1 large egg
  • 1 tsp salt
  • 1/2 tsp black pepper

To garnish

  • Juice and zest of one lemon
  • Rosemary sprigs

METHOD

  1. Preheat the oven to 250C. Place the beets in a large piece of aluminium foil. Coat the beets with the olive oil and sprinkle rosemary leaves over. Feel free to use plenty of olive oil as we will then use the beet-infused oil to dress the gnocchi. Fold the foil over and crimp the sides closed. This helps keep the beets moist, and also contains all the juices. Place in the oven and roast until tender. Smaller beets take about 25 minutes while larger and older beets can take up to an hour. You can check its tenderness by piercing a fork through them. Once done, remove the beets from the oven and set aside so that it is cool enough to handle. Once cool, you can use your fingers to to rub off the their peels. Transfer the beet-infused oil into a small bowl and reserve for later.
  2. Cut the beets into chunks and place them into a blender. Blend until smooth. Take 3/4 cup of the beet purée and place it into a medium bowl. If you have any extra puréed beets, place them into a container and refrigerate. You can use them for other dishes. Stir in the ricotta and parmesan cheese, eggs, salt, and pepper. Then mix in 1 & 1/2 cups of flour (the dough can be made a day ahead, just keep it refridgerated).
  3. Place the remaining 1/2 cup of flour in a bowl. Lightly dust a baking sheet with flour. Scoop the dough into rounds and transfer to the bowl with flour. Then with the tinges of a fork, press down into the dough and then transfer to baking sheet.
  4. Working in batches, cook the gnocchi in a large pot of simmering salted water. Cook for about 2 minutes or until when the gnocchi starts to float to the surface. Cook the gnocchi for a further 1 & 1/2 minutes longer. Then, using a slotted spoon, transfer gnocchi to a serving dish. Drizzle with the beet-infused oil and top with lemon zest, a few squeezes of lemon juice and fresh rosemary leaves.

Beetroot Gnocchi

Beetroot Gnocchi

BON APPÉTIT

– Ally xx

myTaste.com