Hello Everyone! Not only is it another Review Sunday but it is also my 100th post on the blog! 10 months ago I started this blog out of pure procrastination. Basically I was bored over the Easter break and was in no mood to tackle the many assignments that I had at the time for uni. Thus this blog was born. I have long been interested in food even way before 10 months ago, and was encouraged by many to start up a blog. I can say now that what was once just hobby, I have now grown to put much more effort into each dish that I prepare and into each blog post that goes up 3 times a week. I don’t want to say that blogging is now my ‘job’ as it sounds a little bit like ‘I have to do it’ kind of thing. It’s not about me having to do a blog post for everyone out there, but it is more like I do it because I want to do it – if that makes any sense? Anyway, I am just super happy about how well I have been doing with my blog and I have some exciting new changes coming up in the next few months. I am also looking to building up my followers both on wordpress and other social media platforms such as Facebook and Instagram, so if any of you guys out there have any tips on how to do this, your help/knowledge will be much appreciated!

Now on to today’s post – Sadhana Kitchen! I first came to know about this little gem through posts on Instagram from various food bloggers. What attracted me to their menu was that the food they served was always so colourful through the uploads I came across while browsing through my newsfeed. The great thing about Sadhana Kitchen, even though it does not really matter in my case, is that they are gluten-free, organic, raw, and vegan – Sydney’s first organic wholefoods and raw foods café. Now, when I made mention that it does not really matter to me, I meant that I am not gluten intolerant, nor am I a vegan, but I was quite intrigued as to what kind of foods do those with dietary requirements eat since I am a person who can eat almost anything and everything. I often find myself saying how I’d never go vegetarian or vegan because I love meat too much to give it up but after paying a visit to Sadhana Kitchen, I have a whole new appreciation for healthy, organic, and raw superfoods. Though I don’t think that I will ever find myself converting, maybe not right now that is. I can’t say what will happen in the future, maybe tomorrow I will wake up and suddenly transform into a ‘crazy vegan lady’ as one of the waitresses mentioned about her obsession over veganism.
I’ve been here a total of two times, both with friends whom I know to have an appreciation for healthy foods but not necessarily vegans themselves. I thought that they’d be the perfect company for a nice weekend lunch. What was funny though was that one of my friends that I went with (she who shall not be named, but you know who you are), actually asked the lady at the counter if they put any ice cream in their smoothies – I mean, even after my other friend and I explained to her that they would definitely not put ice cream in their smoothies since its all about the vegan. The lady gave her a sort of weirded out look and said that they only use frozen fruits in their smoothies. Though I felt bad, I could not stop laughing on the inside.
This place I feel could do with a lot more seating space. Both times that I’ve been, and not even on the hour when normal people have their breakfast and/or lunch, like I’m talking 2 o’clock in the afternoon, it’s always packed. The first time we visited we were lucky enough to snag the only table left, but the second time around we weren’t so lucky. We waited about 20 minutes before we could run and grab a table, and after we did the place started empty out slowly.
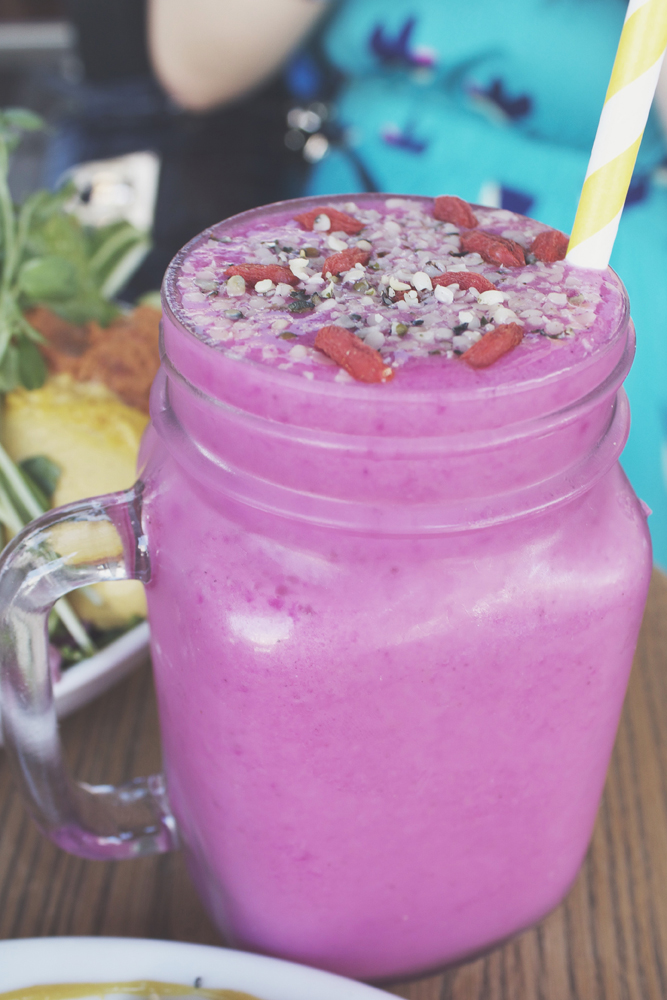 FRAPPES: PITAYA PUNCH
Pitaya (dragon fruit), strawberries, banana, and orange ($9.50)
I love dragon fruit, but even though this is called a ‘pitaya’ smoothie, the banana taste came across more predominantly. A refreshing smoothie nonetheless and had a very vibrant colour to it which made it even more appealing to the eye.
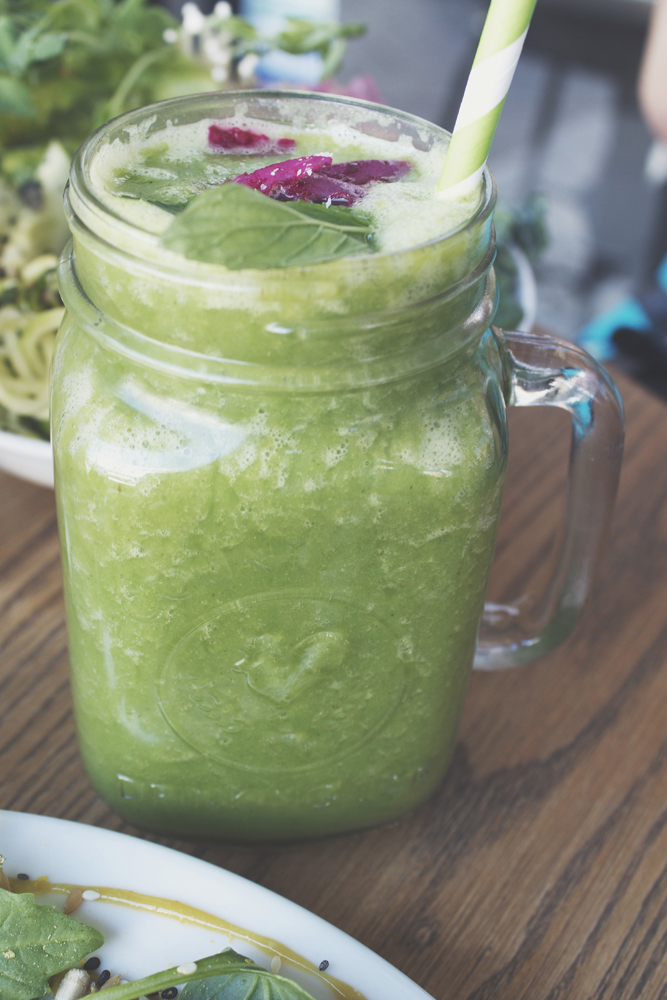
GREEN SMOOTHIES: COOL MINT
Seasonal greens, orange, mango, and flax seeds. Vitamin, mineral, and fibre booster with omega-3 fatty acids ($9.50)
Though I wasn’t quite sure about what greens were added to the smoothie (but I’m guessing either kale, spinach, or even both), the mint flavour really came through. Again, refreshing for a warm summer day.
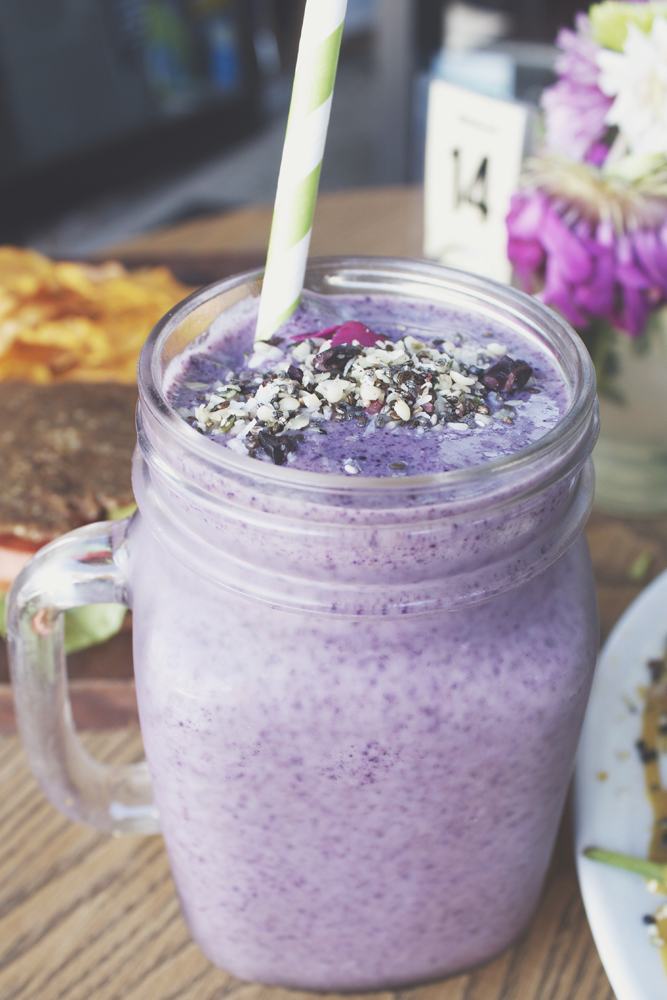 SUPERFOOD SMOOTHIES: WARRIOR SMOOTHIE
Blueberries, raspberries, banana, sprouted brown rice protein powder, chia seeds, coconut oil, mesquite, and almonds. Packed with muscle building cholesterol free protein, omega-3 for brain function, and calcium & manganese for healthy bones ($9.50)
The epic of smoothies! Very thick though so it was a bit difficult to drink from the straw.

RAW SANDWICHES: BLAT
Sadhana coconut bacon, lettuce, avocado, tomato, coriander and house-made mayo, in between two sliced of onion bread ($14.50)
What intrigued me about this dish was the ‘coconut bacon’ which basically was just coconut that was made to look like bacon and even had the texture of bacon. I’m not sure about whether it’s an innovative way of thinking from Sadhana Kitchen, as in if it’s actually already a thing that someone else came up with, but definitely creative idea!

SADHANA LASAGNE
Layers of zucchini pasta, cultured cashew cheeze, basil pesto, walnut mince, wilted spinach, and chunky tomato sauce ($15.50)
This was the dish that I had the first time I came around to visiting Sadhana Kitchen. Don’t be fooled by the size of it on the dish, it actually filled me up good! Loved the flavours of the dish and that walnut mince really looked like meat mince that you’d find in your traditional lasagne.

CARROT AND WALNUT FALAFEL PLATE
Carrot and walnut falafels served with seasonal greens, pickles, olives, zucchini hummus, and beet dip ($16.50)
This was the other dish that I had the second time around. I initially wanted to order their Prana Pad Thai which had kelp and zucchini noodles, but they unfortunately ran out. I had no regrets though because this dish did not only look pretty on the plate and appealing to the eye, it had great flavour and was also surprisingly filling (just not a filling as the lasagne of course). The ‘falafels’ had a nice crunch to them as well as a roasted flavour. The dips complimented them nicely and the salad on the side really enhanced the flavours that it needed to bring it to the next level of flavour satisfaction.

SADHANA SUPER BOWL
Shredded kale, house-made sauerkraut, cherry tomato, cucumber, and pesto zoodles served with Brazil nut cheddar, sundried tomato, and smoked paprika hummus ($17.50)
I’m not quite sure as to how this dish tasted, only because this wasn’t my dish to consume. I had a taste of the zoodles (zucchini noodle) but that was basically it. To me, this dish looked like a bowl of vegetables – that’s it really, though my friend did find it quite satisfying.


SNICKERS CHEEZECAKE
Cashews, almonds, walnuts, desiccated coconut, coconut oil, coconut sugar, vanilla, dates, sesame, and salt ($12.50)
This cheezecake was made with layers of nougat creme, milk chocolate, and chocolate ganache topped with caramelised nut clusters. Probably my favourite from the two of the cakes we had. The flavour really came through as it almost tasted like a traditional snickers bar – when I say traditional, I mean it in a way that it doesn’t taste like the vegan alternative.

WHITE CHOCOLATE & SALTED CARAMEL BANOFFEE PIE
Cashews, desiccated coconut, coconut oil, stevia, cacao butter, sesame, vanilla, dates, maca, mesquite, and lucuma salt ($12.50)
This banoffee pie was made of layers of banana creme, salted caramel creme, and white chocolate creme on a walnut & coconut biscuit base. The name itself was already enough for me to be sold on ordering it, but I must say that that was probably the only good thing about it, the name. I don’t know what it was, but the cake didn’t quite tickle my fancy. I think it was the taste of it? Like the banana tasted a bit off, not that they used a bad banana, but it was more like you know it’s supposed to be banana, but it doesn’t taste like banana kind of thing. It was also the cake that was ignored for a while on the table when we dug into our desserts.

SALTED CARAMEL SUNDAE COCOWHIP
Twisted SK coconut cocowhip, topped with half a caramel slice, cacao nibs, himalayan pink salt, and house made superfood caramel sauce ($13.00)
The second time we came around to visiting Sadhana Kitchen, it was all about the cocowhip hype. To be honest, it was alright. Loved the added toppings, but I felt like the cocowhip was a little bit too soft. By the time we dug in and had about 2-3 spoons each, it was almost like soup, and it wasn’t even a particularly hot day as well for it to melt so fast!
Before I end, here are a few things that you might want to know about organic/raw foods, and veganism:
- Veganism is the practice of abstaining from the use of animal products and by-products, particularly in diet.
- Foods that are prepared and processed without exceeding 40°C are known to be raw. This way of preparation allows the food’s natural enzymes to stay intact, which in return gives your body the most benefit and easy digestion.
- The best place to start improving your health is by improving what you eat. This is the main reason why Sadhana Kitchen insist on using only pure, organic seasonal produce that is free from harmful toxins to create delicious dishes.
Overall, I would definitely recommend this place for those who are fans of organic and raw foods, and of course those who are all about the vegan. I would also recommend this for those who are experimenting with food and are open to broadening their palettes. Like I said, I would probably never go vegan myself, but having experienced the foods has really made me appreciate how else it can be prepared and still be as filling and delicious as what I am used to eating. The food is a definite 8.5 out of 10 for me. Their main menu was the stand out, but their dessert disappointed a bit, even though I was even more excited for their dessert menu. Service was good, and the ambience could be a bit better. Value for money is variable, I don’t know about spending $12.50 for a slice of cake. I definitely hope to visit again soon as I am curious to know what the vegan substitute for their ‘eggs benny’ is and their prana pad thai with kelp and zucchini noodles looks too good to pass up! *drooling*

Sadhana Kitchen
147 Enmore Road
Enmore, New South Wales
Australia, 2042
– Ally xx