Avocado & Shiitake Rice Paper Rolls

Avocado & Shiitake Rice Paper Rolls

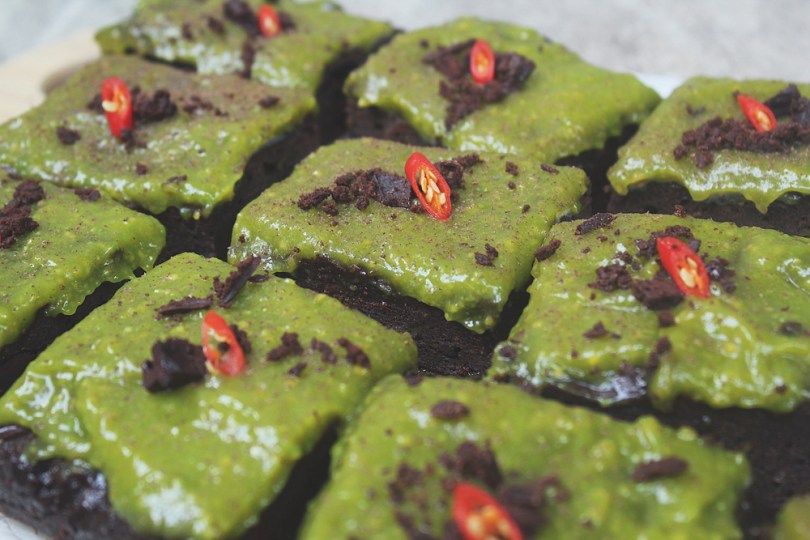
Hello Everyone! I feel like keeping this short one tonight – only because I really don’t have much to say about the dish itself, nor do I have a back story like I did last week about it. Yet again, I have to say that this isn’t one of the prettiest dishes I’ve put up – to be honest, I didn’t really put much thought in how I could have presented this dish. I really had to up the saturation when editing the photographs because it just looked so dead in terms of colour, and of course, composition.

Avocado & Shiitake Rice Paper Rolls

Despite that, this is an easy to make and perfectly healthy snack if you only plan on eating 1 roll, a light dinner if eating 2, and a hefty lunch if you’re planning on eating 4 or more of these! Don’t be deceived like I was – I thought 3 rolls wasn’t going to fill me up for dinner – how wrong I was! I was already struggling towards the end of my second roll!

They’re perfect for a delectable spring or summer dish, with crispy, crunchy, creamy textures and bright, bold flavours. I mean, despite the rain we’ve been having lately, we’ve also seen some beautiful sunny days. Before we head on over to the recipe for tonight, please do check out the original recipe that I adapted from Kristina on Spabettie.

Avocado & Shiitake Rice Paper Rolls Ingredients

PREP TIME 20 MINS | COOKING TIME 10 MINS | MAKES 12 ROLLS

INGREDIENTS

For the rice paper rolls

  • Half pack (125g) cooked rice noodles, drizzled with sesame oil
  • 12 rice paper wrappers
  • 12 large dried shiitake mushroom slices, rehydrated
  • 1 large ripe avocados, peeled, pitted, and sliced
  • 1 small red bell pepper, sliced into matchsticks and blanched
  • 1/4 cup roasted peanuts, roughly chopped
  • Bunch of spring onion, cut into matchsticks and blanched

For the spicy peanut sauce (Recipe adapted from Food in a Minute)

  • 1 small garlic clove, finely minced
  • 1/2 small red onion, finely minced
  • 1/2 cup creamy peanut butter
  • 1/2 cup water
  • 1/4 cup roasted peanuts, roughly chopped
  • 2 tsp chilli powder

METHOD

  1. Spicy Peanut Sauce: Heat a dash of cooking oil (about a tablespoon) in a small saucepan. On low heat, add the minced garlic and sauté until golden in colour and fragrant, about 30 seconds. Then, add the minced onion to the pan and cook for a further 30 to 45 seconds, until slightly softened. Be careful as to not brown/burn the garlic.
  2. Add the peanut butter, roasted peanuts, chilli powder, and water to the pan and stir until smooth. Remove from the heat and set aside.
  3. Rice Paper Rolls: Have two large plates ready, one filled with water and the other for filling/rolling your rice paper rolls. Ensure all your ingredient fillings are also prepared and ready for rolling!
  4. Place a wrapper into the plate with water, flipping so that both sides of the wrapper is soaked. Remove from the water while still firm and place on the other plate and begin to build up your roll.

Tip: Do not over soak the rice paper sheet as it will soften as it sits. This is so that it will not soften to the point that it sticks to the surface of the plate or rips when handling.

Avocado & Shiitake Rice Paper Rolls

  1. Place 2-3 slices of avocado and red bell pepper matchsticks in the middle of the rice paper, with 1-2 slices of shiitake mushroom (depending on its size), and a handful of sesame rice noodles. Top with a tablespoon of the spicy peanut sauce, pinch of crushed roasted peanuts, and a spring onion matchstick.
  2. Roll like a burrito by folding the short sides over, then turning and folding one long side over. Roll, tuck, roll, tuck, until completely enclosed. Repeat for the remaining rice paper sheets – should make at least 12 rolls.
  3. Serve immediately with a side of spicy peanut sauce for dipping. Enjoy!

Avocado & Shiitake Rice Paper Rolls

BON APPÉTIT

– Ally xx

myTaste.com

Advertisement
Fudgy Avocado-Chilli Brownies

Fudgy Avocado-Chilli Brownies

Hello Everyone! Firstly, apologies for not getting this post up last week as originally planned. It has been a crazy hectic week with early days and late nights in the office – even working the weekends ‘til late to meet deadlines for an event that our department/team organised on this day just last week. So because of that, I barely had any time to sit down and comfortably write this post with a stress-free state of mind. Having said that, here I am, back on track again to share a deliciously (healthy?) dessert that’s sure to knock your socks off!

The first time I experienced a Chilli-Chocolate flavour combination was when I was still studying in Sydney for my Bachelor’s of Design Degree. I remember I was at Circular Quay with a friend, and one of the gelato stalls there (can’t remember the name) was having a chocolate gelato fest! I clearly remember the difficulty I had in choosing a chocolate flavour out of the possible 10 or 15 they had available. For those of you who don’t know me, I like my chocolate like how I like my men – dark. Just kidding – I just wanted to say that. I have no particular preferences on skin colour or race when it comes to men. Tangent aside; I’m just not very fond of milk or white chocolate unless I really REALLY crave for it. Well technically I’m not very fond of chocolate altogether unless I really want something chocolatey for dessert.

Fudgy Avocado-Chilli Brownies

Finally getting back to the original story, I remember having doubts on choosing just a regular Dark Chocolate Gelato, or one called Death by Chocolate which was essentially the Dark Chocolate Gelato, but with chilli in it. Me being adventurous to a certain extent (hey we all gotta draw a line somewhere!), I decided to go for the Death by Chocolate since never had I ever, up until that moment of course, tried the pairing of chilli and chocolate before. Boom. My life changed. It was a magical moment. The subtle yet just enough kick of heat that played on my tongue together with the cold creamy gelato that was slightly sweet and slightly bitter at the same time was to die for. It truly did live up to its name – Death by Chocolate. Ever since then, Chilli and Chocolate became my new best friends.

So what about Chocolate and Avocado? How did they also become my new best friends? Well, a couple of years back, when I was still studying abroad, I was out having a weekend (or maybe it was a weekday during the winter holidays) brunch with some of the people/friends I lived with. We went to a place known as Rustic Pearl in Surry Hills. When we were ordering our drinks to start off with, I was super curious about their Chocomolé Smoothie – Chocolate and Guacamole I presumed from its name after reading “with avocado and cocoa.” As usual, I was being my adventurous self and decided to try this foreign-to-me flavour pairing of Avocado and Chocolate. Did it change my life? Why yes. Yes it did. I still can’t quite describe the sensation nor taste of the pairing, but I absolutely love it.

Fudgy Avocado-Chilli Brownies

Therefore, Avocado, Dark Chocolate, and Chilli? Explosive. Every time I want to be adventurous and try something new when it came to gelato flavours, I always say to myself, “no, you need Avocado and Dark Chocolate-Chilli Gelato.” I had been craving brownies for the longest time ever, and this was the perfect opportunity to whip them up and feature them on the blog since it fit with the theme I made it fit with the theme by incorporating avocados into them. These brownies are dense, thick, fudgy, and rich. The frosting though compliments the richness perfectly since it is light in flavour. Yes the frosting tastes like avocado, and no, the brownies do not even if they have avocado mixed into them.

Anyway, apologies for the super long introduction – hope it made up for not posting last week *cheeky grin* but before we pop on over to the recipe below, please do check out the original recipe by Jessica over on How Sweet Eats.

Fudgy Avocado-Chilli Brownies Ingredients

PREP TIME 15 MINS | COOKING TIME 30 MINS | MAKES 12 BROWNIES

INGREDIENTS

For the brownie batter

  • 2 large ripe avocados, peeled, pitted, and mashed
  • 2 large free-range eggs
  • 1-2 red bird’s eye chillies, minced
  • 200g high-quality dark chocolate, melted
  • 50g high-quality dark chocolate, roughly chopped
  • 3/4 cup all-purpose/plain flour
  • 1/2 cup white granulated sugar
  • 1/4 cup unsweetened cocoa powder
  • 3 tbsp extra virgin olive oil
  • 1 tsp vanilla extract
  • 1/2 tsp baking powder
  • 1/4 tsp salt

For to avocado frosting

  • 1 large ripe avocado, peeled, pitted, and mashed
  • 2 & 1/2 cups confectioiner’s sugar
  • 1/4 tsp vanilla extract

METHOD

  1. Preheat oven to 180C (350F or gas mark 4), and generously grease a 9in x 13in baking dish with unsalted butter or non-stick cooking spray.
  2. Fudgy Brownies: Whisk the mashed avocados, melted chocolate, and minced chillies in a large mixing bowl before adding in the white granulated sugar. Whisk again until well combined. Add in the eggs, together with the vanilla extract and mix well.
  3. Sift in the plain flour, cocoa powder, baking powder, and salt into the avocado-chocolate mixture. Mix with a large spoon until JUST combined – be careful as to not overmix the batter.
  4. Stir in the extra virgin olive oil until it is well distributed into the batter and is somewhat smooth in consistency. Gently fold in the chopped chocolate, and then spread onto the prepared baking dish.
  5. Bake for 28-32 minutes, or until the middle has set. You can check this by inserting a toothpick into the centre. If it comes out clean, then the brownies are done. Remove from the oven and set aside for it to completely cool down.
  6. Avocado Frosting: Add the mashed avocado and vanilla extract into a medium-sized mixing bowl. Whisk until combined. Slowly incorporate the confectioner’s sugar into the avocado mixture and whisk until a smooth frosting forms.
  7. Frost the brownies once they have cooled down and top with extra chopped chocolate bits and chilli slices for an added extra kick of heat. Serve and enjoy immediately!

Fudgy Avocado-Chilli Brownies

Tip: If you’re going to pop them in the fridge to eat the next day, and the succeeding days to come, I recommend letting them come back up to room temperature before eating them. They can be even denser and slightly dry after coming out of the fridge.

Fudgy Avocado-Chilli Brownies

BON APPÉTIT

– Ally xx

myTaste.com

Auguest 2018: Brendon D'Souza

Easy Avo Toasts

Hi Foodies! My name is Brendon D’Souza and I run the Sydney Food and Lifestyle Blog known as Brendon The Smiling Chef. I’m so honoured to be guest-posting here at AMCarmen’s Kitchen once again for the third time since Ally started her Auguest series.

In between running a busy collaborative workspace in the heart of Sydney, and a number of side hustles, I love developing fresh and tasty recipes that you will love to cook. Think comforting winter roasts, colourful salads, decadent desserts and much more!

Easy Avo Toasts

Sydney will forever be known as the home of over-glorified Avocado Toast for breakfast (or “brekkie” as we like to call it), and you will always find a variation of this simple recipe at any cafe or restaurant.

Treat your friends to a gorgeous breakfast feast that’s actually super easy to prepare. This is a great recipe for children to make too!

Easy Avo Toasts

PREP TIME 5 MINS | COOKING TIME — MINS | SERVES 1

INGREDIENTS

  • 2 slices multigrain bread
  • 1 large ripe avocado
  • 2 tsp olive oil

METHOD

  1. Toast the bread to your liking.
  2. Carefully peel the avocado and remove the stone.
  3. Use a spoon to scoop out the flesh and slice.
  4. Drizzle the toast with olive oil and top with the sliced avocado and season with a touch of salt and pepper. Serve and enjoy!

Brendon’s Tips

  • Jazz up your Avo Toast with a selection of your favourite ingredients.
  • Try smoked salmon, crispy bacon, fried eggs, rocket, feta, sliced cucumber, cherry tomatoes, roast beetroot or even fresh berries.

Easy Avo Toasts

Easy Avo Toasts

Check out my Instagram @brendonthesmilingchef to keep up do date with all my adventures.

Photo Courtesy & Recipe Copyright © 2018 | brendonthesmilingchef

Happy cooking and keep smiling,

– Brendon (Brendon The Smiling Chef)

myTaste.com

Golden Turmeric Chai Smoothie Bowl

Golden Turmeric Chai Smoothie Bowl

Hello Everyone! It’s been a quiet and boring week to be honest, and I having a serious holiday withdrawal syndrome. I miss the lush greenery of Temburong, crystal clear waters, physical activities, and the sun piercing through your skin – giving you a tan that you’re proud to wear for the next couple of months because it reminds you of the fun times you had. But in all honesty, I just miss going on weekly adventures; a new hike trail every weekend to rejuvenate from the work week. It doesn’t even need to be a holiday, just a 2-day weekend where one of them can be spent going out and exploring, and the other to do chores, cook up a storm for Amcarmen’s Kitchen, and basically recover from the working week. Back in Australia, this was easy to do because there were plenty of trails to explore. Here in Brunei, not so much – and not much of great views too, and the fact that I only have a 1-day weekend.

All that aside, I have a bit of a unique smoothie bowl to share with you guys tonight; and I say unique because I’ve never thought of using these flavours (and spices) in a smoothie before. I mean, besides using spicy chai tea leaves and cinnamon in my Spicy Chai & Banana Cinnamon Smoothie from a while back, that’s pretty much the extent of me using spices in my smoothies.

The link to the original recipe can be found over on My Life Cookbook by Denise. She drew inspiration from ‘Golden Milk’ which, for those of you who don’t know, is basically a combination of turmeric, coconut milk (or oil), and black pepper. This Golden Turmeric Chai Smoothie Bowl is an aromatic, flavour-popping combination of golden milk and chai tea – perfect for an immune system boost if you’re feeling a bit under the weather, but also a quick, easy, and healthy breakfast to go!

Golden Turmeric Chai Smoothie Bowl Ingredients

PREP TIME 5 MINS | COOKING TIME  | SERVES 1

INGREDIENTS

For the smoothie mixture

  • 1 cup coconut milk
  • 2 large bananas
  • 1-2 tbsp honey
  • 2 tsp fresh ginger, grated
  • 1 tsp cinnamon powder
  • 1 tsp turmeric powder
  • 1/2 tsp black pepper, ground
  • 1/2 tsp cardamon, ground
  • 1/2 tsp nutmeg, grated

Toppings

  • Chia Seeds – contains omega-3 fatty acids, fibre, antioxidants, iron, and calcium
  • Goji Berries – excellent source of antioxidants and nutrients that help boost the immune system and protect the body from high levels of inflammation
  • Raspberriesgood source of vitamin C, E, K, manganese, dietary fibre, copper pantothenic acid, biotin, magnesium, folate, omega-3 fatty acids, and potassium
  • Desiccated Coconut

METHOD

  1. Blend the bananas, coconut milk, honey, ginger, and spices altogether until smooth.
  2. Transfer to a bowl and top with the raspberries, chia seeds, goji berries, and desiccated coconut. Enjoy for breakfast or an immune-boosting afternoon snack!

Golden Turmeric Chai Smoothie Bowl

BON APPÉTIT

– Ally xx

myTaste.com

Breakfast Muffins: Avocado & Blueberry

Breakfast Muffins: Avocado & Blueberry

Hello Everyone! I hope you guys had a good Easter weekend! Even though we don’t get a long Easter weekend here in Brunei, I did still manage to enjoy my Easter Sunday day off. I can’t believe that there’s only less than 2 weeks of April left and that May is just around the corner! Time sure flies by when you’re (not) having fun at work. Haha! I know I’ve mentioned this in previous posts about how everything is just becoming routinely for me and it’s actually becoming quite depressing. I’m in need for a little excitement in my life. I think my thoughts have been heard because I’m flying off tomorrow night for a little staycation in the Philippines! The company I’m working at is sending me and three other colleagues to the Philippines for a little work/play adventure, attending events and meetings on behalf of the company, and of course what’s a trip to the Philippines without a little summer fun in the sun? I mean, it’s pretty much our tagline – It’s More Fun In The Philippines!

Breakfast Muffins: Avocado & Blueberry

On this note, I definitely won’t be uploading a post next week because I’ll be away from Thursday to Monday night. Since my Sunday, and the public holiday on Monday is taken up for this trip, I won’t have my dish prepared for a post. So this will be my last Avocado recipe for the month of April that I will be sharing with you guys! In fact, after I’ve posted this, I’ve got to get a head start on my packing because I still have to be at the office tomorrow up until 2 hours before my flight – what the heck right? Also, I was only told on Monday that I’d be flying off, and everything was only firmly confirmed yesterday afternoon. As usual, before we dive into tonight’s recipe, please check the original recipe out by Ali from Gimme Some Oven.

Breakfast Muffins: Avocado & Blueberry Ingredients

PREP TIME 15 MINS | COOKING TIME 25-30 MINS | SERVES 16 MUFFINS

INGREDIENTS

For the avocado and blueberry muffins

  • 2 cups plain flour
  • 1 cup plain fat-free yoghurt
  • 1/2 cup white granulated sugar
  • 1 large free range egg
  • 1 punnet (125g) fresh blueberries
  • 1 ripe avocado, halved, peeled, deseeded and roughly chopped
  • 2 tsp baking powder
  • 1 tsp pure vanilla extract
  • 1/2 tsp baking soda
  • 1/2 tsp ground cinnamon (optional)
  • 1/2 tsp salt

For the streusel topping

  • 30g unsalted butter, melted
  • 2 tbsp plain flour
  • 2 tbsp raw sugar
  • 2 tbsp white granulated sugar

METHOD

  1. Preheat oven to 190C (375F or gas mark 5). Line a 12-hole muffin pan with paper cases and set aside. Now since this recipes makes about 16 muffins, you can line another 6-hole muffin pan (if available), or if you only have one muffin pan, then bake in batches if needed.
  2. For the streusel topping, add all the ingredients in a small bowl until combined and crumbly. Set aside.
  3. In a medium-sized bowl, add the plain flour, baking powder, baking soda, salt, and cinnamon (optional) and stir together to combine. Set aside.
  4. In a separate large mixing bowl, add the roughly chopped avocado and using an electric mixer, beat on medium speed until smooth. Add the sugar in and beat until well blended. Follow with the yoghurt and pure vanilla extract, beating again until just combined.
  5. Add half of the flour mixture into the wet ingredients and beat until just combined. Add in the other half of the flour mixture and beat until well combined.
  6. Gently fold the blueberries in using a rubber spatula, then spoon the batter into the muffin cups, filling them about 2/3 of the way. Sprinkle with the streusel topping and place in the oven to bake for 25-30 minutes or until a tooth pick inserted to the centre of a muffin comes out clean.
  7. Set aside to cool in the muffin pan for about 5 minutes before transferring them to a wire rack to cool down completely. Serve for breakfast or afternoon tea and enjoy!

Breakfast Muffins: Avocado & Blueberry

Muffins taste best on the same day, though they may be stored covered tightly at room temperature for 3 days or in the refrigerator for 5 days.

Now, I know I have a couple of friends and colleagues who don’t particularly like the taste of avocado; don’t ask me why because I think that they’re just plain weird for not liking avocado (hehe!), but give them one of these beautiful green muffins and they’ll probably be hooked on it. The avocado flavour in these muffins are not overpowering or predominant, but there is a slight hint of it in each bite you take. These muffins are a classic twist to a classic blueberry muffin and are light, moist, and al the more healthy for you because of the avocado in place of all the other oils you’d otherwise use when making muffins. Top them off with a crumbly streusel to give it an “extra muffin-y sweetness” as Ali says.

Breakfast Muffins: Avocado & Blueberry

BON APPÉTIT

– Ally xx

myTaste.com

No-bake Avocado Lime Cheesecake

No-bake Avocado Lime Cheesecake

Hello Everyone! Today is a very special day, and for two reasons too! Today is special because God so loved the world that he gave his one and only Son, that whoever believes in him shall not perish but have eternal live (John 3:16 ESV). A very Happy Easter to all who celebrate the resurrection of Jesus Christ.

Besides today being Easter Sunday, today is also special because Amcarmen’s Kitchen turns 3! On this day 3 years ago I was sitting in my room, quite possibly still in my pyjamas at that time, blankly starting at my list of assignments to complete before the end of the Easter mid-semester break on my second-last semester of my degree. Knowing that I had so much to do in so little given time, I thought the only right thing to do at that moment was to take a nap and hopefully, magically, all my assignments would have been completed by the time I woke up from my nap… Well, that wasn’t what happened, but instead I decided to spontaneously delve into the world of WordPress, and *poof!* Kitchen Headquarters was born. Yes, Amcarmen’s Kitchen was previously known as Kitchen Headquarters in 2014 for a good year and a half before I did a whole rebranding in mid-2015.

As it has been for the past 2 years, I decided to make, not bake, a cake for Amcarmen’s Kitchen, and basically for my family and I to enjoy on behalf of my blog haha. I decided to try something new, while of course still sticking to the theme of using avocado in all my recipes for the month of April. Before we dive into today’s recipe, please do check the original by Sheilla on Chef Sheilla.

No-bake Avocado Lime Cheesecake Ingredients

PREP TIME 15 MINS | SETTING TIME 2 HOURS | SERVES 8-10

INGREDIENTS

For the avocado lime cheesecake mixture

  • 250g cream cheese, softened
  • 50g unsalted butter, melted
  • 300ml crème fraîche
  • 1 large avocado, mashed
  • 1 sachet (7g) clear gelatin or agar-agar powder
  • 1 cup granulated sugar
  • Juice and zest of 2 limes
  • 1 cup ground digestive cookies
  • 1 lime, for garnishing

METHOD

  1. Combine the ground digestive cookies and melted butter in a medium-sized bowl and mix until moist crumbs form. Press the crumb mixture onto the bottom of a 10″ springform pan that has been lined with parchment paper. Chill in the freezer for about 10 minutes to set.
  2. Take 100ml of the crème fraîche and combine it with the gelatin or agar-agar powder in a small saucepan. Stir for about 2 minutes until all the gelatin granules has dissolved. Turn the heat to medium and bring to a boil, stirring for a few minutes until the gelatin has completely melted. Remove from the heat and strain through a fine sieve. Set aside.
  3. Add the mashed avocado, cream cheese, sugar, the remaining 200ml of crème fraîche, lime juice, and lime zest to a large mixing bowl and using an electric mixer with a paddle attachment, mix everything together until smooth and well-combined. Pour in the gelatin-cream mixture and continue to mix until creamy and smooth in texture.
  4. Pour the avocado lime cheesecake mixture into the prepared springform pan and smoothen the top. Chill in the freezer for at least two hours for it to set.
  5. Release the cheesecake from the springform pan and serve right away! Garnish the top with some lime slices and zest. Enjoy!

No-bake Avocado Lime Cheesecake

The taste: amazing! The flavour of the avocado definitely shone through, and the hint of tangy flavour from the lime made the whole dessert refreshing in taste. The texture… Well let’s just say that it is supposed to be creamy and smooth, mine wasn’t as smooth as it could be. It has nothing to do with the original recipe; I think that I may have slipped up somewhere along the way. The obvious was probably that I was on the verge of over whipping the cheesecake mixture that the fresh cream started forming little clumps – I stopped before it severely over whipped. Also, I probably didn’t add enough gelatin to the cheesecake mixture so it didn’t quite set right. I only added half of the sachet in even though the original said ‘1 sachet’ – in my defense I didn’t know if Sheilla’s 1 sachet was the same quantity-wise as my 1 sachet. Oh well, I’ve adjusted the quantity of the gelatin in this recipe so hopefully the one listed above works!

Before I end tonight’s post, I’d just like to take this opportunity to thank first and foremost, my Mom who taught me how to cook. I also thank my other family members and friends who encouraged me to start up my blog because if it weren’t for them, Amcarmen’s Kitchen wouldn’t be here today, and I probably wouldn’t have continued pursuing my passion for cooking at home. Let’s face it, when I cook, I cook for my blog, and my family just so happens to be around to eat it after haha! Finally, to those who think I am just wasting my time on this, or assume that I work in a restaurant as a waitress because I didn’t actually go to culinary school to be able to work in a commercial/professional kitchen, take your negativity elsewhere. I have a degree in Design and I am working in the country’s leading Advertising Agency as a Creative Design and Events Management Executive, as well as a Copywriter. Thank you very much.

No-bake Avocado Lime Cheesecake

No-bake Avocado Lime Cheesecake

BON APPÉTIT

– Ally xx

myTaste.com

Smashed Avo Toast (9 ways)

Hello Everyone! Finally I am back on track with my posts and the theme for the month of April is Avocado! All you need is about half a medium-sized avocado everyday as it provides 1% of the calcium, 5% of the magnesium, and 10% of the potassium that you need daily. Avocados are a good source of potassium, which can help lower blood pressure, and in addition, the dark green flesh just under an avocado’s brittle skin contains large amounts of disease-fighting compounds. Though avocados are proven to help lower blood pressure and an abundance of health benefits, we have to be weary of how much we intake daily as they are also high in calories.

Tonight, I will be sharing 9 different ways you can start your mornings with a smile on your face with 9 different smashed avocado toasts! Of course, don’t limit yourselves to just these 9 recipes; I encourage you to get creative with your smashed avo toasts and share your creations with me on Instagram using the hashtag #amcarmenskitchen

1. Five Pepper Smoked Salmon with Red Onions, Capers & Chilli Flakes

Five Pepper Smoked Salmon with Red Onions, Capers & Chilli Flakes

PREP TIME <5 MINS | COOKING TIME  | SERVES 2

INGREDIENTS

  • 2 slices multigrain brown bread
  • 1/2 avocado, smashed
  • 1 small red onion, cut into rings
  • 2 tsp capers
  • Smoked salmon slices with five peppers

METHOD

  1. Lightly toast bread in a toaster for about 1-2 minutes.
  2. Spread a generous amount of the smashed avocado onto the toast and top with smoked salmon, red onion rings, and capers. Sprinkle with a touch of chilli flakes for an added kick (optional).
  3. Enjoy!

2. Medley of Grape Tomato Caprese Salad with Balsamic Reduction

Medley of Grape Tomato Caprese Salad with Balsamic Reduction

PREP TIME <5 MINS | COOKING TIME 5 MINS | SERVES 2

INGREDIENTS

  • 2 slices multigrain brown bread
  • 1/2 avocado, smashed
  • 1 punnet (250g) grape tomato medley, halved
  • 4 cherry bocconcini cheese, sliced
  • 4 tbsp balsamic vinegar
  • Ground sea salt and black pepper, to taste
  • Olive Oil
  • Sweet basil leaves

METHOD

  1. Combine the grape tomatoes, bocconcini slices, and sweet basil leaves in a small bowl. Drizzle with olive oil and season with a touch of ground sea salt and black pepper to taste. Set aside and leave to macerate.
  2. Meanwhile, heat the balsamic vinegar in a small non-stick saucepan over medium-high heat. Simmer, continuously stirring to check on the consistency of the glaze, until the vinegar reduces to a thick sauce, about 5 minutes. Remove from the heat and leave to cool down for a bit.
  3. Lightly toast bread in a toaster for about 1-2 minutes.
  4. Spread a generous amount of the smashed avocado onto the toast, top with the tomato cappers salad, and drizzle the balsamic reduction over the salad.
  5. Enjoy!

3. Sliced Banana & Pumpkin Seeds drizzled with Honey

Sliced Banana & Pumpkin Seeds drizzled with Honey

PREP TIME <5 MINS | COOKING TIME  | SERVES 2

INGREDIENTS

  • 2 slices multigrain brown bread
  • 1/2 avocado, smashed
  • 1 large banana, sliced
  • Honey
  • Pumpkin seeds

METHOD

  1. Lightly toast bread in a toaster for about 1-2 minutes.
  2. Spread a generous amount of the smashed avocado onto the toast, top with banana slices and pumpkin seeds, and drizzle with honey.
  3. Enjoy!

4. Soft-boiled Egg with Chilli Flakes & Parsley

Soft-boiled Egg with Chilli Flakes & Parsley

PREP TIME <5 MINS | COOKING TIME 6 MINS | SERVES 2

INGREDIENTS

  • 2 slices multigrain brown bread
  • 1/2 avocado, smashed
  • 2 large free range eggs
  • Chilli Flakes
  • Parsley, roughly chopped

METHOD

  1. Bring a small pot of water to a rolling boil. Once boiling, reduce the water to a rapid simmer before gently lowering the eggs one by one into the pot. Cook for 5 minutes for a runny yolk, or 7 minutes for a barely set yolk. Once done, remove from the heat and place in an ice bath to stop the cooking process. Once cool, peel the shell off and slice.
  2. Lightly toast bread in a toaster for about 1-2 minutes.
  3. Spread a generous amount of the smashed avocado onto the toast, top with the sliced eggs, and sprinkle with a touch of chilli flakes, and parsley.
  4. Enjoy!

5. Sliced Strawberries & Crumbled Goat’s Cheese with Balsamic Reduction and Peppermint Leaves

Sliced Strawberries & Crumbled Goat's Cheese with Balsamic Reduction and Peppermint Leaves

PREP TIME <5 MINS | COOKING TIME 5 MINS | SERVES 2

INGREDIENTS

  • 2 slices multigrain brown bread
  • 1/2 avocado, smashed
  • 4 large strawberries, sliced
  • 4 tbsp balsamic vinegar
  • Goat’s cheese, crumbled

METHOD

  1. Heat the balsamic vinegar in a small non-stick saucepan over medium-high heat. Simmer, continuously stirring to check on the consistency of the glaze, until the vinegar reduces to a thick sauce, about 5 minutes. Remove from the heat and leave to cool down for a bit.
  2. Lightly toast bread in a toaster for about 1-2 minutes.
  3. Spread a generous amount of the smashed avocado onto the toast, top with the sliced strawberries, crumbled goat’s cheese, and drizzle the balsamic reduction over the strawberries.
  4. Enjoy!

6. Sautéd Brown & Shimeji Mushrooms topped with Fried Enoki & Parsley

Sautéd Brown & Shimeji Mushrooms topped with Fried Enoki & Parsley

PREP TIME <5 MINS | COOKING TIME 8 MINS | SERVES 2

INGREDIENTS

  • 2 slices multigrain brown bread
  • 1/2 avocado, smashed
  • 4 large brown mushrooms, sliced
  • 1/2 bunch (100g) shimeji mushrooms
  • 1/2 bunch (50g) enoki mushrooms
  • 2-3 garlic cloves, minced
  • Ground sea salt and black pepper, to taste
  • Knob of unsalted butter
  • Olive oil
  • Parsley, roughly chopped

METHOD

  1. Melt the unsalted butter in a small frying pan over medium-high heat and add about a teaspoon of olive oil.
  2. Sauté the minced garlic until golden brown and fragrant, about 30 to 45 seconds. Add in the sliced brown mushrooms and shimeji mushrooms and cook until tender, about 3-4 minutes.  Season with pinch of ground sea salt and black pepper. Once tender, remove from the pan and set aside.
  3. In the same pan, heat about 3 tbsp of olive oil over high heat until slightly smoking. Add the enoki mushrooms in and fry until golden brown in colour, about 2-3 minutes. Once done, transfer to a small plate lined with a paper towel. Set aside.
  4. Lightly toast bread in a toaster for about 1-2 minutes.
  5. Spread a generous amount of the smashed avocado onto the toast and top with the sautéd garlic mushrooms and the fried enoki mushrooms. Garnish with a touch of ground black pepper and parsley.
  6. Enjoy!

7. Diced Mango with Chilli Powder & Peppermint

Diced Mango with Chilli Powder & Peppermint

PREP TIME <5 MINS | COOKING TIME  | SERVES 2

INGREDIENTS

  • 2 slices multigrain brown bread
  • 1/2 avocado, smashed
  • 1 small mango, diced
  • Chilli powder
  • Peppermint leaves

METHOD

  1. Lightly toast bread in a toaster for about 1-2 minutes.
  2. Spread a generous amount of the smashed avocado onto the toast and top with the diced mangoes, chilli powder, and peppermint leaves.
  3. Enjoy!

8. Roasted Chickpeas & Parsley

Roasted Chickpeas & Parsley

PREP TIME <5 MINS | COOKING TIME 10 MINS | SERVES 2

INGREDIENTS

  • 2 slices multigrain brown bread
  • 1/2 avocado, smashed
  • 1 can (200g) chickpeas, drained
  • 2 tsp ground smoked paprika
  • Ground sea salt and black pepper, to taste
  • Olive oil
  • Parsley, roughly chopped

METHOD

  1. Preheat oven to 200C (400F or gas mark 6). Line a baking tray with aluminium foil. Set aside.
  2. Add the drained chickpeas in a small bowl together with the ground smoked paprika, sea salt, black pepper, and a drizzle of olive oil. Toss to coat.
  3. Spread the chickpeas onto the prepared baking tray and roast in the oven for about 10 minutes. Once done, remove from the oven.
  4. Lightly toast bread in a toaster for about 1-2 minutes.
  5. Spread a generous amount of the smashed avocado onto the toast and top with the roasted chickpeas and parsley.
  6. Enjoy!

9. Chorizo Sausage & Sweet Corn

Chorizo Sausage & Sweet Corn

PREP TIME <5 MINS | COOKING TIME 4-6 MINS | SERVES 2

INGREDIENTS

  • 2 slices multigrain brown bread
  • 1/2 avocado, smashed
  • 1 chorizo sausage, sliced
  • 1 can (200g) sweet corn kernels, drained
  • Olive oil

METHOD

  1. Heat olive oil in a small frying pan over medium-high. Pan-fry the chorizo slices until browned, about 2-3 minutes per side. Once done, transfer to a plate lined with a paper towel. Set aside.
  2. Bring a small pot of water to a rolling boil and blanch the sweet corn kernels for about a minute or two. Drain and set aside to cool down for a bit.
  3. Lightly toast bread in a toaster for about 1-2 minutes.
  4. Spread a generous amount of the smashed avocado onto the toast, top with the pan-fried chorizo sausages and sweet corn kernels, and drizzle with a bit of the chorizo oil (optional).
  5. Enjoy!

Just a little side note before I end tonight’s post, I spent the whole day amending quite possibly the same artwork because their comments/amendments were all on an installation basis. Such completely waste of time which then prevented me from actually completing the work I had set to do today because I had to keep going back and forth to the same bloody artwork.

​BON APPÉTIT

– Ally xx

myTaste.com

Chocomolé Smoothie

Chocomolé Smoothie

Hello Everyone! It’s week 3 of deliciously healthy smoothies to kickstart your mornings, boost your afternoons, or fuel your post-gym workouts. Well, tonight’s smoothie is a little less healthy in comparison to the two that I’ve posted since the month started – and I say this just because I’m using full cream milk in the recipe. I’ve opted for the light yoghurt though if that makes any difference! *cheeky grin* Anyway, this recipe was inspired by a smoothie that I had probably over a year ago or two now back when I was brunching my way through Sydney with friends. I had this smoothie (or something similarly along the lines of this smoothie) at a café called Rustic Pearl. When I saw this on their menu, the reaction ew came to mind followed with mixed emotions. Nonetheless, I decided to be adventurous and instead of going with a conventional banana and cinnamon smoothie, I ordered the Chocomolé (Chocolate & Guacamole) – may I just add what a creative name to call the smoothie! This was the best decision that I made that day. The smoothie was an absolute yum!

Anyway, don’t forget to check out the original recipe over on Texanerin Baking. There are options for vegan, diary-free, and paleo as well, where you can basically switch out the Greek yoghurt with coconut milk yoghurt, and completely omit the use of full cream milk as well or replace it with coconut milk. Though it was delicious for me, it might not be to everyone’s liking for I think my Mom didn’t like it when I made this batch a couple of weeks ago for the first time haha.

Chocomolé Smoothie Ingredients

PREP TIME <5 MINS | COOKING TIME | SERVES 1

INGREDIENTS

  • 1 medium cold banana
  • 1/2 cold avocado flesh (about 85 grams would suffice)
  • 1/4 cup plain Greek yogurt (or coconut milk yogurt for vegan, dairy-free, paleo
  • 2-4 tbsp milk, optional (omit for vegan, dairy-free, paleo or use coconut milk)
  • 2 tbsp cocoa powder
  • 1/2 tsp vanilla extract

METHOD

  1. Blend everything together in a blender until it’s very creamy. Add more milk until it is to the desired thickness or your liking.
  2. Top with some banana slices and some roughly chopped dark chocolate. Serve immediately or keep covered in the refrigerator for up to one day.

Chocomolé Smoothie

BON APPÉTIT

– Ally xx

myTaste.com

Breakfast Plate

Breakfast Plate

Hello Everyone! I can’t believe that it’s already October! Where did September go?! So I’m sure all of you are aware that a new month calls for a new theme on the blog for the month of October! Those of you who know me, I am a breakfast/brunch person. I mean, I sometimes skip breakfast when the mornings just get a little too hectic for me; that was during my first few years at uni, but towards the end, I made it a habit to pack my breakfast to uni and/or work and eat it there.

I remember my internship days at Hello Social where I’d always be rushing out in the mornings to catch my bus, which therefore meant that I didn’t have time to sit down and enjoy my breakfast. That was where Muffin Making Mondays with Jialing came in, and when I had run out of muffins to take to work (because we only bake fortnightly), I would pack some fruits and even sometimes a small tupperware of cinnamon toast cereal with one of those small drink cartons of milk. When I’d get to the office, I’d pour the milk over my cereal and enjoy breakfast at my table. There was a time where one of the managers asked me what I was having for breakfast and the thought of me bringing a small carton of milk made her laugh so hard. I told her it was practical 😛 Another time when I was also having cereal, my other manager asked if what I was having was shareable; to his dismay, cereal ain’t shareable! He asked what kind of cereal I brought in and I said cinnamon toast. The other manager said that that was so American of me.

Anyway, I mean, if you didn’t already gather what this month’s theme is from my little story, yes it’s breakfast and brunch month on the blog! For the month of October I will be sharing with you some of my favourite breakfast/brunch recipes! I’ll be kicking off tonight’s post with a dish that I threw together when I was still living in Sydney. I was inspired by a post that I saw on Instagram by Raw Pawpaw Café in Brisbane. I was inspired by their plating of one of their dishes, and decided to plate it up with a few of my favourite ingredients for breakfast. I think most of the preparation of the ingredients in this dish is pretty straight forward, and you can get creative yourself by mixing up the ingredients a bit by adding your own favourite breakfast ingredients!

Breakfast Plate Ingredients

PREP TIME 5 MINS | COOKING TIME 20-22 MINS | SERVES 1

INGREDIENTS

  • 2-3 slices of soy & linseed bread, toasted
  • 2 bacon rashers
  • 2 large free range eggs, at room temperature
  • 1 chorizo sausage, thick slices
  • 1/2 avocado, cut into chunks
  • Bunch of grape vine tomatoes
  • Butter, for spreading
  • Ground salt and black pepper to taste
  • Handful of cup mushrooms, sliced
  • Handful of loose baby spinach leaves
  • Lemon wedges, to serve
  • Olive oil

METHOD

  1. In a small bowl, marinate the avocado chunks with a little bit of olive oil, salt, pepper, and lemon juice. Set aside.
  2. Preheat oven to 200C. Line a baking tray with aluminium foil and toss the grape vine tomatoes in a little bit of olive oil and salt. Roast in the oven fro about 10 minutes, or until the tomatoes have gone soft. Turn the temperature down to about 80-90C just to keep them warm before serving.
  3. Meanwhile, heat a large grill pan over medium high and cook the bacon rashers and chorizo slices, about 3 minutes per side. Once done, transfer to the baking tray and keep warm in the oven.
  4. Add your sliced mushrooms to the same grill pan and cook until browned and softened, about 4-5 minutes altogether. Turn the heat off and transfer to the baking tray and keep warm in the oven.
  5. Place the eggs in a small saucepan, covering the eggs with cold water. Bring to a boil over high heat, and once boiling, reduce the heat down to medium. Simmer gently for about 3 minutes. Remove the saucepan from the heat and using a slotted spoon, transfer to the egg carton.
  6. Plate up accordingly and enjoy your breakfast!

Breakfast Plate

Breakfast Plate

Just a little side note here before I end tonight’s post – I wanted to choose an egg carton that wasn’t grey just so that it doesn’t look dull. I must say it was hard choosing eggs based on the colour carton they come in because most of the non-grey ones were caged eggs (yes, I don’t buy caged eggs). Good thing these eggs that came in the blue carton were free range, and the blue really suited the plating and contrasted the food colours nicely.

BON APPÉTIT

– Ally xx

myTaste.com