Baked Sweet Potato & Egg Brekkie Boats

Baked Sweet Potato & Egg Brekkie Boats

Hello Everyone! Oh wow – two words in and I’m already having a writer’s block! I literally just spent the last 20 minutes thinking about what to write after ‘Hello Everyone!’ In all honesty, there are definitely A LOT of things I can talk about to you guys, but the timing isn’t just quite right yet. You’ll probably only hear about everything that I have to share in September – is it worth the wait? Well maybe it’s more just for me as exciting things are about to unfold, maybe for Amcarmen’s Kitchen, but definitely on my personal life and adventures ahead!

So aside from that thing that I can’t tell you guys just yet, there’s actually nothing I can touch on at this moment and just realising what a boring week/weekend I had. Okay, just as I typed weekend out, I just remembered that it wasn’t all that boring at all. I met up with a couple of friends on Friday night to celebrate a birthday. The night was great – the usual good food, good company cliché but I thought that my food could have been a lot better to be honest. And of course, the cherry atop the cake was that of all places and of all times, my Boss had to have dinner at the same place, at the same time, and sit directly opposite the direction I was facing. Good times. Can’t escape. I remember one of my friends saying “Oh sh*t it’s my colleague” as he pointed out to my manager’s (my Boss’ daughter) husband, to which I responded to him “Oh sh*t it’s my Boss and his WHOLE family!” *insert cold sweat emoji* On Sunday night I met up with more friends at a friend’s open house for Raya which equated to more laughs and definitely great home-cooked food! The night ended young for me as I was for some reason immensely exhausted that day.

Baked Sweet Potato & Egg Brekkie Boats

All that side and diving right into tonight’s recipe – I came across the original recipe by Willow over on Will Cook For Friends. I especially loved how she described that this was one of those ‘fluke recipes that came to [her] out of nowhere’ and I’m sure all foodies, home cooks, chefs, and probably anyone really has had one to these revelations(?) is this the correct word to use? Anyway, this is how I come up with so many different variations of stir-fries and weird combinations of food pairings (that actually do surprisingly work, but probably not for Gordon Ramsay) during my university days.

We’ve all stared into the black hole that is our fridge, as Willow describes:

Me: “Man, I really need to go shopping.”
Eggs: “We’re here! Pick us, pick us!”
Me: “I don’t want eggs… unless they were really, really awesome eggs!”
Sweet potato that’s been sitting on my counter for two weeks: “AHEM. I’ve got you covered.”

And so behold these wickedly delicious gluten-free and paleo Baked Sweet Potato Boats for a filling weekend (or even week day if you have the time) brekkie for champs!

Baked Sweet Potato & Egg Brekkie Boats Ingredients

PREP TIME 10 MINS | COOKING TIME 80-95 MINS* | SERVES 2**

*Baking time time will vary depending on the size of your sweet potato.

**Half of a sweet potato with an egg in it for breakfast is already pretty filling, but if you’re serving these to particular bunch of super hungry people, then you might want to plan on a whole potato and two eggs per person. The recipe can easily be doubled, tripled, and so on.

INGREDIENTS

  • 1 very large orange sweet potato, washed and scrubbed clean
  • 2 large free range eggs
  • 2 slices of bacon strips
  • Fresh chopped spring onions, for garnish
  • Ground sea salt and black peppercorns, to taste
  • Tabasco, Sriracha, or any other hot sauce, to taste

METHOD

  1. Preheat oven to 180C (350F or gas mark 4).
  2. Place the washed and dried sweet potato (whole) in a baking dish and into the oven. Bake for about 60-70 minutes, or until tender as time will vary depending on the size of your sweet potato.
  3. Meanwhile, heat a small frying pan over high heat and cook bacon to your liking***. Remove from the pan once done and transfer to a plate lined with a paper towel to drain off excess grease. Set aside.
  4. Once done, remove the sweet potato from the oven and cut it in half lengthwise. Using a pairing knife, carefully carve out a well in the center of each half, about as big as you think you’ll need for the size of your eggs. Crack the eggs into a small bowl and pour into the carved well. Season with a touch of salt and pepper.
  5. Place the potato halves back into the baking dish, resting them against the side of the pan if needed to keep them from tipping and spilling any egg. Return to the oven for about 20 to 25 minutes, or until the eggs are cooked to your liking. I like my whites cooked with an oozy yolk!
  6. Remove from the oven and crumble the bacon over the top. Serve with your favorite hot sauce, and a bit of freshly chopped spring onion to garnish. Enjoy!

***There are many ways in which we all prefer to cook our bacon, and there is no wrong way of doing so. You can do this in a pan on the stove like how I’ve done, or bake it in the oven. To bake the bacon, spread the bacon strips in a single layer on a rimmed baking sheet lined with a sheet of foil for easier cleanup.

Baked Sweet Potato & Egg Brekkie Boats

BON APPÉTIT

– Ally xx

myTaste.com

Advertisement
Savoury Orange Sweet Potato Toasts (3 Ways)

Savoury Orange Sweet Potato Toasts (3 ways)

Hello Everyone! Firstly, I would like to apologise for getting this post up TWO days late (compensating by posting earlier in the day today). I’ve been hibernating for the past few days after mentally and physically tiring days and nights of work. I don’t want to get into a long winded description of why since I’m not a 100% in the mood to write, so I’ll just hop on forward to tonight’s recipe. Hopefully I’ll be in a better mood to write next week. Apologies once again! It’s nothing serious by that way, it just that while I’m writing this, my mind seems to doze off and my eyelids just keep getting heavier and heavier, making it hard for me to concentrate even the slightest bit.

But of course I won’t just leave you guys with a less than mediocre introduction – it is a new month after all on Amcarmen’s Kitchen and I have yet to introduce to you the theme for this month! So just a little bit of inside information, probably about a year ago, I saw these beautifully colourful sweet potato toasts in a Coles Magazine spread and instantly knew I had to give these a go. Fast forward a year (or more) later, and I’ve finally decided to whip up Three Savoury Sweet Potato Toasts for you. They are definitely not as aesthetically pleasing as those you’d find on Pinterest though so don’t hate it these toasts look… Underwhelming. I think my toppings were WAY too massive for the potato slices I had, hence an imbalance proportions. I don’t know – the photographs just look weird to me *insert cold sweat emoji*.

So yes, as you can already see, I’m a bit late on the then hot and trendy sweet potato toasts, but that won’t stop me from sharing them with you guys. Sweet potato toast is basically toast, but without the toast. Skeptics question how can it be called toast without the actual toast? Well, if you’re gluten-free, want a little more fiber in your diet, or are tired of bread for toast, then sweet potatoes are a great option as a substitute. In addition, sweet potatoes contain beta-carotene that gets converted into vitamin A in our body – just like carrots and other orange-coloured fruits and vegetables. Vitamin A is important for hair, skin, nails, vision, and plays a key role in immune function.

Savoury Orange Sweet Potato Toasts (3 Ways)

Preparing your Sweet Potato Toasts

PREP TIME 10 MINS | COOKING TIME 20 MINS* | MAKES 5 SLICES**

*Baking time time will vary depending on the size and thickness of your sweet potato slices.
**Or how-ever-so-many slices you can get from a single sweet potato

INGREDIENTS

  • 1 large orange sweet potato, wash and dried

METHOD

  1. Preheat oven to 180C (350F or gas mark 4). Place a wire rack on a large rimmed baking sheet.
  2. Trim both ends from the sweet potato using a knife and slice them lengthwise into 1/4-inch thick slabs using a knife or mandolin slicer.
  3. Arrange the slabs in a single layer on the wire rack and bake for about 15-20 minutes or until the potatoes are tender, but not fully cooked.
  4. Remove the potatoes from the oven and allow them to cool on wire rack completely before transferring to a storage container. They can be stored in the fridge for up to 4 days.

When it’s go-time simply add the desired number of slices to your toaster and toast away. Setting it on the highest setting takes only one toasting cycle to get them how I like them (warm, bubbly and crispy on the edges). Just be wary that yours may need more or less depending on the toaster that you are using. Adjust to your liking!

Notes/Tips:

    • Look for sweet potatoes that are relatively shaped like a tube so that they’re easier to slice.
    • Don’t remove the skin because fibre in it is good and it helps the slices hold up better during storage.
    • Using a mandolin slicer gives you uniform slices of sweet potatoes, and is easier and safer than using a big knife.
    • Allow them to cool completely after baking before stacking them in a container or they’ll get sweaty and will definitely take longer to toast when you’re ready to eat them.

Now the fun starts – you get to add toppings! The possibilities are pretty much endless but these three are my absolute favourite combinations for a yummy start to my day!


Avocado, Beetroot & Goats Cheese

Savoury Orange Sweet Potato Toasts: Avocado, Beetroot & Goats Cheese

PREP TIME 5 MINS | COOKING TIME 5-10 MINS | SERVES 1

INGREDIENTS

  • Avocado slices
  • Beetroot slices
  • Freshly ground black peppercorns
  • Goats cheese, crumbled
  • Lemon zest
  • Spring onion, chopped
  • Sweet potato slice(s)

METHOD

  1. Place the sweet potato slices into a toaster and toast on the highest setting until warm, bubbly and crispy on the edges.
  2. Top with the above garnishes and enjoy!

Smashed Avo, Crispy Bacon & Poached Egg

Savoury Orange Sweet Potato Toasts: Smashed Avo, Crispy Bacon & Poached Egg

PREP TIME 5 MINS | COOKING TIME 5-10 MINS | SERVES 1

INGREDIENTS

  • Bacon slices
  • Balsamic reduction
  • Poached egg
  • Smashed avocado
  • Sweet potato slice(s)

METHOD

  1. Crispy Bacon: Heat a medium size non-stick frying pan over high heat. Add the bacon strips and cook for about 3-4 minutes per side. Place on a dish lined with paper towels to drain the excess oils. Next add the tomatoes and fry in the bacon fat for about 3-4 minutes per side as well. Set aside in an oven to keep warm before serving.
  2. Balsamic Reduction: Next, pour the 1/2 cup of balsamic vinegar in a small saucepan over medium heat. Bring the vinegar to a boil, then turn down the heat down so that the boil reduces to a simmer. Stir occasionally and allow to simmer until the vinegar has reduced by at least half (for a thinner reduction) or more (for a more syrup-like consistency). If you have impatient tendencies like me when it comes to food, do not increase the heat at this point! Your reduction may burn and you will be left with a stiff, hardened mess.
  3. Poached Eggs: Bring small saucepan of water to the boil over medium-high heat, then reduce the heat to low-medium – the water should be just simmering. Add in the vinegar and stir. Crack one egg into a small bowl and quickly, but gently pour it into the water. Repeat with the other egg. A really soft poached egg should take around 2 minutes, but if you want it a bit more firm, it will take about 4 minutes. To check if they’re cooked right, carefully remove the egg from the pan with a slotted spoon and give the yolk a gentle push (you can tell just by your instincts if it is under or over – or perfect)!
  4. Place the sweet potato slices into a toaster and toast on the highest setting until warm, bubbly and crispy on the edges.
  5. Top with the above garnishes and enjoy!

Beet & Salt-cured Salmon

Savoury Orange Sweet Potato Toasts: Beet & Salt-cured Salmon

PREP TIME 5 MINS | COOKING TIME 5-10 MINS | SERVES 1

INGREDIENTS

***Or store-bought smoked salmon will do just fine as well.

METHOD

  1. Crispy Salmon Skin: Preheat oven to 190C (375F or gas mark 5). Line a baking sheet with parchment paper, and lightly brush olive oil and sprinkle some salt on both sides of the salmon skin. Place the salmon skin, shiny side up, on the baking sheet and bake for 10 minutes or until the skin is crisp. Allow the salmon skin to cool before eating.
  2. Place the sweet potato slices into a toaster and toast on the highest setting until warm, bubbly and crispy on the edges.
  3. Top with the above garnishes and enjoy!

And there you have it! Three simple Savoury Sweet Potato Toasts for a great fix of a seriously nutrient-packed brekkie! What do you think about sweet potato toast? Have you tried it for yourself, and if you have what did you think?

BON APPÉTIT

– Ally xx

myTaste.com

Bacon Eggs Benedict

Bacon Eggs Benedict

Hello Everyone and welcome to an all new theme for the month of May on Amcarmen’s Kitchen! For the month of May, I will be sharing recipes and renditions of a classic go-to foolproof Eggs Benedict! The thing I love about a good ol’ Eggs Benedict dish is its versatility – if you like pork, then go for a Beer-braised Pulled Pork Eggs Benedict accompanied with a Sriracha hollandaise sauce *drools* Or maybe you prefer beef, chicken, lamb, or seafood? The options are endless! You can even take a vegetarian spin to this and go meatless if you prefer. Get creative with the classic hollandaise sauce that makes an Eggs Benedict what it is. Fuse cuisines and cultures.

All this will be covered on the blog this month so do stay tuned on how you can tackle the endless possibilities to make your Eggs Benny experience one to remember! Tonight, I will be starting off with a classic with a slight twist, and as the month progresses, we’ll delve deep into creative fusions that have been inspired from my café adventures back when I was still studying in Australia.

Bacon Eggs Benedict

Now forgive me if I’m giving out false information as I am relying on the world of Wikipedia here. I guess my teachers from high school and uni haven’t taught me well enough to not source from wiki *cheek grin* but anyway, though there seemed to be conflicting recounts on the exact origins of the Eggs Benedict, this one in particular speaks out to me:

Lemuel Benedict, a retired Wall Street stock broker, said that he had wandered into the Waldorf Hotel in 1894 and, hoping to find a cure for his morning hangover, ordered “buttered toast, poached eggs, crisp bacon, and a hooker of hollandaise”. Oscar Tschirky, the maître d’hôtel, was so impressed with the dish that he put it on the breakfast and luncheon menus but substituted ham for the bacon and a toasted English muffin for the toast — “Talk of the Town”. The New Yorker. December 19, 1942.

Therefore, you could safely say (I guess) that the original main ingredients found in a classic Eggs Benedict dish are eggs, bacon, hollandaise sauce, and an English muffin – popularised by Oscar Tschirky. Okay well, when I said that it speaks out to me, I don’t mean in a sense that I’ve ever been hungover, but that this is what I imagined a morning-after hangover meal would be.

Bacon Eggs Benedict Ingredients

Before we dive in, there’s a slight twist to the classic recipe that I will be sharing with you guys tonight – and the twist is basically just a few extra ingredients to bulk it up and add some zing and tang to it. Tanginess from the balsamic reduction and a slight zing from the chimichurri sauce!

PREP TIME 15 MINS | COOKING TIME 25 MINS | SERVES 3

INGREDIENTS

For the eggs benedict

  • 6 slices of streaky bacon
  • 3 English muffins, halved, slightly toasted, and butter
  • 3 large free range eggs
  • 1 large avocado, peeled, pitted, and smashed*
  • 1 large tomato, sliced
  • Chilli flakes, to top

*Squeeze a touch of lemon or lime juice to prevent it from browning

For the hollandaise sauce

  • 3 large free range eggs, yolks separated
  • 175g unsalted butter, cut into cubes, at room temperature
  • 2 tbsp water
  • 2 tbsp fresh lemon juice
  • Fresh Thyme Leaves
  • Ground salt and black pepper to taste

For the chimichurri sauce (by Karina from Cafe Delites)

  • 1/4 cup olive oil
  • 1/4 cup parsley, finely chopped
  • 3-4 garlic cloves, finely minced
  • 2 red bird’s eye chillies, deseeded and finely chopped
  • 1 tbsp white wine vinegar
  • 1/2 teaspoon dried oregano
  • Ground salt and black pepper, to taste

For the balsamic reduction

  • 1/2 cup balsamic vinegar

So I know that there are a heck load more ingredients mentioned in the list above than what is shown in the shot – apologies! If you want a classic Bacon Eggs Benny without the fancy schmancy reductions and sauces, then feel free to omit. They’re really just optional for an extra boost of flavours to an already flavoursome dish.

METHOD

  1. Chimichurri Sauce: Mix all the ingredients together in a small bowl. Allow to sit for 5-10 minutes to release all of the flavours into the oil before using, but I think that the longer it sits, the better it tastes, so prepare this first before everything else to ensure this!
  2. Bacon and Tomatoes: Heat a medium size non-stick frying pan over high heat. Add the bacon  strips and cook for about 3-4 minutes per side. Place on a dish lined with paper towels to drain the excess oils. Next add the tomatoes and fry in the bacon fat for about 3-4 minutes per side as well. Set aside in an oven to keep warm before serving.
  3. Balsamic Reduction: Next, pour the 1/2 cup of balsamic vinegar in a small saucepan over medium heat. Bring the vinegar to a boil, then turn down the heat down so that the boil reduces to a simmer. Stir occasionally and allow to simmer until the vinegar has reduced by at least half (for a thinner reduction) or more (for a more syrup-like consistency). If you have impatient tendencies like me when it comes to food, do not increase the heat at this point! Your reduction may burn and you will be left with a stiff, hardened mess.
  4. Hollandaise Sauce: While the balsamic reduction is underway and slowly simmering, start on the Hollandaise sauce. Place a heatproof bowl over a medium saucepan that is quarter-filled with water. Make sure that the bowl should fit snugly into the pan without touching the water (lift the bowl to check and remove some water if it does). Bring the water to a boil over high heat, then reduce heat to very low so the water is barely simmering (there should be almost no movement at all). It is important that the water is barely simmering while making the sauce – if it is too hot, the egg yolks will cook too much and the sauce will curdle.
  5. Place the egg yolks and the 2 tablespoons of water in the heatproof bowl and place over the pan. Whisk the mixture constantly for 3 minutes or until it is thick and pale, has doubled in volume and a ribbon trail forms when the whisk is lifted.
  6. Add the butter a cube at a time, whisking constantly and adding another cube when the previous one is incorporated completely (about 10 minutes to add it all in). If butter is added too quickly, it won’t mix easily with the egg yolks or the sauce may lose volume. At the same time, it is important that the butter is at room temperature and added a cube at a time, so that it doesn’t take too long to be incorporated – if the sauce cooks for too long, it can curdle.
  7. Remove the bowl from the pan and place on a heatproof surface. The cooked sauce should have the consistency of very lightly whisked thickened cream. Whisk in the lemon juice, fresh thyme leaves, and season with salt and pepper.
  8. Poached Eggs: Bring small saucepan of water to the boil over medium-high heat, then reduce the heat to low-medium – the water should be just simmering. Add in the vinegar and stir. Crack one egg into a small bowl and quickly, but gently pour it into the water. Repeat with the other egg. A really soft poached egg should take around 2 minutes, but if you want it a bit more firm, it will take about 4 minutes. To check if they’re cooked right, carefully remove the egg from the pan with a slotted spoon and give the yolk a gentle push (you can tell just by your instincts if it is under or over – or perfect)!
  9. Assembly: Spread the smashed avocado on the toasted and buttered English muffin half and top with the crispy bacon strips, tomato slice, and then the poached egg. Top a generous amount of the hollandaise sauce and sprinkle with a bit of chilli flakes to pack a slight kick. Finally, drizzle with the balsamic reduction and chimichurri sauce around the plate. Serve and enjoy!

Bacon Eggs Benedict

BON APPÉTIT

– Ally xx

myTaste.com

Quinoa Minestone Soup with Kale Pesto

Quinoa Minestrone Soup with Kale Pesto

Hello Everyone! Week 2 of cooking with quinoa is here and I’ve got a classic recipe with a twist. For those of you who don’t know, minestrone soup is a thick soup of Italian origin made with vegetables that range from, but are not limited to, beans, onions, celery, carrots, and tomatoes. Often, rice or pasta is added to the soup to bulk it up with some carbs. There is no set recipe for minestrone, since it is usually made out of whatever vegetables are in season. It can be vegetarian, contain meat, or contain a meat-based broth.

I’ve made this soup a couple of times before in the past, and is featured in the Mediterranean section of my blog – but today, I’m going to add a little twist to a traditional minestrone soup. I’m switching out the pasta that I would normally add to my soup, with quinoa. Using quinoa in place of pasta adds extra protein and makes this soup gluten free! In addition to using quinoa for this soup, I’m topping it off with some kale pesto as well to give the dish a touch of freshness – and of course, if you have any extra leftover, you can totally whip up another dish just by mixing it through some freshly cooked pasta! Top it of with some grilled chicken or seared tiger prawns for a complete lunch or dinner. The original recipe for this dish can be found over on Taste Australia.

Quinoa Minestone Soup with Kale Pesto Ingredients

PREP TIME 10 MINS | COOKING TIME 20 MINS | SERVES 4

INGREDIENTS

For the soup

  • 1 can (400g) cannellini beans, drained and rinsed
  • 1 can (410g) Italian chopped tomatoes
  • 150g bacon, diced
  • 4 cups chicken stock
  • 1/3 cup tri-coloured quinoa, rinsed
  • 3-4 garlic cloves, minced
  • 1 celery stick, sliced
  • 1 dried bay leaf
  • 1 large brown onion, coarsely chopped
  • 1 medium-sized carrot, peeled and cut into small chunks
  • 1 medium-sized zucchini, cut into small chunks

For the kale pesto

  • 2 & 1/2 cups kale leaves, shredded
  • 1/4 cup grated parmesan
  • 1 small garlic clove, halved
  • 1 tbsp extra virgin olive oil
  • 1 tbsp lemon juice
  • 1 tbsp water

METHOD

  1. For the Soup: Heat the extra virgin olive oil in a large pot over medium-low heat. Add the bacon bits and cook, stirring, for 3-4 minutes or until browned. Remove from the pot and set aside.
  2. Turn the heat up to high and then add in the garlic. Sauté until golden brown and fragrant, about a minute or so. Then add in the onions and cooking, stirring, until soft, about 2 minutes.
  3. Add in the carrot and celery, together with the bay leaf, and cook, covered, stirring occasionally, for about 4 minutes or until soft.
  4. Next, add in the chicken stock and canned chopped tomatoes to the pot. Bring to the boil.
  5. Once boiling, reduce the heat down to medium-low and then stir in the quinoa. Simmer, stirring occasionally, for 5 minutes.
  6. Stir in zucchini. Cook, stirring occasionally, for 5 minutes, and then add in the cannellini beans. Cook, stirring occasionally, for 2 minutes or until the quinoa and zucchini are tender. Season with a touch of ground salt and pepper.
  7. For the Kale Pesto: Add the kale leaves, parmesan cheese, and garlic into a food processor and process until finely chopped. Combine the juice, oil, and water in a jug, and slowly stream the juice mixture into the kale mixture until well combined. Season.
  8. Divide soup among four equal bowls and top with the kale pesto and extra parmesan if you wish.
  9. Serve and enjoy!

Quinoa Minestone Soup with Kale Pesto

Quinoa Minestone Soup with Kale Pesto

BON APPÉTIT

– Ally xx

myTaste.com

Trine Boscaiola

Trine Boscaiola

Trine Boscaiola

Hello Everyone! It’s week 3 of Pasta Month and I’ve got a few things to say before we dive into the recipe. I apologise in advance that what I am about to say has nothing to do with the upcoming recipe – it’s more me telling you about my day/week and upcoming week. So if you don’t want to read this part, you can skip onto the recipe 🙂 Anyway, so last week Friday I had a nice dinner with my colleagues and then we ended the night escaping from a hostage-themed escape room and we did pretty well I must say! We escaped within an hour and one minute – which from what I remember is 14 minutes earlier than the set time limit hooray! Hostage is one of their new rooms, and the other is The Ring-themed *OMG* which I really want to try out with my friends, but I know I will probably regret it later on.

On Sunday, I also spent the afternoon with different colleagues and we watched The Conjuring 2 – which I don’t know whether it was a huge mistake or not haha. I didn’t think I was that scared from the movie, but I only knew that I was definitely scared when I could barely sleep that night. The image of Valak kept appearing in my head in the dark room – but I was definitely fine the next day/night. We then had dinner and said our goodbyes. Today, a few colleagues of mine headed over to the KFM studio to do a voice recording – basically just getting us to wish everyone “Selamat Hari Raya” for the upcoming festivities next month. It was actually quite fun in the end even though I had to convince just one colleague that I did not want to do the script in Malay because they’d all probably laugh at my pronunciation and intonation.

And that’s all I have for you – OH I almost forgot! Tomorrow morning I’ll be flying of to Singapore again for a couple of days. Taking a small break from work to do some shopping, eating, and meeting up with friends – it going to be a great weekend ahead!

Trine Boscaiola Ingredients

PREP TIME 5 MINS | COOKING TIME 10-15 MINS | SERVES 5

INGREDIENTS

  • 500g trine (curly fettuccine) pasta, or any other pasta shape
  • 250g rindless bacon rashers, thinly sliced
  • 1 punnet (250g) brown mushrooms, thinly sliced
  • 40g unsalted butter
  • 300ml thickened cream
  • 1/3 cup parmesan cheese
  • 5 spring onion stalks, chopped
  • Ground salt and black pepper, to taste
  • Olive oil

METHOD

  1. Bring a large pot of salted water to a boil. Cook the trine pasta according to packet instructions or until al dente.
  2. While the pasta is cooking away, heat about 1 tablespoon of olive oil in a large frying pan over medium-high. Cook the bacon until slightly browned and then remove from the pan. Add in the unsalted butter and then the mushrooms and cook for about 3-4 minutes or until soft. Then add in the pale parts of the chipped spring onion.
  3. Add in the cream together with about a cup of the pasta water and parmesan cheese. Turn the heat down to low and bring the mixture to a low simmer.
  4. Once the pasta is done, drain and then transfer the pasta to the cream mixture together with the fried bacon bits. Turn the heat back up to medium-high and then give it a good mix. Top with the remaining spring onions and then turn the heat off.
  5. Season with salt and pepper and toss until well combined. Divide the pasta among serving dishes and top with extra parmesan. Serve and enjoy!

Trine Boscaiola

Trine Boscaiola

BON APPÉTIT

– Ally xx

myTaste.com

Callos a la Madrileña (Ox Tripe Stew)

Callos a la Madrileña (Ox Tripe Stew)

Hello Everyone! Sadly, we’re nearing the end of our 12 days before Christmas special on the blog. How will you be spending your Christmas Eve tomorrow? I know where I’ll be – in the kitchen whipping up food with my Mom for our Noche Buena; and when I’m not cooking, I’ll most likely be taking a relaxed 2-day off doing absolutely nothing… Maybe. I can’t exactly sit around and do nothing. Heck, I’m evening writing this post while watching The Incredibles on TV and I was just talking to my Mom about how this movie never gets old – I still love watching it to date.

Anyway, time to get off the tangent wagon and get down to tonight’s recipe. It is basically a stew that is common and traditional to Madrid, well known as Callos a la Madrileña, or Callos for short. The stew consists of ox tripe, ox feet (or shank), chickpeas, blood sausage (or chorizo), and red capsicum. The tripe and feet are boiled and simmered until the texture becomes extra tender; this makes eating this dish pleasurable. It is then cooked together with the chickpeas and capsicum.

The extra tender tripe and fat from the ox feet literally melts in your mouth while the luscious taste of chorizo and bacon lingers around – inviting you to try more. Though it looks and sounds enticing (which it does), moderation is still recommended because of the high fat and cholesterol content of this dish. It is good to enjoy food but it is better to enjoy life. — Vanjo Merano from Panlasang Pinoy

Ox feet is rarely found in stores/markets here in Brunei – they’re always sold out even if you go extra early in the morning. My guess is that restaurants who use this part of the cow have already reserved it. Anyway, you can substitute it for veal (beef) shanks, however, you won’t get the same feeling of the melt-in-your-mouth fat as you do from ox feet.

Callos a la Madrileña (Ox Tripe Stew) Ingredients

PREP TIME 15 MINS | COOKING TIME 2 HOURS | SERVES 6-8

INGREDIENTS

  • 500g ox tripe, washed and cleaned
  • 500g beef shank
  • 250g bacon
  • 1 can (240g) chickpeas/garbanzos, drained
  • 6 pcs dried bay leaves
  • 2-3 garlic cloves, minced
  • 2 red bird’s eye chillies (optional)
  • 1 brown onion, diced
  • 1 chorizo sausage, sliced diagonally
  • 1 red capsicum, cut into strips
  • 1 tomato, diced
  • 1 tbsp tomato paste
  • Ground salt and black pepper, to taste
  • Whole black peppercorns

METHOD

  1. Add the beef tripe, 3 bay leaves, salt and a generous pinch of whole black peppercorns to a large pot filled with water. Boil for about an hour and a half, or until tender. Do the same for the beef shank in a separate pot. Once done, turn he heat off and leave the meat in the broth for an extra half hours. Remove from the broth and slice both the meats into bit-sized pieces. Discard the liquids from the tripe, but reserve the beef shank broth for later.
  2. Heat a large frying pan over medium-high and add the bacon in, frying until crisp, about 2-3 minutes per side perhaps (or more). Remove from the pan and set aside to cool down a bit before cutting them into smaller pieces.
  3. If there isn’t enough oil produced from the fat of the bacon when you fried it, add about a tablespoon more of oil and fry the chorizo slices until browned, about a minute or two per side. Once done, remove from the frying pan and set aside on a plate lined with a paper towel to soak up any excess oils.
  4. In the same frying pan, sauté the garlic until fragrant and golden brown. Then, add in the onions and cook until soft, about 2-3 minutes altogether. Follow with the diced tomatoes and cook until soft, a further 3-4 minutes.
  5. Add in the tripe and shank, together with a touch of ground salt and black pepper. Give it a good mix before adding the reserved stock, tomato paste, and chillies. Bring to a boil, and cook for about 10 minutes.
  6. Add in the chickpeas/garbanzos, and carrots and cook for a further 5 minutes before adding in the capsicum, bacon bits, and chorizo slices. Give it one final mix and then turn the heat off. Leave, covered, in the pan for about 5 minutes before serving.
  7. Transfer to a serving dish and enjoy hot!

Callos a la Madrileña (Ox Tripe Stew)

Callos a la Madrileña (Ox Tripe Stew)

BON APPÉTIT

– Ally xx

myTaste.com

Breakfast Plate

Breakfast Plate

Hello Everyone! I can’t believe that it’s already October! Where did September go?! So I’m sure all of you are aware that a new month calls for a new theme on the blog for the month of October! Those of you who know me, I am a breakfast/brunch person. I mean, I sometimes skip breakfast when the mornings just get a little too hectic for me; that was during my first few years at uni, but towards the end, I made it a habit to pack my breakfast to uni and/or work and eat it there.

I remember my internship days at Hello Social where I’d always be rushing out in the mornings to catch my bus, which therefore meant that I didn’t have time to sit down and enjoy my breakfast. That was where Muffin Making Mondays with Jialing came in, and when I had run out of muffins to take to work (because we only bake fortnightly), I would pack some fruits and even sometimes a small tupperware of cinnamon toast cereal with one of those small drink cartons of milk. When I’d get to the office, I’d pour the milk over my cereal and enjoy breakfast at my table. There was a time where one of the managers asked me what I was having for breakfast and the thought of me bringing a small carton of milk made her laugh so hard. I told her it was practical 😛 Another time when I was also having cereal, my other manager asked if what I was having was shareable; to his dismay, cereal ain’t shareable! He asked what kind of cereal I brought in and I said cinnamon toast. The other manager said that that was so American of me.

Anyway, I mean, if you didn’t already gather what this month’s theme is from my little story, yes it’s breakfast and brunch month on the blog! For the month of October I will be sharing with you some of my favourite breakfast/brunch recipes! I’ll be kicking off tonight’s post with a dish that I threw together when I was still living in Sydney. I was inspired by a post that I saw on Instagram by Raw Pawpaw Café in Brisbane. I was inspired by their plating of one of their dishes, and decided to plate it up with a few of my favourite ingredients for breakfast. I think most of the preparation of the ingredients in this dish is pretty straight forward, and you can get creative yourself by mixing up the ingredients a bit by adding your own favourite breakfast ingredients!

Breakfast Plate Ingredients

PREP TIME 5 MINS | COOKING TIME 20-22 MINS | SERVES 1

INGREDIENTS

  • 2-3 slices of soy & linseed bread, toasted
  • 2 bacon rashers
  • 2 large free range eggs, at room temperature
  • 1 chorizo sausage, thick slices
  • 1/2 avocado, cut into chunks
  • Bunch of grape vine tomatoes
  • Butter, for spreading
  • Ground salt and black pepper to taste
  • Handful of cup mushrooms, sliced
  • Handful of loose baby spinach leaves
  • Lemon wedges, to serve
  • Olive oil

METHOD

  1. In a small bowl, marinate the avocado chunks with a little bit of olive oil, salt, pepper, and lemon juice. Set aside.
  2. Preheat oven to 200C. Line a baking tray with aluminium foil and toss the grape vine tomatoes in a little bit of olive oil and salt. Roast in the oven fro about 10 minutes, or until the tomatoes have gone soft. Turn the temperature down to about 80-90C just to keep them warm before serving.
  3. Meanwhile, heat a large grill pan over medium high and cook the bacon rashers and chorizo slices, about 3 minutes per side. Once done, transfer to the baking tray and keep warm in the oven.
  4. Add your sliced mushrooms to the same grill pan and cook until browned and softened, about 4-5 minutes altogether. Turn the heat off and transfer to the baking tray and keep warm in the oven.
  5. Place the eggs in a small saucepan, covering the eggs with cold water. Bring to a boil over high heat, and once boiling, reduce the heat down to medium. Simmer gently for about 3 minutes. Remove the saucepan from the heat and using a slotted spoon, transfer to the egg carton.
  6. Plate up accordingly and enjoy your breakfast!

Breakfast Plate

Breakfast Plate

Just a little side note here before I end tonight’s post – I wanted to choose an egg carton that wasn’t grey just so that it doesn’t look dull. I must say it was hard choosing eggs based on the colour carton they come in because most of the non-grey ones were caged eggs (yes, I don’t buy caged eggs). Good thing these eggs that came in the blue carton were free range, and the blue really suited the plating and contrasted the food colours nicely.

BON APPÉTIT

– Ally xx

myTaste.com

Bacon, Beer & Potato Soup

Bacon, Beer & Potato Soup

Hello Everyone! Today is the last day for Winter Warmer Month *sad face* and I’ve got something that the men may like: Bacon, Beer, and ‘Tater Soup (aka “Man Soup”). Towards the end of June, when I was planning Winter Warmer Month, I came across this recipe in my research and decided to give it a go for one reason, and one reason only – it was just because it was called Man Soup, which I’m guessing comes from the bacon and beer.

Bacon, Beer & Potato Soup

If you are, or have been following my Instagram through my blog, you may have noticed that I have been posting a few photographs that show somewhat symmetry (asymmetry) breakfast/brunch/lunch/super late lunch photographs that have been inspired by the symmetrybreakfast guys that have been trending last weekend. I showed them to Jialing and we then decided to have our own symmetry breakfast this past week and it’s actually quite fun! Today, as you can see above, we had bacon, beer, and potato soup, well, we were supposed to have a different brekky this morning but since I was already preparing this for the blog, we decided to have soup instead.

The original recipe can be found on Food.com – I pretty much followed the recipe, but adjusted the quantities, probably not very accurately since I kind of just winged it to make two servings.

Bacon, Beer & Potato Soup Ingredients

PREP TIME 10 MINS | COOKING TIME 1 HOUR 10 MINS | SERVES 2-4

INGREDIENTS

  • 330ml (1 bottle) beer
  • 250g maple-glazed bacon, cut into bits
  • 50g vintage cheddar cheese, crumbed or grated
  • 1 cup chicken broth
  • 2 large potatoes, peeled
  • 1 celery stick, sliced
  • 1/2 brown onion, halved and sliced thinly
  • 1/4 cup plain flour
  • 2 tbsp unsalted butter
  • 2 tbsp light sour cream, plus more for topping
  • Ground salt and black pepper to taste
  • Olive oil

METHOD

  1. Preheat oven to 200C (400F or gas mark 6). Line a baking tray with foil or parchment paper and rub the potatoes with a bit of salt and some olive oil. Bake in the oven for about 45 minutes, adjusting the cooking time if needed to make sure that they pierce easily with a fork.
  2. As the potatoes cook, heat a medium-sized pan over medium-high and add the bacon bits. Fry until crispy. Once done, use a slotted spoon to remove the bacon bits and transfer to a plate lined with a paper towel.
  3. Next, add in the onion and celery slices to the pot with the bacon grease and sauté until soft and translucent, about 5 minutes. Then add in the butter and continue stirring until it melts.
  4. Sprinkle the plain flour over the onion/celery mix, stirring continuously until it starts to form a paste-like texture, and the flour and fats are combined smoothly. Keep stirring it for a further 5 minutes until it becomes a blonde roux (a light tan colour).
  5. Slowly pour the chicken broth into the roux, adding more and more at a time to get the roux into a creamy texture. Once all the broth has been added, pour the beer into the soup slowly, a little at a time and continue to stir.
  6. When the potatoes are done, cut them into small chunks and add them to the pot, stirring to incorporate into the soup.
  7. Using a handheld stick blender, mix the entire mixture into a thick stew. Add water to thin if necessary, however don’t add too much liquid until the blending is done. Then, add the sour cream and cheddar cheese, and let the soup continue cooking for a further 15-20 minutes on medium-low.
  8. Turn the heat off, and divide equally into serving bowls (2 large bowls, or 3-4 small bowls) and top with the crispy bacon bits and a dollop of sour cream. Enjoy!

Bacon, Beer & Potato Soup

BON APPÉTIT

– Ally xx

myTaste.com

Minestrone Soup

Minestrone Soup

Hello Everyone! Winter Warmer Month is coming to an end this week *sad face* but surely we won’t be saying goodbye to soups forever. I’ll keep today’s post short only because I am actually just writing this now (maybe 30 minutes before this goes up) and I didn’t prepare it in advance or during the day. I’m keeping it short because I’m really tired, but I didn’t want to skip out on posting.

Basically I woke up at 6:30am today, yes that’s actually quite early for me especially since I didn’t sleep well last night, don’t know why. I got up earlier than usual to get ready and head over about an hour out West on the train, to Brendon’s (brendonthesmilingchef) place for a cooking collaboration that had been planning for just about over a month now. We spent the whole morning until late afternoon shopping, cooking, styling, eating, and talking – and overall it was a successful day. I won’t say what we made today because that will be coming up for the month of August!

Minestrone Soup

Okay (again I always do this), I said I’d keep it short but I’m already 200 words in and I haven’t actually talked about today’s recipe – Minestrone Soup. is a thick soup of Italian origin made with vegetables, often with the addition of pasta or rice. Common ingredients include beans, onions, celery, carrots, stock, and tomatoes. There is no set recipe for minestrone, since it is usually made out of whatever vegetables are in season. It can be vegetarian, contain meat, or contain a meat-based broth. I’ve made this soup a couple of times in the past and I used risoni pasta and added bacon chunks to it before. Today, I’m keeping it quite traditional, and used left over angel hair pasta hair that I cut into about 2cm long pieces.

Minestrone Soup Ingredients

PREP TIME 10 MINS | COOKING TIME 65 MINS | SERVES 4-6

INGREDIENTS

  • 375g McKenzie’s Italian Style Soup Mix, washed and drained
  • 150g maple-glazed bacon, cut into bits
  • 1 can (400g) canned diced tomatoes
  • 1 cup angel hair pasta, cut into 2cm long strands
  • 2-3 garlic cloves, minced
  • 2 small carrots, peeled and sliced
  • 1 celery stalk, sliced
  • 1 medium-sized onion, diced
  • 1 large potato, peeled and cut into small chunks
  • Ground salt and black pepper to taste
  • Shaved parmesan cheese
  • Bread of choice

METHOD

  1. Preparing the Beans:
    • Quick method: Put required quantity into a saucepan and cover with water – approximately 3 cups of water for every cup of soup mix. Bring to the boil and simmer for approximately 45 minutes or until cooked, skimming if necessary.
    • Traditional method: Soak soup mix for approximately 6-8 hours (overnight if convenient) before cooking.
  2. Minestrone Soup: Heat oil in a large pot over medium-high. Fry the bacon bits until browned, then sauté the garlic together with the bacon until fragrant and golden brown. The add in the onions and cooking until soft.
  3. Add in the carrots, celery, and potatoes, and season with salt and pepper to taste. Give it a good mix and leave to cooking for about 5 minutes before adding the canned diced tomatoes in. Cook for a further 5 minutes.
  4. Add in the chicken stock and bring to a boil. Once boiling, add in the prepared beans and further simmer for about 10-15 minutes, in the last 4 minutes, add in the angel hair pasta.
  5. Turn the heat off, and divide equally into serving bowls (4 large bowls, or 5-6 small bowls) and top with some shaved parmesan cheese. Serve immediately with some stone-baked Pane di Casa bread.

Minestrone Soup

BON APPÉTIT

– Ally xx

myTaste.com

Cuckoo Callay - YA BACON ME CRAZY

Cuckoo Callay

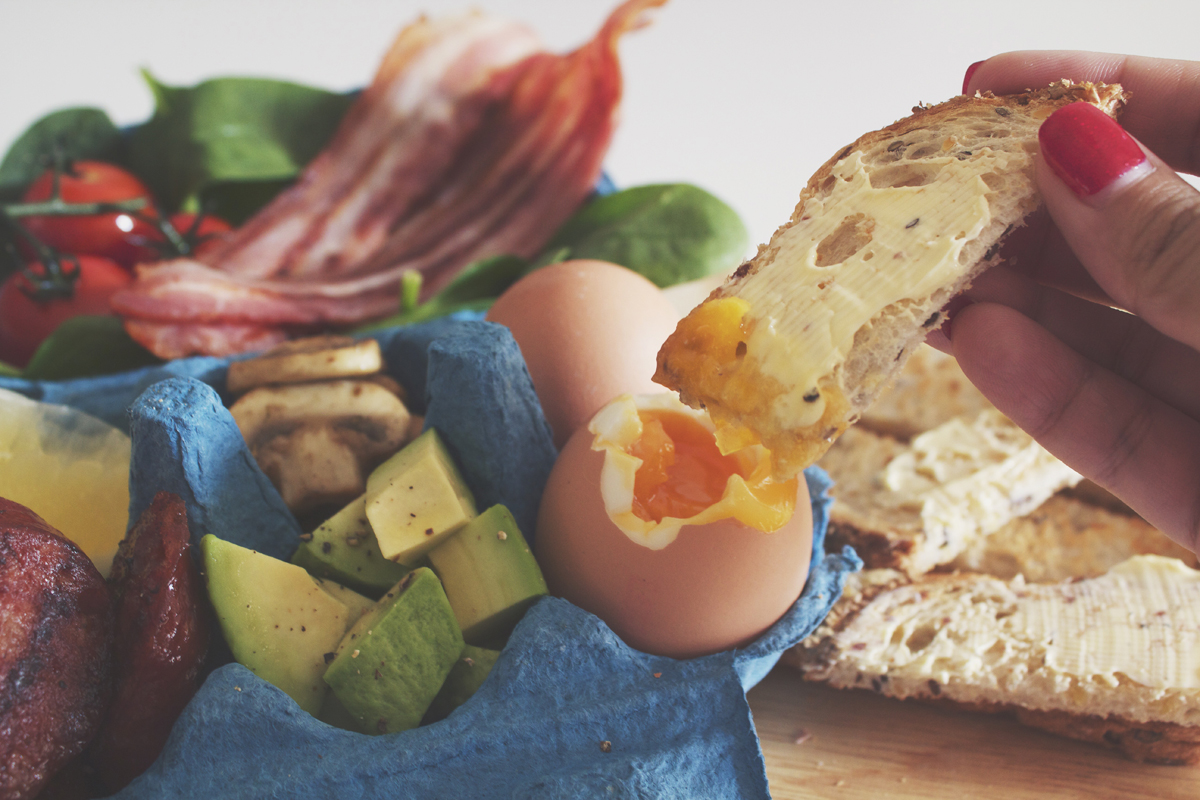
Hello Everyone and welcome back to an all new Review Sunday! Now, I’ve been back to the places twice already, once earlier on this year in February for my last brunch with friends in Sydney before I left to go back to Brunei. The other time I went here was with my family towards the end of May this year to try out their new menu, and to obviously take them to a favourite café of mine (yes I really liked this café from the very first visit I made with my friends). Anyway, the dishes that you are about to see below are a bit muddled in a sense that you will see dishes from their Bacon Festival which launched in the second week of February. The festival lasted for about 6 months I think, and is now no longer on their menu, but don’t fret! They have a whole new menu out and I will also be looking at a few of those dishes in today’s review.

Cuckoo Callay

Firstly, the Bacon Festival; sadly over, but the deliciousness will forever remain! Though I’ve been following the café on Instagram for a while back then, I never really found the chance to pay a visit. When they launched their bacon festival, I made it my mission to go at least once before leaving or else I’d miss out on the festival forever! It was such a great sunny fall day spent with very close uni friends. It was my second last day in Sydney at the time and therefore my last brunch as well before I went back to Brunei. I mean, clearly seeing that I’m back in Sydney, it wasn’t actually my very last time – I just said that at the time because I wasn’t sure if I’d make it to the June graduation sessions, and if I didn’t that meant that I’d be away from Sydney for 9 months until November 2015. I’m glad that I was able to graduate in June, so really I wasn’t gone for too long, but I do only have 2 weeks left in Sydney before I leave for good *sad face*

We decided to all order a dish each, and share amongst the 5 of us so that we’d be able to get a taste of everything bacon! Also to note down, all their bacon goods are free range and sourced from Australian pig farmers by Black Forest Smokehouse.

Cuckoo Callay - BACON DAWG
BACON DAWG: Maple glazed bacon sausage with gruyere cheese sauce, tomato and quince relish, crackling, and dill mustard pickles ($16.00)

My least favourite from the dishes that we ordered and only because I don’t like mustard or pickles, so dill mustard pickles? No! Otherwise if I can recall, my friends quite enjoyed this dish, but it wasn’t their top pick amongst the other dishes. I did love the sausage as it was juicy and succulent, as well as the crackling though, well what I could get of it I suppose since we were all probably going for it!

Cuckoo Callay - BACON ALL THE RULES
BACON ALL THE RULES: Black Forest Smokehouse maple bacon, bourbon bacon, bacon steak, bacon sausage, and bacon-crumbed poached eggs served on sourdough ($24.00)

This dish, though nothing special for me personally seeing as I could whip up something like this at home myself, was a good dish. It was jam packed with meat, eggs, and toast; a classic hefty breakfast. I know this is probably something you probably wouldn’t comment on, but the eggs we’re cooked perfectly with an oozy, runny yolk. I’m commenting on the eggs because you would not believe the many places I’ve been to that say poached eggs and the yolk was a disappointment – basically overcooked. Cuckoo Callay did not disappoint!

Cuckoo Callay - DON'T GO BACON MY HEART
DON’T GO BACON MY HEART: Beer candied bacon and popcorn chicken burger served with beer and tomato chutney, mustard aioli, and ‘slaw on brioche ($19.00)

I don’t really remember if I liked this dish or not – then again I guess not being able to remember a dish means that it didn’t have an impact on me. I don’t think it was bad, but it didn’t impress either. As long as there was bacon, but not just any bacon, beer candied bacon!

Cuckoo Callay - BACON, GET IN MA BELLY
BACON, GET IN MA BELLY: Pork Belly with sticky sweet chilli and fennel seed sauce with bacon, caper, coriander, and lime salad ($20.00)

This was my second favourite dish from the festival. The pork belly was chunky and crispy which was well accompanied by the sticky sweet chilli sauce/glaze it had. The squeeze of lime over the pork belly was a nice hint of freshness along with the capers and coriander. I don’t really like the taste of coriander so I just picked the capers out and ate those 😛

Cuckoo Callay - YA BACON ME CRAZY
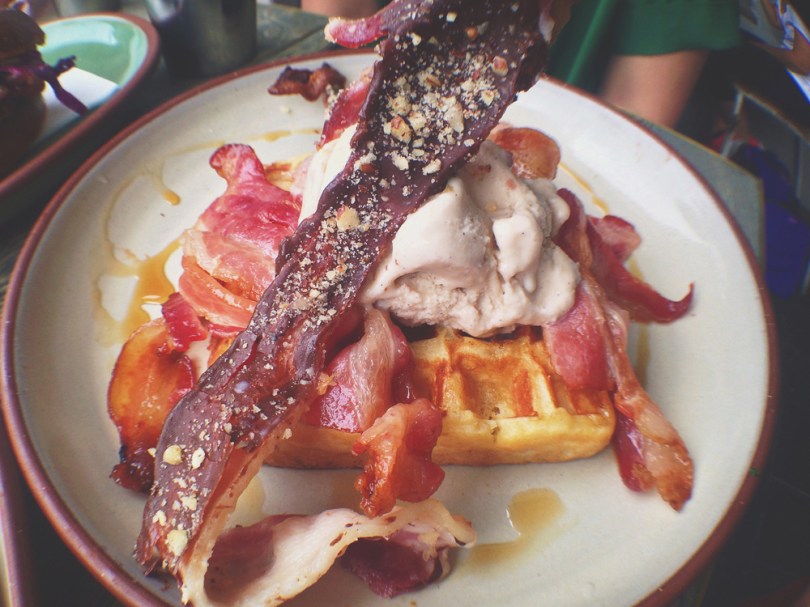
YA BACON ME CRAZY: Buttermilk waffles with house-made bacon, caramel and cinnamon ice cream, Black Forest Smokehouse maple bacon, maple syrup, and chocolate coated bourbon bacon ($20.00)

MY FAVOURITE DISH OF THE BACON FESTIVAL! I love bacon, I love waffles, I love caramel, I love cinnamon, I love ice cream, and I love caramel cinnamon ice cream. Altogether? Heaven. Need I say more? Well, I guess the only things I can say negatively about this dish was that the waffle was a bit soft for my liking. I’m all about the crispy waffle! Otherwise, a superb dish.

Cuckoo Callay - BLOODY BACON CUCKOOTAIL
BLOODY BACON CUCKOOTAIL ($14.00)

I have no words for this, well I do but it’s going to be very biased. For starters, I’ve never had a Bloody Mary before so I was definitely taking a chance on this drink. But bacon makes everything better right? I’m afraid to say not in this case. One of my friends even made the comment saying that, “it tastes like cold pasta sauce” and after that comment, I could not get the image of drinking pasta sauce out of my head. I told you it’d be biased, but for Bloody Mary drinkers, this would probably be heaven for you guys.


So as mentioned above, I was able to revisit Cuckoo Callay a second time with my family when they came to visit. The bacon festival was sadly over (I think the weekend before they arrived actually), but they had a whole new menu out for everyone to enjoy! Before I get into the food, I need to tell you a story about what happened at the café; it’s nothing bad, in fact it was hilarious and I will never forget this story. Anyway, when our dishes came to our table, I of course, whipped out my camera and started taking photos of the dishes. Moments later, I’d say about less than 5 minutes later, our waiter (a charming and cheerful lad I might add), returned to our table and said quite loudly and playfully, “Why haven’t you guys started eating?! Is there something wrong with the food?!” followed by a small giggle. I replied, “I’m taking pictures!” to which he then responded, again playfully with a hint of sympathy, “Oh okay, so everyone has to wait I see”. My Mom then said, “She has a food blog” to which he then gave that raised-head ahhhh expression, and then walked away. It was quite hilarious! I’ve taken so many pictures of food before at cafés/restaurant, but never have I ever been why I’m not eating my food. Well honey, if you just wait for me to be done with my pictures, I’ll gladly eat the food!

Anyway, below are just a few of the dishes you can find at Cuckoo Callay:

Cuckoo Callay - GEORGE'S GORGEOUS COUSIN
GEORGE’S GORGEOUS COUSIN (vegetarian and gluten-free): Marinated avocado and thyme infused confit heirloom tomatoes on sourdough, goats curd, house made basil pesto, lemon herb gremolata, and a 63degree egg ($17.00)

My sister Angela had this dish and I of course had a little bite of it so that I could at least write about the taste of the dish. What I really loved about this dish was the marinated avocados; I mean avocados alone are already just good nought for me with a crack of sea salt and black pepper, but these were simply divine. I can’t quite make out what they marinated the avocados in, but they tasted a bit tangy? Anyway, they tasted so good that I think I might’ve had a bit too much of the avocados than I was offered to have!

Cuckoo Callay - PURPLE RAIN
PURPLE RAIN (gluten-free): Beetroot cured salmon, organic quinoa, chargrilled broccolini, sugar snap peas, avocado, kale, chilli, feta, toasted almonds, and 63degree egg ($21.00)

This was the dish that I had and though the avocados weren’t marinated, I still believe that I made the right choice in ordering this for myself. The dish was packed with lots of flavours and textures, and the runny yolk from that 63degree egg just tied the whole salad together. The cured salmon was something new for me in a sense that I’ve never had beetroot cured salmon before and though it was nice, nothing can compare to Devon Café’s cured salmon for me!

Cuckoo Callay - WE FOUND MARY'S LAMB
WE FOUND MARY’S LAMB: 16 hour slow cooked Moroccan spiced lamb, Israeli couscous, chermoula marinated eggplant, minted yogurt, and pistachio ($22.00)

My youngest sister Alyssa ordered this dish, well more like I ordered the dish for her since she had no clue on what to order. The lamb was very tender and really had that Moroccan flavour packed in it. I really liked the Israeli couscous for the way it looked only because I don’t think I’ve ever seen couscous so big and so round! Besides those two elements, everything else on the dish tied nicely together.

Cuckoo Callay - EGGS ON TOAST
EGGS ON TOAST: soft scrambled ($9.00) with extra marinated avocados (+$4.00)

My mom, though she enjoys food a lot, isn’t much of a big eater and so I ordered a simple eggs on toast with marinated avocados for her. You can choose how you want your eggs, whether soft scrambled, 63degree, or fried, and what extras you would like to go with it from crispy bacon, beetroot cured salmon, duck sausage, to grilled haloumi, marinated avocados, etc. Take your pick really to whatever suits your tastebuds. Anyway, of course before ordering this dish, I had no idea how good the avocados were, so after tasting them from my sister’s dish, I was quite happy with the decision to get extra avocados for my mom’s dish only because it meant that I could have more avocados *insert evil laugh* Anyway, what else can I say? The scrambled eggs were light a fluffy, the way it should be and toast is toast.

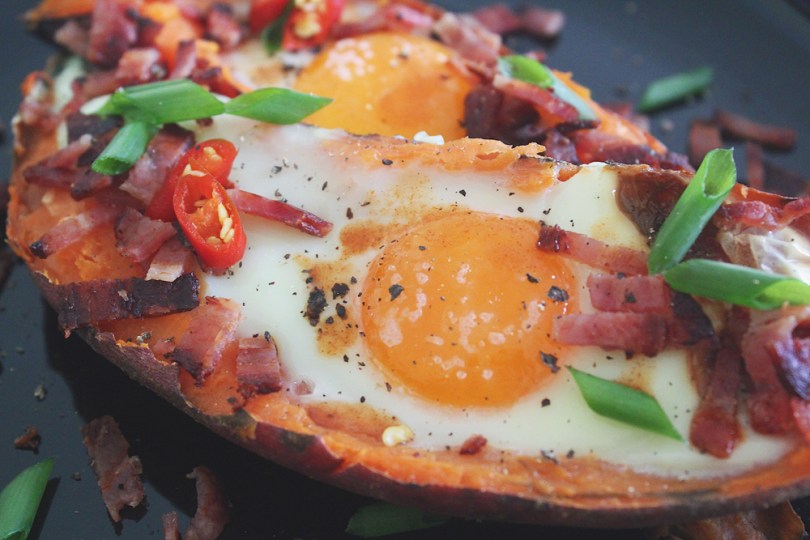
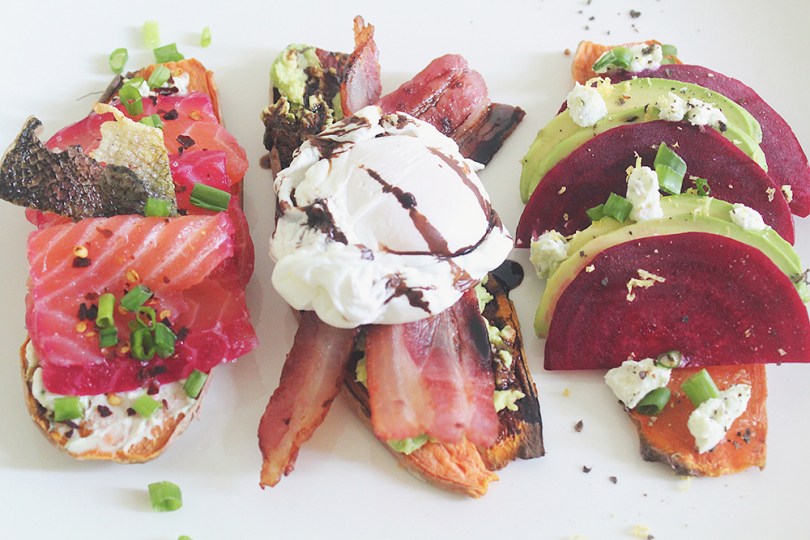
One thing that I noticed with Cuckoo Callay’s menu (both for the bacon festival and their new menu), is that they are very creative with naming their dishes; even my Mom found it very amusing! Overall, both dining experiences were delightful, and both the company and the quality of service was on point. If I recall, we had to wait a while for our dishes during the bacon festival, and that was only because the café was jam-packed with a lot of customers. We even had to wait 45 minutes in line to be seated, but altogether worth the wait I must say. The festival did not disappoint! Value for money? Like I mean it’s definitely worth your money in comparison to other places that I’ve been too. My Mother on the other hand, of course having just arrived from Brunei where you can probably get a similar dish for half the price, found it quite expensive. However, before she and my sisters left to go back to Brunei, she did comment on how yes eating out is definitely more expensive in Australia, but you get double the portion than you do back home. I’d give value for money an 8/10. The food probably a 8/10 as well; some minor issues due to personal taste, but nothing bad or mediocre about the food to give it a lower rating.

Cuckoo Callay
Newtown Railway Station
Shop 324B Erskineville Road
Newtown, New South Wales
Australia, 2042

– Ally xx