No-bake Avocado Lime Cheesecake

No-bake Avocado Lime Cheesecake

Hello Everyone! Today is a very special day, and for two reasons too! Today is special because God so loved the world that he gave his one and only Son, that whoever believes in him shall not perish but have eternal live (John 3:16 ESV). A very Happy Easter to all who celebrate the resurrection of Jesus Christ.

Besides today being Easter Sunday, today is also special because Amcarmen’s Kitchen turns 3! On this day 3 years ago I was sitting in my room, quite possibly still in my pyjamas at that time, blankly starting at my list of assignments to complete before the end of the Easter mid-semester break on my second-last semester of my degree. Knowing that I had so much to do in so little given time, I thought the only right thing to do at that moment was to take a nap and hopefully, magically, all my assignments would have been completed by the time I woke up from my nap… Well, that wasn’t what happened, but instead I decided to spontaneously delve into the world of WordPress, and *poof!* Kitchen Headquarters was born. Yes, Amcarmen’s Kitchen was previously known as Kitchen Headquarters in 2014 for a good year and a half before I did a whole rebranding in mid-2015.

As it has been for the past 2 years, I decided to make, not bake, a cake for Amcarmen’s Kitchen, and basically for my family and I to enjoy on behalf of my blog haha. I decided to try something new, while of course still sticking to the theme of using avocado in all my recipes for the month of April. Before we dive into today’s recipe, please do check the original by Sheilla on Chef Sheilla.

No-bake Avocado Lime Cheesecake Ingredients

PREP TIME 15 MINS | SETTING TIME 2 HOURS | SERVES 8-10
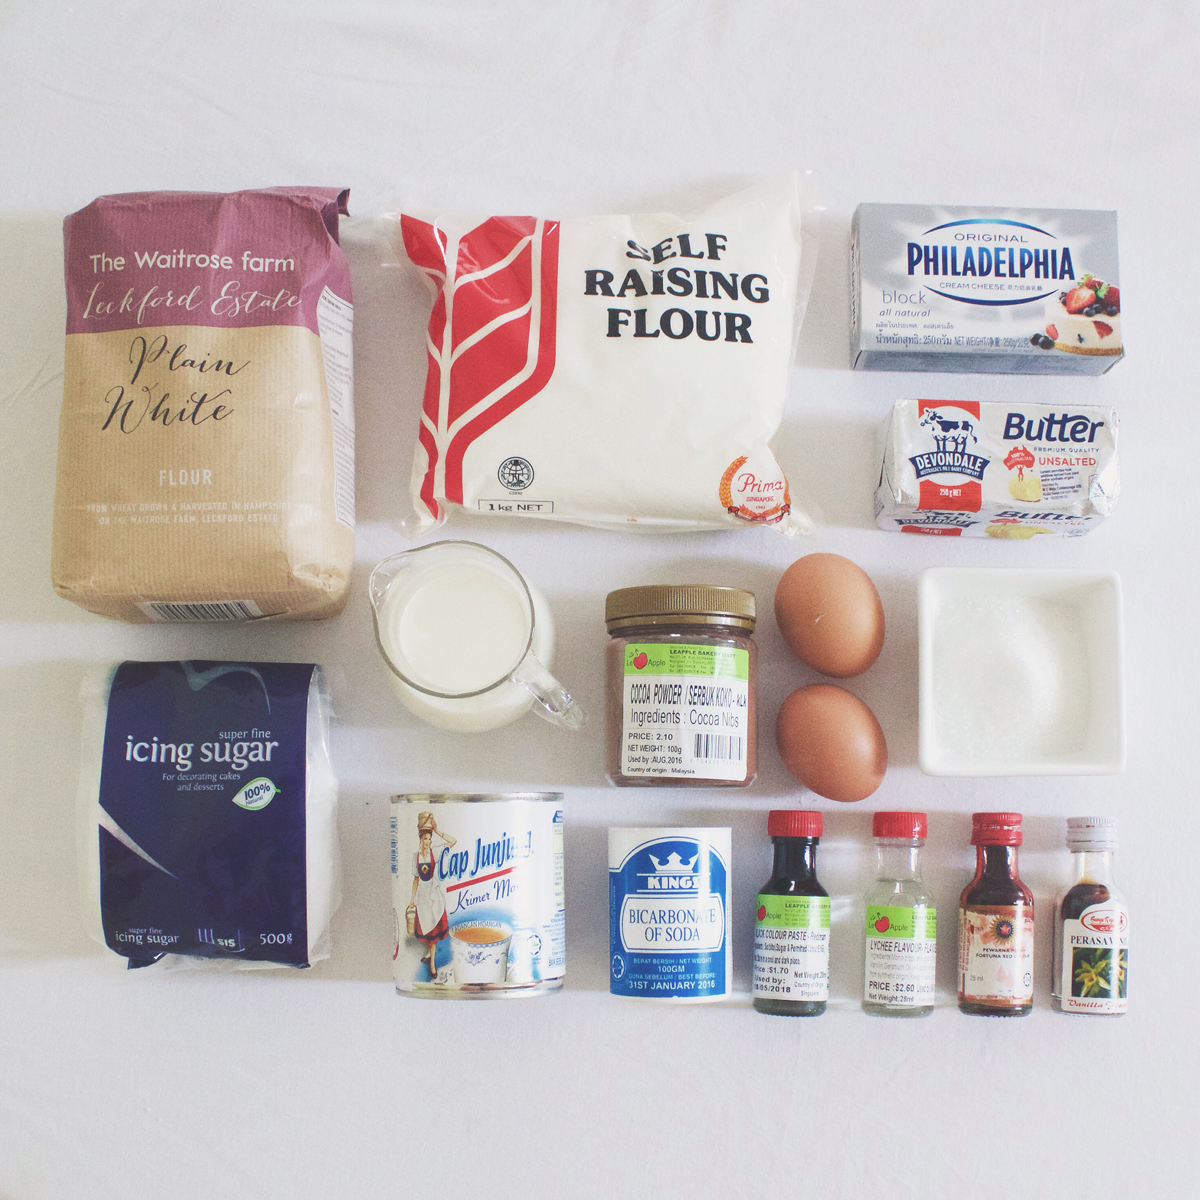
INGREDIENTS

For the avocado lime cheesecake mixture

  • 250g cream cheese, softened
  • 50g unsalted butter, melted
  • 300ml crème fraîche
  • 1 large avocado, mashed
  • 1 sachet (7g) clear gelatin or agar-agar powder
  • 1 cup granulated sugar
  • Juice and zest of 2 limes
  • 1 cup ground digestive cookies
  • 1 lime, for garnishing

METHOD

  1. Combine the ground digestive cookies and melted butter in a medium-sized bowl and mix until moist crumbs form. Press the crumb mixture onto the bottom of a 10″ springform pan that has been lined with parchment paper. Chill in the freezer for about 10 minutes to set.
  2. Take 100ml of the crème fraîche and combine it with the gelatin or agar-agar powder in a small saucepan. Stir for about 2 minutes until all the gelatin granules has dissolved. Turn the heat to medium and bring to a boil, stirring for a few minutes until the gelatin has completely melted. Remove from the heat and strain through a fine sieve. Set aside.
  3. Add the mashed avocado, cream cheese, sugar, the remaining 200ml of crème fraîche, lime juice, and lime zest to a large mixing bowl and using an electric mixer with a paddle attachment, mix everything together until smooth and well-combined. Pour in the gelatin-cream mixture and continue to mix until creamy and smooth in texture.
  4. Pour the avocado lime cheesecake mixture into the prepared springform pan and smoothen the top. Chill in the freezer for at least two hours for it to set.
  5. Release the cheesecake from the springform pan and serve right away! Garnish the top with some lime slices and zest. Enjoy!

No-bake Avocado Lime Cheesecake

The taste: amazing! The flavour of the avocado definitely shone through, and the hint of tangy flavour from the lime made the whole dessert refreshing in taste. The texture… Well let’s just say that it is supposed to be creamy and smooth, mine wasn’t as smooth as it could be. It has nothing to do with the original recipe; I think that I may have slipped up somewhere along the way. The obvious was probably that I was on the verge of over whipping the cheesecake mixture that the fresh cream started forming little clumps – I stopped before it severely over whipped. Also, I probably didn’t add enough gelatin to the cheesecake mixture so it didn’t quite set right. I only added half of the sachet in even though the original said ‘1 sachet’ – in my defense I didn’t know if Sheilla’s 1 sachet was the same quantity-wise as my 1 sachet. Oh well, I’ve adjusted the quantity of the gelatin in this recipe so hopefully the one listed above works!

Before I end tonight’s post, I’d just like to take this opportunity to thank first and foremost, my Mom who taught me how to cook. I also thank my other family members and friends who encouraged me to start up my blog because if it weren’t for them, Amcarmen’s Kitchen wouldn’t be here today, and I probably wouldn’t have continued pursuing my passion for cooking at home. Let’s face it, when I cook, I cook for my blog, and my family just so happens to be around to eat it after haha! Finally, to those who think I am just wasting my time on this, or assume that I work in a restaurant as a waitress because I didn’t actually go to culinary school to be able to work in a commercial/professional kitchen, take your negativity elsewhere. I have a degree in Design and I am working in the country’s leading Advertising Agency as a Creative Design and Events Management Executive, as well as a Copywriter. Thank you very much.

No-bake Avocado Lime Cheesecake

No-bake Avocado Lime Cheesecake

BON APPÉTIT

– Ally xx

myTaste.com

Baked Broccoli Parmesan Fritters

Baked Broccoli Parmesan Fritters

Hello Everyone! How are y’all doing on this fine Wednesday evening? Or morning? Or even still Tuesday evening for some? Well, whatever timezone you’re in, I hope everything is going well, and if it isn’t, keep your head held high and power through, for remember that life doesn’t always give you what you want, but it gives you what you deserve. Push yourself to strive for better, because no one else is going to do it for you – if anything, they’re going to drag you down. Walk away from anyone who takes you joy away, for life is too short to put up with them.

​Wow, I just realised how emotionally motivational I just got there, and no it doesn’t have anything to with what’s going on with me right now, but I just wanted to start off by asking you guys how you are all doing. When I hit the point of assuming that everyone is doing fine, I instantly became aware of that fact that not everyone may be doing fine, and it’s okay to not feel 100% all the time; just remember that YOU are the creator of your own destiny.

Baked Broccoli Parmesan Fritters

All that aside, we’re powering through with hero-ing Broccoli for the month of March! Two more days to April, and still 2 more recipes (excluding this one) to share for this month! Tonight’s recipe I stumbled upon one day while on Pinterest in search for some food inspiration, but before I move onto the recipe, be sure to check out the original over on Karina from Cafe Delites: for all good food lovers.

A fair warning, my fritters don’t look anywhere as near as how amazingly delicious to the eye Karina’s, but they nonetheless taste amazing, but probably not crispy. ​Well, apparently the trick to getting baked fritters pan-fried crispy is to lightly spray a coating of olive oil on top of them. Also, I think I may have accidentally baked mine for too long and they’re probably a bit too spread out and hence flatter… Oops!

Baked Broccoli Parmesan Fritters Ingredients

PREP TIME 10-12 MINS | COOKING TIME 25-30 MINS | SERVES 8-10 FRITTERS

INGREDIENTS

  • 1 head broccoli, cut into florets
  • 1 large free range egg
  • 1 medium-sized brown onion, diced
  • 2-3 garlic cloves, minced
  • 1/3 cup plain flour (or if you wish for a low-carb option, use almond flour instead)
  • 1/3 cup grated or shaved parmesan cheese
  • 1 tsp ground sea salt
  • 1/4 tsp ground black pepper
  • Olive oil cooking spray

METHOD

  1. Preheat oven to 200C (400F or gas mark 6). Line a baking tray with parchment paper. Set aside.
  2. Place the broccoli florets in a food processor and pulse a few times until the florets have been chopped finely.
  3. Add the egg, diced onions, minced garlic, plain flour, and parmesan cheese to the food processor and pulse again a couple of times until the ingredients are well combined. Add the sea salt and black pepper to the mixture and stir.
  4. Form about 8 to 10 fritters on the prepared baking tray, making sure that they do not touch each other. Spray the tops of each fritter with a light coating of olive oil.
  5. Bake in the oven for 12-15 minutes on each side until golden. Alternatively, you can pan fry these fritters in a non-stick pan over medium heat until golden on both sides.
  6. Allow the fritters to cool down slightly before serving with your choice of dip. Enjoy!

Baked Broccoli Parmesan Fritters

BON APPÉTIT

– Ally xx

myTaste.com

Banana Cheesecake Rollups

Banana Cheesecake Rollups

Hello Everyone! Yes, I’m still trying to play catch up here and hoping to get everything back to order by the time April sneaks up on us. I’ve been trying very hard to get recipes up on the blog for the past week, but I just never got around to because of, well, I was going to say several factors, but after running them by my head just a second ago, there were really only two factors that affected my mood to write. The first being unnecessary workplace drama that put me in such a mood for the past week, and second, it’s that time of month. You can imagine the rollercoaster of emotions I went through – I was just glad the the working week was over by the time it was Saturday, but it doesn’t help that I’ll be back to work again tomorrow. Seriously, a one-day weekend definitely NOT enough.

All that aside though, I watched Beauty and the Beast on Thursday night with my Mom and my sister. Belle could not have been played any better than Emma Watson; she was just an absolute fit for that role. Not only was she the definition of “Belle”, her singing was also on point. The movie just brought back many childhood memories, and I may have shredded a few tears here and there throughout the movie, and sung along to the songs while I saw people just snapchatting or Instagram storying the sh*t out of the movie – like put your phones away you uncultured and uneducated youngsters!

Anyway, tonight’s recipe is the last of the banana recipes that was supposed to be covered last month, and one that I stumbled upon through my research when I was planning for Amcarmen’s Kitchen early on the year. I did’t want to make a whole batch of these, so I only made 4 rollups. Unfortunately for me, out of the 4 only one didn’t burst open so I do apologise if the photographs for this recipe look a bit… Lonely. Hahaha! You can find the original recipe for these Banana Cheesecake Rollups over on The Cards We Drew. Also, just something to note, I tried this recipe out using puff pastry instead of crescent roll dough like in the original recipe. The reason? Nothing in particular actually aside from the fact that remade crescent roll doughs aren’t available here in Brunei and therefore I made the decision to use puff pastry instead. I also didn’t add the toppings to the rollups as I assumed that the dessert would already be too sweet for me to handle and with extra sweetness on top would probably be overkill for me. Feel free to top yours though if you’re a sweet tooth.

Banana Cheesecake Rollups Ingredients

PREP TIME 15 MINS | COOKING TIME 15-18 MINS | SERVES 12 ROLLS

INGREDIENTS

  • 2 large bananas, cut into 6 pieces each
  • 1 packet (500g) puff pasty block, defrosted
  • 250g cream cheese, softened
  • 3/4 cup of sugar
  • 1/2 cup of brown sugar
  • 1/2 tsp vanilla

METHOD

  1. Preheat oven to 180C (350F or gas mark 4). Line a baking tray with parchment paper and set aside.
  2. Lightly flour both the work surface and the pastry before rolling out to your required thickness. Allow for the pastry to stand for a few minutes to help reduce shrinkage.
  3. While the pastry is left to stand, combine the cream cheese, sugar, and vanilla in a medium-sized bowl and using a handheld electrical mixer, beat the ingredients together on high. Set aside.
  4. Roll out the puff pastry dough to about 3mm thick and cut into 12 long triangles. Starting at the largest end, add a tablespoon of the cream cheese mixture, a pinch of brown sugar, then a piece of banana on top.
  5. Tuck the edges over top of the banana, roll up, and place onto the prepared baking tray. Repeat this until you’ve made all 12 rollups.
  6. Bake in the oven for about 15-18 minutes, until golden brown and cooked through. Once baked, sprinkle some powdered sugar over top and serve warm with a cup of coffee. Enjoy!

Banana Cheesecake Rollups

Banana Cheesecake Rollups

BON APPÉTIT

– Ally xx

myTaste.com

Upside-down Banana Cake

Upside-down Banana Cake

Hello Everyone! So I don’t think I’ve shared this little piece of information on the blog before – I’m going on holiday starting this coming Friday! I’ll be in Singapore for a 10-hour layover (yay me) before finally setting off to my final destination. I won’t share where I’ll be going as I’ve been trying so hard to keep this a secret from a few people – but you’ll definitely know in next week’s post. I’ve got everything planned out and prepared for the blog for this month so you guys don’t have to worry about me being gone from Amcarmen’s Kitchen for another 3 weeks (yeap, that’s how long I’ll be on holiday for) seeing as I just returned for 2017.

Anyway, that aside, today’s recipe has been made multiple times before back when I was still studying in Sydney. My then housemate and I would whip this cake up whenever we’d see our fruit bowl of bananas start to get all spotty and soft. This is definitely a recipe you should consider when you find yourself in a similar situation – instead of throwing those bruised bananas, which are actually still pretty mint, mash them up and make an upside-down banana cake! You definitely won’t regret it.

This is an incredibly moist and flavourful dessert, but it could be great for breakfast or as a morning/afternoon snack too. You can take it a step further as well by topping it all off with some toasted pecans, a generous amount of caramel sauce, and topped with a scoop or two of creamy vanilla ice cream. I decided to keep mine simple without all the extra and unnecessary sugars on top since I’m not a big fan of too much sugar, and the fact that my Mom is a diabetic is an enough reason to hold back on the sugar since she’ll definitely be having a slice or two… Or even the whole cake to herself.

Upside-down Banana Cake Ingredients

PREP TIME 15 MINS | COOKING TIME 55-65 MINS | SERVES 10-12

INGREDIENTS

  • 65g unsalted butter, cut into cubes
  • 2/3 cup brown sugar
  • 2-3 large bananas, 1/3″ rounds
For the cake batter
  • 70g unsalted butter, softened
  • 2 large free range eggs
  • 1 & 3/4 cups plain flour
  • 1 cup overripe bananas, mashed
  • 3/4 cup granulated sugar
  • 1/3 cup plain yoghurt
  • 1 & 1/2 tsp baking powder
  • 1 & 1/2 tsp vanilla extract
  • 1 tsp baking soda
  • 1/2 tsp ground cinnamon
  • 1/4 tsp salt

METHOD

  1. Preheat the oven to 180C (350F or gas mark 4). Grease a 9″ x 2″ round cake pan, or an 8″ x 8″ x 2″ square cake pan. Spread the 2/3 cup of brown sugar on the bottom of the pan and scatter the pieces of cubed butter on top.
  2. Place the pan in the oven for about 5 to 7 minutes until the butter has completely melted. Remove the cake pan from the oven and give the butter and brown sugar a stir, spreading evenly on the bottom. Arrange the sliced bananas to cover the caramel bottom then set aside.
  3. For the batter, add the dry ingredients – plain flour, baking powder, baking soda, baking powder, ground cinnamon, and salt – to a medium sized bowl and stir together until combined. Set aside.
  4. In a large bowl using a handheld electric mixer on medium speed, cream the softened butter granulated sugar together until pale in colour. Add the eggs and vanilla extract, mixing well to combine. Then add in the plain yoghurt and mashed bananas, again mixing well to combine.
  5. Turn the speed of your mixer on low and slowly add the dry ingredients to the wet. Mix just enough to combine.
  6. Pour the batter over bananas, smoothing the top and then place in the oven to bake for 30 minutes at 180C. After half an hour, reduce the heat to 170C (325F or gas mark 3) and bake for additional 25-35 minutes until a toothpick inserted in the centre comes out completely clean.
  7. Once down, remove form the oven and let it cool in the pan completely, or at least until the bottom is barely warm before inverting onto a plate. Use a knife to loosen the edges from the pan then place a plate upside-down on top of the pan, then invert cake.
  8. At this point you can make a caramel sauce to top off the cake and add a handful of toasted, roughly chopped pecans to your dessert/breakfast/snack. Otherwise, enjoy the cake as it is!

Upside-down Banana Cake

Upside-down Banana Cake

BON APPÉTIT

– Ally xx

myTaste.com

White Chocolate Snickerdoodle Blondies

White Chocolate Snickerdoodle Blondies

Hello Everyone! Wow! I can’t believe that it’s the last day of November today! Once again, another month managed to slip right under our noses! Christmas is nearing, and in the blink of an eye, it will be 2017! Anyway, I’m not going to give a brief recap of my year just yet – I’ll probably save that for sometime in December – I’ll just give you a recap of my week as it was indeed a busy one! Firstly, I have been home alone for the past 5 nights as my Mom and my sister flew off on Friday to visit the other sibling over in Singapore. Secondly, I had two back-to-back events that I helped with the event decorations for, one was Phantom of the Opera themed (but very minimal/close to none on the decorations that actually resembled anything from Phantom of the Opera), and the other was an Alice and Wonderland/Enchanted Forest themed Staff Appreciation Night. I had loads of fun designing the initial proposal for the decorations, and of course helping with execution of the decorations onsite.

My next task, in terms of event decoration is to propose and present to the client, the theme ‘The Chronicles of Narnia; The Lion, The Witch, and The Wardrobe’ for a corporate 25th Anniversary Dinner coming up in mid-January. The presentation will be on Friday and I’m both excited and nervous at the same time; fingers-crossed that they will like my idea and that they see the underlying meaning of the chosen theme. Other than work, I scored VIP tickets from my Boss to watch Coreyah and JinJo Crew perform at The Rhythm of Korea on Saturday night. It was a free event hosted by the Korean Embassy here in Brunei as a sort of launching of their moving in to their new Embassy which will happen sometime in December if I’m not mistaken – so yes, this was an early celebration for the general public.

White Chocolate Snickerdoodle Blondies

A cross between a chewy blondie and moist butter cake, these blondies are studded with white chocolate chips and ribboned with sweet cinnamon sugar! — Sally’s Baking Addiction

But enough of the long-winded, personal life stories and let’s move on to tonight’s recipe shall we? So, I think you guys can probably tell that this is another recipe followed and adapted from none other than Sally’s Baking Addiction. I honestly think that the theme for this November shouldn’t have been ‘Cooking with Chocolate’ but rather Sally-themed instead haha! Anyway, I don’t actually have much to say for this recipe as it was kind of just a I-need-to-bake-something-for-my-blog-but-what-should-I-bake kind of moment early on the Sunday morning before I went grocery shopping to make sure I had all the ingredients. I came across this recipe while browsing and I thought that it’d be interesting to make.

White Chocolate Snickerdoodle Blondies Ingredients

PREP TIME 15 MINS | COOKING TIME 30-35 MINS | SERVES 12-15 BARS

INGREDIENTS

For the blondies

  • 2 & 1/3 cups plain flour
  • 1 cup white chocolate chips
  • 3/4 cup granulated sugar
  • 3/4 cup packed light brown sugar
  • 3/4 cup unsalted butter, softened to room temperature
  • 2 large free range eggs, room temperature
  • 2 tsp vanilla extract
  • 1 & 1/4 tsp baking powder
  • 1/2 tsp salt

For the cinnamon-sugar filling

  • 1/3 cup granulated sugar
  • 2 tsp ground cinnamon

METHOD

  1. Preheat oven to 180C (350F or gas mark 4). Line a 9×9, 11×7, or 9×13 inch baking pan with parchment paper, leaving enough overhang on the sides to easily pull the blondies out of the pan and cut once done.
  2. Combine the plain flour, baking powder, and salt in a small bowl, then set aside. Beat the unsalted butter on high speed using a hand or stand mixer fitted with a paddle attachment, in a large bowl. Beat for at least 1 minute until creamy, and then add in the granulated and brown sugars, beating for 2 full minutes on high speed until light and fluffy. Scrape down the sides and bottom of bowl when needed.
  3. Beat in the eggs and vanilla on high speed, scraping down the sides and bottom of the bowl as needed. On low speed, beat in dry ingredients until just combined. With a large wooden spoon or rubber spatula, fold in the white chocolate chips.
  4. Spoon half the batter into pan. It will be a relatively thin layer, but try to spread it across the pan evenly. Combine the cinnamon and sugar and sprinkle on top of them bottom layer, reserving 1 tbsp for the top. Spread the remaining batter over top. Some of the cinnamon-sugar will mix into the top layer as you spread it, which is fine. Sprinkle the top with remaining cinnamon-sugar.
  5. For a 9×9 or 11×7 baking pan, bake for 30-35 minutes or until golden brown and a toothpick inserted in the centre comes out clean. For a 9×13, bake 22-26 minutes or until golden brown and toothpick inserted in centre comes out clean. Cool completely for about 1 hour.

White Chocolate Snickerdoodle Blondies

These bars can be made 3 days in advance and kept in an airtight container at room temperature until ready to serve. Bars freeze well, up to 3 months. Simply thaw overnight in the refrigerator and bring to room temperature before serving. Leftover bars can be stored in an airtight container in the refrigerator or at room temperature for up to 1 week.

BON APPÉTIT

– Ally xx

myTaste.com

White Chocolate & Macadamia Red Velvet Cookies

White Chocolate & Macadamia Red Velvet Cookies

Hello Everyone! I don’t think I ever mentioned it in the past 3 posts for the month of November, but I’m pretty sure that most of you who follow my blog are smart little ducklings and have already probably figured out that the theme for Amcarmen’s Kitchen this month is all about Procrastibaking – well, really, not really. The theme isn’t just centred around baking, but it is most definitely about baking with… CHOCOLATE! How did I come up with this month’s theme you ask (well if you didn’t ask then read ahead hehe), I wanted to bake a Chocolate cake for my birthday this month, and I had two chocolate-linked recipes sitting in my archives waiting to be post up on my blog, and so… Baking with Chocolate came into play!

Or you could probably just say that I’ve been lazy and haven’t been in the mood to cook on Sundays for the past few weeks – which is partially true. It’s not that I was being lazy – it was more like I wanted to have a Sunday to myself doing whatever I want, meaning doing nothing actually *cheeky grin* instead of slaving away in the hot kitchen the whole afternoon. I’ve probably mentioned this in a post before, but for those of you who don’t know, I work 6 days a week from 8am to 5pm. By Sunday, all I want to do is just sit back and do nothing, however, if I did do that, I wouldn’t be able to keep up with Amcarmen’s Kitchen any longer.

White Chocolate & Macadamia Red Velvet Cookies

Anyway, enough of my rants, let’s move on to tonight’s recipe – an adaptation from none other than my favourite baker out there, Sally’s Baking Addiction. You can find the original recipe for these cookies over on her blog. If you went over to visit her blog, you’d notice that they are actually Red Velvet Chocolate Chip Cookies, but I decided to do a little twist and use white chocolate chips instead and pair them with macadamia nuts! The perfect combination in my opinion! I’d like to take this opportunity to share a recipe by a friend of mine, also known as Brendon The Smiling Chef, for his “I Love You This Much” Giant Red Velvet Cookie. I remember the time we met up and cooked together for my Auguest series last year, Brendon baked a Giant Chocolate Chip Cookie from the left over cookie dough he had from his “Cookies & Cream” inspired dessert. I think I might bake a Giant Cookie for next week actually!

White Chocolate & Macadamia Red Velvet Cookies Ingredients

White Chocolate & Macadamia Red Velvet Cookies

PREP TIME 1 HOUR 10 MINS* | COOKING TIME 10 MINS | SERVES 18 COOKIES

*Includes chilling time

INGREDIENTS

  • 1 & 1/2 cups + 1 tbsp plain flour, spooned and leveled
  • 1 cup semi-sweet white chocolate chips (plus a few extra for after baking)
  • 3/4 cup packed light (or dark) brown sugar
  • 1/2 cup raw macadamia nuts, roughly chopped
  • 1/4 cup granulated sugar
  • 1/4 cup unsweetened natural cocoa powder
  • 115g unsalted butter, softened to room temperature
  • 1 large free range egg, room temperature
  • 1 & 1/2 tbsp red food colouring
  • 1 tbsp milk
  • 2 tsp vanilla extract
  • 1 tsp baking soda
  • 1/4 tsp salt

METHOD

  1. In a medium-sized bowl, whisk together the flour, cocoa powder, baking soda, and salt together until incorporated well. Set aside.
  2. In a large bowl, beat the softened butter using a handheld or stand mixer with a paddle attachment on high speed until creamy, about 1 minute. When necessary, scrape down the sides and the bottom of the bowl. Add in the brown and granulated sugar, beating until combined and creamy, about another minute. Then, beat in the egg, milk, and vanilla extract, scraping down the sides and bottom of the bowl as needed. Once mixed, add the food colouring and beat until combined.
  3. Turn the mixer off and pour the dry ingredients into the wet ingredients. Turn the mixer on and slow beat on low speed until a very soft dough is formed. Beat in more food colouring if you’d like the dough to be a brighter red.
  4. Add in the white chocolate chips, and roughly chopped macadamia nuts and use a spatula to combine with the dough mixture. At this point, the dough will be sticky.
  5. Cover the dough tightly with aluminum foil or plastic wrap and chill for at least 1 hour (and up to 3 days). Chilling is mandatory.
  6. Preheat the oven to 180C (350F or gas mark 4) (177°C). Line two large baking trays with parchment paper or silicone baking mats and set aside.
  7. Scoop about 1 and 1/2 tablespoons of dough and roll into a ball, as pictured above. Place 9 balls onto each baking sheet and bake each batch for about10-11 minutes. The cookies may have only spread slightly and that’s ok. Simply press down on the warm cookies to slightly flatten and form crinkles. Stick a few chocolate chips into the tops of the warm cookies (optional and only for looks).
  8. Allow the cookies to cool on the cookie sheet for 5 minutes before transferring to a wire rack to cool down completely. Enjoy and share with family and friends!

White Chocolate & Macadamia Red Velvet Cookies

White Chocolate & Macadamia Red Velvet Cookies

BON APPÉTIT

– Ally xx

myTaste.com

Chilli Chocolate & Cinnamon Cake

Chilli Chocolate & Cinnamon Cake

Hello Everyone! Well… Today has been quite an eventful day! For my followers who do not know, today marks my quarter of a century years young! 25 years of achievements and failures has brought me to where I am today.

Round 1 of Birthday Celebrations

My colleagues surprised me with a cake earlier this afternoon – quite funny as the whole morning they kept telling me not to expect anything because they didn’t have a surprise for me, nor did they have cake. By afternoon, my Manager called me to their department, asking me to help her with a design that I had helped her with earlier in the afternoon. Being the gullible person that I am, I went up to her, and that’s when the rest started singing Happy Birthday and brought out the cake (mini tower of cream puffs). So I’d like to take this opportunity to thank everyone in the office who greeted me today – and for the surprise!

Round 2 of Birthday Celebrations

Round 2 of celebrations began earlier tonight as well, with my Mom, Sister, and my Godmother. We had Japanese for dinner and of course, the restaurant staff sang Happy Birthday to me as they brought out the cake that I had baked for myself for my birthday – which is tonight’s recipe! Original recipe can be found over on Dish.

Dense, rich and moist with a little hint of chilli and cinnamon – everything a great chocolate cake should be, and even more delicious when served with candid pepitas. — Claire Aldous.

Chilli Chocolate & Cinnamon Cake Ingredients

PREP TIME 15 MINS | COOKING TIME 20-25 MINS | SERVES 10-12

INGREDIENTS

For the cake:

  • 200g Lindt Chilli Chocolate, roughly chopped
  • 200g unsalted butter, cubed
  • 2 large free range eggs, lightly beaten
  • 1/2 cup caster sugar
  • 2 tbsp plain flour
  • 1 tsp ground cinnamon
  • 1 tsp vanilla extract
  • 1/2 tsp salt
  • 1/4 tsp ground cayenne pepper (optional if you’d like a little more kick to your chilli chocolate cake)

For the glaze:

  • 100g dark chocolate
  • 100ml thickened cream

METHOD

  1. Preheat the oven to 170C (325F or gas mark 3).
  2. Melt the butter and chocolate in a heat-proof bowl in the microwave at 30-second intervals and stirring until the butter and chocolate has melted. Once melted, stir in the sugar and vanilla extract, setting aside to cool for 10 minutes.
  3. Once cooled, gradually stir in the eggs and then fold in the flour, salt, cinnamon, and cayenne pepper. Pour into a buttered cake tin and smoothen the top.
  4. Bake for 20-25 minutes until the centre of the cake is set but not too firm. Once done, transfer to a rack and leave to cool completely in the tin.
  5. While the cake is cooling down, get started on the glaze by melting the dark chocolate in a heat-proof bowl set over a pan of simmering water, stirring occasionally. Do not let the base of the bowl touch the water. Once the chocolate has melted, slowly add in the cream, stirring gently. Remove from the heat.
  6. Transfer the cake to a dish and pour the glass over. Finish with a light dust of confectioners’ sugar and enjoy with family and friends!

Chilli Chocolate & Cinnamon Cake

Chilli Chocolate & Cinnamon Cake

BON APPÉTIT

– Ally xx

myTaste.com

Cassava Cake

Cassava Cake

Hello Everyone! Once again, apologies for another later than usual post. I just got home after doing some gift shopping for a friend’s wedding this Sunday, and a Secret Santa exchange gift on Monday. After my shopping spree, I had a nice and filling dinner with my Mom and sisters at Rack & Brew, a café cum boutique. I’ve always wanted to try out the food from this place since it opened late this year somewhere in September, and I finally got around to tonight.

For those of you who have been following my blog on a daily basis for the past week, you would’ve known that I made something called Pichi-Pichi on Sunday using grated cassava. Tonight, I’m going to share with you another cassava recipe in case you have any leftovers that you didn’t get around to using for your pichi-pichi. Some of the ingredients are similar (just that this requires less!), but what differentiates one from the other is the method of cooking. Pichi-Pichi is steamed, while tonight’s recipe for cassava cake is oven-baked. I do recommend that when you go out to buy cassava, buy a few kilos (up to 3 or 4 is sufficient), so that you can just peel and grate everything all in one go and cook it up in many different ways. Also, grated cassava freezes well for up to 3 months, just defrost before using.

Cassava cake is a classic Filipino dessert, or a hefty afternoon snack made from grated cassava and coconut milk. My Mom always makes hers with pure cassava (no added flour like the pre-made ones we find in the shops/restaurants where the ratio feels like 98% flour and 2% cassava), and fresh coconut milk squeezed from the flesh of a mature coconut. You may add more coconut milk on top of the cassava once it is baked about halfway through, or you can top with off with other favourites such as macapuno or a non-traditional topping such as custard. My Mom likes hers plain, and it tastes just as good.

Cassava Cake Ingredients

PREP TIME <5 MINS* | COOKING TIME 40-45 MINS | SERVES 8-10

*This assumes that you have grated cassava readily available (fresh or frozen).

INGREDIENTS

  • 4 cups grated cassava
  • 2 cups fresh coconut milk (from a can is fine as well)
  • 1 can (380g) condensed milk
  • 50g unsalted butter, melted

METHOD

  1. Preheat oven to 190C. Grease 2 x 10″ square pans with a bit of butter. Set aside.
  2. Add all the ingredients together in a large mixing bowl and mix using a spatula until well combined.
  3. Pour the batter equally into the prepared pans and place in the oven for about 40-45 minutes, or until the tops have browned and a toothpick inserted into the centre of the cake comes out clean.
  4. Remove from the oven and leave it to cool down a bit on a wire rack. Once they have cooled down slightly, cut them into medium-sized squares.
  5. Serve warm and enjoy!

Cassava Cake

BON APPÉTIT

– Ally xx

myTaste.com

Salted Caramel Popcorn Layered Cake

Salted Caramel Popcorn Layered Cake

Hello Everyone! Today is a special day, and that special day is my birthday! For those who want to know, I am 24 years young today, and another year wider, I mean, wiser, but not another year taller unfortunately. It’s been 4 years since I last celebrated my birthday in Brunei with my family, and friends I grew up and went to high school with. It’s been that long because for the past 4 years I’ve spent my birthday’s in Australia, with my friends from uni. I didn’t really plan anything special, I just organised a dinner party at Villa Mauri last Friday night with some friends; exchanging conversations, laughter, and of course, no gathering is complete without some dirty talk! We’ve all not changed one bit 🙂 I’d just like to take this opportunity to thank those who came that night, and also thank everyone else who has greeted me so far. I am so blessed to have family and friends from all over sending love my way. I know, that sounded a bit cheesy.

24th Birthday Celebrations
Birthday with my high school friends at Villa Mauri (November 6th, 2015)

24th Birthday Celebrations
Birthday with my work friends at 
Patisserie (November 9th, 2015)

I baked this cake yesterday afternoon for my birthday dinner tonight with my mom and my sister. Seriously, I cannot stress out how much I hate frosting – it take so bloody long for me to get it perfect. Well, not so much perfect, but for me to get it to cover the cake. I don’t know if I’m doing it wrong or I should blame the climate, but the buttercream is runny to begin with, so I put it in the freezer to stiffen up a bit before I frost. Then when I start frosting, it quickly becomes runny again to the point that I have to keep placing the cake in and out of the freezer multiple times before I can get the frosting to somewhat cover the cake. But anyway, after much frustration on the eve of my birthday, I managed to get a decent looking cake up I guess (so over it right now – so over baking cakes altogether).

Actually, I think I know the reason (maybe not really) why my frosting was runny. I had a look at the ingredients photo that I took and saw that I had icing sugar in it. At first, I thought that that might’ve been the reason, but when I looked at the original recipe, there was no sign of icing sugar. So why did my frosting go wrong?! 😦 Not enough butter?

24th Birthday Celebrations
Birthday with my family at home (November 9th 2015)

Anyway, I’ve been wanting to make a cake like this for a while; as in the whole salted caramel with caramel popcorn on top kind of cake. I was blown away when I came across it over on La Pêche Fraîche – so beautiful and well photographed. So don’t forget to check out the original recipe over on her blog; she has adapted the different components to making this cake from various recipes (all links have been acknowledged below). Plus, her’s looks much more beautiful, and somehow taller than my cake *cries*.

Salted Caramel Popcorn Layered Cake Ingredients

PREP TIME 20 MINS | COOKING TIME 50-55 MINS | SERVES 8-10

INGREDIENTS

For the yellow butter cake (adapted from Joy of Baking)

  • 120g unsalted butter
  • 4 large free range egg yolks
  • 2 & 1/4 cups plain flour
  • 1 cup sugar
  • 3/4 cup milk
  • 2 & 1/4 tsp baking powder
  • 1 & 1/2 tsp vanilla
  • 1/4 tsp salt

For the salted caramel (adapted from FoodSwoon)

  • 30g unsalted butter
  • 1/2 cup sugar
  • 1/4 cup + 2 tbsp heavy cream
  • 2 tbsp water
  • 1 tbsp corn syrup
  • 1/4 tsp salt

For the salted caramel Italian meringue buttercream (adapted from FoodSwoon)

  • 350g unsalted butter, cut into small chunks
  • 4 egg whites
  • 1 cup sugar
  • 1/4 cup water
  • 1 tsp corn syrup
  • Pinch of salt
  • Half of a batch of salted caramel, cooled, the rest reserved for drizzling (see recipe below)

For the salted caramel popcorn (adapted from the Kitchn)

  • Popped popcorn from about 1 & 1/2 bags of popcorn
  • 130 grams unsalted butter
  • 3/4 cup brown sugar
  • 1/4 tsp baking soda
  • Big pinch salt, plus a little for sprinkling

METHOD

  1. Yellow Butter Cake:
    • Preheat oven to 180C (350F or gas mark 4). Grease 2 x 8.5-inch pans with a little bit of butter.
    • In a medium-sized bowl, whisk together the plain flour, baking powder, and salt together. Set aside.
    • In a large bowl, beat the butter and sugar together until light and fluffy, about 4 minutes altogether. Scrape the sides of the bowl, then add the egg yolks in and beat for a further 2 minutes. Add in the milk and vanilla, stirring gently to combine.
    • Add in the dry ingredients all at once, and stir gently until the batter comes together. Divide the batter evenly between your prepared pans and bake in the oven for 20-25 minutes or until a tooth pick inserted into the centre of the cake comes out clean.
    • Set the cakes aside to cool down completely before frosting.
  2. Salted Caramel:
    • Heat the sugar, water, corn syrup and salt together over medium-low in a small saucepan . Whisk at the beginning until they dissolve. Once dissolved, leave the mixture to caramelise into an amber colour.
    • Once amber, remove from the heat and quickly whisk in the butter and cream. Be careful of any splattering that may occur. Whisk until completely smooth.
    • Set aside to cool down before using it.
  3. Salted Caramel Italian Meringue Buttercream:
    • Place the water, sugar, corn syrup, and salt in a small saucepan. Heat on low until it reaches to about 115C/240F.
    • Meanwhile, as your sugar+water mixture is slowly heating up, place the egg whites in a large bowl and start to beat using a handheld electric mixer. Beat the eggs until soft peaks start to form. Then, slowly stream the water+sugar syrup into the egg whites with the mixer still going.
    • Beat the meringue until cooled to about body temperature, and then beat in the butter about 2 tablespoons (30g) at a time. Continue whipping the buttercream until it is silky before adding half of the caramel mixture in.
    • Set aside in the fridge until it is time to frost your cake.
  4. Salted Caramel Popcorn:
    • Preheat oven to 130C (250F or gas mark 1/2) and line a baking tray with parchment paper.
    • Place the popcorn in a big bowl and make sure not to include any unpinned kernels.
    • In a small saucepan, heat the butter, brown sugar, and salt until they begin to caramelise. Whisk well to combine, and then add in the baking soda. Quickly pour the caramel over the popcorn and toss well to coat.
    • Scrape the popcorn  out onto the baking tray and lightly sprinkle with a touch of salt. Bake in the oven for 30 minutes or until the caramel is completely dry and crunchy. Once done, set aside.
  5. Assembly:
    • Stack your cake on a cake stand and frost it with the buttercream. Drizzle the remaining caramel on the edges of the cake and then top the cake with a mountain of caramel popcorn!
    • Serve, share, and enjoy!

Salted Caramel Popcorn Layered Cake

BON APPÉTIT

– Ally xx

myTaste.com

Halloween Special: Creepy Broken Glass Cupcakes!

Halloween Special: Creepy Broken Glass Cupcakes!

Halloween Special: Creepy Broken Glass Cupcakes!

Hello Everyone! Where do I even begin? Well, how about I start off by wishing everyone a Happy Halloween! So one day, probably about a few weeks ago, I was browsing through my Reader page on WordPress and going through some of the recipes of other bloggers/writers that I follow. I came across a recipe over at Easy Baked which, if I can recall, were for some sort of cupcakes all decked up for Halloween. I really loved the bright purple, orange, and green colours that Ruthanne used to decorated her Halloween-inspired baked goodies. It was from there that I followed a link to her Creepy Broken Glass Cupcakes and I knew from that very moment that I had to tackle that recipe.

I haven’t seen anything quite like that before, and I thought it would be a nice, and fun baking activity on a Sunday afternoon (yes, I actually baked this last Sunday only because I knew I would have time to do so during the week leading up to Halloween, nor on Halloween Day). Also, Ruthanne notes that this is not an original idea of hers as she has seen many examples of these cupcakes online, but rather she made it her goal to create this recipe in the easiest way possible with fewer steps.

Halloween Special: Creepy Broken Glass Cupcakes!

Anyway, this recipe gave me a bit of a headache – well, just the broken glass candy part, and a little bit of the red velvet cupcake as well. Let’s just say that with the red velvet, it did not rise as I had wanted it to or hoped, and it wasn’t very red because of the lack of colouring (I used less because my bottle of red ran out). I had actually attempted to make this recipe 2 weeks ago, but because I was so defeated and tired by the end of the afternoon, I gave up and decided to try it out again the following weekend. At least when I tried that week, I managed to get 50% of the recipe done – the frosting and edible blood. I just kept them in the fridge until the following week when I rebaked my muffins and gave the broken glass candy another go (still was not perfect, but made do with what I had).

Basically, with the glass candy, I couldn’t get the sugar to harden – as in it was mushy as still syrup-like. Apparently, as I read in the comments section of Ruthanne’s blog, another person had the same problem and it was purely because the sugar wasn’t cooked for long enough. So make sure that if you want to try this recipe out, cook it just enough so that you won’t get a mushy mess! But obviously not for too long as it will turn amber in colour which, in this case, is not what you want.

Halloween Special: Creepy Broken Glass Cupcakes! Ingredients

PREP TIME 20 MINS | COOKING TIME 25 MINS | SERVES 12 CUPCAKES

INGREDIENTS

For the cupcake batter

  • 185g butter, at room temperature, plus extra melted, to grease
  • 125ml buttermilk
  • 2 large free range eggs
  • 2/3 cup caster sugar
  • 1/2 cup self-raising flour, sifted
  • 1/4 cup plain flour, sifted
  • 2 tbsp cocoa powder
  • 2 tbsp red food colouring
  • 1/4 tsp baking soda

For the cream cheese frosting

  • 250g cream cheese, at room temperature
  • 60g butter, at room temperature
  • 1/3 cup icing sugar, sifted
  • 1/4 tsp vanilla extract

For the ‘broken glass’

  • 1 cup granulated sugar
  • 1/2 cup light corn syrup
  • 1 tsp clear food flavouring (I used lychee)

For the edible ‘blood’

  • 1 can (395g) sweetened condensed milk
  • 1 tbsp red food colouring
  • 1 tsp clear flavouring (I used lychee)
  • Black food colouring

Halloween Special: Creepy Broken Glass Cupcakes!

Halloween Special: Creepy Broken Glass Cupcakes!

METHOD

A tip before starting off: Make the decorations first, the candy glass and edible blood, as you can keep them in the fridge until just before decorating your cupcakes for your party. They can both keep for several days so you can definitely make them ahead of time.

  1. Broken Glass Candy
    • Cover a baking tray with wax paper and grease it liberally with cooking oil spray, or alternatively you can grease it with some butter if cooking spray is not readily available in your pantry.
    • Place the granulated sugar and corn syrup into a microwave safe bowl and mix them together. Cover the bowl with plastic wrap microwave on high for about 3 minutes. Remove from the microwave and CAREFULLY (beware of the hot steam!) remove the plastic wrap. Stir well and cover again with fresh plastic wrap. Microwave again for another 3 minutes, but check the mixture after about 2 minutes just to make sure that it hasn’t coloured – if you cook the sugar/syrup mixture for too long, it will be amber in colour instead of a nice clear glass you want.
    • CAREFULLY remove the bowl from the microwave and CAREFULLY remove the plastic wrap. The mixture will be very hot and sticky so be cautious as to not touch any of the hot candy! Pour the mixture over the greased wax paper and allow it to sit and harden completely (will take a couple of hours).
    • When the candy has hardened, tap a knife into the ‘glass’ to break it into sharp pieces (do be careful at this point because the pieces are actually quite sharp themselves!), and push the pieces up off the was paper and onto a plate.
    • The glass candy can be kept in a ziplock bag or an airtight container for about a week. Moisture (including the moisture from the frosting on the cupcakes) will eventually start to break the glass candy down.
  2. Edible Blood
    • In a small bowl, add the sweetened condensed milk and mix in the flavouring and red food colouring (a bit at a time) until you get a brilliant red colour. Add a tiny bit of black as the colour can go a long way! Mix and adjust until you get a nice dark red colour.
    • Spoon the ‘blood’ into a ziplock bag and seal tightly. Keep refrigerated until use.
  3. Red Velvet Cake Mix
    • Preheat oven to 180C (350F or gas mark 4). Line a 12 hole muffin pan with black paper cases.
    • Sift the baking soda, cocoa powder, plain flour, self-raising flour into a medium-sized bowl and set aside.
    • Meanwhile in a large bowl, cream the butter and the sugar using an electric handheld mixer. Mix until pale and creamy. Add the eggs and beat on slow speed, making sure that it’s all blended in. Add the flour mixture into egg mixture and gently fold it in. Finally, add in the buttermilk and red food colouring. Mix together.
    • Spoon the batter into the prepared muffin cups, filling them 3/4 of the way and bake in the oven for 20-25 minutes or until cooked through. To check if they are done, insert a toothpick in the centre of the muffin.
    • Once done, remove from the oven and allow to cool down for about 5 minutes, then transfer them out of the muffin pans and onto a wire rack to allow them to cool down completely.
  4. Cream Cheese Frosting
    • Smooth the butter, cream cheese, and vanilla together using an electric handheld mixer. Fold in the icing sugar, and then use the mixer again to beat it until it is light and fluffy.
    • Place the frosting into a ziplock bag and refrigerate until use.
  5. Assembly & Decoration
    • Place some parchment paper on your work surface to protect it from all the red colouring from your edible blood, or alternatively you can use a platter or tray that you will be serving the cupcakes on.
    • Snip off a corner of your ziplock bag of frosting and pipe onto the cooled cupcakes. Press 2 to 3 pieces of the glass candy into the top of each cupcake.
    • Snip off a corner of your ziplock bag of edible blood and drizzle over the top of each cupcake and glass candy, allowing it to drip down the sides of both.
    • Serve the same day after decorating, with plates and forks or else you will have red fingers! Enjoy a bloody delicious dessert and a very Happy Halloween to all my family, friends, and followers!

Cupcakes taste best on the same day, though they may be stored covered tightly at room temperature for 3 days (undecorated) or in the refrigerator for 5 days.

Halloween Special: Creepy Broken Glass Cupcakes!

Once again, a very Happy Bloody Halloween to all my family, friends, and followers! I will be back on Tuesday with a new theme for the month of November so stay tuned!

BON APPÉTIT

– Ally xx

myTaste.com