Vegan No-bake Blueberry & Lemon 'Cheesecake'

Vegan No-bake Blueberry & Lemon ‘Cheesecake’

Hello Everyone and a very happy first day of May! For those of you celebrating Labour Day, I hope you’re having a blast with your long weekend! Unfortunately, Labour Day isn’t celebrated in Brunei, so yes, I worked today *sad face*. Well, I’m actually not here out of my usual posting schedule to talk about Labour Day, in fact, I’m here for a completely different, and special occasion!

Happy Birthday Mom!
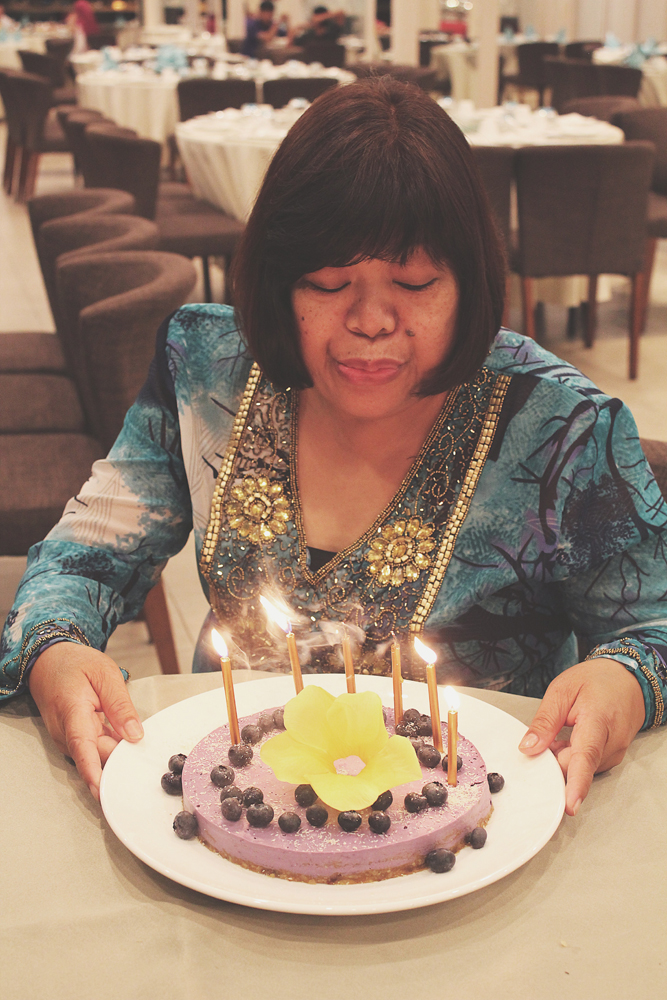
Everyday I wake up, I always have you to thank. I have your guidance, your food, your warmth, your love, and your heart: someone who loves me (and the other 2 troublemakers as well) unconditionally. I promise I’m not just saying this because it’s your birthday haha! Happiest of Birthdays Mom!

This year for my Mom’s birthday, I decided to whip up a Vegan No-bake Blueberry & Lemon ‘Cheesecake’ after my huge success with my sister’s vegan ‘cheesecake’ back in August 2016. I’ve been wanting to try out more vegan ‘cheesecakes’ since then and now the opportunity has surfaced once again. This ‘cheesecake’ is completely gluten-free, dairy-free, and egg-free. Before we move on to the recipe, please check out the original over on Call Me Cupcake by Linda. Please take note that I have adjusted the quantities below to make an 8.5-inch round cake.

Vegan No-bake Blueberry & Lemon 'Cheesecake' Ingredients

PREP TIME 20 MINS | CHILL TIME min. 6 HOURS | SERVES 8-10
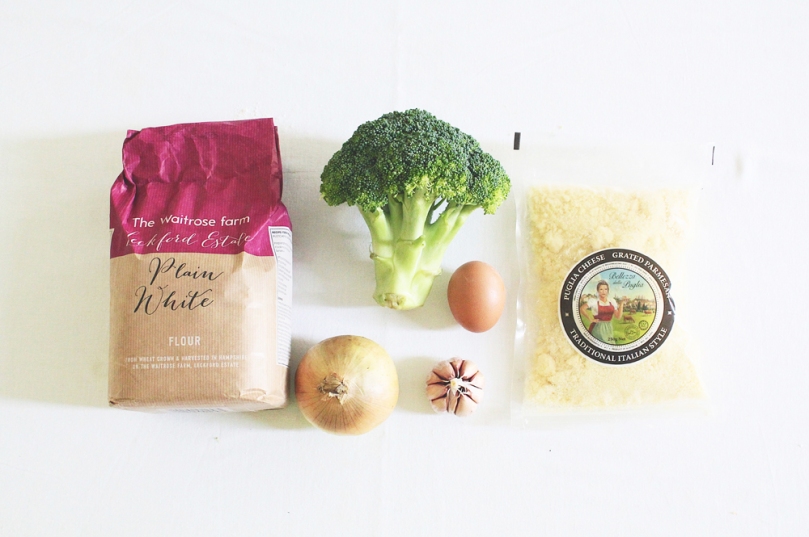
INGREDIENTS

For the base

  • 1 cup pitted dates, roughly chopped
  • 1 cup almonds, finely chopped
  • 1 tsp salt

For the filling

  • 1 & 1/2 cups cashew nuts, soaked in water overnight then drained*
  • 2/3 cup full fat coconut milk
  • 1/2 cup (50g) fresh or frozen (but thawed) blueberries
  • 6 tbsp coconut oil, melted
  • 4 tbsp freshly squeezed lemon juice
  • 3 tbsp maple syrup, to taste
  • Zest of 1 lemon

For the topping

  • Edible flowers**
  • Fresh blueberries
  • Shredded coconut

*Or soaked in very hot water for an hour if pressed for time

**To my Brunei followers if you could help me out, I don’t know where to find edible flowers here so what I usually do is just pick non-edible flowers from my garden, make sure they get a good wash and then use them only for photographic purposes.

METHOD

  1. Soak the roughly chopped dates in warm water for 15 minutes. Drain and transfer to a small mixing bowl combined with the finely chopped almonds and salt. Using the back of a fork, mash and mix the ingredients together until a paste forms.
  2. Press the mixture into an 8-8.5 inch springform pan (and if you don’t have one, you may use a regular pie/cake tin covered with parchment paper). Place the pan in the freezer while you prepare the ‘cheesecake’ filling.
  3. Put al the ingredients for the the filling in a blender and blend on low until the mixture is as smooth as possible. Pour the filling onto the crust, cover with plastic wrap and freeze for at least 6 hours before serving.
  4. Remove the cake from the pan and top with extra fresh blueberries, shredded coconut, and edible flowers. Leave to thaw in room temperature for about 10-15 minutes before cutting into it; you may run your knife under warm water and dry off to make a cleaner cut. Let each slice of cake thaw for a few more minutes before serving. Enjoy!

Vegan No-bake Blueberry & Lemon 'Cheesecake'

Vegan No-bake Blueberry & Lemon 'Cheesecake'

So usually, it is a habit of mine to read through the recipe first either a few days before, or the night before just so that I have proper planning when it come to buying the ingredients needed to proceed with the recipe. This time around, I completely forgot about doing this – I already had the recipe bookmarked from probably the beginning of the year so I guess this is probably one of the reasons why it completely slipped my mind. Why is it important to read a recipe ahead of time? Well for starters, the cashew nuts in this recipe require to be soaked in water overnight. Did I soak mine overnight? Nope I didn’t. Luckily, this can be rectified as it does say in the original recipe that if you’re in a hurry, you can soak the cashew nuts in very hot water for an hour (which is what I did) hehe.

Also, I missed out on a crucial bit of information which I only saw earlier on this afternoon when I was writing this post: “makes 1 tiny cheesecake (12cm/5-inches)” No wonder my cheesecake looked short and just barely had enough crust to cover the whole bottom. My springform pan is 8.5-inches in size which mean that I could’ve easily just doubled the recipe *face palm* but oh well, I would’ve have had enough ingredients to double the recipe if I had noticed it early and that’s only because I probably wouldn’t have been bothered to drive out to the grocers again to pick up a few more ingredients.

Vegan No-bake Blueberry & Lemon 'Cheesecake'

Happy Birthday Mom!

So what did I learn tonight? READ THE RECIPE FIRST A DAY OR TWO AHEAD OF TIME!

BON APPÉTIT

– Ally xx

myTaste.com

Breakfast Muffins: Avocado & Blueberry

Breakfast Muffins: Avocado & Blueberry

Hello Everyone! I hope you guys had a good Easter weekend! Even though we don’t get a long Easter weekend here in Brunei, I did still manage to enjoy my Easter Sunday day off. I can’t believe that there’s only less than 2 weeks of April left and that May is just around the corner! Time sure flies by when you’re (not) having fun at work. Haha! I know I’ve mentioned this in previous posts about how everything is just becoming routinely for me and it’s actually becoming quite depressing. I’m in need for a little excitement in my life. I think my thoughts have been heard because I’m flying off tomorrow night for a little staycation in the Philippines! The company I’m working at is sending me and three other colleagues to the Philippines for a little work/play adventure, attending events and meetings on behalf of the company, and of course what’s a trip to the Philippines without a little summer fun in the sun? I mean, it’s pretty much our tagline – It’s More Fun In The Philippines!

Breakfast Muffins: Avocado & Blueberry

On this note, I definitely won’t be uploading a post next week because I’ll be away from Thursday to Monday night. Since my Sunday, and the public holiday on Monday is taken up for this trip, I won’t have my dish prepared for a post. So this will be my last Avocado recipe for the month of April that I will be sharing with you guys! In fact, after I’ve posted this, I’ve got to get a head start on my packing because I still have to be at the office tomorrow up until 2 hours before my flight – what the heck right? Also, I was only told on Monday that I’d be flying off, and everything was only firmly confirmed yesterday afternoon. As usual, before we dive into tonight’s recipe, please check the original recipe out by Ali from Gimme Some Oven.

Breakfast Muffins: Avocado & Blueberry Ingredients

PREP TIME 15 MINS | COOKING TIME 25-30 MINS | SERVES 16 MUFFINS

INGREDIENTS

For the avocado and blueberry muffins

  • 2 cups plain flour
  • 1 cup plain fat-free yoghurt
  • 1/2 cup white granulated sugar
  • 1 large free range egg
  • 1 punnet (125g) fresh blueberries
  • 1 ripe avocado, halved, peeled, deseeded and roughly chopped
  • 2 tsp baking powder
  • 1 tsp pure vanilla extract
  • 1/2 tsp baking soda
  • 1/2 tsp ground cinnamon (optional)
  • 1/2 tsp salt

For the streusel topping

  • 30g unsalted butter, melted
  • 2 tbsp plain flour
  • 2 tbsp raw sugar
  • 2 tbsp white granulated sugar

METHOD

  1. Preheat oven to 190C (375F or gas mark 5). Line a 12-hole muffin pan with paper cases and set aside. Now since this recipes makes about 16 muffins, you can line another 6-hole muffin pan (if available), or if you only have one muffin pan, then bake in batches if needed.
  2. For the streusel topping, add all the ingredients in a small bowl until combined and crumbly. Set aside.
  3. In a medium-sized bowl, add the plain flour, baking powder, baking soda, salt, and cinnamon (optional) and stir together to combine. Set aside.
  4. In a separate large mixing bowl, add the roughly chopped avocado and using an electric mixer, beat on medium speed until smooth. Add the sugar in and beat until well blended. Follow with the yoghurt and pure vanilla extract, beating again until just combined.
  5. Add half of the flour mixture into the wet ingredients and beat until just combined. Add in the other half of the flour mixture and beat until well combined.
  6. Gently fold the blueberries in using a rubber spatula, then spoon the batter into the muffin cups, filling them about 2/3 of the way. Sprinkle with the streusel topping and place in the oven to bake for 25-30 minutes or until a tooth pick inserted to the centre of a muffin comes out clean.
  7. Set aside to cool in the muffin pan for about 5 minutes before transferring them to a wire rack to cool down completely. Serve for breakfast or afternoon tea and enjoy!

Breakfast Muffins: Avocado & Blueberry

Muffins taste best on the same day, though they may be stored covered tightly at room temperature for 3 days or in the refrigerator for 5 days.

Now, I know I have a couple of friends and colleagues who don’t particularly like the taste of avocado; don’t ask me why because I think that they’re just plain weird for not liking avocado (hehe!), but give them one of these beautiful green muffins and they’ll probably be hooked on it. The avocado flavour in these muffins are not overpowering or predominant, but there is a slight hint of it in each bite you take. These muffins are a classic twist to a classic blueberry muffin and are light, moist, and al the more healthy for you because of the avocado in place of all the other oils you’d otherwise use when making muffins. Top them off with a crumbly streusel to give it an “extra muffin-y sweetness” as Ali says.

Breakfast Muffins: Avocado & Blueberry

BON APPÉTIT

– Ally xx

myTaste.com

No-bake Avocado Lime Cheesecake

No-bake Avocado Lime Cheesecake

Hello Everyone! Today is a very special day, and for two reasons too! Today is special because God so loved the world that he gave his one and only Son, that whoever believes in him shall not perish but have eternal live (John 3:16 ESV). A very Happy Easter to all who celebrate the resurrection of Jesus Christ.

Besides today being Easter Sunday, today is also special because Amcarmen’s Kitchen turns 3! On this day 3 years ago I was sitting in my room, quite possibly still in my pyjamas at that time, blankly starting at my list of assignments to complete before the end of the Easter mid-semester break on my second-last semester of my degree. Knowing that I had so much to do in so little given time, I thought the only right thing to do at that moment was to take a nap and hopefully, magically, all my assignments would have been completed by the time I woke up from my nap… Well, that wasn’t what happened, but instead I decided to spontaneously delve into the world of WordPress, and *poof!* Kitchen Headquarters was born. Yes, Amcarmen’s Kitchen was previously known as Kitchen Headquarters in 2014 for a good year and a half before I did a whole rebranding in mid-2015.

As it has been for the past 2 years, I decided to make, not bake, a cake for Amcarmen’s Kitchen, and basically for my family and I to enjoy on behalf of my blog haha. I decided to try something new, while of course still sticking to the theme of using avocado in all my recipes for the month of April. Before we dive into today’s recipe, please do check the original by Sheilla on Chef Sheilla.

No-bake Avocado Lime Cheesecake Ingredients

PREP TIME 15 MINS | SETTING TIME 2 HOURS | SERVES 8-10

INGREDIENTS

For the avocado lime cheesecake mixture

  • 250g cream cheese, softened
  • 50g unsalted butter, melted
  • 300ml crème fraîche
  • 1 large avocado, mashed
  • 1 sachet (7g) clear gelatin or agar-agar powder
  • 1 cup granulated sugar
  • Juice and zest of 2 limes
  • 1 cup ground digestive cookies
  • 1 lime, for garnishing

METHOD

  1. Combine the ground digestive cookies and melted butter in a medium-sized bowl and mix until moist crumbs form. Press the crumb mixture onto the bottom of a 10″ springform pan that has been lined with parchment paper. Chill in the freezer for about 10 minutes to set.
  2. Take 100ml of the crème fraîche and combine it with the gelatin or agar-agar powder in a small saucepan. Stir for about 2 minutes until all the gelatin granules has dissolved. Turn the heat to medium and bring to a boil, stirring for a few minutes until the gelatin has completely melted. Remove from the heat and strain through a fine sieve. Set aside.
  3. Add the mashed avocado, cream cheese, sugar, the remaining 200ml of crème fraîche, lime juice, and lime zest to a large mixing bowl and using an electric mixer with a paddle attachment, mix everything together until smooth and well-combined. Pour in the gelatin-cream mixture and continue to mix until creamy and smooth in texture.
  4. Pour the avocado lime cheesecake mixture into the prepared springform pan and smoothen the top. Chill in the freezer for at least two hours for it to set.
  5. Release the cheesecake from the springform pan and serve right away! Garnish the top with some lime slices and zest. Enjoy!

No-bake Avocado Lime Cheesecake

The taste: amazing! The flavour of the avocado definitely shone through, and the hint of tangy flavour from the lime made the whole dessert refreshing in taste. The texture… Well let’s just say that it is supposed to be creamy and smooth, mine wasn’t as smooth as it could be. It has nothing to do with the original recipe; I think that I may have slipped up somewhere along the way. The obvious was probably that I was on the verge of over whipping the cheesecake mixture that the fresh cream started forming little clumps – I stopped before it severely over whipped. Also, I probably didn’t add enough gelatin to the cheesecake mixture so it didn’t quite set right. I only added half of the sachet in even though the original said ‘1 sachet’ – in my defense I didn’t know if Sheilla’s 1 sachet was the same quantity-wise as my 1 sachet. Oh well, I’ve adjusted the quantity of the gelatin in this recipe so hopefully the one listed above works!

Before I end tonight’s post, I’d just like to take this opportunity to thank first and foremost, my Mom who taught me how to cook. I also thank my other family members and friends who encouraged me to start up my blog because if it weren’t for them, Amcarmen’s Kitchen wouldn’t be here today, and I probably wouldn’t have continued pursuing my passion for cooking at home. Let’s face it, when I cook, I cook for my blog, and my family just so happens to be around to eat it after haha! Finally, to those who think I am just wasting my time on this, or assume that I work in a restaurant as a waitress because I didn’t actually go to culinary school to be able to work in a commercial/professional kitchen, take your negativity elsewhere. I have a degree in Design and I am working in the country’s leading Advertising Agency as a Creative Design and Events Management Executive, as well as a Copywriter. Thank you very much.

No-bake Avocado Lime Cheesecake

No-bake Avocado Lime Cheesecake

BON APPÉTIT

– Ally xx

myTaste.com

Baked Broccoli Parmesan Fritters

Baked Broccoli Parmesan Fritters

Hello Everyone! How are y’all doing on this fine Wednesday evening? Or morning? Or even still Tuesday evening for some? Well, whatever timezone you’re in, I hope everything is going well, and if it isn’t, keep your head held high and power through, for remember that life doesn’t always give you what you want, but it gives you what you deserve. Push yourself to strive for better, because no one else is going to do it for you – if anything, they’re going to drag you down. Walk away from anyone who takes you joy away, for life is too short to put up with them.

​Wow, I just realised how emotionally motivational I just got there, and no it doesn’t have anything to with what’s going on with me right now, but I just wanted to start off by asking you guys how you are all doing. When I hit the point of assuming that everyone is doing fine, I instantly became aware of that fact that not everyone may be doing fine, and it’s okay to not feel 100% all the time; just remember that YOU are the creator of your own destiny.

Baked Broccoli Parmesan Fritters

All that aside, we’re powering through with hero-ing Broccoli for the month of March! Two more days to April, and still 2 more recipes (excluding this one) to share for this month! Tonight’s recipe I stumbled upon one day while on Pinterest in search for some food inspiration, but before I move onto the recipe, be sure to check out the original over on Karina from Cafe Delites: for all good food lovers.

A fair warning, my fritters don’t look anywhere as near as how amazingly delicious to the eye Karina’s, but they nonetheless taste amazing, but probably not crispy. ​Well, apparently the trick to getting baked fritters pan-fried crispy is to lightly spray a coating of olive oil on top of them. Also, I think I may have accidentally baked mine for too long and they’re probably a bit too spread out and hence flatter… Oops!

Baked Broccoli Parmesan Fritters Ingredients

PREP TIME 10-12 MINS | COOKING TIME 25-30 MINS | SERVES 8-10 FRITTERS

INGREDIENTS

  • 1 head broccoli, cut into florets
  • 1 large free range egg
  • 1 medium-sized brown onion, diced
  • 2-3 garlic cloves, minced
  • 1/3 cup plain flour (or if you wish for a low-carb option, use almond flour instead)
  • 1/3 cup grated or shaved parmesan cheese
  • 1 tsp ground sea salt
  • 1/4 tsp ground black pepper
  • Olive oil cooking spray

METHOD

  1. Preheat oven to 200C (400F or gas mark 6). Line a baking tray with parchment paper. Set aside.
  2. Place the broccoli florets in a food processor and pulse a few times until the florets have been chopped finely.
  3. Add the egg, diced onions, minced garlic, plain flour, and parmesan cheese to the food processor and pulse again a couple of times until the ingredients are well combined. Add the sea salt and black pepper to the mixture and stir.
  4. Form about 8 to 10 fritters on the prepared baking tray, making sure that they do not touch each other. Spray the tops of each fritter with a light coating of olive oil.
  5. Bake in the oven for 12-15 minutes on each side until golden. Alternatively, you can pan fry these fritters in a non-stick pan over medium heat until golden on both sides.
  6. Allow the fritters to cool down slightly before serving with your choice of dip. Enjoy!

Baked Broccoli Parmesan Fritters

BON APPÉTIT

– Ally xx

myTaste.com

Banana Cheesecake Rollups

Banana Cheesecake Rollups

Hello Everyone! Yes, I’m still trying to play catch up here and hoping to get everything back to order by the time April sneaks up on us. I’ve been trying very hard to get recipes up on the blog for the past week, but I just never got around to because of, well, I was going to say several factors, but after running them by my head just a second ago, there were really only two factors that affected my mood to write. The first being unnecessary workplace drama that put me in such a mood for the past week, and second, it’s that time of month. You can imagine the rollercoaster of emotions I went through – I was just glad the the working week was over by the time it was Saturday, but it doesn’t help that I’ll be back to work again tomorrow. Seriously, a one-day weekend definitely NOT enough.

All that aside though, I watched Beauty and the Beast on Thursday night with my Mom and my sister. Belle could not have been played any better than Emma Watson; she was just an absolute fit for that role. Not only was she the definition of “Belle”, her singing was also on point. The movie just brought back many childhood memories, and I may have shredded a few tears here and there throughout the movie, and sung along to the songs while I saw people just snapchatting or Instagram storying the sh*t out of the movie – like put your phones away you uncultured and uneducated youngsters!

Anyway, tonight’s recipe is the last of the banana recipes that was supposed to be covered last month, and one that I stumbled upon through my research when I was planning for Amcarmen’s Kitchen early on the year. I did’t want to make a whole batch of these, so I only made 4 rollups. Unfortunately for me, out of the 4 only one didn’t burst open so I do apologise if the photographs for this recipe look a bit… Lonely. Hahaha! You can find the original recipe for these Banana Cheesecake Rollups over on The Cards We Drew. Also, just something to note, I tried this recipe out using puff pastry instead of crescent roll dough like in the original recipe. The reason? Nothing in particular actually aside from the fact that remade crescent roll doughs aren’t available here in Brunei and therefore I made the decision to use puff pastry instead. I also didn’t add the toppings to the rollups as I assumed that the dessert would already be too sweet for me to handle and with extra sweetness on top would probably be overkill for me. Feel free to top yours though if you’re a sweet tooth.

Banana Cheesecake Rollups Ingredients

PREP TIME 15 MINS | COOKING TIME 15-18 MINS | SERVES 12 ROLLS

INGREDIENTS

  • 2 large bananas, cut into 6 pieces each
  • 1 packet (500g) puff pasty block, defrosted
  • 250g cream cheese, softened
  • 3/4 cup of sugar
  • 1/2 cup of brown sugar
  • 1/2 tsp vanilla

METHOD

  1. Preheat oven to 180C (350F or gas mark 4). Line a baking tray with parchment paper and set aside.
  2. Lightly flour both the work surface and the pastry before rolling out to your required thickness. Allow for the pastry to stand for a few minutes to help reduce shrinkage.
  3. While the pastry is left to stand, combine the cream cheese, sugar, and vanilla in a medium-sized bowl and using a handheld electrical mixer, beat the ingredients together on high. Set aside.
  4. Roll out the puff pastry dough to about 3mm thick and cut into 12 long triangles. Starting at the largest end, add a tablespoon of the cream cheese mixture, a pinch of brown sugar, then a piece of banana on top.
  5. Tuck the edges over top of the banana, roll up, and place onto the prepared baking tray. Repeat this until you’ve made all 12 rollups.
  6. Bake in the oven for about 15-18 minutes, until golden brown and cooked through. Once baked, sprinkle some powdered sugar over top and serve warm with a cup of coffee. Enjoy!

Banana Cheesecake Rollups

Banana Cheesecake Rollups

BON APPÉTIT

– Ally xx

myTaste.com

Upside-down Banana Cake

Upside-down Banana Cake

Hello Everyone! So I don’t think I’ve shared this little piece of information on the blog before – I’m going on holiday starting this coming Friday! I’ll be in Singapore for a 10-hour layover (yay me) before finally setting off to my final destination. I won’t share where I’ll be going as I’ve been trying so hard to keep this a secret from a few people – but you’ll definitely know in next week’s post. I’ve got everything planned out and prepared for the blog for this month so you guys don’t have to worry about me being gone from Amcarmen’s Kitchen for another 3 weeks (yeap, that’s how long I’ll be on holiday for) seeing as I just returned for 2017.

Anyway, that aside, today’s recipe has been made multiple times before back when I was still studying in Sydney. My then housemate and I would whip this cake up whenever we’d see our fruit bowl of bananas start to get all spotty and soft. This is definitely a recipe you should consider when you find yourself in a similar situation – instead of throwing those bruised bananas, which are actually still pretty mint, mash them up and make an upside-down banana cake! You definitely won’t regret it.

This is an incredibly moist and flavourful dessert, but it could be great for breakfast or as a morning/afternoon snack too. You can take it a step further as well by topping it all off with some toasted pecans, a generous amount of caramel sauce, and topped with a scoop or two of creamy vanilla ice cream. I decided to keep mine simple without all the extra and unnecessary sugars on top since I’m not a big fan of too much sugar, and the fact that my Mom is a diabetic is an enough reason to hold back on the sugar since she’ll definitely be having a slice or two… Or even the whole cake to herself.

Upside-down Banana Cake Ingredients

PREP TIME 15 MINS | COOKING TIME 55-65 MINS | SERVES 10-12

INGREDIENTS

  • 65g unsalted butter, cut into cubes
  • 2/3 cup brown sugar
  • 2-3 large bananas, 1/3″ rounds
For the cake batter
  • 70g unsalted butter, softened
  • 2 large free range eggs
  • 1 & 3/4 cups plain flour
  • 1 cup overripe bananas, mashed
  • 3/4 cup granulated sugar
  • 1/3 cup plain yoghurt
  • 1 & 1/2 tsp baking powder
  • 1 & 1/2 tsp vanilla extract
  • 1 tsp baking soda
  • 1/2 tsp ground cinnamon
  • 1/4 tsp salt

METHOD

  1. Preheat the oven to 180C (350F or gas mark 4). Grease a 9″ x 2″ round cake pan, or an 8″ x 8″ x 2″ square cake pan. Spread the 2/3 cup of brown sugar on the bottom of the pan and scatter the pieces of cubed butter on top.
  2. Place the pan in the oven for about 5 to 7 minutes until the butter has completely melted. Remove the cake pan from the oven and give the butter and brown sugar a stir, spreading evenly on the bottom. Arrange the sliced bananas to cover the caramel bottom then set aside.
  3. For the batter, add the dry ingredients – plain flour, baking powder, baking soda, baking powder, ground cinnamon, and salt – to a medium sized bowl and stir together until combined. Set aside.
  4. In a large bowl using a handheld electric mixer on medium speed, cream the softened butter granulated sugar together until pale in colour. Add the eggs and vanilla extract, mixing well to combine. Then add in the plain yoghurt and mashed bananas, again mixing well to combine.
  5. Turn the speed of your mixer on low and slowly add the dry ingredients to the wet. Mix just enough to combine.
  6. Pour the batter over bananas, smoothing the top and then place in the oven to bake for 30 minutes at 180C. After half an hour, reduce the heat to 170C (325F or gas mark 3) and bake for additional 25-35 minutes until a toothpick inserted in the centre comes out completely clean.
  7. Once down, remove form the oven and let it cool in the pan completely, or at least until the bottom is barely warm before inverting onto a plate. Use a knife to loosen the edges from the pan then place a plate upside-down on top of the pan, then invert cake.
  8. At this point you can make a caramel sauce to top off the cake and add a handful of toasted, roughly chopped pecans to your dessert/breakfast/snack. Otherwise, enjoy the cake as it is!

Upside-down Banana Cake

Upside-down Banana Cake

BON APPÉTIT

– Ally xx

myTaste.com

White Chocolate Snickerdoodle Blondies

White Chocolate Snickerdoodle Blondies

Hello Everyone! Wow! I can’t believe that it’s the last day of November today! Once again, another month managed to slip right under our noses! Christmas is nearing, and in the blink of an eye, it will be 2017! Anyway, I’m not going to give a brief recap of my year just yet – I’ll probably save that for sometime in December – I’ll just give you a recap of my week as it was indeed a busy one! Firstly, I have been home alone for the past 5 nights as my Mom and my sister flew off on Friday to visit the other sibling over in Singapore. Secondly, I had two back-to-back events that I helped with the event decorations for, one was Phantom of the Opera themed (but very minimal/close to none on the decorations that actually resembled anything from Phantom of the Opera), and the other was an Alice and Wonderland/Enchanted Forest themed Staff Appreciation Night. I had loads of fun designing the initial proposal for the decorations, and of course helping with execution of the decorations onsite.

My next task, in terms of event decoration is to propose and present to the client, the theme ‘The Chronicles of Narnia; The Lion, The Witch, and The Wardrobe’ for a corporate 25th Anniversary Dinner coming up in mid-January. The presentation will be on Friday and I’m both excited and nervous at the same time; fingers-crossed that they will like my idea and that they see the underlying meaning of the chosen theme. Other than work, I scored VIP tickets from my Boss to watch Coreyah and JinJo Crew perform at The Rhythm of Korea on Saturday night. It was a free event hosted by the Korean Embassy here in Brunei as a sort of launching of their moving in to their new Embassy which will happen sometime in December if I’m not mistaken – so yes, this was an early celebration for the general public.

White Chocolate Snickerdoodle Blondies

A cross between a chewy blondie and moist butter cake, these blondies are studded with white chocolate chips and ribboned with sweet cinnamon sugar! — Sally’s Baking Addiction

But enough of the long-winded, personal life stories and let’s move on to tonight’s recipe shall we? So, I think you guys can probably tell that this is another recipe followed and adapted from none other than Sally’s Baking Addiction. I honestly think that the theme for this November shouldn’t have been ‘Cooking with Chocolate’ but rather Sally-themed instead haha! Anyway, I don’t actually have much to say for this recipe as it was kind of just a I-need-to-bake-something-for-my-blog-but-what-should-I-bake kind of moment early on the Sunday morning before I went grocery shopping to make sure I had all the ingredients. I came across this recipe while browsing and I thought that it’d be interesting to make.

White Chocolate Snickerdoodle Blondies Ingredients

PREP TIME 15 MINS | COOKING TIME 30-35 MINS | SERVES 12-15 BARS

INGREDIENTS

For the blondies

  • 2 & 1/3 cups plain flour
  • 1 cup white chocolate chips
  • 3/4 cup granulated sugar
  • 3/4 cup packed light brown sugar
  • 3/4 cup unsalted butter, softened to room temperature
  • 2 large free range eggs, room temperature
  • 2 tsp vanilla extract
  • 1 & 1/4 tsp baking powder
  • 1/2 tsp salt

For the cinnamon-sugar filling

  • 1/3 cup granulated sugar
  • 2 tsp ground cinnamon

METHOD

  1. Preheat oven to 180C (350F or gas mark 4). Line a 9×9, 11×7, or 9×13 inch baking pan with parchment paper, leaving enough overhang on the sides to easily pull the blondies out of the pan and cut once done.
  2. Combine the plain flour, baking powder, and salt in a small bowl, then set aside. Beat the unsalted butter on high speed using a hand or stand mixer fitted with a paddle attachment, in a large bowl. Beat for at least 1 minute until creamy, and then add in the granulated and brown sugars, beating for 2 full minutes on high speed until light and fluffy. Scrape down the sides and bottom of bowl when needed.
  3. Beat in the eggs and vanilla on high speed, scraping down the sides and bottom of the bowl as needed. On low speed, beat in dry ingredients until just combined. With a large wooden spoon or rubber spatula, fold in the white chocolate chips.
  4. Spoon half the batter into pan. It will be a relatively thin layer, but try to spread it across the pan evenly. Combine the cinnamon and sugar and sprinkle on top of them bottom layer, reserving 1 tbsp for the top. Spread the remaining batter over top. Some of the cinnamon-sugar will mix into the top layer as you spread it, which is fine. Sprinkle the top with remaining cinnamon-sugar.
  5. For a 9×9 or 11×7 baking pan, bake for 30-35 minutes or until golden brown and a toothpick inserted in the centre comes out clean. For a 9×13, bake 22-26 minutes or until golden brown and toothpick inserted in centre comes out clean. Cool completely for about 1 hour.

White Chocolate Snickerdoodle Blondies

These bars can be made 3 days in advance and kept in an airtight container at room temperature until ready to serve. Bars freeze well, up to 3 months. Simply thaw overnight in the refrigerator and bring to room temperature before serving. Leftover bars can be stored in an airtight container in the refrigerator or at room temperature for up to 1 week.

BON APPÉTIT

– Ally xx

myTaste.com

White Chocolate & Macadamia Red Velvet Cookies

White Chocolate & Macadamia Red Velvet Cookies

Hello Everyone! I don’t think I ever mentioned it in the past 3 posts for the month of November, but I’m pretty sure that most of you who follow my blog are smart little ducklings and have already probably figured out that the theme for Amcarmen’s Kitchen this month is all about Procrastibaking – well, really, not really. The theme isn’t just centred around baking, but it is most definitely about baking with… CHOCOLATE! How did I come up with this month’s theme you ask (well if you didn’t ask then read ahead hehe), I wanted to bake a Chocolate cake for my birthday this month, and I had two chocolate-linked recipes sitting in my archives waiting to be post up on my blog, and so… Baking with Chocolate came into play!

Or you could probably just say that I’ve been lazy and haven’t been in the mood to cook on Sundays for the past few weeks – which is partially true. It’s not that I was being lazy – it was more like I wanted to have a Sunday to myself doing whatever I want, meaning doing nothing actually *cheeky grin* instead of slaving away in the hot kitchen the whole afternoon. I’ve probably mentioned this in a post before, but for those of you who don’t know, I work 6 days a week from 8am to 5pm. By Sunday, all I want to do is just sit back and do nothing, however, if I did do that, I wouldn’t be able to keep up with Amcarmen’s Kitchen any longer.

White Chocolate & Macadamia Red Velvet Cookies

Anyway, enough of my rants, let’s move on to tonight’s recipe – an adaptation from none other than my favourite baker out there, Sally’s Baking Addiction. You can find the original recipe for these cookies over on her blog. If you went over to visit her blog, you’d notice that they are actually Red Velvet Chocolate Chip Cookies, but I decided to do a little twist and use white chocolate chips instead and pair them with macadamia nuts! The perfect combination in my opinion! I’d like to take this opportunity to share a recipe by a friend of mine, also known as Brendon The Smiling Chef, for his “I Love You This Much” Giant Red Velvet Cookie. I remember the time we met up and cooked together for my Auguest series last year, Brendon baked a Giant Chocolate Chip Cookie from the left over cookie dough he had from his “Cookies & Cream” inspired dessert. I think I might bake a Giant Cookie for next week actually!

White Chocolate & Macadamia Red Velvet Cookies Ingredients

White Chocolate & Macadamia Red Velvet Cookies

PREP TIME 1 HOUR 10 MINS* | COOKING TIME 10 MINS | SERVES 18 COOKIES

*Includes chilling time

INGREDIENTS

  • 1 & 1/2 cups + 1 tbsp plain flour, spooned and leveled
  • 1 cup semi-sweet white chocolate chips (plus a few extra for after baking)
  • 3/4 cup packed light (or dark) brown sugar
  • 1/2 cup raw macadamia nuts, roughly chopped
  • 1/4 cup granulated sugar
  • 1/4 cup unsweetened natural cocoa powder
  • 115g unsalted butter, softened to room temperature
  • 1 large free range egg, room temperature
  • 1 & 1/2 tbsp red food colouring
  • 1 tbsp milk
  • 2 tsp vanilla extract
  • 1 tsp baking soda
  • 1/4 tsp salt

METHOD

  1. In a medium-sized bowl, whisk together the flour, cocoa powder, baking soda, and salt together until incorporated well. Set aside.
  2. In a large bowl, beat the softened butter using a handheld or stand mixer with a paddle attachment on high speed until creamy, about 1 minute. When necessary, scrape down the sides and the bottom of the bowl. Add in the brown and granulated sugar, beating until combined and creamy, about another minute. Then, beat in the egg, milk, and vanilla extract, scraping down the sides and bottom of the bowl as needed. Once mixed, add the food colouring and beat until combined.
  3. Turn the mixer off and pour the dry ingredients into the wet ingredients. Turn the mixer on and slow beat on low speed until a very soft dough is formed. Beat in more food colouring if you’d like the dough to be a brighter red.
  4. Add in the white chocolate chips, and roughly chopped macadamia nuts and use a spatula to combine with the dough mixture. At this point, the dough will be sticky.
  5. Cover the dough tightly with aluminum foil or plastic wrap and chill for at least 1 hour (and up to 3 days). Chilling is mandatory.
  6. Preheat the oven to 180C (350F or gas mark 4) (177°C). Line two large baking trays with parchment paper or silicone baking mats and set aside.
  7. Scoop about 1 and 1/2 tablespoons of dough and roll into a ball, as pictured above. Place 9 balls onto each baking sheet and bake each batch for about10-11 minutes. The cookies may have only spread slightly and that’s ok. Simply press down on the warm cookies to slightly flatten and form crinkles. Stick a few chocolate chips into the tops of the warm cookies (optional and only for looks).
  8. Allow the cookies to cool on the cookie sheet for 5 minutes before transferring to a wire rack to cool down completely. Enjoy and share with family and friends!

White Chocolate & Macadamia Red Velvet Cookies

White Chocolate & Macadamia Red Velvet Cookies

BON APPÉTIT

– Ally xx

myTaste.com

Double Chocolate Crinkle Cookies

Double Chocolate Crinkle Cookies

Hello Everyone! For those who follow me on my personal social media pages will most definitely know that I’ve probably celebrated my turning of a quarter of a century one too many times that I guess an average person would celebrate their birthday. To quote a friend “[I] only turn 25 once” I think she meant that in a way that I probably had too many celebrations – but of course I’m going to take that as yes, I only turn 25 once so I’m going to go all out and use my birthday as an excuse to eat all the cake and food without feeling guilty *cheeky grin* Okay, so it’s been exactly a week now since I turned 25 so I guess it’s only fair to put a cease to the celebrations and start hitting the gym to burn off all the cake (3 cakes in total to be honest).

That aside, tonight’s recipe that I will be sharing is one that I whipped up last year for Christmas. I baked a batch of soft, chewy Double Chocolate Crinkle Cookies long with some traditional Sugar Cookies to take to the office with me on Boxing Day, to share with my colleagues – I know right. I’m so nice. Anyway, you might realise  in the photos that the cookies may look like they have a hint of red to them – well, I tried adding a little bit of red food colouring (what I had left of it anyway) to make it look like a red velvet crinkle cookie, but I guess I didn’t have enough coloring for it to really shine through.

Double Chocolate Crinkle Cookies Ingredients
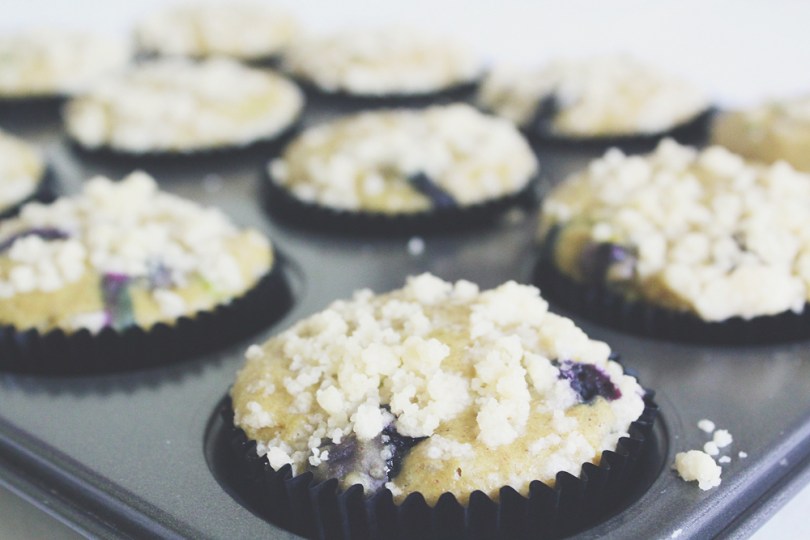
Oh you know – just my little owly friend that also happens to be one of my measuring spoons basking in a bowl of flour mixture.

Anyway! Before I head onto the recipe, please take the time to check out the original over on Sally’s Baking Addiction. I think I have said this before, but nonetheless, I will say it again. Sally’s recipes are definitely spot on and easy to follow. I don’t think that I’ve ever screwed up a recipe of hers when in the kitchen myself. Somewhere in the past, I attempted to bake crinkle cookies after seeing my Aunt post her cookies on her Facebook page. I followed a recipe, not Sally’s of course and they ended being a total FAIL. I was so sad because I had baked them to share with friends – which I did anyway, and I think they were just being nice and said that the cookies were ‘still’ good haha.

Double Chocolate Crinkle Cookies Ingredients

PREP TIME 3 HOURS 30 MINS* | COOKING TIME 10 MINS | SERVES 20 COOKIES

*Includes chilling time – it is highly recommended that you chill the cookie dough for at least 3 hours. The longer, the better! Chilling helps the flavors to develop, prevents spreading, and makes the otherwise sticky cookie dough easy to handle.

INGREDIENTS

  • 1 cup all-purpose flour, levelled
  • 1 cup confectioners’ sugar, for rolling
  • 1/2 cup & 2 tbsp unsweetened cocoa powder
  • 1/2 cup granulated sugar
  • 1/2 cup packed light or dark brown sugar
  • 180g Belgian dark chocolate, roughly chopped
  • 115g unsalted butter, softened to room temperature
  • 1 large free range egg, at room temperature
  • 1 tsp baking soda
  • 1 tsp pure vanilla extract
  • 1/8 teaspoon salt

METHOD

  1. Using a hand-held electric mixer, beat the butter in a large mixing bowl for about 1 minute on medium speed until completely smooth and creamy. Then, add in the granulated sugar and brown sugar, continuing to beat on medium-high speed until fluffy and light in colour. Beat in the egg and vanilla extract on high speed. Scrape down the sides and bottom of the bowl as needed. Set aside.
  2. In a separate medium-sized bowl, whisk the flour, cocoa powder, baking soda, and salt together until combined. On low speed, slowly mix into the wet ingredients until combined. The cookie dough will be quite thick. Switch to high speed and beat in the roughly chopped Belgian chocolate. At this point, the cookie dough will be sticky. Cover dough tightly with aluminum foil or plastic wrap and chill for at least 3 hours and up to 3 days. Chilling is mandatory for this cookie dough.
  3. Remove the cookie dough from the refrigerator and allow it to sit at room temperature for about 20 minutes; if the cookie dough was chilled longer than 3 hours, then let it sit at room temperature for about 30 minutes. This makes the cookie dough easier to scoop and roll.
  4. Preheat oven to 180C (350F or gas mark 4). Line two large baking sheets with parchment paper or silicone baking mats, and then set aside.
  5. Scoop and roll the dough, about 1.5 tbsp of dough each, into balls. Roll each ball generously in the confectioners’ sugar and place them on the prepared baking sheets.
  6. Bake the cookies for about 8-9 minutes. The baked cookies will look extremely soft in the centers when you remove them from the oven. Allow them to cool for 5 minutes on the cookie sheet; they will slightly deflate as you let them cool. Transfer to a cooling rack to cool completely. Once cooled, enjoy and share with family and friends!

Double Chocolate Crinkle Cookies

Double Chocolate Crinkle Cookies

Cookies stay fresh covered at room temperature for up to 1 week. Baked cookies freeze well – up to three months. Unbaked cookie dough balls (that are not coated in confectioners’ sugar) freeze well – up to three months. Coat the frozen cookie dough balls in confectioners’ sugar, then bake for about 10 minutes. No need to thaw them.

BON APPÉTIT

– Ally xx

myTaste.com

Chilli Chocolate & Cinnamon Cake

Chilli Chocolate & Cinnamon Cake

Hello Everyone! Well… Today has been quite an eventful day! For my followers who do not know, today marks my quarter of a century years young! 25 years of achievements and failures has brought me to where I am today.

Round 1 of Birthday Celebrations

My colleagues surprised me with a cake earlier this afternoon – quite funny as the whole morning they kept telling me not to expect anything because they didn’t have a surprise for me, nor did they have cake. By afternoon, my Manager called me to their department, asking me to help her with a design that I had helped her with earlier in the afternoon. Being the gullible person that I am, I went up to her, and that’s when the rest started singing Happy Birthday and brought out the cake (mini tower of cream puffs). So I’d like to take this opportunity to thank everyone in the office who greeted me today – and for the surprise!

Round 2 of Birthday Celebrations

Round 2 of celebrations began earlier tonight as well, with my Mom, Sister, and my Godmother. We had Japanese for dinner and of course, the restaurant staff sang Happy Birthday to me as they brought out the cake that I had baked for myself for my birthday – which is tonight’s recipe! Original recipe can be found over on Dish.

Dense, rich and moist with a little hint of chilli and cinnamon – everything a great chocolate cake should be, and even more delicious when served with candid pepitas. — Claire Aldous.

Chilli Chocolate & Cinnamon Cake Ingredients

PREP TIME 15 MINS | COOKING TIME 20-25 MINS | SERVES 10-12

INGREDIENTS

For the cake:

  • 200g Lindt Chilli Chocolate, roughly chopped
  • 200g unsalted butter, cubed
  • 2 large free range eggs, lightly beaten
  • 1/2 cup caster sugar
  • 2 tbsp plain flour
  • 1 tsp ground cinnamon
  • 1 tsp vanilla extract
  • 1/2 tsp salt
  • 1/4 tsp ground cayenne pepper (optional if you’d like a little more kick to your chilli chocolate cake)

For the glaze:

  • 100g dark chocolate
  • 100ml thickened cream

METHOD

  1. Preheat the oven to 170C (325F or gas mark 3).
  2. Melt the butter and chocolate in a heat-proof bowl in the microwave at 30-second intervals and stirring until the butter and chocolate has melted. Once melted, stir in the sugar and vanilla extract, setting aside to cool for 10 minutes.
  3. Once cooled, gradually stir in the eggs and then fold in the flour, salt, cinnamon, and cayenne pepper. Pour into a buttered cake tin and smoothen the top.
  4. Bake for 20-25 minutes until the centre of the cake is set but not too firm. Once done, transfer to a rack and leave to cool completely in the tin.
  5. While the cake is cooling down, get started on the glaze by melting the dark chocolate in a heat-proof bowl set over a pan of simmering water, stirring occasionally. Do not let the base of the bowl touch the water. Once the chocolate has melted, slowly add in the cream, stirring gently. Remove from the heat.
  6. Transfer the cake to a dish and pour the glass over. Finish with a light dust of confectioners’ sugar and enjoy with family and friends!

Chilli Chocolate & Cinnamon Cake

Chilli Chocolate & Cinnamon Cake

BON APPÉTIT

– Ally xx

myTaste.com