Salmon Fish Cakes with Oven-baked Eggs

Everyone loves food. You have some who love to cook it and some who enjoy eating it. For me, passion for cooking only really started while I was studying abroad. I enjoyed the luxury of having control of what I ate and what I bought. Coming from a big family you don’t get to pick what everyone else eats. So having that choice was amazing. I couldn’t take it for granted.

I started getting serious with cooking when I moved to Sheffield in the UK. I wasn’t a Michelin style chef but I loved being able to create meals in minutes. Simplicity was my game and ShefShaz started all because of that simple concept. I wanted to share with students alike that making meals didn’t have to be difficult. That you could save a lot and look after yourself all at the same time.

Salmon Fish Cakes with Oven-baked Eggs

Salmon Fish Cakes with Oven-baked Eggs

As a mum, I live by the same concept. Keep things simple which reflects very well in the food I make. Having a kid is no joke but knowing you can put aside 30 minutes and whip up a delicious meal makes you feel super accomplished.

I have known Allison (Ally) more or less all my life. From childhood classmates to now still good friends. I think it’s great we both share a passion for food with a healthier twist. Ally has always been a very visual person. She knows how to make everything look good.

ShefShaz, Little ShefShaz, and Amcarmen's Kitchen
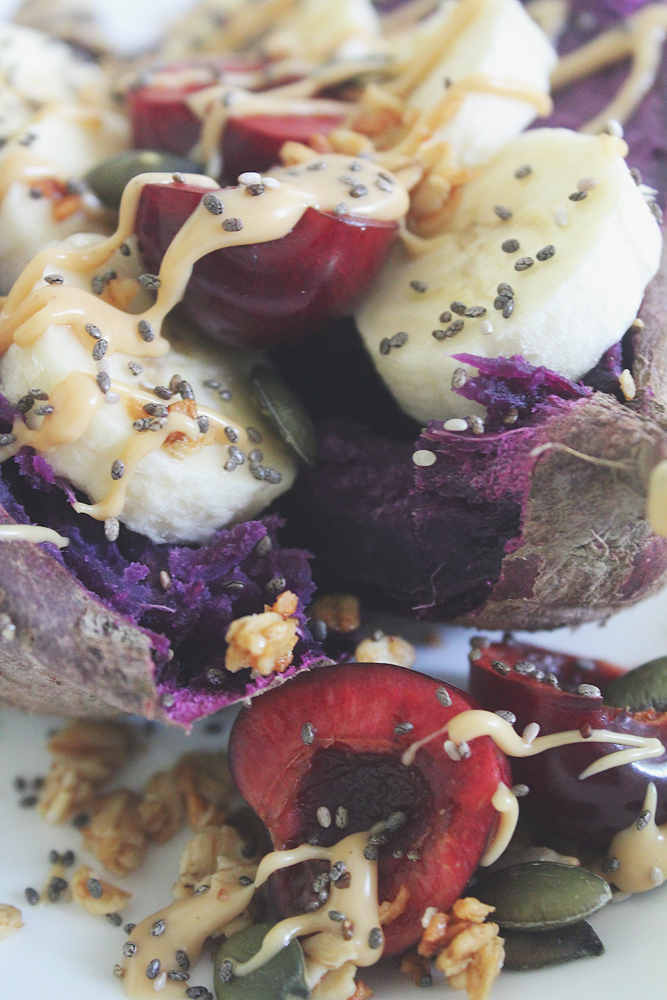
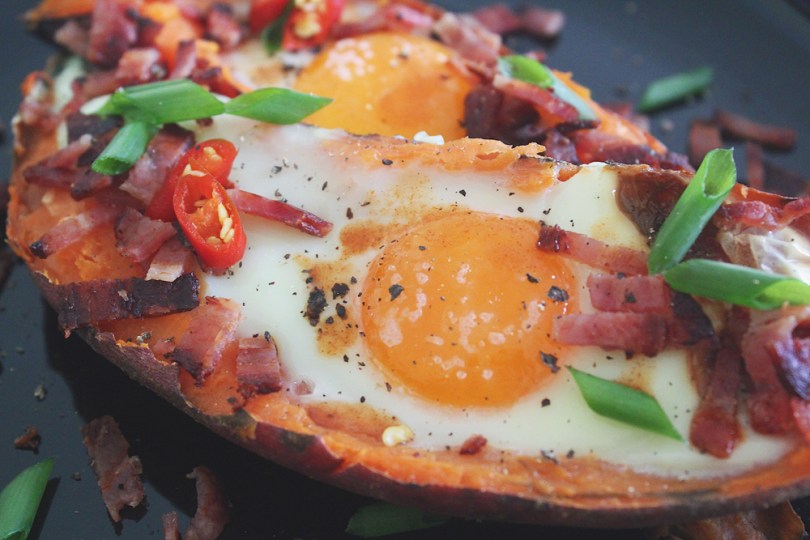
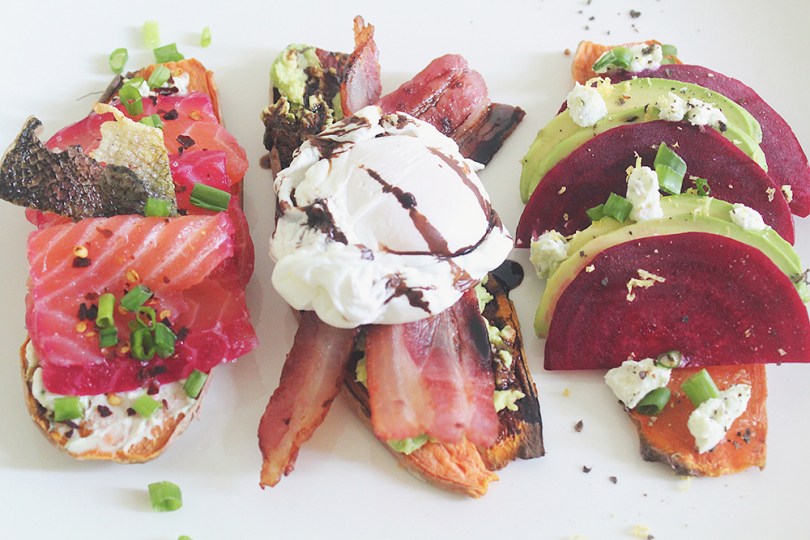
L to R: ShefShaz, Little ShefShaz, and Amcarmen’s Kitchen

The inspiration from my dishes are a very Jamie Oliver take on food. Simple, delicious food, fast. Something I know kids will enjoy as well as adults and bitesize to make each spoonful a party in your mouth.

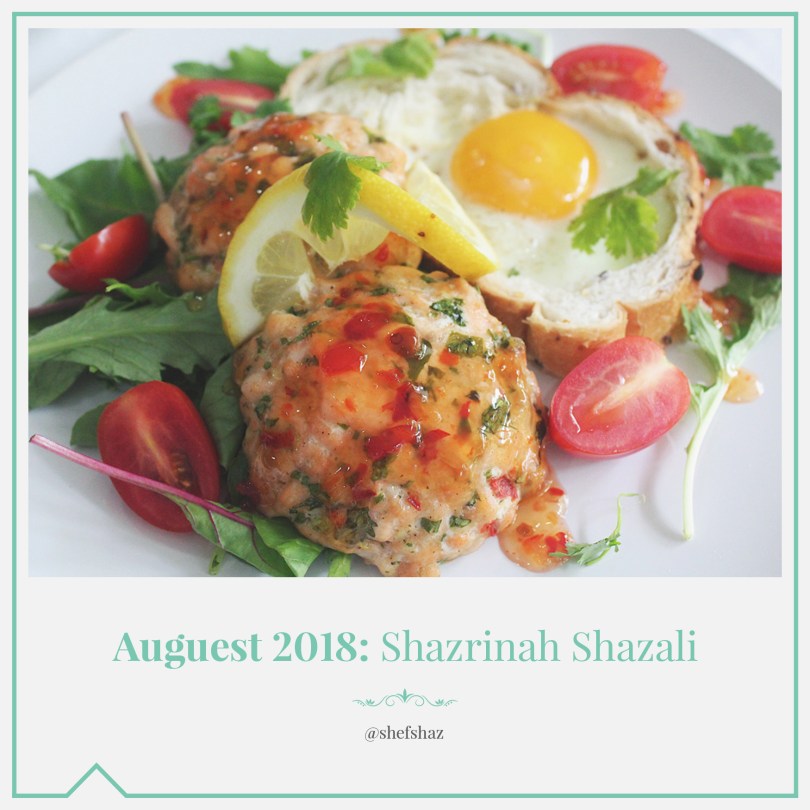
Hope you enjoy this simple and quick recipe for Salmon Fish Cakes with Oven-baked Eggs!

Salmon Fish Cakes with Oven-baked Eggs Ingredients

PREP TIME 10 MINS | COOKING TIME 20 MINS | SERVES 4

INGREDIENTS

For the salmon fish cakes

  • 500g salmon fillets, skin off* and de-boned, minced
  • 20g fresh coriander
  • 6cm fresh ginger, finely minced
  • 2 stalks of lemongrass, finely minced
  • 1 chilli, minced with seeds in
  • Freshly ground sea salt and black pepper, to taste
  • 4 large free range eggs
  • 4 slices of bread
  • Cherry tomatoes, halved
  • Salad greens
  • Sweet chilli sauce
  • Lemon wedges

*Do not toss out your salmon skin! You can pop these into the oven to make crispy salmon skin for an extra added crunch texture to the dish.

METHOD

  1. Preheat oven to 180C (350F or gas mark 4). Line a baking tray with foil and set aside.
  2. Salmon Fish Cakes: Add all the ingredients for the salmon fish cakes into a large mixing bowl and combine.
  3. Form the mixture into patties, you should be able to make 8 patties with this recipe.
  4. Bake in the oven for 15 minutes (more or less depending on the side of your patties). Once done, remove from the oven and leave it to rest. Turn the oven temperature down to 160C (300F or gas mark 2).
  5. Toast: Cut a hole in each slice of bread using a round cutter.
  6. Crack one egg into each hole and then bake in the oven for 5 minutes.
  7. Serve immediately with fresh salad greens, cherry tomatoes and sweet chilli sauce.

Salmon Fish Cakes with Oven-baked Eggs

Salmon Fish Cakes with Oven-baked Eggs

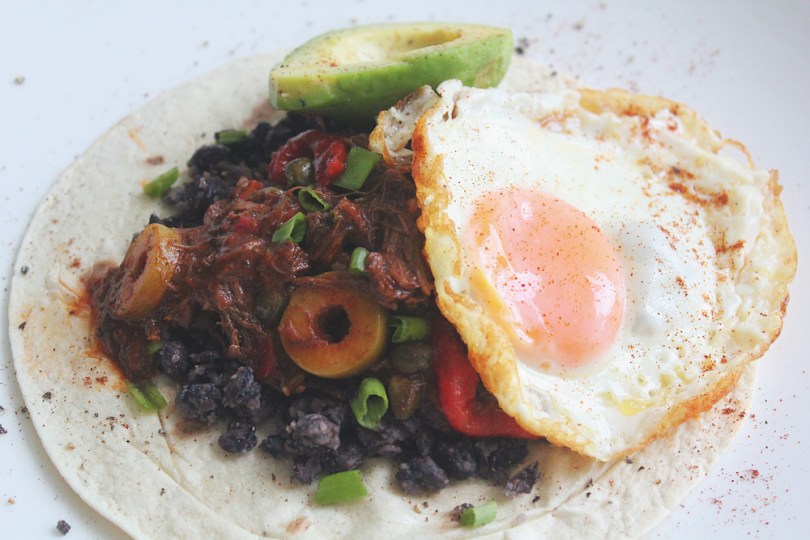
The optional recipe below is actually a recipe by Allison that she whipped up for her Colombian style Arepas that she made during our weekend cook-off. We both paired the salsa together with our Salmon Fish Cakes just too see what it would taste like – and it was magical! So feel free to give this a go with this recipe!

OPTIONAL Aji (Colombian Salsa)

INGREDIENTS

  • 1 tbsp fresh lemon juice
  • 1 tbsp white vinegar
  • 1/4 cup spring onion (white and light green parts only), finely minced
  • 1/8 cup fresh parsley, finely minced
  • 2 small red chillies, deseeded and finely minced
  • 1/2 small tomato, finely minced

METHOD

  1. Combine all ingredients in a bowl.
  2. Mix well, cover, and let it sit it the fridge for at least an hour for all the flavours to infuse before serving.

Salmon Fish Cakes with Oven-baked Eggs

Salmon Fish Cakes with Oven-baked Eggs

Recipe Copyright © 2018 | shefshaz

BON APPÉTIT

– ShefShaz

myTaste.com

Baked Purple Sweet Potato with Banana & Cherries

Baked Purple Sweet Potato with Banana & Cherries

Hello Everyone! A thousand apologies as this recipe was meant to go up a couple of days ago – but I haven’t been home at a decent hour for the past few nights to be able to write and get this up as planned. But, please bear with me for a moment as I attempt to absorb the fact that we’re 2 days away to the end of the month. All I can hint at this moment is that the upcoming month for me will say a final goodbye to a lifelong chapter – or should I say book? I feel like it’s more than an end to a chapter, but rather a book that I will be closing. To be able to open up a new story and at the same time revisit more chapters to one that was on hold for the past 3 years. One that I knew I will have the opportunity to continue writing. I know, I know, this all sounds very vague right now but in due time…

Baked Purple Sweet Potato with Banana & Cherries

Tangent aside and moving on, this recipe is pretty much open for you to get your creative juices flowing. Pair your favourite fruits together, add an element of crunch, and drizzle with your desired spread. What you can also do is play around with colour – I chose my fruits based on what colours will pop next to a beautiful deep purple sweet potato. This will make it look oh so aesthetically pleasing to the eye and (of course) taste even better in your tummy.

Before we dive into tonight’s recipe, be sure to check out where I drew inspiration for this beautiful breakfast dish over on Food with Feeling by Brita. Also, please make sure to read the end of this post to find out what’s happening on Amcarmen’s Kitchen for the month of August!

Baked Purple Sweet Potato with Banana & Cherries Ingredients

Baked Purple Sweet Potato with Banana & Cherries Ingredients

PREP TIME 10 MINS | COOKING TIME 80-95 MINS* | SERVES 2**

*Baking time time will vary depending on the size of your sweet potato.
**Half of a sweet potato for breakfast is already pretty filling, but the recipe can easily be doubled, tripled, and so on if you’re feeding more than 1-2 people at the table.

INGREDIENTS***

  • 1 medium-sized sweet potato, washed and scrubbed clean
  • 1 large banana, sliced
  • Chia seeds
  • Handful of fresh cherries, halved and pitted
  • Heaped spoonful of peanut butter
  • Granola

***Other optional toppings just to get your mind flowing: an array of mixed berries such as blueberries, strawberries, raspberries, and blackberries, hemp seeds, pepitas, nut butter, nutella, and many other choices for you to have fun with it!

METHOD

  1. Preheat oven 200C (400F or gas mark 6).
  2. Bake the sweet potato**** directly on the rack for about 40 to 50 minutes. Baking times may vary depending on the size of the potato. So to know if they’re done, stab it with a fork and if it easily pierces into the centre of the potato, the inside is most definitely tender.
  3. Once tender, cut a slit down the centre of the sweet potato about two thirds of the way down. Optional: slighty mush the inside of the potato.
  4. Top with your favourite breakfast toppings and don’t forget to make it look pretty on the plate too!
  5. Serve and enjoy!

****Here’s a tip: you can bake extra potatoes at the same time (I actually baked these together with my from week 2 of July), so that you can chuck them in the fridge and heat them up the next morning or two for another super easy and quick breakfast! It only takes less than 5 minutes to throw something together with your pre-baked potato.

Baked Purple Sweet Potato with Banana & Cherries

Baked Purple Sweet Potato with Banana & Cherries

Before I end tonight’s post, I’d like to share a little introduction to what’s coming as I won’t have the chance to when the next wave of recipes hit. If you have been following my blog since the beginning, or have been a frequent follower for more than a year or so, you’ll already know what August (or should I say, Auguest) means for Amcarmen’s Kitchen. Every year since 2015 I have been rounding up a couple of food bloggers and foodies alike to share their recipes in relation to the set theme. This year I have been able to round up some new faces, as well as familiar and recurring guests on Amcarmen’s Kitchen!

Stay tuned for an enticing array of delectably sweet and savoury breakfast dishes! If you want to read more on how this all started, click on the ‘Auguest’ tab above and there should be a link to take you to an introductory post that I wrote back in 2015.

BON APPÉTIT

– Ally xx

myTaste.com

Sweet Purple Sweet Potato Toasts (3 ways)

Sweet Purple Sweet Potato Toasts (3 ways)

Hello everyone! Apologies for not getting this post up last week as it was supposed to – I feel like I’ve been repeating myself in every post so far but yes, things have been hectic. Amongst the hecticness I speak of, my sister also arrived back from Singapore last week. Other than that, nothing exciting has happened over the past week – the week ahead though will definitely be one to remember.

Anyway, I’ll keep tonight’s introduction short and just dive straight into the recipe. To recap, the theme for this month on Amcarmen’s Kitchen is to hero Sweet Potatoes for breakfast! At the beginning of he month, I shared Savoury Orange Sweet Potato Toasts 3 Ways for you, and tonight I’m going to share you a Sweet Purple Sweet Potato Toasts 3 Ways for those who prefer a sweet option rather than savoury to kick start their mornings!

Sweet Purple Sweet Potato Toasts (3 ways)

Preparing your Sweet Potato Toasts

PREP TIME 10 MINS | COOKING TIME 20 MINS* | MAKES 5 SLICES**

*Baking time time will vary depending on the size and thickness of your sweet potato slices.
**Or how-ever-so-many slices you can get from a single sweet potato

INGREDIENTS

  • 1 large purple sweet potato, wash and dried

METHOD

  1. Preheat oven to 180C (350F or gas mark 4). Place a wire rack on a large rimmed baking sheet.
  2. Trim both ends from the sweet potato using a knife and slice them lengthwise into 1/4-inch thick slabs using a knife or mandolin slicer.
  3. Arrange the slabs in a single layer on the wire rack and bake for about 15-20 minutes or until the potatoes are tender, but not fully cooked.
  4. Remove the potatoes from the oven and allow them to cool on wire rack completely before transferring to a storage container. They can be stored in the fridge for up to 4 days.

When it’s go-time simply add the desired number of slices to your toaster and toast away. Setting it on the highest setting takes only one toasting cycle to get them how I like them (warm, bubbly and crispy on the edges). Just be wary that yours may need more or less depending on the toaster that you are using. Adjust to your liking!

Notes/Tips:

    • Look for sweet potatoes that are relatively shaped like a tube so that they’re easier to slice.
    • Don’t remove the skin because fibre in it is good and it helps the slices hold up better during storage.
    • Using a mandolin slicer gives you uniform slices of sweet potatoes, and is easier and safer than using a big knife.
    • Allow them to cool completely after baking before stacking them in a container or they’ll get sweaty and will definitely take longer to toast when you’re ready to eat them.

Now the fun starts – you get to add toppings! The possibilities are pretty much endless but these three are my absolute favourite combinations for a yummy start to my day – the sweet edition!


Blackberries & Buttermilk Caramelised White Chocolate

Sweet Purple Sweet Potato Toasts (3 ways): Blackberries & Buttermilk Caramelised White Chocolate

PREP TIME 5 MINS | COOKING TIME 5-10 MINS | SERVES 1

INGREDIENTS

  • Blackberries, fresh or frozen (thawed)
  • Sweet potato slice(s)
  • Whittaker’s West Coast Buttermilk Caramelised White Chocolate (Artisan Collection), roughly chopped

METHOD

  1. Place the sweet potato slices into a toaster and toast on the highest setting until warm, bubbly and crispy on the edges.
  2. Top with the above garnishes and enjoy!

Banana, Blueberries & Peanut Butter

Sweet Purple Sweet Potato Toasts (3 ways): Banana, Blueberries & Peanut Butter

PREP TIME 5 MINS | COOKING TIME 5-10 MINS | SERVES 1

INGREDIENTS

  • Banana slices
  • Blueberries, fresh or frozen (thawed)
  • Chia seeds
  • Granola
  • Peanut butter
  • Sweet potato slice(s)

METHOD

  1. Place the sweet potato slices into a toaster and toast on the highest setting until warm, bubbly and crispy on the edges.
  2. Top with the above garnishes and enjoy!

Strawberries & Goats Cheese with Balsamic Reduction

Sweet Purple Sweet Potato Toasts (3 ways):Strawberries & Goats Cheese with Balsamic Reduction

PREP TIME 5 MINS | COOKING TIME 5-10 MINS | SERVES 1

INGREDIENTS

  • Balsamic reduction
  • Goats Cheese
  • Lemon zest
  • Strawberry slices, fresh
  • Sweet potato slice(s)

METHOD

  1. Place the sweet potato slices into a toaster and toast on the highest setting until warm, bubbly and crispy on the edges.
  2. Top with the above garnishes and enjoy!

And there you have it – three simple ways you can make you mornings sweeter, brighter, full of colour, healthier, and energising altogether! I’ll TRY to get the last post for the month up, if not on Wednesday night, then on Thursday night hopefully – fingers crossed!

BON APPÉTIT

– Ally xx

myTaste.com

Baked Sweet Potato & Egg Brekkie Boats

Baked Sweet Potato & Egg Brekkie Boats

Hello Everyone! Oh wow – two words in and I’m already having a writer’s block! I literally just spent the last 20 minutes thinking about what to write after ‘Hello Everyone!’ In all honesty, there are definitely A LOT of things I can talk about to you guys, but the timing isn’t just quite right yet. You’ll probably only hear about everything that I have to share in September – is it worth the wait? Well maybe it’s more just for me as exciting things are about to unfold, maybe for Amcarmen’s Kitchen, but definitely on my personal life and adventures ahead!

So aside from that thing that I can’t tell you guys just yet, there’s actually nothing I can touch on at this moment and just realising what a boring week/weekend I had. Okay, just as I typed weekend out, I just remembered that it wasn’t all that boring at all. I met up with a couple of friends on Friday night to celebrate a birthday. The night was great – the usual good food, good company cliché but I thought that my food could have been a lot better to be honest. And of course, the cherry atop the cake was that of all places and of all times, my Boss had to have dinner at the same place, at the same time, and sit directly opposite the direction I was facing. Good times. Can’t escape. I remember one of my friends saying “Oh sh*t it’s my colleague” as he pointed out to my manager’s (my Boss’ daughter) husband, to which I responded to him “Oh sh*t it’s my Boss and his WHOLE family!” *insert cold sweat emoji* On Sunday night I met up with more friends at a friend’s open house for Raya which equated to more laughs and definitely great home-cooked food! The night ended young for me as I was for some reason immensely exhausted that day.

Baked Sweet Potato & Egg Brekkie Boats

All that side and diving right into tonight’s recipe – I came across the original recipe by Willow over on Will Cook For Friends. I especially loved how she described that this was one of those ‘fluke recipes that came to [her] out of nowhere’ and I’m sure all foodies, home cooks, chefs, and probably anyone really has had one to these revelations(?) is this the correct word to use? Anyway, this is how I come up with so many different variations of stir-fries and weird combinations of food pairings (that actually do surprisingly work, but probably not for Gordon Ramsay) during my university days.

We’ve all stared into the black hole that is our fridge, as Willow describes:

Me: “Man, I really need to go shopping.”
Eggs: “We’re here! Pick us, pick us!”
Me: “I don’t want eggs… unless they were really, really awesome eggs!”
Sweet potato that’s been sitting on my counter for two weeks: “AHEM. I’ve got you covered.”

And so behold these wickedly delicious gluten-free and paleo Baked Sweet Potato Boats for a filling weekend (or even week day if you have the time) brekkie for champs!

Baked Sweet Potato & Egg Brekkie Boats Ingredients

PREP TIME 10 MINS | COOKING TIME 80-95 MINS* | SERVES 2**

*Baking time time will vary depending on the size of your sweet potato.

**Half of a sweet potato with an egg in it for breakfast is already pretty filling, but if you’re serving these to particular bunch of super hungry people, then you might want to plan on a whole potato and two eggs per person. The recipe can easily be doubled, tripled, and so on.

INGREDIENTS

  • 1 very large orange sweet potato, washed and scrubbed clean
  • 2 large free range eggs
  • 2 slices of bacon strips
  • Fresh chopped spring onions, for garnish
  • Ground sea salt and black peppercorns, to taste
  • Tabasco, Sriracha, or any other hot sauce, to taste

METHOD

  1. Preheat oven to 180C (350F or gas mark 4).
  2. Place the washed and dried sweet potato (whole) in a baking dish and into the oven. Bake for about 60-70 minutes, or until tender as time will vary depending on the size of your sweet potato.
  3. Meanwhile, heat a small frying pan over high heat and cook bacon to your liking***. Remove from the pan once done and transfer to a plate lined with a paper towel to drain off excess grease. Set aside.
  4. Once done, remove the sweet potato from the oven and cut it in half lengthwise. Using a pairing knife, carefully carve out a well in the center of each half, about as big as you think you’ll need for the size of your eggs. Crack the eggs into a small bowl and pour into the carved well. Season with a touch of salt and pepper.
  5. Place the potato halves back into the baking dish, resting them against the side of the pan if needed to keep them from tipping and spilling any egg. Return to the oven for about 20 to 25 minutes, or until the eggs are cooked to your liking. I like my whites cooked with an oozy yolk!
  6. Remove from the oven and crumble the bacon over the top. Serve with your favorite hot sauce, and a bit of freshly chopped spring onion to garnish. Enjoy!

***There are many ways in which we all prefer to cook our bacon, and there is no wrong way of doing so. You can do this in a pan on the stove like how I’ve done, or bake it in the oven. To bake the bacon, spread the bacon strips in a single layer on a rimmed baking sheet lined with a sheet of foil for easier cleanup.

Baked Sweet Potato & Egg Brekkie Boats

BON APPÉTIT

– Ally xx

myTaste.com

Savoury Orange Sweet Potato Toasts (3 Ways)

Savoury Orange Sweet Potato Toasts (3 ways)

Hello Everyone! Firstly, I would like to apologise for getting this post up TWO days late (compensating by posting earlier in the day today). I’ve been hibernating for the past few days after mentally and physically tiring days and nights of work. I don’t want to get into a long winded description of why since I’m not a 100% in the mood to write, so I’ll just hop on forward to tonight’s recipe. Hopefully I’ll be in a better mood to write next week. Apologies once again! It’s nothing serious by that way, it just that while I’m writing this, my mind seems to doze off and my eyelids just keep getting heavier and heavier, making it hard for me to concentrate even the slightest bit.

But of course I won’t just leave you guys with a less than mediocre introduction – it is a new month after all on Amcarmen’s Kitchen and I have yet to introduce to you the theme for this month! So just a little bit of inside information, probably about a year ago, I saw these beautifully colourful sweet potato toasts in a Coles Magazine spread and instantly knew I had to give these a go. Fast forward a year (or more) later, and I’ve finally decided to whip up Three Savoury Sweet Potato Toasts for you. They are definitely not as aesthetically pleasing as those you’d find on Pinterest though so don’t hate it these toasts look… Underwhelming. I think my toppings were WAY too massive for the potato slices I had, hence an imbalance proportions. I don’t know – the photographs just look weird to me *insert cold sweat emoji*.

So yes, as you can already see, I’m a bit late on the then hot and trendy sweet potato toasts, but that won’t stop me from sharing them with you guys. Sweet potato toast is basically toast, but without the toast. Skeptics question how can it be called toast without the actual toast? Well, if you’re gluten-free, want a little more fiber in your diet, or are tired of bread for toast, then sweet potatoes are a great option as a substitute. In addition, sweet potatoes contain beta-carotene that gets converted into vitamin A in our body – just like carrots and other orange-coloured fruits and vegetables. Vitamin A is important for hair, skin, nails, vision, and plays a key role in immune function.

Savoury Orange Sweet Potato Toasts (3 Ways)

Preparing your Sweet Potato Toasts

PREP TIME 10 MINS | COOKING TIME 20 MINS* | MAKES 5 SLICES**

*Baking time time will vary depending on the size and thickness of your sweet potato slices.
**Or how-ever-so-many slices you can get from a single sweet potato

INGREDIENTS

  • 1 large orange sweet potato, wash and dried

METHOD

  1. Preheat oven to 180C (350F or gas mark 4). Place a wire rack on a large rimmed baking sheet.
  2. Trim both ends from the sweet potato using a knife and slice them lengthwise into 1/4-inch thick slabs using a knife or mandolin slicer.
  3. Arrange the slabs in a single layer on the wire rack and bake for about 15-20 minutes or until the potatoes are tender, but not fully cooked.
  4. Remove the potatoes from the oven and allow them to cool on wire rack completely before transferring to a storage container. They can be stored in the fridge for up to 4 days.

When it’s go-time simply add the desired number of slices to your toaster and toast away. Setting it on the highest setting takes only one toasting cycle to get them how I like them (warm, bubbly and crispy on the edges). Just be wary that yours may need more or less depending on the toaster that you are using. Adjust to your liking!

Notes/Tips:

    • Look for sweet potatoes that are relatively shaped like a tube so that they’re easier to slice.
    • Don’t remove the skin because fibre in it is good and it helps the slices hold up better during storage.
    • Using a mandolin slicer gives you uniform slices of sweet potatoes, and is easier and safer than using a big knife.
    • Allow them to cool completely after baking before stacking them in a container or they’ll get sweaty and will definitely take longer to toast when you’re ready to eat them.

Now the fun starts – you get to add toppings! The possibilities are pretty much endless but these three are my absolute favourite combinations for a yummy start to my day!


Avocado, Beetroot & Goats Cheese

Savoury Orange Sweet Potato Toasts: Avocado, Beetroot & Goats Cheese

PREP TIME 5 MINS | COOKING TIME 5-10 MINS | SERVES 1

INGREDIENTS

  • Avocado slices
  • Beetroot slices
  • Freshly ground black peppercorns
  • Goats cheese, crumbled
  • Lemon zest
  • Spring onion, chopped
  • Sweet potato slice(s)

METHOD

  1. Place the sweet potato slices into a toaster and toast on the highest setting until warm, bubbly and crispy on the edges.
  2. Top with the above garnishes and enjoy!

Smashed Avo, Crispy Bacon & Poached Egg

Savoury Orange Sweet Potato Toasts: Smashed Avo, Crispy Bacon & Poached Egg

PREP TIME 5 MINS | COOKING TIME 5-10 MINS | SERVES 1

INGREDIENTS

  • Bacon slices
  • Balsamic reduction
  • Poached egg
  • Smashed avocado
  • Sweet potato slice(s)

METHOD

  1. Crispy Bacon: Heat a medium size non-stick frying pan over high heat. Add the bacon strips and cook for about 3-4 minutes per side. Place on a dish lined with paper towels to drain the excess oils. Next add the tomatoes and fry in the bacon fat for about 3-4 minutes per side as well. Set aside in an oven to keep warm before serving.
  2. Balsamic Reduction: Next, pour the 1/2 cup of balsamic vinegar in a small saucepan over medium heat. Bring the vinegar to a boil, then turn down the heat down so that the boil reduces to a simmer. Stir occasionally and allow to simmer until the vinegar has reduced by at least half (for a thinner reduction) or more (for a more syrup-like consistency). If you have impatient tendencies like me when it comes to food, do not increase the heat at this point! Your reduction may burn and you will be left with a stiff, hardened mess.
  3. Poached Eggs: Bring small saucepan of water to the boil over medium-high heat, then reduce the heat to low-medium – the water should be just simmering. Add in the vinegar and stir. Crack one egg into a small bowl and quickly, but gently pour it into the water. Repeat with the other egg. A really soft poached egg should take around 2 minutes, but if you want it a bit more firm, it will take about 4 minutes. To check if they’re cooked right, carefully remove the egg from the pan with a slotted spoon and give the yolk a gentle push (you can tell just by your instincts if it is under or over – or perfect)!
  4. Place the sweet potato slices into a toaster and toast on the highest setting until warm, bubbly and crispy on the edges.
  5. Top with the above garnishes and enjoy!

Beet & Salt-cured Salmon

Savoury Orange Sweet Potato Toasts: Beet & Salt-cured Salmon

PREP TIME 5 MINS | COOKING TIME 5-10 MINS | SERVES 1

INGREDIENTS

***Or store-bought smoked salmon will do just fine as well.

METHOD

  1. Crispy Salmon Skin: Preheat oven to 190C (375F or gas mark 5). Line a baking sheet with parchment paper, and lightly brush olive oil and sprinkle some salt on both sides of the salmon skin. Place the salmon skin, shiny side up, on the baking sheet and bake for 10 minutes or until the skin is crisp. Allow the salmon skin to cool before eating.
  2. Place the sweet potato slices into a toaster and toast on the highest setting until warm, bubbly and crispy on the edges.
  3. Top with the above garnishes and enjoy!

And there you have it! Three simple Savoury Sweet Potato Toasts for a great fix of a seriously nutrient-packed brekkie! What do you think about sweet potato toast? Have you tried it for yourself, and if you have what did you think?

BON APPÉTIT

– Ally xx

myTaste.com

Breakfast Muffins: Spiced Plum & Quinoa

Breakfast Muffins: Spiced Plum & Quinoa

Hello Everyone! I hope the week has been good to all. Tonight will be the last of my Muffin Making Monday series on Amcarmen’s Kitchen and I will be back to sharing recipes with y’all on my usual Wednesday night uploads. I’ll still be continuing the overall theme for the year of Breakfast Foods, but next week I’ll be sharing a completely new sub-theme on the blog so stay tuned for that!

Yesterday was such a tiring day overall that I think I crashed in bed right after dinner and probably had one of the best sleeps that night – it would’ve been even better if I hadn’t had to wake up so early for work. We held a garage sale yesterday morning from 7am to (officially) 10am, but people still kept coming by the house past 11am that morning. The night before we invited our close friends to the house so that they could have the first choice in picking out what they wanted before we sold our stuff to others the following morning. We made almost $500 that night and morning for all our small items such as clothes, jewellery, bags, accessories, toys, etc. and about $1000 more on our large furnitures. After a tiring morning of turning our unwanted things into money, I spent the afternoon catching up with friends and food at one of our friend’s open house. That was my day in a nutshell.

Breakfast Muffins: Spiced Plum & Quinoa

Moving on, plums are extremely nutritious, offering a wide variety of health benefits. They contain over 15 different vitamins and minerals, and in addition, fibre and antioxidants that may help reduce the risk of several chronic diseases. To have a further read on the health benefits of Plums (and Prunes), head on over to Health Line. Moving on, in addition to the many vitamins and minerals packed into these breakfast muffins, quinoa also gives them a major protein boost. Check out the original recipe from The Good Housekeeping Test Kitchen.

Breakfast Muffins: Spiced Plum & Quinoa Ingredients

PREP TIME 10 MINS | COOKING TIME 15-20 MINS | SERVES 12 MUFFINS

INGREDIENTS

  • 1 & 1/4 cup plain flour
  • 1 cup buckwheat flour
  • 1 cup full-fat plain yoghurt
  • 1/2 cup honey, plus more for drizzling
  • 1/3 cup raw white quinoa
  • 113g unsalted butter, melted
  • 2 large free range eggs
  • 2 plums, 1 roughly chopped and 1 sliced, thinly
  • 1 & 1/2 tsp baking powder
  • 1 tsp ground cinnamon
  • 1/2 tsp baking soda
  • 1/2 tsp ground ginger
  • 1/2 tsp salt

METHOD

  1. Preheat oven to 200C (400F or gas mark 6). Line a 12 hole muffin pan with paper cases. Set aside.
  2. In large mixing bowl, whisk the flours, quinoa, baking powder, cinnamon, ginger, baking soda, and salt together.
    In another mixing bowl, medium-sized, whisk the eggs, yoghurt, melted butter, and honey together. Gently fold the egg mixture into flour mixture until just combined; then stir in the chopped plum.
  3. Divide the batter equally among the prepared muffin cases (about 1/4 cup each) and top each with a couple of plum slices.
  4. Bake for 15 to 20 minutes or until toothpick inserted into centres of the muffins comes out clean. Cool in the pan for about 5 minutes and then transfer them to a wire rack to cool down completely.
  5. Drizzle with honey, if desired, before serving and enjoy!

Breakfast Muffins: Spiced Plum & Quinoa

Breakfast Muffins: Spiced Plum & Quinoa

Breakfast Muffins: Spiced Plum & Quinoa

BON APPÉTIT

– Ally xx

myTaste.com

Breakfast Muffins: Blue Cheese & Mushroom

Breakfast Muffins: Blue Cheese & Mushroom

Hello Everyone! I hope everyone had a great weekend and are all pumped for another week ahead! I may have been a little unmotivated today though seeing as it is a Monday after a long weekend. Friday was the first day of Hari Raya (Eid al-Fitr) here in Brunei and we got that Friday and Saturday off from work. To my surprise, the long weekend has been quite uneventful and quiet for Hari Raya.

On the eve of Raya, my mom, sister, and I went to watch the premier of The Incredibles 2! My inner 12-year-old was screaming for joy as the long wait for a sequel finally came into fruition. I remember when I was at the snacks counter, they had these character cups for the drinks. I was asked by the guy at the counter which character would I like, and with probably too much amusement for a 26-year-old in my tone, I squealed, Jack Jack! Thank God the guy did not ask me who Jack Jack was, I would’ve shamed him *shame shame shame* After I got the popcorn and drinks, I stood aside to wait for my hotdog (don’t judge, we were watching the film during our normal dinner time), and the next lady came up to the counter. I wasn’t even listening to the exchange of words between her and the snacks counter guy, but I was in such disbelief when I heard her utter the words “I want the baby.” My eyes widened and in my head I said, how dare you, you uncultured swine. You don’t deserve to watch the movie if you don’t even know the character’s name! Anyway, the film was WORTH THE WAIT. I was laughing non-stop throughout the film, and the people seated beside us were probably thinking, what is this girl on – LET ME HAVE MY MOMENT. My favourite line from the movie? “Num Num Cookie!”

Breakfast Muffins: Blue Cheese & Mushroom

Anyway, that aside for some more side-tracking – if you want to skip ahead to the recipe, just continuing scrolling. I basically spent the rest of my long weekend at home sorting out stuff that I want to get rid of – we’re having a garage sale at home this coming Sunday – and spent the remaining of the long weekend in the kitchen cooking up a storm both good and bad *cheeky grin* I had a bit a failed attempt at a recipe I was so eager to tackle, which made me feel a little deflated after, but I did also have a successful cook the following day for a different recipe though, so all is well. I also went over to a friend’s, had lots of food, dirty talks that involved Urban Dictionary, and of course insanely MASSIVE laughs that turned into silent and out of breath laughs with tears involved for a good 5 minutes. Those are the best kind of laughters, especially between people who get the joke, or get what it is that needs to be laughed at without having to explain further.

Okay, I guess with the long-winded introduction to this post, my long weekend doesn’t seem to be THAT uneventful at all. But moving on, the adventures of Muffin Making Monday continues for its third week and I’ve got, let’s see… Blue Cheese? AND Mushies?! YAAASSS! These delightfully savoury blue cheese and mushroom muffins are delicious for ANY time of day with a hot bevvy (no, not alcohol). I know, I know, some are not very fond of the pungent taste and smell of blue cheese, but trust me when I say that these muffins smell nothing but amazing when freshly baked and the taste and the taste of the blue cheese only just subtly shines through. Check out the original recipe over on All Recipes.

Breakfast Muffins: Blue Cheese & Mushroom Ingredients

Breakfast Muffins: Blue Cheese & Mushroom Ingredients

PREP TIME 10 MINS | COOKING TIME 30-35 MINS | SERVES 16 MUFFINS

INGREDIENTS

  • 1 punnet (125g) brown mushrooms, roughly chopped*
  • 125g unsalted butter
  • 2 large free range eggs
  • 3 & 1/3 cups plain flour
  • 1 cup milk
  • 2 tsp baking powder
  • 1 tsp dried oregano
  • 1 tsp dried thyme**
  • Freshly ground black pepper, to taste

*Reserved a few mushies to slice thinly, to decorate on top of the muffins (optional).
**Or you may use 2 tsp of herbes de Provence if available which is basically a combination of savory, marjoram, rosemary, thyme, and oregano.

METHOD

  1. Preheat oven to 200C (400F or gas mark 6). Line one 12 hole and one 6 hole muffin pan with paper cases. Set aside.
  2. Add the butter in a heatproof bowl and melt in the microwave, about 30 seconds. Set aside to cool down a bit.
  3. Melt a knob of butter in a medium-size pan over medium-high heat. Add the sliced mushrooms and cook until half done, about 30 seconds per side. Remove from the pan. Add the roughly chopped mushrooms to the pan and cook until soft, about 5 minutes. Season with the herbs and freshly ground black pepper. Remove from the heat and set aside to cool.
  4. In a small mixing bowl, whisk the eggs with the milk, and then stir in the melted butter.
  5. Sift the flour and baking powder into a large mixing bowl. Gradually stir in the egg mixture until well combined.
  6. Add the sautéd mushrooms and crumbled blue cheese into the flour mixture and gently mix. Spoon the mixture into the prepared pan and no more than up to 3/4 full (this allows room for the muffins to rise). Top each muffin with a sliced mushie.
  7. Bake for 20 to 25 minutes until golden brown. Remove from the oven and serve immediately with a nice cup of coffee. Enjoy!

You can store the muffins in an airtight container in the refrigerator for up to 3 days. Heat them back up in a steamer before serving.

Breakfast Muffins: Blue Cheese & Mushroom

Breakfast Muffins: Blue Cheese & Mushroom

Before I wrap things up here, I just thought I’d share this weird little fascination of mine with these muffins. While I was having them for an afternoon snack, I was fascinated by the speckles of mold present in the muffins in such a way that I really sat there and observed the muffin for a good five minutes before biting into it. I even raised it up to my Mom saying, “look at all the mold in these muffins!” with an obvious hint of excitement in my tone. To which my Mom replied, “if I didn’t know you bought blue cheese for this recipe, I would’ve thrown it out because I thought it went bad since it was moldy and smelled like feet!” *cheeky grin*

Breakfast Muffins: Blue Cheese & Mushroom

BON APPÉTIT

– Ally xx

myTaste.com

Breakfast Muffins: Brownie, Salted Caramel & Avocado Gelato

Breakfast Muffins: Brownie, Salted Caramel & Avocado Gelato

Hello Everyone! The title of this post already sounds super enticing doesn’t it? Well brace yourselves, for tonight I will be sharing a cheekily sweet breakfast muffin that borderlines dessert. Who says you can’t have dessert for breakfast though? If anyone says that you can’t, unfriend them because you don’t need that kind of negativity in your life EVER. For those of you that are just tuning in, I usually upload a recipe to Amcarmen’s Kitchen on Wednesday nights. However, yes I am aware that it is a Monday night (in Brunei that is, for some it may be just the morning of), and the reason for the switch up for this month only is because Muffin Making Monday has returned!

I’m not sure if I’ve mentioned this in a post before, but I’ll say it again anyway, I am NOT a huge fan of chocolate. I can already see a few jaws dropping upon reading the previous sentence in pure disbelief. But yes it’s true. I can’t sit down and eat a whole bar of chocolate even if I wanted to. I’d probably get sick after just one bite. Don’t fret guys for there is a however – a slice (or two, maybe more) of a dark, rich, dense, and fudgy with a deep to-die-for chocolate flavour brownie is my exception. Oh and of course, how could I forget my love for the beautiful marriage between dark chocolate and avocado!

Breakfast Muffins: Brownie, Salted Caramel & Avocado Gelato

Therefore behold the Brownie Muffin – combining my Breakfast Muffin series with a favourite dessert of mine! I was going to call this hybrid a ‘Bruffin’ like how Brookies are for Brownie Cookies. Alas, I was disappointed to find that the term Bruffin has already been registered and trademarked for a light and flaky, brioche-like pastry in the form of a muffin! So should I call these Broffins? Sounds less cool than Bruffin *sad face* so I guess I’ll just stick with Brownie Muffins instead of a portmanteau of the two. Check out the original recipe by Shiran over on Pretty. Simple. Sweet.

To take it to the next level, I’ve filled these Brownie Muffins with a sticky and salty caramel sauce so that you’re hit with an oozy gooey treat when you bite (or cut) into them! And of course, you need to complete this breakfast (dessert) with a generous serving of avocado gelato! I sourced mine from my favourite gelato place in Brunei known as Rumah Gelato! Whenever I want my fix of dark chocolate AND avocado gelato, this is where I’m at. I bought a large tub of just the avocado gelato to pair with this recipe, and of course extra to just indulge in happily for the next couple of days.

Breakfast Muffins: Brownie, Salted Caramel & Avocado Gelato Ingredients

Rumah Gelato's Bravo Avocado

PREP TIME 15 MINS | COOKING TIME 30 MINS | SERVES 6 MUFFINS

INGREDIENTS

For the brownie muffin batter

  • 113g (4oz) bittersweet or semisweet chocolate, coarsely chopped
  • 113g unsalted butter, cut into small cubes
  • 2 large free range eggs
  • 1/3 cup + 1 tbsp plain flour
  • 1/3 cup granulated sugar
  • 1/3 cup unsweetened cocoa powder
  • 1/8 tsp salt

For the salted caramel sauce

  • 2 cups granulated sugar
  • 170g unsalted butter, room temperature and cut into pieces
  • 1 cup double cream, at room temperature
  • 1 tbsp sea salt rocks
  • Avocado Gelato or any of your favourite flavours that tickle your tastebuds

METHOD

  1. Preheat oven to 180C (350F or gas mark 4). Grease a 6 hole muffin pan with butter. Set aside.
  2. Brownie Muffin Batter: Place the chopped chocolate and unsalted butter cubes into a medium-sized heatproof bowl. Heat in the microwave at 20-second intervals, stirring between each interval, until melted. Set aside.
  3. In a small bowl sift the plain flour, cocoa powder, salt, and set aside.
  4. Using an electric handheld mixer fitted with the whisk attachment, whisk the eggs and sugar on high speed until thick and pale, about 4 minutes. Reduce speed down to low and slowly add in chocolate and butter mixture, whisking until just incorporated.
  5. Using a spatula, fold in the flour mixture until just combined. Do not over-mix.
  6. Spoon the mixture into the prepared muffin pan, filling each case to about 3/4 of the way full. Bake for 13-16 minutes or until a toothpick inserted into the center of the muffins comes out with moist crumbs and not dry.
  7. Once done, transfer to a wire rack and let them cool for about 10 minutes before removing from the pan. Allow muffins to cool completely on the wire rack.
  8. Salted Caramel Sauce: In a small saucepan, melt the sugar over medium-high heat, stirring frequently to avoid burning. Once all the sugar has melted, watch your caramel carefully, swirling the pan occasionally.
  9. As soon as the sugar turns amber in colour add the butter and whisk vigorously until all the butter has melted.
  10. Remove the pan from the heat and slowly pour in the cream while whisking vigorously until the cream is incorporated well, and then whisk in the sea salt rocks.
  11. Fill a piping bag fitted with a small decorating tip with the caramel sauce. Insert the tip into the top of the muffin, pushing about an inch into the muffin. Squeeze the filling into the muffin. If the filling starts to leak outside of the hole, stop.
  12. Serve with ice-cream or gelato with the flavour of your choice, and drizzle more of the salted caramel sauce atop. Enjoy!

Breakfast Muffins: Brownie, Salted Caramel & Avocado Gelato

Breakfast Muffins: Brownie, Salted Caramel & Avocado Gelato

You can store these Brownie Muffins in an airtight container at room temperature or in the refrigerator for up to 2 days. Make sure to let them reach back to room temperature before serving. I personally would prefer to warm them up in a steamer (the oven or microwave usually dries it out even more) because I’d rather have a warm, fudgy, and gooey muffin than a room temperature one *cheeky grin* but like I said, it’s just my personal preference.

Before I wrap up tonight’s recipe, here’s a key extract from Shiran:

Timing is everything: The right baking time is always the most crucial part of making brownies. It only takes a couple of minutes to turn them from rich fudge brownies to a dry chocolate cake. When done, brownies should appear baked on the outside, but the center should still be soft. You’ll need to bake them only until a toothpick inserted into the center comes out with very moist crumbs, not dry.
— Shiran from Pretty. Simple. Sweet.

Breakfast Muffins: Brownie, Salted Caramel & Avocado Gelato

BON APPÉTIT

– Ally xx

myTaste.com

Breakfast Muffins: Feta Cheese, Onion & Rosemary

Breakfast Muffins: Feta Cheese, Onion & Rosemary

Hello Everyone and a happy first Monday for the month of June! Hope the Monday blues didn’t hit you guys hard, especially to my friends/followers in Brunei – unlike me, I know some of you guys have had a super long weekend with all the public holidays we’ve been having. We, as in my office, didn’t get to have one of the public holiday off so it was a normal working day for us on Thursday while most likely 80% of the working population was off. Thank goodness Saturday was public holiday that applied to us so yay for the long weekend (normal weekend anyway for some)! If you guys don’t already know from my constant mentions on several posts, and on the ‘about’ section of my blog, I work SIX full days a week. So getting to have a Saturday off (which is quite rare) because of a public holiday is pure bliss.

Moving on from that… mini rant? I mentioned in one of my posts last week that I’ll be switching up my post schedule just for this month – and yes it does have something to do with the theme for June. The title of this post may have already given it away for some of my loyal and consistent followers. Drumroll please! So I may have taken it to Google and searched ‘how to type out a drumroll sound’ – gives up 30 minutes later.

Breakfast Muffins: Feta Cheese, Onion & Rosemary

MUFFIN MAKING MONDAY IS BACK ON AMCARMEN’S KITCHEN! Muffin Making Mondays started about 4 years ago now I think, where Jialing would come back to my place after our Monday morning lecture together on main campus. We’d bake muffins together for our on-the-go work brekkie for that week. Well, we’d bake together but we’d both have our own recipes, i.e. she’d make sweet muffins for herself while I’d make savoury ones – we still share 1 or 2 though after we’ve baked them. I also remember how we’d both have a 1-on-1 Cards Against Humanity game where we’d both just unanimously vote which was the best (dirtiest) answer while our muffins were baking in the oven. Those were the days.

Anyway, it’s probably going to get lonely in the kitchen as it’ll just be me, myself, and I without Jialing, but I’m bringing back Muffin Making Mondays for the month of June! And to kick things off, I’ve got a delicious Feta, Onion, and Rosemary Savoury Muffin to start your mornings with a bang! Check out the original recipe over on Genius Kitchen.

Breakfast Muffins: Feta Cheese, Onion & Rosemary Ingredients

PREP TIME 15 MINS | COOKING TIME 30 MINS | SERVES 12 MUFFINS

INGREDIENTS

For the muffin batter

  • 1 & 3/4 cups plain flour
  • 1 cup milk
  • 1 large free range egg
  • 1 tbsp baking powder
  • 1 tsp salt

For the onion and cheese mixture

  • 100g feta cheese, crumbed
  • 1 medium-sized brown onion, finely chopped
  • 1 tbsp fresh rosemary, finely chopped
  • Freshly ground black peppercorns
  • Knob of unsalted butter

METHOD

  1. Preheat oven to 200C (400F or gas mark 6). Line a 12 hole muffin pan with paper cases.
  2. Melt the butter in a small frying pan over medium heat. Add in the chopped onions and cook for about 5 minutes until soft and slightly caramelised. Remove from heat and set aside to cool.
  3. Once the onions have cooled down, add in the crumbed feta cheese and chopped rosemary. Season with freshly ground black pepper and give it a good mix. There is no need for salt since the feta is quite salty by itself. Set aside.
  4. For the muffin batter, sift the plain flour, baking powder, and salt into a large mixing bowl.
    In another medium-sized bowl, beat the egg, followed by the milk and give it a good whisk to combine.
  5. Pour the egg and milk mixture into the flour, until well incorporated, using minimum number of folding movements. Ignore the lumps in the mixture and do not over-mix.
  6. Gently add the onion and cheese mixture into the batter mixture, folding in, as before, with as few strokes as possible. Spoon the mixture into the prepared muffin pan.
  7. Bake for about 20 minutes, or until well risen and golden. Remove the muffins from the tins and serve immediately. Enjoy!

Breakfast Muffins: Feta Cheese, Onion & Rosemary

Breakfast Muffins: Feta Cheese, Onion & Rosemary

These muffins are perfect for sahur with a hot cup of teh tarik for my Muslim friends and followers. Well to be honest, it’s perfect for any time of the day with a nice hot cup of anything like coffee, tea, or hot chocolate!

BON APPÉTIT

– Ally xx

myTaste.com

Ropa Vieja con Huevos Rancheros

Ropa Vieja con Huevos Rancheros

Hello Everyone! You guys must be thinking that I’m on a roll here! Three consecutive recipes?! Don’t get used to it because it’s just for this one time to get everything wrapped up for this month so that I can start a new theme for the month of June! I did mention in a couple of posts back that for the month of June, I’ll be switching up my upload schedule day to Mondays, and the reason does indeed correlate to the theme. I’ll keep everyone on their toes for a while longer and come Monday, all will be revealed!

I had lots of fun last night a my friend’s place for sungkai (iftar) and of course to celebrate her daughter turning 1! Tonight’s post is a little later than usual this time around because I literally just came back from another night out for a sungkai catch up dinner with friends. I’ve probably mentioned this before in a post somewhere on this blog, but I’ll mention it again just to clear things up – I’m not a Muslim. I don’t practice ramadhan which then subsequently means that I don’t have to break fast for iftar. Yes I was born and bred in a Muslim country, and even though I have been exposed to these practices for practically my whole life, I wasn’t born into the religion (hint on the ‘Third Culture Foodie’!).

Anyway, tonight’s recipe is sort of another way you can use leftover Ropa Vieja to make similar, but not so Eggs Benny dish. Okay, I mentioned in yesterday’s post about this Latin American café that Jialing and I found during one of our “Fatness Fridays” adventures. While I thought back to this day, I was totally convinced that the Huevos Rancheros dish that I had was a marriage of it and the Ropa Vieja sandwich that Jialing had, but it wasn’t until I scrolled through hundreds of Instagram photos on my feed to recall the dishes to find out that they were two separate things.

Ropa Vieja con Huevos Rancheros

In my last post I said that a Ropa Vieja Eggs Benny came into mind – which it did, but that wasn’t they way I had initially imagined it. In fact, this Ropa Vieja con Huevos Rancheros was how I pictured the ‘Eggs Benny’ dish to look, but in the end I decided to reimagine it just because this didn’t really have the feel of an Eggs Benny dish. However, I didn’t want this dish to end up in my archive of ‘will never get around to posting’ but since this dish is sort of related to the last two I posted, I thought I’d share the recipe with you! I mean, it’s essentially, well practically identical to the last recipe, just a few minor differences, especially with the plating.

Huevos Rancheros, or in English “rancher’s eggs”, is a traditional breakfast dish served as a mid-morning fare on rural Mexican farms – hence its name. The dish is made up of fried eggs that is served atop a lightly fried tortilla (traditionally corn, but other adaptations have used wheat tortillas instead), with a tomato-chilli sauce, refried beans, and slices of avocado or guacamole. You could say that my adaptation to marry Ropa Vieja and Huevos Rancheros together is an amped up version of a humble and traditional Huevos Rancheros brekkie.

Ropa Vieja con Huevos Rancheros Ingredients
Ignore the other ingredients photographed but not mentioned below – the other ingredients are of the ropa vieja dish to accompany this dish!

PREP TIME 5-10 MINS | COOKING TIME 10-15 MINS* | SERVES 3

*Provided that you’ve made your Ropa Vieja ahead of time, i.e. the night before, if not then make sure you allocate yourself 3-4 hours altogether for this recipe

INGREDIENTS

  • Leftover Ropa Vieja
  • 3 super soft flour tortilla wraps
  • 3 large free range eggs
  • 2 large avocados, pitted, peeled, and halved**
  • 1 can (16oz) organic black beans, drained, blanched in hot water, and smashed
  • Chopped spring onions, to garnish
  • Tabasco sauce, to taste

**Squeeze a touch of lemon or lime juice to prevent it from browning

METHOD

  1. If you haven’t pre-made your Ropa Vieja for this recipe, then start of with this before moving on to the other components of the dish. Allocate yourself about 3-4 hours prior.
  2. Heat about a tablespoon of olive oil in a small frying pan. Crack the egg in and fry until the edges start to brown. I personally like my sunny-side up eggs this way – the browned edges gives a nice nutty flavour to the whites which is total yum! Repeat for the remaining eggs.
  3. In a medium-sized non-stick frying pan, lightly heat the tortilla wraps until they start to slightly brown. Remove from the pan and repeat for the remaining wraps.
  4. Place the tortilla wrap on a plate and top with the smashed black beans. Make a nest in the middle and top with the ropa vieja, sunny-side up egg, and halved avocado to the side. Drizzle a bit of tabasco sauce over and sprinkle some chopped spring onions. Serve and enjoy!

Ropa Vieja con Huevos Rancheros

Tune in on Monday for an all new theme and a bunch of yummy recipes!

BON APPÉTIT

– Ally xx

myTaste.com