Auguest 2019: Shazrinah Shazali

Dark Chocolate Açaí Tahini Tart with Mixed Fruit Mountain

Indulgences can be sinful and healthy. A mixture of sweet, bitter and salty goodness combined into what may seem to be regular dark chocolate tart, is sure to give your guests a delicious and tantalising surprise.

PREP TIME 25 MINS | COOKING TIME 10 MINS | SERVES 6-8

INGREDIENTS

For the crust

  • 2 packets of Oreos
  • 2 tbsp tahini
  • 2 tbsp unsalted butter OR 4 tbsp coconut oil
  • Pinch of Himalayan salt

For the filling

  • 340g dark chocolate (70%)
  • 1/2 cup whipped cream OR coconut cream
  • 1/2 cup fresh or frozen açaí berries*, blended
  • 1/4 cup maple syrup (optional)
  • 2 tbsp unsalted butter OR 4 tbsp coconut oil
  • 1 tbsp vanilla essence
  • Pinch of Himalayan salt

* If using frozen açaí berries, thaw first before blending.

Dark Chocolate Açaí Tahini Tart with Mixed Fruit Mountain

Tip: Switch out the butter for coconut oil and whipped cream for coconut cream to easily make this tart vegan and dairy-free friendly. Use vegan-friendly maple syrup or other substitute sweeteners, and of course a vegan biscuit/cookie base. Also, while most dark chocolate brands are vegan-friendly, it’s best to check for those that do/do not contain any whey or dairy in them.

METHOD

  1. Crust: Preheat oven to 180C.
  2. Blend the Oreos, unsalted butter, Himalayan salt, and tahini together in a food processor.
  3. Transfer the blended mixture to a 10” tart tray and bake for 10 minutes. Once done, set aside to cool before filling the tart.
  4. Filling: Heat dark chocolate, unsalted butter, whipped cream, and maple syrup in a saucepan at a low to medium flame until melted and well combined.
  5. Once melted, mix in the vanilla essence, blended açaí berries, and salt.
  6. Take off the heat and then pour into the crust.
  7. Even out filling and chill in the fridge overnight to set.
  8. Finishing: Top with fruits of your choice to add freshness and volume to your tart. In this case, I used a medley of mangoes, kiwis, blueberries, and cherries. Serve and enjoy!

Dark Chocolate Açaí Tahini Tart with Mixed Fruit Mountain

PS: Ally here! Before we end tonights post, please read this article on the Goddess behind Fuel’d, who is none other than Shaza!

Photo Courtesy & Recipe Copyright © 2019 | Shazrinah Shazali

BON APPÉTIT

– Shazrinah Shazali

myTaste.com

Advertisement
Fudgy Avocado-Chilli Brownies

Fudgy Avocado-Chilli Brownies

Hello Everyone! Firstly, apologies for not getting this post up last week as originally planned. It has been a crazy hectic week with early days and late nights in the office – even working the weekends ‘til late to meet deadlines for an event that our department/team organised on this day just last week. So because of that, I barely had any time to sit down and comfortably write this post with a stress-free state of mind. Having said that, here I am, back on track again to share a deliciously (healthy?) dessert that’s sure to knock your socks off!

The first time I experienced a Chilli-Chocolate flavour combination was when I was still studying in Sydney for my Bachelor’s of Design Degree. I remember I was at Circular Quay with a friend, and one of the gelato stalls there (can’t remember the name) was having a chocolate gelato fest! I clearly remember the difficulty I had in choosing a chocolate flavour out of the possible 10 or 15 they had available. For those of you who don’t know me, I like my chocolate like how I like my men – dark. Just kidding – I just wanted to say that. I have no particular preferences on skin colour or race when it comes to men. Tangent aside; I’m just not very fond of milk or white chocolate unless I really REALLY crave for it. Well technically I’m not very fond of chocolate altogether unless I really want something chocolatey for dessert.

Fudgy Avocado-Chilli Brownies

Finally getting back to the original story, I remember having doubts on choosing just a regular Dark Chocolate Gelato, or one called Death by Chocolate which was essentially the Dark Chocolate Gelato, but with chilli in it. Me being adventurous to a certain extent (hey we all gotta draw a line somewhere!), I decided to go for the Death by Chocolate since never had I ever, up until that moment of course, tried the pairing of chilli and chocolate before. Boom. My life changed. It was a magical moment. The subtle yet just enough kick of heat that played on my tongue together with the cold creamy gelato that was slightly sweet and slightly bitter at the same time was to die for. It truly did live up to its name – Death by Chocolate. Ever since then, Chilli and Chocolate became my new best friends.

So what about Chocolate and Avocado? How did they also become my new best friends? Well, a couple of years back, when I was still studying abroad, I was out having a weekend (or maybe it was a weekday during the winter holidays) brunch with some of the people/friends I lived with. We went to a place known as Rustic Pearl in Surry Hills. When we were ordering our drinks to start off with, I was super curious about their Chocomolé Smoothie – Chocolate and Guacamole I presumed from its name after reading “with avocado and cocoa.” As usual, I was being my adventurous self and decided to try this foreign-to-me flavour pairing of Avocado and Chocolate. Did it change my life? Why yes. Yes it did. I still can’t quite describe the sensation nor taste of the pairing, but I absolutely love it.

Fudgy Avocado-Chilli Brownies

Therefore, Avocado, Dark Chocolate, and Chilli? Explosive. Every time I want to be adventurous and try something new when it came to gelato flavours, I always say to myself, “no, you need Avocado and Dark Chocolate-Chilli Gelato.” I had been craving brownies for the longest time ever, and this was the perfect opportunity to whip them up and feature them on the blog since it fit with the theme I made it fit with the theme by incorporating avocados into them. These brownies are dense, thick, fudgy, and rich. The frosting though compliments the richness perfectly since it is light in flavour. Yes the frosting tastes like avocado, and no, the brownies do not even if they have avocado mixed into them.

Anyway, apologies for the super long introduction – hope it made up for not posting last week *cheeky grin* but before we pop on over to the recipe below, please do check out the original recipe by Jessica over on How Sweet Eats.

Fudgy Avocado-Chilli Brownies Ingredients

PREP TIME 15 MINS | COOKING TIME 30 MINS | MAKES 12 BROWNIES

INGREDIENTS

For the brownie batter

  • 2 large ripe avocados, peeled, pitted, and mashed
  • 2 large free-range eggs
  • 1-2 red bird’s eye chillies, minced
  • 200g high-quality dark chocolate, melted
  • 50g high-quality dark chocolate, roughly chopped
  • 3/4 cup all-purpose/plain flour
  • 1/2 cup white granulated sugar
  • 1/4 cup unsweetened cocoa powder
  • 3 tbsp extra virgin olive oil
  • 1 tsp vanilla extract
  • 1/2 tsp baking powder
  • 1/4 tsp salt

For to avocado frosting

  • 1 large ripe avocado, peeled, pitted, and mashed
  • 2 & 1/2 cups confectioiner’s sugar
  • 1/4 tsp vanilla extract

METHOD

  1. Preheat oven to 180C (350F or gas mark 4), and generously grease a 9in x 13in baking dish with unsalted butter or non-stick cooking spray.
  2. Fudgy Brownies: Whisk the mashed avocados, melted chocolate, and minced chillies in a large mixing bowl before adding in the white granulated sugar. Whisk again until well combined. Add in the eggs, together with the vanilla extract and mix well.
  3. Sift in the plain flour, cocoa powder, baking powder, and salt into the avocado-chocolate mixture. Mix with a large spoon until JUST combined – be careful as to not overmix the batter.
  4. Stir in the extra virgin olive oil until it is well distributed into the batter and is somewhat smooth in consistency. Gently fold in the chopped chocolate, and then spread onto the prepared baking dish.
  5. Bake for 28-32 minutes, or until the middle has set. You can check this by inserting a toothpick into the centre. If it comes out clean, then the brownies are done. Remove from the oven and set aside for it to completely cool down.
  6. Avocado Frosting: Add the mashed avocado and vanilla extract into a medium-sized mixing bowl. Whisk until combined. Slowly incorporate the confectioner’s sugar into the avocado mixture and whisk until a smooth frosting forms.
  7. Frost the brownies once they have cooled down and top with extra chopped chocolate bits and chilli slices for an added extra kick of heat. Serve and enjoy immediately!

Fudgy Avocado-Chilli Brownies

Tip: If you’re going to pop them in the fridge to eat the next day, and the succeeding days to come, I recommend letting them come back up to room temperature before eating them. They can be even denser and slightly dry after coming out of the fridge.

Fudgy Avocado-Chilli Brownies

BON APPÉTIT

– Ally xx

myTaste.com

Raspberry & Passionfruit Smoothie Bowl

Raspberry & Passionfruit Smoothie Bowl

Hello Everyone! It’s the last of my Smoothie Bowl series for the past two months! I hope that everyone that has been following have enjoyed a burst of colourful and healthy breakfast smoothies in a different limelight. As I have always said in, if not all, then most of my posts from the past two months is that you can cater to your favourite flavour combinations for these smoothie bowls. You can also get creative in the toppings and enjoy decorating them for a vivid start to your mornings. They’re easy to whip up for those busy weekdays as well as for those chill weekends.

From all the smoothies bowls I’ve whipped up and experimented with, I would say that my most favourite one would have to be the Avocado & Spinach Smoothie Bowl in terms of taste. In terms of colour, hands down to the ever so vibrant Pitaya & Pineapple Smoothie Bowl, and I would have to say that tonight’s recipe beats the rest in terms of presentation. Let me know in the comments below what your favourites are based on the three categories that I mentioned: Taste, Colour, and Presentation.

Also, a special shoutout to my Mama who turned 58 yesterday! May God continue to shower you with love, happiness, and health for the many more years to come. I didn’t have time to bake her a cake – so we got a deconstructed Pineapple Tart for her yesterday at the restaurant we celebrated at last night. I literally came back from the Philippines on Sunday night, which, those of you who know me or have read somewhere on this blog, that Sunday is my only day off from my work week and the only time I can cook or bake. But don’t worry guys! I’ll make it up to her for Mother’s Day next weekend, plus that deconstructed Pineapple Tart was TO. DIE. FOR. If my Mom hadn’t stopped me, I would’ve gladly ordered another plate just for myself.

Mama's 58th Birthday

Just to note, I know that whenever it’s a new month on the blog, I always start a new theme – but because my scheduling got a bit messed up last month, I still have one more Smoothie Bowl recipe to share with everyone instead of leaving it in my archive of ‘recipes I haven’t posted yet because it doesn’t fit the theme’. Next week I’ll be back with a new Breakfast theme for Amcarmen’s Kitchen so stay tuned!

Moving on, you may find something off in the ingredients shot below. If you haven’t/didn’t read my post last week Tuesday, I mentioned that my jar of peanut butter went missing for that recipe when I was photographing the ingredients for it and ended up in this recipe instead *cheeky grin* but I had only noticed it when I went through the photos a couple of day later after shooting and making the two smoothie bowls on that same day. I was too lazy to set it all up again just for the right photo, so bear with me on this – my mind tends to float from time to time. I know it’s not that big of a deal, but sometimes things like these tickle my mild acquaintance to OCD.

Raspberry & Passionfruit Smoothie Bowl Ingredients

PREP TIME 5 MINS | COOKING TIME  | SERVES 1

INGREDIENTS

For the smoothie mixture

  • 1 cup frozen raspberries
  • 1 large banana
  • 1/2 cup yoghurt
  • 1/4 cup low-fat milk
  • 1 tbsp chia seeds

Toppings

  • Granola – contains vitamins, minerals, and other essential nutrients, including, but not limited to, dietary fibres, sodium, potassium, zinc, phosphorus, magnesium, calcium, vitamin C & E, niacin, iron, and thiamin
  • Kiwis – loaded with vitamins and minerals such as Vitamins A, B6, B12, E, and potassium, calcium, iron, and magnesium
  • Passionfruitrich in antioxidants, flavonoids, vitamin A & C, riboflavin, niacin, iron, magnesium, phosphorus, potassium, copper, fiber, and protein
  • Raspberrygood source of vitamin C, E, K, manganese, dietary fibre, copper pantothenic acid, biotin, magnesium, folate, omega-3 fatty acids, and potassium
  • Dark Chocolate
  • Desiccated Coconut

METHOD

  1. Blend the raspberries, banana, milk, yoghurt, and chia seeds until smooth.
  2. Transfer to a bowl and top with passionfruit pulp, sliced kiwis, granola, roughly chopped dark chocolate, desiccated coconut, and crushed raspberries and granola. Enjoy!

Raspberry & Passionfruit Smoothie Bowl

And that wraps up Breakfast Smoothie Bowls on Amcarmen’s Kitchen. Here’s an image that a edited together for a recap on what I’ve covered. Head on over to the recipes tab above under ‘Western’ to find the links to all of the yummilicious bowls. Stay tuned for a whole new theme on the blog in a couple of days (hopefully)!

8 Brekkie Smoothie Bowls

BON APPÉTIT

– Ally xx

myTaste.com

Dark Chocolate, PB & Banana Smoothie Bowl

Dark Chocolate, PB & Banana Smoothie Bowl

Hello Everyone! First off, apologies as I did say in my last post that I’d get this up within the week where I posted about Amcarmen’s Kitchen turning 4 last week! (Unnecessary) things got in the way which was why I wasn’t able to get this up. So to make up for that, since after this post I still have one more Smoothie Bowl recipe to share with all of you, I’ll ATTEMPT to get that up for you before May rolls in. Bare in mind that I will be flying off once again tomorrow, hence also why this post is going up on a Tuesday instead of my usual Wednesday post schedule, so my attempt may already be void at this point *cheeky grin* but for you guys, I will try my best to.

Moving on, here is tonight’s recipe for a devilishly delicious Dark Chocolate, PB, and Banana Smoothie Bowl! So incase you guys haven’t been following my Instagram pages, I got back from a 5-day business trip to Hong Kong two Sundays ago. I’ve italicised ‘business’ because well, though yes it was for business, it was also sort of a mini-vacation. It was my first time to travel to Hong Kong as well so I made sure that I made the most out of the trip, outside of business hours that is. Though it was a fun trip, both on the business and vacation side to it, I was super exhausted and sleep deprived from the trip when I got back. It’s not that I was out partying every single night until the wee hours of dawn, but rather my roommate/colleague basically kept me up all night. She snores like a helicopter continuously hovering over me and talks in her sleep. I’m a very sensitive sleeper and this for me was just… Pure torture. I probably collectively only slept 8-10 hours during that 5 day trip, and the hard part was, I couldn’t even take naps in between because she snores in her naps too. I’m definitely requesting for separate rooms if I ever have to travel with her again. At least I’ll be travelling by myself to the Philippines tomorrow so I won’t have to worry about a snore fest for the upcoming 5 days (thank God).

Rant over. So Dark Chocolate, PB, and Banana? In a smoothie bowl? For breakfast? Don’t mind if I do! Classic flavour combinations for those who prefer to start their mornings off on a sweet note. Now you may notice that in the ingredients shot below that the jar of peanut butter is missing… So here’s what happened, that day I was making two different smoothie bowls for a Sunday afternoon snack, therefore I took two ingredient shots that day. The jar of peanut butter found it’s way into the other shot (which by the way doesn’t need peanut butter) and I only realised it after I was going through the photographs I took a few days later – silly me! Oh well, so ignore the jar of peanut butter in the next recipe post!

Dark Chocolate, PB & Banana Smoothie Bowl Ingredients

PREP TIME 5 MINS | COOKING TIME  | SERVES 1

INGREDIENTS

For the smoothie mixture

  • 1 cup low-fat milk
  • 1/2 cup yoghurt
  • 60g dark chocolate*
  • 1 large banana
  • 1 tbsp peanut butter
  • 1/2 tbsp cocoa powder

*I used Whittaker’s Marlborough Sea Salt and Caramel Brittle Chocolate for this recipe – super yum with that hint of salt and sweet caramel.

Toppings

  • Bananas – loaded with essential vitamins and minerals such as potassium, calcium, manganese, magnesium, iron, folate, niacin, riboflavin, and B6
  • Granola – contains vitamins, minerals, and other essential nutrients, including, but not limited to, dietary fibres, sodium, potassium, zinc, phosphorus, magnesium, calcium, vitamin C & E, niacin, iron, and thiamin
  • Coco Pops
  • Dark Chocolate
  • Desiccated Coconut

METHOD

  1. Add the milk, peanut butter, cocoa powder, dark chocolate, yoghurt, and banana to a blender and blend until smooth.
  2. Transfer to a bowl and top with sliced bananas, coco pops, desiccated coconut, roughly chopped dark chocolate, and granola. Enjoy as quick and easy breakfast or a filling afternoon snack to get rid of that midday schlump!

Dark Chocolate, PB & Banana Smoothie Bowl

BON APPÉTIT

– Ally xx

myTaste.com

Death by Chocolate Cupcakes

Death by Chocolate Cupcakes

Hello Everyone! It’f finally November which means, other than a new theme on the blog as usual, it is also my birthday month! I’ll be 25 in exactly a week and I’ve got a few get-togethers planned with family, friends, and colleagues. I actually baked these cupcakes last year for my Manager’s birthday. The week before her birthday I shared the leftover red velvet cupcakes that I had baked for halloween with my colleagues. When I offered her the cupcakes, she told me that she didn’t like red velvet, and that chocolate was more her thing. So, my colleagues told me that I should bake her some chocolate cupcakes for her birthday. I’m not sure if she liked them, but my colleagues and I definitely did!

Death by Chocolate Cupcakes

These cupcakes  are not overly sweet, but rather deep and intense in pure chocolate flavour. They are dark chocolate cupcakes with a thick dark chocolate frosting on top and sprinkled with dark chocolate shavings. The mixture of melted chocolate and cocoa powder to make these cupcakes ultra fudgey, rich, and moist. Are you salivating yet? Well, if you aren’t then please go away – if you can’t salivate over fudgey dark chocolate cupcakes then we cannot be friends *cheeky grin*

Today is actually her birthday, and we tried to surprise her today which ended up being a massive fail. Well, it’s hard to surprise someone who already expects a surprise – my colleague was right, we should’ve just not surprised her as that would’ve been the ultimate surprise. She’ll probably get mad at us for forgetting, but then again she’ll definitely know that we didn’t forget and still expect a surprise in some way or another. Maybe that will be the plan for next year?

Anyway, Please take the time to check out the original recipe over on Sally’s Baking Addiction. Anyway, I don’t want to take you guys on a massive tangent so let’s move on to the recipe for tonight!

Death by Chocolate Cupcakes Ingredients

PREP TIME 12 MINS | COOKING TIME 18 MINS | SERVES 12 CUPCAKES

INGREDIENTS

For the dark chocolate cupcakes

  • 3/4 cup (95g) all-purpose flour
  • 1/2 cup buttermilk*
  • 1/2 cup granulated sugar
  • 1/2 cup unsweetened cocoa powder
  • 1/4 cup light brown sugar
  • 115g unsalted butter
  • 60g semi-sweet baking chocolate
  • 2 large eggs, at room temperature**
  • 1 tsp vanilla extract
  • 3/4 tsp baking powder
  • 1/2 tsp baking soda
  • 1/4 tsp salt

For the dark chocolate frosting

  • 2 & 3/4 cup confectioners’ sugar
  • 2/3 cup unsweetened cocoa powder
  • 95ml heavy cream
  • 90g unsalted butter, softened to room temperature
  • 1 tsp vanilla extract

Optional

  • Semi-sweet chocolate chips or shaved dark chocolate for decoration

*Room temperature eggs are required for this recipe. To bring eggs to room temperature quickly, put them in a glass of warm water for 5-10 minutes.

**Buttermilk is required for this recipe. If you do not have buttermilk, make your own by mixing 2 teaspoons white vinegar or lemon juice with 1/2 cup milk. Stir and let sit for 5 minutes.

METHOD

  1. Preheat the oven to 180C (350F or gas mark 4). Line a 12-cup cupcake/muffin pan with cupcake liners and set aside.
  2. For the cupcakes: Melt the butter and chocolate together in the microwave at 30-second intervals, stirring between each time until smooth. Once smooth, set aside to slightly cool. You may also melt the butter and chocolate over low heat on the stovetop.
  3. In a medium-sized bowl, combine the cocoa powder, flour, baking soda, baking powder, and salt together, and then set aside.
  4. In a large bowl, whisk the eggs, sugar, brown sugar, and vanilla together until smooth. Then, add in the cooled butter and chocolate mixture, whisking until smooth. Add half of the flour mixture, then half of the buttermilk. Repeat until everything is added, stirring until just combined; be careful to not over mix otherwise the batter will be very thick like pudding. Fill the cupcake liners about 2/3 of the way full with batter.
  5. Bake for 18 minutes, or until a toothpick inserted into the centre of the cupcake comes out clean. Allow to cool completely before frosting.
  6. For the frosting: Sift the confectioners’ sugar and cocoa powder together to assure there are no lumps, and then set aside.
  7. With a handheld or stand mixer fitted with a paddle attachment, beat the butter on medium speed until creamy – about 2 minutes. Gradually add the sifted sugar and cocoa powder mixture alternately with the heavy cream and vanilla extract. Beat on low speed after each addition. Once all added, beat on high speed until creamy and combined for at least 2 minutes. Add a pinch of salt if frosting is too sweet.
  8. Frost the cooled cupcakes and top with chocolate chips or shaved dark chocolate as desired. Cupcakes stay fresh at room temperature in an airtight container for up to 4 days. Store covered in the refrigerator is desired for up to 1 week.
  9. Share and enjoy amongst family and friends!

Death by Chocolate Cupcakes

Death by Chocolate Cupcakes

BON APPÉTIT

– Ally xx

myTaste.com

Auguest 2015: Brendon D'Souza

Brendon’s Cookies & Cream

Hi Everyone! Hope you’re all having a lovely day wherever you are. My name is Brendon D’Souza and I am a writer and food blogger from Sydney. I’m very honoured to be a part of this Auguest series and have some exciting dessert creations to share with you over the next two posts.

I launched my website Brendon The Smiling Chef in 2012, posting simple recipes that I had cooked for dinner. I developed skills in food styling and photography through internships and writing and editing roles at Green Lifestyle, Grapeshot, Australian Catholics and Youth Food Movement Australia and started to apply these skills to my recipe posts. This year I plan to make a few exciting changes with the website and include a restaurant review section called “Smiling & Dining @” which features reviews that I publish at Zomato While you’re there feel free to check out all my foodie adventures in Instagram at @brendonthesmilingchef.

Brendon's Cookies & Cream

I met Ally a few months ago at a food blogging seminar held in Sydney and she told me all about her passion for exploring cultures through food, which is something that I too love! We caught up a few weeks ago for a fabulous cooking day where she showed me how to make some delicious Filipino recipes (Which you can check out at Brendon The Smiling Chef next week). The recipe that I’m going to share with you today is a bit of an invention that I have drawn from my experiences of growing up here in Australia. Like Ally, I too am a bit of a third-culture foodie. My family are Indian and are originally from the state of Goa which sits on the West Coast of India. Goa is largely influenced by the Portuguese, who colonised the region in around the 16th Century, so our culture, customs and cuisine are surprisingly similar to Europe. I was born in Bahrain and lived there for two years before we migrated to Australia in the mid-nineties.

Growing up in Western Sydney, I was surrounded by a wealth of multicultural diversity and from a young age I was introduced to the cultures and cuisines of the Philippines, Southern America, Malta and Vietnam to name a few. Despite all this I have to admit that as a child I was very embarrassed about being Indian. It’s one of side-effects of growing up in Anglo-Saxon society. I saw myself as different from all the other kids at school. I had black hair, brown skin and brown eyes rather than blonde hair and blue eyes. Now that we’ve all grown up, a lot of my friends have said that they experienced these feelings too! I would cringe when I opened my lunchbox to find the beautiful Goan prawn curry and rice that mum had packed for me. What would the other kids think? We never really ate much Indian food at home when we were younger because my sister and I, being True Blue Aussies, didn’t like the pungent spices used in most of our cooking. They were too hot for our tiny tastebuds to handle. In these instances, six-year-old Brendon would drag a chair to the kitchen and reach for a jar of tomato paste sauce to put together my version of Spaghetti Bolognese; 1 kilogram of beef mince with 1 jar of tomato paste, yes paste (#IcantbelieveIdidthat), stirred through.

Brendon's Cookies & Cream

The 2000’s came along we noticed a number of American food products appearing on the supermarket shelves including Pop Tarts, Oreos, and Krispy Kreme Donuts. My favourite was Hershey’s Cookies ’n’ Creme bar, (or the Mars® counterpart Dove), a dreamy combination of white chocolate with tiny chocolate cookie pieces. It was ever popular among my Filipino friends. They had experienced this delight for years because it was sold in all the Filipino grocery stores. We saw it as a luxury because it was so new! It became one of my favourite flavour combos and, to nine-year-old Brendon’s delight, even started appearing in ice creams and cheesecakes!

I was playing around with the idea of reinventing Cookies and Cream and turning it into a sophisticated dessert. Chocolate chip cookies would definitely feature because who doesn’t love a good chocolate chip cookie? A white chocolate and vanilla bean ganache could represent the Cream and a 70% dark chocolate ganache would balance the sweetness. It had been a while since I’d tried to make macarons from scratch but I thought it would be nice to have some chocolate almond cigars to add another texture and flavour to the dessert. We made up the recipe for these while referring to the Master Adriano Zumbo’s for rough measurements. They weren’t as smooth on top but they made delicious chewy cookies.

Brendon's Cookies & Cream Ingredients

PREP TIME 30 MINS | COOKING TIME 15 MINS | SERVES 2-3

INGREDIENTS

For the white chocolate and vanilla bean ganache

  • 100ml pure cream
  • 200g white chooclate, chopped
  • 1 tbsp vanilla bean paste
  • 1 tsp glucose syrup

For the bitter dark chocolate ganache

  • 100ml pure cream
  • 150g dark chocolate (min. 70% cocoa solids)
  • 1 tsp glucose syrup

For the chocolate almond cigars

  • 1 free range egg white
  • 250g caster sugar
  • 150g almond meal
  • 2 tbsp Dutch process cocoa powder

For the chocolate chip cookies

  • 250g unsalted butter, softened
  • 200g dark chocolate, chopped
  • 200g milk chocolate, chopped
  • 1 cup brown sugar
  • 1 cup plain flour
  • 1/4 cup baking powder
  • 1 free range egg
  • 1 tbsp vanilla bean paste (or extract)

METHOD

Preparation

  1. White chocolate and vanilla bean ganache: Place the cream and white chocolate into a microwave-safe bowl and stir to combine. Heat for 30 seconds on medium then give the bowl a stir with a spatula. Continue to heat and stir the ganache in this way until smooth. Alternatively you can place the chocolate and cream into a heatproof glass bowl set over a pan of simmering water and stir until melted. When smooth, add the vanilla bean paste and the glucose syrup and stir until smooth. Allow to cool completely. Transfer the ganache to a disposable piping bag, seal the end with a rubber band and place in the fridge until cold but pliable.
  2. Bitter chocolate ganache. Place the cream and dark chocolate into a microwave-safe bowl and stir to combine. Heat for 30 seconds on medium then give the bowl a stir with a spatula. Continue to heat and stir the ganache in this way until smooth. Alternatively you can place the chocolate and cream into a heatproof glass bowl set over a pan of simmering water and stir until melted. When smooth, add the glucose syrup and stir until smooth. Allow to cool completely. Transfer the ganache to a disposable piping bag, seal the end with a rubber band and place in the fridge until cold but pliable.

Chocolate Almond Cigars

  1. Pre-heat the oven to 150C (300F or gas mark 2). Line a baking tray with baking paper and set aside.
  2. Place the egg white into a clean stainless steel or glass bowl free from grease or dirt. Whip to soft peaks using clean electric beaters. Add 1 tbsp of castor sugar to the egg whites and beat for 20-30 seconds or until the sugar has dissolved. Continue to add the sugar in this way until you have a glossy meringue. Sprinkle the almond meal and cocoa powder over and fold using a spatula to form a smooth batter.
  3. Transfer the batter to a disposable piping bag, twist the opening to enclose the filling and carefully cut off the tip of the bag to create a hole 2cm in diameter.
  4. Pipe 5cm cigars onto the baking sheet. You will need about 8 for this recipe. Allow them to rest for 10 minutes.
  5. Place the tray on the middle shelf of the oven and bake for 10-15 minutes or until the cigars have risen. Remove the tray from the oven and allow them to cool. When cool, take your piping bag with the white chocolate ganache and pipe a line down half the cigars. Sandwich with another cigar on top.

Brendon's Cookies & Cream

Chocolate Chip Cookies

  1. Place the butter and sugar and vanilla into the bowl of an electric mixer and beat until fluffy. Alternatively use electric hand beaters. Add the egg and beat until combined. Add the flour, baking powder and salt and stir to form a smooth dough. Add the chopped chocolate stir to combine.
  2. Roll out 12 cookies using 2 tsp cookie dough for each. Place them onto the prepared baking tray leaving about 3cm between each cookie for spreading. You will only need a small amount of the dough for the recipe but I’ll show you what you can do with your leftovers in my next recipe. Wrap the leftover dough tightly with cling wrap and place in the fridge.
  3. Place the baking tray on the middle shelf of the oven and bake for 10-15 minutes until the cookies have spread. Remove from the oven and allow to cool.
  4. Crumble 4 of the cookies to form cookie crumbs.

Plate up the dessert

  1. This is where the fun begins. Feel free to let your imagination run wild. Sprinkle the cookie crumbs across 4 serving plates. Pipe some white chocolate ganache onto each of the serving plates. Then rest a cigar along the ganache. Divide the chocolate chip cookies among the plates. Make a 1cm hole in the piping bag with the biter chocolate ganache and pipe them around the plate. Serve.

Ally and I had lots of fun with the plating. Check out our attempts.

Brendon's Cookies & Cream

Brendon's Cookies & Cream

Recipe Copyright © 2015 | brendonthesmilingchef

Happy cooking and keep smiling,

Brendon D’Souza 🙂

myTaste.com

Layered Chocolate & Salted Caramel Cake

Layered Chocolate & Salted Caramel Cake

Hello Everyone and welcome back to reading another blog post! So this recipe was actually made (and consumed) yesterday, but I would like to take this opportunity to tell you all what the cake was for. Basically last week when Jialing and I were having our lava cake bake off session, Lydia asked if I was free next week (which was yesterday), to make a chocolate cake for her birthday (which is today, Sunday). So first off, Happy 21st Birthday once again to my housemate and friend, Lydia! So on Thursday, I was going through chocolate cake recipes to make, and I came across this one on Taste. Chocolate and Salted Caramel – the ultimate flavour sensation! Jialing, and most specifically the birthday girl, were happy with this selection. So Saturday morning, Lydia and I met up with Jialing at Kingsford, had a gigantic lunch, and then headed over to Maroubra Junction to do our grocery shoppings, and also of course cake ingredient shopping. While shopping – may I just point out, we saw a tub of ready made salted caramel. We debated over whether we should just buy one, and I made the call to just make our own caramel – I mean why not? We were already making the cake from scratch!

Got home and immediately started on the cake because we knew it was going to take a while. Of course, Lydia was on dry ingredient duty, Jialing took over the wet, while I helped Lydia with the dry. Popped the mixture in the oven, and then it was onto the salted caramel. Seriously, so many problems with this, but nonetheless, it tasted #amazeballs. Also, while I was working on this, Jialing and Lydia started to prep the frosting for the cake. Also, somewhere in-between all that, Vidhya, our acting supervisor (not really) sat around and watched the chaos unfold in the kitchen – okay she did help a little bit as well before going back to sleep again (after having just woken up from her slumber). It was then more or less time to take the cakes out of the oven, left to cool, and then assemble! We assembled the first two layers and then, disaster struck. Our top layer wasn’t cooked all the way through so we had to pop it back into the oven. Once we got it out of the oven, we still had to wait for it to cool down. While that was happening, we left everything to where it was and headed out to get a take out dinner. We were so engrossed in our cake making session that we totally forgot about dinner! So went to the Indian place nearby and got dinner for 6 – by then Abdullah, Marissa, and Vidhya (when she woke up) joined us.

Layered Chocolate & Salted Caramel Cake

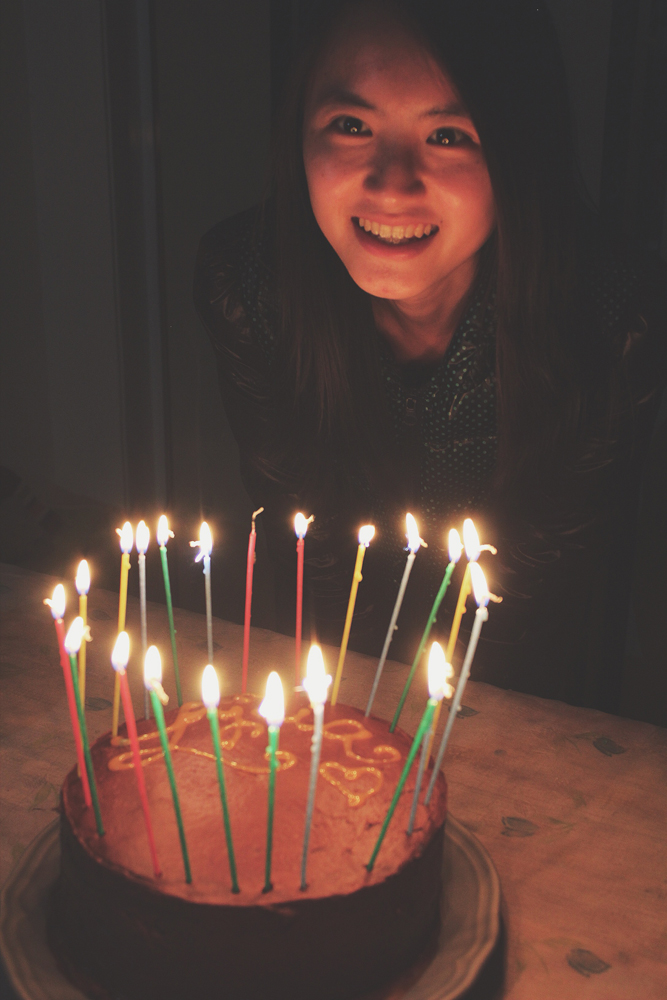
We then assembled the cake. Once that was done and over with, we had Vidhya distract Lydia so that we could put candles on her cake (which by the way she was not expecting). It was hilarious because whatever Vidhya needed doing was basically a one-man job turned two/three person job just to keep Lydia distracted and away from the dining room for a bit. When she finally walked back into the dining room, she was SO happy and even had a little jump/skip when she saw the candles on her cake. Priceless moment. We then took photos, sang happy birthday, had more housemates join us, ate cake, drank wine, and had a good time. So yes, if you took the time to read all that, thank you! And if you are just here for the recipe, fear not, it begins here…


Layered Chocolate & Salted Caramel Cake Ingredients

Layered Chocolate & Salted Caramel Cake Ingredients

PREP TIME 20 MINS | COOKING TIME 30-35 MINS | SERVES 8-10

INGREDIENTS

For the cake

  • 2 cups plain flour
  • 1 & 1/2 cups self-raising flour
  • 1 & 1/2 cups buttermilk
  • 1 & 1/4 cups caster sugar
  • 1/2 cup cocoa powder
  • 1/2 cup vegetable oil
  • 395g can caramel*
  • 4 free range eggs
  • 2 tsp vanilla extract (or 1 tsp if using concentrated extract)
  • 1 & 1/2 tsp sea salt rocks
  • 1 tsp baking soda
  • Sea salt rocks, to decorate (optional)

For the chocolate frosting

  • 400g dark chocolate, melted and cooled
  • 250g unsalted butter, softened
  • 1/2 cup icing sugar, sifted
  • 1/4 cocoa powder, sifted

*If you read all of the above before scrolling down to the recipe, I actually made my own salted caramel which I will be uploading the recipe to tomorrow (hopefully), so stay tuned for that!

METHOD

  1. Preheat oven to 180C. Grease three 9″ round disposable aluminium tins (we didn’t have cake pans to work with so we bought these instead, and since they came in a pack of three, we made a three-layer cake instead).
  2. Sift flours, sugar, cocoa, baking of soda and 1/2 teaspoon of salt into a large bowl. Add in the eggs, buttermilk, oil, vanilla extract, and 1 cup cold water. Combine using a spatula. Then, using and electrical mixer, beat the mixture over medium speed for 3 to 4 minutes or until the mixture is smooth.
  3. Divide the batter between the tins and bake for 30 to 35 minutes or until a skewer inserted in the centre comes out clean. Stand in pans for 5 minutes before turning them out onto a wire rack to cool.
  4. Meanwhile, gather ingredients for your salted caramel while waiting for your cakes to cook (if making from scratch).
  5. Chocolate Frosting: Whisk the cocoa powder and 1/4 cup of warm water in a bowl until the cocoa powder has dissolved. Meanwhile, using an electric mixer, beat butter and sugar until pale and fluffy. Beat in the melted chocolate, then cocoa mixture until combined.
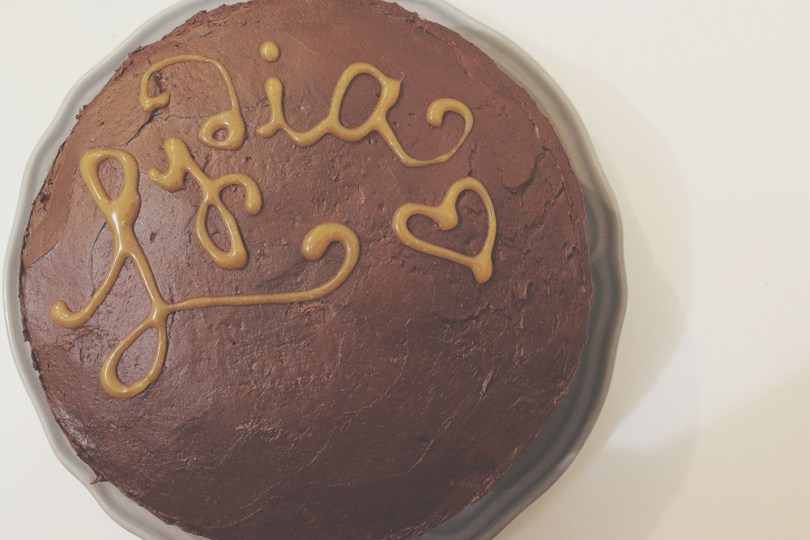
  6. Using a serrated knife, trim tops of cakes. Then, transfer the base of 1 cake to a plate. Spread with 1/3 of the caramel. Top with another cake layer and spread with 1/2 of the remaining caramel. Repeat layering with 1 cake layer and remaining caramel mixture. Top with remaining cake layer. Spread top and sides of cake with chocolate frosting. Serve!

Layered Chocolate & Salted Caramel Cake

Layered Chocolate & Salted Caramel Cake

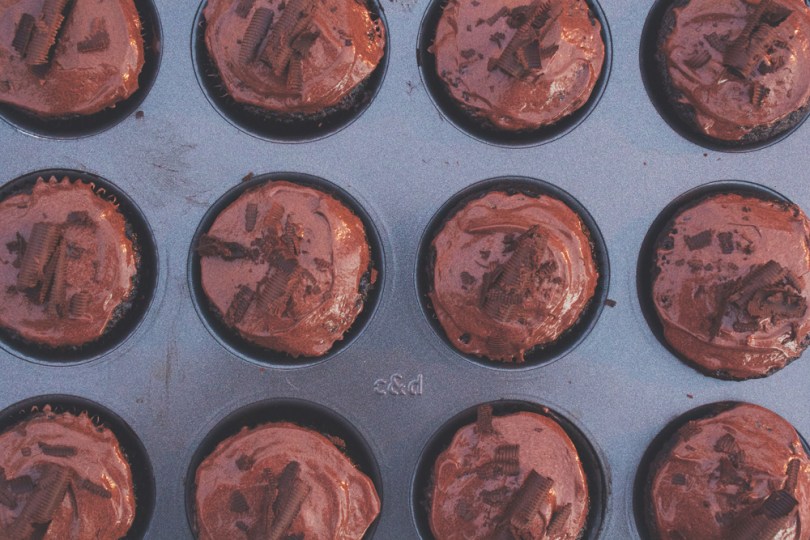
You can’t really see the layers of caramel in-between because while we were assembling we realised that the top layer wasn’t cooked all the way through. So while waiting for that to bake away in the oven, on top of getting take out and eating dinner, the caramel that was on the other layers of cake either seeped into the cake or dripped over the sides. Sad times, but still oh so decadent in flavour!

Happy Birthday Lydia

Once again, Happy Birthday Lydia! ❤

BON APPÉTIT

– Ally xx

myTaste.com