Spiced Carrot Cake Loaf with Cinnamon Cream Cheese Frosting

Spiced Carrot Cake Loaf with Cinnamon Cream Cheese Frosting

Hello Everyone!

AMCARMEN’S KITCHEN TURNS EIGHT TODAY!

And what a journey it has been indeed! So much has happened this year that it’s been extra difficult to keep up with the blog and my social media accounts associated with Amcarmen’s Kitchen. Just before my blog turned 7 last year, I started a foodie community group on Instagram together with a foodie friend of mine, Chamaine (she also participated in my Auguest 2021 series). From there, we started organising and hosting food collaborations amongst the IG foodie community, internationally. Aside from that, I also expanded my social media reach into the world of TikTok and started uploading video content there. It was also from TikTok where I placed third in a virtual cooking competition, and was invited to join in food campaigns where I won prizes weekly.

To be honest, with all that going on side-by-side with my work and social life, I actually didn’t prepare anything for my blog’s anniversary today. In fact, I was going back and forth with myself whether to whip up something or indulge in a lazy Easter long weekend. Prior to this weekend, I spent the last two weekends (Friday to Sunday) in a classroom from 9am – 7pm where I did a Premiere Pro and After Effects course. So yes, I totally deserve a do-nothing weekend after all that *cheeky grin*.

Luckily, because of my oh-so busy schedule, I had this recipe for a Spiced Carrot Cake Loaf with Cinnamon Cream Cheese Frosting that didn’t get posted towards the end of March. Still, it’s perfect for a celebration!

Spiced Carrot Cake Loaf with Cinnamon Cream Cheese Frosting

This carrot cake turned carrot cake loaf is dense, yet ultra soft, moist, and flavoured with fall-favourite spices such as cinnamon, ginger, and nutmeg. You can serve it plain, or spruce it up with your choice of nuts, dried fruit, and/or top with some cream cheese frosting. Now if you want to be a little bit extra, all you need is a pinch or two of cinnamon powder to take your frosting to another level. The delicious cinnamon-flavoured cream cheese frosting really heightens each slice of carrot cake loaf!

I’ve made this carrot cake loaf three times now, the first time was just because I wanted to bake something that was easy to take to work for a mid-morning or mid-afternoon snack. The second time I baked this loaf was with my boyfriend when he visited for the weekend a few months back. The third time, I was searching for a recipe where I could feature Binda Valley’s Vanilla Bliss Natural Greek Style Yoghurt, which I received courtesy of Gourmet Direct PH a few months back. This is also one of my achievements from last year, to be recognised by a brand and create promotional content for them.

This recipe makes two carrot cake loaves, feel free to double or downsize the recipe, but trust me, you don’t want to be downsizing because one loaf disappears fast! If you can turn a cake into a loaf, you can most definitely turn this loaf into muffins as well!

PREP TIME 15 MINS | COOKING TIME 55 – 65 MINS | MAKES 2 LOAVES

INGREDIENTS
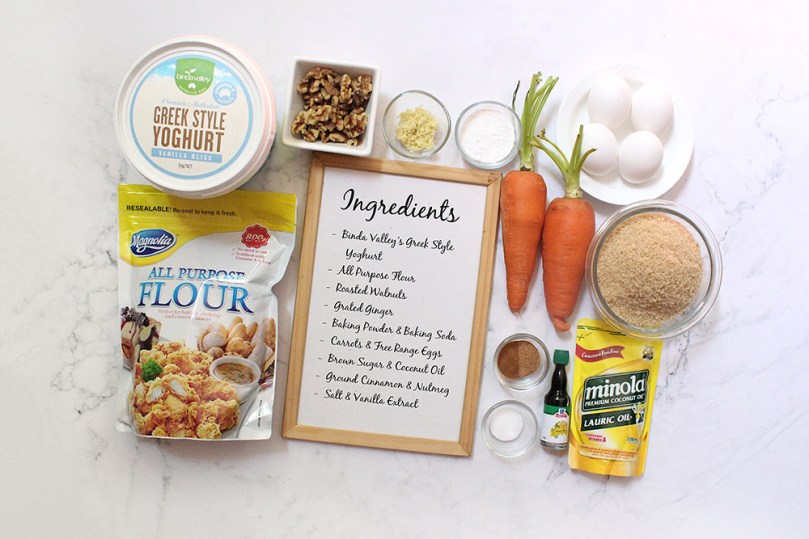
Spiced Carrot Cake Loaf Ingredients

For the carrot cake loaf

Dry ingredients

  • 3 cups all-purpose flour
  • 2 tsp baking powder
  • 2 tsp ground cinnamon
  • 1/2 tsp ground nutmeg
  • 1 & 1/2 tsp baking soda
  • 1/2 tsp salt
  • 3/4 cup roasted walnuts, roughly chopped

Wet ingredients

Cinnamon Cream Cheese Frosting Ingredients

For the cinnamon cream cheese frosting

  • 1 block (225g) cream cheese, softened
  • 2 tbsp unsalted butter, softened
  • 1 cup confectioners’ sugar
  • 1/2 tsp vanilla extract
  • 1/4 tsp ground cinnamon
  • Pinch of salt

METHOD

  1. Preheat oven to 180C (350F or gas mark 4) and line two 9×5-inch loaf pans with parchment paper.
  2. Carrot Loaf: Whisk all the dry ingredients, except for the walnuts, together in a large mixing bowl until well combined. Set aside.
  3. In a medium-sized mixing bowl, whisk all the wet ingredients together until well combined.
  4. Pour the wet ingredients into the dry ingredients and gently whisk together until just combined. The batter should be semi-thick in consistency. Fold the chopped walnuts into the batter.
  5. Equally divide the batter between the prepared loaf pans and bake for 55 to 65 minutes, or until a toothpick inserted into the center of the cake comes out clean as baking times may vary.
  6. Remove from the oven once done and leave it to cool completely in its pan on a wire rack.
  7. Cinnamon Cream Cheese Frosting: Using a handheld (or stand) mixer, beat the cream cheese in a medium-sized bowl on medium-high speed until smooth and creamy.
  8. Beat in the butter, and then followed by the confectioners’ sugar, vanilla extract, cinnamon, and a pinch of salt over low speed until smooth and creamy. Taste and adjust to your liking.
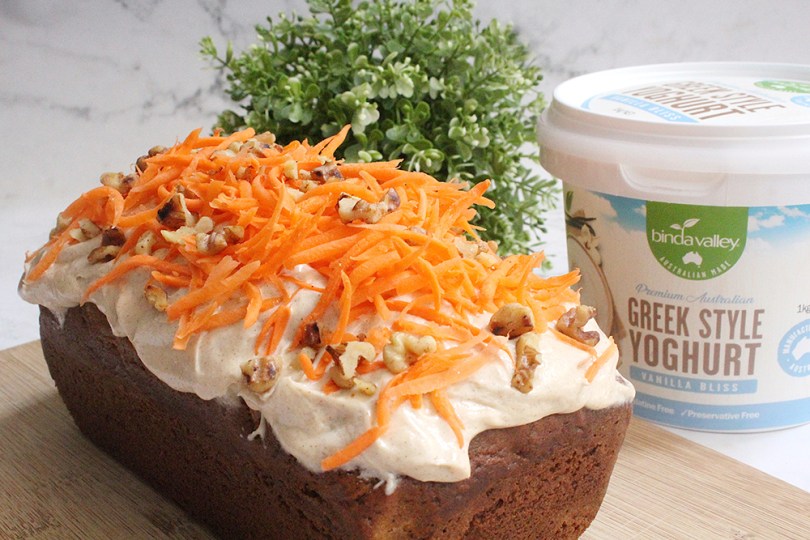
  9. Once the carrot cake loaf has cooled, frost with the cinnamon cream cheese and top with roasted walnuts and shredded carrots.
  10. Slice, serve, and enjoy!

Spiced Carrot Cake Loaf

Storage tip: Store your carrot cake loaf without the frosting! Cover and store leftover loaf/slices at room temperature for up to 3-4 days or in the refrigerator for up to about 10 days. Store the frosting separately in the refrigerator for up to a week.

Before I end tonight’s post, I just want to say a special thank you to my Mom. She was the one who patiently taught me how to cook my favourite dishes when I was growing up. She was my #1 supporter. Thank you Mama for passing down your knowledge and love for food on to me. I know you’re proudly watching from above. I love you.

Spiced Carrot Cake Loaf with Cinnamon Cream Cheese Frosting

BON APPÉTIT

– Ally xx

Follow me on my social media accounts:
Facebook: Amcarmen’s Kitchen
Instagram: @amcarmenskitchen
TikTok: @amcarmenskitchen

myTaste.com

French Toast Wraps with Mixed Berry Compote & Vanilla Yoghurt

French Toast Wraps with Mixed Berry Compote & Vanilla Yoghurt

Hello Everyone! Yesterday I shared a recipe for a simple mixed berry compote, and tonight I’ll show you how you can use it in a sweet breakfast dish (or even for dessert), featuring Binda Valley’s Vanilla Bliss Natural Greek Style Yoghurt, courtesy of Gourmet Direct PH!

French Toast Wraps with Mixed Berry Compote & Vanilla Yoghurt

These French Toast Wraps are a creative cross between traditional French toast and crêpes. They are made by dipping wholewheat wraps in a mixture of egg, soy milk, cinnamon, nutmeg, and vanilla extract. Make sure that you dip the wraps in the egg mixture rather than soak. You can let them soak for 30 seconds or so, but it will make the wraps a touch more fragile to handle. They are then fried in butter on both sides until golden brown. For my recipe, I fried them in coconut oil as I realised I didn’t have any butter left in my fridge.

The result is a deliciously mouth-watering, crêpe-like wrap without the hassle of actually making crêpes from scratch. Fill the wraps with your yoghurt of choice, sweetened or unsweetened, and you can also mix up your choice of fruits and granola, and even use herbs such as basil or mint. You can even go for savoury French Toast Wraps if you want with this recipe!

French Toast Wraps with Mixed Berry Compote & Vanilla Yoghurt Ingredients

PREP TIME 10 MINS | COOKING TIME 10 MINS | SERVES 3

INGREDIENTS

For the French toast wraps

  • 6 wholewheat tortilla wraps
  • 1/2 cup soy milk
  • 1 large free range egg
  • 1 tsp vanilla extract
  • 1/2 tsp ground cinnamon
  • 1/4 tsp ground nutmeg
  • 3/4 cup Binda Valley’s Vanilla Bliss Natural Greek Style Yoghurt
  • 1 tbsp lemon juice
  • 1/2 tbsp honey
  • 1/3 cup mixed berry compote
  • 3 large bananas, peeled and sliced
  • Granola (with dried cranberries and pumpkin seeds)
  • Confectioners’ sugar (optional)
  • Coconut oil, for cooking

METHOD

  1. In a shallow bowl, add the soy milk, egg, vanilla extract, cinnamon, and nutmeg together. Whisk until well combined. Dip both sides of each tortilla in the egg mixture.
  2. Add the coconut oil to a pan over medium-high heat. Add the dipped tortilla to the pan and cook until golden brown, about 1 to 2 minutes on each side. Once done, transfer to a plate and repeat with the other tortillas.
  3. In a small bowl, mix the yoghurt, lemon juice, and honey together until well combined. Spoon the yoghurt mixture down the centre of each tortilla and top with the sliced bananas.
  4. Fold the sides of the tortilla over the top of the yoghurt and bananas, and top with the warmed mixed berry compote. Top with more sliced bananas, granola, and sprinkle with confectioners’ sugar (optional). Serve and enjoy immediately!

French Toast Wraps with Mixed Berry Compote & Vanilla Yoghurt

French Toast Wraps with Mixed Berry Compote & Vanilla Yoghurt

BON APPÉTIT

– Ally xx

Follow me on my social media accounts:
Facebook: Amcarmen’s Kitchen
Instagram: @amcarmenskitchen
TikTok: @amcarmenskitchen

myTaste.com

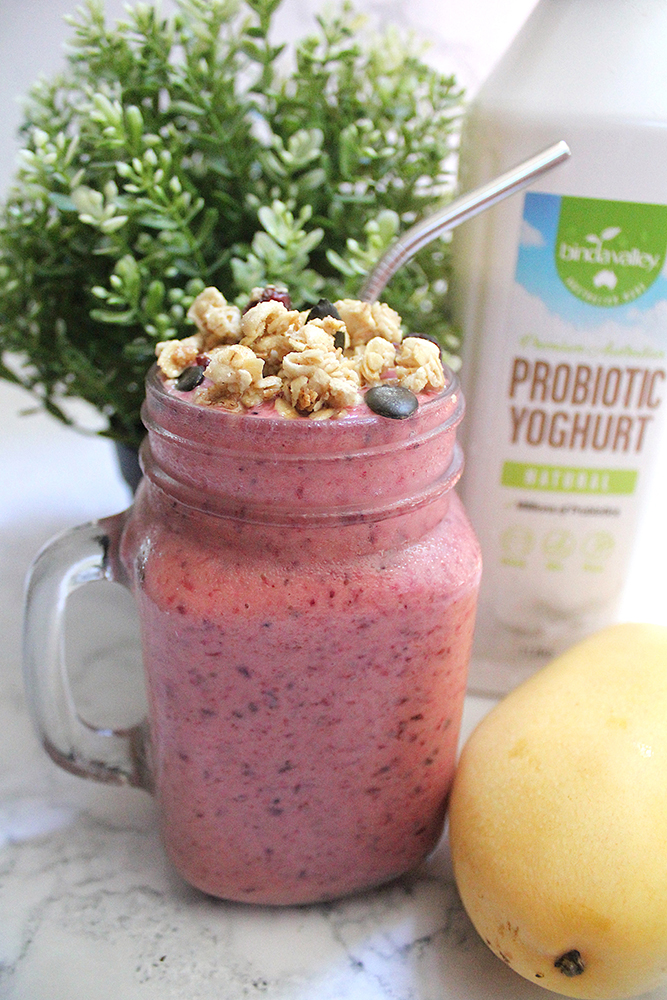
Mango Berry Probiotic Yoghurt Smoothie

Mango Berry Probiotic Yoghurt Smoothie

Hello Everyone! If you read my post last week, I mentioned that in the upcoming weeks ahead, I’ll be featuring recipes using Binda Valley’s Probiotic Drinking Yoghurt and/or Greek Style Yoghurt that Gourmet Direct PH sent over in mid January. Last week I shared a recipe for Peach Mango Pie Probiotic Yoghurt Smoothie Bowl and this week I’ll also be sharing another smoothie recipe.

This Mango Berry Smoothie Probiotic Yoghurt Smoothie combines the delicious flavors of a juicy sweet mango together with tangy berries in one refreshing drink. Since berries aren’t native to the Philippines (except for strawberries where you can source locally), I decided to use frozen mixed berries to make this smoothie. You can also use fresh berries for this recipe but I find that they don’t give off a vibrant colour as opposed to using frozen fruit. Also, using frozen fruit gives the smoothie a nice and thick consistency.

Gourmet Direct PH x Binda Valley Yoghurt

To be honest, I was never really a smoothie kind of person until I left for Australia for my university studies. I always cherished my sleep more than waking up early in the morning to prepare my breakfast. I leave just enough time to shower, get ready, and dash out the door, grabbing breakfast either on campus or just outside my workplace during my internship. While this worked out fine, I realised I was spending so much money for breakfast. I remember getting toast with ricotta and berries for AUD 8 (almost 300 PHP) which is like a full fancy meal here in the Philippines or 3 full fast food meals.

Not that this smoothie is any cheaper than a fast food breakfast meal, but if you’re pressed for time in the mornings, and want to eat healthier, this smoothie is perfect for a quick and on-the-go breakfast. All you need to do is add an extra 5 minutes to your morning routine!

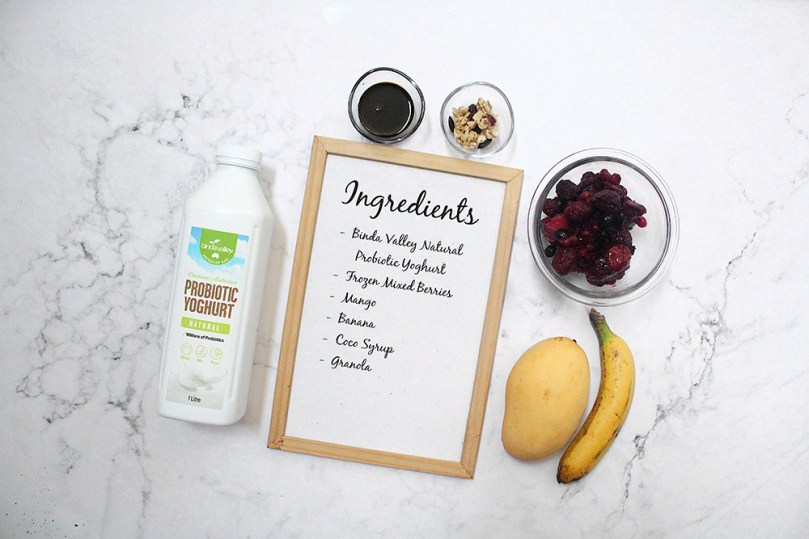
Mango Berry Probiotic Yoghurt Smoothie Ingredients

PREP TIME 5 MINS | COOKING TIME | SERVES 1

INGREDIENTS

  • 1 cup Binda Valley’s Probiotic Drinking Yoghurt
  • 1 cup mango, frozen
  • 1 & 1/2 cups mixed berries, frozen
  • 1 banana, peeled and cut into 1-inch pieces
  • 1 tbsp coco syrup
  • Granola, to top

METHOD

  1. Add all the ingredients, except the granola, into a blender and blend until smooth.
  2. Transfer to a glass and top with the granola. Serve immediately and enjoy!

Mango Berry Probiotic Yoghurt Smoothie

BON APPÉTIT

– Ally xx

Follow me on my social media accounts:
Facebook: Amcarmen’s Kitchen
Instagram: @amcarmenskitchen
TikTok: @amcarmenskitchen

myTaste.com

Peach Mango Pie Probiotic Yoghurt Smoothie Bowl

Peach Mango Pie Probiotic Yoghurt Smoothie Bowl

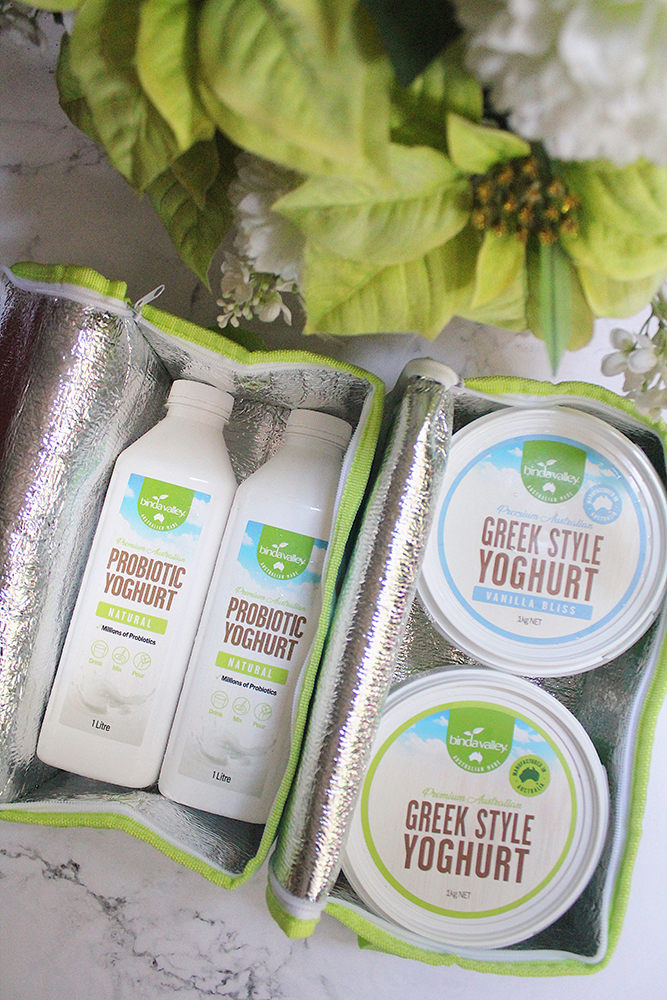
Hello Everyone! Last week I received a message from Gourmet Direct PH asking if they could deliver some yoghurt by Binda Valley to me to use in my recipes, to which I said yes to since I also collaborated with them last year when they sent Nuttelex products over to create recipes for the holiday season. I was actually very surprised by their generosity as I did not expect to receive 2 bottles of Probiotic Drinking Yoghurt (1 kg each), 1 tub (1 kg) of Natural Greek Style Yoghurt, and 1 tub (1 kg) of Vanilla Greek Style Yoghurt, all worth P1,560.00 in total. So expect to see some yoghurt-centered recipes over the next few weeks on Amcarmen’s Kitchen.

Gourmet Direct PH x Binda Valley Yoghurt

Tonight, I will be sharing a recipe using the Probiotic Drinking Yoghurt. While you can enjoy it as a drink on its own, you can also use it in your baking, add it to your cereal for breakfast, or in my case, use it as a base for a delicious smoothie! Binda Valley’s Probiotic Yoghurt is made from 100% Australian ingredients – the freshest milk to give it its deliciously rich and creamy texture. In addition, Probiotic Yoghurt also contains a lot of vitamins and minerals to promote a healthy digestive system.

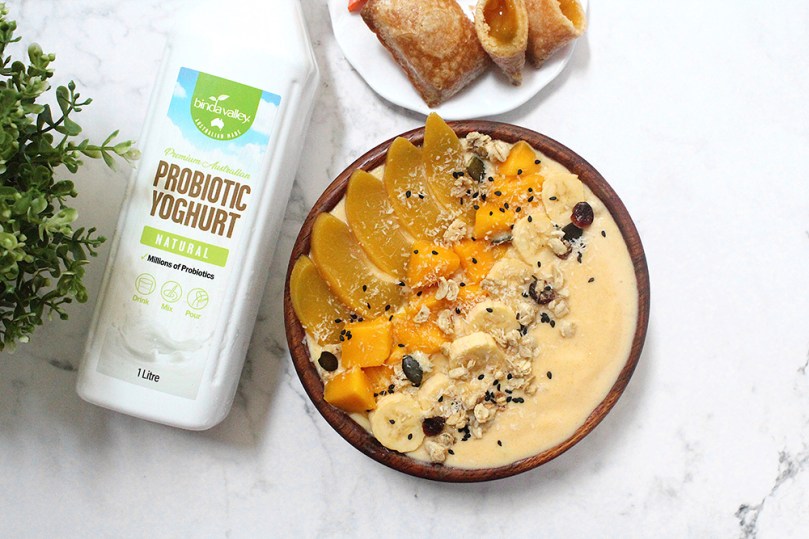
The idea behind the flavour of this smoothie bowl is inspired by Jollibee’s famous Peach Mango Pie. You’ve got the sweet peach and juicy mango blended together with some cinnamon and nutmeg for that pie flavour, and topped with granola for the crusty pie texture to complete it. Unlike a deep fried pie pocket, this smoothie bowl is rich in protein, vitamins, and minerals.

Peach Mango Pie Probiotic Yoghurt Smoothie Bowl

This Peach Mango Pie Probiotic Yoghurt Smoothie Bowl is the perfect weekend breakfast bowl to jumpstart your day in the morning or to cool off with after an afternoon workout. It’s also a healthier option to satisfy your sweet tooth at night. You can get creative with the toppings as well by adding things like assorted fruits, nuts, seeds, and granola to name a few. Since peaches aren’t native to the Philippines, I decided to use canned peaches that I froze in the freezer overnight before making this smoothie bowl. But if you’re living in a country where fresh peaches are available locally and in season, then it’s best to buy them fresh and freeze them yourself. It’s important to use frozen fruit for this smoothie so that you get a nice and thick consistency.

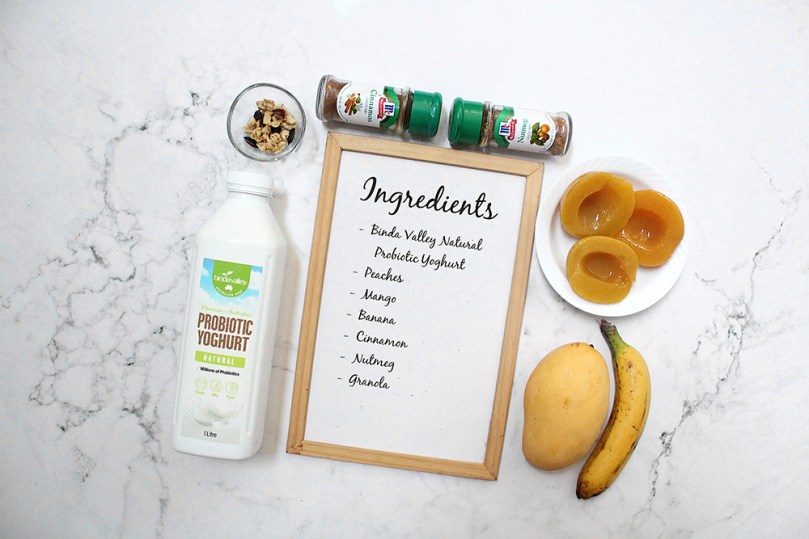
Peach Mango Pie Probiotic Yoghurt Smoothie Bowl Ingredients

PREP TIME 5 MINS | COOKING TIME | SERVES 1

INGREDIENTS

  • 1 cup Binda Valley’s Probiotic Drinking Yoghurt
  • 1 cup mango, frozen
  • 1 cup peaches, frozen
  • 1/8 tsp ground cinnamon
  • 1/8 tsp ground nutmeg

For the toppings

  • Banana slices
  • Black sesame seeds
  • Canned peaches, sliced
  • Desiccated coconut
  • Fresh mango, cubed
  • Granola

METHOD

  1. Add all the ingredients for the smoothie into a blender and blend until smooth.
  2. Transfer to a bowl and top with your choice of assorted fruits, nuts, seeds, and granola. Serve immediately and enjoy!

Peach Mango Pie Probiotic Yoghurt Smoothie Bowl

I’m also contributing this recipe to an open collaboration on Instagram (not run by me) called No Flame, No Fire Recipes where we basically have to share recipes that do not require to be cooked. The collaboration started today and runs until Saturday hence why I posted this recipe today, Thursday, instead of my usual Wednesday night schedule.

To get your hands on Binda Valley Fresh Yoghurt and Probiotic Yoghurt Drink or inquiries, you may head to their IG: @gourmetdirectph, FB: Gourmet Direct Philippines, or their website on http://www.gourmetdirect.ph.

BON APPÉTIT

– Ally xx

Follow me on my social media accounts:
Facebook: Amcarmen’s Kitchen
Instagram: @amcarmenskitchen
TikTok: @amcarmenskitchen

myTaste.com

Pastéis de Nata (Portuguese Egg Tarts)

Pastéis de Nata (Portuguese Egg Tarts)

Hello Everyone! As I mentioned in my post last week, East Timor was colonised by Portugal from the 16th century up until 1975, hence why East Timorese food even up to this day is heavily influenced by Portuguese cuisine. A favourite East Timor dessert snack that stuck around is Pastéis de Nata, or in English, Portuguese Egg Tarts. These egg tarts were originally created and made by Catholic nuns in Lisbon over 200 years ago. In East Timor, these tarts are a standard dessert found in fancy hotels, usually paired with a flavourful, aromatic, and organically grown East Timorese coffee.

If you’ve ever had one of these egg tarts, you’ll know that they are one of the greatest pastries to binge-eat! It has a crisp, flaky crust that holds a rich and creamy custard center that is blistered on top from the high heat of an oven. It tastes like home, even if you aren’t from Portugal. They’re just as enchanting as a trip to Lisbon.

Pastéis de Nata (Portuguese Egg Tarts)

Before we dive into tonight’s recipe, please take the time to check out the original where I drew my inspiration from over on the Tasting Table. Now in the original recipe, they make their own puff pastry dough, which you can also do. If you want to save time and energy (like me), you can always use store-bought puff pastry. The results are pretty much the same for a quick, easy, and hassle-free Portuguese Egg Tart.

Now you may notice that the tops may not brown quite as much as the authentic pastéis when baking at home. In fact my oven only goes to a maximum of 250C (482F or gas mark 9) and commercial pastry shops that sell these tarts have oven temperatures that blast up to 430C (800F)!

Pastéis de Nata (Portuguese Egg Tarts) Ingredients

PREP TIME 10 MINS | COOKING TIME 30 MINS | MAKES 32 TARTS

INGREDIENTS

  • 3/4 cup white granulated sugar
  • 2/3 cup water
  • 1 cinnamon stick
  • 1 cup & 6 tbsp whole milk
  • 1/2 cup all-purpose flour
  • 6 free-range egg yolks
  • Puff pastry sheets
  • Ground cinnamon, to garnish (optional)

Pastéis de Nata (Portuguese Egg Tarts)

METHOD

  1. Cinnamon Sugar Syrup: Combine the sugar, water, and cinnamon stick in a small saucepan. Over high heat, bring the mixture to a boil and cook for about a minute or until all the sugar granules have dissolved. Remove from the heat and let it sit aside until ready to use.
  2. Egg Filling: Add one cup plus one tablespoon of the whole milk into a separate saucepan over medium heat, until bubbles begin to form around the edges, about 4 to 5 minutes.
  3. While the milk is heating up, whisk the flour and remaining five tablespoons of milk in a large mixing bowl. Continue to whisk while adding the hot milk in a slow and steady stream.
  4. Discard the cinnamon stick from the sugar syrup and slowly whisk it into the milk mixture in a steady steam.
  5. Return the milk and sugar mixture to the saucepan and cook over low heat, whisking constantly until thickened, about 10 to 12 minutes.
  6. Turn the heat off and add in the yolks to the mixture. Whisk until well combined, and then strain through a fine-mesh sieve into a mixing bowl. Set aside to cool down slightly.
  7. Egg Tarts: Preheat oven to 260C (500F or gas mark 10).
  8. Prepare you muffin tins by lightly greasing them with a little butter.
  9. Roll out your store-bought puff pastry sheets and cut them depending on the size of your muffin tins. Ideally you’ll want them about 3/4 up the sides of each muffin mold. Evenly flatten the dough against the bottom and sides by pressing down on it.
  10. Pour about 1 & 1/2 tablespoons of the warm egg filling into each pastry shell.
  11. Bake for about 15 to 20 minutes, or until the shells are golden brown and crisp, the custards are set, and the tops are blackened in spots.
  12. Let cool in the pans on wire racks for 5 minutes, and then remove them from the tin and onto the wire rack. Sprinkle with cinnamon, serve warm, and enjoy!

Pastéis de Nata (Portuguese Egg Tarts)

BON APPÉTIT

– Ally xx

myTaste.com

Num Treap (Sticky Rice with Sesame Seeds)

Num Treap (Sticky Rice with Sesame Seeds)

Hello Everyone! Forget about brownie sundaes, forget about éclairs and chocolate cake; the real desserts, the sinfully sweet and decadent treats, can be found in one region: Southeast Asia. Ingredients in Southeast Asian treats are less traditional than the sweet flavours you typically see in Western desserts. Ingredients like cassava, mung beans, and lotus seeds paired with sticky sweet syrups like coconut cream, palm syrup, and condensed milk are common and no strangers to Cambodian treats. Beyond these ingredients you can also always expect to have at least one fresh fruit added to the mix. Look for favourites like mangoes, rambutan, durian and of course, bananas.

Just as Southeast Asian desserts, Cambodian treats are most frequently enjoyed mid-morning. Instead of being served to cap off a delicious meal, the treats are bought and enjoyed in markets as you are doing your shopping around town. Many of the most popular Khmer treats are sold from mobile street stands. Look out for the crowds of students outside universities and schools, flocked around a stand.

Traditional Cambodian treats, also known as Khmer sweets, also come in the form of custards and puddings; egg-based dishes that are spiced up with a variety of flavours (vanilla and cinnamon are typical favourites). Since rice remains a main staple in current day cuisine, being eaten as often as three times a day, rice-based cakes are also very popular.

Num Treap (Sticky Rice with Sesame Seeds)

Tonight, I will be sharing a Cambodian favoured treat that is simple and super easy to make at home. The best part? You’ll most likely have everything readily available to whip this up in your pantry. Num Treap, or in English, Sticky Rice with Sesame Seeds, is a treat that is basically as the name states, steamed sticky rice mixed in a warm coconut sauce. The mixture is then spread into a baking dish or pan, topped with sesame seeds, and then set aside to cool before cutting into squares and then served. You may serve it as it is, or with fruits on the side. Num in Cambodian means pastry, so it is essentially a sticky rice (bai damnaeb) pastry treat.

This dessert is very much similar to a sweet rice cake that we have here in the Philippines known as Biko. It is also made of coconut milk, brown sugar, and glutinous rice, that is topped with latik (coconut curds) instead of sesame seeds.

Num Treap (Sticky Rice with Sesame Seeds) Ingredients

PREP TIME 60 MINS* | COOKING TIME 45-60 MINS | MAKES 9 SLICES

*Allow for an additional 6 hours (or more) to soak the glutinous rice before cooking.

INGREDIENTS

  • 1 cup sweet glutinous rice, soaked for at least 6 hours or overnight
  • 2/3 cup coconut milk
  • 1/2 cup coconut sugar
  • 3 tbsp sesame seeds, toasted
  • 2 tsp vanilla extract
  • 1/2 tsp salt

METHOD

  1. Rice: Drain the water (no need to shake off the excess water), and evenly arrange the soaked sticky rice in a steamer lined with a greased banana leaf.
  2. Cover and steam for 30-45 minutes. You can check the rice and increase the steaming time if need be. Once done, keep the rice in the steamer or covered to prevent it from drying out until you need to use it.
  3. Coconut Sauce: While the rice is cooking, add the coconut milk, coconut sugar, salt, and vanilla extract in a large saucepan and cook over medium-high heat. Stir frequently until it thickens, about 5 minutes.
  4. Num Treap: Fluff the cooked rice with a fork to separate the grains. With the heat off, add the rice to the saucepan with the coconut sauce and mix well.
  5. Spread the rice mixture into a shallow dish or baking pan, pressing them down with a spatula. Sprinkle sesame seeds on top and cover with plastic wrap. Leave to set and cool for about an hour.
  6. Cut into squares, then serve and enjoy!

Num Treap (Sticky Rice with Sesame Seeds)

Num Treap (Sticky Rice with Sesame Seeds)

BON APPÉTIT

– Ally xx

myTaste.com

Kuih Koci Gula Kelapa (Glutinous Rice Cake with Coconut Filling)

Kuih Koci Gula Kelapa (Glutinous Rice Cake with Coconut Filling)

Hello Everyone! Tonight I will be sharing my last recipe from Brunei. As previously mentioned in a post I shared two weeks ago, I came across this Kuih Koci Gula Kelapa from the same website entitled ‘Brunei’s Traditional Sweet Treats You Must Try’.

To be honest, when I was still living in Brunei, this was a kuih that I barely saw sold in the night markets or road-side stalls – or maybe I was too focused on my favourite kuih-kuih that I failed to notice them amongst the pack. Nevertheless, as with most, if not all, kuih-kuih found in Brunei originate from a different country, and the Kuih Koci Gula Kelapa is no stranger to that. As it turns out, it is actually native to Indonesia.

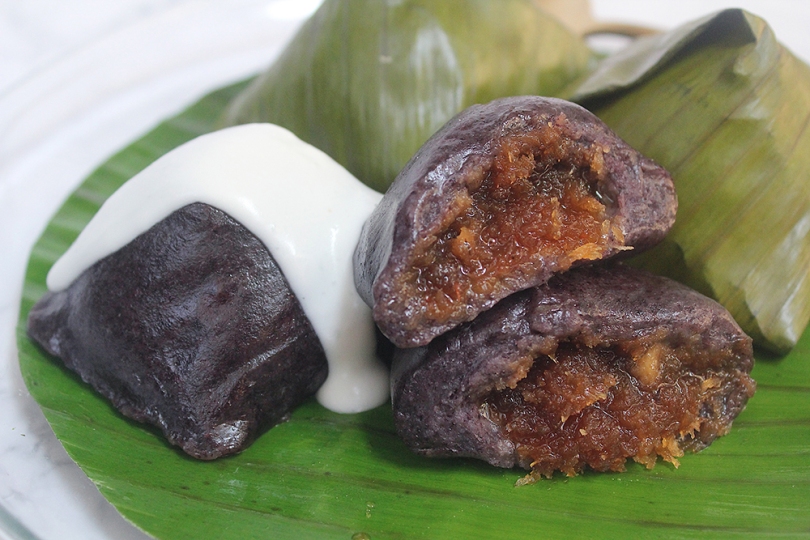
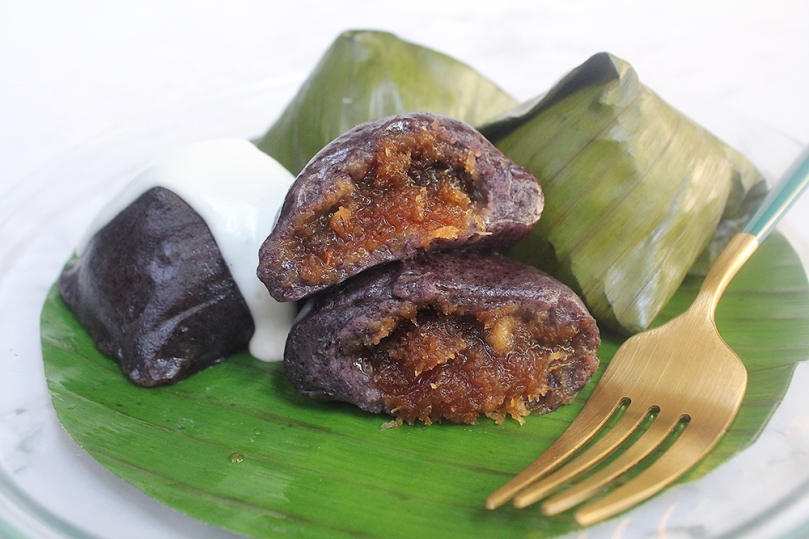
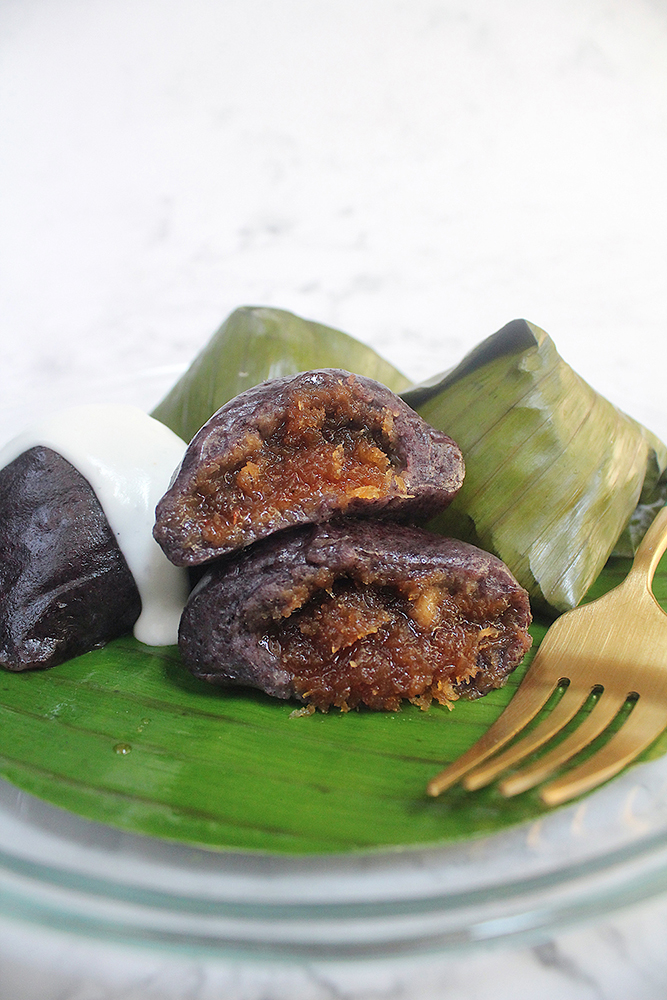
Pronounced koh-chee, this is a snack/dessert made with a mix of white and black glutinous rice flour, stuffed with sweetened coconut and palm sugar filling, wrapped in banana leaves, and then steamed. The deep purple hue of the kuih comes from the black glutinous rice flour. There are also varieties of this kuih that do not require black glutinous rice flour, in fact a majority of it is made with white glutinous rice flour. The black glutinous rice flour is mainly used to colour the kuih.

Kuih Koci Gula Kelapa (Glutinous Rice Cake with Coconut Filling)

In fact, black glutinous rice flour may be quite difficult to source (depending on where you live). You can actually make your own too by grinding black glutinous rice grains. Place them in a coffee grinder or blender and then grind until really fine. Sieve the flour and then grind again. You need to grind several times until you get a really fine flour, so technically it’s a lot of work too. I managed to source mine online from Indonesia.

The Kuih Koci has a mochi-like texture and is sweet in flavour from the coconut filling inside. Though optional, a slightly salty coconut sauce cuts through the sweetness nicely. Other than just adding a dollop of it atop after the kuih has been steamed, you can also spoon the coconut sauce into the banana leaf, place the dough in, and then steam it with the coconut sauce.

Before we dive into tonight’s recipe, please take the time to check out the original where I drew my inspiration from over on What To Cook Today by Marvellina.

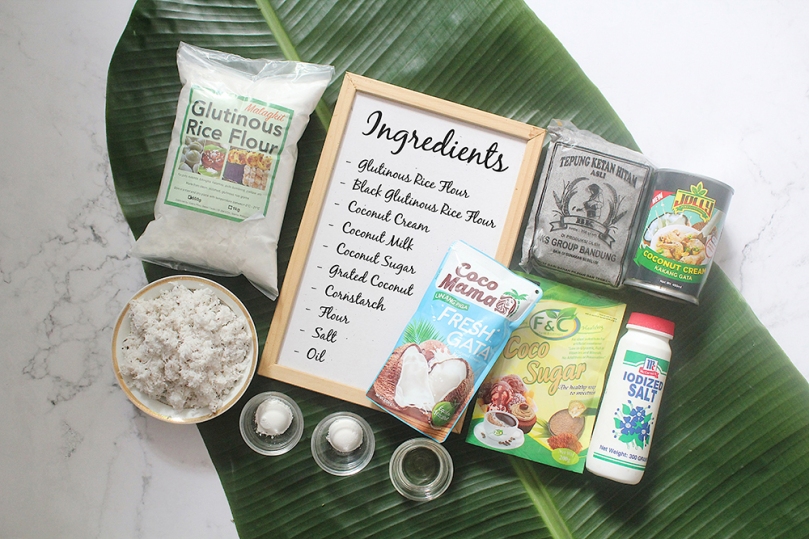
Kuih Koci Gula Kelapa (Glutinous Rice Cake with Coconut Filling) Ingredients

PREP TIME 30 MINS | COOKING TIME 30 MINS | MAKES 6 PCS

INGREDIENTS

For the dough

  • 1 & 1/2 cups white glutinous rice flour
  • 1/3 cup black glutinous rice flour
  • 2/3 cup coconut milk

For the coconut filling

  • 2 cups grated coconut
  • 1/2 cup coconut sugar*
  • 1/4 cup coconut cream
  • 1/4 cup white granulated sugar**
  • 1 tsp cornstarch
  • 1/4 tsp salt

*Gula Melaka (palm sugar) is the choice of sweetener used when it comes to traditional kuih like this, but if you can’t seem to source it, you can always substitute it for coconut sugar like I did.

**Also, I ran out of coconut sugar. It’s supposed to be 1 cup of coconut sugar but I only had half a cup left and therefore mixed it together with a quarter cup of white granulated sugar.

For the coconut sauce (optional)

  • 2/3 cup coconut cream
  • 1 tsp all-purpose flour
  • Pinch of salt, to taste

Wrapping

  • 6 pcs banana leaves (15cm x 20cm)
  • Coconut oil, for brushing

METHOD

  1. Prepare the Banana Leaves: Soak the banana leaves in warm water for 30 minutes. Wipe them dry and brush with coconut oil. Set aside.
  2. Coconut Filling: Meanwhile, add the coconut cream and sugars in a pan over medium heat. Mix until the sugars have melted, then stir in the grated coconut and salt. Mix until well incorporated and then sprinkle the cornstarch over the coconut-sugar mixture. Stir and cook until the mixture thickens. Once done, set aside and let it cool down completely.
  3. Coconut Sauce: Add the coconut cream and a pinch of salt to a small saucepan. Whisk in the all-purpose flour until smooth. Place on the stove and cook over medium heat, whisking continuously until the sauce thickens. Set aside.
  4. Dough: Heat the coconut milk in a small saucepan until it is hot, but not boiling. Add both flours to a large mixing bowl, together with the hot coconut milk. Stir to mix everything, until the dough comes together. It should be pliable and not sticky.
  5. Divide the dough into 6 equal pieces. Flatten the dough with the palm of your hands and place the cool coconut filling in the middle. Wrap around it and roll the dough into a smooth ball. Repeat with the remaining dough.
  6. Wrapping: Take a piece of banana leaf and shape into a cone. Place a dough ball in the cone and gently push it into the leaf. Fold one side over, and then the adjacent side. Then fold the other two sides to make your cone-shaped Kuih Koci.

You may also choose to wrap them into a parcel, or steam them with no wrapping at all! Just place the balls onto a small sheet of banana leaf.

  1. Steaming: Place the wrapped Kuih Koci into a steamer and steam for about 10 -15 minutes.
  2. Serve: Once done, unwrap and serve immediately while hot, topped with the coconut sauce. Enjoy as a light mid-morning or mid-afternoon snack!

Kuih Koci Gula Kelapa (Glutinous Rice Cake with Coconut Filling)

Note: Steamed Kuih Koci can be kept in the refrigerator for up to 3 days. Otherwise, you may freeze the uncooked kuih koci for later consumption. Steam, frozen for, 15-18 minutes.

BON APPÉTIT

– Ally xx

myTaste.com

Kuih Kosui (Rice Cakes with Grated Coconut)

Kuih Kosui (Rice Cakes with Grated Coconut)

Hello Everyone! The Bruneian traditional kuih (or kueh) is similar to many traditional cakes from around the region, such as in Singapore, Malaysia, and Indonesia. Nobody knows where the true origins of each traditional kuih came from in Brunei, but we know it all started from the water village – Kampong Ayer many decades ago. Back in the day, due to limited supply of resources, Bruneian cake makers would make use of natural elements and materials to prepare the cakes, such as wrapping with leaves, and making use of all parts of a coconut or palm tree.

Today, Bruneian kuih-kuih (plural for kuih) are still as popular as ever due to the nostalgia and historical heritage that it carries with every bite. Upon researching traditional kuih-kuih native to Brunei, I came across a website entitled ‘Brunei’s Traditional Sweet Treats You Must Try’. Kuih Kosui was amongst the list, but as it turns out, it is actually native to Malaysia, as most kuih-kuih are.

Kuih Kosui is a saucer-shaped rice cake that is flavoured with either pandan (screwpine leaves) juice or gula melaka (palm sugar). It is also known as Kue Lumpang in native Indonesian language, and is actually very similar to what we have closer to home here in the Philippines, known as kutsinta.

Kuih Kosui (Rice Cakes with Grated Coconut)

Kuih Kosui is very economical to make. The kuih is characterised by its ‘dimple’ in the middle of the cake, lightly sweet taste, soft, yet wobbly and slightly bouncy in texture. They are then topped with a slightly salted, grated coconut topping to give that extra layer of flavour with the classic sweet-salty combination.

Unlike with a traditional kutsinta recipe, the soft, wobbly, and bouncy texture of Kuih Kosui can be achieved without having to add any alkaline water. You just need the right combination of flours and you can still achieve its distinct chewy texture and dimples.

Before we dive into tonight’s recipe, please take the time to check out the original where I drew my inspiration from over on What To Cook Today by Marvellina.

Kuih Kosui (Rice Cakes with Grated Coconut) Ingredients

PREP TIME 15 MINS | COOKING TIME 15-20 MINS | MAKES 14 CAKES

INGREDIENTS

  • 1/2 cup + 1 tbsp + 1 & 3/4 tsp rice flour
  • 2 tsp wheat starch
  • 2 tsp cornstarch
  • 1/4 tsp salt

For pandan flavour

  • 2/3 & 1/4 cup boiling water (cooled for 15 minutes)*
  • 1/2 cup white granulated sugar
  • 1/3 cup pandan-infused water**

For coconut sugar flavour

  • 1 & 1/4 cup boiling water (cooled for 15 minutes)*
  • 1/4 cup coconut sugar
  • 1 tsp white granulated sugar

For the topping

  • Freshly grated coconut
  • Pinch of salt

Notes:

  • *Bring water to a boil and let it cool down for 15 minutes so it should feel lukewarm after that. The warm water will stabilize the starch/flour and they won’t separate when you steam. Make sure not to use boiling hot water as this will cook the starch/flour into a dough.
  • **Place the pandan leaves and water into a blender. Blend until the leaves are chopped very finely. Pour contents through a fine sieve and press against it using a spoon to draw out any extra juice. Discard the leaves.
  • Flour and starch measurements are for one recipe per flavour. If you want to make both flavours at the same time, make sure to measure out another set of flour and starch ingredients.

METHOD

  1. Topping: Add the pinch of salt together with the grated coconut and give it a good mix. Steam over high heat for 10 minutes and set aside once done.
  2. Kuih Kosui: Bring the water in the steamer to a boil and place the empty cups in the steamer. Allow them to heat up for about 5 minutes while you are preparing the batter This step is important to prevent the starch/flour from separating when steaming your rice cakes.
  3. Add the three different types of flour and starches, together with the salt, into a medium-sized mixing bowl. Depending on your chosen flavour, add the sugars, (then the pandan-infused water if making pandan flavour Kuih Kosui), and then the lukewarm water. Stir into a smooth batter until the sugars have dissolved.
  4. Pour the batter into the preheated cups, about 3/4 of the wall full and steam over high heat for 12-15 minutes (18 minutes if your cups are larger).

If your steamer cannot fit all the cups/batter in at the same time, work in batches. Do not pour the mixture into the remaining cups ahead of time and let them sit. The flour and starch mixture tends to settle at the bottom after a while. This is important otherwise your Kuih Kosui won’t turn out right.

  1. After steaming, remove the cups from the steamer and let them cool down for about 5 minutes. They can be easily removed by running a small rubber spatula around the edges to lift them up.
  2. Repeat with the next batch of batter. Make sure the steaming water is back to a rolling boil before steaming. Stir the batter first before pouring into the preheated cups.
  3. Once done, sprinkle with the prepared grated coconut topping. Serve and enjoy as an afternoon snack! Should make around 14 kuih-kuih.

Kuih Kosui (Rice Cakes with Grated Coconut)

If you ever happen to find yourself travelling through Brunei on your next travel adventure, drop by any day or night markets and you’re bound to come across this kuih and many others. If you’re lucky enough, you can even catch the vendor making them fresh on the spot for you.

The best time to find all the local snacks and kuih-kuih in one place is during the holy month of Ramadhan at various food markets. You can find a plethora of local and traditional goodies for you to try. Alternatively, you can also get these at the Gadong Night Market or Tamu Kianggeh throughout the year and more often the vendors would be more than happy to describe each one to you!

BON APPÉTIT

– Ally xx

myTaste.com

Ube Champorado

Ube Champorado

Hello Everyone! Everything is about ube these days; ube ice cream, cakes, and desserts and all that. ‘New’ recipes are being developed all the time – new meaning adding an ube twist to already classic favourites. The latest ube trend/craze to come out of this quarantine is of course none other than the overrated Ube Cheese Pandesal.

Ube Champorado

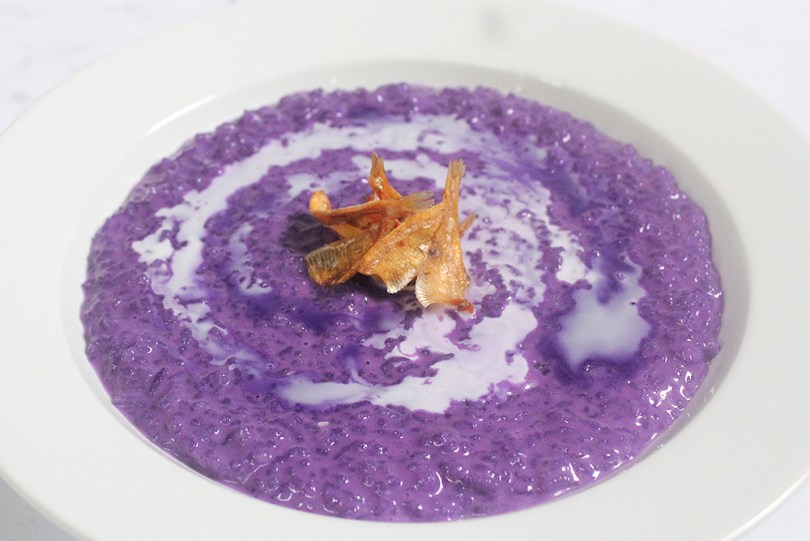
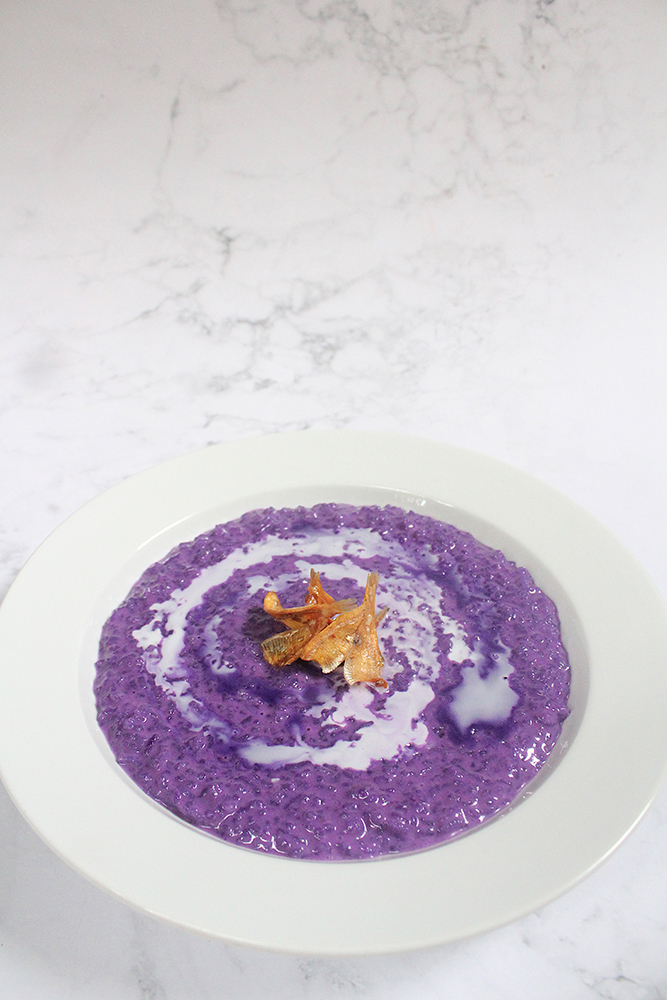
Like this Ube Champorado, it is as good as our favourite original chocolate version. Almost two years ago (just shy of a few days actually), I made the classic version of this champorado using tablea chocolate. In that post, I talked about pairing a sweet rice pudding with dried, salted fish. I remember getting messages from friends when I posted a photo of the dish on IG; all with the same “wow, that’s interesting!” reaction. There are a lot of desserts out there that embrace the salty-sweet combination; salted caramel and salted chocolate being the top two favourite bases to endless dessert options!

This Ube Champorado with dried salted fish is no exception. It adds pops of salty surprises to each spoonful of the sweet ube rice porridge that you take. If the combination is off putting for you, then you could get away with adding a pinch of rock salt into your champorado – but it won’t be the same. For all the ube lovers out there, this is an ideal breakfast, snack, or dessert for any occasion!

Ube Champorado Ingredients

PREP TIME 5 MINS | COOKING TIME 25 MINS | SERVES 6

INGREDIENTS

  • 4 cups filtered water
  • 1 cup (250g) white glutinous rice, rinsed
  • 1 cup ube jam/halaya
  • 1/2 cup coconut milk
  • 1 tsp ube extract
  • Pinch of salt

METHOD

  1. Add the rinsed glutinous rice together with the water in a medium-sized stockpot over medium heat. Bring to a boil and then lower the heat down to a simmer. Cook until the rice is almost tender, about 15 minutes. Stir regularly to avoid scorching and sticking. Add more water if necessary to achieve your desired consistency.
  2. Stir in the ube jam/halaya, ube extract, coconut milk, and season with a pinch of salt. Taste and adjust if needed. Cook, still continuously stirring, until tender and the ube is mixed in well with the rice, a further 10 minutes or so.
  3. Once done, ladle the champorado into individual serving bowls and top with a swirl each of the ube condensada and coconut milk. You may also top them with fried boneless dilis if you’re feeling adventurous.
  4. Enjoy immediately while steaming hot on a chilly and crisp morning!

Ube Champorado

You may use fresh/raw ube for this recipe, however, so using store-bought ube jam/halaya, ube extract, or ube powder is just as good; quick and hassle free as how champorado should be. Having to work with fresh Ube will totally ruin that aspect of a no-fuss champorado for me.

Ube Champorado

BON APPÉTIT

– Ally xx

myTaste.com

Ube Biscoff Cheesecake

Ube Biscoff Cheesecake

Hello Everyone and a Happy belated Birthday to me! I was supposed to get this recipe up on the day of my birthday, but only having baked this Ube Biscoff Cheesecake the night before, I didn’t have time to edit the photos and videos for uploading and for my Instagram posts. Nevertheless, to make up for that, I have a special announcement to make, which you can read at the end of this post!

If you had asked me where or how I would be spending my birthday this year at the start of our country-wide Enhanced Community Quarantine due to the on-going pandemic, I would’ve never guessed that 8 months later, we’d still be celebrating birthdays in quarantine. Nevertheless, I’m still super thankful that even with the virus still spreading, my family, friends, and myself included, are all safe and healthy.

Ube Biscoff Cheesecake

So to be perfectly honest, this wasn’t the cake I had intended to make for my birthday. I only made the last minute decision (as in the morning before my actual birthday) to make an Ube Biscoff Cheesecake, inspired by an Instagram post I saw about a week or two ago. Well okay, the plan was to still push through with the cake I originally had in mind, and then bake mini Ube Biscoff Cheesecakes to share with my workmates, but baking two cakes in one day sounded daunting. I could already foresee the countless mishaps that are bound to happen juggling two recipes at the same time.

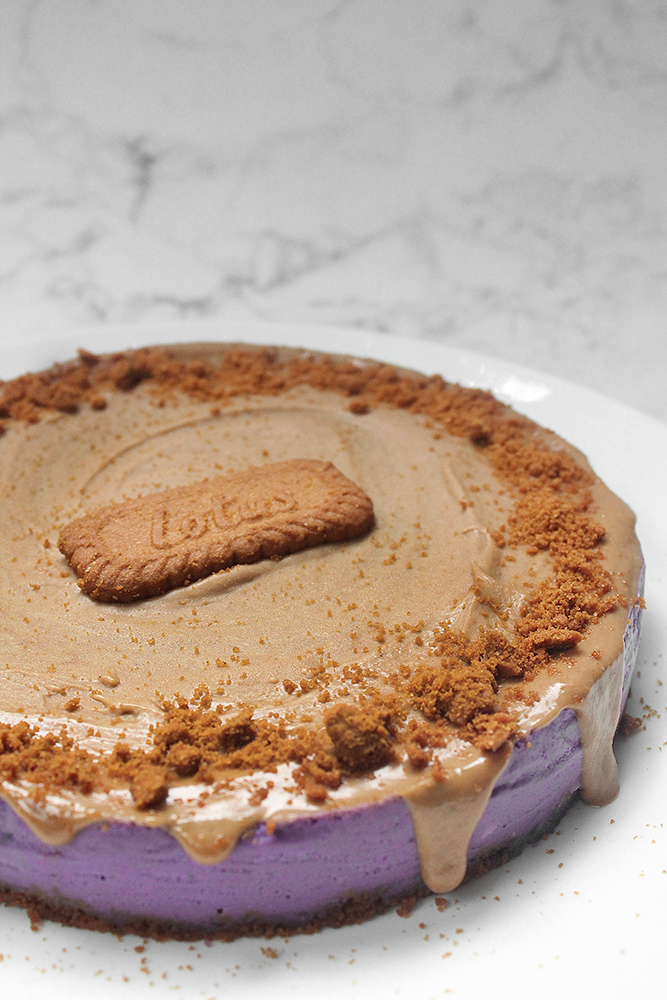
This Ube Biscoff Cheesecake is the perfect recipe for all the ube, biscoff, and cheesecake lovers. If you’ve never tried biscoff before, you should definitely try this dessert! This is utterly delicious and different to my other cheesecakes I’ve made in the past – the biscoff spread on top gives a nice rich addition to the cheesecake and creates a delicious spiced cookie flavour. The biscoff crust is buttery and sweet, and the cheesecake filling is thick and rich with ube that just melts-in-your-mouth with every bite. Honestly, it’s everything a cheesecake should be, and you may opt to do a no-bake or baked cheesecake with this recipe.

Ube Biscoff Cheesecake Ingredients

PREP TIME 15 MINS | COOKING TIME 1 HOUR | SERVES 6-8

INGREDIENTS

For the ube cheesecake mixture

  • 450g cream cheese
  • 250ml all purpose cream
  • 2 large free-range egg
  • 1 cup ube halaya (or ube jam)
  • 1/4 cup white or brown sugar
  • 1 tsp ube extract

For the biscoff crumb base

  • 200g Lotus biscoff cookies, crushed
  • 75g unsalted margarine, melted
  • Pinch of salt

For the biscoff spread

  • 50g Lotus biscoff cookies, crushed
  • 1/4 cup water
  • 1/8 cup coconut oil
  • 2 tbsp unsalted margarine, melted
  • Dash of vanilla extract
  • Pinch of ground cinnamon

METHOD

  1. Preheat oven to 130C (250F or gas mark 1).
  2. Biscoff Crumb Base: Add the crushed biscoff cookies, salt, and melted butter together in a small mixing bowl. Mix together until well combined.
  3. Grease an 8” spring-form pan with a bit of margarine and line the bottom and sides it with parchment paper. Cover the outside of the pan with tin foil. Press the crumb into the base of the cake pan and set aside in the fridge for about 15 minutes to set.
  4. Ube Cheesecake Mixture: Using an electric handheld mixer, beat, on medium speed, the cream cheese and sugar together in a medium-sized bowl until smooth.
  5. With the mixer running, add in the eggs, all purpose cream cream, ube halaya, and ube extract, mixing for a further 2 minutes.
  6. Pour the mixture into the prepared spring-form cake pan, evenly covering the biscuit base.
  7. Place the cake pan in a water bath and bake for 1 hour, or until just set.
  8. Allow to cool down to room temperature and then chill in the fridge for about half an hour before serving.
  9. Biscoff Spread: While the cake is chilling in the fridge, add the crushed biscoff cookies, ground cinnamon, vanilla extract, coconut oil, and butter into an immersion blender cup. Blend until the ingredients are well incorporated.
  10. Add the water and blend further until you have a nice, smooth, and creamy spread. Set aside until ready to use.
  11. Assemble: Carefully remove the cheesecake from the spring-form pan. Top the cheesecake with the biscoff spread and a biscoff cookie. Serve a slice or two… maybe three, immediately! *cheeky grin* Enjoy!

Ube Biscoff Cheesecake

Ube Biscoff Cheesecake

And now, here’s the announcement that I promised to share with you guys. One of my Auguesters, known as Karina Pineda a.k.a. @wanderlittlegirl, partnered up for my birthday to launch our very first Instagram Giveaway! The giveaway was launched on Monday and will run through until November 20. Further details of the giveaway are specified on my Instagram post which you can find here on @amcarmenskitchen. The giveaway is only open to residents in Metro Manila, but if you have family or friends living in the area, feel free to share the giveaway with them. My goal is to help my lovely friend promote her smol home-grown business (@madebywanderlittlegirl) and also in return, treat two (2) lucky winners with some home-baked goodies!

#AMCxMADE Cookie Giveaway

#AMCxMADE Cookie Giveaway

BON APPÉTIT

– Ally xx

myTaste.com