Bengali Doi Maach (Fish in Yoghurt Curry)

Bengali Doi Maach (Fish in Yoghurt Curry)

Hello Everyone! I’m back with another recipe featuring one of Binda Valley’s products, specifically their Natural Greek Style Yoghurt that I received from Gourmet Direct PH last month. I featured smoothies in my previous posts and tonight I wanted to share a savoury recipe using yoghurt. As far as my knowledge goes, I know that yoghurt is commonly used as a marinade for chicken in savoury Indian dishes, but since I wanted to keep in line with only sharing pescatarian, vegetarian, or vegan recipes for my blog, I had to do further research for this.

Gourmet Direct PH x Binda Valley Yoghurt

I typed ‘fish and yoghurt’ recipes into Google and a recipe for Bengali Doi Maach, or in English, Fish in Yoghurt Curry caught my attention. It is a deliciously thick, subtly spicy, and delicately sour fish curry. The fish is first marinated, lightly fried, and then simmered in a yoghurt-based gravy. The end result is a very tender and flavourful fish having absorbed the wonderful flavours of the gravy. The yoghurt and minimal spices used makes this dish light yet hearty, and is best served with basmati rice for a complete Indian meal.

Bengali Doi Maach (Fish in Yoghurt Curry)

Not only does it come together quickly, making it a perfect weeknight dish, it is also very cost effective. The ingredients for this dish are quite cheap and easy to find. You can use your choice of freshwater fish (the best would be thick, meaty fish) and get it simmering away with pantry staples. I literally had all the ingredients readily available in my pantry, which made me super excited to tackle this Doi Maach!

Bengali Doi Maach (Fish in Yoghurt Curry) Ingredients

PREP TIME 30 MINS | COOKING TIME 30 MINS | SERVES 6
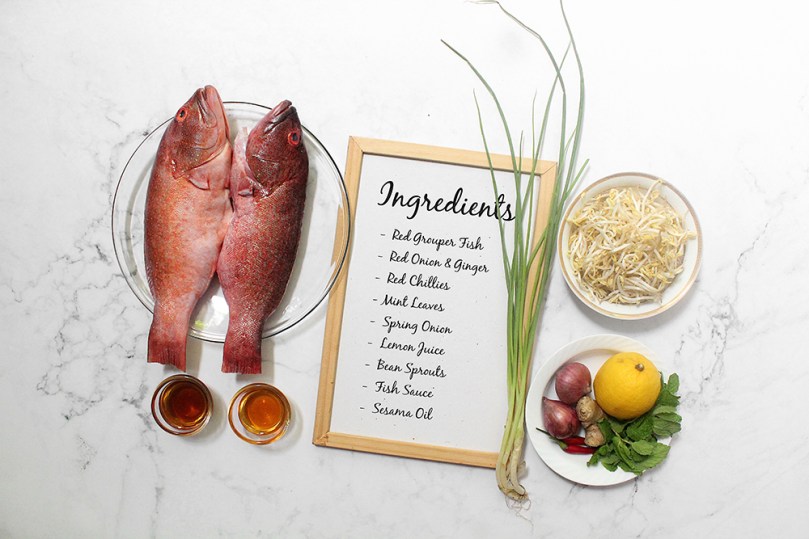
INGREDIENTS

For the fish

  • 1 kg Spanish mackerel (tanigue, in Tagalog), sliced
  • 1 tbsp turmeric powder
  • 1 tbsp cayenne pepper powder
  • 2 tsp salt
  • 1 & 1/2 tsp ground black pepper
  • 1 tbsp coconut oil
  • 2 tbsp calamansi juice (or lemon/lime juice)
  • Cooking oil, for searing

For the yoghurt curry

  • 6 whole cloves
  • 4 red chillies (fresh or dried)
  • 3 green cardamom pods
  • 1-inch cinnamon stick
  • 1 tsp cumin seeds
  • 2 red onions, grated
  • 6 cloves garlic, grated
  • 1/2-inch ginger, grated
  • 1 cup water
  • 1 & 1/2 cups Binda Valley’s Natural Greek Style Yoghurt
  • 2 tsp sugar
  • Salt, to taste
  • Chilli leaves* (optional)

*Normally, this dish would be garnished with some coriander leaves, but if you know me, you know I detest the taste of coriander. So to add a pop of green to this dish, I used chilli leaves instead.

METHOD

  1. Combine all the ingredients for the fish marinade in a large mixing bowl, making sure the fish slices are evenly coated. Cover and set aside to marinate for at least 30 minutes to an hour.
  2. Heat enough oil in a large pan, over high heat and sear the marinated fish slices; work in batches if needed. Once done, remove from the pan and set aside.
  3. Remove any excess oil from the pan, leaving about 2 tablespoons and reduce the heat down to medium. Toast the spices (cloves, chillies, cardamom pods, cinnamon stick, and cumin seeds) until fragrant, before adding the grated onions, garlic, and ginger. Cook for about 30 to 45 seconds.
  4. Add half of the cup of water to the pan to deglaze it, and then add the yoghurt, stirring until it is incorporated into the water and spices mixture.
  5. Season with salt and sugar, and leave to simmer over medium-high heat for about 15 minutes, or until slightly reduced.
  6. Add the fried fish to the pan and cook for a further 10 minutes. In the last cooking minute, add the chilli leaves to the pan and cook until the leaves have just wilted.
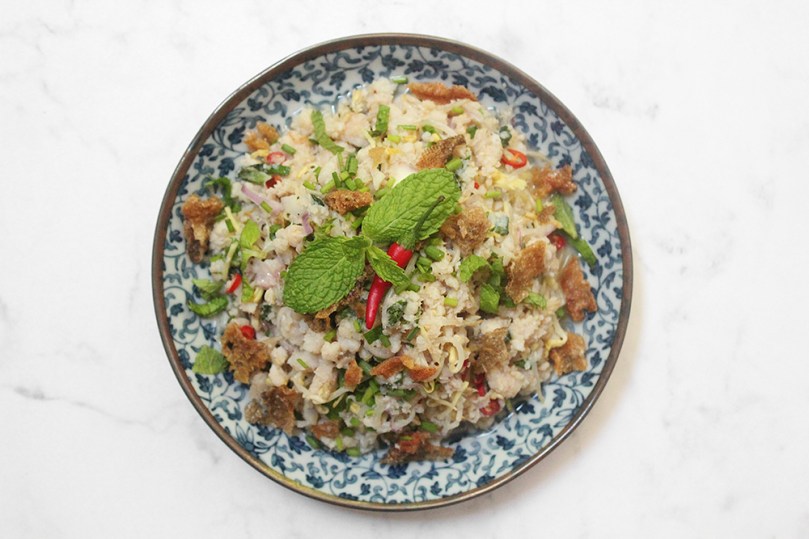
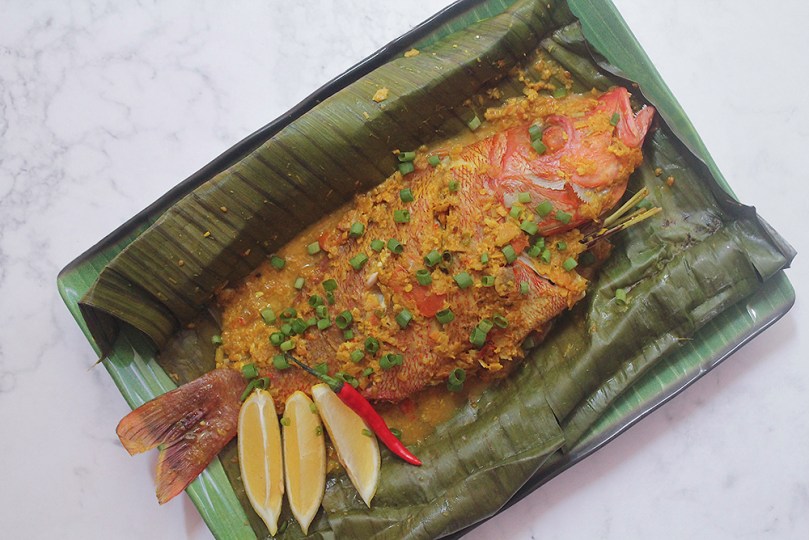
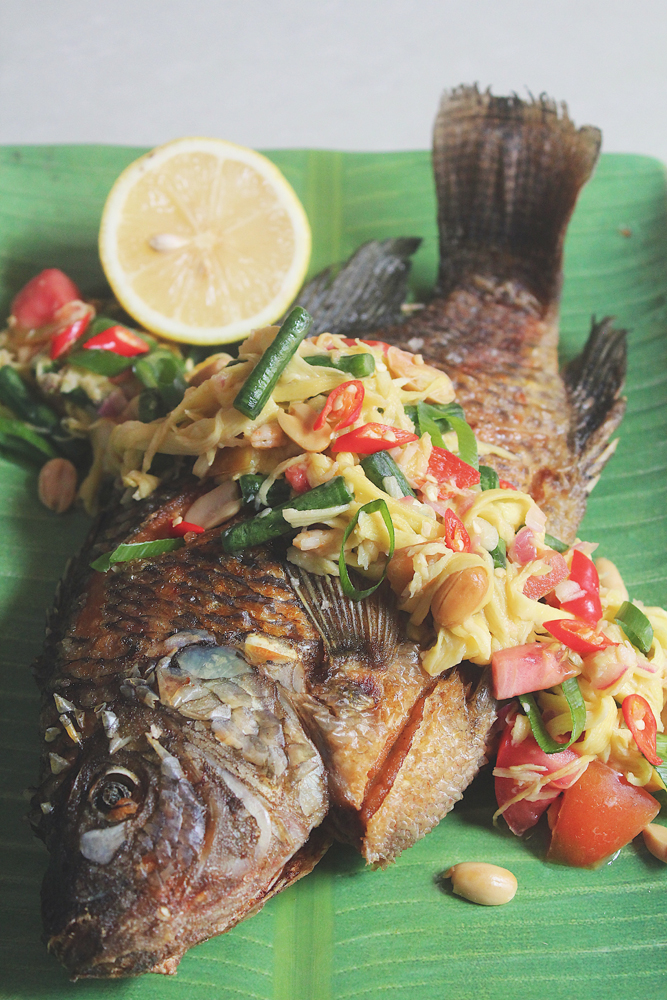
  7. Transfer the fish curry to a serving dish and enjoy immediately with freshly steamed rice!

Bengali Doi Maach (Fish in Yoghurt Curry)

Bengali Doi Maach (Fish in Yoghurt Curry)

BON APPÉTIT

– Ally xx

Follow me on my social media accounts:
Facebook: Amcarmen’s Kitchen
Instagram: @amcarmenskitchen
TikTok: @amcarmenskitchen

myTaste.com

Advertisement
Assam Pedas Ikan

Assam Pedas Ikan

Hello everyone! A new month means we’ve ventured onwards to our next Southeast Asian destination, and tonight we’re kicking off our journey through Malaysia! Having lived in Brunei for 26 years of my life, and Bruneian food being so heavily influenced by the cuisine of its neighbouring country, Malaysia, it’s no wonder that it’s a cuisine that’s very close to my heart and that I love so much on top of everything else that I seem to love when it comes to food *cheeky grin*

Assam Pedas Ikan

Assam Pedas Ikan, or literally translated as Sour Spicy Fish in English, is a classic Malaysian dish that’s undoubtedly sour, fiery hot, and super satisfying! Special ingredients such as tamarind peel, ginger torch flower, and Vietnamese coriander (laksa leaves) are key in achieving the flavour profile and aroma of Assam Pedas. However, while these ingredients may be difficult to source in certain countries, the sourness is the important component; and you can use tamarind pulp or paste for this. I guess that it’s also safe to say why everyone has their own take on this favourite Malaysian dish; the adaptations are endless! Ultimately, a good balance of sourness, saltiness, sweetness, and spiciness is all you need to make a good Assam Pedas dish.

Tonight, I’ll be sharing the way I remember how my Mom used to make it when we were still living in Brunei. It’s been a while since I’ve had this dish and I was actually surprised by how quick and easy it is to make, as well as how readily available all the ingredients are, for the version that I will be making of course. Instead of using water for my version, I used my own homemade fish broth from fish scraps to give the Assam Pedas more depth in flavour. Traditionally, locals would use ikan tenggiri (Spanish mackerel), or ikan pari (stingray), but my Mom and I prefer to use pomfret fish (pampano in Tagalog) for its delicate white flesh, subtle non-fishy and sweet taste, as well for its firm texture.

Assam Pedas Ikan Pedas

PREP TIME 30 MINS | COOKING TIME 10 MINS | SERVES 4

INGREDIENTS

For the spice paste

  • 8-10 pcs dried red chillies, roughly chopped
  • 1 garlic clove, roughly chopped
  • 1 small red onion, diced
  • 1 stalk lemongrass (white part only), roughly chopped
  • 1/2 tbsp sambal belacan paste

For the assam pedas ikan

  • 2 large pomfret fish
  • 2 tbsp cooking oil
  • Spice Paste
  • 1 tsp fish curry powder
  • 1 tbsp coconut sugar
  • 2 tbsp tamarind paste
  • 2 cups fish broth
  • 2 tomatoes, quartered
  • 1 small red onion, quartered
  • 1 thumb-sized ginger, sliced
  • Spring onion, white part
  • 10 pcs okra
  • Salt, to taste
  • Spring onion (green part), to garnish

METHOD

  1. Spice Paste: Using a mortar and pestle, pound all the ingredients for the spice paste together, or you may also use a food processor to do so. Set aside.
  2. Assam Pedas Ikan: Heat cooking oil to a large pot over medium-high. Add the spice paste and fry for about 2 minutes or until fragrant before adding the curry powder, coconut sugar, and tamarind paste. Fry for a further 2 minutes.
  3. Add the fish broth, followed by the tomatoes, red onion, ginger slices, and white parts of the spring onion, and leave to simmer for about 5 minutes or until the tomatoes have softened.
  4. Add the pomfret fish and cook for 20 minutes or until the fish is cooked through. Add the okra and cook for a further 5 minutes, or until the okra is tender.
  5. Serve immediately while hot and enjoy with freshly steamed white rice!

Assam Pedas Ikan is best served with plain steamed white rice. You may also serve it with noodles, kind of like a laksa, if you’re using boneless fish. Rice noodles would be the go-to choice as they take on the flavour of the Assam Pedas best.

Assam Pedas Ikan

Assam Pedas Ikan

BON APPÉTIT

– Ally xx

myTaste.com

Laab Paa (Fish Herb Salad)

Laab Paa (Fish Herb Salad)

Hello Everyone! For the later part of June, we’ll be saying goodbye to Indonesia for now and will be venturing off to Laos and since I am not very familiar with Lao dishes, I’ll only be covering two dishes that I’ve had similar experiences with.

The first Lao dish that I will be sharing tonight is known as laab (can also be spelt as larb). Laab is a type of Lao minced meat salad that can be made with either chicken, duck, beef, pork, fish, or mushrooms. It is seasoned with fish sauce, lime juice and padaek, a traditional Lao condiment made from pickled or fermented fish that has been cured. It is thicker and more seasoned than the fish sauce. Chillies, assorted vegetables, and fresh herbs such as mint, are also added to give the salad more flavour.

1916

Though this is the first time I’m tackling a Lao dish, I am familiar with the process and taste of laab. My Thai aunt taught me how to make the Thai version of this dish using chicken, beef, and pork; this was way back when I was still in university and used to eat meat. Even though this is the ‘unofficial’ national dish of Lao, it is also eaten in a certain region in Northern Thailand where the majority of the population is of the Lao ethnicity. Variants of this dish can also be found in Myanmar (Burma) and in the Yunnan province of China.

I’ll be sharing a pescatarian-friendly version known as Laab Paa, or in English, Fish Herb Salad. It is refreshing because of the fresh mint and fresh ginger slices that cut through the saltiness, sourness, and spiciness of the dish as a whole. While the fish meat is soft and tender, you also get a different texture from the crispy-fried fish skin that is mixed into the salad. The dish is served at room temperature and usually with a serving of sticky rice and raw or fresh vegetables. You can even serve them as lettuce wraps. We served ours with rice noodles instead.

Laab Paa (Fish Herb Salad) Ingredients

PREP TIME 20 MINS | COOKING TIME 5 MINS | SERVES 2

INGREDIENTS

  • 500g minced fish, I used red grouper fish
  • Fish skin
  • Salt, to taste
  • 2-3 red chillies, minced
  • 1 small red onion, halved and sliced thinly
  • 1 thumb-sized ginger, julienned
  • 1/2 tbsp fish sauce
  • 1/2 tbsp sesame oil
  • Juice of half a lemon
  • Handful of blanched bean sprouts
  • Mint leaves
  • Spring onion

METHOD

  1. Add about a tablespoon or 2 of cooking oil in a medium-sized frying pan over medium-high. Add the minced fish and season with salt, to taste. Cook until translucent, about 4 to 5 minutes.
  2. While the fish is cooking, heat oil in a separate pan and fry the fish skin until browned and crispy. Once fried, break them into smaller sizes. Set aside.
  3. In a large mixing bowl, toss the cooked fish together with all the remaining ingredients. Adjust the seasoning to your liking, i.e. add more fish sauce for saltiness, or more lemon juice for sourness.
  4. Plate up and top the laab paa with the crispy-fried fish skin. Serve and enjoy!

Laab Paa (Fish Herb Salad)

Laab Paa (Fish Herb Salad)

BON APPÉTIT

– Ally xx

myTaste.com

Ikan Pepes (Grilled Fish in Banana Leaves)

Ikan Pepes (Grilled Fish in Banana Leaves)

Hello Everyone! Tonight’s recipe is actually also a national fish dish in East Timor. As we’ve covered back in March when we travelled through East Timor on our Flavours of Southeast Asia journey, the country was invaded and colonised by Indonesia after they gained their independence from Portugal. Therefore a lot of their cuisine is also inspired by Indonesian culture.

I’ve actually never had Ikan Pepes before; I guess the closest I’ve had that’s similar to this dish is Ikan Bakar, which in English literally means ‘burn fish’. The main difference between the two is how the banana leaves are used.

Pepes is an Indonesian cooking method using banana leaves as a food wrapping and secured with a fastener made from the central ribs of a coconut leaf (known as lidi seumat). The banana leaf package containing the food is then steamed or grilled over charcoal. Bakar on the other hand is a charcoal-grilling method where sometimes a sheet of banana leaf placed between the food and grill to prevent it from sticking to the grill and breaking into pieces.

Ikan Pepes (Grilled Fish in Banana Leaves)

Ikan Pepes is made by generously smothering the fish in a spice mixture. The mixture may vary among regions and places, but usually consists of a combination of shallots, garlic, chillies, coriander, tamarind paste, candlenuts, turmeric, galangal, and salt; all pounded together using a mortar and pestle, or blitzed in a food processor to create a paste. The fish is then wrapped in banana leaves to not only protect the fish from excessive charring, but also to add a subtle touch of fragrance to the dish as a whole. The fish is then typically eaten with rice for a complete meal.

You can use any type of fish for this dish as you prefer, such as snapper, perch, bream, or tilapia, and you may also opt to use fish fillets rather than cooking with a whole fish especially for those who don’t like struggling with fish bones. Likewise, while the method of pepes is commonly used to prepare fish, other ingredients such as shrimp, squid, chicken, beef, tofu, tempeh, mushrooms, or other vegetables are also available to be prepared using this method.

Ikan Pepes (Grilled Fish in Banana Leaves) Ingredients

PREP TIME 15 MINS | COOKING TIME 25 MINS | SERVES 4-6

INGREDIENTS

  • 2 red snappers (about 500g each in weight), descaled, gutted, and cleaned
  • Salt and freshly ground black pepper, to season

For the spice mixture

  • 3 red chillies, chopped
  • 2-3 garlic cloves, roughly chopped
  • 1 small red onion, roughly chopped
  • 1 stalk lemongrass (white part only), finely chopped
  • 1 thumb-sized turmeric, peeled and finely chopped
  • 1 tbsp raw peanuts
  • 7 cherry tomatoes*, halved
  • 1 tsp shrimp paste
  • 1 tbsp coconut sugar
  • 1 tbsp tamarind paste
  • Salt, to taste
  • Fresh banana leaves

To garnish

  • Lemon wedges
  • Red chillies, chopped
  • Spring onion (green parts), chopped

*Or use one small tomato and roughly chop. I used cherry tomatoes because I had some lying around that were getting soft.

METHOD

  1. Spice Mixture: Using a mortar and pestle, pound the garlic, onion, lemongrass, turmeric, and peanuts together until it forms into a rough paste. Add the tomatoes and continue to pound until they start to break down.
  2. Add in the shrimp paste, coconut sugar, tamarind paste, and season with salt. Use a spoon to mix them all together until well combined.

If using a food processor, add all the ingredients together and blend into a rough paste.

  1. Ikan Pepes: Place the prepared fish, that has been seasoned with a touch of salt and freshly ground black pepper, on top of a piece of banana leaf, on top of a piece of aluminium foil.
  2. Stuff the cavity of the snapper fish with the green parts of the lemongrass and white part of the spring onion. This is optional as I didn’t want to put these parts to waste so I decided to use them in the dish as well.
  3. Generously cover both sides of the fish with the spice mixture and enclose it in the banana leaf, and aluminium foil.
  4. Place the fish over a grill and cook on medium-high heat for 15 minutes on one side, and 10 minutes on the other; a total of 25 minutes, or until cooked through depending on the size of your fish or method of cooking.
  5. Once done, remove from the grill and transfer to a serving plate. Garnish with some spring onions, extra chillies, and lemon wedges on the side. Serve immediately while hot with rice. Enjoy!

1898

Ikan Pepes (Grilled Fish in Banana Leaves)

BON APPÉTIT

– Ally xx

myTaste.com

Tilapia with Spicy Red Pepper Sauce

Tilapia with Spicy Red Pepper Sauce

Hello Everyone and a very Happy New Year to all! I’m pleased to let everyone know that Amcarmen’s Kitchen is officially back from its hiatus to bring you some exciting recipes and dishes for 2020! As you know, or I guess, as my loyal/long-time followers know, every year I set a new theme for the blog.

Last year was all about cooking with fruits, be it a savoury or sweet dish; and then every month I’d feature a different fruit. What I absolutely enjoyed about last year’s theme was discovering unique ways of cooking with fruit in savoury dishes. My favourite dish from last year would have to be the very latest post I shared: Mangosteen Vermicelli Salad with Steamed Prawns & Snow Peas. I just love the tang and sweetness the mangosteen fruit brought to the dish!

Tilapia with Spicy Red Pepper Sauce

For now, I won’t reveal the overall theme for this year to you guys just yet, only because I want to see how many of you out there can guess it. I’m honestly not too sure if it will be that obvious, so I’ll give it a few months or so before I actually let you guys in, on the theme.

Tonight’s recipe is something that you can whip up in 30 minutes (or less really), which means that it’s great for a hearty and warm weeknight dinner at home if time isn’t on your side. It can be served over steamed rice or pasta – the choice is yours! But before we dive into tonight’s recipe, please take the time to check out the original where I adapted my take on this recipe by Rachael Ray over on Rachael Ray Mag.

Tilapia with Spicy Red Pepper Sauce Ingredients

PREP TIME 15 MINS | COOKING TIME 30 MINS | SERVES 6

INGREDIENTS

  • 6 tilapia fillets (about 150g per fillet)
  • 1 can (400g) diced tomatoes
  • 4 garlic cloves, minced
  • 2 red bird’s eye chillies, minced
  • 1 large brown onion, halved and thinly sliced
  • 1 large red bell pepper (capsicum), thinly sliced
  • 2 tbsp olive oil
  • 1 & 1/2 tbsp baby capers in brine, rinsed and drained
  • 1 tbsp sliced black olives in brine, rinsed and drained
  • 1 tbsp dried thyme
  • 2 tsp turmeric powder
  • Freshly squeezed lemon juice (about half a lemon’s worth)
  • Parsley or spring onion, to garnish
  • Salt and freshly ground black pepper, to taste

METHOD

  1. Season the fish with salt, pepper, turmeric powder, and lemon juice. Set aside.
  2. In a large nonstick skillet, heat olive oil over medium-high. Sauté the minced garlic until golden brown and fragrant, about 30 seconds. Be careful to not burn the garlic. Then add in the sliced onions, chillies, and bell pepper. Cook, stirring often, until the vegetables soften, about 5 minutes.
  3. Add the canned tomatoes and its juices, together with the capers, olives, and thyme. Season with salt and pepper according to taste. Reduce the heat down to medium-low. Cover and leave to simmer for about 15 minutes to allow the flavours to meld. Check and stir occasionally.
  4. After about 15 minutes, nestle the seasoned fish fillets into the red pepper sauce. Cover and cook until the fish flakes easily, about 5 minutes. Once done, turn the heat off and serve immediately with rice or pasta.
  5. Garnish with fresh parsley or sliced spring onions. Enjoy!

Tilapia with Spicy Red Pepper Sauce

Tilapia with Spicy Red Pepper Sauce

BON APPÉTIT

– Ally xx

myTaste.com

Yam Pla Duk Fu (ยำปลาดุกฟู) Crispy Fish with Green Mango Salad

Yam Pla Duk Fu (ยำปลาดุกฟู) Crispy Fish with Green Mango Salad

Hello Everyone! Tonight’s dish branches out from the first recipe I shared with you guys at the beginning of this month. If you haven’t been able to check that recipe out, here it is again: Som Tam Mamuang (ส้มตำมะม่วง) Green Mango Salad.

Yam Pla Duk Fu (ยำปลาดุกฟู), or in English, Crispy Fish with Green Mango Salad, is a classic and much loved Thai “drinking food” of all time. The combination of a crispy exterior with moist fish meat on the inside, paired with a spicy, tart green mango salad is truly a match made in heaven. For all my alcohol-loving Filipino family, friends, and followers out there, give the sisig a rest and opt for a lighter and maybe healthier alternative to your pulutan and pair this humble fish dish with your beer. On the flip side, don’t think that you can limit this dish just for happy hour; it is also best paired with a cup of steamed rice for a delicious lunch or dinner.

Yam Pla Duk Fu (ยำปลาดุกฟู) Crispy Fish with Green Mango Salad

Traditionally, Thai charcoal-grilled catfish (pla duk) is used to make this dish, as it is widely available on the streets of Thailand. The fish is first grilled whole. Its flesh is then fluffed (fu) into tiny cotton-like flakes, and then deep-fried until crispy and golden brown. A simple green mango salad (yam) is then served alongside the crispy fluffy fish flakes.

You can see that the ingredients and process of making this dish literally translates into its name – Yam Pla Duk Fu. Since I’m not using catfish for this recipe, nor have I really paid attention to the ‘fluffing’ of the fish meat, my rendition of this dish can simply be called Yam Pla, just Salad Fish *cheeky grin*

Yam Pla Duk Fu (ยำปลาดุกฟู) Crispy Fish with Green Mango Salad

As I did further research into this dish, many restaurants in Thailand have opted to use other variants of fish. I’ve also seen various images of the dish where a whole fish is used instead of it being fluffed into flakes. At least I know I won’t be cursed for using a fish other than the traditional Thai catfish. I did find a rather angry blog post about why people are still insistent on calling the dish by its traditional name of Yam Pla Duk Fu when ‘duk fish’ isn’t even used. So before I too get bombed about titling this post by its traditional name where it’s far from it, just note that I did this just so that I could touch on the back-story of this dish.

This dish would otherwise be named, Yam Pla (ยำปลา) Fish Salad: My Rendition of the Traditional Yam Pla Duk Fu (ยำปลาดุกฟู) Crispy Fish with Green Mango Salad. That’s one heck of a long-ass title – reminds me of the days of how Fall Out Boy used to title their songs back in the day! One of my favourites: I’m Like a Lawyer with the Way I’m Always Trying to Get You Off (Me & You).

Yam Pla Duk Fu (ยำปลาดุกฟู) Crispy Fish with Green Mango Salad Ingredients

PREP TIME 15-20 MINS | COOKING TIME 10-12 MINS | SERVES 4

INGREDIENTS

For the Green Mango Salad

  • Som Tam Mamuang (ส้มตำมะม่วง) Green Mango Salad Recipe

For the Crispy Fish

  • 2 large tilapia fish (about 700g – 800g per fish), gutted and scaled
  • Ground salt and pepper, to taste

METHOD

  1. Prepare the Green Mango Salad according to the recipe (link provided above). Set aside.
  2. Season the fish with a touch of salt and ground black pepper on both sides and fry until browned and crispy, about 5-6 minutes per side. Once done, transfer to a serving dish.
  3. Top with the Green Mango Salad and serve with steamed jasmine rice, or a cold bevy of your choice.

Tip: We usually rub about a tablespoon of turmeric powder when frying fish for added flavour. I completely forgot to pick some up when grocery shopping hence why we’ve left it out, but if you do happen to have it lying around, use it!

Yam Pla Duk Fu (ยำปลาดุกฟู) Crispy Fish with Green Mango Salad

I know the recipe says 2 tilapia fish, but in the final shots of the dish there’s only one. It’s only because we had this dish for lunch and dinner for the day and instead of frying both for lunch, we fried the other when it came to dinner time so that it’d be hot and crispy for then!

Disclaimer: Again, like in last week’s post, I do apologise to any of my Thai followers, or any who have just stumbled upon my blog, and this post in particular. I’ve seen so many variations of the spelling for Yam Pla Duk Fu and I’m not sure if I’ve picked the right one! *cheeky grin*

BON APPÉTIT

– Ally xx

myTaste.com

Salmon Belly Paksiw sa Gata (Stewed in Vinegar & Coconut Milk)

Salmon Belly Paksiw sa Gata (Stewed in Vinegar & Coconut Milk)

Hello Everyone! I find it hard to believe that it’s already the middle of the month – oh how time flies by so quickly! I don’t have a long-winded tangent to go on about tonight so this post will most likely be shorter than the previous two.

Paksiw sa Gata is a Filipino cooking procedure that involves two cooking styles – Paksiw (stewed in vinegar), and Ginataan (stewed in coconut milk/cream). This cooking procedure is a quick and easy way of preparing a fish dish; a staple amongst Filipino families.

Salmon Belly Paksiw sa Gata (Stewed in Vinegar & Coconut Milk)

You can use other cuts of salmon such as the heads, tails, and the flesh itself. Likewise, you can also use other types of fish such as Threadfin Bream (Bisúgo) and this unnamed White/Silver Fish that my mom used to get from the markets in Brunei for her paksiw (without the gata) dishes that we grew up on. The only reason why it’s unnamed is because I don’t actually know the name of it *cheeky grin*

Besides the protein, it is also an easy dish to incorporate greens into. Bitter melon (ampalaya) leaves are most common, but not restricted to. I absolutely detest bitter melon and its leaves, and so I opted to use malunggay leaves for this dish. Other common/favourite alternatives include spinach, water spinach (kangkong), and chilli leaves.

Salmon Belly Paksiw sa Gata (Stewed in Vinegar & Coconut Milk) Ingredients

PREP TIME 10 MINS | COOKING TIME 20 MINS | SERVES 6

INGREDIENTS

  • 1 kg salmon belly, washed, scaled and, cut into large chunks
  • 1 cup coconut milk (fresh, canned, or frozen)
  • 1 cup water
  • 1/2 cup spicy vinegar*
  • 3 long green chillies
  • 3 red bird’s eye chillies**
  • 2-3 garlic cloves, crushed
  • 1 small red onion, quartered
  • 1 bunch malunggay leaves
  • Thumb-sized ginger, peeled and sliced
  • 1 tsp whole black peppercorns
  • Salt, to taste

*Or you can always use normal white vinegar if you don’t sit well with spice

**Optional – only if you want your paksiw sa gata to have a spicy kick to it or not

METHOD

  1. Add the ginger, garlic, onions, chillies, black peppercorns, vinegar, and water into a medium-sized cooking pot. Heat over medium-high and bring to a brisk boil. Continue boiling for about 10 minutes to allow the vinegar to cook and for the aromatics to infuse into the liquid.
  2. Turn the heat down to low, and slowly stir in the coconut milk in and season with a touch of salt. Bring to a slow boil. It is important to bring it back to a boil slowly to avoid curdling the coconut milk. This happens when it is heated too quickly.
  3. Add in the salmon belly chunks and allow to cook for a further 5-7 minutes before adding the malunggay leaves in. Turn the heat off and cover for about 30-60 seconds to allow the malunngay leaves to wilt.
  4. Transfer to a serving plate and enjoy with steamed jasmine rice. Paksiw and Ginataan dishes are always best eaten with rice!

Salmon Belly Paksiw sa Gata (Stewed in Vinegar & Coconut Milk)

This only just came into mind as I was finishing this post off. I thought back to popular (highly viewed) dish that I made a while back that also uses Salmon Belly (Pan-fried Salmon Bellies).

The next time I make this dish, I’m going to pan-fry my salmon bellies to get it nice and crisp. Then, cook the vinegar and coconut milk sauce separately and just pour it over the pan-fried bellies. There’s nothing I love more than a mouthful of crispy yet melt-in-the-mouth belly fat!

BON APPÉTIT

– Ally xx

myTaste.com

Lemon, Butter & Ginger Tilapia en Papillote

Lemon, Butter & Ginger Tilapia en Papillote

Hello Everyone! Before I begin with tonight’s post I would like to apologise for not getting this post up last week, I actually had it prepared and ready to go – I just needed to edit the pictures for the post. But this time last week I was rushing to get ready and out of the house in an hour after arriving home from work to pick up a few friends and then off to another friend’s house for Raya celebrations. So that night, I didn’t get to go home until about past 11pm and when I was finally ready for bed, it was just past midnight and I had work the next day. I was going to post the next day or at least before the new month but I never got around to doing it until it ended up being Wednesday again. Whoops! Anyway, before we push through, I’d like to take this opportunity to wish all my Muslim family and friends in Brunei and around the world a belated Selmat Hari Raya! Maaf Zahir dan Batin. For those of you who don’t know on Monday (here in Brunei that is) marked the end of the fasting month, also known as Ramadhan.

Tonight’s recipe I will be sharing with you is simple yet flavourful. “En papillote” is French for in parchment, or if in Italian is known as al cartoccio where it is a method of cooking in which the food is put into a folded pouch or parcel of parchment paper and then baked. You can literally put anything into this parcel so feel free to get creative in mixing up flavour combinations that are to your liking. I decided to make a spring onion and ginger oil to serve with the fish just to enhance the flavours a little more, but feel free to omit this as well if you wish.

Lemon, Butter & Ginger Tilapia en Papillote Ingredients

PREP TIME 10 MINS | COOKING TIME 10-12 MINS | SERVES 4

INGREDIENTS

For the en papillote

  • 2 large tilapia fish, scaled and filleted
  • 4 x 10g unsalted butter
  • 2-3 garlic cloves, minced
  • 2-inch sized ginger, peeled and sliced
  • 1 lemon, sliced
  • 4 tsp whole black peppercorns
  • Pinch of ground sea salt, to taste

For the spring onion and ginger oil

  • 4 stalks spring onion, sliced thinly
  • 3 tbsp peanut oil
  • 2 tbsp grated ginger
  • 1/2 tsp salt
  • Asparagus stalks, blanched in salted water
  • Touch of paprika, for garnish

METHOD

  1. Preheat oven to 230C (450F or gas mark 8). Cut 4 pieces of parchment paper, about 25cm in length (or bigger if needed depending on the size of your fillets).
  2. Line a few of the ginger slices on the parchment paper and place 1 fillet on top, adding all the other ingredients. Fold parchment over fish, making small overlapping folds along edges and sealing with a paper clip. Place on rimmed baking sheets. Roast until parchment puffs, 10 to 12 minutes.
  3. While the fish is cooking away you can work on the spring onion and ginger oil. add the spring onions, ginger and salt to a heatproof mortar and pound lightly with the pestle. Heat the oil in a small frying pan until smoking and pour onto the mixture. Once the sizzling stops, combine lightly with the pestle and leave to infuse for a few minutes.
  4. One the fish are done, remove from the oven and transfer the parcels to Carefully cut packets, avoiding escaping steam, and serve.

Lemon, Butter & Ginger Tilapia en Papillote

Lemon, Butter & Ginger Tilapia en Papillote

BON APPÉTIT

– Ally xx

myTaste.com

Sarciadong Tilapia (Tilapia Braised in Sautéed Tomatoes)

Sarciadong Tilapia (Tilapia Braised in Sautéed Tomatoes)

Hello Everyone! I hope everyone had a much better than weekend than I did! I say this because I got called to work on Sunday for an event; it was towards the end of a Saturday work day and I was excitedly looking forward to a do-nothing Sunday when I got a text from my supervisor asking if I was free to work and help out with an event. I sighed when I saw the message, and was tempted to say “no I’m not free because it’s Sunday”. I probably would’ve gotten an earful on the Monday though, so being the ever so star employee (no not really) that I am, I said “yes I’m free”. So there went my only day off. I’m definitely looking forward to this weekend though for the long weekend; 3 days off (including Sunday) and a short start to next week! I’ll definitely be using this time to experiment in the kitchen.

Anyway, that aside, the recipe that I will be sharing with everyone tonight is a classic favourite in the Geronimo household. Ever since I was a little kid, this dish will always somehow make it’s way to the table either for a delicious lunch, or a warm hearty dinner. Sarciado (sar-shee-ah-doh) is a fish dish from the Philippines that predominantly features tomatoes and eggs. The name sarciado in the Tagalog language means cooked with a thick sauce where the word “sarsa” is derived from the Spanish word “salsa” meaning sauce.

It is essentially a combination of two separate dishes: “piniritong isda”(fried fish), and a tomato-scrambled eggs “sarsa” sautéd in a flavour combination of garlic, onions, ginger, and fresh tomatoes. Traditionally, the dish was developed as a way to make leftover fried fish into a whole new dish that is both appetising and hearty. It may seem strange to put fish and eggs together, but trust me, they do go very well together. Having said this though, the dish does not solely rest its fate on leftover fried fish – there’s not stopping you to whip up this dish using a freshly fried fish of any kind really – mackerel, snapper, grouper, or even tilapia works well. For the recipe that I will be sharing tonight, I have chosen to fry up some beautiful fresh saltwater tilapia.

Sarciadong Tilapia (Tilapia Braised in Sautéed Tomatoes) Ingredients

PREP TIME 20 MINS | COOKING TIME 30 MINS | SERVES 4

INGREDIENTS

  • 2 whole tilapia (about 500g each), gutted, scaled, and cleaned
  • 1 cup fish stock*
  • 2-3 garlic cloves, minced
  • 2 medium-sized tomatoes, diced
  • Thumb-sized ginger, peeled and sliced thinly
  • 1 large free range egg, lightly beaten
  • 1 small brown onion, halved and then sliced thinly
  • Ground sea salt and black pepper, to taste
  • Fish sauce, to taste
  • Turmeric powder
  • Spring onions, chopped
  • Vegetable oil, for frying

*I have a lot of fish heads and bones left over from the previous two recipes which can be found here and here, so I decided to drop them into a pot of water together with salt, garlic cloves, whole black peppercorns, ginger slices, and some dried bay leaves. Left to simmer for about 45 minutes to an hour and you’ve got yourself a lovely fish broth. Alternatively you can just use water instead of fish stock.

METHOD

  1. Heat about 1/4 cup of vegetable oil in a large frying pan over medium-high. Season the tilapia fish with ground sea salt, pepper, and rub the turmeric powder into the fish. Fry the fish until golden and cooked through, about 4-5 minutes and then flip the fish over and cook the other side for a further 3-4 minutes. Once done, transfer to a plate lined with a paper towel to soak up any excess oil. (If you are using leftover fish, skip this part and move on to step 2).
  2. Remove some of the oil from the large frying pan, leaving about a tablespoon behind. Bring the heat down to medium and sauté the ginger and minced garlic together until fragrant and golden brown, about a minute. Add the onions in and cook until soft, a further 1-2 minutes.
  3. Add the tomatoes, toss and leave to cook until the tomatoes are soft, about 2-3 minutes. Once soft, add the fish stock (or water) and cook for a further 3-4 minutes until the sauce is brought to a simmer. Season with a bit of fish sauce, adjust to your liking, and ground black pepper.
  4. Place the fish in the pan and cover it with the sauce while leaving it to braise (quickly), about 5 minutes. Pour the egg into the sauce and quickly mix until well combined. Turn the heat off before the egg completely solidifies.
  5. Transfer to a serving dish and top with some chopped spring onions (unlike me where I completely forgot, though optional). Serve immediately with hot steamed rice and enjoy!

Sarciadong Tilapia (Tilapia Braised in Sautéed Tomatoes)

BON APPÉTIT

– Ally xx

myTaste.com

Sweet Gourd Noodles with Tilapia & Egg White Soup

Sweet Gourd Noodles with Tilapia & Egg White Soup

Hello Everyone! I hope that this time around I say that I will keep a post short, that I will actually keep it short *fingers crossed (yet no promises will be made)*. Continuing on with the theme of hero-ing tilapia in all recipes for the month of June, tonight I will be sharing a recipe that I came across last year during a corporate dinner with Ambassadors from a few Southeast Asian countries as we celebrated the Ambassador of Cambodia’s farewell from Brunei. How did a score an invite to a dinner with high-ranking officials? Well, it’s not hard to when your Boss has the connections.

Tangent aside, it was during this dinner that I came across this particular dish that I will be sharing with you guys tonight. I honestly have no clue what the dish is called, as in if there is a special name for it so I do apologise for the blunt name – just calling it as I see it! Anyway, as I recall, the dish didn’t have slices of tilapia in it, I just added it on for extra flavour and protein to the overall dish. I know that the dish doesn’t sound like it packs a lot of flavour to it, well I think it isn’t supposed to anyway. From what I remember, the broth was subtle in taste, and what really shined through was the sweetness of the sponge gourd and a little pop of sour from the goji berries. Honestly, I’m not exactly sure what the egg white does to help the dish as I know it’s rather bland in flavour – maybe to give the broth some texture?

Sweet Gourd Noodles with Tilapia & Egg White Soup

Anyway, I remember really enjoying the dish that night and last weekend I decided to give the dish a go based from the ingredients that I recognised, playing around with flavoring the broth, and of course incorporating tilapia into the overall dish. I’ll be honest and say that I was a bit nervous going blindly into this recipe with having only tried the dish once just shy of a year ago, but it turned out to be a delicious hit!

Sweet Gourd Noodles with Tilapia & Egg White Soup Ingredients

PREP TIME 10 MINS | COOKING TIME 1 HOUR | SERVES 4

INGREDIENTS

  • 750g tilapia, filleted and sliced, heads and bones reserved
  • 1 large sweet gourd, peeled and cut into long thin strips (like noodles)
  • 2 large free range egg whites
  • Handful of dried goji berries

For the fish broth

  • 1L water
  • 3-4 garlic cloves
  • 2-3 dried bay leaves
  • 2 tsp salt
  • 2 tsp whole black peppercorns
  • Reserved tilapia heads and bones
  • 1 tbsp cornstarch + 1 tbsp water

METHOD

  1. Add all the ingredients for the fish broth into a large pot and bring to a boil. Once boiling, bring the heat down to low and allow the broth to slowly simmer for about 30-45 minutes. Once done, strain out the tilapia heads, bones, garlic cloves, peppercorns, bay leaves, and discard.
  2. Meanwhile, soak the goji berries in hot water for about 5 minutes. Drain and then set aside.
  3. Bring the heat back up to high and the broth to a rapid boil. Add the sweet gourd noodles to the broth and cook until tender but still has a slight crunch to it, about 2-3 minutes altogether, or longer if you prefer it soft. Once done, strain and then divide evenly into each single serving deep dish.
  4. Add the fish slices into the broth and quickly blanch until cooked through, about 1-2 minutes. Strain and then divide evenly.
  5. Drizzle the egg whites into the broth a little at a time using a fork to continuously stir into the broth as the egg whites are dropped in. Eggs whites would cook immediately.
  6. Once the eggs whites have been dropped, gradually stir in the cornstarch and water mixture into the broth until the soup is thickened to your desired consistency. Turn the heat off and divide the soup evenly between the individual serving dishes.
  7. Top the dish with the goji berries and a touch of ground black pepper. Serve immediately and enjoy!

Sweet Gourd Noodles with Tilapia & Egg White Soup

BON APPÉTIT

– Ally xx

myTaste.com