Yu Xiang Qie Zi (Spicy Sichuan Eggplant Stir-fry)

Yu Xiang Qie Zi (Spicy Sichuan Eggplant Stir-fry)

Hello Everyone! Back in May of last year, a foodie friend of mine and I started hosting open food collaborations on Instagram under the Foodies United PH group that we co-admin. Most of the food that I featured for the collaborations didn’t end up here on my blog; the reason being was that it didn’t fit with the theme. This is also part of the reason why I decided not to go with a theme for my blog for this year.

International Hot & Spicy Food Day Collaboration by Foodies United PH

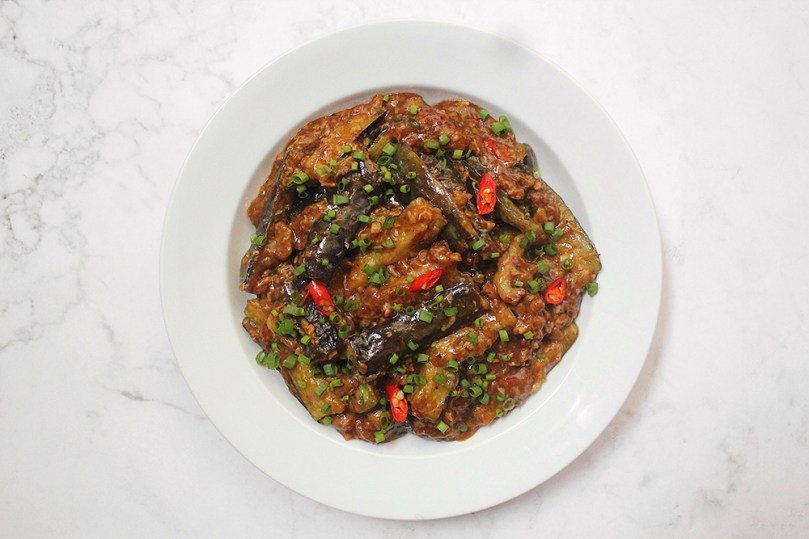
This post was supposed to go up on Sunday, but I was having issues with WordPress at that time. Anyway, on Sunday 16 January 2022, we hosted a collaboration for International Hot & Spicy Food Day. I love spicy food, and I would say that my spice tolerance is above average. When I was brainstorming a dish for this collaboration, I had a faint memory of an eggplant dish that I had way back when I was still studying in Australia. I remember it being a spicy dish that I absolutely loved, but unfortunately could not remember what the dish was. So after some research, I think the closest to my vivid memory of the dish is Yu Xiang Qie Zi, or in English, Sichuan Eggplant, which is the dish that I am featuring to celebrate International Hot & Spicy Food Day.

Before we begin, here’s a fun fact: Yu Xiang literally translates to ‘fish-fragrant’ while Qie Zi means ‘eggplant’. Despite the literal translation, this dish does not actually have any fish in it. The term is actually a style of cooking for a particular Sichuan fish dish. Since this eggplant dish uses the same aromatics, sauce, and style of cooking, it was named Yu Xiang, preceding the Qie Zi.

Yu Xiang Qie Zi (Spicy Sichuan Eggplant Stir-fry)

Yu Xiang Qie Zi is essentially a Sichuan chilli garlic eggplant stir-fry, and can be cooked with or with minced pork. The addition of minced pork is to add more flavour to the dish, but you can completely leave this out to make this a vegetarian/vegan friendly dish. I wanted to add mince though for texture to contrast the eggplants. So I decided to try out Veega’s Meat-free Giniling (in English, mince) in place for the minced pork. I’ve been seeing this product all over social media for the past year and have been wanting to try it out, but to my surprise though, their meat-free giniling actually contains egg whites. I’m not sure if their other products also include egg (or derivatives) in them.

I checked to see if they are marketing their brand as vegan, which thankfully they aren’t, but did state they are a vegetarian line, which they should actually properly label as ovo-vegetarian (a person who does not eat meat or dairy products but does eat eggs and egg-derived ingredients) in my opinion. I did also see that they’ve started a vegan line with no egg or dairy in them – so this is something I look forward to trying as well!

Yu Xiang Qie Zi is a quick and easy dish that you can be put together with minimal effort in under 30 minutes, which makes it perfect for a weeknight lunch or dinner.

Yu Xiang Qie Zi (Spicy Sichuan Eggplant Stir-fry) Ingredients

PREP TIME 15 MINS | COOKING TIME 20 MINS | SERVES 5-6
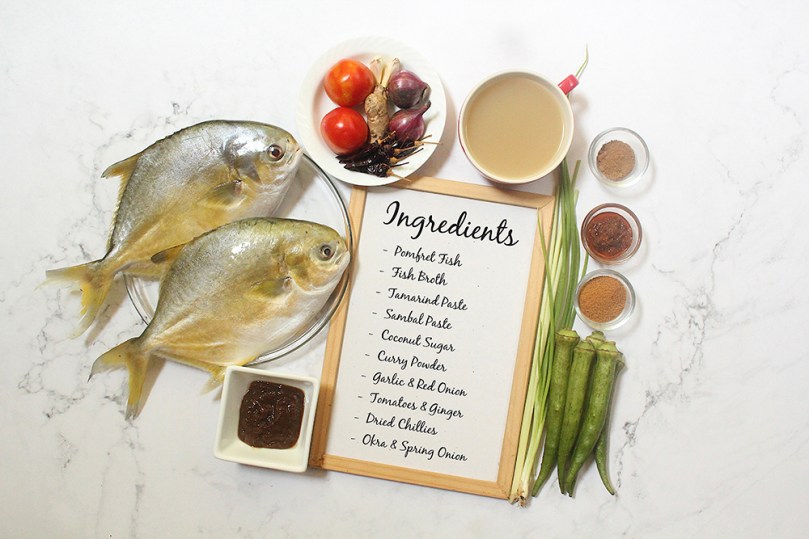
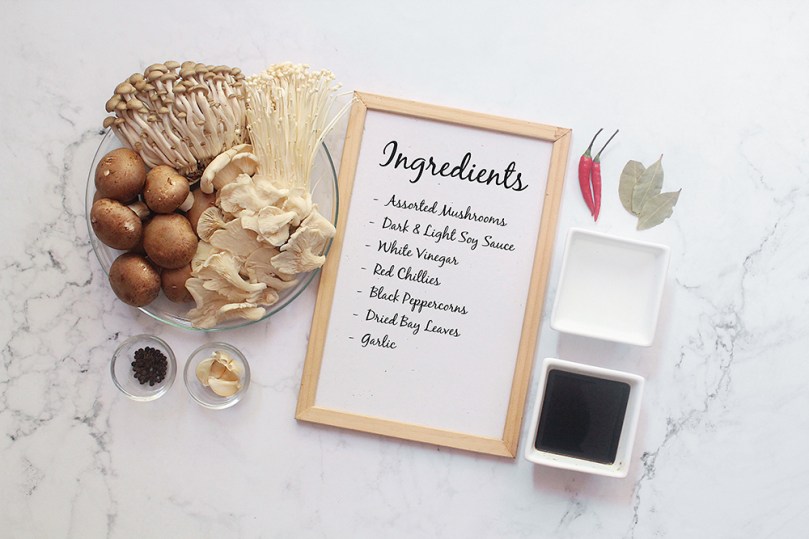
INGREDIENTS

  • 6 long eggplants, halved and then cut into long strips
  • 1 tsp salt, for soaking
  • Cornstarch, for cooking
  • Oil, for frying
  • 200g Veega meat-free giniling (mince)
  • 1 tbsp doubanjiang (chilli bean paste)
  • 3 red chillies, minced
  • 2 dried red chillies, chopped
  • 3 tsp grated ginger
  • Spring onion (white part), chopped
  • 4 garlic cloves, finely minced

For the sauce

  • 1/3 cup water (or veggie stock)
  • 4 tbsp white granulated sugar
  • 3 tbsp black vinegar
  • 3 tbsp cornstarch
  • 2 tbsp light soy sauce
  • 1 & 1/2 tsp sichuan peppercorns, toasted and ground
  • 1/2 tsp salt

To garnish

  • Red chillies, chopped
  • Spring onion (green part), chopped

METHOD

  1. Sauce: Add all the ingredients for the sauce in a small bowl and mix to combine. Set aside.
  2. Eggplant: Soak the eggplant slices in salted water for about 15 minutes. Once done, drain and pat dry.
  3. Evenly coat the individual eggplant slices in cornstarch and shallow fry in a preheated pan over high heat, until browned. Remove and transfer to a plate lined with a paper towel to soak up any excess grease. Work in batches if needed. Set aside.
  4. Turn the heat down to medium and remove some of the oil, leaving behind about a tablespoon’s worth.
  5. Sichuan Eggplant: In the same pan, sauté the garlic, chillies, ginger, and white part of the spring onion until golden and fragrant, about 30 seconds.
  6. Add the meat-free mince and continue to cook, stirring for about 2 to 3 minutes, before adding the chilli bean paste and cooking for a further 3 to 4 minutes.
  7. Add the sauce mixture to the pan and cook until thickened. Turn the heat off.
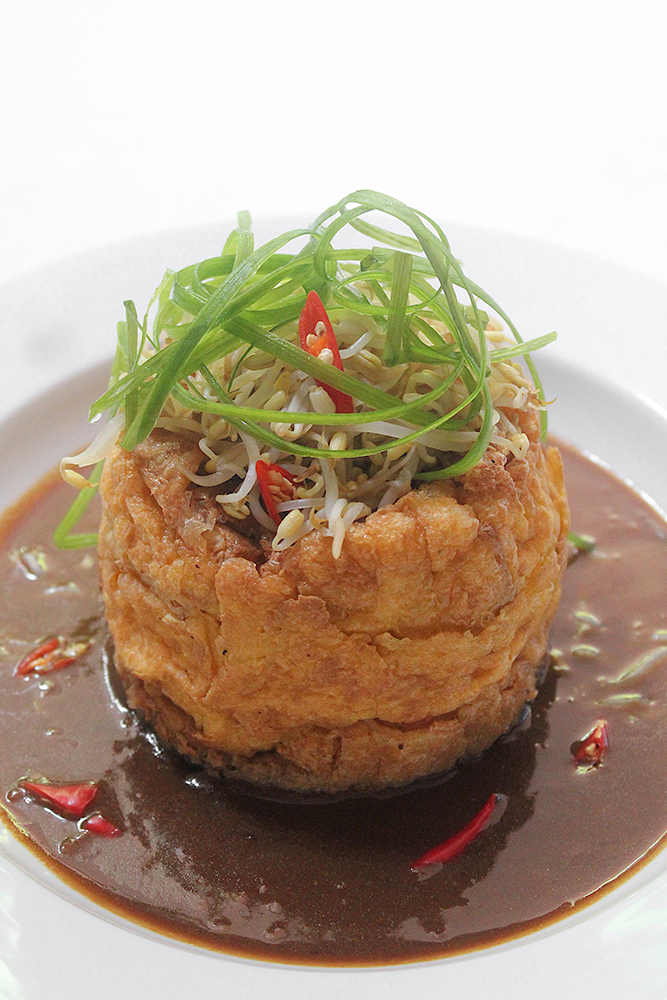
  8. Immediately stir in the eggplant and then plate up. Garnish with the green part of the spring onion and extra chilli slices (optional). Serve with freshly steamed rice and enjoy!

Yu Xiang Qie Zi (Spicy Sichuan Eggplant Stir-fry)

BON APPÉTIT

– Ally xx

Follow me on my social media accounts:
Facebook: Amcarmen’s Kitchen
Instagram: @amcarmenskitchen
TikTok: @amcarmenskitchen

myTaste.com

Advertisement
Auguest 2021: Chamaine

Spicy Purple Sweet Potato Soup

“Happiness is Homemade. Real cooking is more about following your heart than following recipes. Fresh is always better.” — Chamaine

Auguest 2021: Chamaine

Hello Everyone! Chamaine here taking over Amcarmen’s Kitchen tonight to bring you a Thai-inspired dish for the Flavours of Southeast Asia journey on this blog for this year’s Auguest theme. I am so grateful to be part of this series as, through this, I have learnt to explore other cuisines and dishes from countries outside of my home country and knowledge.

I believe that Happiness is Homemade. My favourite thing to do at home is COOK, and I season everything with LOVE. For me, cooking is an ART. I plate like an ARTIST and invent recipes like a SCIENTIST.

Spicy Purple Sweet Potato Soup

Thai cuisine has proven to be quite a challenge for me since I am not so familiar with it. Some ingredients are unusual to me, but since I am eager to learn something new, I accepted this challenge. Upon my research, I found this recipe for Sweet Potato Soup rather intriguing. All my life, I have known sweet potatoes to be used as a snack and finger food; I never thought that it could potentially be used to make a starter or appetizer in the form of a soup.

For this dish, I substituted some of the ingredients as I could not source some of them, but don’t worry, I have the best options in our pantry. If you do have these original ingredients readily available for you, then by all means stick to using them:

  • Kaffir lime leaves to bay leaves
  • Lime juice to calamansi juice
  • Coriander seeds to oregano
  • Red curry paste to red chillies

As a result, I can say this dish is absolutely appetizing. With its tangy, savoury, and creamy flavour, plus the slightly sour and sweet taste, everything complimented each other so well!

Spicy Purple Sweet Potato Soup

PREP TIME 10 MINS | COOKING TIME 25 MINS | SERVES 4

INGREDIENTS

  • 3 medium-sized purple sweet potatoes, peeled and cut into small chunks
  • 1 tbsp olive oil
  • 1 tsp fresh ginger, finely chopped
  • 1 red onion, finely chopped
  • 1 bay leaf
  • 2 red chillies, roughly chopped
  • 1 tbsp fish sauce*
  • 1 vegetable stock cube
  • 2 cups water
  • 1 cup coconut milk
  • 1 tbsp calamansi juice
  • 1 stalk spring onion
    A pinch of oregano

*Replace with salt for a fully vegetarian/vegan alternative

METHOD

  1. In a large frying pan over medium-high, heat the olive and sauté the ginger and onions until lightly golden and fragrant, about 30 seconds.
  2. Add the sweet potatoes, bay leaf, red chillies, fish sauce and toss, cooking for a few minutes.
  3. Pour in the coconut milk and water, and add a vegetable stock cube. Bring to a boil then reduce the heat to bring it down to a simmer. Continue to cook until the sweet potatoes are tender.
  4. Once done, remove the bay leaf, and then transfer everything into a food processor and blend until smooth and creamy.
  5. Add the calamansi juice and gently mix into the soup.
  6. Transfer to individual serving dishes and garnish with more chopped chillies, spring onions, calamansi juice, and a sprinkle of oregano. Serve and enjoy!

1957

Spicy Purple Sweet Potato Soup

Photo Courtesy & Recipe Copyright © 2021 | Chamaine (@chamaine_homemade)

BON APPÉTIT

– Chamaine

myTaste.com

Assam Pedas Ikan

Assam Pedas Ikan

Hello everyone! A new month means we’ve ventured onwards to our next Southeast Asian destination, and tonight we’re kicking off our journey through Malaysia! Having lived in Brunei for 26 years of my life, and Bruneian food being so heavily influenced by the cuisine of its neighbouring country, Malaysia, it’s no wonder that it’s a cuisine that’s very close to my heart and that I love so much on top of everything else that I seem to love when it comes to food *cheeky grin*

Assam Pedas Ikan

Assam Pedas Ikan, or literally translated as Sour Spicy Fish in English, is a classic Malaysian dish that’s undoubtedly sour, fiery hot, and super satisfying! Special ingredients such as tamarind peel, ginger torch flower, and Vietnamese coriander (laksa leaves) are key in achieving the flavour profile and aroma of Assam Pedas. However, while these ingredients may be difficult to source in certain countries, the sourness is the important component; and you can use tamarind pulp or paste for this. I guess that it’s also safe to say why everyone has their own take on this favourite Malaysian dish; the adaptations are endless! Ultimately, a good balance of sourness, saltiness, sweetness, and spiciness is all you need to make a good Assam Pedas dish.

Tonight, I’ll be sharing the way I remember how my Mom used to make it when we were still living in Brunei. It’s been a while since I’ve had this dish and I was actually surprised by how quick and easy it is to make, as well as how readily available all the ingredients are, for the version that I will be making of course. Instead of using water for my version, I used my own homemade fish broth from fish scraps to give the Assam Pedas more depth in flavour. Traditionally, locals would use ikan tenggiri (Spanish mackerel), or ikan pari (stingray), but my Mom and I prefer to use pomfret fish (pampano in Tagalog) for its delicate white flesh, subtle non-fishy and sweet taste, as well for its firm texture.

Assam Pedas Ikan Pedas

PREP TIME 30 MINS | COOKING TIME 10 MINS | SERVES 4

INGREDIENTS

For the spice paste

  • 8-10 pcs dried red chillies, roughly chopped
  • 1 garlic clove, roughly chopped
  • 1 small red onion, diced
  • 1 stalk lemongrass (white part only), roughly chopped
  • 1/2 tbsp sambal belacan paste

For the assam pedas ikan

  • 2 large pomfret fish
  • 2 tbsp cooking oil
  • Spice Paste
  • 1 tsp fish curry powder
  • 1 tbsp coconut sugar
  • 2 tbsp tamarind paste
  • 2 cups fish broth
  • 2 tomatoes, quartered
  • 1 small red onion, quartered
  • 1 thumb-sized ginger, sliced
  • Spring onion, white part
  • 10 pcs okra
  • Salt, to taste
  • Spring onion (green part), to garnish

METHOD

  1. Spice Paste: Using a mortar and pestle, pound all the ingredients for the spice paste together, or you may also use a food processor to do so. Set aside.
  2. Assam Pedas Ikan: Heat cooking oil to a large pot over medium-high. Add the spice paste and fry for about 2 minutes or until fragrant before adding the curry powder, coconut sugar, and tamarind paste. Fry for a further 2 minutes.
  3. Add the fish broth, followed by the tomatoes, red onion, ginger slices, and white parts of the spring onion, and leave to simmer for about 5 minutes or until the tomatoes have softened.
  4. Add the pomfret fish and cook for 20 minutes or until the fish is cooked through. Add the okra and cook for a further 5 minutes, or until the okra is tender.
  5. Serve immediately while hot and enjoy with freshly steamed white rice!

Assam Pedas Ikan is best served with plain steamed white rice. You may also serve it with noodles, kind of like a laksa, if you’re using boneless fish. Rice noodles would be the go-to choice as they take on the flavour of the Assam Pedas best.

Assam Pedas Ikan

Assam Pedas Ikan

BON APPÉTIT

– Ally xx

myTaste.com

Tahu Telur (Indonesian Tofu Omelette)

Hello Everyone! So if you saw my recipe yesterday for Homemade Egg Tofu, you’ll know that I’m back with a recipe that uses them in the dish that I will be sharing tonight.

Back in my very first post in May when we first landed in Indonesia for our Flavours of Southeast journey, I mentioned that there was this Indonesian restaurant in Brunei that my family and I would always go to on a weekly basis. One of the dishes that we would always order is Tahu Telur, or in English, Indonesian Tofu Omelette. It is an inexpensive and humble dish that originated from East Java, and although meatless, it is packed with protein from the eggs and tofu, making it perfect for those on a ovo-vegetarian diet. The dish may seem intimidating in terms of its preparation, but trust me, it doesn’t require much skill and is actually easy to put together. It’s also worth it!

Tahu Telur (Indonesian Tofu Omelette)

What makes this tahu telur dish stand out from other omelettes out there is its tower-like structure. You can also find flat versions of this dish, but it’s not as exciting and dynamic as a vertical omelette in my opinion. To achieve this tower, you’ll need a ring mold to cook the eggs and tofu in. If you do not have a ring mold, you can DIY one from a tin can that is at least 4 inches in diameter and 5 inches high. This is what I did when I could not seem to find ring molds in stores; and it worked just as good!

When fried the eggs are fluffy and crispy on the outside, but soft and moist on the inside when you cut through it due to the tofu that’s mixed in it. You can top it with various fresh vegetables of your choice to add a different crunch that’s refreshing to the palette. The dish is then brought together with a sweet and spicy peanut sauce that you can easily adjust to suit your liking.

1907

PREP TIME 15 MINS | COOKING TIME 20 MINS | SERVES 4

INGREDIENTS

For the tauhu telur

  • 5 large free-range eggs
  • 2 tbsp tapioca flour
  • 1 tsp salt
  • Homemade egg tofu*, deep fried
  • Cooking oil

*I used a quarter serving of this recipe, and cut them into 8 rectangular pieces.

For the peanut sauce

  • 5 garlic cloves, peeled
  • 3 red chillies
  • 1 cup hot water
  • 3 tbsp kicap manis
  • 2 tbsp coconut sugar
  • 1 & 1/2 tbsp peanut butter

To garnish

  • Blanched bean sprouts
  • Fresh red chillies, chopped
  • Spring onion

METHOD

  1. Peanut Sauce: In a small pan, fry the garlic cloves and chillies until soft and browned. Add all the ingredients into a blender and blend until combined.
  2. Transfer the mixture to a small saucepan and cook over medium heat until reduced and slightly thickened. You may want to add more kicap manis at this point to darken the colour of the sauce. Once done, remove from the heat and set aside. Reheat later if needed.
  3. Tauhu Telur: Beat the eggs, tapioca flour, and salt together until well combined. Dissolve as much of the flour as possible.
  4. In a large frying pan, heat over medium-high, enough oil so that you are able to scoop up using a ladle, I used about 6 to 8 cups. Place the ring mold in the center of the pan and ladle the hot oil over the mold to prevent sticking while cooking.
  5. Pour about a third of the egg mixture into the ring mold and let it cook for about 30 to 45 seconds. Add half of the deep fried egg tofu to the eggs and cook for a further 30 seconds, ladling hot oil into the mold.
  6. Add another third of the egg mixture and top with the remaining egg tofu. Ladle more hot oil into the mold, and then add the remaining egg mixture on top.
  7. Reduce the heat down to medium and cook by continuously ladling hot oil on top of the mixture. Remove the oil if it stops sizzling and pour hot oil on top, repeating until golden brown in colour, about 4 to 5 minutes, or until the egg is cooked enough that it can hold its shape upright.
  8. Using a knife, gently scrape the inner side of the mold to loosen the egg. Use tongs to slowly and gently pull the mold away from the egg. Continue to cook until the sides are golden brown in colour.
  9. Once done, remove from the pan and shake off any excess oil. Transfer to a plate lined with paper towels to soak up any more excess grease.
  10. Transfer to a serving plate with the peanut sauce, and top with the blanched bean sprouts, fresh chillies, and spring onion. Enjoy!

Tahu Telur (Indonesian Tofu Omelette)

1909

BON APPÉTIT

– Ally xx

myTaste.com

Spicy Mushroom Adobo

Hello Everyone! The month is going by swiftly and we’re almost halfway through the fourth month of 2021! Before we dive right into the recipe, I just want to say that I have a special announcement which I have saved for the end of this post. Feel free to skip ahead if you want to know more about what’s happening on Amcarmen’s Kitchen this week!

Adobo is a very popular dish in the Philippines which involves marinating meat, seafood, or vegetables in a mixture of vinegar, soy sauce, garlic, bay leaves, and black peppercorns, and then cooked in its own marinade. The most common choice of protein is chicken or pork, squid for seafood, and kang kong (water spinach) or yardlong beans for vegetables. I’m sure there are other choices of seafood and vegetables, but these are the ones that I am most familiar with.

Spicy Mushroom Adobo

To be very honest, before I even found out about the ‘marinating’ process involved in making adobo, I used to always just throw everything into a pot and let it simmer away for 20 minutes – well at least that’s how my Mom taught me how to make adobo; no marinating and no sautéing needed. Even without the marinating process, the way my Mom taught me how to cook adobo tastes just as good! I’ve tried a recipe where I marinated the protein before, and to be honest, I can’t spot the difference.

This is one of the main reasons why, when I used to live alone while I was studying for my degree in Australia, this would be my go-to weeknight dinner meal – quick and hassle free. The other best part of it is that the longer you keep it in the fridge, the more the flavours start to develop, and it doesn’t go off that easily! In fact, cooking with vinegar and salt helps keep food fresh for longer especially in the tropical climates of the Philippines.

Spicy Mushroom Adobo Ingredients

Since water spinach and yardlong beans are very common vegetables used when making a vegetarian/vegan adobo dish, I chose to work with my favourite ‘vegetable’ – mushrooms! I used vegetables in quotation marks because, although mushrooms are classified as vegetables, they are technically not plants, but are part of the kingdom called fungi. Stick around because I’m not just going to show you how to make Spicy Mushroom Adobo, I’m going to make it into a full meal for you guys!

If you want to check out my other adobo recipes on my blog, feel free to check them out! Disclaimer: these are all meat dishes from when I used to eat meat.

Spicy Mushroom Adobo Ingredients

PREP TIME 10 MINS | COOKING TIME 15-20 MINS | SERVES 3-4

INGREDIENTS

  • 500g assorted mushrooms*
  • 3-4 garlic cloves, finely minced
  • 2-3 pcs dried bay leaves
  • 2 red bird’s eye chillies, sliced
  • 1/2 cup white vinegar
  • 1/4 cup light soy sauce
  • 2 tbsp dark soy sauce
  • 2 tbsp cooking oil
  • 1 tbsp whole black peppercorns
  • Crispy garlic, to garnish
  • Fresh red chillies, to garnish

*I used an array of swiss brown, shimeji, enoki, and oyster mushrooms. Feel free to use whatever is readily available and most importantly, fresh.

METHOD

  1. Add oil to a large pan over medium-high heat. Once hot, add the minced garlic and red chillies to the pan and sauté until the garlic is lightly golden and fragrant, about 30 seconds. Follow with the whole black peppercorns and dried bay leaves and continue to sauté to release their flavours.
  2. Turn the heat down to medium and add the mushrooms to the pan. Mix well and cook until the mushrooms have started to wilt and brown.
  3. Add the light and dark soy sauce, together with the white vinegar to the mushrooms. Do not mix. Turn the heat down to medium-low and cover. Allow the mushrooms to simmer for about 10-15 minutes.
  4. Give the mushrooms a good mix and adjust the taste to your liking, i.e. add more soy sauce if you want it a little saltier or more chillies for heat. Continue to cook until most of the liquid has evaporated.
  5. Once done, remove from the pan and transfer to a serving bowl. Garnish with crispy garlic and extra red chillies. Serve and enjoy with freshly steamed rice!

Spicy Mushroom Adobo

Now you can stop here, or you can take this dish further by making Mushroom Adobo Fried Rice and serve it with a simple mango salsa and top it off with a sunny side up egg, which is definitely what I did! To make the mushroom fried rice, make sure you have cold, day old rice on hand.

  1. In the same pot that you used to cook your mushroom adobo, add about another 2 tbsp of oil over medium high heat. Sauté about 3 cloves of finely minced garlic until golden brown and fragrant. Add your cold, day old rice to the pan, mix, and cook.
  2. Once the rice is heated through, season with a touch of salt and freshly ground black pepper. Add the mushroom adobo sauce to the rice and mix well.
  3. Transfer the rice to individual serving plates and top with a sunny side up egg, and to freshen the dish up a bit, with some fresh mango salsa (or salsa of choice). Serve and enjoy!

Spicy Mushroom Adobo

Before I end tonight’s post, I just want to say that I will be posting another recipe this week on Friday evening and on Saturday morning or evening (depending when I can get the post done). Stay tuned for a very special occasion for Amcarmen’s Kitchen!

BON APPÉTIT

– Ally xx

myTaste.com

Balado with Ai Manas (Fried Boiled Egg with Chilli Sauce)

Balado with Ai Manas (Fried Boiled Egg with Chilli Sauce)

Hello Everyone! Who here doesn’t love eggs? Eggs are probably one the the reasons why I don’t think I’d ever be able to go on a fully vegan diet. It’s amazing how many varieties of dishes we can make using the eggs as a side or main ingredient. So put your hands up if you love eggs!

To be perfectly honest, boiled eggs are my least favourite from all of the basic ways to cook eggs. Since I like a runny yolk, my absolute go-to would be sunny-side up eggs (with browned, crispy edge that gives a certain nutty flavour to the white) and/or poached eggs. I guess it’s now safe to say that the recipe that I will be sharing tonight has changed the way I see boiled eggs. Now, if you’re like me and this recipe doesn’t convert you, then I don’t know what will!

Balado with Ai Manas (Fried Boiled Egg with Chilli Sauce)

Here’s a great way to turn boring and plain-old boiled eggs into a spectacular appetizer or side dish at home. The East Timorese version of Balado is an adaptation of the original Indonesian Spicy Eggs, known as Telur Balado. Balado is a popular snack that you can find being sold, usually by children, all over the streets of East Timor. If you want a flavourful egg dish where the sauce penetrates all the way into the inside, then you really want to develop a fried and crispy skin to your eggs. Likewise, you can serve this dish with a fried egg or sunny-side up, but tradition calls for boiled eggs.

On the streets for just 25 cents, you get a fried, hard-boiled accompanied by a bold sour and spicy chilli sauce, called Ai Manas. Ai Manas is the heart of every East Timorese food. It’s very famous all over the country and comes with many regional varieties that vary according to taste. Green or red chillies often make up the bulk of the ingredients of the paste. The chilies are grounded along with lime or lemon rind and juice, ginger, onions, and several other local spices. Even a teaspoon of this sauce is enough to fire up any meal. Thai chillies are usually used for this sauce, which can be significantly hot for some. Use what you like and can tolerate.

Balado with Ai Manas (Fried Boiled Egg with Chilli Sauce) Ingredients

PREP TIME 10 MINS | COOKING TIME 10 MINS | SERVES 6

INGREDIENTS

  • 6 large free-range eggs

For the spicy chilli sauce

  • 8-10 pc red bird’s eye chillies, roughly chopped
  • 2 garlic cloves, finely minced
  • 1 small red onion, finely diced
  • 1-2 tsp white granulated sugar (optional)
  • Handful of Thai basil, roughly chopped
  • Salt, to taste
  • Small thumb-sized ginger, grated
  • Zest and juice of 1 lemon

METHOD

  1. Ai Manas: Using a mortar and pestle, pound the chillies, garlic, and red onion into a rough paste.
  2. Follow with the grated ginger, lemon zest, and a pinch of the basil leaves. Continue to pound and season with a touch of salt. Add in the lemon juice and give it a good mix. Taste and adjust to your liking.

I had to add about a teaspoon or two of white granulated sugar to balance the spice and tang of the sauce. You don’t have to add it if you’re alright with the level of sour and spice.

  1. Once done, add the rest of the chopped basil leaves to the sauce, mix, and then set aside.

Balado with Ai Manas (Fried Boiled Egg with Chilli Sauce)

  1. Balado: To boil the eggs, heat a medium-sized pot of water (enough to cover all the eggs) over high heat until boiling. Once boiling, turn the heat down to low and carefully place the eggs in the pot using a ladle to prevent them from cracking.
  2. Depending on your preference, boil for 5 minutes for soft-boiled eggs, 7 minutes for medium eggs, or 10 minutes for hard-boiled eggs. Take note that you’ll be cooking the eggs again, so I would recommend you go for soft or medium eggs if you don’t like over-cooked boiled eggs as a result.
  3. While the eggs are cooking, prepare an ice bath* by combining ice and tap water in a large bowl. Once the eggs are cooked, immediately transfer them to the ice bath to cool for 2 to 3 minutes.
  4. Peel the eggs and make sure to pat them dry if you don’t want them to explode while frying.
  5. Heat oil, enough to submerge an egg for deep frying, in a medium-sized pot over medium high. Carefully lower the eggs into the oil and fry until golden brown, about 2-3 minutes.
  6. Carefully remove from the oil using a slotted spoon and transfer to a plate lined with a paper towel to absorb any excess grease.
  7. Serve the fried boiled egg with the spicy chilli sauce and enjoy while hot!

Balado with Ai Manas (Fried Boiled Egg with Chilli Sauce)

*The ice bath will cool the eggs quickly and stop the cooking process. The ice water will also cause the egg to contract and pull away from the shell, which will make it easier to peel.

BON APPÉTIT

– Ally xx

myTaste.com

Stir-fried Handmade Noodles with Spicy Tofu & Mushroom Mince

Stir-fried Handmade Noodles with Spicy Tofu & Mushroom Mince

Hello Everyone! I can’t believe that it’s already October – how did the months in quarantine fly by so fast? I felt like March was just last week! I hope everyone is staying safe at home, and only going out when necessary, for work or essentials. I still haven’t reported back to the office since our country declared enhanced community quarantine, and I hope that I won’t have to go back until this pandemic is under control.

That aside, I will continue sharing blue-inspired dishes for the month of October, and what better way than to kick things off with this recipe for Stir-fried Handmade Noodle with Spicy Tofu & Mushroom Mince. I initially drew my inspiration for this recipe by Blue Willow, a thematic bar and bistro located in Singapore that derives its inspiration from one of our favourite science-fiction movies of 2009 – Avatar.. Now, I haven’t been there myself, but when I was doing research earlier on this year to look for blue-inspired dishes, I came across Blue Willow’s Eywa Natural Blue Carbonara, where pasta dough is naturally coloured using butterfly pea flowers.

Chinese Handmade Noodles

My initial idea was to recreate this exactly as it is, a blue carbonara. As the months went by and drew closer to tackling this dish, paired with hours of research for new recipes (not necessarily just for this dish in particular), my idea shifted to making Chinese-style handmade noodles instead of pasta. To be honest, this was actually a recipe that I had initially planned for the third week of September, to serve with the Chinese Blue Tea Eggs (茶叶蛋) that I had also made earlier last month. However, I wasn’t happy with how the dish was put together, in terms of how I dressed the noodles. I didn’t want to share something that I wasn’t happy with, visually and taste wise, so it wasn’t until I did more research and tackled this dish once again towards the end of September – and finally something that I am happy to share with you guys!

Before we dive into tonight’s recipe, please take the time to check out the original recipe for Handmade Noodles over on The Woks of Life by Sarah, one of a family of four cooks. Also, check out the original recipe for Tofu and Mushroom Mince over on Scruff And Steph by Scruff.

The making of the noodles really tired me out for they were kneaded, rolled, and cut from scratch, and all by hand. If you have a mixer with a dough hook attachment, it’ll be a piece of cake! If not, you need a bit (lot) of elbow grease, and you’ll be making noodles the same way cooks have been making them in China for centuries.

PREP TIME 1 HOUR | COOKING TIME 30 MINS | SERVES 4

INGREDIENTS

Chinese Handmade Noodles Ingredients

For the handmade noodles

  • 3 cups all purpose flour
  • 1 cup water
  • 1 & 1/2 tsp loose dried butterfly pea flowers
  • 1/4 tsp salt

Stir-fried Handmade Noodles with Spicy Tofu & Mushroom Mince Ingredients

For the spicy tofu & mushroom mince

  • 250g firm tofu, mashed
  • 1/2 cup dried sliced shiitake mushrooms, rehydrated finely minced
  • 1/2 cup dried wood ear mushroom, rehydrated and roughly chopped
  • 2 garlic cloves, minced
  • 2 red bird’s eye chillies, minced
  • 1 small red onion, minced
  • 1 thumb-sized ginger, julienned
  • 2 tbsp coconut oil
  • 2 tbsp sesame oil
  • 1 tbsp light soy sauce
  • 1 tbsp sweet soy sauce
  • Salt and freshly ground black pepper, to taste

For the stir-fried noodles

  • 3 tbsp sesame oil
  • Spring onion stalks, white part only

To serve with

  • Chinese greens of choice
  • Spring onions, for garnishing

METHOD

  1. Handmade Noodles: Combine the dried butterfly pea flowers in a small saucepan together with the water and salt. Bring to a boil over high heat. Once boiling, turn the heat off and leave to steep for about 10-15 minutes. Discard the flowers and set aside to cool down completely.
  2. Add the all purpose flour to a large plate (or even directly onto your clean kitchen countertop). Create a well in the middle and bit by bit, pour the blue water into the flour, mixing with a pair of chopsticks, spatula, or even just your hand as you go. Once all the water is added, the dough should be in shaggy threads with little/no dry flour in the bowl.
  3. Begin pressing the dough together. Avoid the temptation to add additional water, as this will affect the texture of your noodles. If you find the dough is too dry and there’s still dry flour that’s hard to incorporate into the dough, drizzle just enough water until there’s no dry flour left. Knead the dough for about 15 minutes.
  4. Cover the dough with plastic wrap and set aside to rest for about 30 minutes. During this time, it will continue to absorb moisture, and become more pliable and elastic.
  5. Spicy Tofu & Mushroom Mince: While the dough is resting, heat oil in a large frying pan over medium. Add in the ginger together with the red bird’s eye chillies and sauté until fragrant, about 45 seconds. Immediately add in the garlic, continuing to sauté until fragrant and slightly golden in colour before adding the onions. Cook until the onions have softened and begin to go translucent, a further 45 seconds.
  6. Add the mashed tofu, shiitake and wood ear mushrooms. Continue to stir and cook for 5 minutes and then add in the light and sweet soy sauce. Season with salt and freshly ground black pepper, and stir the tofu-mushroom mixture around for a further 10 minutes. Taste and adjust the seasoning to your liking. Set aside and cook your noodles.

Chinese Handmade Noodles

  1. Stir-fry Noodles: After the dough has rested, knead it a few more times to get any air bubbles out of it, about 2-3 minutes. Form into a ball and cut it in half.
  2. On a floured surface, roll one half of the dough into a thin sheet, about 2mm thick. Flour the surface of the sheet thoroughly, flip over, and thoroughly flour the other side. Once floured, fold the dough so you have 4 layers. Slice the noodles with a sharp knife to your desired thickness. As you’re cutting the noodles, gently separate them out with your hands and toss them in flour so they don’t stick.
  3. Bring a pot of water to a boil and cook the noodles for 1 to 3 minutes, depending on the thickness. Keep an eye on the noodles as they cook and taste them to determine when they’re cooked. There is a lot of variation depending on how thinly they were rolled and cut, so test in real time to determine when they’re done. Drain and rinse under cold water. Set aside.
  4. Add sesame oil in a separate frying pan over high heat until smoking. Add the spring onion stalks together with the boiled noodles and fry for about 3-4 minutes.
  5. Transfer to individual serving dishes and top with the Spicy Tofu & Mushroom Mince. Garnish with spring onions and serve with Chinese Greens of your choice. Enjoy!

Stir-fried Handmade Noodles with Spicy Tofu & Mushroom Mince

You can also follow the recipe for Chinese Handmade Noodles and basically make anything and everything with them! These deliciously chewy, springy noodles can be served in soup or mixed with whatever tasty sauces and toppings you can dream up for a delicious meal. Here are just some key tips for success:

  • Use bread flour (high gluten flour): The way to get a good chew in your noodles is to develop the gluten in the dough. Using flour with high gluten content makes a big difference. That being said though, all purpose flour works fine too.
  • Don’t add too much water: The dough will look rather dry and lumpy at first, but do resist the temptation to add additional water. Too much water will make the noodles gummy rather than springy. You just have to have faith and give the flour enough time to absorb moisture through kneading.
  • Use lots of flour when rolling and cutting: The action of cutting the noodles with a knife will press the layers of dough together. To prevent them from sticking, be sure to thoroughly flour both sides of the dough before folding and cutting. This is another reason to avoid using too much water in the dough – to prevent it from sticking.
  • Be mindful of thickness: The noodles will expand when cooked, so whatever thickness you see when cutting the raw dough, the cooked noodles will be significantly thicker. Keep this in mind when rolling and cutting. You may want to roll the dough out thinner and cut the noodles thinner than you initially think.

Storage Tips:

  • Cooked Noodles: If you plan on reheating, you can slightly undercook the noodles (to al dente) to create a better texture once reheated. Store the noodles in an airtight container or a ziplock bag in the fridge for up to 3 days or in the freezer for up to 3 months.
  • Frozen Dough: Let the frozen dough thaw in the fridge overnight. Transfer the refrigerated dough to room temperature and let it rest for 2 hours. The dough will become super soft and can be gently shaped, rested for another 10 minutes or so, and rolled. Follow the method stated above to cook.

Stir-fried Handmade Noodles with Spicy Tofu & Mushroom Mince

BON APPÉTIT

– Ally xx

myTaste.com

Auguest 2020: Jenel Laureta

Deconstructed Spicy Seafood Jambalaya

“Learn as much as you can through reading cookbooks, watching cooking shows, attending short cooking classes, and from other people. Then try to incorporate all these in your daily cooking.” — Jenel Laureta

Auguest 2020: Jenel Laureta

I was greatly influenced by my paternal grandfather to love food and cooking! Hands down, he was a great cook because there was not a dish I didn’t like. All his dishes were simply delicious. His cooking was not by-the-book and he had no recipes to follow. He cooked by taste and with utmost passion.

In my Lolo Pepe’s kitchen, I began with peeling garlic and onions for homemade atchara. We were busiest in the kitchen during town fiestas. Lolo Pepe would whip up his specialties: Asadong Manok, Mechadong Baka, and Adobong Hito to name a few. I would linger in the kitchen to smell the bubbling sauces and of course to get a taste of each cooked dish.

From him, I also learned how to appreciate good food. We weren’t rich but he wouldn’t settle for less than the best. I remember that he would always buy our butter from a PX store and we would always travel to a nearby city to eat good food.

A great part of my childhood memory is about food and cooking, and this may be the reason why until now I love to eat and cook! In my kitchen now, I try to replicate Lolo Pepe’s cooking. Although I do not have any recipes to follow, I just try to remember the smell, the taste, and the look of a certain dish!

Deconstructed Spicy Seafood Jambalaya

Jambalaya is a popular dish of West African, French (especially in Provençal cuisine), Spanish and Native American influence; similar to, but distinct from, other rice-and-meat dishes known in Louisiana cuisine.

An easy Jambalaya recipe is pure comfort food filled to the brim with flavor. A soffritto-like trinity of onion, bell peppers and celery are also included, along with rice, chilies, cajun spice, other seasonings, and broth. Jambalaya is a quintessential one pot recipe, usually cooked together until the rice is done, but since this is a recipe for a deconstructed Jambalaya, we’re going to need a pot/pan more or two.

Deconstructed Spicy Seafood Jambalaya Ingredients

PREP TIME 10 MINS | COOKING TIME 45 MINS | SERVES 1-2

INGREDIENTS

  • 1 pc river prawn
  • 1 pc blue swimmer crab
  • 1 pc crab claw
  • 3 pcs large prawns
  • 4 pcs mussels
  • 2 stalks celery, sliced
  • 1 whole green bell pepper, cubed
  • 1 medium-sized white onion, minced
  • 5 cloves garlic, minced
  • 1-2 pcs red chili, diced (optional)
  • 1 & 1/2 to 2 cups seafood broth or water
  • 1 to 1 & 1/2 tbsp cajun spice
  • 1 can (approx. 400g) diced tomatoes
  • Olive oil
  • Salt, to taste
  • 2 cups cooked rice
  • Cherry tomatoes, lightly fried, for garnish

METHOD

  1. Jambalaya Stew: Add olive oil in a shallow pan and start sautéing in this order: green bell pepper, celery, white onion, and then garlic. Add cajun spice and continue cooking for a further 2 minutes.
  2. Pour the can of diced tomatoes and let it cook until softened before adding a cup of seafood broth or water. Bring to a boil.
  3. Add assorted seafood and cover until cooked. Add more seafood broth or water as needed and leave to simmer, seasoning with salt according to your taste.
  4. Once the assorted seafood is cooked through, fish out into a bowl and set aside.
  5. Jambalaya Rice: In a separate pan, sauté the garlic until golden and fragrant.
  6. Ladle about a cup of the jambalaya stew and add it to the pan with sautéed garlic. Leave to simmer to allow the flavors to concentrate.
  7. Add the cooked rice and mix well. Season with salt and pepper to taste, and allow the rice to absorb all the stew.
  8. Jambalaya Soup: Add half a cup of seafood broth to the remaining jambalaya stew and simmer.
  9. Season with salt and pepper, to taste. Optional, if you want an intense jambalaya flavor, you can add a half teaspoon more of cajun spice.
  10. Purée the stew in a blender and pass it through a fine sieve.
  11. Pour soup in a bottle and keep warm.
  12. Assembly: Arrange the assorted seafood in a large shallow plate and garnish with lightly fried cherry tomatoes.
  13. Pour the warm jambalaya soup over the assorted seafood and serve with jambalaya rice. Enjoy!

Deconstructed Spicy Seafood Jambalaya

Deconstructed Spicy Seafood Jambalaya

Photo Courtesy & Recipe Copyright © 2020 | Jenel Laureta (@jenel.laureta)

BON APPÉTIT

– Jenel Laureta

myTaste.com

Auguest 2020: Shazrinah Shazali

Roasted Garlic & Onion Tomato Tagliatelle with Butter Beans,Tuna, and a Chilli Balsamic Drizzle

“Cooking is an exploration of our own creativity. Always try out new flavour combinations, different cooking techniques, build on textbook recipes, and have fun!” — Shazrinah Shazali

Auguest 2020: Shazrinah Shazali

Hello Everyone! I am a neuroscientist and home-grown chef best known as ShefShaz. I started my entrepreneurial journey from home, supplying healthy lunch meal plans to offices and homes. I then ventured into collaboration with The Healthy Habit in January 2018 to develop menus and co-founded FUEL’D. Just this year I’ve also recently co-opened a cafe in the gardens to work with the garden’s nursery to develop menus and create delicious food from their produce.

Tonight I will be sharing a delicious and healthy dish that is packed with the flavours of roasted garlic, chilli, and balsamic vinegar. You can easily whip up for a quick weeknight dinner if you’re pressed for time!

Roasted Garlic & Onion Tomato Tagliatelle with Butter Beans,Tuna, and a Chilli Balsamic Drizzle Ingredients

PREP TIME 10 MINS | COOKING TIME 20 MINS | SERVES 4

INGREDIENTS

For the tagliatelle

  • 200g dried tagliatelle pasta
  • 1 can (approx 400g) butter beans, drained
  • 1 can (approx. 185g) tuna in olive oil
  • 1 can (approx. 400g) roasted garlic and onion tomato pasta sauce
  • 4 garlic cloves, minced
  • 4 shallots, minced
  • 2 red bird’s eye chillies, minced
  • 1 tsp sweet ground paprika
  • Salt and freshly cracked black pepper, to taste
  • Parmesan cheese (optional)

For the chilli balsamic drizzle

  • 1/4 cup olive oil
  • 2 garlic cloves, minced
  • 1 red bird’s eye chilli, minced
  • 2 tbsp balsamic vinegar
  • 1 tsp fresh parsley, minced
  • Salt and freshly cracked black pepper, to taste

METHOD

  1. Chilli Balsamic Drizzle: In a mortar and pestle, grind the garlic, chilli, and parsley together. Add the olive oil, balsamic vinegar, and season with salt and pepper to taste. Adjust to your liking and set aside.
  2. Roasted Garlic & Onion Tomato Tagliatelle: In a large pot with boiling salted water, cook the tagliatelle pasta according to packet directions or until al dente. Drain and set aside, reserving about half a cup of the pasta water.
  3. In a separate pan over medium-high heat, sauté the minced garlic, shallots, and chilli until golden, fragrant, and translucent, about a minute or two.
  4. Add in the drained butter beans together with the tuna in olive oil and cooked until warmed through. Add the ground paprika and season with salt and pepper to taste.
  5. Stir in the canned tomato pasta sauce plus the half cup of reserved pasta water. Bring to a rapid simmer before adding the cooked pasta. Once done, transfer to individual serving plates.
  6. Top with parmesan cheese if desired, fresh arugula or any other leafy greens you prefer, and drizzle with the chilli balsamic mixture. Serve and enjoy!

Roasted Garlic & Onion Tomato Tagliatelle with Butter Beans,Tuna, and a Chilli Balsamic Drizzle

Roasted Garlic & Onion Tomato Tagliatelle with Butter Beans,Tuna, and a Chilli Balsamic Drizzle

Photo Courtesy & Recipe Copyright © 2020 | Shazrinah Shazali (@shefshaz // @fueld.bn // @glowcafebn)

BON APPÉTIT

– Shazrinah Shazali

myTaste.com

Cayenne Shrimp & Corn Chowder

Cayenne Shrimp & Corn Chowder

Hello Everyone! I’ll keep tonight’s introduction short as I haven’t got much to say really. This Cayenne Shrimp & Corn Chowder is the perfect comfort food for the wintry days, or even just those cold, rainy nights. It’s easy, hearty, spicy, sweet, slightly creamy, incredibly smoky, and packed with tons of flavour!

Cayenne Shrimp & Corn Chowder

Shrimp is a popular choice for any meal of the day. Be sure and get the right sized shrimp for your recipe Medium-size shrimp are best for soups, for example, because they are easier to eat with a spoon. The best part of this dish though is that you can control the heat levels by adding more or less cayenne and/or paprika, to taste. If you ask me though, I’d say the more the better because that smokiness is the true star in this chowder!

As I was cooking, I realised that the dish was turning out to be more on the orange side rather than yellow. Oops! Nevertheless, before we dive into tonight’s recipe, please take the time to check out the original where I drew my inspiration from over on Gimmie Some Oven by Ali.

Cayenne Shrimp & Corn Chowder Ingredients

PREP TIME 20 MINS | COOKING TIME 1 HOUR 25 MINS | SERVES 3-4

INGREDIENTS

  • 500g shrimp, heads removed, peeled, and deveined

For the prawn head soup base

  • Shrimp heads and peels
  • 1.5L water
  • 5 garlic cloves, whole
  • 3 celery stalks, roughly chopped
  • 3 dried bay leaves
  • 2 small red onion, quartered
  • 1/2 tbsp salt
  • 1/2 tbsp whole black peppercorns

For the chowder

  • Shrimp meat
  • 400ml coconut milk
  • 1 bag (200g) frozen corn*, thawed
  • 3 celery stalks, sliced
  • 3 large potatoes, peeled and cut into medium-sized cubes
  • 2-3 garlic cloves, minced
  • 1 small red onion, diced
  • 2 tbsp olive oil
  • 2 tsp cayenne pepper powder
  • 2 tsp smoked paprika powder
  • 1/2 tsp dried thyme
  • 1/2 tsp garlic powder
  • Salt and ground black pepper, to taste
  • Chopped spring onions, to garnish

* Alternatively, you can also use fresh corn or canned corn for this recipe; whichever is readily available for you.

METHOD

  1. Prawn Head Soup Base: Add all the ingredients to a large heavy-bottomed pot. Bring to a boil over high heat. Once boiling, turn the heat down to a slow simmer. Make sure to press down on the heads and peels as it simmers away to extract as much flavour as you can. Leave it to simmer for about 30 to 45 minutes.
  2. Once done, strain the soup base into a large mixing bowl and set aside.
  3. Chowder: In the same heavy-bottomed pot, heat olive oil over medium-high. Add the minced garlic and sauté until golden brown and fragrant, about 30 seconds. Be careful to not burn the garlic. Then add in the diced onions, cooking until they soften, about 1-2 minutes.
  4. Add the sliced celery and potatoes to the pot, together with the spices, herbs and season with ground black pepper. Stir and cook for about a minute before adding in the prawn head soup base to the mixture. Bring to a rapid boil.
  5. Once boiling, turn the heat down to low so that the soup reduces to a slow simmer. Simmer away for 10 to 15 minutes, covered. Slowly add in half of the coconut milk and bring back to a slow simmer. Check and stir occasionally to avoid curdles from forming, cooking for a further 5 to 10 minutes. Taste to check if the chowder needs more seasoning or not.
  6. Add in the prawns and thawed sweet corn. If you’re using fresh corn, add them a little earlier to ensure that they are cooked all the way through. Cook for about 5 minutes and then add in the remaining coconut milk. Turn the heat up to medium-high and bring the chowder up to a rapid boil and cook for a further 5 minutes.
  7. Turn the heat off and equally divide the chowder into individual serving bowls. Top with some freshly chopped green onions and serve immediately while hot. Best with a crusty baguette on the side. Enjoy!

Cayenne Shrimp & Corn Chowder

Cayenne Shrimp & Corn Chowder

BON APPÉTIT

– Ally xx

myTaste.com