Easy Hummus (without Tahini)

Easy Hummus (without Tahini)

Hello Everyone! Tonight, I will be sharing the recipe for the last and third component of my lunchbox series from the National Pack Your Lunch Day (March 10) collaboration that I organised with my foodie friends over on IG. Here’s a quick and easy recipe for Hummus, without the tahini.

The debate over the origin of hummus dates back to the 13th century. The Greeks like to claim it as their own, but based on historical information, hummus likely originated from ancient Egypt. Regardless of where it’s originally from, hummus is enjoyed by all cultures, not just Greek and Middle Eastern. In the Middle East, hummus is usually eaten as a dip, with pita bread. In the West, it is now produced industrially, and is often served as a snack or an appetiser with crackers.

Easy Hummus (without Tahini)

But before we dive into the recipe, what exactly is tahini?

Tahini is a Middle Eastern paste or sauce made from toasted ground hulled sesame seeds, oil, and sometimes salt. The ground sesame seeds are emulsified with oil to create a smooth and creamy seed butter with a pourable consistency. It can be served by itself, as a dip or used as a major ingredient in hummus.

If tahini is a key ingredient in hummus, can we make hummus without tahini?

The answer is, yes!

Unlike all the other ingredients that go into making hummus, tahini is one where you’re likely to not always have on hand. It’s not cheap either if you manage to find them at your local supermarket, but it’s not commonly found here in the Philippines. You can also make your own at home, but if you’re on the same boat as me and want homemade hummus without the fuss of making your own tahini at home, then this recipe is just as good without it!

Because of the other ingredients that are mixed in the making of hummus, it tastes nothing like chickpeas. Instead, it tastes a little garlicky, smoky, and also tangy because of lemon juice. It’s a smooth, creamy paste that melts in your mouth, and the taste of cumin will linger on your tongue.

Easy Hummus (without Tahini) Ingredients

PREP TIME 5 MINS | COOKING TIME — MINS | SERVES 6-8

INGREDIENTS

  • 1 can (425g) garbanzo beans (chickpeas), drained and blanched
  • 1 garlic clove, minced
  • 2 to 4 tbsp water
  • 2 tbsp extra virgin olive oil
  • 1 tbsp lemon juice
  • 3/4 tsp toasted ground cumin
  • 1/2 tsp ground paprika
  • 1/4 tsp salt

METHOD

  1. Add all the ingredients into a food processor. Process until smooth and creamy; if needed, you may add additional water to get your desired consistency. You may also add additional spices, and/or seasoning to suit your taste preference.
  2. Transfer to a serving dish and top with more olive oil, toasted cumin seed, and ground paprika.
  3. Serve with your veggies and crackers of choice. I went with carrots and celery, and multi-seed rice crackers. Enjoy!

Easy Hummus (without Tahini)

BON APPÉTIT

– Ally xx

Follow me on my social media accounts:
Facebook: Amcarmen’s Kitchen
Instagram: @amcarmenskitchen
TikTok: @amcarmenskitchen

myTaste.com

Advertisement
Pad Krapow (Thai Basil Tofu)

Pad Krapow (Thai Basil Tofu)

Hello everyone! This will be the last recipe that I will be sharing for the year on our Flavours of Southeast Asia journey. I’ve had to cut our journey short as the holiday season syndrome took over; basically all I wanted to do was just relax and take twice as long to get the things I needed done, actually done – for example this post! I had it up and ready to go two weeks ago but I hadn’t gotten around to editing the video for this to upload on my TikTok account, not until just this afternoon *cheeky grin*. So yes, our Flavours of Southeast Asia journey for 2021 will be ending here in Thailand tonight. Maybe next year I’ll cover some Vietnamese dishes to make up for this.

Tonight’s recipe is actually something I’ve been wanting to share on the blog for a while after coming across a vegetarian/vegan-friendly version of it on Instagram several times. Pad Krapow is a dish that I have tried many times before, but with chicken or pork (this was way back when I used to eat meat), so when I came across a version of it using tofu to make it meat-free, I knew I had to try this out.

There are three main types of basil used in Thai cooking: Thai sweet basil (ใบโหระพา bai horapa), or just referred to as Thai basil, lemon basil (ใบแมงลัก bai maenglak), and holy basil (ใบกะเพรา bai kra prao). Unfortunately it can be challenging to find holy basil outside of Thailand. You can still make this recipe using other basil variants, just be weary that it won’t have the same vibrant peppery flavour that holy basil has to give this dish its authentic Thai flavour profile.

Pad Krapow (Thai Basil Tofu)

Pad Krapow is usually served with steamed rice, but if you want to make it a little fancier without the extra carbs, serve it in a lettuce leaf and top each with a fried quail egg instead. I’ve also seen versions of pad krapow as a spaghetti dish so feel free to get creative when serving this dish up!

Now, I can’t exactly make it 100% vegan because pad krapow isn’t what it is without a fried egg where the edges of the egg white are crispy and browned to give it an added nutty flavour, but the yolk is still runny and creamy. So here’s an ovo-vegetarian Pad Krapow for you!

Pad Krapow (Thai Basil Tofu) Ingredients

PREP TIME 10 MINS | COOKING TIME 15 MINS | SERVES 2-3

INGREDIENTS

For the sauce

  • 2-3 garlic cloves, finely minced
  • 1 dried red chilli, chopped
  • 1 stalk scallion (white part only), chopped
  • 1 tsp grated ginger
  • 1 tbsp light soy sauce
  • 2 tbsp sweet soy sauce

For the tofu

  • 500g firm tofu, mashed
  • 2 tbsp coconut oil
  • 1 red onion, diced
  • 1 red bird’s eye chilli, chopped
  • 1 stalk scallion (white part only), chopped
  • 100g cremini mushrooms, diced
  • Salt and black pepper, to taste
  • 1 bunch Thai basil leaves

To serve with

  • Crispy Thai basil leaves
  • Fried quail eggs
  • Lettuce leaves

METHOD

  1. Sauce: Add all the ingredients for the sauce in a small bowl and mix well to combine. Set aside.
  2. Pad Krapow: Add a tablespoon of the oil into a large pan over medium-high heat. Cook the mashed tofu until dry. Remove from the pan.
  3. Add the remaining oil and the sauté the red onion, chilli, and scallion until fragrant, about 30 seconds, before adding the cremini mushrooms and cooking for a further 30 to 45 seconds.
  4. Add the mashed tofu back into the pan and mix to combine.
  5. Season with salt and black pepper, to taste, and add the sauce mixture to the tofu. Mix until well combined into the tofu, and cook for about 5 minutes.
  6. Add the Thai basil leaves and mix it into the tofu, then remove from the heat.
  7. Add about a tablespoon or more to a piece of lettuce, then top with a fried quail egg and some crispy-fried Thai basil leaves.
  8. Plate up, serve immediately, and enjoy!

Pad Krapow (Thai Basil Tofu)

Pad Krapow (Thai Basil Tofu)

BON APPÉTIT

– Ally xx

Follow me on my social media accounts:
Facebook: Amcarmen’s Kitchen
Instagram: @amcarmenskitchen
TikTok: @amcarmenskitchen

myTaste.com

Tohu Thoke (Chickpea Tofu Salad)

Tohu Thoke (Chickpea Tofu Salad)

Hello Everyone! This will be the last Burmese recipe that I will be sharing on our Flavours of Southeast Asia journey throughMyanmar for the month of September. Next week we’ll be heading off to one of the remaining three Southeast Asian countries I have yet to cover for the year.

The recipe that I will be sharing tonight is a build on of the recipe for Tohu (Burmese Chickpea Tofu) that I shared last week. We’ll be turning the tohu into a delicious salad known as Tohu Thoke, or in English, Chickpea Tofu Salad. Ever since coming across this recipe, I’ve already made this salad three times this month – yes it’s THAT addicting! Not only does it taste oh-so good, it’s also very easy to put together which makes it ideal for a quick weeknight dinner, provided that you’ve made the chickpea tofu in batches and ahead of time. This salad is also perfect for vegetarians, vegans, and Meatless Mondays.

Tohu Thoke (Chickpea Tofu Salad)

Tohu Thoke is bright, tangy, refreshing, and meant to be eaten cold, therefore perfect for those hot summer days. By mixing both fresh and fried tohu together, you get creamy, silky-smooth, and crispy textures altogether. If you don’t fancy frying, then feel free to skip it. It’s nevertheless delicious with or without the fried aspect or not. Also, the triangle shape for the fried tofu pieces isn’t necessary; cut them into whatever shape you want; same goes for the fresh ones too.

The great thing about this salad is that it gives you the chance to get creative with it. As long as you keep the sour flavours of the tamarind dressing and balance with a hint of sweetness and heat (which is essential to Burmese cuisine), you can bulk up the salad with other vegetables or leafy greens to make it more substantial and a full meal on its own.

Tohu Thoke (Chickpea Tofu Salad) Ingredients

PREP TIME 15 MINS | COOKING TIME 10 MINS | SERVES 4

INGREDIENTS

For the tamarind dressing

  • 5 garlic cloves, finely minced
  • 1 stalk scallion (white part), thinly sliced
  • 2 tbsp tamarind paste
  • 1 tbsp water
  • 4 tsp coconut sugar
  • 2 tsp salt
  • 1 tsp cayenne pepper powder

For the tohu thoke

  • 1 recipe for Tohu (Burmese Chickpea Tofu), fresh and fried pieces
  • 10 cherry tomatoes, halved
  • 3 kaffir lime leaves, thinly sliced
  • 1 red chilli, finely minced
  • Handful of bean sprouts, blanched
  • 3 tbsp sesame oil

To garnish

  • Crispy shallots or garlic
  • Roasted peanuts, crushed
  • Scallions (green part), thinly sliced

METHOD

  1. Dressing: Combine all the ingredients in a small bowl. Mix and adjust the dressing to your taste. Set aside. Extra dressing can keep for up to 1 month in the refrigerator.
  2. Tohu Thoke: Add all the ingredients into a large mixing bowl. Add the tamarind dressing, about a quarter cup for this recipe, and gently toss everything together.
  3. Transfer to a serving plate and top with the garnishes. Serve immediately and enjoy!

Tohu Thoke (Chickpea Tofu Salad)

Tohu Thoke (Chickpea Tofu Salad)

BON APPÉTIT

– Ally xx

myTaste.com

Tohu (Burmese Chickpea Tofu)

Tohu (Burmese Chickpea Tofu)

Hello Everyone! This is probably one of the best food discoveries that I have come across from the many years of researching for Amcarmen’s Kitchen and experimenting in the kitchen.

Tohu, or in English, Burmese Tofu, is made using chickpea (besan) flour, mixed with water, a little salt, and if you want, turmeric powder, mainly to give it a more vibrant yellow colour. The mixture is then heated and stirred constantly, until it reaches a thick and creamy consistency. It is then transferred into a tray and allowed to set.

The end result is matte yellow in colour, jelly-like but firm in consistency, therefore it does not crumble when cut or sliced. It is basically the best of both worlds between silken tofu and egg tofu – you get the silkiness of the silken tofu and firmness from the egg tofu in this Burmese tofu. The best part? It is dairy, egg, and soy-free; perfect for vegetarians, vegan, and/or anyone with soy allergies!

1986

Additionally, chickpea flour is high in protein, fiber, and micronutrients, while being low in carbohydrates and calories. Half a cup of chickpea flour contains an impressive 11 grams of protein, 5 grams of fiber, and nutrients like folate, iron, magnesium, and zinc. Chickpea flour is also heart-healthy, making this Burmese tofu oh-so healthy!

In Myanmar, the tofu can be eaten fresh in a salad, deep fried to make tofu fritters, or sliced very thinly and dried to make crackers for deep frying. It is also used in curries as well for added protein if meat or poultry is unaffordable (especially amongst the poorer population).

I still have some besan flour on hand after making this recipe, so I can definitely say that I will be making more of these delicious Burmese tofu and experimenting them in certain dishes outside of Burmese cuisine!

Tohu (Burmese Chickpea Tofu)

PREP TIME 1 HOUR | COOKING TIME 8 MINS | SERVES 2-3

INGREDIENTS

  • 1 cup chickpea flour (also known as garbanzo bean flour or besan flour)
  • 1 tsp salt
  • 1/4 tsp ground turmeric (optional)
  • 3 cups water, divided
  • Oil

METHOD

  1. Lightly grease an 8-in x 8-in baking dish with a bit of neutral flavoured oil.
  2. Add the chickpea flour in a medium-sized mixing bowl together with the salt and, if using, the ground turmeric as well. Whisk to combine.
  3. Add 1 and a half cups of water to the flour and whisk until smooth.
  4. Add the remaining 1 and a half cups of water into a small saucepan and bring to a boil over high heat.
  5. Once boiling, reduce the heat to medium-high and slowly pour the chickpea flour mixture into the boiling water while continuing to whisk.
  6. Whisk over the heat until the mixture becomes really thick and glossy. This should take about 8 minutes in total.
  7. Once done, immediately pour the mixture into your prepared baking dish and leave it to cool down at room temperature for at least an hour. The longer you let it sit, the more water will drain out of the tofu and therefore firmer in texture.
  8. Cut into your desired shapes and sizes, depending on how you will use it. Enjoy it as it is, deep fried, or use it as a source of protein for other dishes.

Tohu (Burmese Chickpea Tofu)

Stay tuned next week to see what Burmese dish I will make with this Burmese Tofu!

Note: You can store the tofu in an airtight container and in the fridge for up to 3 days.

Tohu (Burmese Chickpea Tofu)

BON APPÉTIT

– Ally xx

myTaste.com

Auguest 2021: Brendon D'Souza

Banana Peel Curry with Coconut Rice & Pickled Red Onion

“When someone cooks with love, the meal deserves to be celebrated. You get dressed, choose a killer playlist, and pour a glass of wine then sit down to share the magic with your loved ones.” — Brendon D’Souza

Auguest 2021: Brendon D'Souza

Hello Everyone! How’s life? It’s Brendon D’Souza from CookWithBrendon.com here. By day I work in sales and around the clock I spend the countless hours we have in lockdown doing my favourite thing – cooking for my loved ones and developing recipes for my blog.

After 6 years at my former blog Brendon The Smiling Chef, I realised there might be a space for online cooking classes and social get-togethers for like-minded foodies. After running a number of free workshops with my colleagues and friends I’m so ready to take it to the next level and open up the classes to the world. Let me know if you would like to join in the fun!

Now more than ever is the perfect time to try and find clever little ways to use up leftover bits and pieces you find in the kitchen. This curry will allow you to do exactly that, and is inspired by the flavours of Laos, Thailand, India, and Australia altogether.

Banana Peel Curry

By no means do I claim to be the creator of this dish. As I’m sure you’ve seen over your socials it gained cult status recently when Nigella Lawson wrote about it in her 2020 TV series and cookbook Cook Eat Repeat. It’s such a great way to transform something that would otherwise be destined for the bin. I was surprised to learn that banana skins are packed full of potassium so I’m hoping it’s doing that extra bit of good for my insides too.

I’ve also taken the liberty to use up some leftovers for this dish including a batch of leftover marinara sauce and some roast sweet potatoes. So you can absolutely feel free to swap out some of the ingredients for others which you may have at hand. Don’t forget to tag #CookWithBrendon so I can see your creations. Let’s cook!

Banana Peel Curry Ingredients

PREP TIME 30 MINS | COOKING TIME 30 MINS | SERVES 2-3

INGREDIENTS

  • 2 ripe bananas
  • 2 medium red onion, sliced
  • 1/2 tbsp castor sugar
  • 1/4 cup rice wine vinegar
  • 1/2 cup basmati or jasmine rice
  • 1 can coconut milk
  • 1 tsp ground cumin
  • 1 tsp ground coriander
  • 1 tsp ground turmeric
  • 1/2 cup canned tomatoes
  • 1/2 tsp brown sugar
  • 1/2 cup diced sweet potato (or use regular potato)
  • 1/2 cup frozen peas (or any other fresh or frozen green veg)
  • 1 bunch coriander

METHOD

Start this recipe 1 hour before serving time.

  1. Banana Peel: Peel the bananas. Slice off the tops and tails.*
  2. Place the banana peels into a large heatproof bowl with 1/2 tbsp salt. Cover with boiling water and leave to soak for 30 mins. This helps to tenderise the skins and they will change in colour from yellow to brown which is totally fine.
  3. Pickled Onion: While the bananas are soaking. Finely slice 1 onion and place into a glass or ceramic bowl with the rice vinegar, castor sugar and 1/2 a tablespoon of salt. Give it a stir and then set aside. Repeat every 10 minutes or so while you’re making the curry and the onions will turn a vibrant pink and tenderise by the time you’re ready.

Banana Peel Curry with Coconut Rice & Pickled Onion

  1. Remove the banana peels from the soaking liquid** and pat dry with a paper towel. Slice the peels finely into batons.
  2. Coconut Rice: Place the rice into a medium heatproof saucepan. Cover with enough cold water to reach 2-cm above the level of the rice, then add the coconut milk. Place over a high heat and bring to the boil. When it is bubbling, immediately turn the heat off and pop on a tight fitting lid and let it sit there***. The rice will continue to absorb any liquid while you prepare the curry.
  3. Banana Peel Curry: Heat a medium saucepan over a low heat. Add 1 tablespoon of sunflower oil, the cumin, coriander powder, and turmeric. Cook, stirring for 1-2 minutes to toast the spices, and then add the marinara sauce****.
  4. Add 1 tablespoon of crushed ginger and the banana skins, and cook, stirring over medium heat for 5 minutes.
  5. Add 1/2 a cup of vegetable stock or water and bring to the boil. Cook for a further 5 minutes or until the banana peels are tender.
  6. Add the sweet potato, frozen peas, coconut milk, and chopped coriander stems, and cook for another 2-3 minutes or until the veggies are cooked through. Finally, add the coconut milk and stir until combined.
  7. Serve with the coconut rice and pickled onion. Enjoy!

Banana Peel Curry with Coconut Rice & Pickled Onion

Notes:

  • *These can be composted. Save the banana flesh for another use (I’m thinking everyone’s favourite lockdown banana bread!).
  • **The minerals found in the banana peels such as potassium, phosphorus and calcium, will leach into the water. You can then use this liquid fertiliser for your plants.
  • ***I use my Mum’s absorption method trick to cook my rice and it works every time!
  • ****I’ve used 1/2 a cup of leftover marinara sauce with onion in it but you could easily substitute for 1 small onion and 1/2 a cup of crushed tomatoes.

Give this recipe a try and if you do be sure to tag #CookWithBrendon in your posts when you do!

I’m trying really hard to grow @cookwithbrendon on Instagram and now TikTok so if you have a second to visit and give both a follow I’d be so grateful.

Banana Peel Curry with Coconut Rice & Pickled Onion

Photo Courtesy & Recipe Copyright © 2021 | Brendon D’Souza (@cookwithbrendon)

BON APPÉTIT

– Brendon D’Souza

myTaste.com

Auguest 2021: Karina Pineda

Ginataang Kalabasa (Squash with Coconut Milk)

“Take off on a food journey that is both healthy and happy.” — Karina Pineda

Auguest 2021: Karina Pineda

Hello Everyone! Karina here again returning for the second time on Amcarmen’s Kitchen! When Allison had invited me to join this year’s Auguest series, she told me that the theme would be Flavours of Southeast Asia. She also gave me the liberty to choose from a list of available countries, and fortunately, the Philippines still had an available slot and I grabbed it immediately. Aside from being Filipino, I’ve always appreciated Philippine cuisine — from the variety of flavours it has to offer, to the culture and history it’s rich in. I want to celebrate my country through my entry.

My chosen dish is Ginataang Kalabasa (Squash with Coconut Milk). I also put a twist to the traditional recipe by adding ground tofu. Following the guidelines, I decided to make something vegetarian to show that Filipino food goes beyond adobong manok, lechon kawali, balut, and other meat dishes. We, Filipinos, actually have a number of equally delicious vegetable meals!

Ginataang Kalabasa (Squash with Coconut Milk) Ingredients

PREP TIME 10 MINS | COOKING TIME 20 MINS | SERVES 2-3

INGREDIENTS

  • 500g kalabasa (squash), cubed
  • 2 to 2 1/2 cups of fresh gata (coconut milk)
  • 1/4 block of firm tofu, ground
  • Garlic cloves, minced
  • Ground black pepper (to taste)
  • Cooking oil

METHOD

  1. Mince the garlic cloves and mash the tofu until it resembles ground meat/tofu scramble.
  2. Sauté the minced garlic cloves in a deep pan until slightly roasted.
  3. Add the kalabasa (squash) cubes and cook for about 2-3 minutes.
  4. Pour the gata (coconut milk) into the pan, and sprinkle with some ground black pepper to taste.
  5. Let it boil until the kalabasa is soft and cooked through, no more than 15 minutes. Stir occasionally and allow the coconut milk to thicken.
  6. While waiting for the mixture to boil, cook the ground tofu in a separate pan until slightly roasted.
  7. Once done, add the cooked ground tofu to the kalabasa and gata.
  8. Transfer the ginataang kalabasa to a serving bowl and enjoy on its own or paired with your favorite ulam (viand)!

Ginataang Kalabasa (Squash with Coconut Milk)

Photo Courtesy & Recipe Copyright © 2021 | Karina Pineda (@wanderlittlegirl)

BON APPÉTIT

– Karina Pineda

myTaste.com

Mee Goreng Mamak (Mamak-style Stir-Fried Noodles)

Mee Goreng Mamak (Mamak-style Stir-Fried Noodles)

Hello Everyone! We’re venturing forward on our Flavours of Southeast Asia journey through Malaysia with a dish that’s very close to my heart. Now, you probably already know that there are countless recipes for mee goreng (fried noodles), that vary depending on its country or region of origin, but tonight in particular, I will be sharing a Mamak-style mee goreng dish; a staple of ours that we would always order when my family and I were at our favourite roti canai eatery.

Mee Goreng Mamak (Mamak-style Stir-Fried Noodles)

Mamak is a local word used to describe people of Indian-Muslim origins in Malaysia; and thus with these two cultures merging together created a unique dish known as Mee Goreng Mamak, or in English, Mamak-style Stir-Fried Noodles. It is normally made with fresh egg noodles, boiled potatoes, fried tofu, and Chinese greens of choice that is tossed in a delicious sauce, but you can also bulk it up with other proteins such as chicken, squid, or seafood. Pork and beef are typically avoided for obvious reasons.

If you’re looking for a way to change up your weeknight noodle meals, then this is a recipe you should definitely try out. It’s quick, easy, and made with ingredients that you can easily source at your local market or grocer. Mee Goreng Mamak is a delicious blend of spicy, savoury, sweet, tangy, smoky (from all that wok hay), and sticky flavours in a single dish. The recipe that I will be sharing tonight is perfect for ovo-vegetarians.

Mee Goreng Mamak (Mamak-style Stir-Fried Noodles) Ingredients

PREP TIME 15 MINS | COOKING TIME 30 MINS | SERVES 4

INGREDIENTS

For the sauce

  • 1/2 cup water
  • 2 tbsp ketchup
  • 2 tbsp light soy sauce
  • 1 tbsp curry powder
  • 1 tbsp dark soy sauce
  • 1 tbsp sambal paste
  • 2 tsp white granulated sugar

For the noodles

  • 2 x 500g packs fresh yellow noodles, washed and drained*
  • 4 pcs firm tofu, fried and cut into chunks
  • 2 medium-sized cooked potatoes, peeled and cut into chunks
  • 2-3 garlic cloves, minced
  • Spring onion
  • 2 large free-range eggs
  • Handful of celery leaves
  • 1/2 cup bean sprouts
  • Oil, for cooking
  • Chinese cabbage, blanched
  • Red pepper, sliced
  • Lemon wedges, optional

*Fresh yellow noodles are usually oiled. Rinse it in cold water to loosen up the threads and remove part of the oil, or you can quickly blanch it in hot water and drain before using.

METHOD

  1. Sauce: In a medium-sized bowl, mix all the ingredients together until well combined. Set aside until ready to use.
  2. Mee Goreng Mamak: Add oil in a large pan over high heat. Add the garlic and white/light green part of the spring onion and sauté until the garlic is lightly golden and fragrant, about 30 seconds.
  3. Add the yellow noodles and fry for about a minute or two. Push the noodles to the side and add the eggs. Let the eggs cook a little to set and then mix it into the noodles.
  4. Add the fried tofu, cooked potatoes, celery leaves, and the sauce mixture to the noodles. Toss until the noodles are evenly coated with the sauce, frying for about 3 to 4 minutes. Try not to mix too hard or it will break up the noodles into tiny threads.
  5. Add the remaining spring onion and bean sprouts. Give it another quick toss, about a minute or so for the bean sprouts to cook.
  6. Once done, transfer to individual serving plates and serve with red peppers and Chinese cabbage (or any greens of your choice). Garnish with a squeeze of fresh lemon juice and enjoy immediately while hot!

1933

1934

BON APPÉTIT

– Ally xx

myTaste.com

Tahu Telur (Indonesian Tofu Omelette)

Hello Everyone! So if you saw my recipe yesterday for Homemade Egg Tofu, you’ll know that I’m back with a recipe that uses them in the dish that I will be sharing tonight.

Back in my very first post in May when we first landed in Indonesia for our Flavours of Southeast journey, I mentioned that there was this Indonesian restaurant in Brunei that my family and I would always go to on a weekly basis. One of the dishes that we would always order is Tahu Telur, or in English, Indonesian Tofu Omelette. It is an inexpensive and humble dish that originated from East Java, and although meatless, it is packed with protein from the eggs and tofu, making it perfect for those on a ovo-vegetarian diet. The dish may seem intimidating in terms of its preparation, but trust me, it doesn’t require much skill and is actually easy to put together. It’s also worth it!

Tahu Telur (Indonesian Tofu Omelette)

What makes this tahu telur dish stand out from other omelettes out there is its tower-like structure. You can also find flat versions of this dish, but it’s not as exciting and dynamic as a vertical omelette in my opinion. To achieve this tower, you’ll need a ring mold to cook the eggs and tofu in. If you do not have a ring mold, you can DIY one from a tin can that is at least 4 inches in diameter and 5 inches high. This is what I did when I could not seem to find ring molds in stores; and it worked just as good!

When fried the eggs are fluffy and crispy on the outside, but soft and moist on the inside when you cut through it due to the tofu that’s mixed in it. You can top it with various fresh vegetables of your choice to add a different crunch that’s refreshing to the palette. The dish is then brought together with a sweet and spicy peanut sauce that you can easily adjust to suit your liking.

1907

PREP TIME 15 MINS | COOKING TIME 20 MINS | SERVES 4

INGREDIENTS

For the tauhu telur

  • 5 large free-range eggs
  • 2 tbsp tapioca flour
  • 1 tsp salt
  • Homemade egg tofu*, deep fried
  • Cooking oil

*I used a quarter serving of this recipe, and cut them into 8 rectangular pieces.

For the peanut sauce

  • 5 garlic cloves, peeled
  • 3 red chillies
  • 1 cup hot water
  • 3 tbsp kicap manis
  • 2 tbsp coconut sugar
  • 1 & 1/2 tbsp peanut butter

To garnish

  • Blanched bean sprouts
  • Fresh red chillies, chopped
  • Spring onion

METHOD

  1. Peanut Sauce: In a small pan, fry the garlic cloves and chillies until soft and browned. Add all the ingredients into a blender and blend until combined.
  2. Transfer the mixture to a small saucepan and cook over medium heat until reduced and slightly thickened. You may want to add more kicap manis at this point to darken the colour of the sauce. Once done, remove from the heat and set aside. Reheat later if needed.
  3. Tauhu Telur: Beat the eggs, tapioca flour, and salt together until well combined. Dissolve as much of the flour as possible.
  4. In a large frying pan, heat over medium-high, enough oil so that you are able to scoop up using a ladle, I used about 6 to 8 cups. Place the ring mold in the center of the pan and ladle the hot oil over the mold to prevent sticking while cooking.
  5. Pour about a third of the egg mixture into the ring mold and let it cook for about 30 to 45 seconds. Add half of the deep fried egg tofu to the eggs and cook for a further 30 seconds, ladling hot oil into the mold.
  6. Add another third of the egg mixture and top with the remaining egg tofu. Ladle more hot oil into the mold, and then add the remaining egg mixture on top.
  7. Reduce the heat down to medium and cook by continuously ladling hot oil on top of the mixture. Remove the oil if it stops sizzling and pour hot oil on top, repeating until golden brown in colour, about 4 to 5 minutes, or until the egg is cooked enough that it can hold its shape upright.
  8. Using a knife, gently scrape the inner side of the mold to loosen the egg. Use tongs to slowly and gently pull the mold away from the egg. Continue to cook until the sides are golden brown in colour.
  9. Once done, remove from the pan and shake off any excess oil. Transfer to a plate lined with paper towels to soak up any more excess grease.
  10. Transfer to a serving plate with the peanut sauce, and top with the blanched bean sprouts, fresh chillies, and spring onion. Enjoy!

Tahu Telur (Indonesian Tofu Omelette)

1909

BON APPÉTIT

– Ally xx

myTaste.com

Nasi Goreng (Indonesian Fried Rice)

Nasi Goreng (Indonesian Fried Rice)

Hello everyone! Oh where did the days go; how is it that we’re already into the fifth month of 2021? Well, as you all know, a new month means we’re packing up and saying goodbye (for now) to the Philippines to venture on to our next country on our Flavours of Southeast Asia journey.

Last year, I was looking forward to travelling to Indonesia, Bali to be exact, for the very first time. I had my itinerary all planned out, jam-packed with activities down to the last minute. I signed up for an authentic cooking class that included a market and Balinese rice terrace tour. All of that was unfortunately cancelled due to the global pandemic. Our family trip was supposed to be in early April of 2020, and by mid-March our country had already gone into a national enhanced community quarantine that is still being implemented to this present day. Yes, since the later part of 2020 did quarantine restrictions ease, but we’re nevertheless, still in quarantine.

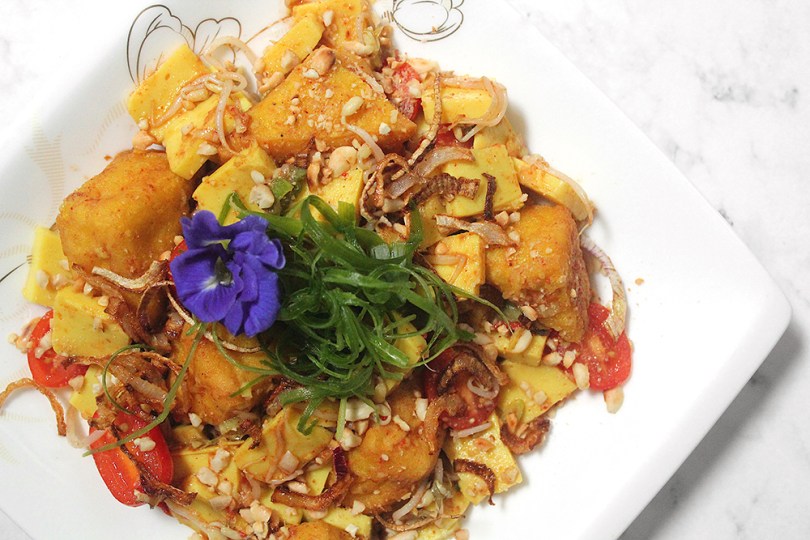
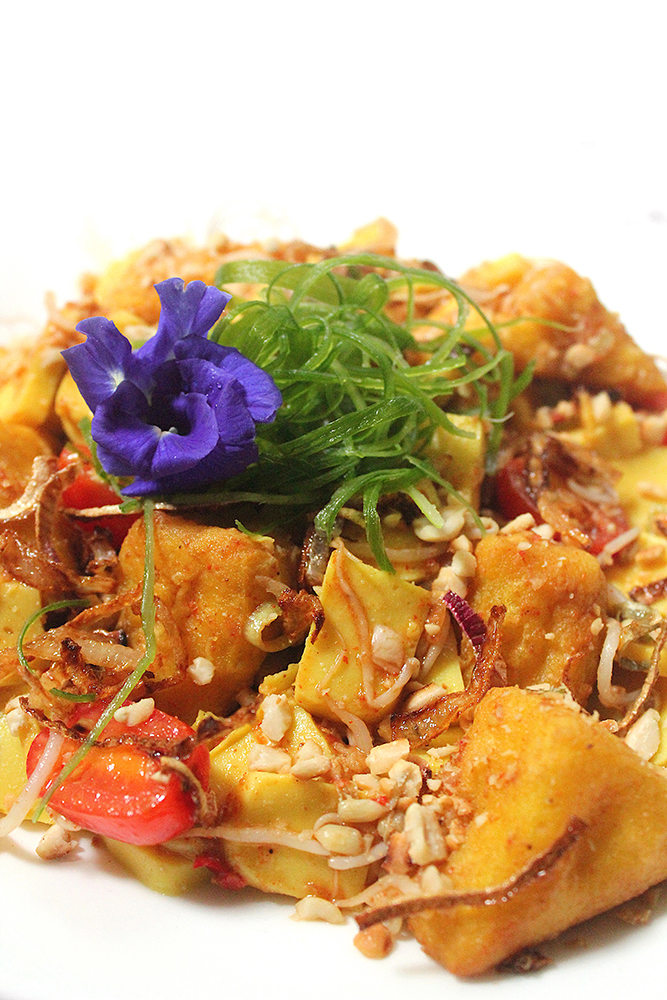
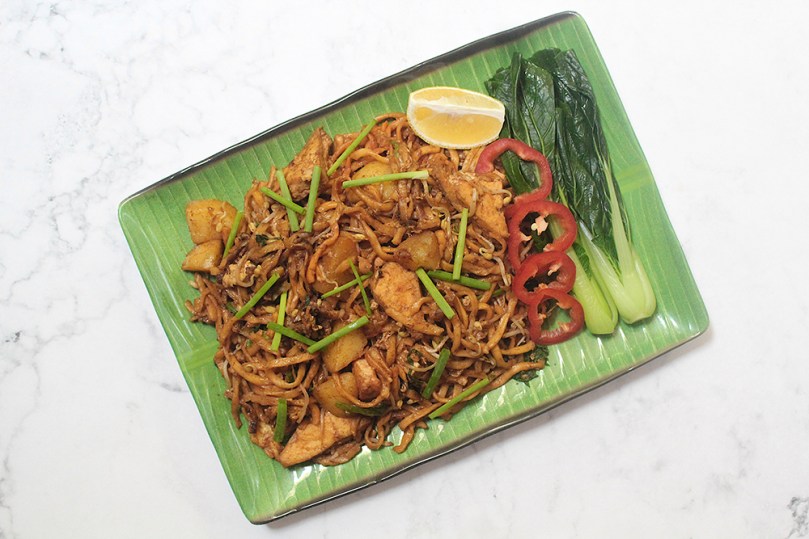
Even if I haven’t had the chance to travel to Indonesia just yet, I’ve experienced authentic Indonesian cuisine almost on a weekly basis when I was living in Brunei. Every Saturday evening after attending anticipated mass, we (my Mom, my sister, and myself) would go to our favourite Indonesian restaurant and order our favourite dishes such as nasi goreng, ayam penyet, satay, and tahu telur to name a few. I even had Indonesian food regularly when I was living in Australia; one place in particular on Kensington street, near UNSW’s main campus, that I would line up for their delicious ayam or ikan bakar (grilled chicken/fish).

Nasi Goreng (Indonesian Fried Rice)

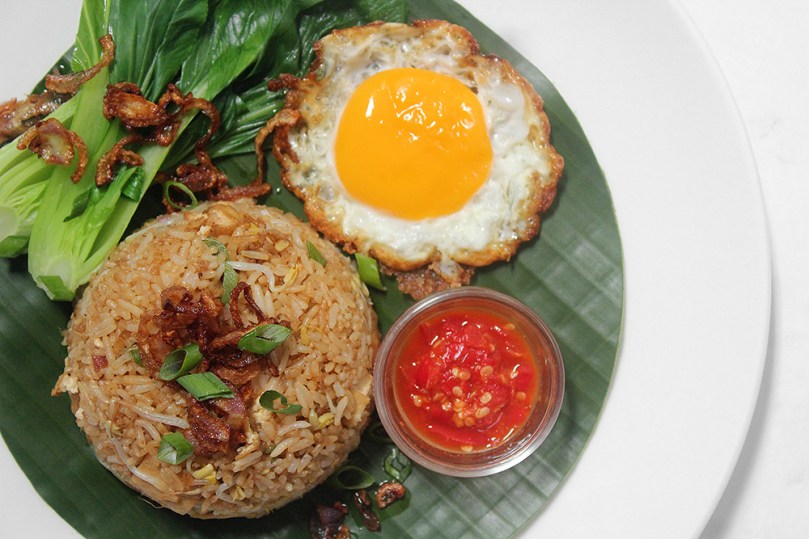
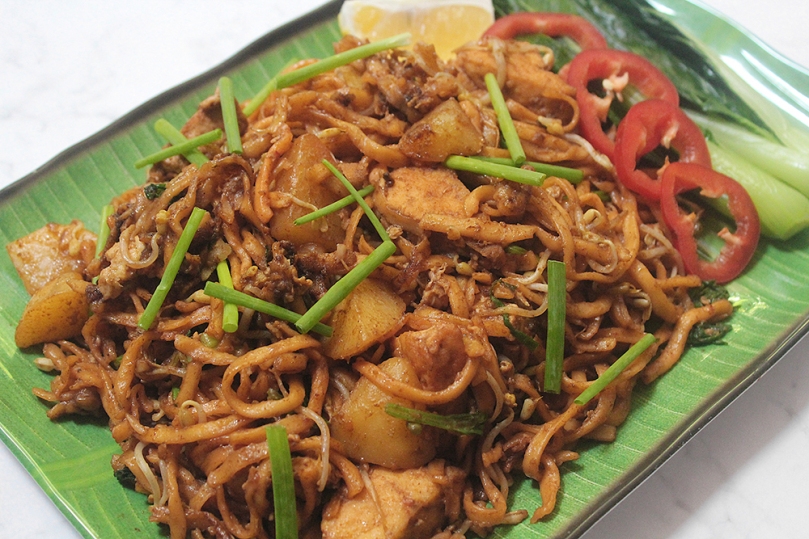
Tonight, I will be sharing a classic favourite, nasi goreng. Nasi Goreng is considered the national dish of Indonesia, and literally translates to fried rice . It is a rice dish cooked with meat or seafood, and vegetables, however, there is no single defined recipe for it. Its composition and preparation varies greatly from household to household in all regions where the dish is native to. The key distinction though to nasi goreng is its smoky aroma, from the wok hay* as it’s fried, and the caramelised yet savoury undertones of flavour from the kecap manis**.

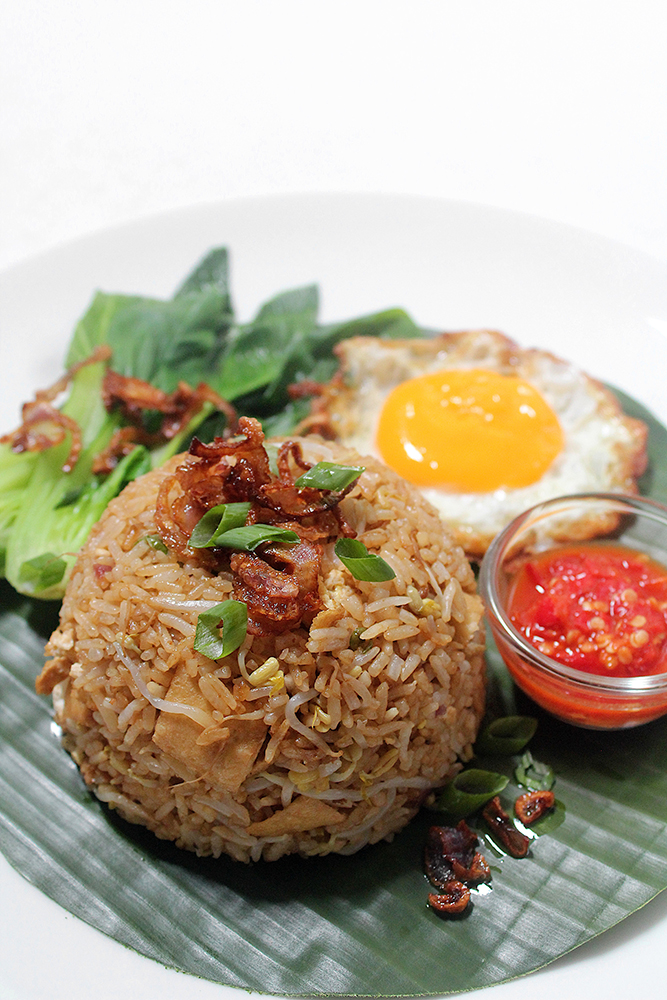
The version of nasi goreng that I will be sharing tonight is actually called Nasi Goreng Santri, which is vegetarian fried rice. While there are no specific vegetables that you can use to make up an authentic Indonesian vegetarian fried rice, I decided to make mine with tofu and bean sprouts. Feel free to bulk it up with your choice of vegetables to your liking. You can’t skip the fried sunny side up egg as nasi goreng is traditionally served with it to make it a complete meal.

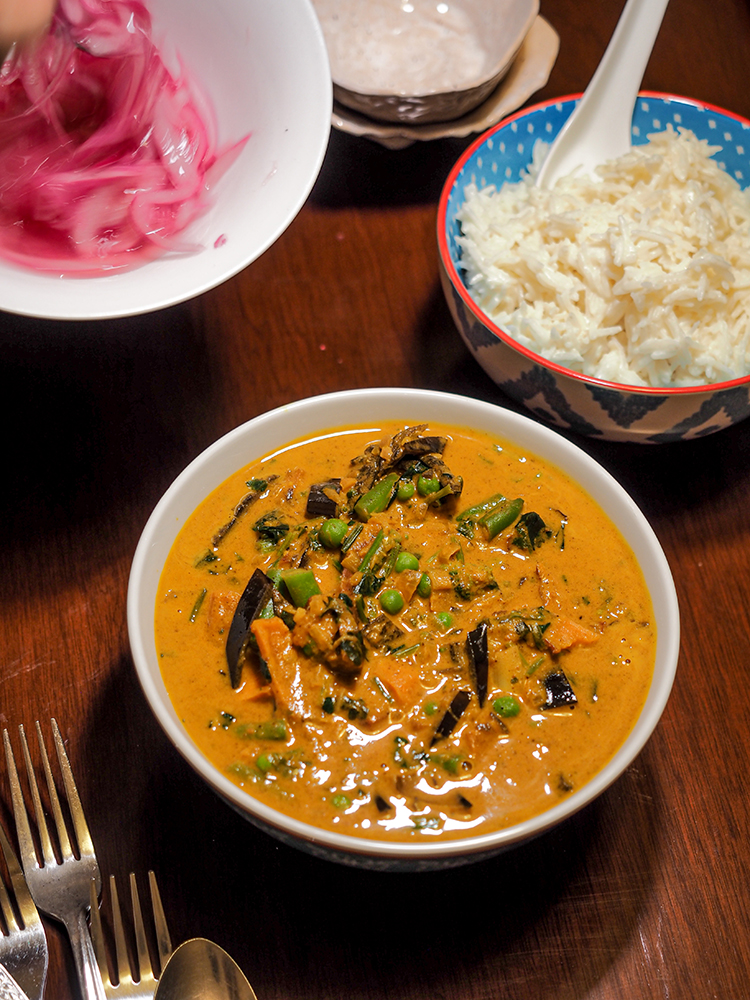
You also cannot serve nasi goreng without a sambal of some sort on the side. I decided to make a simple sambal oelek which is a raw Indonesian chilli paste made of red chillies, vinegar, and salt. The word sambal is an Indonesian word referring to a sauce made primarily with chili peppers, while oelek refers to a mortar and pestle. Therefore, sambal oelek is Indonesian for a chilli sauce ground with a mortar and pestle.

Nasi Goreng (Indonesian Fried Rice) Ingredients

PREP TIME 20 MINS | COOKING TIME 25 MINS | SERVES 4

INGREDIENTS

For the nasi goreng

  • 1 & 1/2 tbsp cooking oil
  • 3 garlic cloves, finely minced
  • 2 red bird’s eye chillies, finely chopped
  • 1 red onion, finely minced
  • 1 stalk scallion (white part only), chopped
  • 3 pcs firm tofu, fried and cut into cubes
  • 1 cup bean sprouts
  • Salt & freshly cracked black pepper, to taste
  • 3 cups cooked white rice, day old and cold
  • 2 tbsp kecap manis

If you can’t find kecap manis at your local grocers, or don’t have any readily available in your pantry, you can simply make your own! Just combine 1/4 cup ordinary soy sauce and 1/4 cup brown sugar over medium heat. Bring to a simmer and reduce until it becomes maple syrup-like in consistency. As it cools, the mixture will thicken more.

For the sambal oelek

  • 10 pcs red bird’s eye chillies, stems removed
  • 1 tbsp white vinegar
  • 1 & 1/2 tsp salt

To serve with

  • Bok choy, blanched
  • Crispy fried shallots/onions
  • Sambal oelek
  • Scallion (green parts), chopped
  • Sunny side up egg

METHOD

  1. Sambal Oelek: Using a mortar and pestle, pound the red chillies they start to break down. Make sure not to pound too much; leave the chillies a bit coarse, not a fine paste.
  2. Add the vinegar and salt, and using a spoon, mix together until the salt has dissolved. Transfer to a small serving bowl and set aside until ready to serve.
  3. Nasi Goreng: Add oil to a large pan over high heat. Once hot, add the minced garlic and red chillies to the pan and sauté until the garlic is lightly golden and fragrant, about 30 seconds. Follow with the onions and scallions, continuing to sauté for a further 30 seconds.
  4. Add the fried tofu and sauté for about a minute or two before adding the bean sprouts. Season with salt and freshly cracked black pepper, to taste. Cook for a further minute or two.
  5. Add the cooked rice and mix well, breaking up any remaining clumps of rice. Add the kecap manis and cook, stirring constantly to ensure that every single grain of rice is coated with the sweet soy sauce and start to caramelise. Cook for 10 minutes.
  6. Once the rice is done, plate up and top with garnishes of choice, I went with crispy fried shallots/onions, and green scallions. Serve with the sambal oelek, blanched bok choy, and sunny side up egg***. Enjoy!

Nasi Goreng (Indonesian Fried Rice)

Notes:

  • *‘Wok hay’ is Cantonese phrase used to describe a particular essence and aroma that is created in a dish when authentic stir-frying is performed. ‘Hay’ means energy or breath; therefore, ‘wok hay’ means “the energy or breath of a wok”.
  • **Kecap manis is an Indonesian sweet soy sauce. Compared to mildly salty regular soy sauce, the sweet soy sauce has a slightly thicker consistency, and tastes much sweeter.
  • ***Omit the egg if you want to make this dish vegan-friendly.

Nasi Goreng (Indonesian Fried Rice)

BON APPÉTIT

– Ally xx

myTaste.com

Dr. Seuss’ Green Eggs and No Ham

Dr. Seuss’ Green Eggs and No Ham

Hello Everyone! I’ve been wanting to do my own take on Dr. Seuss’ Green Eggs and Ham for Amcarmen’s Kitchen ever since last year. I was super excited when I realised that I could tackle this idea for this month, but then quickly questioned, what am I going to do about the ‘ham’ part of this recipe?

For those of you who don’t know me personally, or if you haven’t picked it up from the recipes I have been sharing since the beginning of the year, I’ve been slowly cutting meat out from my diet. Since the second half of last year, I’ve managed to cut both beef and pork from my diet (with very rare relapses – I can’t avoid a good beef kaldereta during work events). I tried cutting out chicken from my diet this year too and attempted a pescatarian diet, but that didn’t quite work out. Nonetheless, I’ve strictly kept the recipes I’ve been uploading on the blog to pescatarian, vegetarian, or vegan.

Dr. Seuss’ Green Eggs and No Ham

Mini tangent aside and back on to tonight’s recipe; after having spent countless hours on the Internet searching for how I could adapt Dr. Seuss’ Green Eggs and Ham without the ham, I came across Jenny’s Green Eggs, No Ham over on Jenny Can Cook.

Breakfast can’t get any healthier than this! This recipe for Dr. Seuss’ Green Eggs and No Ham has three servings of green vegetables to boost your immune system, combined with the fluffiest, moist, flavorful, and evenly cooked scrambled eggs for protein – all in one single meal!

The best thing about this recipe is that you can get creative with the greens. Choose what’s cheap and local to your area; what’s in season and most importantly, your favourite greens to eat!

Dr. Seuss’ Green Eggs and No Ham Ingredients

PREP TIME 10 MINS | COOKING TIME 10 MINS | SERVES 3

INGREDIENTS

  • 6 large free-range eggs
  • 1 red bird’s eye chilli, sliced
  • 1 small red onion, diced
  • 1 cup kale leaves, roughly chopped
  • 1 cup spinach leaves
  • 1/2 cup broccoli, roughly chopped
  • 4 tbsp milk
  • 2 tbsp olive oil
  • 1 tbsp sesame oil
  • Salt and freshly ground black pepper, to taste

METHOD

  1. In a small bowl, beat the eggs together with the sesame oil and milk. Season with a touch of salt and freshly ground black pepper then set aside.
  2. In a large non-stick frying pan, heat 1 tablespoon of the olive oil over medium-high. Add the diced onion and cook until soft, about 1 minute. Then add in the broccoli and cook for a further minute or two. Season with a touch of salt and freshly ground black pepper.
  3. Add in the kale leaves and give it a good mix before adding the spinach leaves in. Reduce the heat down to low and cover for about a minute to allow the leaves to wilt. Once wilted, transfer the cooked vegetables to a plate or bowl.
  4. Bring the heat back up to medium* and in the same frying pan, add the remaining olive oil. Pour the eggs into the pan and using a rubber spatula, begin pulling the cooked outer edges in towards the centre of the eggs. Uncooked eggs will flood the area you just pulled back while the cooked scrambled eggs will gather at the centre of the pan.
  5. When the eggs are about halfway cooked through, add the cooked vegetables back to the pan and continue pulling the uncooked eggs to the center of the pan.
  6. Turn off the heat when the eggs are 90% cooked. And transfer to a serving plate immediately. Perfectly cooked scrambled eggs are moist but not runny, with no crisp or brown edges.
  7. Garnish with some sliced red chillies, freshly ground black pepper, and a sprinkle of ground smoked paprika. Serve immediately with some toasted bread on the side if you desire. Enjoy!

Dr. Seuss’ Green Eggs and No Ham

* It’s important to leave the heat somewhere between medium-low and medium, so that it warms up but doesn’t get too hot. If the pan is too hot, the eggs will cook too quickly and become rubbery.

** If you plan on adding cheese to your eggs, add it in at this point. This will allow ample time for the cheese to melt and integrate into the eggs. Make sure that the cheese is shredded/prepared and set aside so you can add it to the eggs quickly.

Dr. Seuss’ Green Eggs and No Ham

BON APPÉTIT

– Ally xx

myTaste.com