Hello Everyone! Firstly, I would like to apologise for getting this post up TWO days late (compensating by posting earlier in the day today). I’ve been hibernating for the past few days after mentally and physically tiring days and nights of work. I don’t want to get into a long winded description of why since I’m not a 100% in the mood to write, so I’ll just hop on forward to tonight’s recipe. Hopefully I’ll be in a better mood to write next week. Apologies once again! It’s nothing serious by that way, it just that while I’m writing this, my mind seems to doze off and my eyelids just keep getting heavier and heavier, making it hard for me to concentrate even the slightest bit.
But of course I won’t just leave you guys with a less than mediocre introduction – it is a new month after all on Amcarmen’s Kitchen and I have yet to introduce to you the theme for this month! So just a little bit of inside information, probably about a year ago, I saw these beautifully colourful sweet potato toasts in a Coles Magazine spread and instantly knew I had to give these a go. Fast forward a year (or more) later, and I’ve finally decided to whip up Three Savoury Sweet Potato Toasts for you. They are definitely not as aesthetically pleasing as those you’d find on Pinterest though so don’t hate it these toasts look… Underwhelming. I think my toppings were WAY too massive for the potato slices I had, hence an imbalance proportions. I don’t know – the photographs just look weird to me *insert cold sweat emoji*.
So yes, as you can already see, I’m a bit late on the then hot and trendy sweet potato toasts, but that won’t stop me from sharing them with you guys. Sweet potato toast is basically toast, but without the toast. Skeptics question how can it be called toast without the actual toast? Well, if you’re gluten-free, want a little more fiber in your diet, or are tired of bread for toast, then sweet potatoes are a great option as a substitute. In addition, sweet potatoes contain beta-carotene that gets converted into vitamin A in our body – just like carrots and other orange-coloured fruits and vegetables. Vitamin A is important for hair, skin, nails, vision, and plays a key role in immune function.

Preparing your Sweet Potato Toasts
PREP TIME 10 MINS | COOKING TIME 20 MINS* | MAKES 5 SLICES**
*Baking time time will vary depending on the size and thickness of your sweet potato slices.
**Or how-ever-so-many slices you can get from a single sweet potato
INGREDIENTS
- 1 large orange sweet potato, wash and dried
METHOD
- Preheat oven to 180C (350F or gas mark 4). Place a wire rack on a large rimmed baking sheet.
- Trim both ends from the sweet potato using a knife and slice them lengthwise into 1/4-inch thick slabs using a knife or mandolin slicer.
- Arrange the slabs in a single layer on the wire rack and bake for about 15-20 minutes or until the potatoes are tender, but not fully cooked.
- Remove the potatoes from the oven and allow them to cool on wire rack completely before transferring to a storage container. They can be stored in the fridge for up to 4 days.
When it’s go-time simply add the desired number of slices to your toaster and toast away. Setting it on the highest setting takes only one toasting cycle to get them how I like them (warm, bubbly and crispy on the edges). Just be wary that yours may need more or less depending on the toaster that you are using. Adjust to your liking!
Notes/Tips:
-
- Look for sweet potatoes that are relatively shaped like a tube so that they’re easier to slice.
- Don’t remove the skin because fibre in it is good and it helps the slices hold up better during storage.
- Using a mandolin slicer gives you uniform slices of sweet potatoes, and is easier and safer than using a big knife.
- Allow them to cool completely after baking before stacking them in a container or they’ll get sweaty and will definitely take longer to toast when you’re ready to eat them.
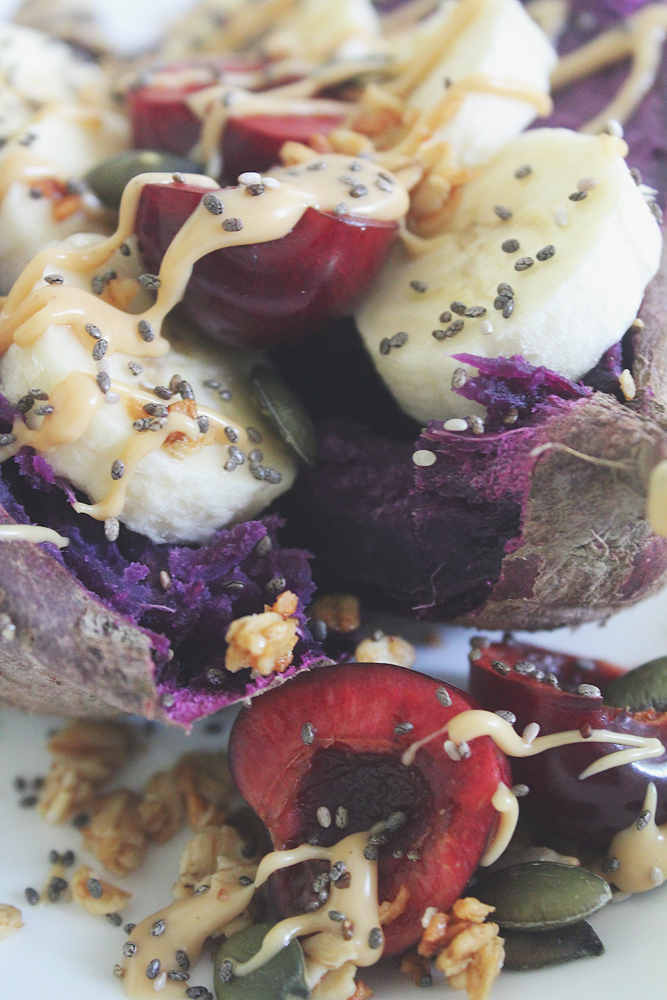
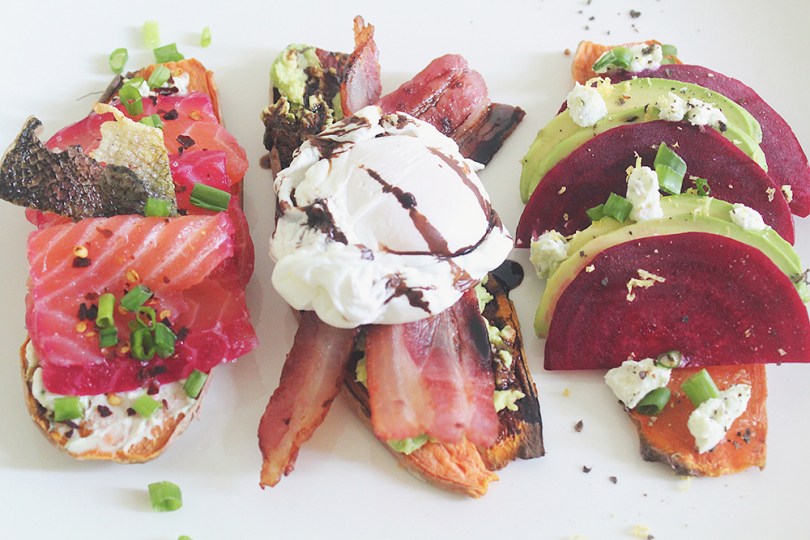
Now the fun starts – you get to add toppings! The possibilities are pretty much endless but these three are my absolute favourite combinations for a yummy start to my day!
Avocado, Beetroot & Goats Cheese

PREP TIME 5 MINS | COOKING TIME 5-10 MINS | SERVES 1
INGREDIENTS
- Avocado slices
- Beetroot slices
- Freshly ground black peppercorns
- Goats cheese, crumbled
- Lemon zest
- Spring onion, chopped
- Sweet potato slice(s)
METHOD
- Place the sweet potato slices into a toaster and toast on the highest setting until warm, bubbly and crispy on the edges.
- Top with the above garnishes and enjoy!
Smashed Avo, Crispy Bacon & Poached Egg

PREP TIME 5 MINS | COOKING TIME 5-10 MINS | SERVES 1
INGREDIENTS
- Bacon slices
- Balsamic reduction
- Poached egg
- Smashed avocado
- Sweet potato slice(s)
METHOD
- Crispy Bacon: Heat a medium size non-stick frying pan over high heat. Add the bacon strips and cook for about 3-4 minutes per side. Place on a dish lined with paper towels to drain the excess oils. Next add the tomatoes and fry in the bacon fat for about 3-4 minutes per side as well. Set aside in an oven to keep warm before serving.
- Balsamic Reduction: Next, pour the 1/2 cup of balsamic vinegar in a small saucepan over medium heat. Bring the vinegar to a boil, then turn down the heat down so that the boil reduces to a simmer. Stir occasionally and allow to simmer until the vinegar has reduced by at least half (for a thinner reduction) or more (for a more syrup-like consistency). If you have impatient tendencies like me when it comes to food, do not increase the heat at this point! Your reduction may burn and you will be left with a stiff, hardened mess.
- Poached Eggs: Bring small saucepan of water to the boil over medium-high heat, then reduce the heat to low-medium – the water should be just simmering. Add in the vinegar and stir. Crack one egg into a small bowl and quickly, but gently pour it into the water. Repeat with the other egg. A really soft poached egg should take around 2 minutes, but if you want it a bit more firm, it will take about 4 minutes. To check if they’re cooked right, carefully remove the egg from the pan with a slotted spoon and give the yolk a gentle push (you can tell just by your instincts if it is under or over – or perfect)!
- Place the sweet potato slices into a toaster and toast on the highest setting until warm, bubbly and crispy on the edges.
- Top with the above garnishes and enjoy!
Beet & Salt-cured Salmon

PREP TIME 5 MINS | COOKING TIME 5-10 MINS | SERVES 1
INGREDIENTS
***Or store-bought smoked salmon will do just fine as well.
METHOD
- Crispy Salmon Skin: Preheat oven to 190C (375F or gas mark 5). Line a baking sheet with parchment paper, and lightly brush olive oil and sprinkle some salt on both sides of the salmon skin. Place the salmon skin, shiny side up, on the baking sheet and bake for 10 minutes or until the skin is crisp. Allow the salmon skin to cool before eating.
- Place the sweet potato slices into a toaster and toast on the highest setting until warm, bubbly and crispy on the edges.
- Top with the above garnishes and enjoy!
And there you have it! Three simple Savoury Sweet Potato Toasts for a great fix of a seriously nutrient-packed brekkie! What do you think about sweet potato toast? Have you tried it for yourself, and if you have what did you think?
BON APPÉTIT
– Ally xx