Hello Everyone and welcome back to an all new Review Sunday! I think I will keep the introduction short today just because you’re about to dive into a 2200 word review below and I’m already tired of typing and spinning words out of my brain at this hour of the night. Seriously though, if university essays were this easy to write in less than 4 hours, I’d never hate writing essays (most probably)…
About three months or so, I actually don’t remember, I attended a talk organised by General Assembly on the Business of Food Blogging. It was there that I met Brendon D’Souza from brendonthesmilingchef, and he was indeed a happy smiling chap. Last week he invited me and a few other bloggers for an Instagram Meet Up at In Asia Restaurant and Bar in North Strathfield. He told an interesting story about how he came to know about this restaurant; basically he and his family were driving along looking for a place to hold his graduation dinner. They came across In Asia and I think he pretty much fell in love with the food here and even said that the Popular Popcorn Parfait dessert sold it for him. He met the owner of the restaurant and talked about organising a food blogger’s event to basically build up a social media presence of the restaurant. I’m really glad that Brendon organised this event because it was definitely a great experience for not just me, but for everyone else who was a part of the night. I met a lot of other food bloggers, and shared a few laughs over the night as we all started getting a bit tipsy from the drinks.
Let’s get straight into their menu and what I thought of their awesome dishes:

COCKTAILS: SUGAR FLOSS MARTINI
Vodka, fresh strawberries and limes, with candy floss ($16.00)
I remember seeing one of the blogger’s ordering this drink across the other table. Rachael and Angela, who were seated in front of me, bolted over to take a picture of this very photogenic drink that looked like a fluffy unicorn. I wasn’t bothered to get up, only because I was sitting on the inside of the booth(?), not sure what kind of seating it was, but it meant that I had to ask people to get up for me, slide over, and then get out. When the girls returned, we decided to all order a cocktail each and share so that we could get a taste of what In Asia had to offer. I really liked this drink, mainly for the fairy floss and vodka combination, but you can’t really go wrong with strawberry and lime.
 COCKTAILS: TOBLERONE
Baileys, Frangelico, Kahlua, cream, chocolate syrup, and Toblerone shavings ($16.00)
This was something that I’ve not actually seen before elsewhere, but then again, I’ve only been to how many bars in my life? Yeah, not a lot. Anyway, this was by far my favourite cocktail of the night; alcohol and chocolate? Don’t mind if I do! I’m not a heavy drinker myself, but I’d definitely have 2 or 3 more glasses of this. For me, I couldn’t really taste the alcohol, but that’s okay because it tasted more like a chocolate drink to me, and I like that!

COCKTAILS: FINE LYCHEE DAIQUIRI
Bacardi, Soho Lychee Liqueur, fresh lychees, and lime ($16.00)
I am currently obsessing over lychees so this drink was also a favourite of mine that night. Loved the sweetness of the lychee paired with a tangy lime. I very much enjoyed this drink and would definitely come back for more of this… And the two above as well *cheeky grin*

ENTRÉE: PAN-SEARED CANADIAN SCOLLOPS
with chilli purée and lime sauce, fresh pear ($15.00)
I love love love love LOVE scollops. Have I told you how much I really love scollops? Well, as you can tell for my love of scollops, it is without a doubt that this was my favourite entrée of the night. The scollops were cooked perfectly and surprised me with that great kick of heat. I say surprised because I wasn’t expecting it to be that big of a kick to my mouth. I found it quite spicy to my liking at first, but loved it as I had more of it. The pear was a nice touch of freshness to the dish as well.

ENTRÉE: BARBECUED CALAMARI
with pickled papaya, fennel, cashew nuts, and crispy pork crackling ($15.00)
I honestly cannot remember what my tastebuds were going through when I had this dish. I mean, it was not a bad dish, but I feel like I didn’t have an overwhelming reaction towards the dish like I did with the other entrée dishes. The calamari was cooked well, and the salad was dressed nicely too. I like how they’ve added the crispy pork crackling in the dish for that added crispy element, but they were all gone before I could get any onto my plate (yes, most of the bloggers who I shared the dish with picked most of the crackling out)!
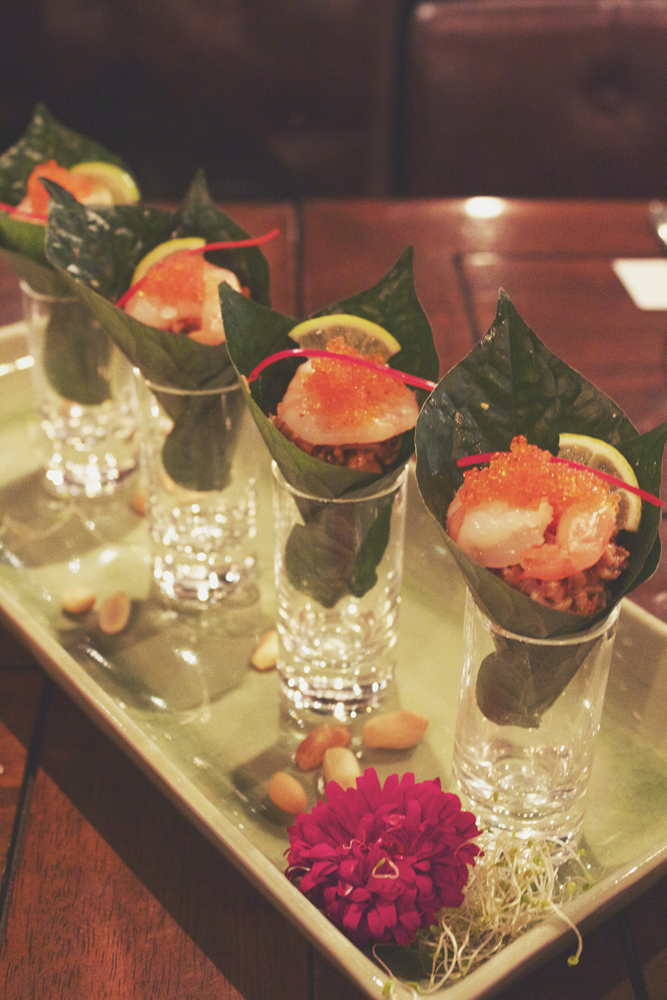 ENTRÉE: BETAL LEAF OF POACHED PRAWN
with roast coconut, crushed peanuts, ginger, chilli, lime, and caramel sauce: 2 pieces ($12.00)
As soon as this dish hit the tables, I was flabbergasted by its presentation. Loved the shot glasses. Moreover, I was impressed with the flavour combinations in such a little piece of betal leaf wrap. You’ve got the roast coconut, crushed peanuts, together with the ginger and caramel sauce I presume, that is topped with the tender, melt in the mouth poached prawn topped with roe and a tangy hit with a thinly sliced piece of lime, all wrapped in a peppery betal leaf that gave a nice fresh crunch to everything. It was a bit of a guessing game on how many bites you should take with this; it feels a bit big for one bite, but not big enough for two if you get what I mean. I tried two bites, but then you’re left with just the coconut and peanuts at the bottom without the prawn for your second bite. So I just went for it in one bite for my second serve. I find it quite expensive though because that means that one betal leaf wrap if $6.00; it’s quite a spectacular dish, but I don’t know if I’d pay that much for it.
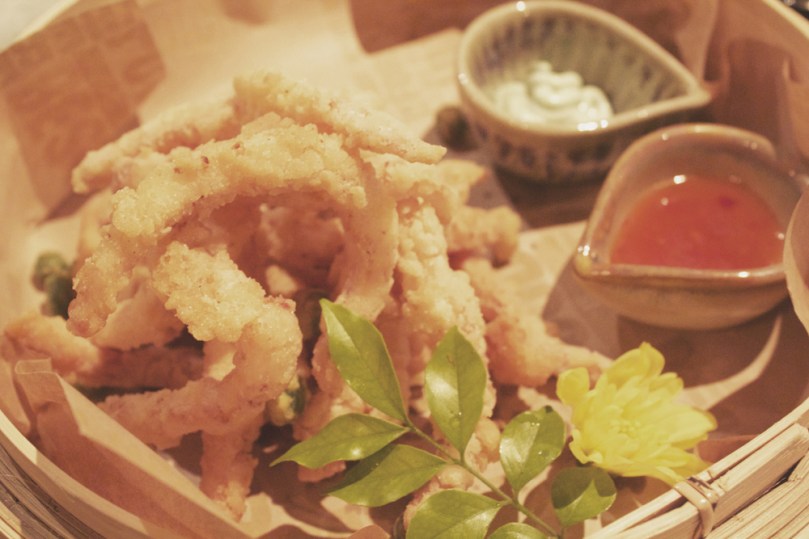
ENTRÉE: SEA SALT AND BLACK PEPPER CALAMARI
with wasabi mayo and sweet chilli sauce
I had a look back at their main menu and didn’t see this dish so I can’t say how much it’d cost you to order this. There’s nothing much I can comment on this only just because it’s salt and pepper calamari; I mean you can practically get it anywhere you go. Nothing special, but I did like the tender calamari, however not a big fan of wasabi myself.
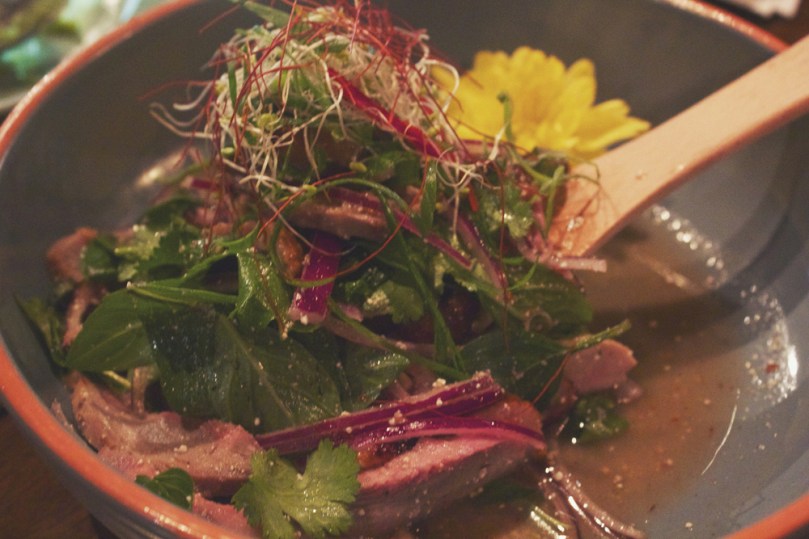
SALAD: TEA SMOKED DUCK BREAST
with roasted rice, chilli, lemongrass, Vietnamese mint, and tamarind dressing ($22.00)
I felt like it’s quite similar to a Thai dish known as Nam Tok in terms of flavour, but anyway this was a very innovative dish and the flavours were a nice accompaniment to the duck. I actually wouldn’t have been able to tell that the duck was tea-smoked, but nonetheless, the duck was delicious and I wanted more!

STIR FRY: WAGYU BEEF
with asparagus, shallots, and onion with hoisin sauce ($28.00)
Again, this was nothing special for me because I know how to make a mean beef stir-fry myself. I mean, it’s a good, simple, and humble dish, but nothing really as innovative as what I’ve already covered from this point on their menu.
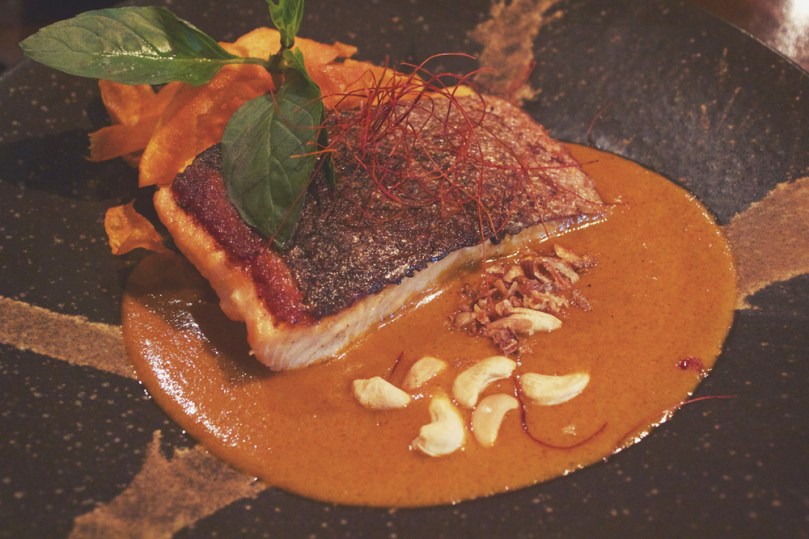
MAIN: CRISPY SKIN SALMON
with IN ASIA’s spiced Kumara mash, cashew nuts, sweet potato chips ($27.00)
I wasn’t a fan of this dish for several reasons: firstly, I thought that it was a curry-based dish because of the ‘sauce’ and then I was surprised when I re-read the menu again at it was actually kumara mash. In my opinion, it was a bit thin for a mash. I like my mash creamy no doubt, but this felt like it took creamy to a whole other level. Secondly, though the salmon lived up to its crispy skin, it was however overcooked to my liking; it was a bit dry on the inside for me. The only thing I liked on this dish was probably the sweet potato chips. Sorry!

MAIN: CRISPY SKIN ROASTED DUCK
with tamarind sauce, pumpkin mash, and navel orange
This I liked better than the salmon dish, and I loved the pairing of the duck with the navel oranges. Though the skin wasn’t as crispy as I thought it would be, it was still a very good dish, and that’s also mainly because I love duck no matter how it’s cooked (just not overcooked of course). You may have noticed as well that there is no price – same what I mentioned above for another dish, I couldn’t find it on their actual menu so sorry to say I can’t make out how much this dish would cost if you want to order this dish.

MAIN: KOREAN STYLE BARBECUED WAGYU BEEF
with grilled pear, black sesame, pickled radish, and ginger ($28.00)
This dish wasn’t actually on the pre-planned menu that the restaurant had for us. One of the girls, as she called herself, “that annoying person who just doesn’t like seafood”, ordered this off the menu as the owner of In Asia suggested that she did as he felt bad for having pretty much a seafood-heavy planned menu for the night. I am actually glad that she got to order off their menu and shared a little bit of her food with everyone else because this was a really REALLY lovely dish. The wagyu beef was cooked perfectly and was very tender. The grilled pear, I mean, where do I even begin with this pear? It was so good and paired so well with the beef. It was a match made it heaven.

MAIN: CARAMELISED TWICE COOKED PORK BELLY
with crispy panko egg and sweet tamarind sauce ($23.00)
This was another dish that was ordered off the menu, and yet another great dish that made me happy that she doesn’t like seafood. This was actually my favourite main dish of the night. The pork belly was crispy and sweet, and that panko egg was just lovely. I honestly wanted more of this dish, but since we were only sharing, it made me sad that I could not have more that night. I would definitely recommend this dish if you’re ever thinking of dining here. It is a must! I would definitely go again if it weren’t so far from where I live!

DESSERT: MONKEY SNICKER
with banana pudding, passionfruit curd, pandan foam, pandan granita, shredded coconut, and coconut ice cream ($12.00)
Finally on to dessert! This was probably not one of the best desserts of the night just because I didn’t enjoy it as much as the other dessert that you’ll see below, both in terms of presentation and flavour. This didn’t really wow me that much I’m sorry to say!

DESSERT: MRS B’S FIRST KISS
with organic banana lightly battered in shredded coconut and fried, palm sugar caramel, tapioca sauce, and rice puffs, served with passionfruit sorbet ($14.00)
I apologise in advance because I cannot comment on the flavour of this dish, and I will tell you why. So when the desserts arrived at the table, everyone went nuts for this dessert, as well as the one below because of their spectacular presentation. It was almost too beautiful to eat! So I got my pictures, and then I had a sudden urge to go to the bathroom. I thought, okay I’ll go to the bathroom quickly since the other bloggers were still busy taking pictures of the desserts. Came back about 2 or 3 minutes later and this dish was completely demolished. Lesson of the night? Hold it in, no matter how urgent it is. It’s not worth it especially if dessert is concerned and you’re sharing one dish with about 12 other bloggers. I was so sad!

DESSERT: POPULAR POPCORN PARFAIT
with IN ASIA’s crushed corn flakes, caramel popcorn, grilled sweet corn, and caramel jersey cream ($14.00)
Okay, at least there was a good quarter or so of this dessert left when I came back from nature’s calling. Thank goodness because this dessert was the absolute bomb. I loved the flavours and different textures that you got in each mouthful of the dessert, and I didn’t think that grilled corn would be such a great compliment to the overall dish. The presentation was on point as well. Well done In Asia for this dessert!
There were some ups and some downs with the dishes that we had over the night, but I can safely say that the positives overpowered the negatives greatly. There was really only one dish that was a let down for me, and the others that had minor issues based on just my personal opinion and palette is nothing major to say that it was a bad dish. I’d rate the food of the night a solid 9.5 out of 10; the food really blew me away and clearly the definition of modern (kind of, sort of fine dining) Asian cuisine. For me, it’s sort of somewhere in the middle like it’s not casual but not extreme fine dining either. Not only did the flavours and textures impress me, the presentation of some of the dishes, mainly the entrées and desserts, really blew me away. The service was great as well, though I wasn’t sure why it took quite possibly close to 30 to 45 minutes for the light menu (which were the tea smoked duck salad and the barbecued calamari salad) to come out to the table after entrées – I wasn’t complaining though because I had a pretty hefty entrée to begin with. I’d give the service an 8 or possibly 9 out of 10 anyway. Now, value for money – the dishes here are pretty pricey to be honest but I guess you can say that you actually do pay for what you’re getting. If you’ve got the money to spend, definitely spend it here, otherwise it’s not really a place you can just rock up to if you don’t have the money or for a casual dine.
In Asia Restaurant & Bar
181 Concord Road
North Strathfield, New South Wales
Australia, 2137
– Ally xx