Sicilian-style Salmon with Garlic Mushrooms & Poached Broccoli

Sicilian-style Salmon with Garlic Mushrooms & Poached Broccoli

Hello Everyone! I can’t believe that it’s already the last day of March, meaning quarter of the year has just zoomed past in the blink of an eye! I felt like the first part of March went by really quickly for me, and the rest of the month just dragged on slowly to be honest. Maybe it was just because I spent the final week of my travels to New Zealand and Australia in the first week of March and the second week pouting about my post-vacation depression, and then of course dragging myself out of bed and to the office through the rest of March. I sound so pessimistic in this post in comparison to Wednesday’s post when I was all motivational and whatnot. Haha! I don’t mean to be pessimistic, I’m just stating the obvious lack of adventure in my life the moment I arrived back from my trip to Australia and New Zealand.

Negativity aside, I forgot to mention this in my previous post: last week, I was contacted by a student from Spain who was drawn to the concept of Amcarmen’s Kitchen following the concept of a ‘third culture kid/foodie’ and my style of food photography. She sought my help through an interview that we shared earlier on the week on Monday evening and she was interested in having me as a sample in her research thesis on International Food Bloggers, which I found this to be quite an interesting topic. I’d like to take this opportunity to thank her for choosing to sample Amcarmen’s Kitchen in her work and I am looking forward to seeing her work when it’s done!

Sicilian-style Salmon with Garlic Mushrooms & Poached Broccoli

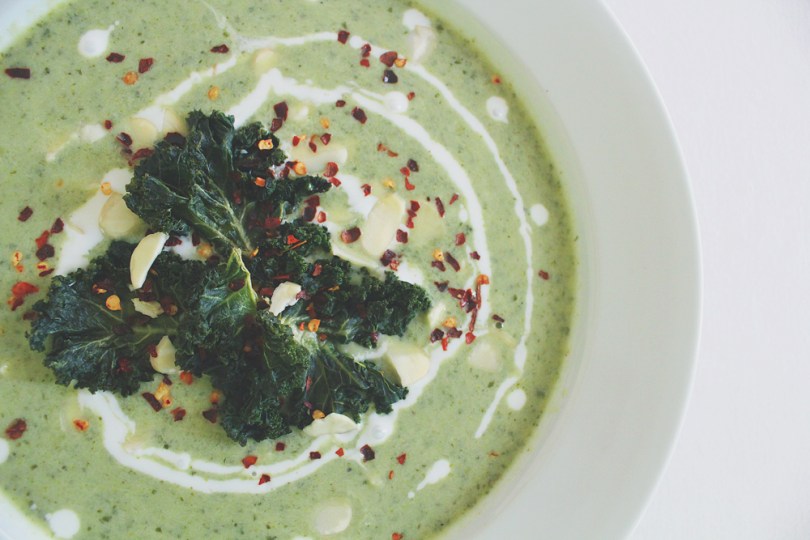
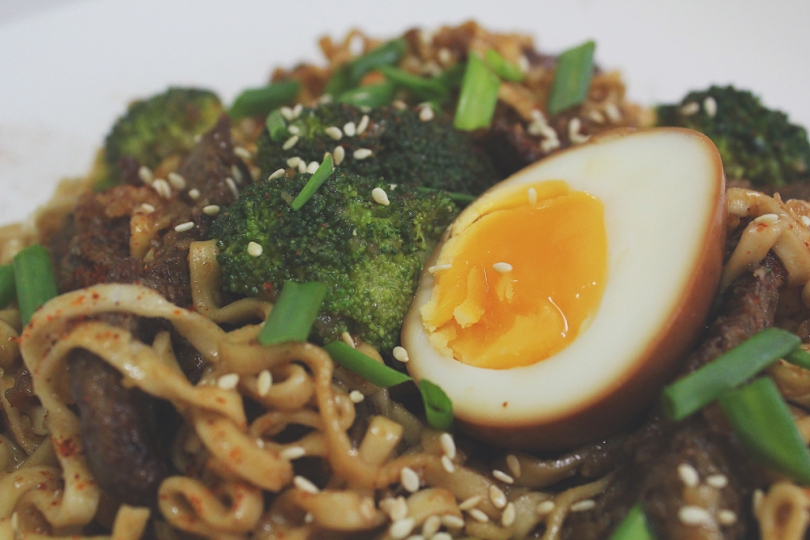
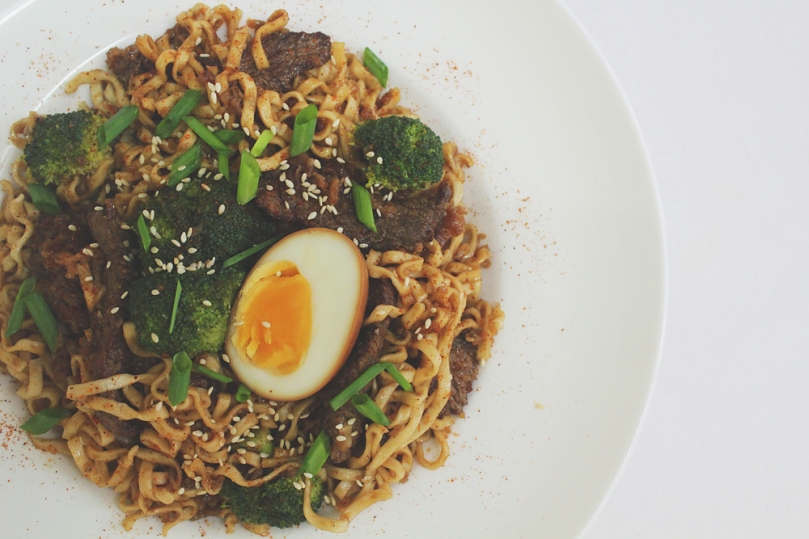
​Moving forward, I just want to make mention that this is not the final recipe for this month’s theme. If you’re a new follower on Amcarmen’s Kitchen, I have been posting a recipe up every Wednesday evening, Brunei time, since the beginning of 2016, and since there are 5 Wednesdays in March, you will be getting 5 recipes that hero/include broccoli in it! So there’s just one more to go before after this recipe is up before I dive into the theme for April!

Tonight’s recipe is a simple one. Nothing too fancy and over-the-top, just fresh ingredients with humble flavours brought to your plate from Sicily. Bake or pan-fry your salmon portions that have been massaged with some smoked paprika and chilli powder for that added kick. Pair them with some sautéed garlic mushrooms, and poached broccoli for a nice crunch to the plate and you’ve got yourself a delectable fish supper. Before we delve into tonight’s recipe, please don’t forget to check out the original recipe over on BBC Food Recipes by Gino D’Acampo.

Sicilian-style Salmon with Garlic Mushrooms & Poached Broccoli Ingredients

PREP TIME 10 MINS | COOKING TIME 10-15 MINS | SERVES 3

INGREDIENTS

For the salmon

  • 3 salmon portions (100g-150g per portion)
  • 2 tsp ground smoked paprika
  • 1 tsp chilli powder
  • Ground sea salt and black pepper, to taste
  • Juice of 1 lemon
  • Olive oil, for drizzling

​For the mushrooms

  • 1 punnet (250g) brown mushrooms, sliced
  • 30g unsalted butter
  • 3-4 garlic cloves, minced
  • 1 small red onion, finely diced
  • 1 tbsp olive oil
  • 1 head broccoli, cut into florets

METHOD

  1. Preheat oven to 180C (350F or gas mark 4). Line a baking tray with parchment paper and lightly oil.
  2. Place the salmon portions on the baking tray and drizzle a little bit of olive oil and lemon juice over the salmon. Gently massage the chilli powder, smoked paprika, sea salt, and black pepper.
  3. Bake in the oven for about 10 minutes, or until cooked through. Alternatively, you can pan-fry the portions for about 5-6 minutes per side over medium heat.
  4. Meanwhile, melt the butter in a medium-sized frying pan over medium-high heat and then add the tablespoon of olive oil until foamy. Sauté the minced garlic until golden brown and fragrant, about 30 to 45 seconds. Add in the finely diced onions and cook until soft, about 1-2 minutes.
  5. Toss in the mushrooms and cook until tender, about 2 to 3 minutes. Set aside.
  6. Bring a small pot of salted water to a boil and add the broccoli florets in. If you prefer a crispy bite, a minute or two is enough for the boil. If you would like to have it softer, then 2-3 minutes is great. Once done, drain immediately.
  7. Plate up and enjoy with a squeeze of lemon on top!

Sicilian-style Salmon with Garlic Mushrooms & Poached Broccoli

BON APPÉTIT

– Ally xx

myTaste.com

Vegan Broccoli & Kale Soup

Vegan Broccoli & Kale Soup

Hello Everyone! I’ll try to keep tonight’s post short and sweet, well, I guess the only reason why it’d be short is because I don’t actually have much to share about the past week I’ve had. It was just one of those routinely days like wake up, go to work, eat, go home, eat, go to the gym, shower, sleep, repeat kind of week *sigh* Oh wait! How did I possibly forget the most important thing that happened this week?! My Mom, my sister, and I went to see the Power Rangers Movie on opening night! So many childhood memories came back alive and I think that this movie was much more worth the hype than for Beauty and the Beast. Please go watch it if you haven’t already watched it!

Moving on, I used to make a lot of soups when I was still studying in Sydney​, ​especially during the winter season​. Now, being the typical Asian that I was, I used to never see a meal without rice as a fully complete meal, so you can imagine how distraught I was when I’d hear people say that they had “soup” for dinner. I would be like, “only soup?!” with a hint of what-the-actual-fishsticks are you on about look on my face. However, having lived in Sydney for 4 years and basically exposed to cuisines other than the typical I-need-rice in every meal ideal, I grew to appreciate soups as a meal. It can actually be quite filling if you pair it with a nice crusty bread to soak up all the yummy flavours and wipe the bowl clean. Tonight’s recipe is a delicious blend of Broccoli and Kale, both nutritious super green foods that are packed with healthy vitamins and minerals essential to one’s daily diet. Please check out the original recipe by Taylor over on The Girl on the Bloor.

Vegan Broccoli & Kale Soup Ingredients

PREP TIME 10 MINS | COOKING TIME 15 MINS | SERVES 6-8

INGREDIENTS

For the soup:

  • 2 cups non-dairy milk, for instance almond or coconut milk
  • 2 cups vegetable broth
  • 1 head broccoli, cut into florets
  • 1 large brown onion, diced
  • 1 leek, cleaned and sliced
  • 3-4 garlic cloves, minced
  • 4 tbsp coconut oil
  • 1/2 tsp red pepper flakes
  • Chilli flakes, for garnish
  • Flaked almonds, for garnish
  • Ground sea salt and black pepper, to taste
For the kale chips:
  • 2 cups kale, chopped
  • 1-2 tsp olive oil
  • Ground sea salt and black pepper, to taste

Okay, before I venture on to the method, some of you might/might not have picked up on a bit of a confusion with the ingredients. The list says to use leeks, but in the ingredient shot, the “leeks” would appear to some as spring onions. Actually, I do believe that what has been photographed are indeed spring onions, and not leeks, but the label did say “local leeks” at the grocery store. Since these were the only leeks available at that time, I had no choice but to buy them I guess. If you didn’t notice the difference, then I guess I could’ve gotten away without having to explain myself here, haha!

METHOD

  1. Preheat oven to 200C (400F or gas mark 6). Line a baking tray with parchment paper. Set aside.
  2. Wash and thoroughly dry the 2 cups of chopped kale for the chips before tossing it with olive oil. Massaging oil into leaves and season with ground sea salt and black pepper before spreading in onto the prepared baking tray. Set aside for now.
  3. Melt the coconut oil in a large pot over medium-high heat and sauté the minced garlic until golden brown and fragrant, about a minute. Follow with the diced onions and sliced leeks, cooking until soft, about 2 to 3 minutes.
  4. Add broccoli florets and vegetable broth, bringing the mixture to a boil and then simmering for a further 2 minutes until the broccoli is tender.
  5. Once the broccoli is tender, remove from heat, and stir in the chopped kale. Leave the soup to cool down for about 15 minutes.
  6. While waiting for the soup and veggies to cool down, you can start baking your kale chips! Bake them in the preheated oven for 7 to 8 minutes, checking and flipping them every couple minutes so they don’t burn. When they’re crispy, remove them from the oven and set aside to top your soup with.
  7. Once your soup has cooled down, purée the veggies using a stick blender until the soup is smooth. Add your non-dairy milk, and season with a touch of ground sea salt and black pepper, stirring your soup until thickened.
  8. Divide the soup into individual bowls and top with the kale chips, flaked almonds, and chilli flakes. Serve and enjoy!

Vegan Broccoli & Kale Soup

Vegan Broccoli & Kale Soup

Before I end tonight’s post, I encourage you guys to head on over to Thrive Cuisine to learn more on the nutritional benefits of kale. There are plenty of links as well as to more recipes that include the famous cruciferous veggie known as kale.

BON APPÉTIT

– Ally xx

myTaste.com

Beef & Broccoli Mee Pok with Soy Eggs

Beef & Broccoli Mee Pok with Soy Eggs

Hello Everyone! Finally I’ve managed to come to the theme that was intended for the month of March on Amcarmen’s Kitchen! Three weeks late, but you know what they say, better late than never! I hope that I can get all the recipes up for March before the end of the month so that I can start fresh (frish – inside joke) for April seeing as it is also an important upcoming month ahead for Amcarmen’s Kitchen. If you have been following my blog since the beginning, or long enough to know why April is important for Amcarmen’s Kitchen – I won’t reveal things now, but as the days draw closer to April, I will tell you why!

If​ you are just tuning in to the blog, the theme for this year is all based around foods that lower or help maintain your blood pressure to normal and safe level. I drew up the theme when I found out last year that I am susceptible to high blood pressure, and ever since, I’ve been doing what I can to eat right – it hasn’t been easy. So tangent aside, the theme for March is basically hero-ing broccoli! Though I must say, some of the dishes that I will be sharing with you guys don’t exactly hero broccoli, but at least it includes the ingredient I guess? Haha. Broccoli is a good source of the blood pressure-regulating minerals magnesium, calcium, and potassium. Previous research in animals has found that a diet high in broccoli sprouts may help reduce blood pressure, cardiovascular disease, and stroke.

Tonight’s recipe is a little twist on the classic Beef and Broccoli Ramen – well okay, it’s not really a massive twist or anything like that, the only difference is that I used mee pok noodles instead of ramen noodles. Mee pok is a Chinese noodle characterised by its flat and yellow appearance, varying in thickness and width. Mee Pok is commonly served tossed in a sauce (often referred to as “dry”, or tah in Hokkien, though sometimes served in a soup (where it is referred to as “soup”, or terng), where meat and vegetables are then added on top. Other than that, everything else is pretty much the same, so before I move onto tonight’s recipe, please take the time to check out the original recipe over on Chelsea’s Messy Apron. I’ve also added a soft-boiled soy egg just for another layer of flavour and texture to the overall dish. When I thought of adding a soy egg to the dish, I didn’t look into how I could add more flavour the egg rather than just dunking it in soy sauce, but turns out that you can add star anise and cinnamon bark to the soy sauce, and apparently leave it overnight to soak up all the flavour. I left mine for about an hour or so just for the colour really.

Also, I know that this recipe calls for a lot of soy sauce which is in fact contradictory to lowering high blood pressure because of the amount of sodium in soy sauce. Therefore, ensure that you use low-sodium soy sauce for this recipe.

Beef & Broccoli Mee Pok with Soy Eggs Ingredients

PREP TIME 15* MINS | COOKING TIME 20 MINS | SERVES 4

*Plus about 4-6 hours of marination time

INGREDIENTS

For the beef marinade:

  • 500g rump steak, sliced thinly
  • 2 tbsp low-sodium dark soy sauce
  • 2 tbsp low-sodium light soy sauce
  • 2 tbsp oyster sauce
  • 2 tbsp sesame oil
  • 1/2 tsp ginger, grated
  • Ground sea salt and black pepper, to taste
  • 3 tbsp cornstarch

For the mee pok:

  • 1 package (400g) mee pok noodles
  • 1 head broccoli, cut into florets
  • 1 cup low-sodium beef stock
  • 1/4 cup low-sodium dark soy sauce
  • 3-4 garlic cloves, minced
  • Ground black pepper, to taste

For the soy eggs:

  • 4 large free range eggs
  • 1/2 cup low-sodium dark soy sauce
  • 1/2 cup warm water

Optional:

  • Chilli powder
  • Lightly toasted sesame seeds
  • Spring onion

METHOD

  1. Whisk all the ingredients for the beef marinade (except for the cornstarch) in a small bowl. Place the beef slices, and the whisked marinade into a medium-sized zip lock bag and seal. Give it a good shake and then set aside in the fridge for about 4-6 hours, or no more than 12 hours. Flip the steak in the bag halfway through the marinating time.
  2. While the beef is marinating, you can get a head start on your soy eggs. Fill a saucepan with a few inches of water and set it over high heat. Let the water come to a rolling boil. Once it comes up to a rolling boil, reduce the water to a rapid simmer by lowering the heat. Gently lower the eggs into the water one at a time and cook the eggs for 5 to 7 minutes (5 minutes for a very runny yolk or up to 7 minutes for a barely-set yolk). I cooked mine for about 6 minutes. Remove the eggs with a slotted spoon and run under cold tap water for 30 to 60 seconds. Slowly are carefully peel the shell off the eggs and dunk them into a bowl of dark soy sauce and warm water mixture. Make sure that the eggs are fully submerged in the mixture and let it sit for an hour or so until the egg white is coloured by the soy sauce.
  3. Bring a medium-sized pot of water to a boil and then cook the mee pok noodles for about 2 minutes. Drain and rinse in cold water. Set aside.
  4. Remove the rump steak from the bag and drain off any remaining marinade. Toss the steak to coat with the cornstarch.
  5. Heat some olive oil in a large frying pan over high heat, until the oil is shimmering and then cook the beef in batches if needed, adding a touch more of olive oil after each batch. Cook without moving or flipping the beef until it is well seared, about 1-1/2 minutes. Continue cooking while stirring until the beef is lightly cooked but still pink in spots, about 30 seconds. Transfer to a plate and set aside.
  6. In the same pan, sauté the minced garlic until golden brown and fragrant, about 30-45 seconds, then add the beef stock and dark soy sauce. Stir and cook (uncovered) over medium heat until sauce thickens a bit and reduces by about a third (about 5-8 minutes). You don’t want to reduce it too much so it can still generously coat all the noodles & veggies.
  7. Bring the mixture to a boil. Once boiling, top the mixture evenly with the broccoli (don’t stir in). Cover the pot with a lid and reduce the heat to low. Allow the broccoli to steam until crisp tender about 3 minutes or to desired tenderness.
  8. Once the broccoli is to your liking, remove the lid, add in the cooked noodles and beef. Stir and top with desired toppings: green onions, chilli powder, and sesame seeds, and not forgetting the soy egg!
  9. Serve and enjoy immediately with family and friends.

Beef & Broccoli Mee Pok with Soy Eggs

Beef & Broccoli Mee Pok with Soy Eggs

BON APPÉTIT

– Ally xx

myTaste.com

Svenska Köttbullar (Swedish Meatballs)

Svenska Köttbullar (Swedish Meatballs)

Hello Everyone! We’re finally into the last month for 2016! Gosh how time flies by so quickly! Anyway, I won’t go into another sentimental tangent on how the year is almost up and all that jazz, and I’ll just get right into it! Like I said on Instagram, I won’t reveal what the theme for December will be for Amcarmen’s Kitchen – instead I will have you guys guess what the theme is. You don’t have to guess right away, and I think the theme will only be a little more clear by the second or third week.

Svenska Köttbullar (Swedish Meatballs)

So, I first came across this dish, not through my travels to Sweden, but through the many adventures I’ve had when, as stereotypical as this will sound, visiting IKEA. Yes, IKEA – whether it was when I was still living in Australia, or travelling through Singapore, you’d definitely see me at their food court for either lunch, or dinner, depending on the time of day I visited there, with a plate of köttbullar. If you were to ask ten different Swedes about making köttbullar, you will most indefinitely get ten different answers. Sure they would be similar in some way or another, but most Swedes will have their own way of making köttbullar and so everyone will use a bit more or a bit less of this or that ingredient. Apparently, köttbullar is Sweden’s national dish, which some do question as it is not a particular exciting dish that speaks for the whole Swedish cuisine. Nonetheless, I think most real Swedes would agree that these meatballs are pretty good.

Svenska Köttbullar (Swedish Meatballs)

I can’t get over how deliciously amazing the gravy that accompanied my meatballs were. I think I probably ate half of it by the time every element for the dish was done, and I definitely drowned my balls in the gravy after. In southern Sweden many people prefer their ground meat with a little more fat, but the further north you go, the less pork you will find in the meatball mixture. However, bread or crumbs allowed to swell in milk are as important as the lingonberries on the side. They give Swedish meatballs their special soft consistency. I had some leftover herbed focaccia bread lying in the fridge from the week before and so I decided to cut them up into about 1cm cubes, drizzle them with a bit of olive oil and then toast them in the oven until browned and crisp. I then added the toasted bread into a food processor and pulsed until crumbed. Before we dive into the recipe, please check out the original recipe for Classic Swedish Meatballs over on BBC Good Food.

Also, you may notice that once you go through to the recipe that I mentioned about ‘blanching’ the balls before browning them. The reason why I decided to blanch the balls first is to maintain it’s round shape and therefore I shall not encounter a lifetime of sadness when it come to browning them after. I cannot express how much sadness I’ve experienced when making meatballs. Every time I fry them, the go flat on one side, and of course, when I try to flip them, they somehow get ruined, and when that happens, my day is ruined.

Svenska Köttbullar (Swedish Meatballs) Ingredients

Svenska Köttbullar (Swedish Meatballs)

PREP TIME 15 MINS | COOKING TIME 20 MINS | MAKES 20 MEATBALLS*

*My balls were about slightly smaller than a ping pong ball and I managed to make 20 of them. You could probably make 30-35 balls if they are slightly smaller than mine.

INGREDIENTS

For the meatballs

  • 400g lean pork mince
  • 1/3 cup bread crumbs
  • 1 large free range egg, beaten
  • 1 small brown onion, finely chopped
  • 1 tbsp finely chopped parsley, plus extra to serve
  • Ground salt and black pepper, to taste

For the gravy

  • 3 cups beef or pork stock**
  • 50g unsalted butter
  • 3 tbsp plain flour
  • Ground salt and black pepper, to taste

Optional to serve

  • Chunky mashed potatoes
  • 2-4 tbsp of Lingonberry (otherwise red currant, raspberry, or cranberry jelly), less or more to taste

**I made my own pork stock by boiling a few pork bones with black peppercorns, salt, and dried bay leaves.

METHOD

  1. In a large bowl, combine all the ingredients for the meatballs and mix until well incorporated. Then, form the pork mince mixture into meatballs to the size that you want.
  2. Bring a large pot of salted water to a boil and the drop each meatball in one by one and ‘blanch’ for about a minute to a minute and a half before removing them from the pot. You may need to do this in batches if your pot is not big enough. Once removed, drain.
  3. Heat a large frying pan with about 2 tbsp of olive oil over medium-high. Add in the meatballs and brown all over, about 5 minutes altogether. Again, you may need to do this in batches. Once browned, transfer to a dish lined with a paper towels to absorb any excess oil from the meatballs.
  4. To make the sauce/gravy, first make a roux by heating the butter in the same frying pan on medium heat until melted and slightly browned. Then, slowly whisk in the flour, stirring until smooth. Continue to stir for several minutes as this allows the flour mixture to cook, until the roux is the colour of coffee-with-cream.
  5. When the roux has cooked to a lovely shade of light brown, slowly add the stock to the roux, stirring as you add the stock. The stock will sputter at first and the roux may seize up, but keep adding the stock slowly and keep stirring. Eventually the sauce will loosen and become silky.
  6. Serve the meatballs on a bed of chunky mashed potatoes, topped with the gravy and an optional of lingonberry on the side. Enjoy with family and friends!

Svenska Köttbullar (Swedish Meatballs)

Svenska Köttbullar (Swedish Meatballs)

BON APPÉTIT

– Ally xx

myTaste.com

Bœuf Bourguignon with Potato Gnocchi

Bœuf Bourguignon with Potato Gnocchi

Hello Everyone! It’s week 2 of Cooking with Alcohol month and today I will be cooking with one of my favourite bevvys to have when I’m out with friends or just socialising with – well, this was back when I was in Australia and I don’t do it now; only if a friend throws a party and there’s red wine being served *cheeky grin*. Of course, using red wine in your cooking is just as good as having a glass or two (whispers: or more) on the weekends.

“Secondary cuts of meat are my favourite and I love to use them in this dish. Remember, you’ll need to start this the day before so the beef has time to marinate overnight in that gorgeous red wine. You really do need to use a bold red wine for this recipe, it makes all the difference — just make sure you buy an extra bottle to drink with the meal!” — Manu Feildel

Bœuf Bourguignon Ingredients

Okay, so a little bit of a tangent before I move on to the recipe, this morning at work, my colleague asked me a question after she had seen the ingredients shot that I uploaded just minutes before she asked me this: “I have one question… Whenever you cook, do you always buy new ingredients?” At first I was confused, because obviously I buy meat and veggies when I need them so it’s always fresh, and then she pointed out that my block of butter was new as seen in the photograph below, and went on to point out a new tube of maple syrup in another photo, and a new jar of something which I can’t remember. Well, to answer your question, especially to the particular photograph that she pointed out this morning, yes, most of the stuff were new there because I didn’t have those ingredients in my pantry at that time. Then she saw another photograph that had the same tube of maple syrup that looked new. I then told her that I gently move it around so that the maple syrup sticks to the sides of the tube to make it look full. Also, in terms of butter, I always, and I repeat ALWAYS have a new block of untouched butter in the fridge for my photos, especially if it’s less than half a block already. I eventually use it anyway within the next couple of weeks – it’s not like it sits in the fridge for months/years.

Anyway, one last thing, but not a tangent – before I head on to the recipe, please visit Manu Feildel for the original recipe! I once made Manu’s recipe for Bœuf Bourguignon, while I was still studying in Australia. I made this dish during my second year of studies, and when I come to think of it, that was 4 years ago! I can’t believe how long ago that was! Well, I decided to whip it up again for this theme since I really enjoyed this dish the first time I cooked it. So don’t forget, as the man Manu said: you need to start the recipe a day before so that your beef cuts have enough time to soak in the marinade overnight. And of course, make sure you leave some wine behind, or buy an extra bottle to have with your Bœuf Bourguignon!

Bœuf Bourguignon Ingredients

PREP TIME min. 24 HOURS* | COOKING TIME 2 HOURS | SERVES 6-8

*If you didn’t read above, the beef needs to marinate overnight to soak up all the yummy flavours before cooking.

INGREDIENTS

  • 2kg beef chuck

For the marinade

  • 1L red wine (Burgundy or Shiraz)*
  • 4 garlic cloves, minced
  • 2 sprigs rosemary**
  • 2 bay leaves
  • 1 brown onion, roughly chopped
  • 1 carrot, roughly chopped
  • 1 stick celery, roughly chopped

*I used Jacob’s Creek Shiraz Cabernet.

**Manu’s recipe used thyme, but at that moment I couldn’t find fresh thyme in the stores and I really didn’t want to use the dried kind – however, I had some sprigs of rosemary in the fridge leftover from another recipe I whipped up before this, so I used that instead.

For the stew

  • 250g brown mushrooms
  • 200g bacon, cut into bits
  • 20g unsalted butter
  • 3 brown onions, quartered
  • 2 carrots, peeled and chopped
  • 3 tbsp olive oil
  • 2 tbsp plain flour
  • Ground sea salt and black pepper, to taste

To serve

  • Fresh parsley
  • Pasta, mashed potato, gnocchi, or crusty French bread***

***I first paired my Bœuf Bourguignon with soft pillows of potato gnocchi, and any leftovers we had, we paired them with fettuccine pasta.

METHOD

  1. Place the chopped carrots, celery, and onions in a large bowl (or deep pyrex dish like I have) together with the minced garlic, rosemary sprigs, and bay leaves. Cut beef into large 4cm/1.5″ cubes and add to the dish with the aromatics. Pour over the red wine to submerge the meat and vegetables, then cover with some cling wrap and refrigerate overnight.
  2. Remove beef from marinate and season well with salt and pepper. Strain out the marinade herbs and vegetables and discard, but reserve the liquid as this will be your sauce!
  3. Heat the butter and half of the olive oil in a large heavy-bottomed pot over medium-high heat. When the butter starts to foam, add in the meat and sear on all sides for a minute or two. Do this in batches if needed, and once done, set the meat and any pan juices aside.
  4. Heat the remaining olive oil in the same pot, and add onions, carrots, and mushrooms, cooking until golden and caramelised on the edges, about 2-3 minutes. Add in the bacon bits and cook for a further 3 minutes.
  5. Return seared beef and juices to the pan and sprinkle over the plain flour. Stir well, and then add in the red wine liquid to the pan.
  6. Cover the surface of the liquid with a cartouche (baking paper lid), and bring to the boil. Once boiling, reduce it to a simmer and cook for 1.5 to 2 hours until the beef is tender enough to pull apart with your fingers.
  7. Once tender, spoon the Bœuf Bourguignon into a dish, sprinkle with freshly chopped parsley and serve with fresh pasta, mashed potato, potato gnocchi, or even a big wedge of crusty French bread. Enjoy!

Bœuf Bourguignon with Potato Gnocchi

Bœuf Bourguignon with Potato Gnocchi

BON APPÉTIT

– Ally xx

myTaste.com

Spicy Kimchi Quinoa Bowls

Spicy Kimchi Quinoa Bowls

Hello Everyone! Wow! I can’t believe that we’ve reached the end of Cooking with Quinoa month, and with that, I can’t believe that September will be ending in a couple of days! Now that we’re approaching October soon, I can’t believe that we’re already into the 10th month of the year — which also means that I will have been working in my current company as a Creative Design Executive for a year already. *sigh* Time is flying by in the blink of an eye. I don’t know why, but the introduction to this blog post is feeling very overemotional *cheeky grin* and I guess I will stop here.

I’ve saved the best recipe for last! Well actually, now that I think of it, I think the best recipe for this month was the very first that I posted in the beginning of the month with my take on a Californian-inspired Quinoa Salad. I still consider tonight’s a recipe one of the best as it is a creative and healthy take on a classic kimchi fried rice recipe — and you guessed it! Quinoa will be replacing the rice in this recipe. I was going to try an attempt to make my own Kimchi at home, but I forgot why I didn’t try to DIY it since it’s actually super easy to do — I guess the reason was because I saw a shelf of ready-made kimchi at the supermarket and just could not resist to pick up a jar to speed up my time in the kitchen for that day  *cheeky grin* The original idea for this recipe can be found over on Simply Quinoa.

Spicy Kimchi Quinoa Bowls

For those of you who do not know, kimchi is a traditional Korean dish that uses the process of fermentation to pickle and preserve fresh vegetables. The spicy, crunchy, cabbage-based vegetable mixture has a texture similar to sauerkraut but boasts much bolder flavours thanks to garlic and spicy seasonings. This process of pickling and preserving fresh vegetables was originally developed in 7th Century Korea as a means of storing vegetables during cold winters. Though of Korean origin, the dish has been steadily — if not, slowly — gaining recognition beyond the boundaries of its native country. Fermentation in general has been shown to increase the nutritional properties of food. Kimchi specifically has been linked to anti-obesity effects, and might help treat atopic dermatitis and even lower cholesterol. Other than that, the dish’s health benefits are in large part attributable to its high probiotic content (i.e. good-for-you bacteria), and it is also loaded with fibre and vitamins A, B, and C. Spicier varieties also get a boost from capsaicin, a component of hot peppers that’s been shown to improve metabolism.

Spicy Kimchi Quinoa Bowls Ingredients

PREP TIME 5 MINS | COOKING TIME 10 MINS | SERVES 2

INGREDIENTS

  • 2 cups cooked tri-colour quinoa, cooled
  • 2 cups kale, finely chopped
  • 1 cup kimchi, chopped
  • 3-4 garlic cloves, minced
  • 2 large free range eggs
  • 2 tsp gluten-free tamari
  • 2 tsp kimchi “juice” (the liquid from the jar)
  • 2 tsp toasted sesame oil
  • 1/2 tsp freshly grated ginger

Optional

  • 1/4 cup sliced green onions, for garnish
  • 1 tsp hot sauce
  • Fresh ground black pepper, for garnish

METHOD

  1. Heat about a tablespoon of olive oil in a large frying pan over medium-high. Add the grated ginger and garlic and sauté for until golden and fragrant, about a minute.
  2. Add the quinoa and kimchi and cook until just lightly heated through, about 2 – 3 minutes. Stir in kimchi juice, tamari, and hot sauce if using, then turn the heat down to low and stir occasionally while you prepare the other ingredients.
  3. In a separate frying pan, cook the eggs on low until the whites have cooked through but the yolks are still runny, about 3 – 5 minutes. Set aside.
  4. Steam the kale in a separate pot for 30 – 60 seconds until soft. Set aside.
  5. Transfer the kimchi-quinoa mixture and kale to two separate serving bowls evenly and top it off with a sunny side up egg each. Garnish with some green onions and fresh ground black pepper if using. If you fancy, top with more kimchi.
  6. Serve and enjoy!

Spicy Kimchi Quinoa Bowls

BON APPÉTIT

– Ally xx

myTaste.com

Quinoa Minestone Soup with Kale Pesto

Quinoa Minestrone Soup with Kale Pesto

Hello Everyone! Week 2 of cooking with quinoa is here and I’ve got a classic recipe with a twist. For those of you who don’t know, minestrone soup is a thick soup of Italian origin made with vegetables that range from, but are not limited to, beans, onions, celery, carrots, and tomatoes. Often, rice or pasta is added to the soup to bulk it up with some carbs. There is no set recipe for minestrone, since it is usually made out of whatever vegetables are in season. It can be vegetarian, contain meat, or contain a meat-based broth.

I’ve made this soup a couple of times before in the past, and is featured in the Mediterranean section of my blog – but today, I’m going to add a little twist to a traditional minestrone soup. I’m switching out the pasta that I would normally add to my soup, with quinoa. Using quinoa in place of pasta adds extra protein and makes this soup gluten free! In addition to using quinoa for this soup, I’m topping it off with some kale pesto as well to give the dish a touch of freshness – and of course, if you have any extra leftover, you can totally whip up another dish just by mixing it through some freshly cooked pasta! Top it of with some grilled chicken or seared tiger prawns for a complete lunch or dinner. The original recipe for this dish can be found over on Taste Australia.

Quinoa Minestone Soup with Kale Pesto Ingredients

PREP TIME 10 MINS | COOKING TIME 20 MINS | SERVES 4

INGREDIENTS

For the soup

  • 1 can (400g) cannellini beans, drained and rinsed
  • 1 can (410g) Italian chopped tomatoes
  • 150g bacon, diced
  • 4 cups chicken stock
  • 1/3 cup tri-coloured quinoa, rinsed
  • 3-4 garlic cloves, minced
  • 1 celery stick, sliced
  • 1 dried bay leaf
  • 1 large brown onion, coarsely chopped
  • 1 medium-sized carrot, peeled and cut into small chunks
  • 1 medium-sized zucchini, cut into small chunks

For the kale pesto

  • 2 & 1/2 cups kale leaves, shredded
  • 1/4 cup grated parmesan
  • 1 small garlic clove, halved
  • 1 tbsp extra virgin olive oil
  • 1 tbsp lemon juice
  • 1 tbsp water

METHOD

  1. For the Soup: Heat the extra virgin olive oil in a large pot over medium-low heat. Add the bacon bits and cook, stirring, for 3-4 minutes or until browned. Remove from the pot and set aside.
  2. Turn the heat up to high and then add in the garlic. Sauté until golden brown and fragrant, about a minute or so. Then add in the onions and cooking, stirring, until soft, about 2 minutes.
  3. Add in the carrot and celery, together with the bay leaf, and cook, covered, stirring occasionally, for about 4 minutes or until soft.
  4. Next, add in the chicken stock and canned chopped tomatoes to the pot. Bring to the boil.
  5. Once boiling, reduce the heat down to medium-low and then stir in the quinoa. Simmer, stirring occasionally, for 5 minutes.
  6. Stir in zucchini. Cook, stirring occasionally, for 5 minutes, and then add in the cannellini beans. Cook, stirring occasionally, for 2 minutes or until the quinoa and zucchini are tender. Season with a touch of ground salt and pepper.
  7. For the Kale Pesto: Add the kale leaves, parmesan cheese, and garlic into a food processor and process until finely chopped. Combine the juice, oil, and water in a jug, and slowly stream the juice mixture into the kale mixture until well combined. Season.
  8. Divide soup among four equal bowls and top with the kale pesto and extra parmesan if you wish.
  9. Serve and enjoy!

Quinoa Minestone Soup with Kale Pesto

Quinoa Minestone Soup with Kale Pesto

BON APPÉTIT

– Ally xx

myTaste.com

Risoni al Ratatouille

Risoni al Ratatouille

Risoni al Ratatouille

Hello Everyone! Today is the last day of Pasta Month; sad to be ending as I actually have a whole lot more pasta dishes that I want to try out, but also happy to move onto a new theme for next month! Just a heads up though – the likelihood of a theme not happening is quite possible. I did have a theme in mind, and I’ve already prepared and cooked two dishes for it in advanced, the only problem is getting two more made for next month’s theme is quite unlikely. I say this because I am heading off to the Philippines on Saturday for about a month! Because of that, I probably won’t have time to cook. I also will not be sure if I will have Internet connection during my stay there so the likelihood of me uploading content for the month of July might not happen as well. So I guess I’ll just see how it goes – if posting on my blog is a problem, then you can follow me over on Instagram @amcarmenskitchen to follow my food journey while I am in the Philippines – I’ll make sure to keep that up to speed 🙂

Anyway, so okay, the dish is not quite a Ratatouille (I just thought naming it for this post would make it sounds fancier than it looks, hehe) – more like it’s inspired by some of the vegetables used to make a ratatouille *cheeky grin* but nonetheless, it still tastes pretty good for something that I just “whipped up” with the ingredients lying in the fridge and the pantry. You can bulk this dish up by adding meat or seafood if you wish, but I decided to keep this dish vegetarian.

Risoni al Ratatouille Ingredients

PREP TIME 10 MINS | COOKING TIME 15 MINS | SERVES 6

INGREDIENTS

  • 500g risoni, or other shaped pasta
  • 3-4 garlic cloves, minced
  • 2-3 red bird’s eye chilies, sliced
  • 2 medium-szied Lebanese eggplants, sliced into 1-inch thick chunks and then quartered
  • 1 medium-sized zucchini, sliced into 1-inch thick chunks and then quartered
  • 1 onion, diced
  • 1 punnet (125g) cherry tomato medley, sliced
  • 1/2 bunch asparagus, woody ends snapped off and cut into thirds
  • 1 tbsp baby capers, washed and drained
  • Freshly squeezed lemon juice from 1 lemon
  • Ground sea salt and black pepper, to taste
  • Handful of grated parmesan cheese
  • Olive oil

METHOD

  1. Bring a large pot of salted water to a boil. Once boiling, add in the risoni pasta and cook according to packet instructions or until al dente (mine was about 11 minutes).
  2. While your pasta is cooking away, heat some olive oil in a large frying pan. Sauté the garlic and chilies until golden brown and fragrant, about a minute, and then add in the onions, cooking until soft for another minute or two.
  3. Add in the asparagus, together with the zucchini and eggplant, cooking until soft for about 6-7 minutes. Season with a bit of ground salt and black pepper. Add in the cherry tomatoes and leave to cook for a further 4-5 minutes. Lastly, add in the capers and then turn the heat off.
  4. Once the risoni is done, drain, and then return to the pot. Add in the stir-fried veggies to the pot with the risoni and then give it a good mix.
  5. Divide the risoni equally into 6 portions and then top with a generous handful of  grate parmesan cheese and some ground black pepper. Serve immediately and enjoy!

Risoni al Ratatouille

BON APPÉTIT

– Ally xx

myTaste.com

Trine Boscaiola

Trine Boscaiola

Trine Boscaiola

Hello Everyone! It’s week 3 of Pasta Month and I’ve got a few things to say before we dive into the recipe. I apologise in advance that what I am about to say has nothing to do with the upcoming recipe – it’s more me telling you about my day/week and upcoming week. So if you don’t want to read this part, you can skip onto the recipe 🙂 Anyway, so last week Friday I had a nice dinner with my colleagues and then we ended the night escaping from a hostage-themed escape room and we did pretty well I must say! We escaped within an hour and one minute – which from what I remember is 14 minutes earlier than the set time limit hooray! Hostage is one of their new rooms, and the other is The Ring-themed *OMG* which I really want to try out with my friends, but I know I will probably regret it later on.

On Sunday, I also spent the afternoon with different colleagues and we watched The Conjuring 2 – which I don’t know whether it was a huge mistake or not haha. I didn’t think I was that scared from the movie, but I only knew that I was definitely scared when I could barely sleep that night. The image of Valak kept appearing in my head in the dark room – but I was definitely fine the next day/night. We then had dinner and said our goodbyes. Today, a few colleagues of mine headed over to the KFM studio to do a voice recording – basically just getting us to wish everyone “Selamat Hari Raya” for the upcoming festivities next month. It was actually quite fun in the end even though I had to convince just one colleague that I did not want to do the script in Malay because they’d all probably laugh at my pronunciation and intonation.

And that’s all I have for you – OH I almost forgot! Tomorrow morning I’ll be flying of to Singapore again for a couple of days. Taking a small break from work to do some shopping, eating, and meeting up with friends – it going to be a great weekend ahead!

Trine Boscaiola Ingredients

PREP TIME 5 MINS | COOKING TIME 10-15 MINS | SERVES 5

INGREDIENTS

  • 500g trine (curly fettuccine) pasta, or any other pasta shape
  • 250g rindless bacon rashers, thinly sliced
  • 1 punnet (250g) brown mushrooms, thinly sliced
  • 40g unsalted butter
  • 300ml thickened cream
  • 1/3 cup parmesan cheese
  • 5 spring onion stalks, chopped
  • Ground salt and black pepper, to taste
  • Olive oil

METHOD

  1. Bring a large pot of salted water to a boil. Cook the trine pasta according to packet instructions or until al dente.
  2. While the pasta is cooking away, heat about 1 tablespoon of olive oil in a large frying pan over medium-high. Cook the bacon until slightly browned and then remove from the pan. Add in the unsalted butter and then the mushrooms and cook for about 3-4 minutes or until soft. Then add in the pale parts of the chipped spring onion.
  3. Add in the cream together with about a cup of the pasta water and parmesan cheese. Turn the heat down to low and bring the mixture to a low simmer.
  4. Once the pasta is done, drain and then transfer the pasta to the cream mixture together with the fried bacon bits. Turn the heat back up to medium-high and then give it a good mix. Top with the remaining spring onions and then turn the heat off.
  5. Season with salt and pepper and toss until well combined. Divide the pasta among serving dishes and top with extra parmesan. Serve and enjoy!

Trine Boscaiola

Trine Boscaiola

BON APPÉTIT

– Ally xx

myTaste.com

Spaghetti al Nero di Seppia con Calamari e Vongole

Spaghetti al Nero di Seppia con Calamari e Vongole

Spaghetti al Nero di Seppia con Calamari e Vongole

Hello Everyone! It’s week 2 of Pasta Month and let me tell you a little story (don’t I always? *cheeky grin*) before I move on to the recipe. The first time I had squid ink pasta was in an Italian Restaurant when I was studying in Sydney. If I’m not mistaken, the restaurant is called Pizza e Birra on Crown Street in the suburb of Surry Hills. I was having a fancy dinner night out with my flatmate at that time and squid ink pasta was on their specials menu. I was a bit hesitant at first because I obviously hadn’t tried it before and to be honest, I was a bit put off knowing that the colour of the pasta would be black (yes, at that time my palette wasn’t quite as sophisticated as it is right now). To my surprise, the squid ink pasta tasted like any normal pasta – it was just that the colour that was different to me. I’ve had my fair share of squid ink pastas, both in Australia, and here in Brunei. I decided to combine my favourite flavours from both experiences to put up this dish to share with you guys.

I’ve never made fresh squid ink pasta at home, and only because I have no idea where to source squid ink from besides from the ink sacs of fresh squids/cuttle fish. I did some reading online and found that you can actually buy bottled squid ink, but you definitely won’t find them in stores here in Brunei. Heck they don’t even have store bought squid ink pasta here! So how did I manage to source mine? Well, if you’re a regular follower/reader of my blog, you’ll know that I was in Singapore a couple of months back. I was shopping for groceries with my friends for a dinner party that night and I was flabbergasted by all the produce and products found in that grocery store. I was supposed to be focused on grabbing the ingredients I needed to cook my dish for that night, but instead I wandered off, going from aisle to aisle, looking at anything and everything. I found myself in the pasta aisle and that where I came across store bought squid ink pasta. You had no idea how excited and in shock I was when I saw it – because I had no idea that you could buy it on the shelves; and without any hesitation at all, I bought myself a pack to bring back here to Brunei. I know, I know – I’m crazy right? Haha. My next mission will be tomato squid ink pasta from scratch, and I’ll definitely share it on my blog whenever I get around to trying it out! For now, here’s one recipe you can do for your squid ink pasta:

Spaghetti al Nero di Seppia con Calamari e Vongole Ingredients

PREP TIME 10 MINS | COOKING TIME 10-15 MINS | SERVES 5

INGREDIENTS

  • 1 pack (500g) squid ink pasta*
  • 1 pack (250g) cherry tomato medley, halved
  • 1 fish bouillon cube, dissolved in 2/3 cup of boiling water
  • 250g baby clam meat
  • 4 red bird’s eye chillies, sliced
  • 2 large squids, cleaned and cut into pieces
  • 1 lemon, wedged
  • 1/2 bulb garlic, minced
  • Olive Oil
  • Parsley, roughly chopped

*Fresh homemade squid ink pasta or store bought is fine for this recipe

METHOD

  1. Lightly score the inner surface of the squid, or alternatively, cut into rings. Set aside.
  2. Bring a large pot of salted water to a boil. Cook the squid ink spaghetti according to packet instructions or until al dente.
  3. While the pasta is cooking away, heat about 2 tablespoons of olive oil in a large frying pan over medium-high. Sauté the minced garlic and chillies together until golden brown and fragrant.
  4. Add the clam meat, juice of half a lemon, and a pinch of ground black pepper. Give it a good mix before adding the fish bouillon stock. Turn the heat down to low and leave to simmer for about 3-4 minutes. Add in the calamari when the pasta is almost done.
  5. Once the pasta is done, drain and then transfer to the calamari and clam mixture. Turn the heat back up to medium-high and then give it a good mix. Top with the chopped parsley and then turn the heat off.
  6. Serve immediately with a lemon wedge. Enjoy!

Spaghetti al Nero di Seppia con Calamari e Vongole

Spaghetti al Nero di Seppia con Calamari e Vongole

BON APPÉTIT

– Ally xx

myTaste.com