Hello Everyone! So my allergies have been acting up all day and usually dust triggers my constant sneezing, but I didn’t do anything out of the ordinary today to inhale a load of dust for this to happen. While I’m left clueless, I’m also left with a slight headache, fatigue, and quite possibly (but hopefully not) might end up with the flu when I wake up tomorrow morning, followed by a chain of bugs – a fever, a sore throat, and a terrible cough. On the other hand, sometimes I wake up feeling 120% better as if nothing happened. So I HOPE for the latter.
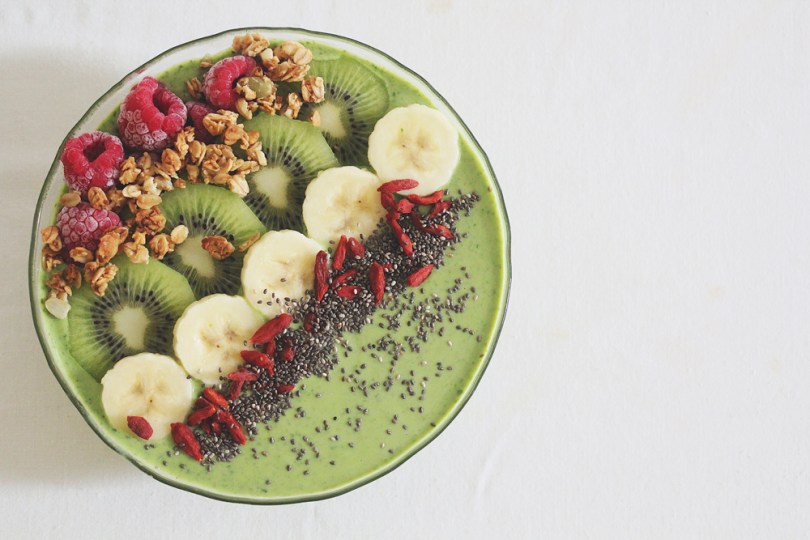
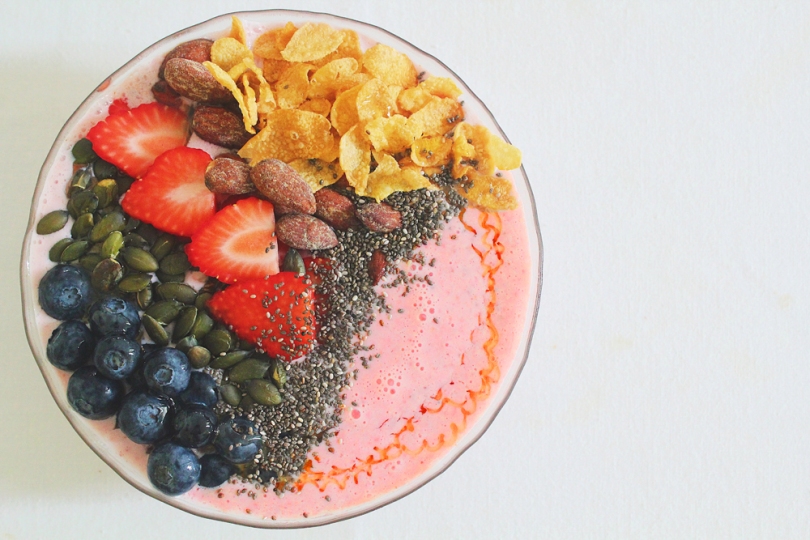
To be completely honest with everyone – I’ve never had a smoothie bowl until I started this series of mine. I’ve seen it all over social media back when it was the new ‘foodie’ trend and it always looked aesthetically pleasing to the eye, but I was a bit skeptic on the idea of using a spoon to eat my smoothie rather than using a conventional straw to drink it. I tried to wrap my head around the idea to imagine as if I was having a bowl of thick soup, but the thought of having cold soup soon consumed my mind and I didn’t like that thought. I just thought that it was weird for some reason, until I decided to try one out for my breakfast series on Amcarmen’s Kitchen and feel completely in love with them.
They are super EASY to make, as you may have seen in my previous posts, the take about a minimum of 5 minutes to put together. It allows you to get creative with your favourite toppings and this not only adds colour to your mornings or makes it look pretty, but it also adds texture to your smoothie. Furthermore, it’s a great way to slowly use up those chia seeds and pepitas lying on your pantry shelf just waiting to go out of date because you don’t know where else you can use them!

PREP TIME 5 MINS | COOKING TIME — | SERVES 1
INGREDIENTS
For the smoothie mixture
- 1 cup frozen blackberries
- 1/2 cup vanilla yoghurt
- 1/4 cup low-fat milk
- 1 large banana
- 1 tbsp honey
- 1 tbsp chia seeds
Toppings
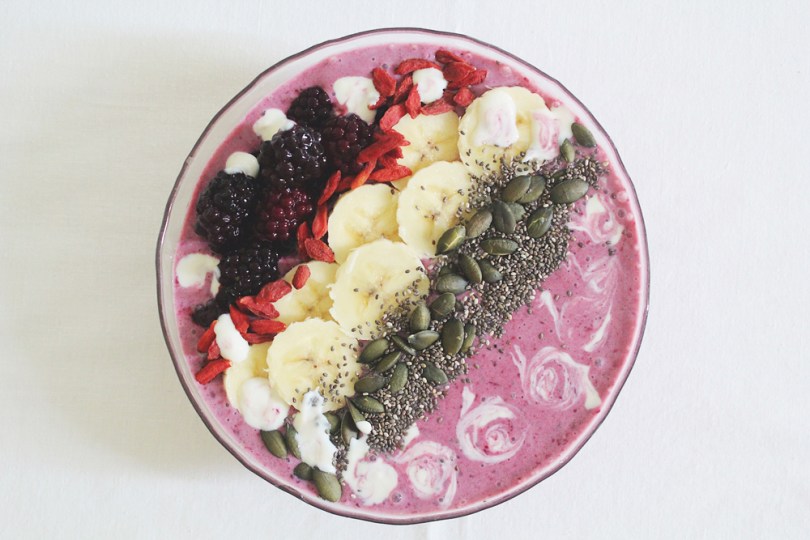
- Bananas – loaded with essential vitamins and minerals such as potassium, calcium, manganese, magnesium, iron, folate, niacin, riboflavin, and B6
- Blackberries – rich in vitamin A, B, C, E, K, as well as antioxidants lutein and zeaxanthin, and minerals such as sodium, copper, manganese, magnesium, potassium, pantothenic acid, pyridoxine, riboflavin, niacin, and folic acid
- Chia Seeds – contains omega-3 fatty acids, fibre, antioxidants, iron, and calcium
- Goji Berries – excellent source of antioxidants and nutrients that help boost the immune system and protect the body from high levels of inflammation
- Pumpkin Seeds – contains magnesium, manganese, copper, protein, and zinc
METHOD
- Blend the frozen blackberries, yoghurt, milk, banana, honey, and chia seeds until smooth.
- Transfer to a bowl and top with sliced bananas, blackberries, chia seeds, goji berries, and pumpkin seeds. Enjoy!

If you have yet to try out a smoothie bowl, then you should definitely try out this recipe for a Banana and Blackberry Smoothie Bowl. The great thing about this bowl was that I had everything on hand and didn’t need to buy extra ingredients for this bowl – except for the blackberries of course. We always have a bunch of bananas lying around in the kitchen, and well, we’ve had the chia seeds, pepitas, and goji berries lying around for a bit now.
Don’t forget that you are not limited to the choice of toppings mentioned above. Use whatever you have lying around so that you don’t have to go and spend extra money on the things that you don’t have. I’ve basically been doing the same thing since I started my Smoothie Bowl series at the beginning of the month!
BON APPÉTIT
– Ally xx